Backup & Restore
Automatically Backup an iPhone or iPad via Wi-Fi

💡iMazing 3
This guide is not yet complete or updated for iMazing 3. An update will be available soon.
There are several ways to automatically back up your iPhone or iPad. You can use iCloud backups, but you must have enough free space in your iCloud account. iCloud backups also lack transparency: you don't really see what gets backed up and you cannot browse the contents of a backup. You may also be weary of storing your most personal data in a cloud that you do not control.
You can also backup your iPhone or iPad with iTunes, or on macOS Catalina and above, with the Finder. You can do this when you connect your iOS device to your computer, or you can use Wi-Fi syncing. This latter method is unreliable, and only works when the device is charging.
Or you can opt for backing up with iMazing. It offers the best way to back up your iPhone or iPad to your computer (Mac or PC). It is transparent, private, and fully configurable. It can automatically back up your iOS devices over Wi-Fi, on your schedule. You can choose where to store the backups and even back up to an external drive. And it maintains a history of your iPhone and iPad backups, so you can recover files or data that you may have accidentally deleted.
| iTunes Backup | iCloud Backup | iMazing Backup | |
|---|---|---|---|
| Price | Free | Paid | Free |
| Schedule | No | No | Yes |
| Choose Location | No | No | Yes |
| Backup History | No | No | Yes |
| Encryption | Yes | Yes* | Yes |
* iCloud backups are encrypted, but Apple holds the key and may surrender data to law enforcement if issued a subpoena. In China, it is widely believed that authorities have near-direct access to iCloud backup encryption keys, and hence to all data contained in iCloud backups of Chinese residents.
Here's how to automatically back up your iPhone or iPad to your computer:
- Download and install iMazing if needed
- Launch iMazing and connect your device
- Schedule automatic backups
In-Depth Tutorial
1. Launch iMazing and connect your device
If you haven't already, download and install iMazing.
Launch iMazing, and connect your iPhone, iPad or iPod touch to your Mac or PC via USB. If it is the first time that you're connecting the device to your computer, iMazing will prompt you to unlock it and Trust the computer by responding to the Trust prompt on the device itself. This process is usually called pairing.
💡 For more information on device pairing, see Connect your device to iMazing
Once your device is paired with your computer, iMazing will display the Initial Backup Screen:

Click Backup Now and iMazing will present the device options screen:
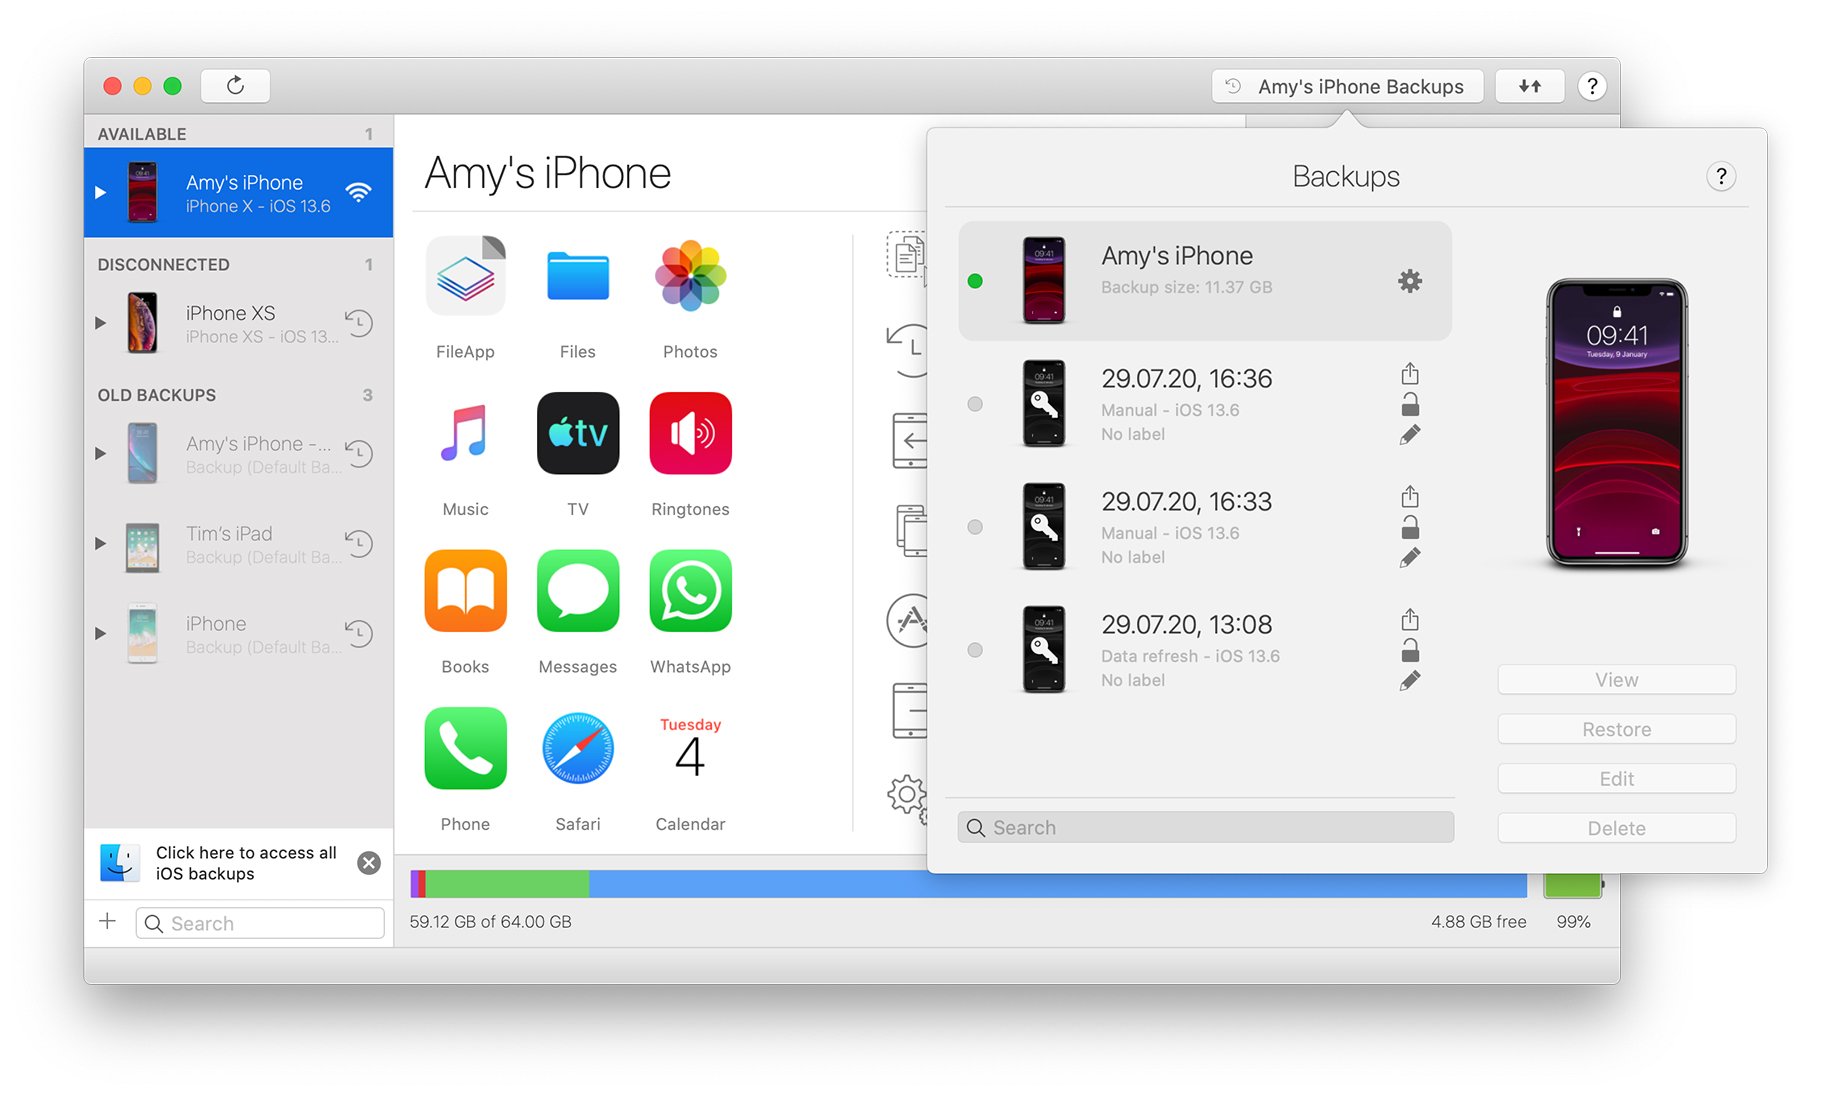
You can also manually access this options screen by selecting your device in iMazing's sidebar and clicking the cogwheel icon as shown below:
2. Schedule automatic backups
Click on the Change button of the Automatic Backups option to configure the backup schedule of your iOS device. We recommend daily backups, as shown below:
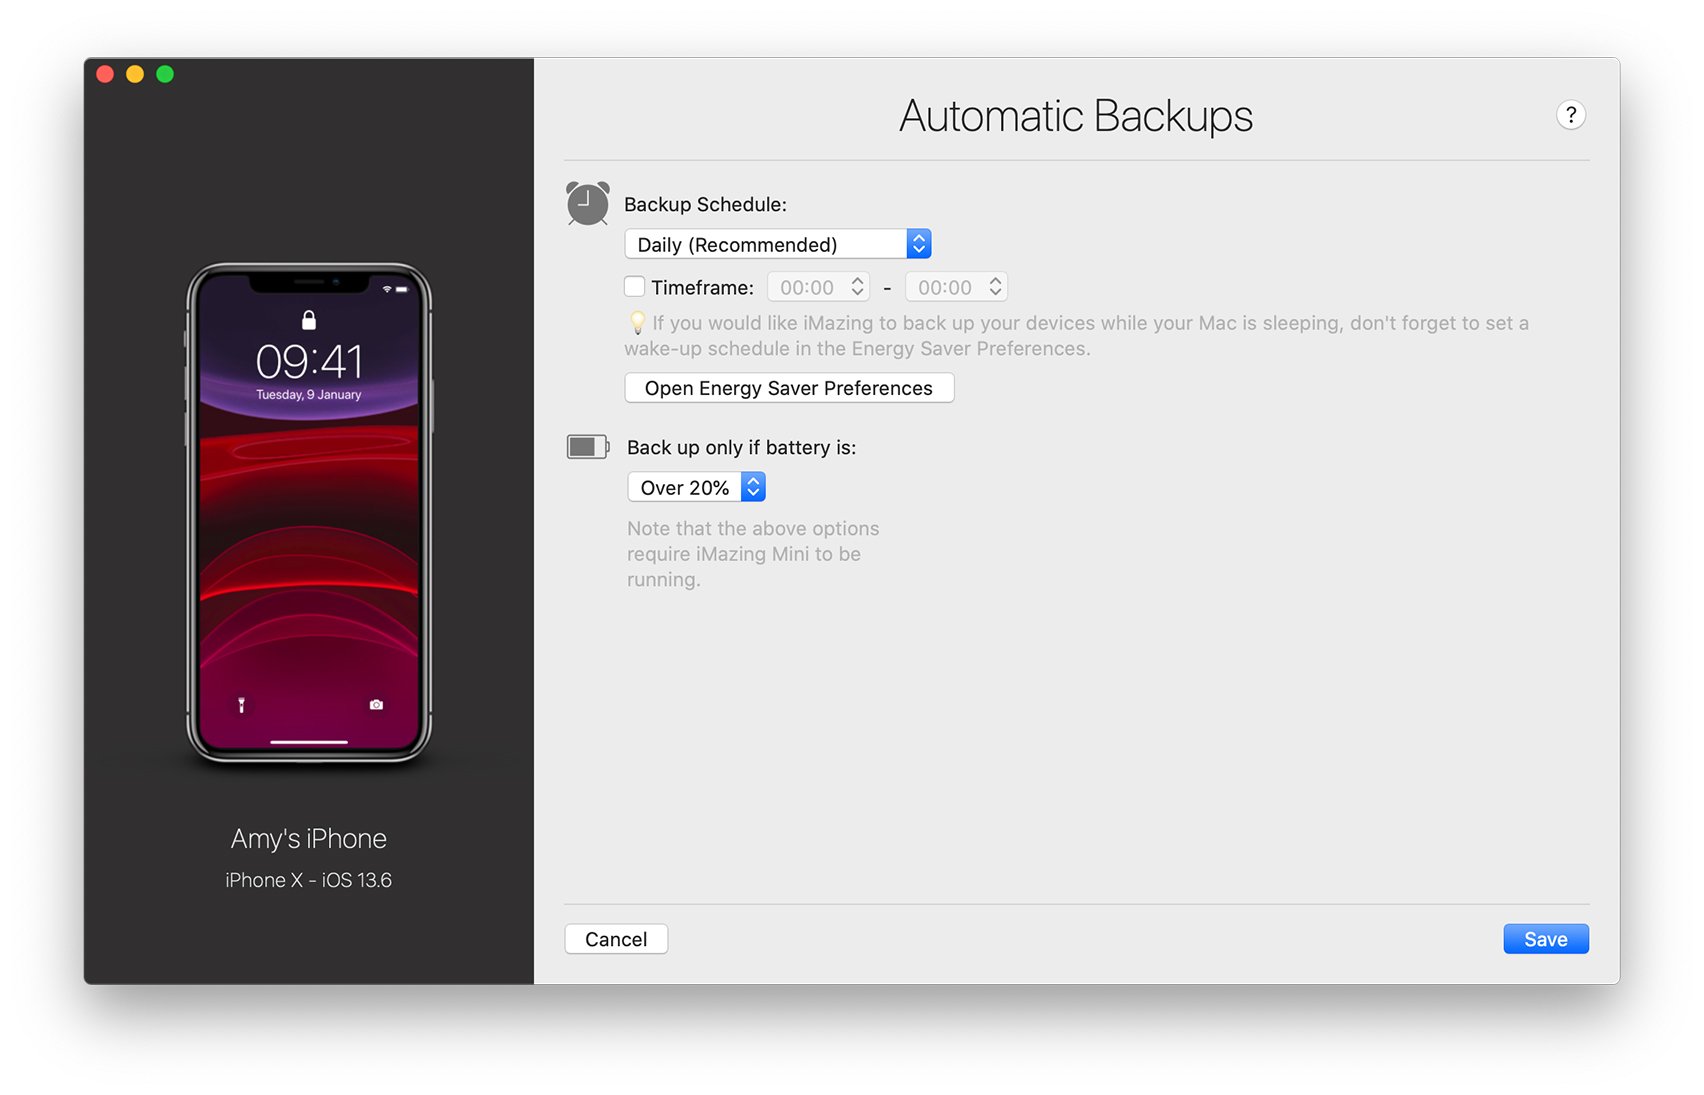
Besides choosing how frequently automatic backups happen, you can:
- Set a timeframe for your preferred backup time.
- Prevent backups from running if your battery is running low.
💡 Timeframes: if you wish to restrict backups to a specific timeframe, you should allow for at least a few hours. The computer must be awake during the specified timeframe, and your iPhone or iPad reachable via Wi-Fi. Note that if the last backup of the device was made too recently, iMazing will skip a backup in order to preserve disk space.
Once you're done with configuring your backup schedule, click Save to return to the Options screen.
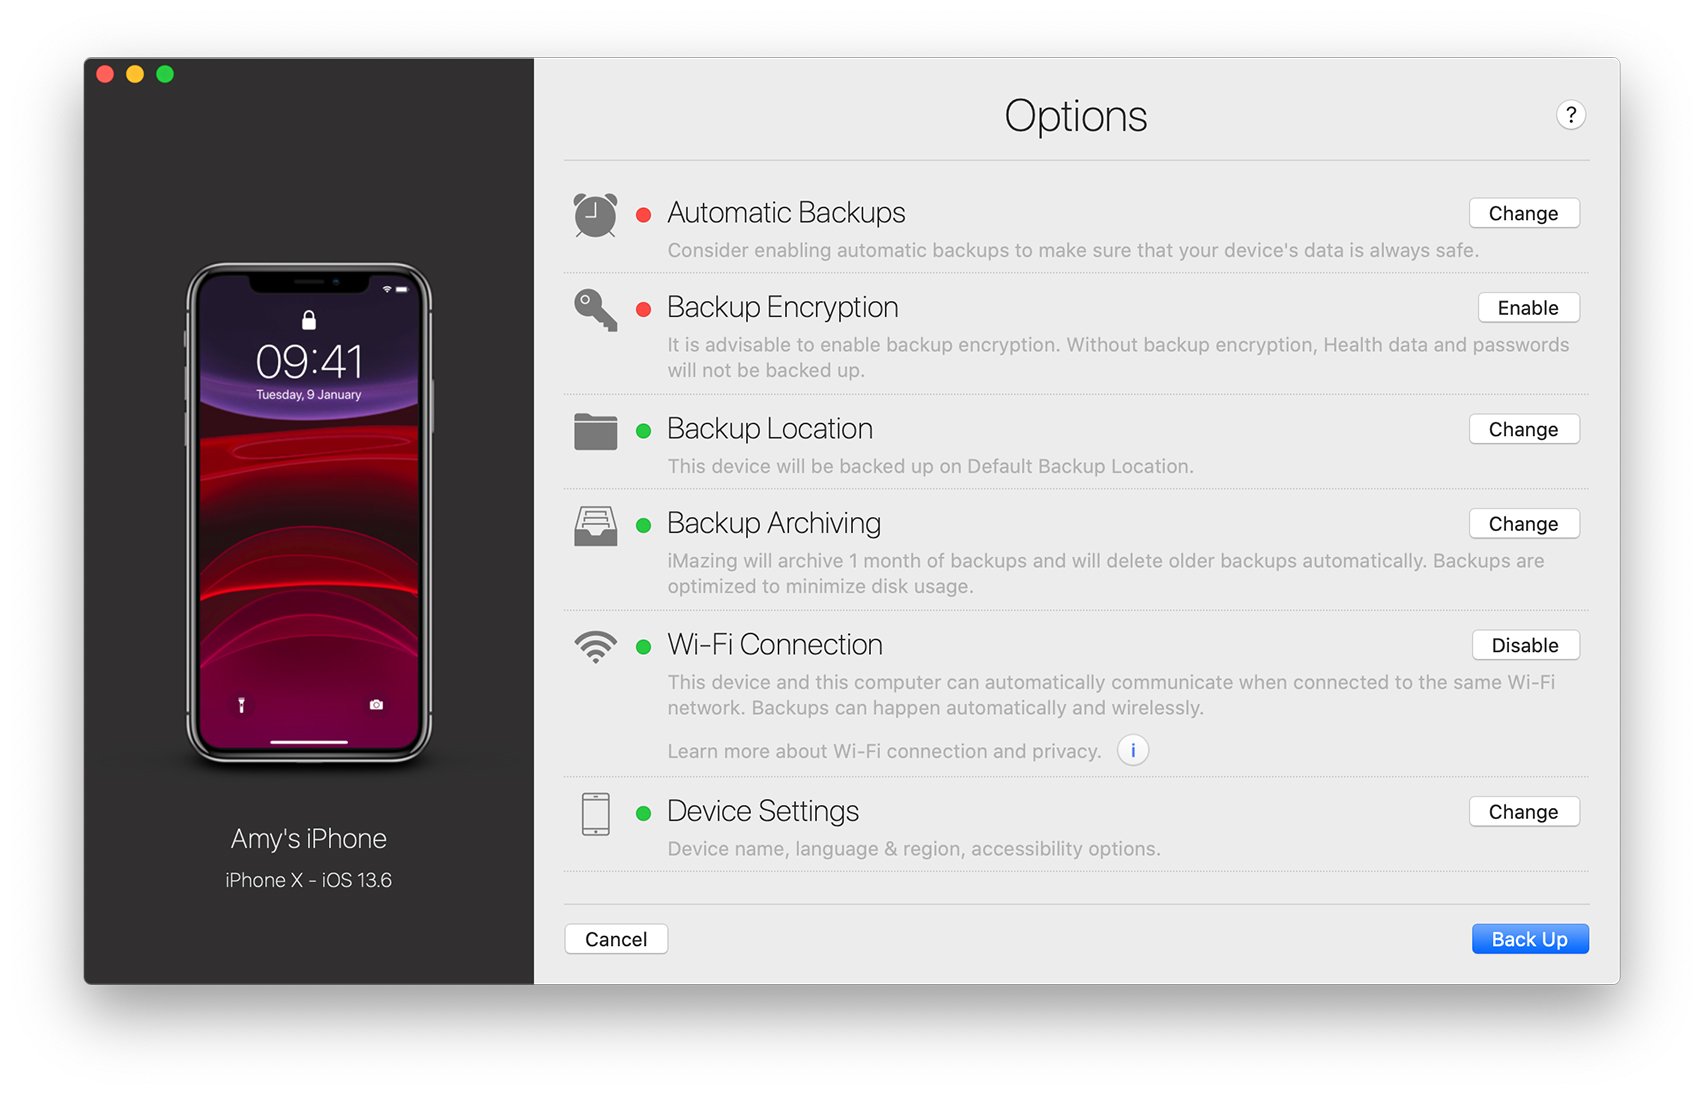
3. Review other important backup options
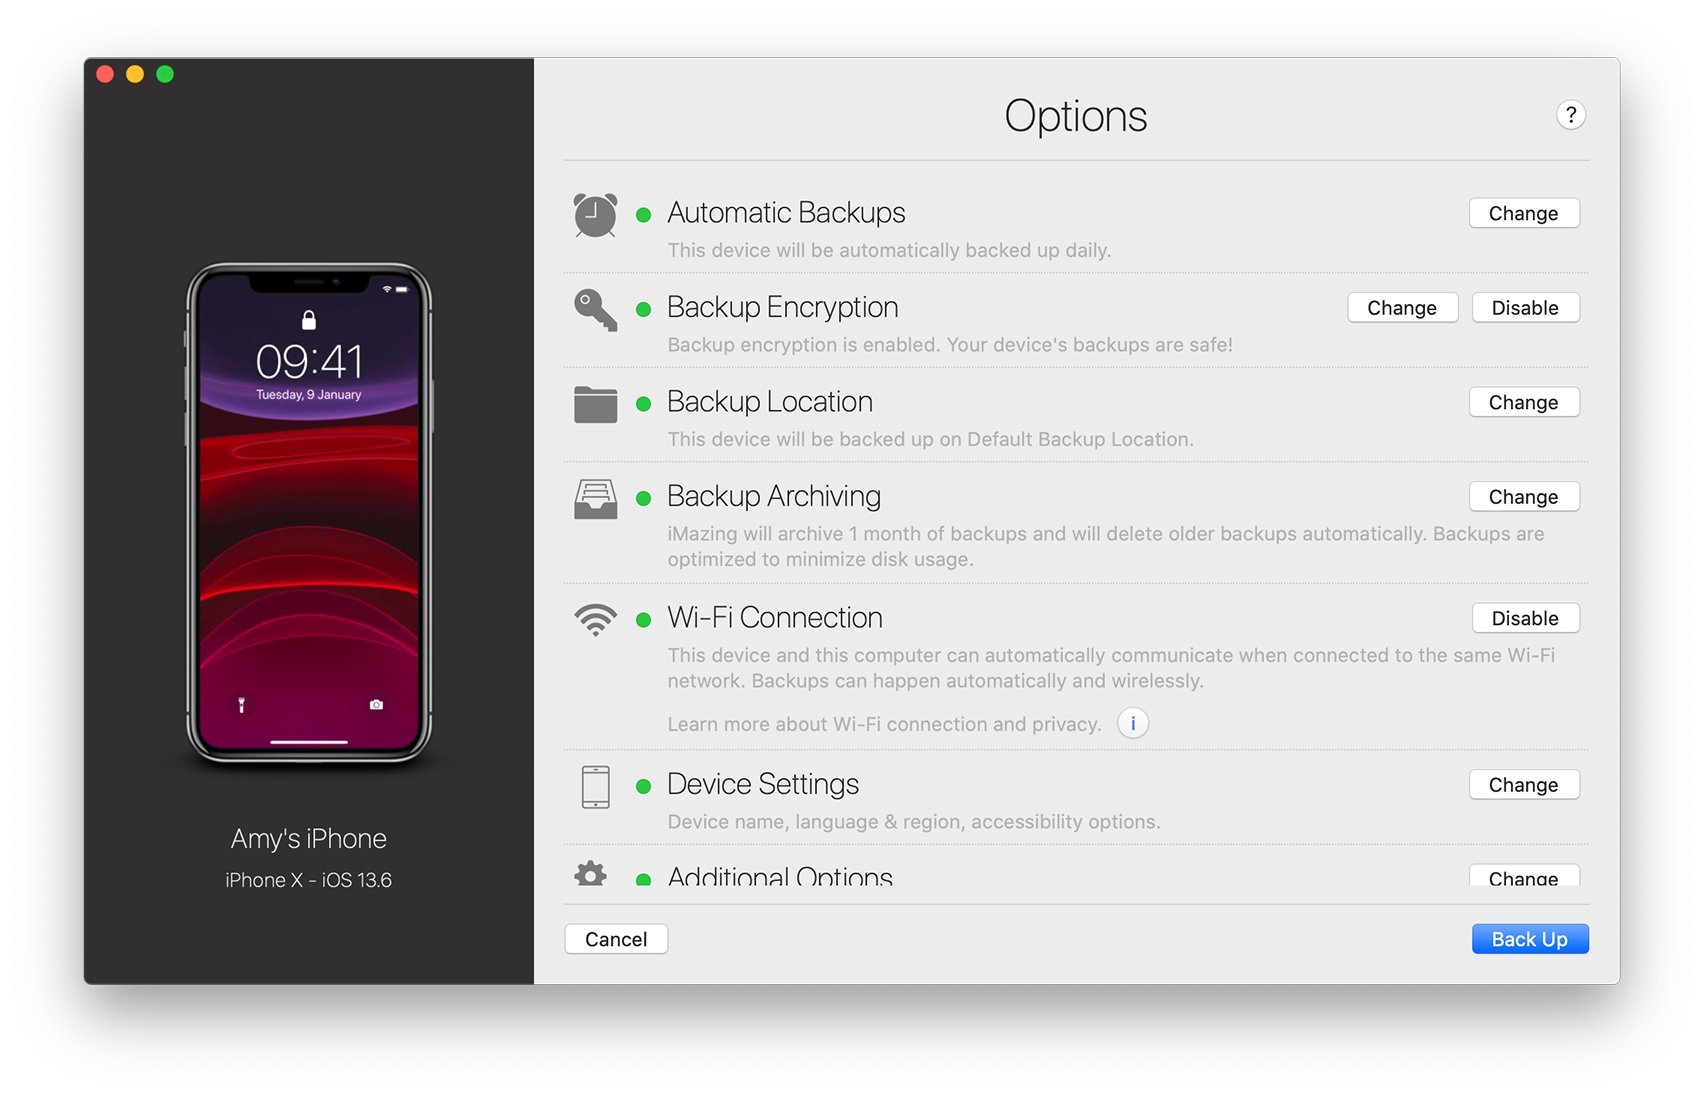
The second option in the list is Backup Encryption. To protect your data, and enable backups of sensitive information such as health data and passwords, you must activate backup encryption. We recommend that you do this for all of your devices to ensure that these backups are protected.
The third option, Backup Location, lets you choose where you want iMazing to store your iPhone or iPad backups. Backing up to an external drive is one of iMazing's most useful features, since iOS backups can get quite large and neither the Finder nor iTunes will let you change the backup location. Learn more about changing your iPhone or iPad's backup location.
Fourth on the list are Backup Archiving options:

By default, iMazing will keep one month of backups before it starts cleaning older backup snapshots. You can change that to keep every single backup if you're a hoarder, or keep just a single backup if you really don't need iMazing to maintain a history of your data. Keep in mind that iMazing optimizes disk usage so that keeping many backup snapshots shouldn't use too much disk space – 1 month is a minimum in our opinion, better safe than sorry!
Next is Wi-Fi Connection. By default, iMazing enables a Wi-Fi link with your devices – you can disable that link here, and also prevent iMazing from enabling Wi-Fi automatically in iMazing's Preferences. Automatic backups are that much more convenient when you don't need to connect your iPhone or iPad to your computer, so we really recommend leaving this option on.
There are other options in the Device Options screen – you can learn about them here.
4. Perform your first backup
If you haven't backed up in iMazing before, simply click Backup Now in the options screen and iMazing will start backing up your device. Leave it connected via USB for the entire initial backup: the first backup is also the most lengthy, so it's worth speeding up the process by doing it via USB. Subsequent daily backups will be incremental and even via Wi-Fi shouldn't take more than 15 minutes, often much less than that if you haven't snapped too many photos and 4k videos.
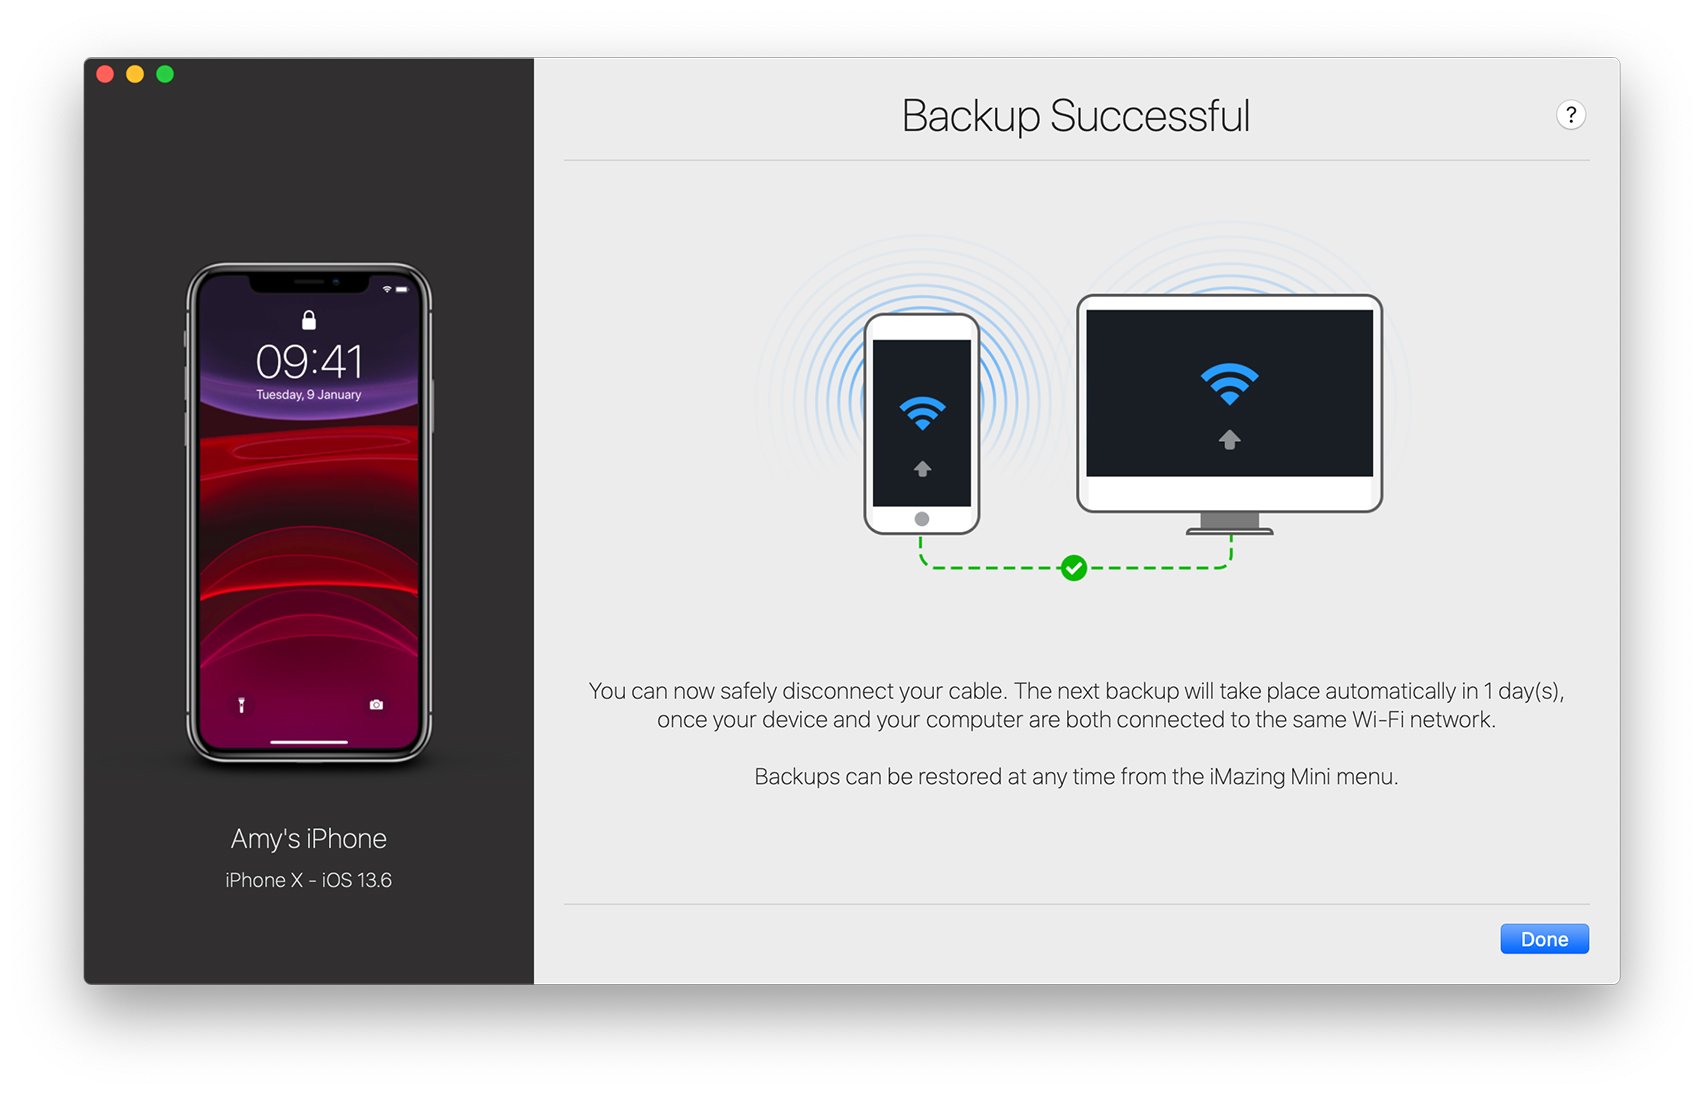
Once the initial backup is finished, click Done to close the backup wizard and return to iMazing's main view.
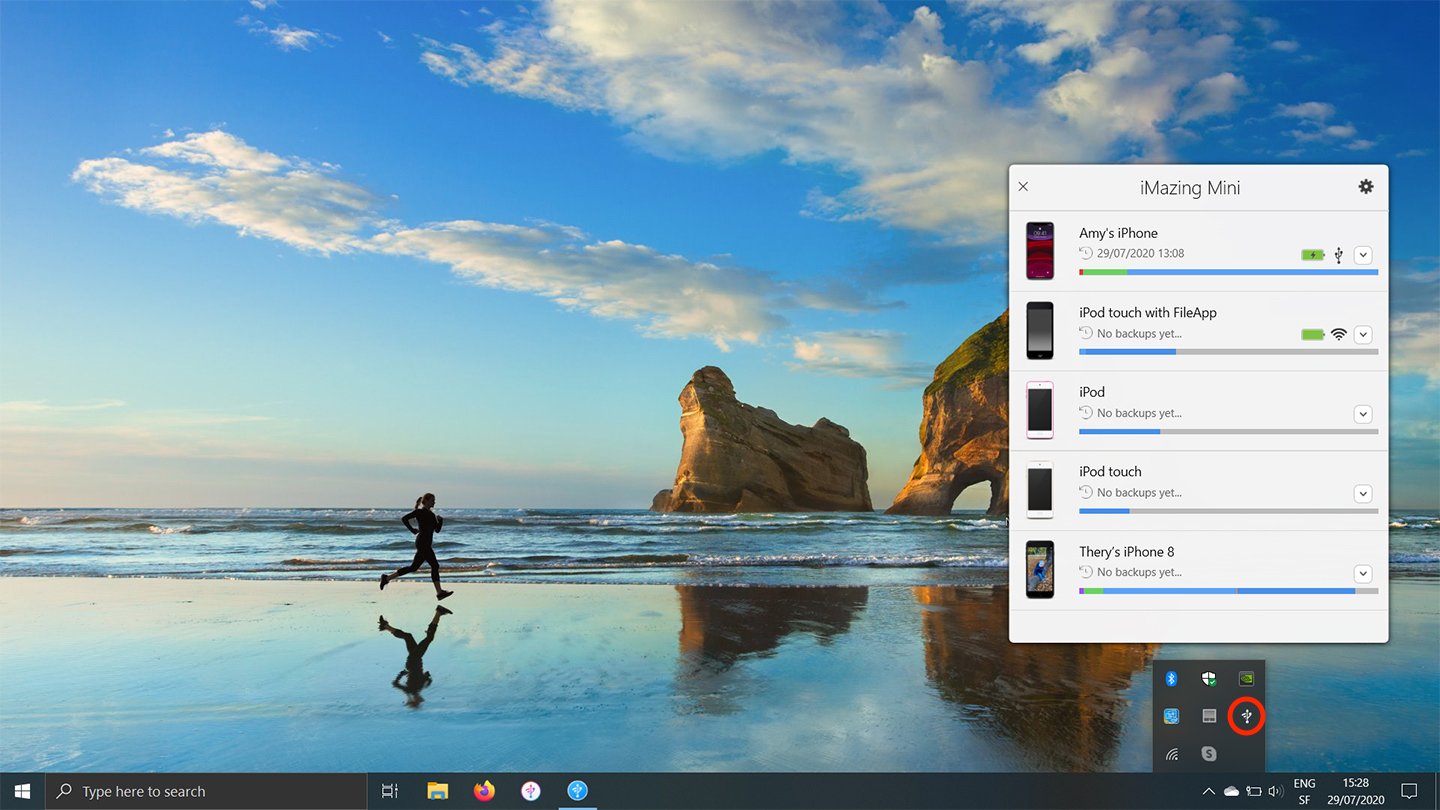
5. Meet iMazing Mini!
At that point, iMazing will offer to launch it's companion app, iMazing Mini:
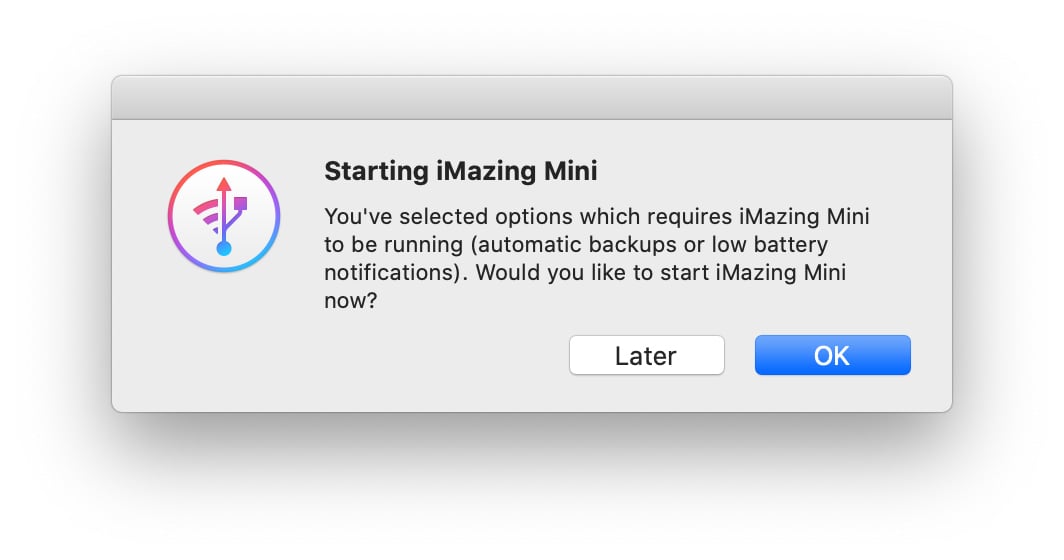
iMazing Mini is a lightweight app which is automatically launched when you login to your computer and runs in the background. It periodically checks your backup schedule, performs backups, and notifies you when a backup has succeeded, failed, or if no backup was successful for more than 3 days past your backup schedule. iMazing Mini does not access your data or upload it anywhere.
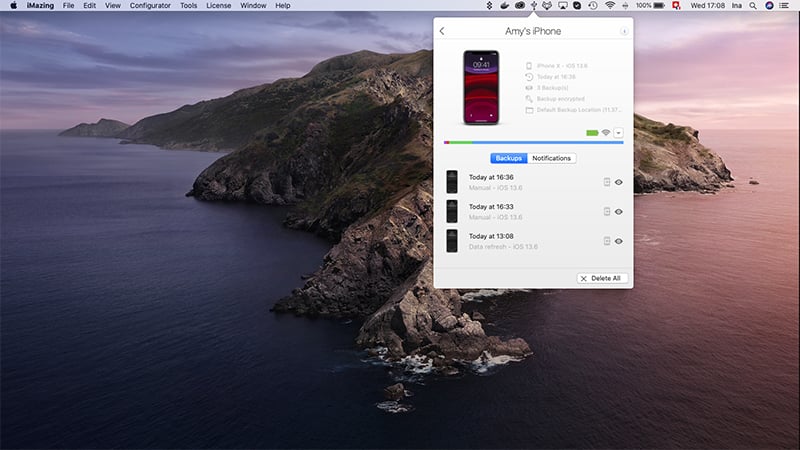
On macOS, iMazing Mini is found in the menu bar at the top right of your screen:
On Windows, it resides in the system tray at the bottom right.
💡 iMazing Mini can also be launched from iMazing's Tools menu.
You can open iMazing Mini at any time to check your backups, battery level, connectivity and more. You can even drag and drop files straight to your device in iMazing Mini, handy! Check out our Getting started with iMazing Mini guide, and learn everything about what iMazing Mini has to offer.

Related Articles
- This guide for iMazing Version 2.
- Backup an iPhone, iPad, or iPod touch to your Mac or PC computer
- Understanding & fixing slow iPhone or iPad backups
- Restore an iPhone, iPad or iPod touch from a local backup
- Device Options in iMazing
- Backup Options in iMazing
- Backup Encryption in iMazing
Support Center
Related Videos

Enterprise License Information Request
Thank you! We'll be in touch shortly.