Device Management
Put Multiple Apple Devices in Single App Mode with iMazing Configurator

💡iMazing 3
This guide is not yet complete or updated for iMazing 3. An update will be available soon.
Single App Mode (also known as Kiosk Mode) locks your business iPhone, iPad or iPod touch devices to a single app defined by you. It is a very powerful iOS/iPadOS feature which enables using Apple mobile devices as single purpose digital tools in your business or institution. Use cases include:
- Lock several iPads to a point of sales (POS) app like Square for cashiers
- Lock several iPods touch to a restaurant management app like TouchBistro to manage bookings and orders
- Use Apple's Photos app on several iPads to showcase a photography or art portfolio
- Lock several iPads to an augmented reality visitor app useful for guided tours (Museum, Art gallery, etc.)
- Lock several iPads to a digital signage app for informational purposes (hotel, medical, etc.)
- And more...
If you have just one device or a handful, you can use iMazing to put them in Single App Mode as explained in our guide Put iPhone, iPad and iPod touch in Single App Mode (Kiosk Mode). But, once you cross into higher volumes territory, iMazing Configurator is the best tool to automate and streamline the job.
In this guide we will show you how to build an iMazing Configurator blueprint which will allow you to deploy a fleet of Single App Mode devices at the same time.
- Prerequisites
- Creating the Single App Mode blueprint
- Launch iMazing Configurator
- Start a blueprint template
- General options configuration
- Organization & supervision options configuration
- Setup & accessibility options configuration
- Actions options configuration
- Apps options configuration
- App files & config options configuration
- Review blueprint configuration
- Applying the Single App Mode blueprint to multiple devices
- Troubleshooting
1. Prerequisites
In order to enter Single App Mode, devices must be supervised. If you follow the steps in this guide your blueprint will contain a supervision step.
In addition, devices must have a minimum iOS version compatible with the single app that will be deployed.
Lastly, and in contrast to the simple Single App Mode available with iMazing, configuring Single App Mode with iMazing Configurator requires an ABM/ASM account with license for the single app purchased through Apps and Books. This, however, does not apply if the single app is one of the apps preinstalled on your device.
2. Creating the Single App Mode blueprint
In this section, we will demonstrate how to create a blueprint for provisioning devices into Single App Mode. A blueprint is a set of actions and configurations which can be repeatably applied on multiple devices using iMazing Configurator.
For more information about iMazing Configurator blueprints visit our Blueprints Deep Dive guide.
The blueprint that we are going to set up will wipe and supervise devices before installing the single app, configuring basic settings, and entering the device into Single App Mode. Supervision is a requirement for Single App Mode, and supervision generally requires devices to be wiped. If your devices are already supervised, you can skip the supervision step in this guide.
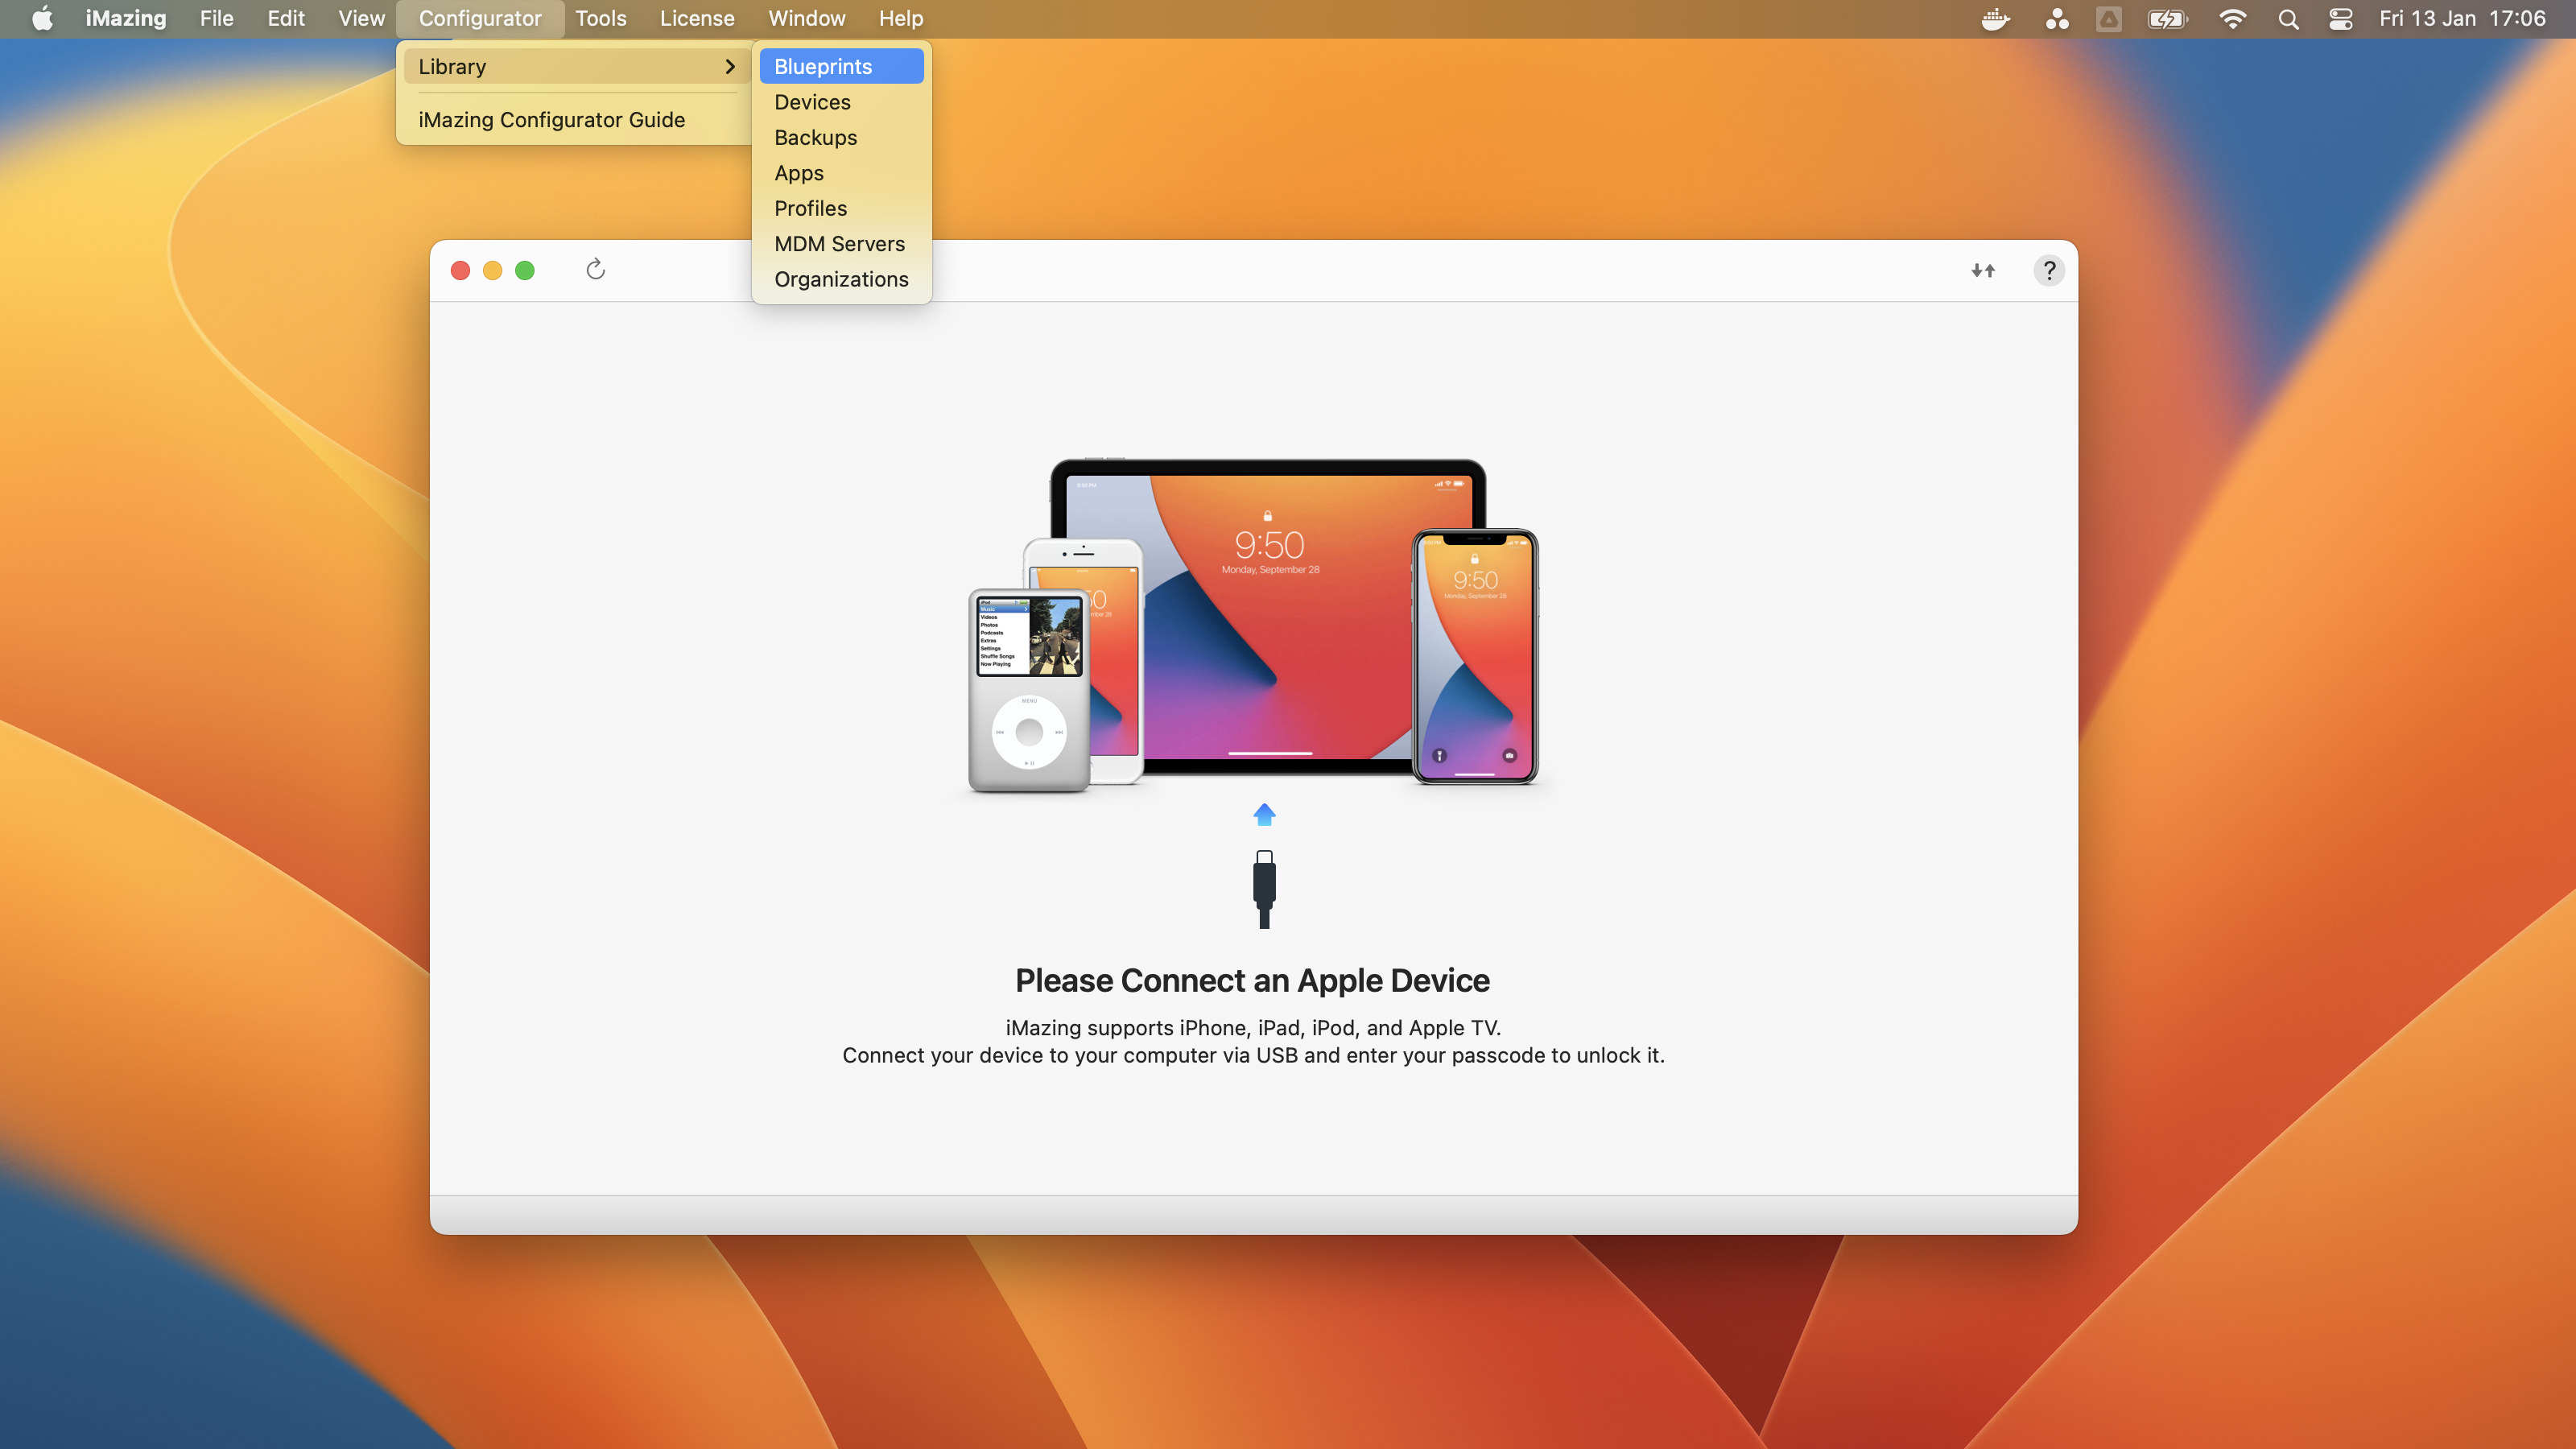
1. Launch iMazing Configurator
Launch iMazing and using the menu bar click on Configurator > Library > Blueprints:
2. Create a blueprint template
The iMazing Configurator window will appear and present the Blueprints tab. Here you can click on the '+' sign at the bottom right to start working on a new blueprint.
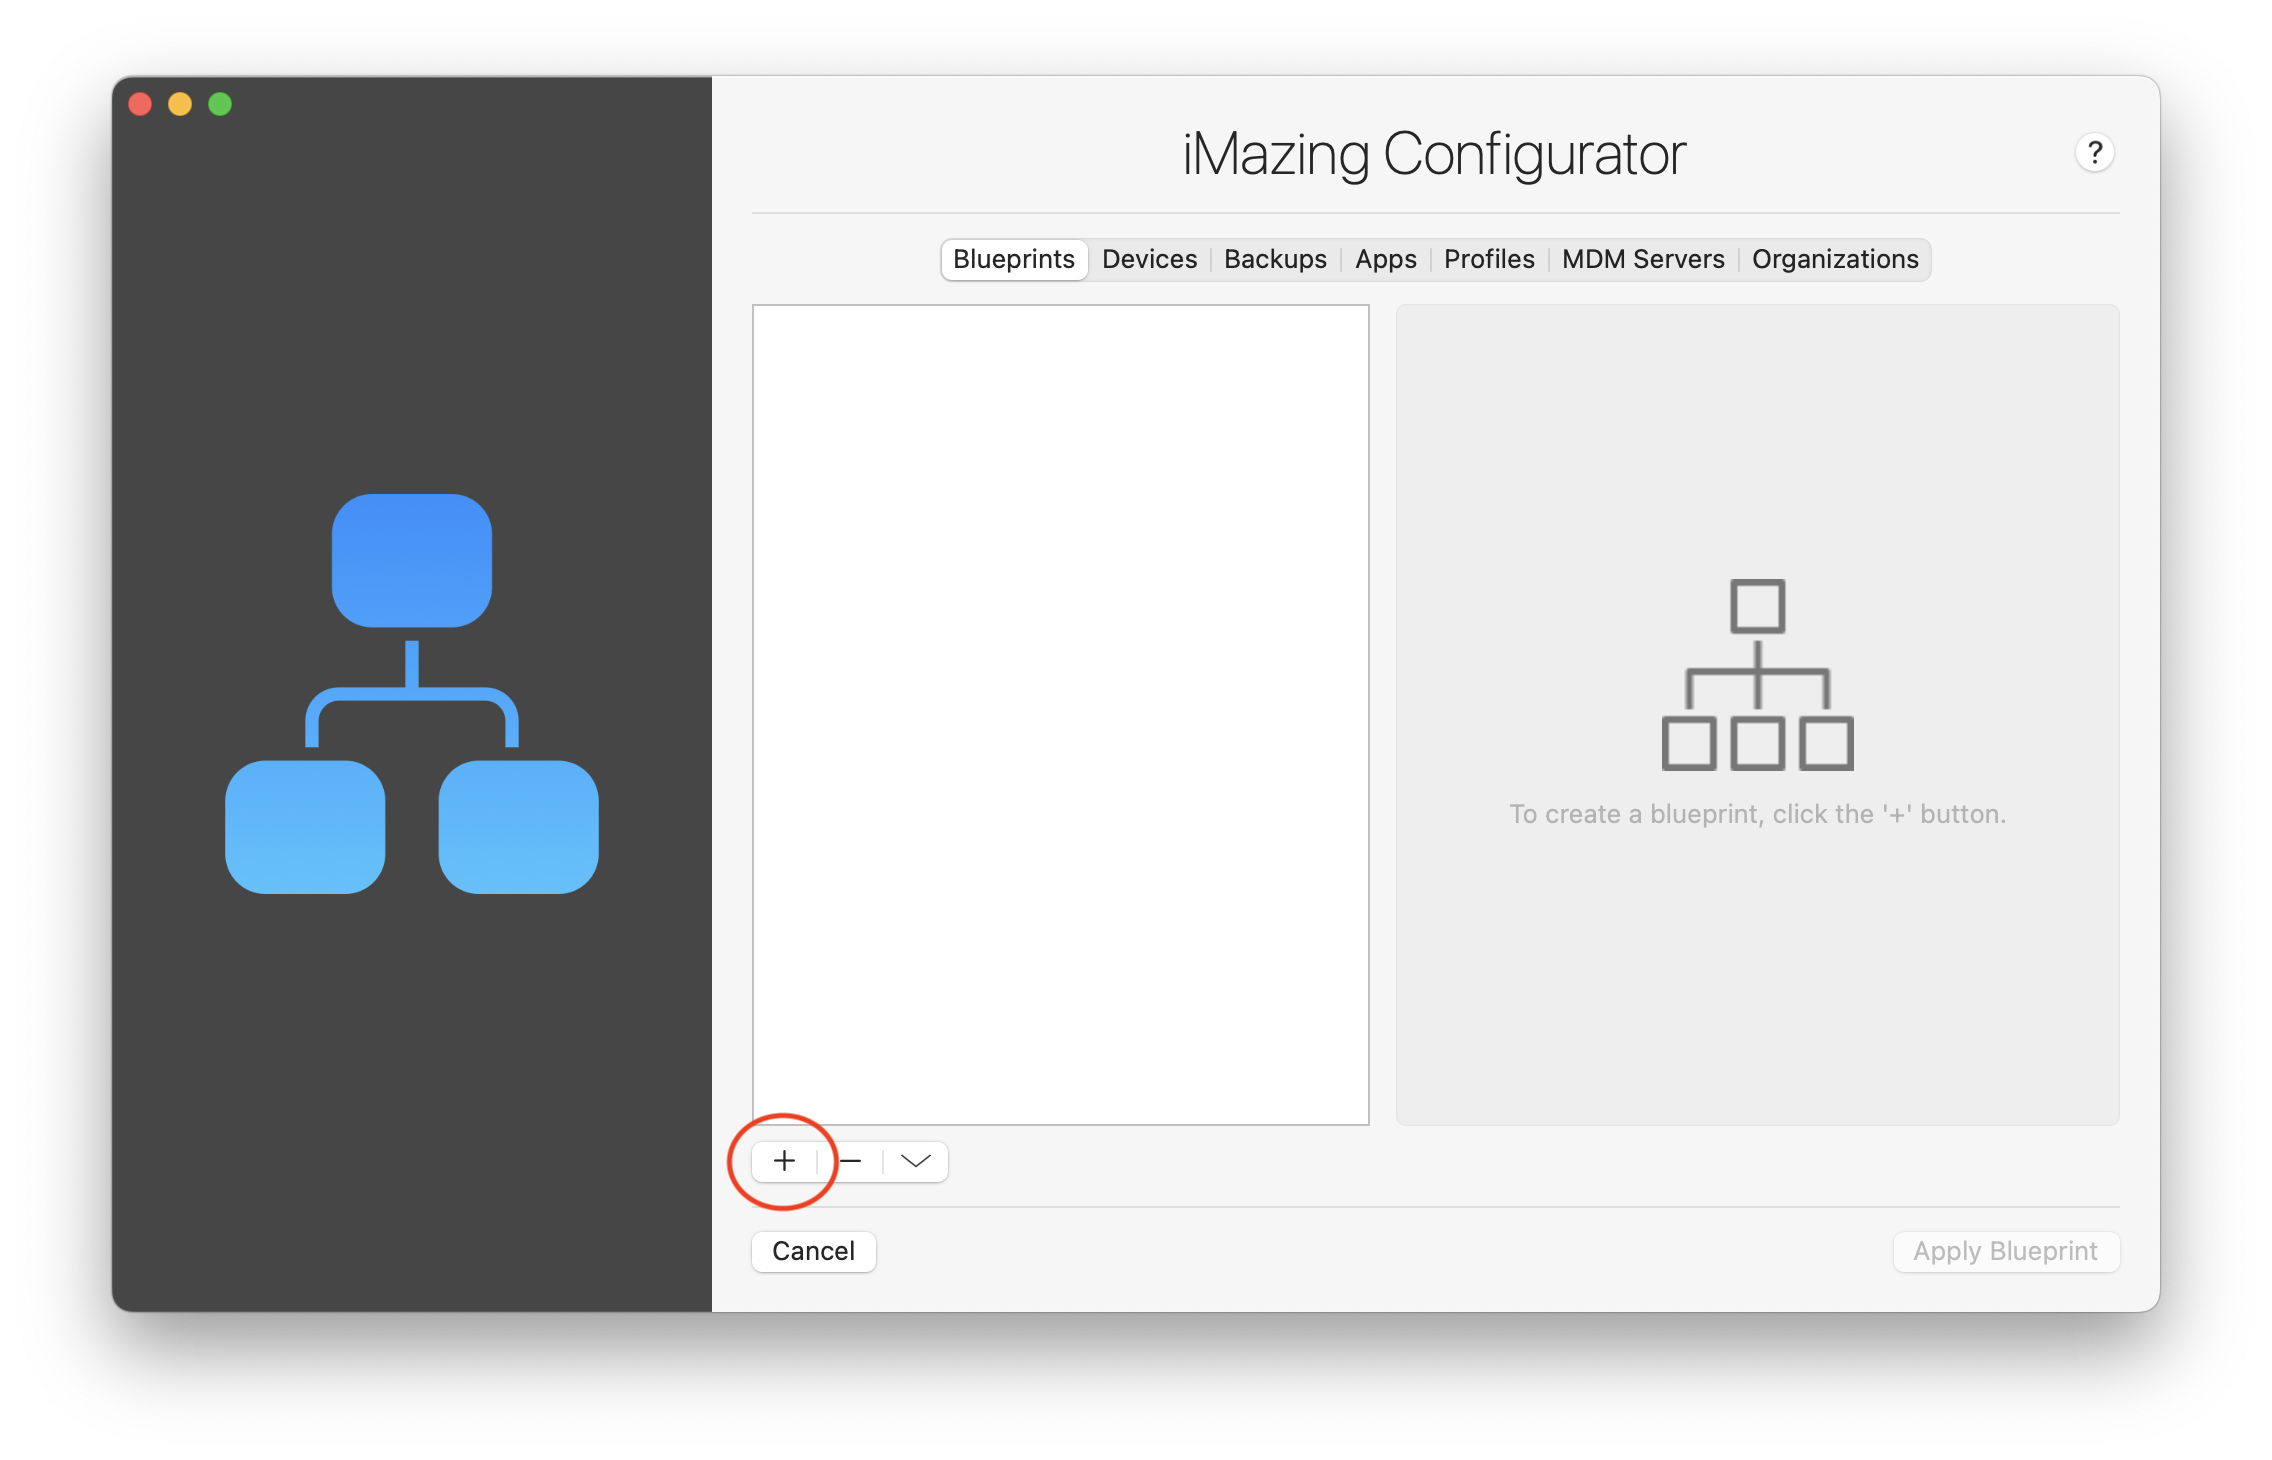
A blueprint editor will appear with its multiple settings sections which will allows you to define with granularity the options to apply on your devices.
3. General options configuration
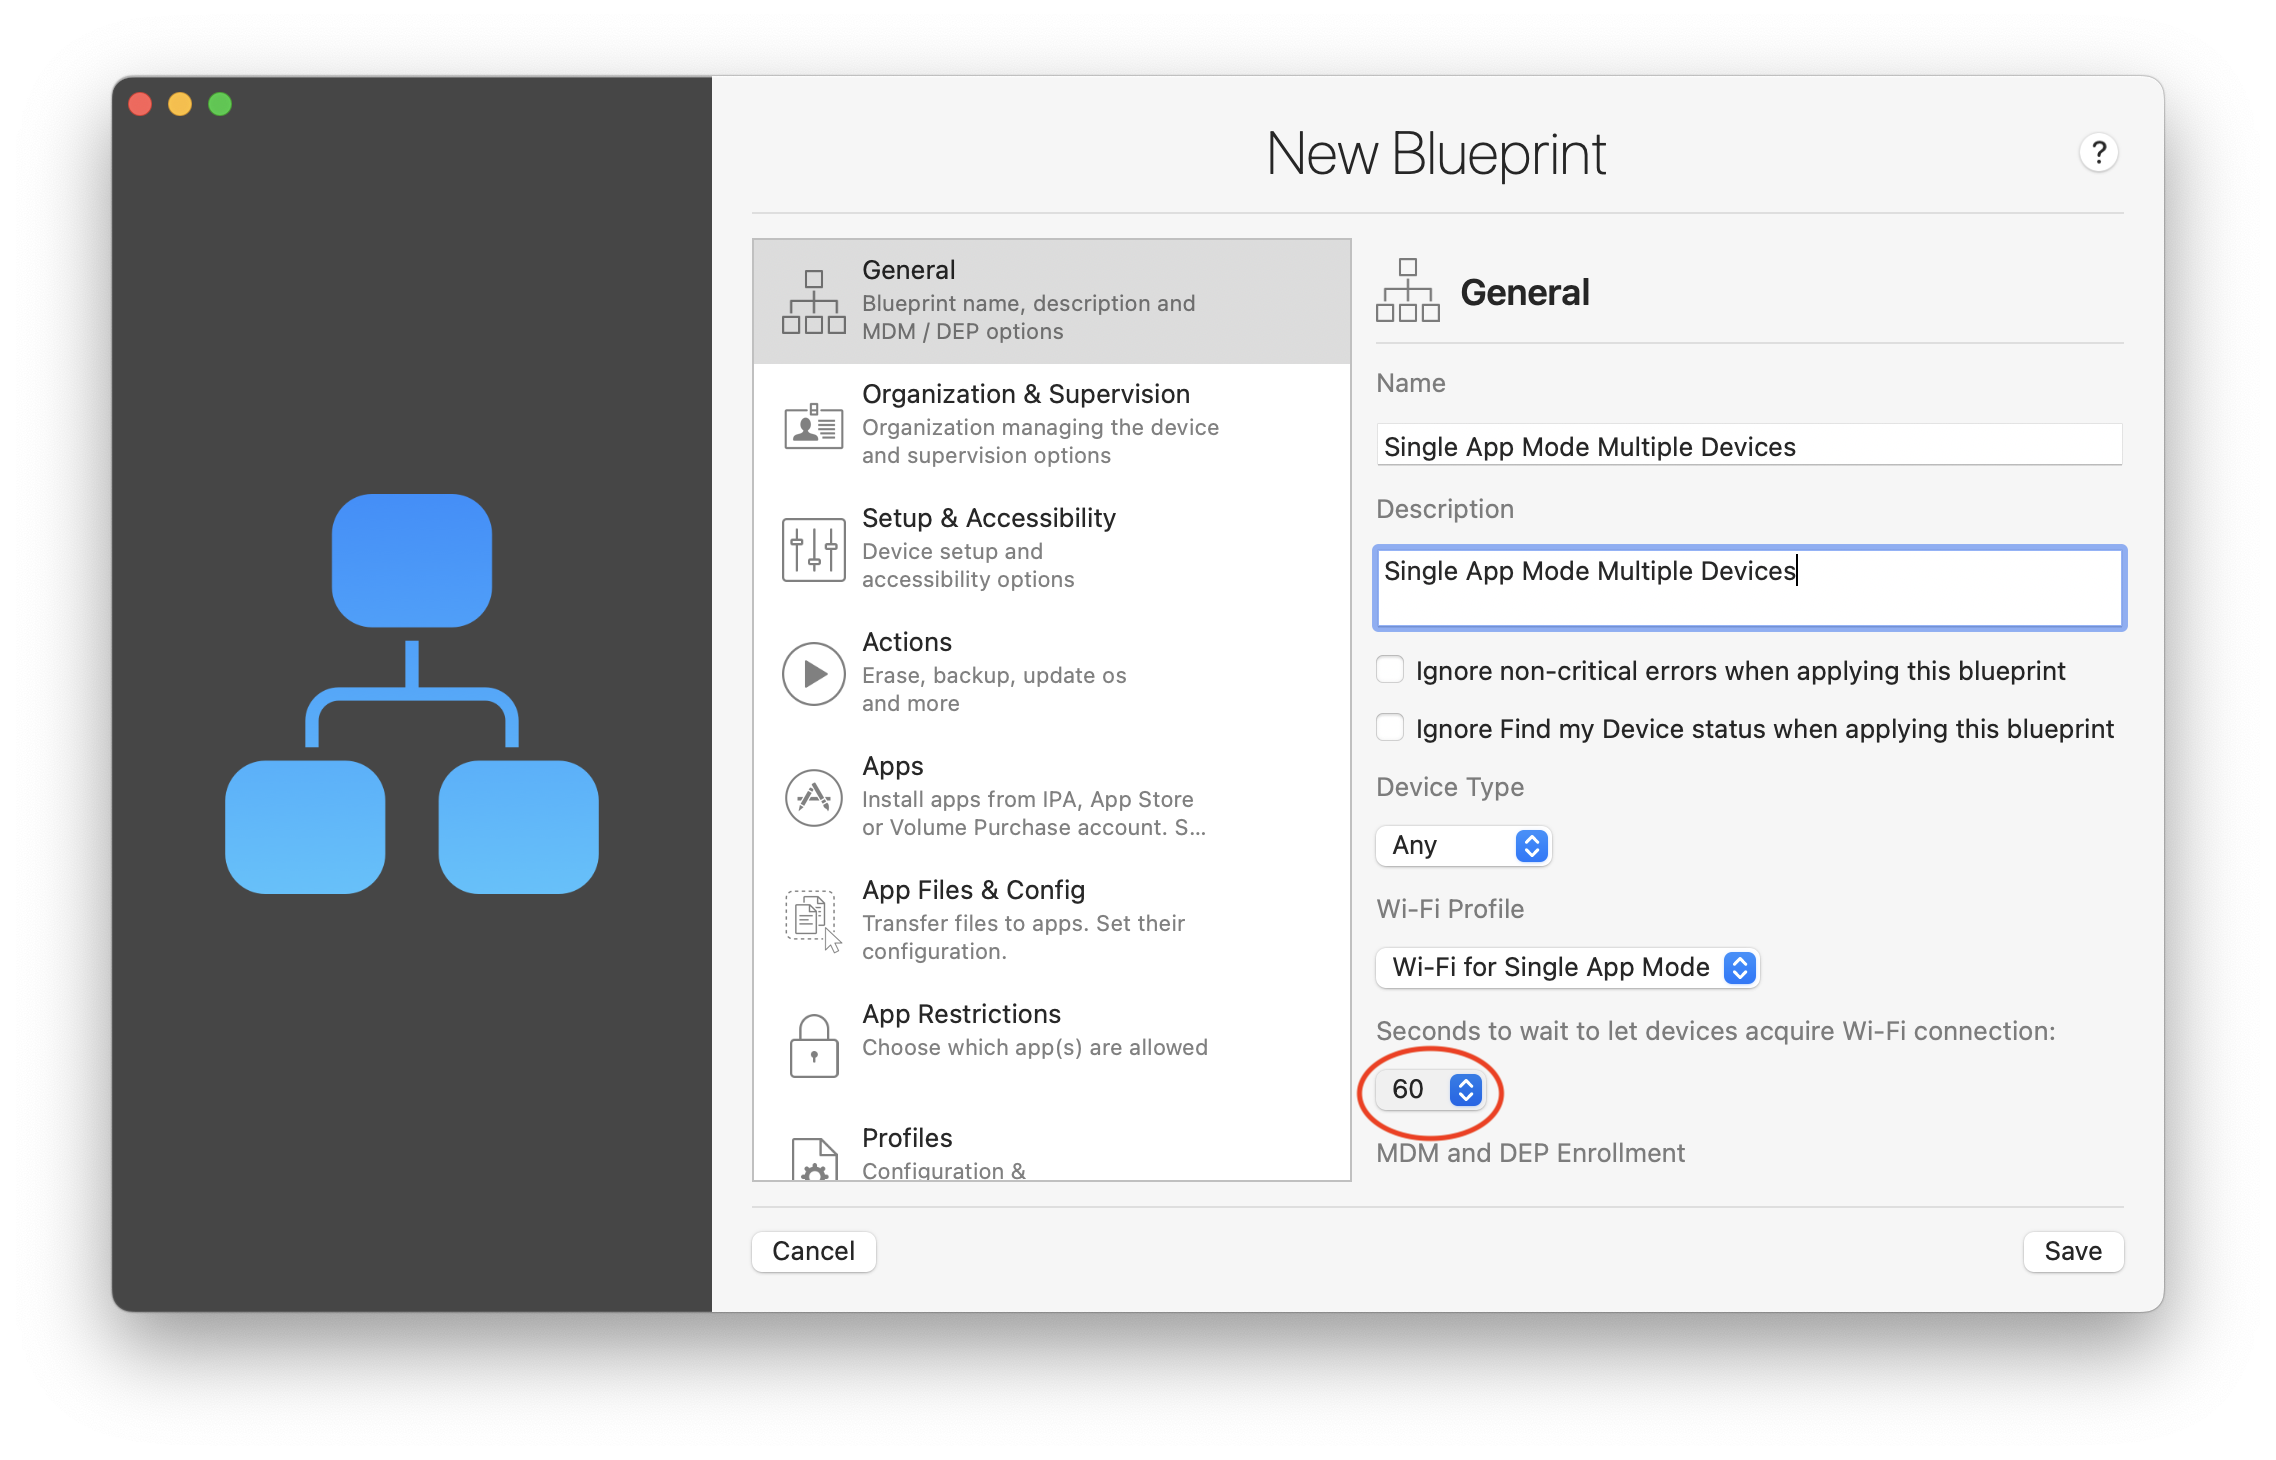
In the General section and, as a first step, name your blueprint and add a description. Then, please click on Wi-Fi Profile to create a network configuration profile which will apply after the devices restore:
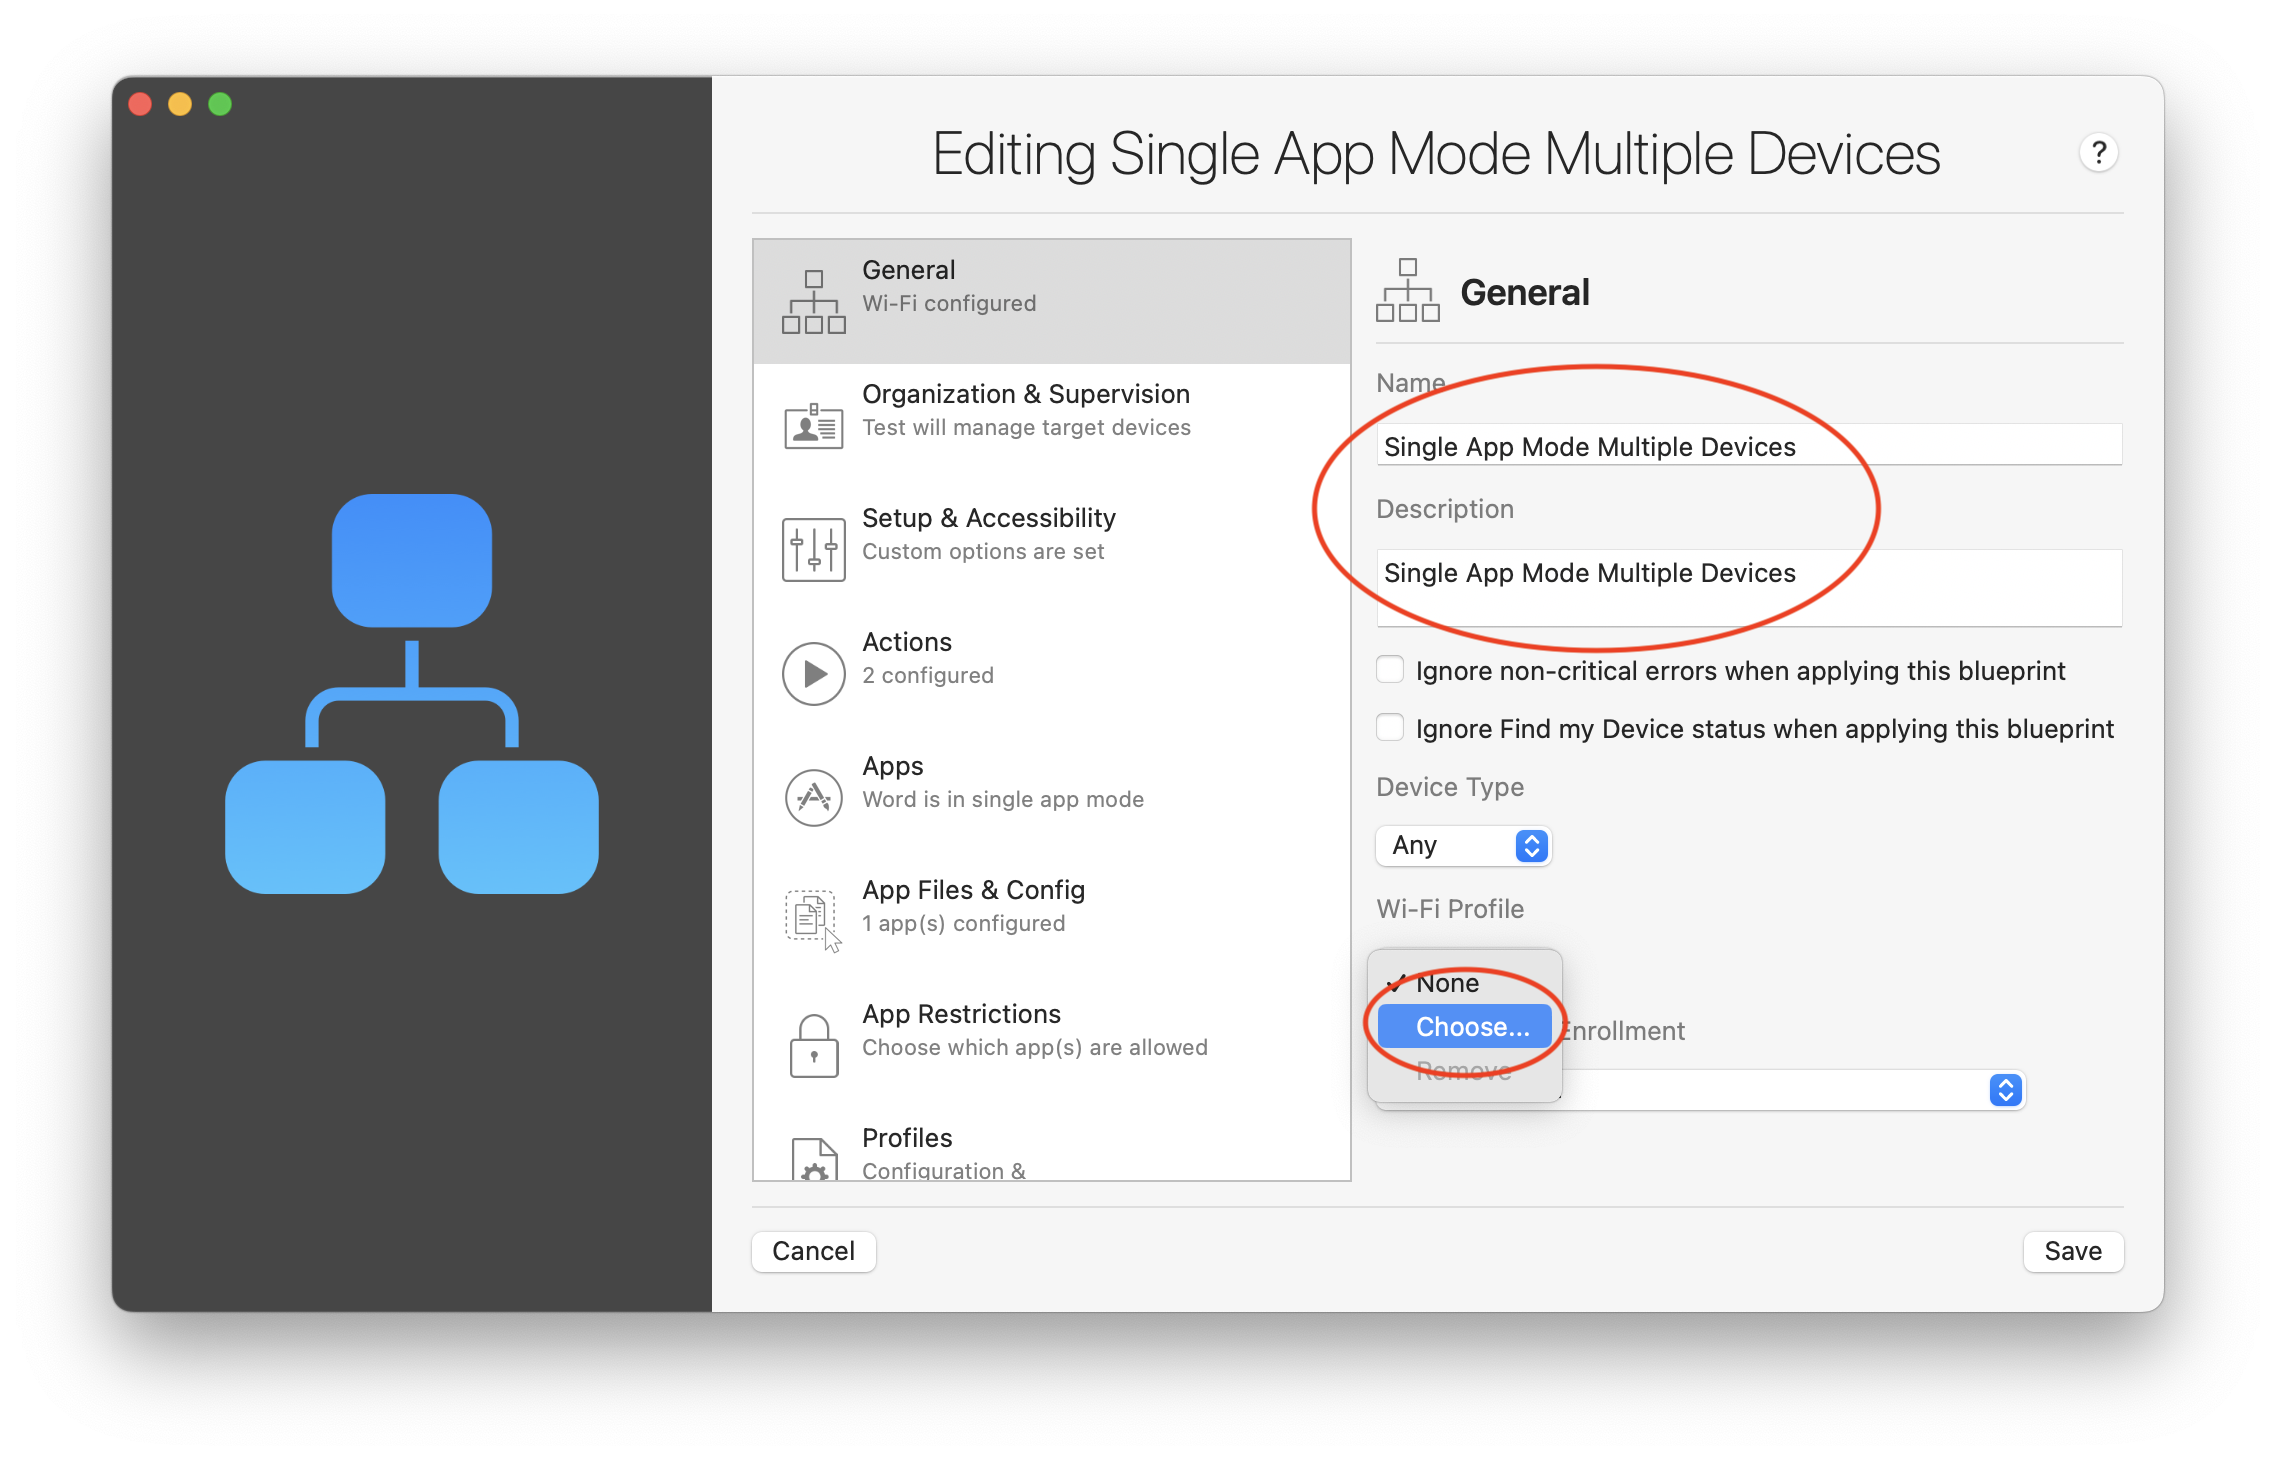
💡 Tip: Wi-Fi settings are required to allow devices to acquire its single app license. Please note that iMazing will handle the download of the application itself.
To learn about creating a Wi-Fi profile, visit our Getting Started with iMazing Profile Editor guide.
After you have created the configuration profile, please select it and click on Choose:
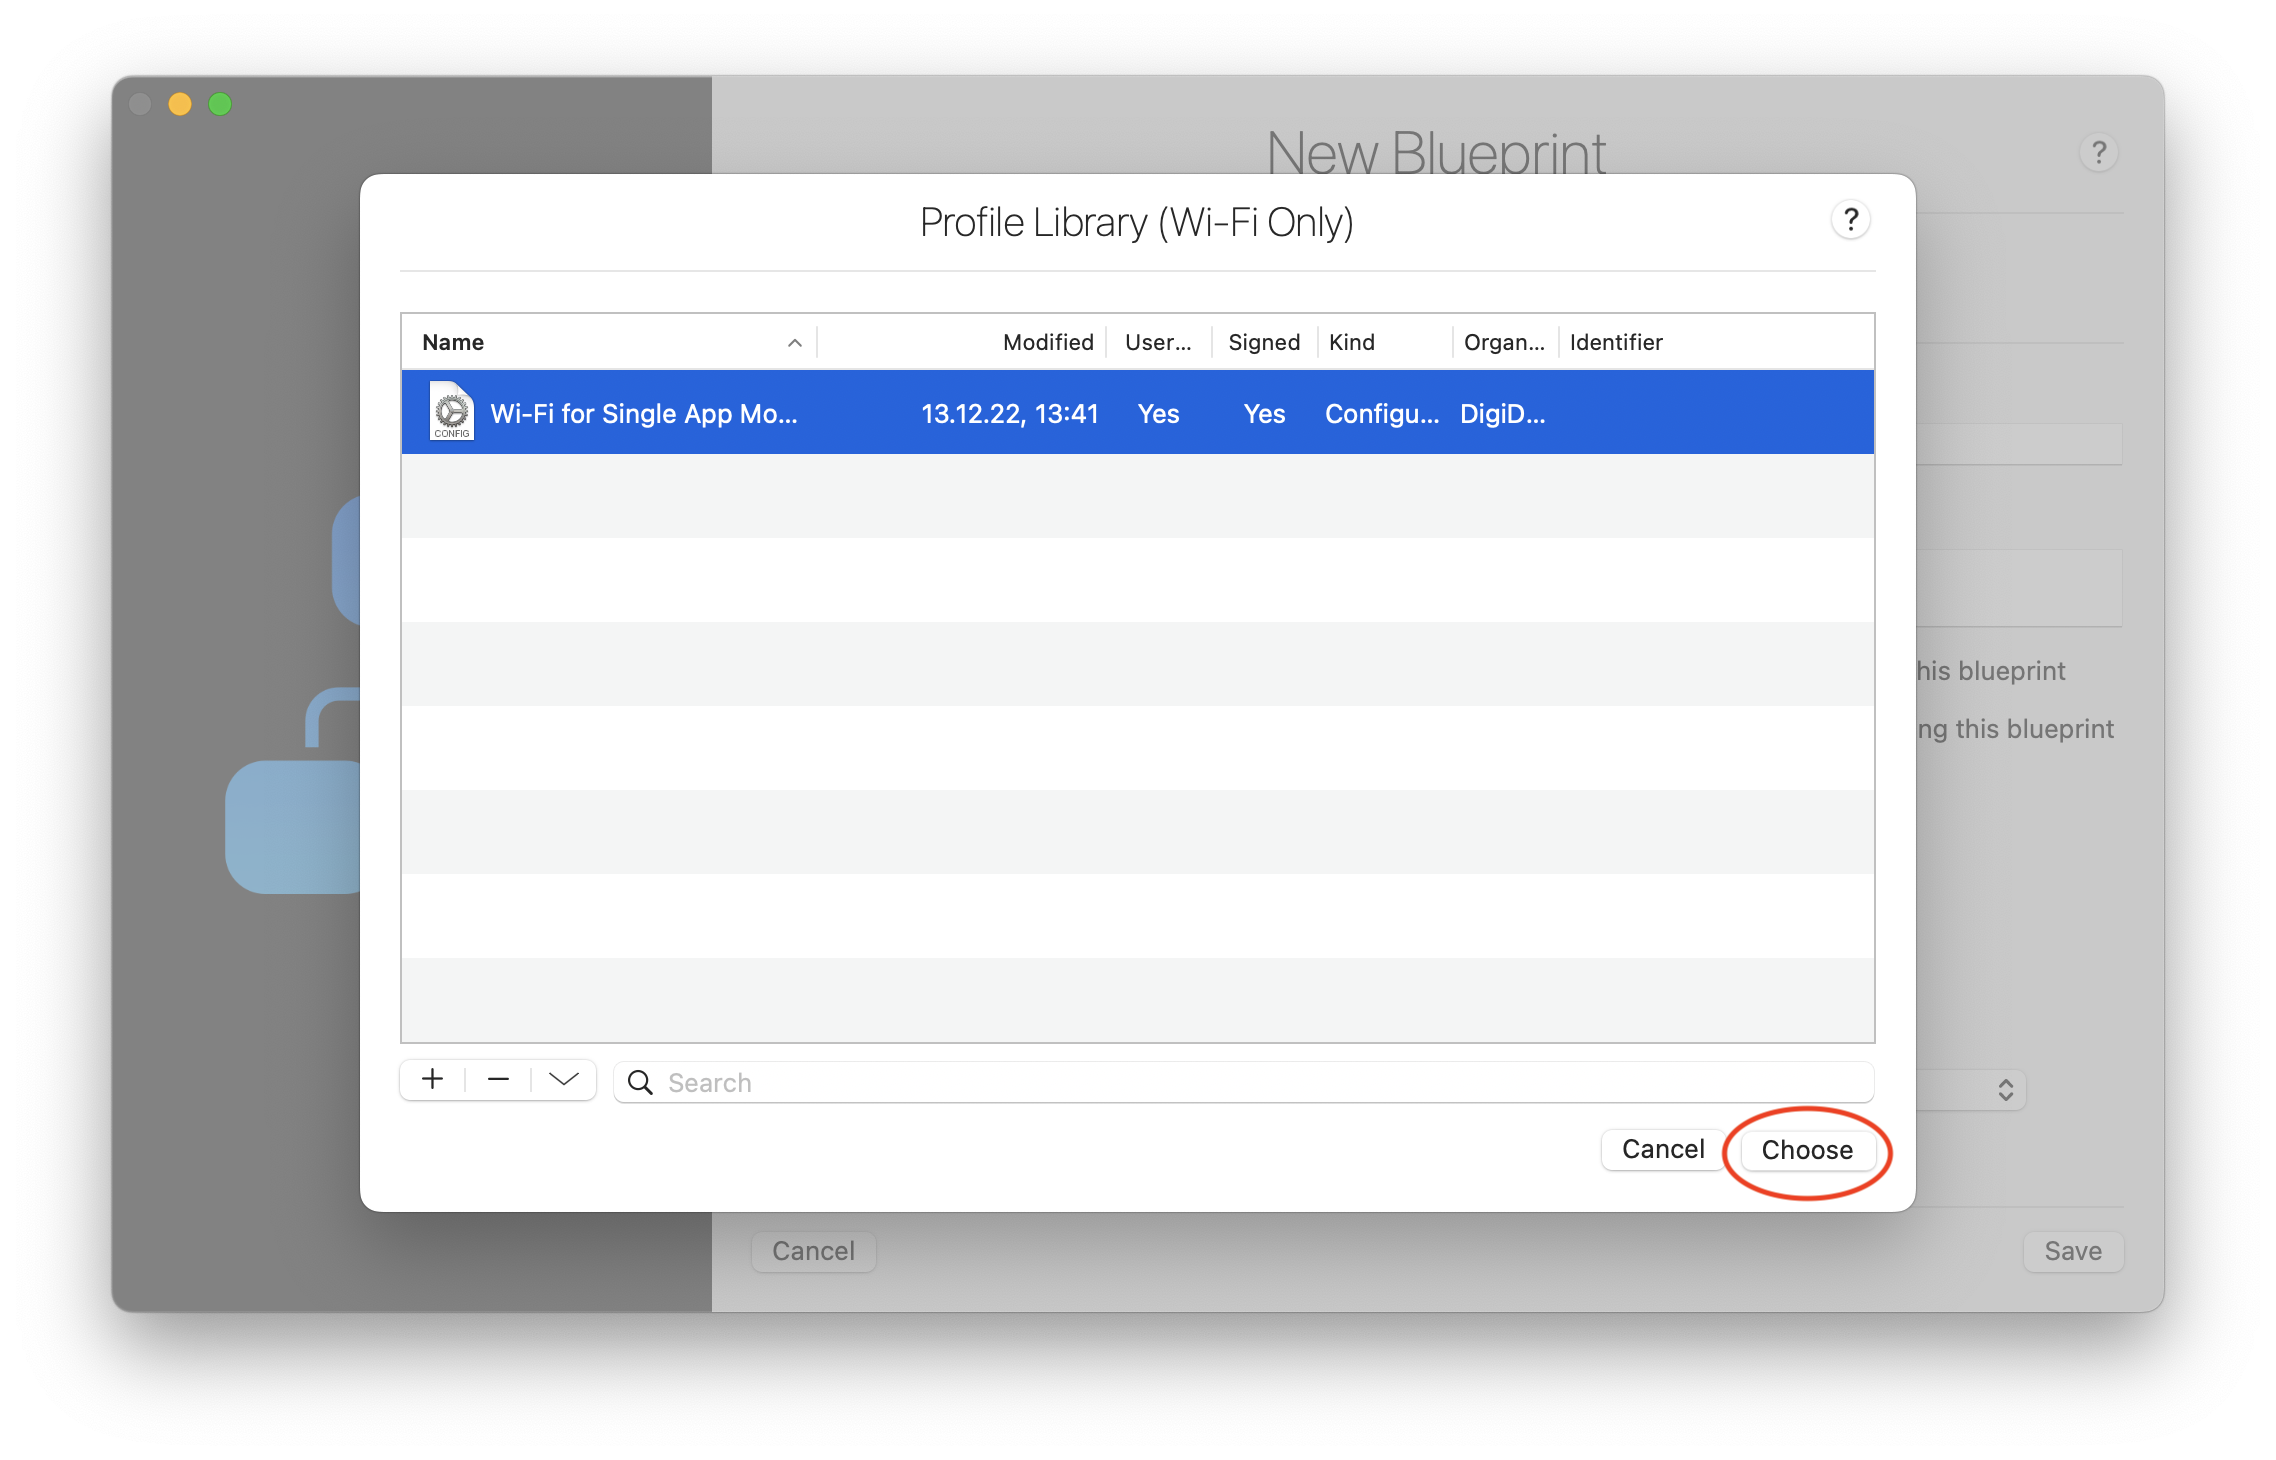
You can now see here as result that your chosen Wi-Fi profile has been set on the new blueprint:

As a last step in this section, extend the Seconds to wait to let the devices acquire Wi-Fi connection to 60 seconds. This allows the device for more time to try and acquire internet access which is necessary before it receives the command to download the single app and to acquire its license:
4. Organization & Supervision options configuration
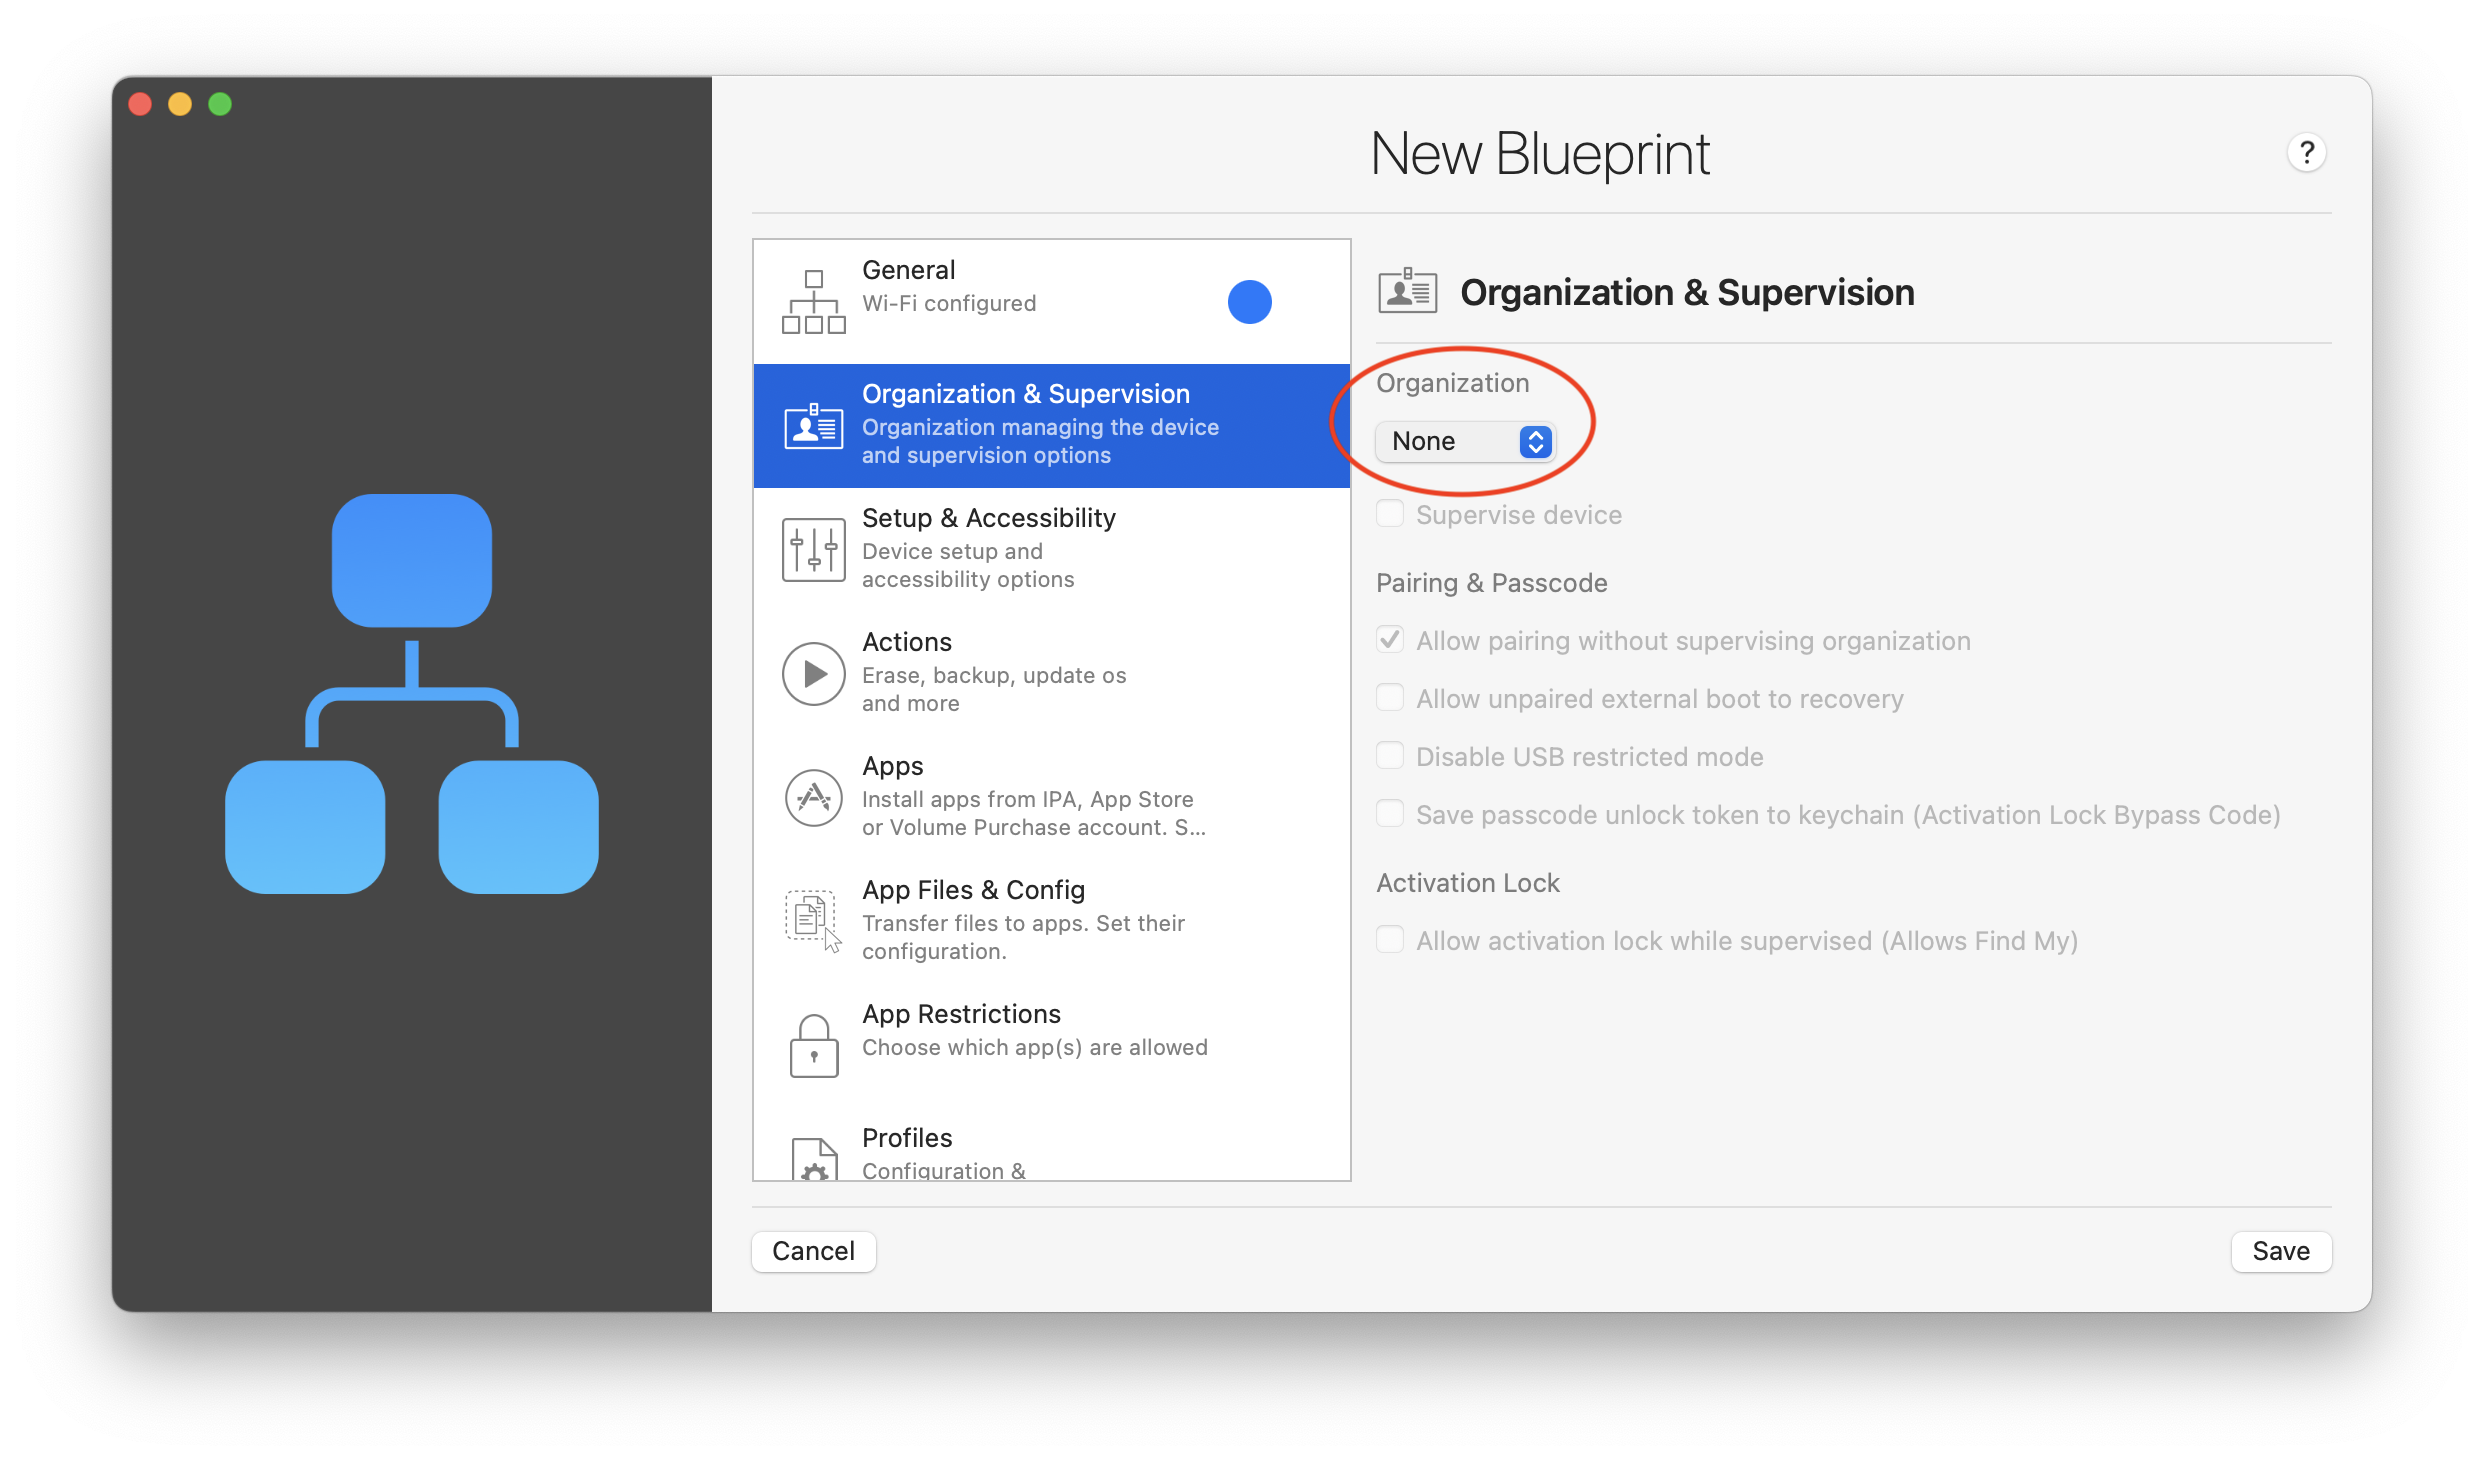
In the Organization & Supervision section, start by selecting an organization that will supervise the device:
Select the organization from the library, or create a new one if needed:
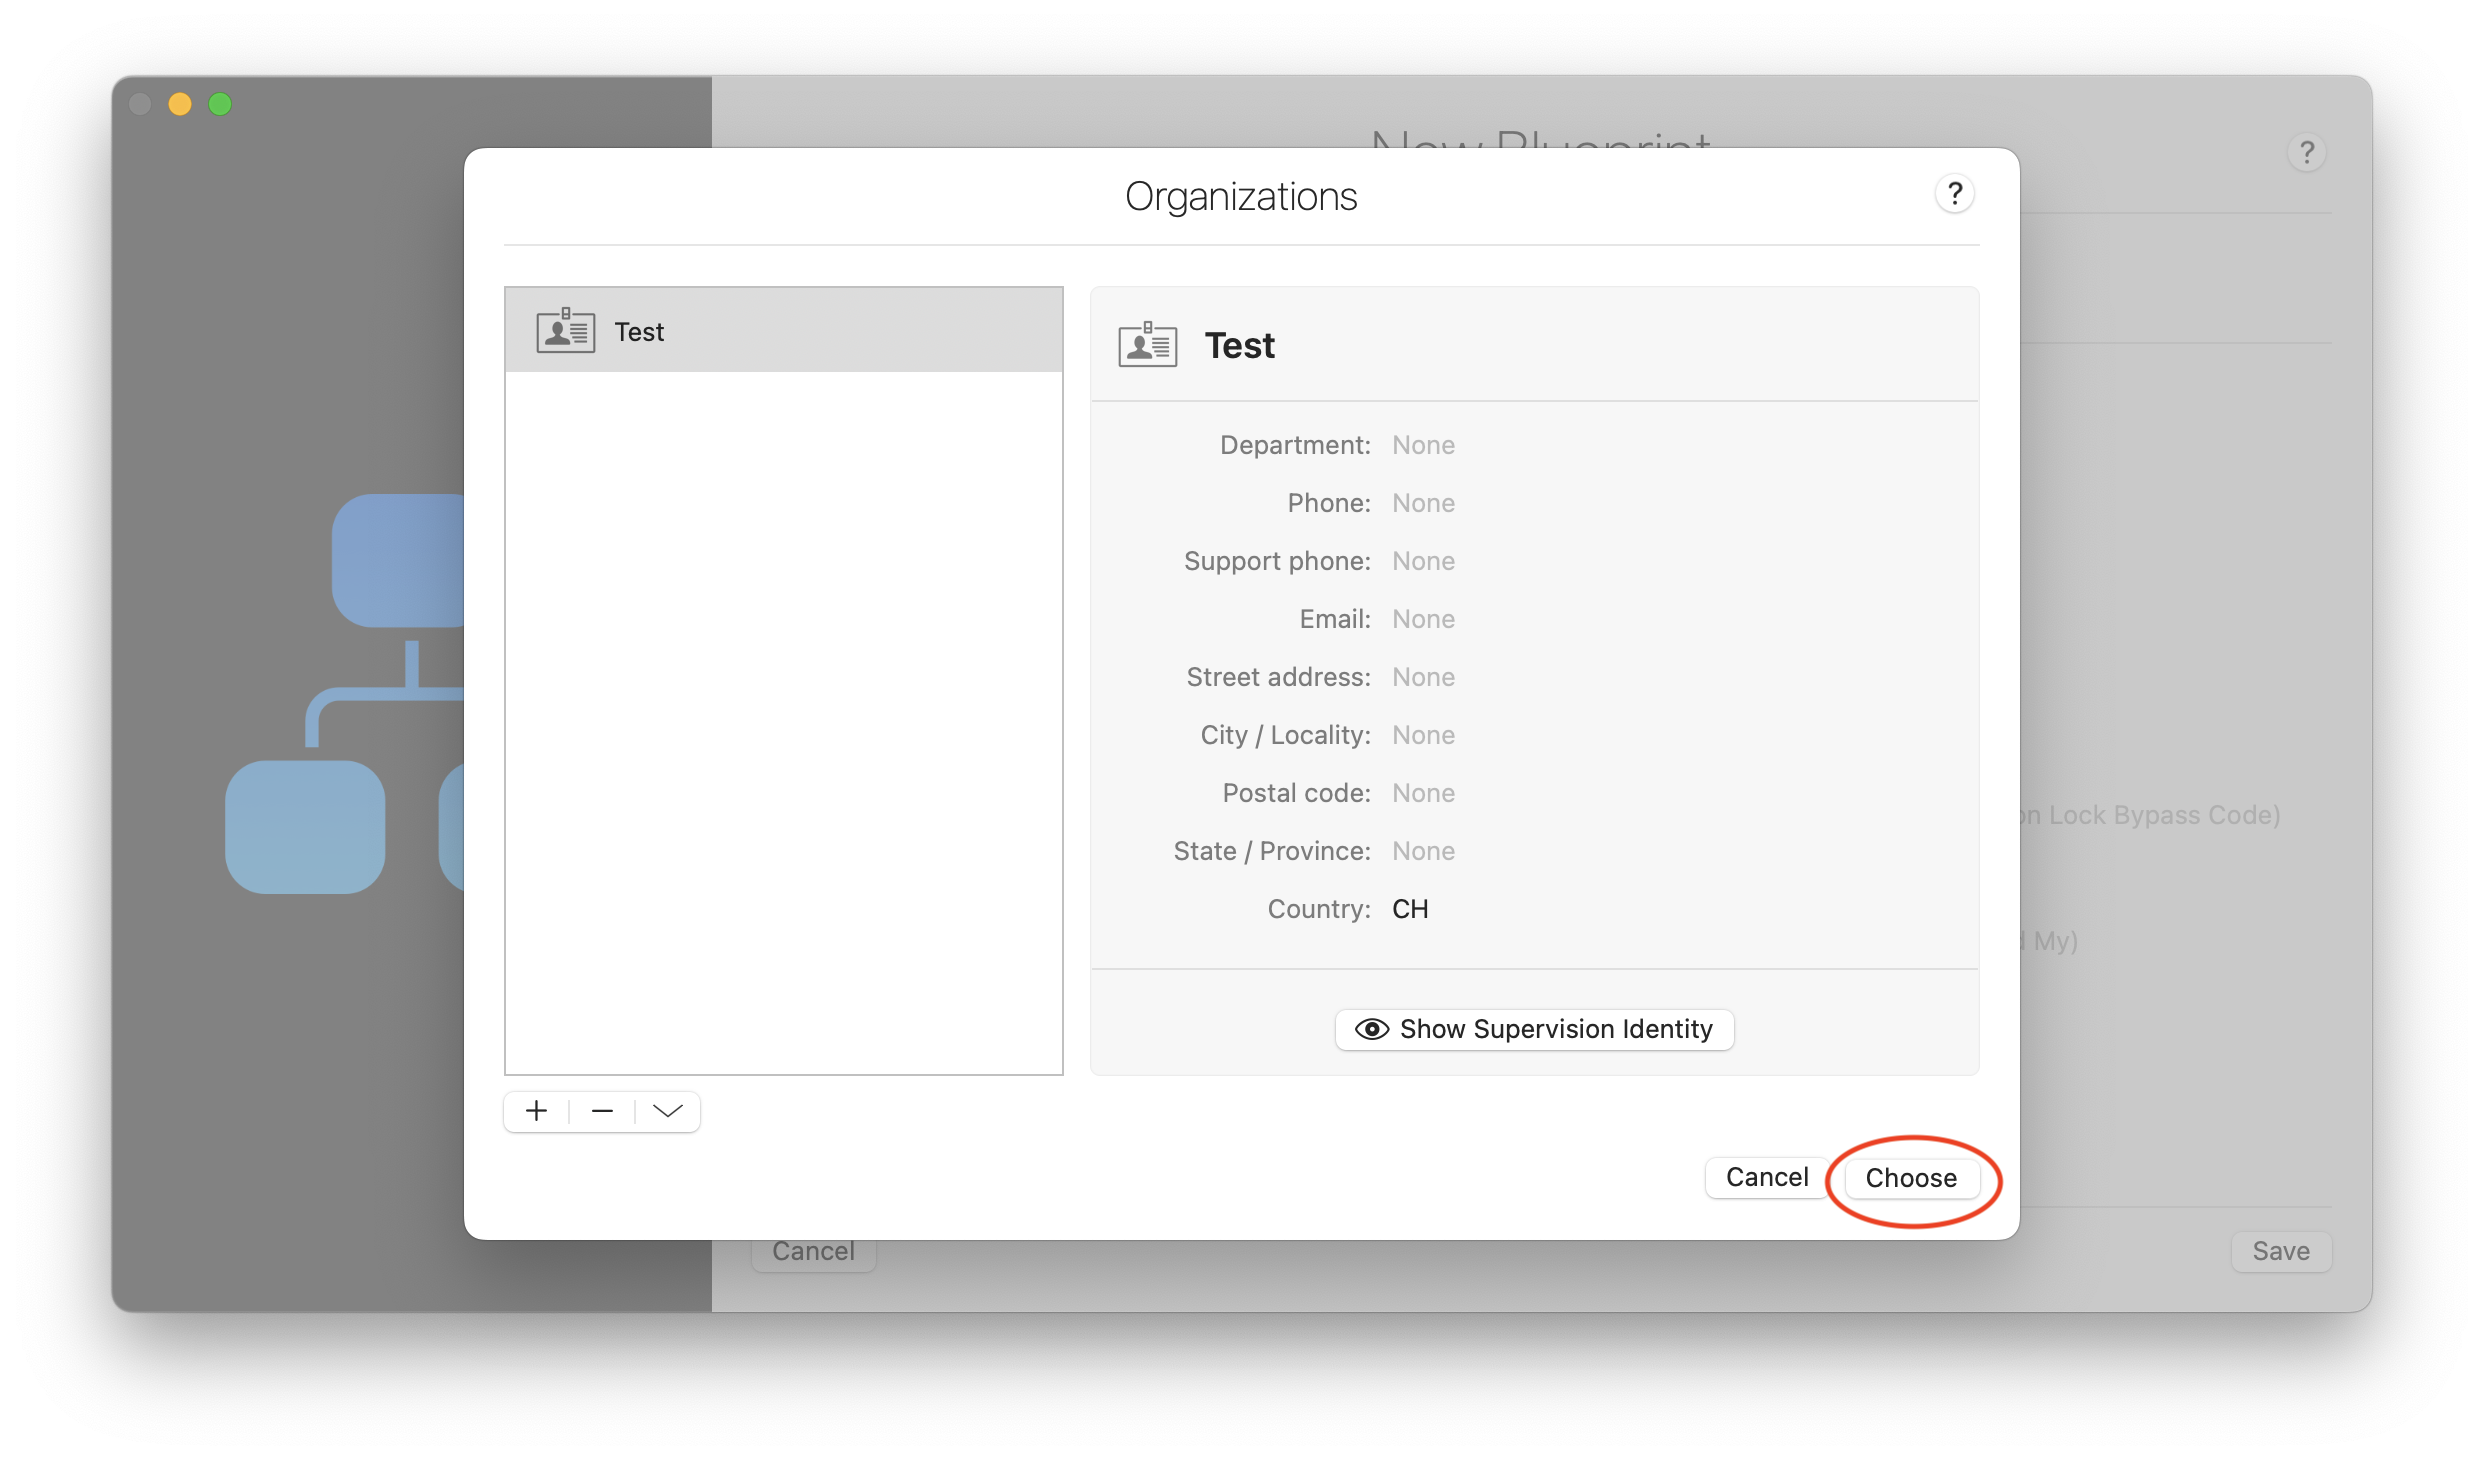
For more information about creating a new organization in iMazing Configurator, visit the Organizations section in the iMazing Configurator Overview.
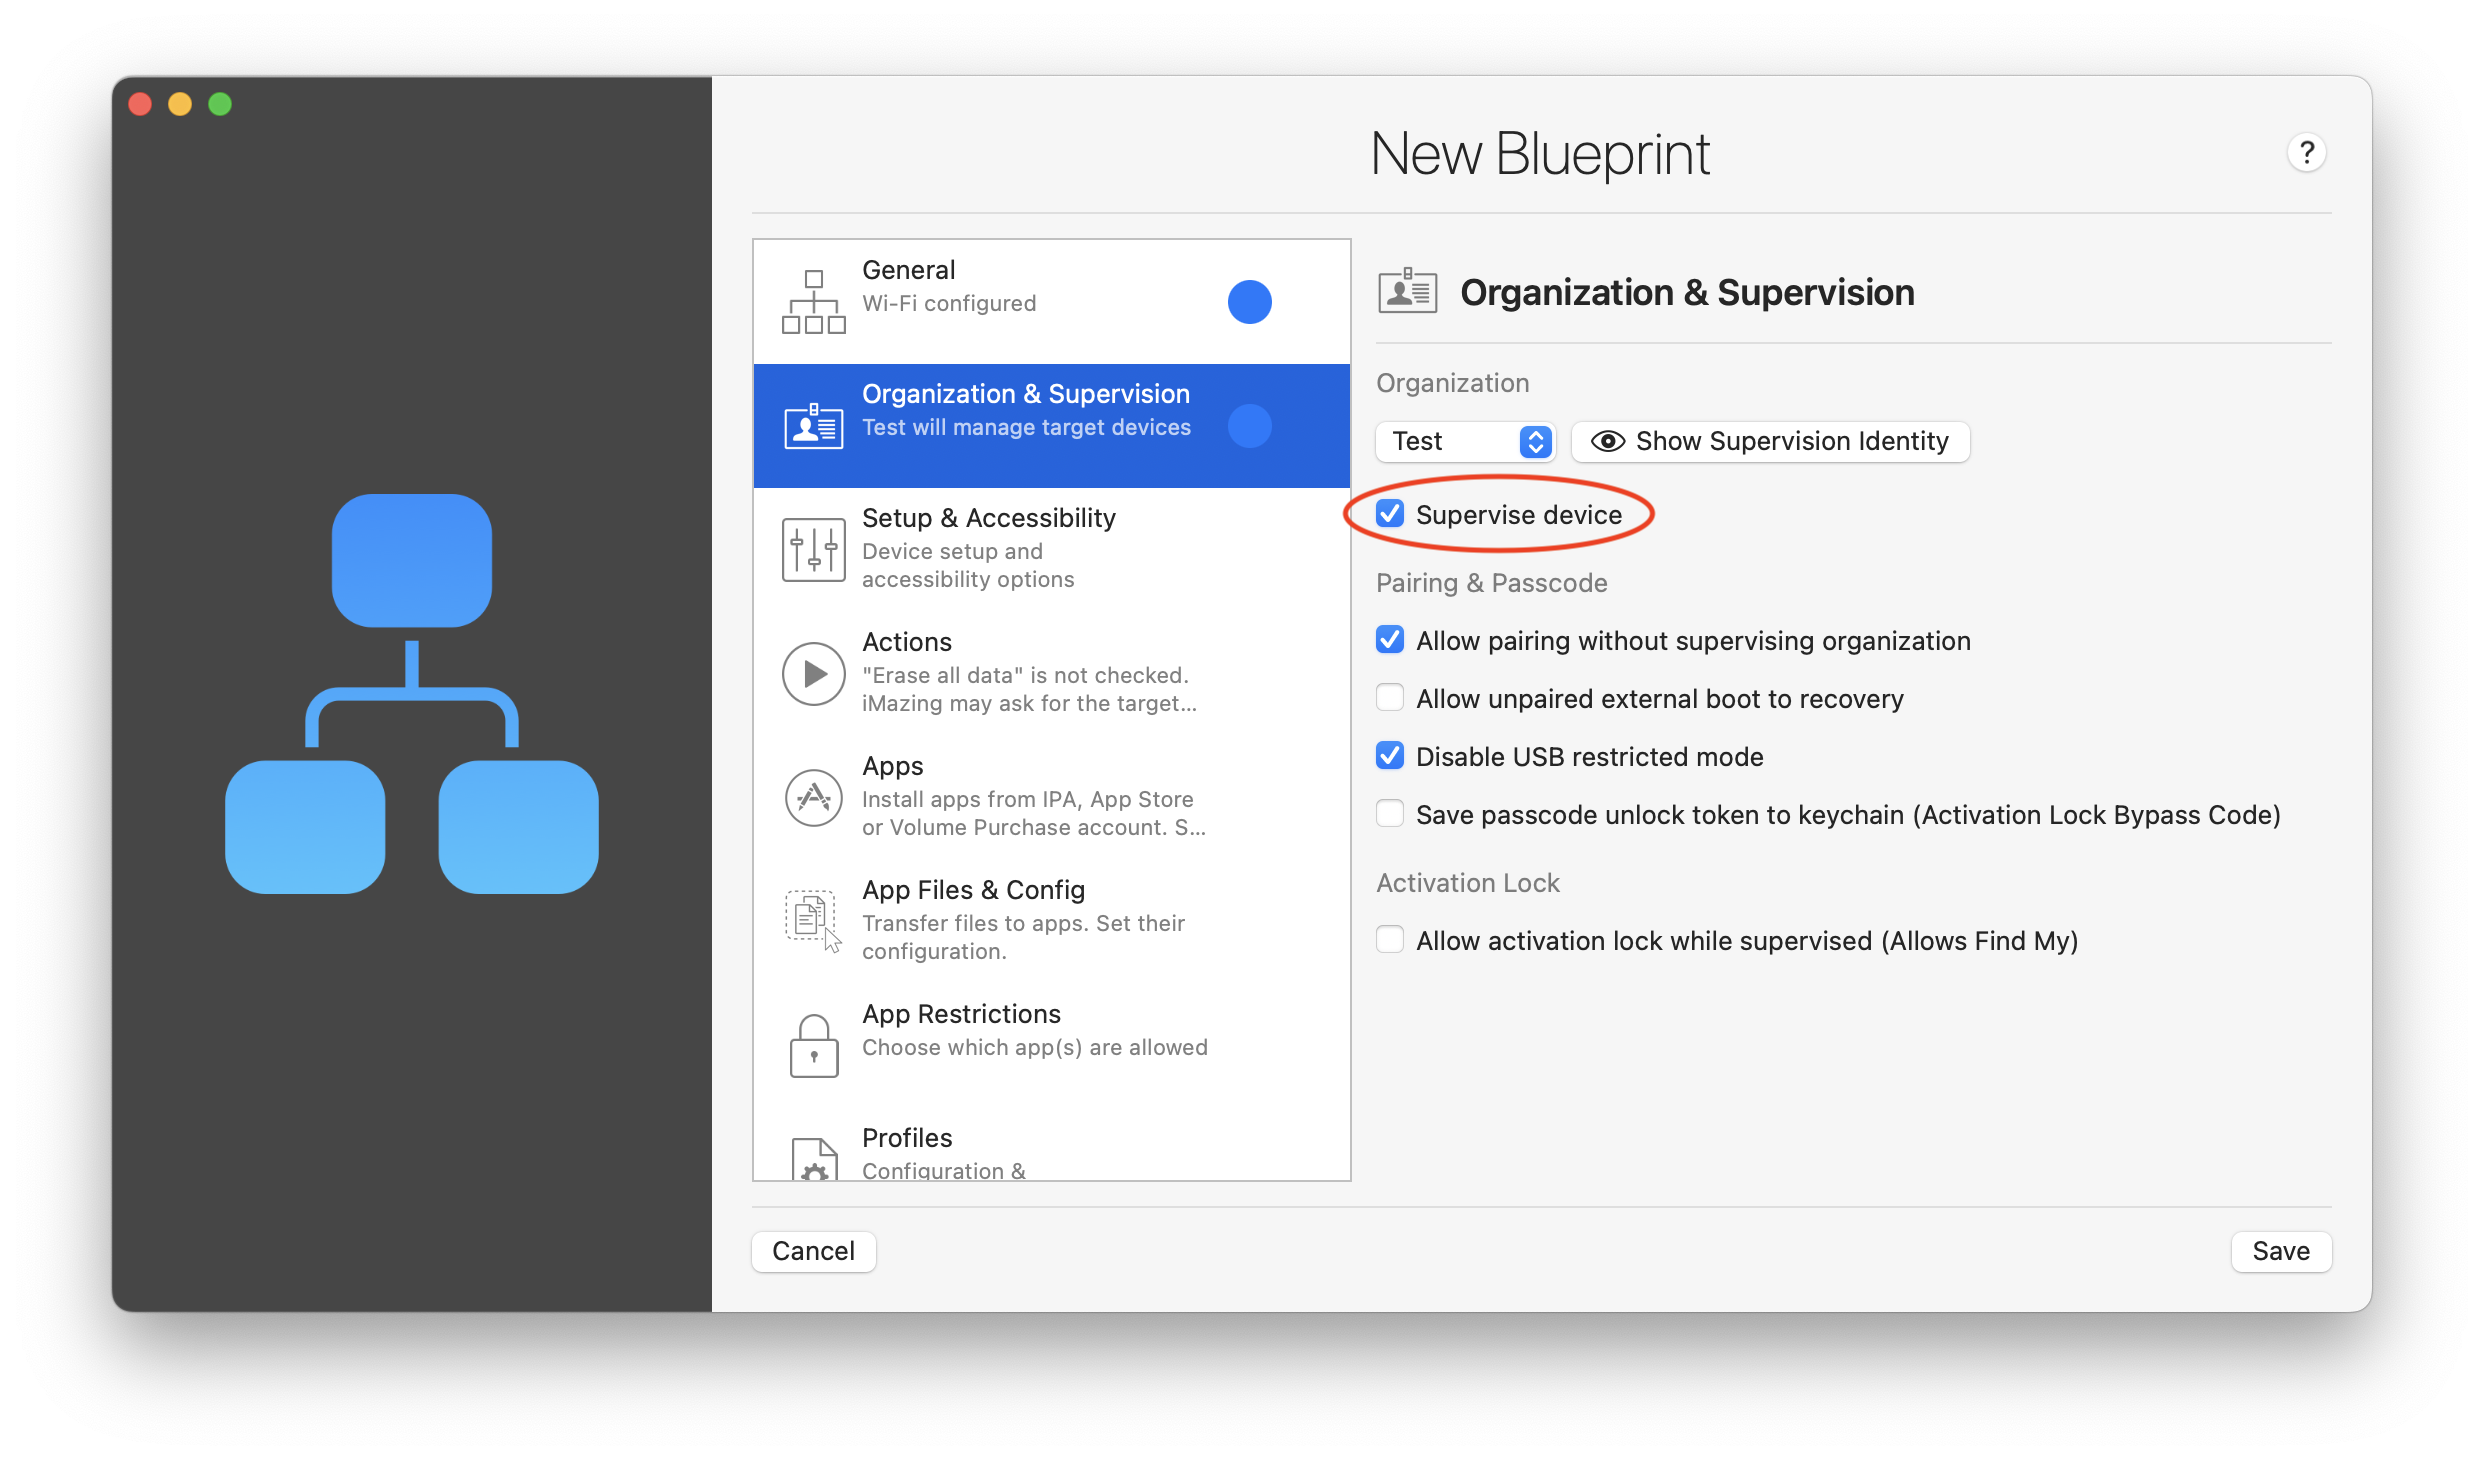
As a last step in this section, tick Supervise device:
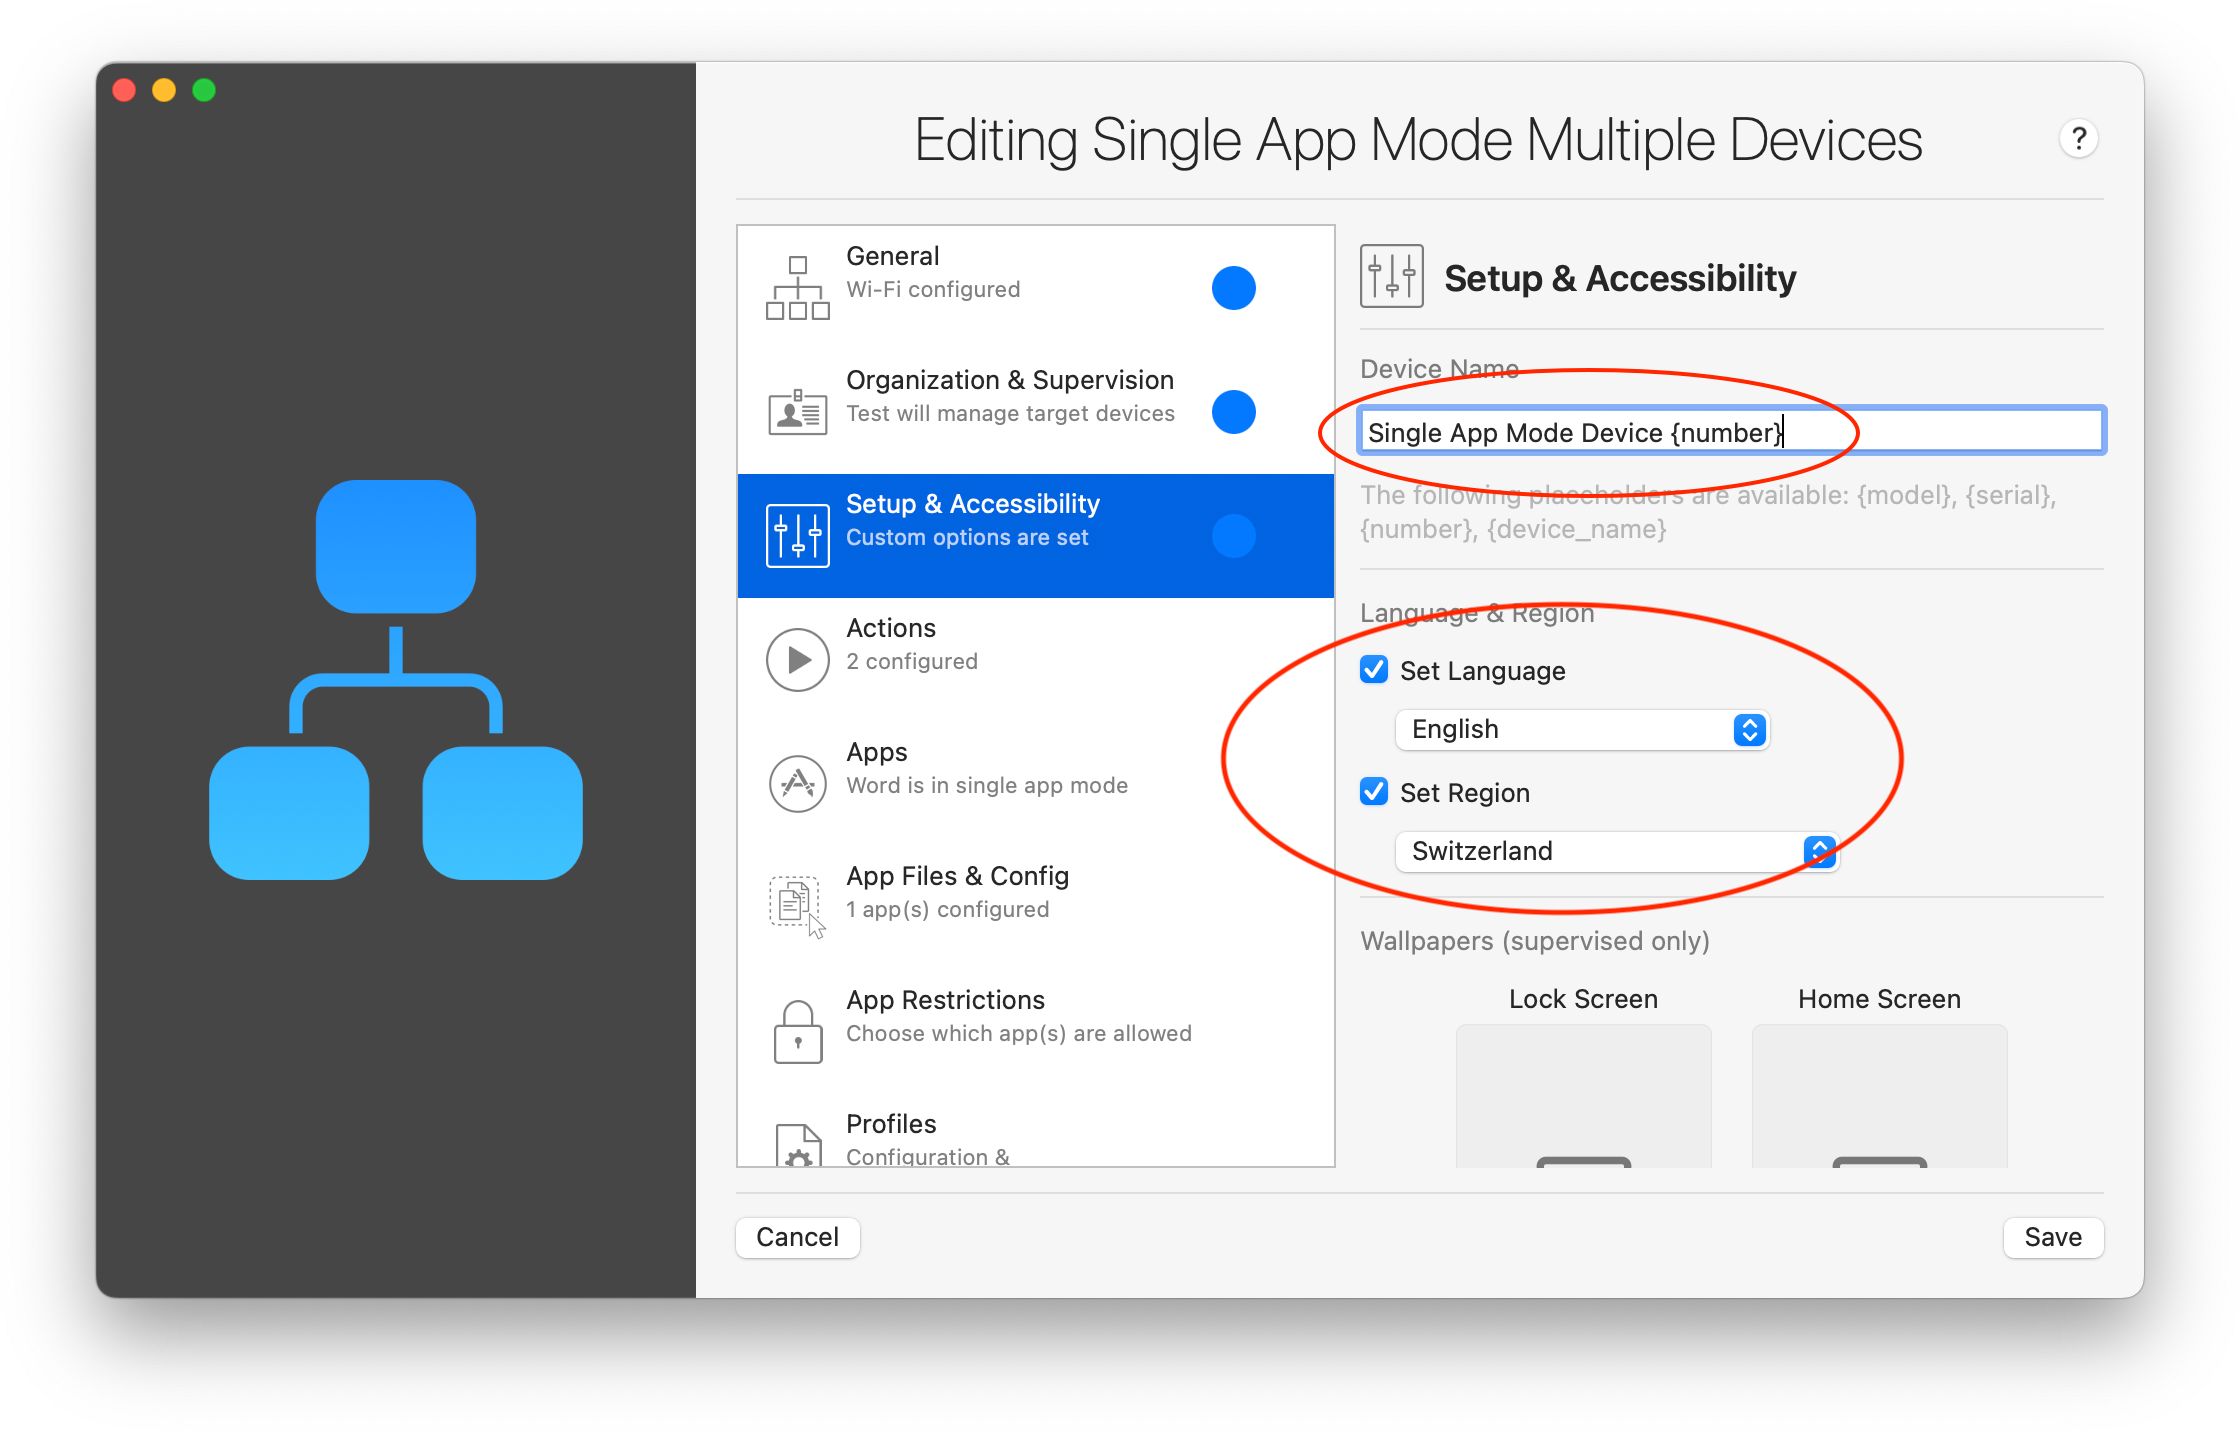
5. Setup & Accessibility options configuration
In the Setup & Accessibility section, you can choose a name template for your devices. For example 'Single App Mode Device {number}'. The {number} placeholder appended to the name will ensure that device names are incrementally numbered. Make sure to set both Language and Region in this section as well:
6. Actions options configuration
As mentioned earlier, we recommend to fully erase all devices during this procedure. The following steps ensure that this action is a part of the blueprint.
In the Actions section, select Erase all data and settings (keep Preserve eSIM data and Prevent proximity setup selected as well) to start with a clean installation. Here you can also take the advantage of updating your devices to the latest iOS/iPadOS version by choosing Update OS to the latest available version:
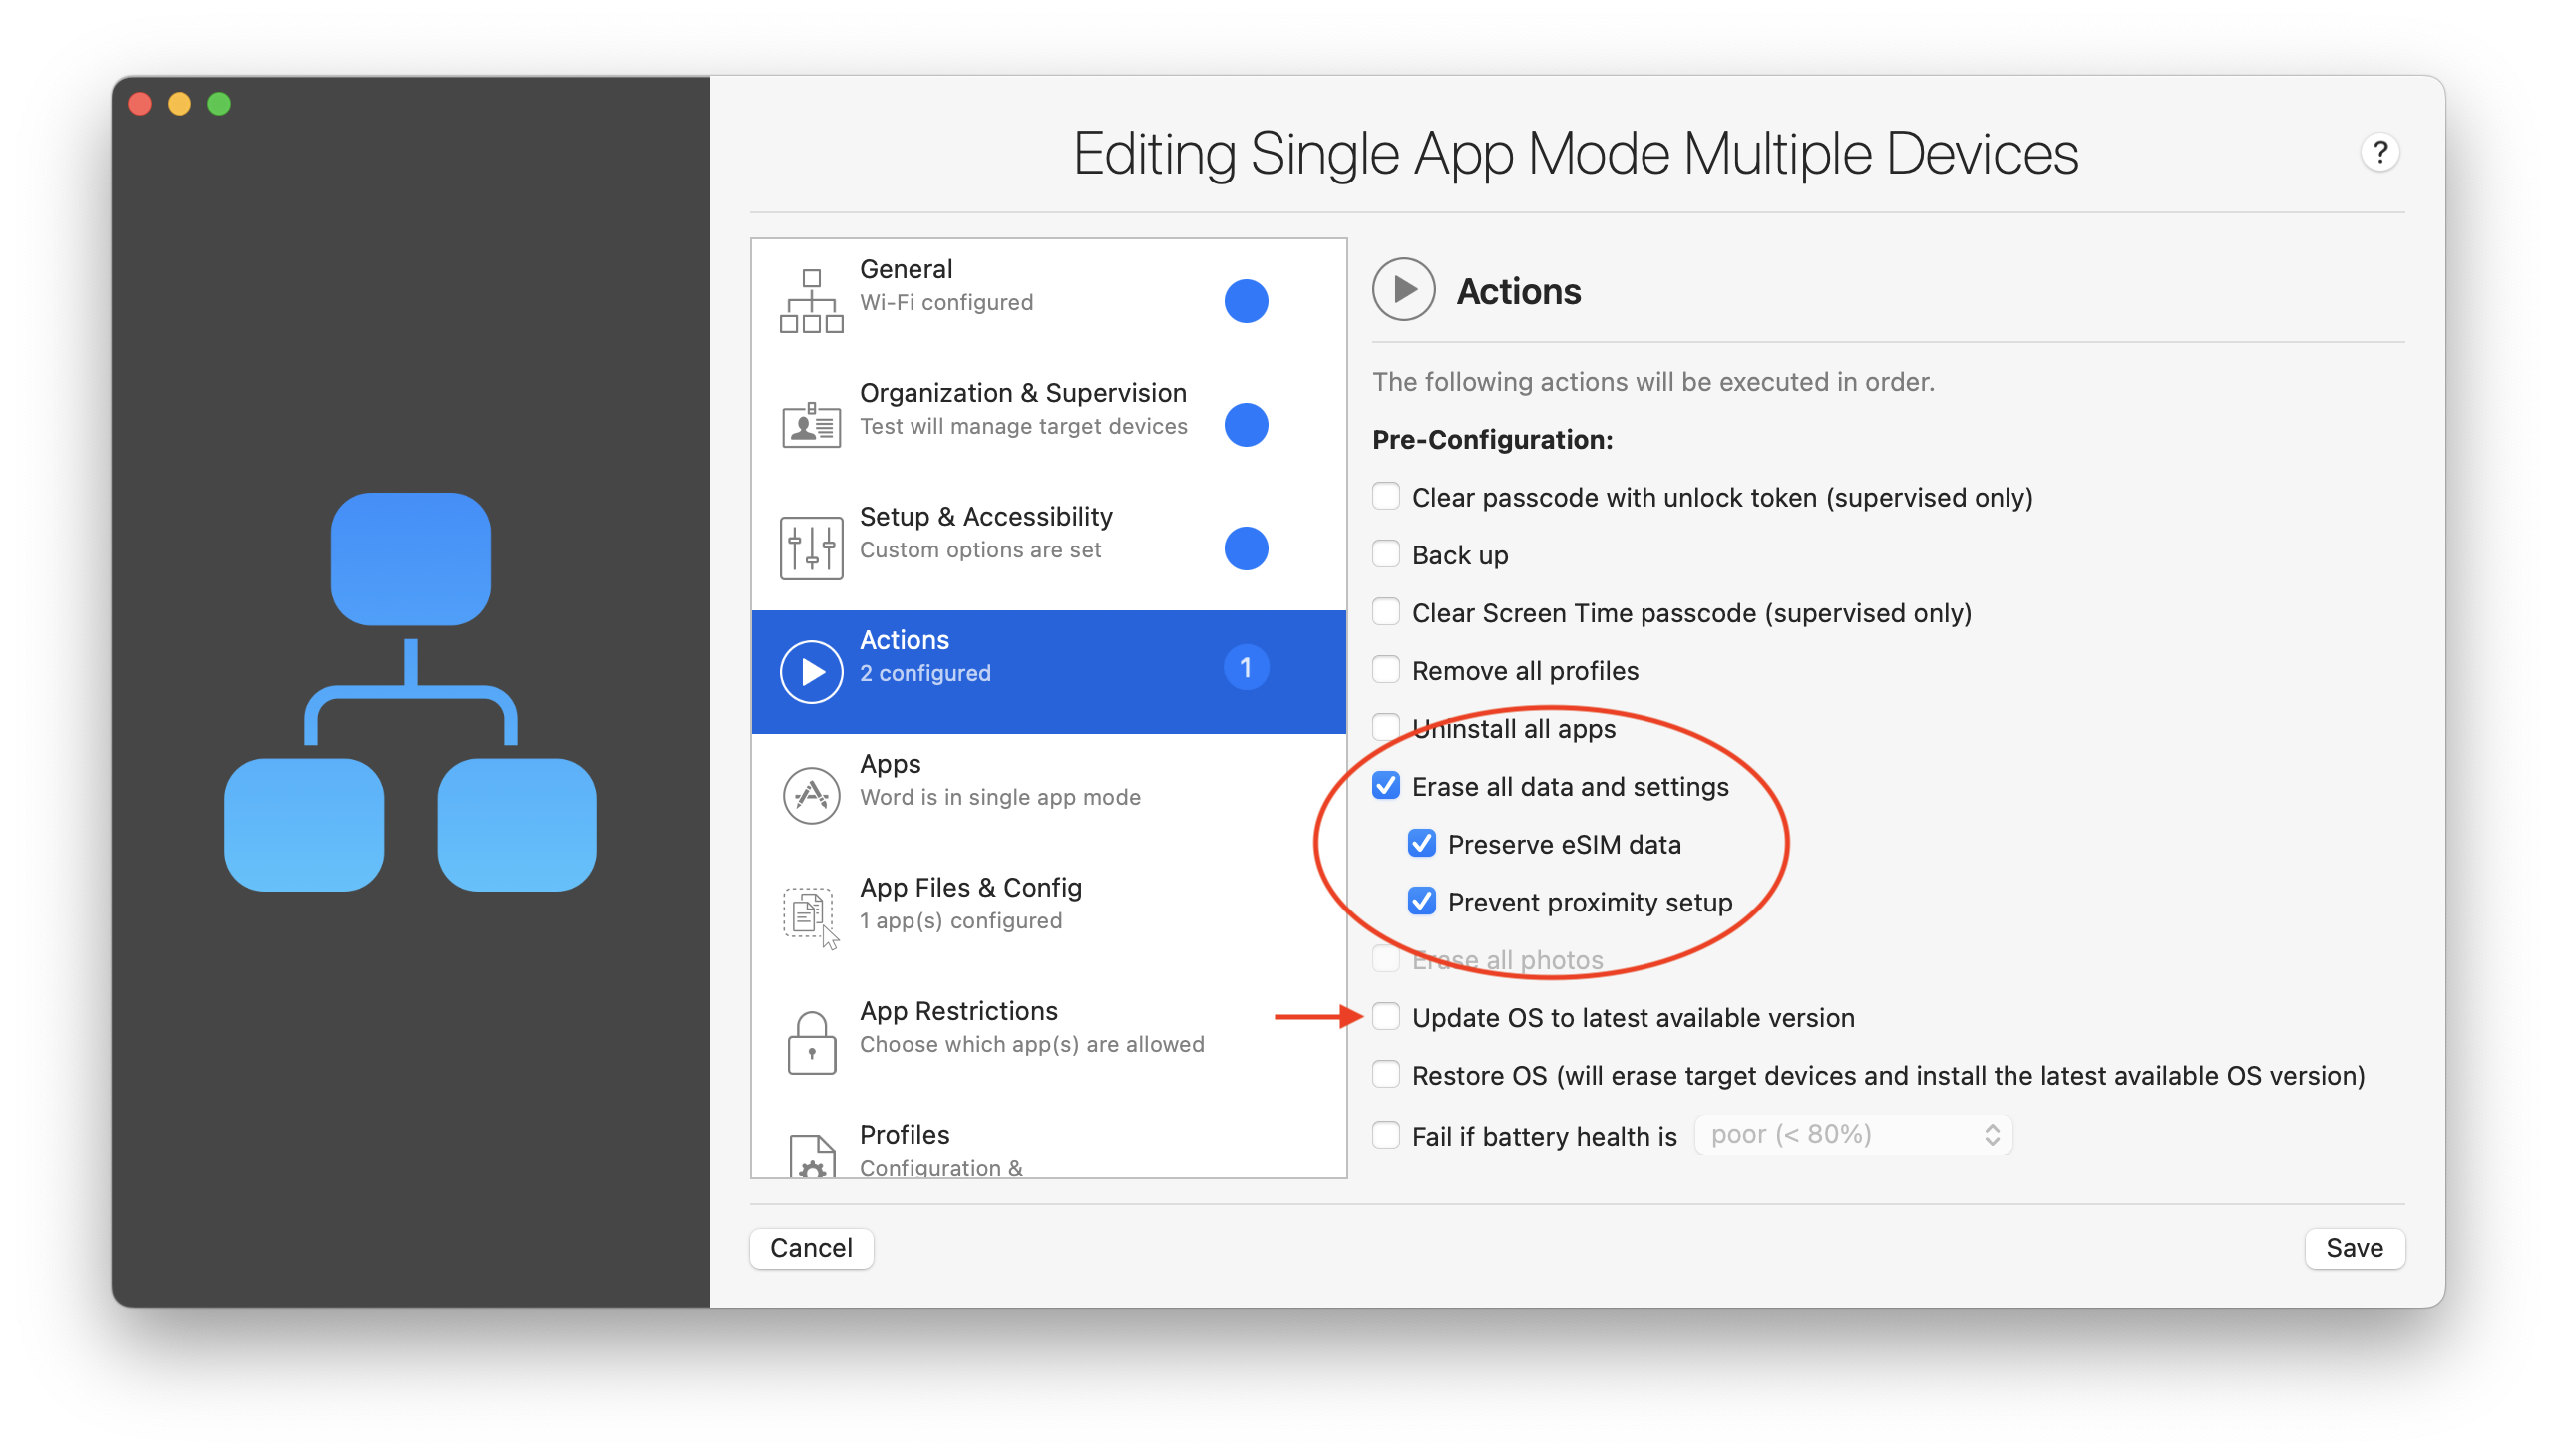
If you choose to not include an iOS/iPadOS update step in the blueprint, we recommend that you check the compatibility of the OS version on your devices with the one required by the application to be deployed.
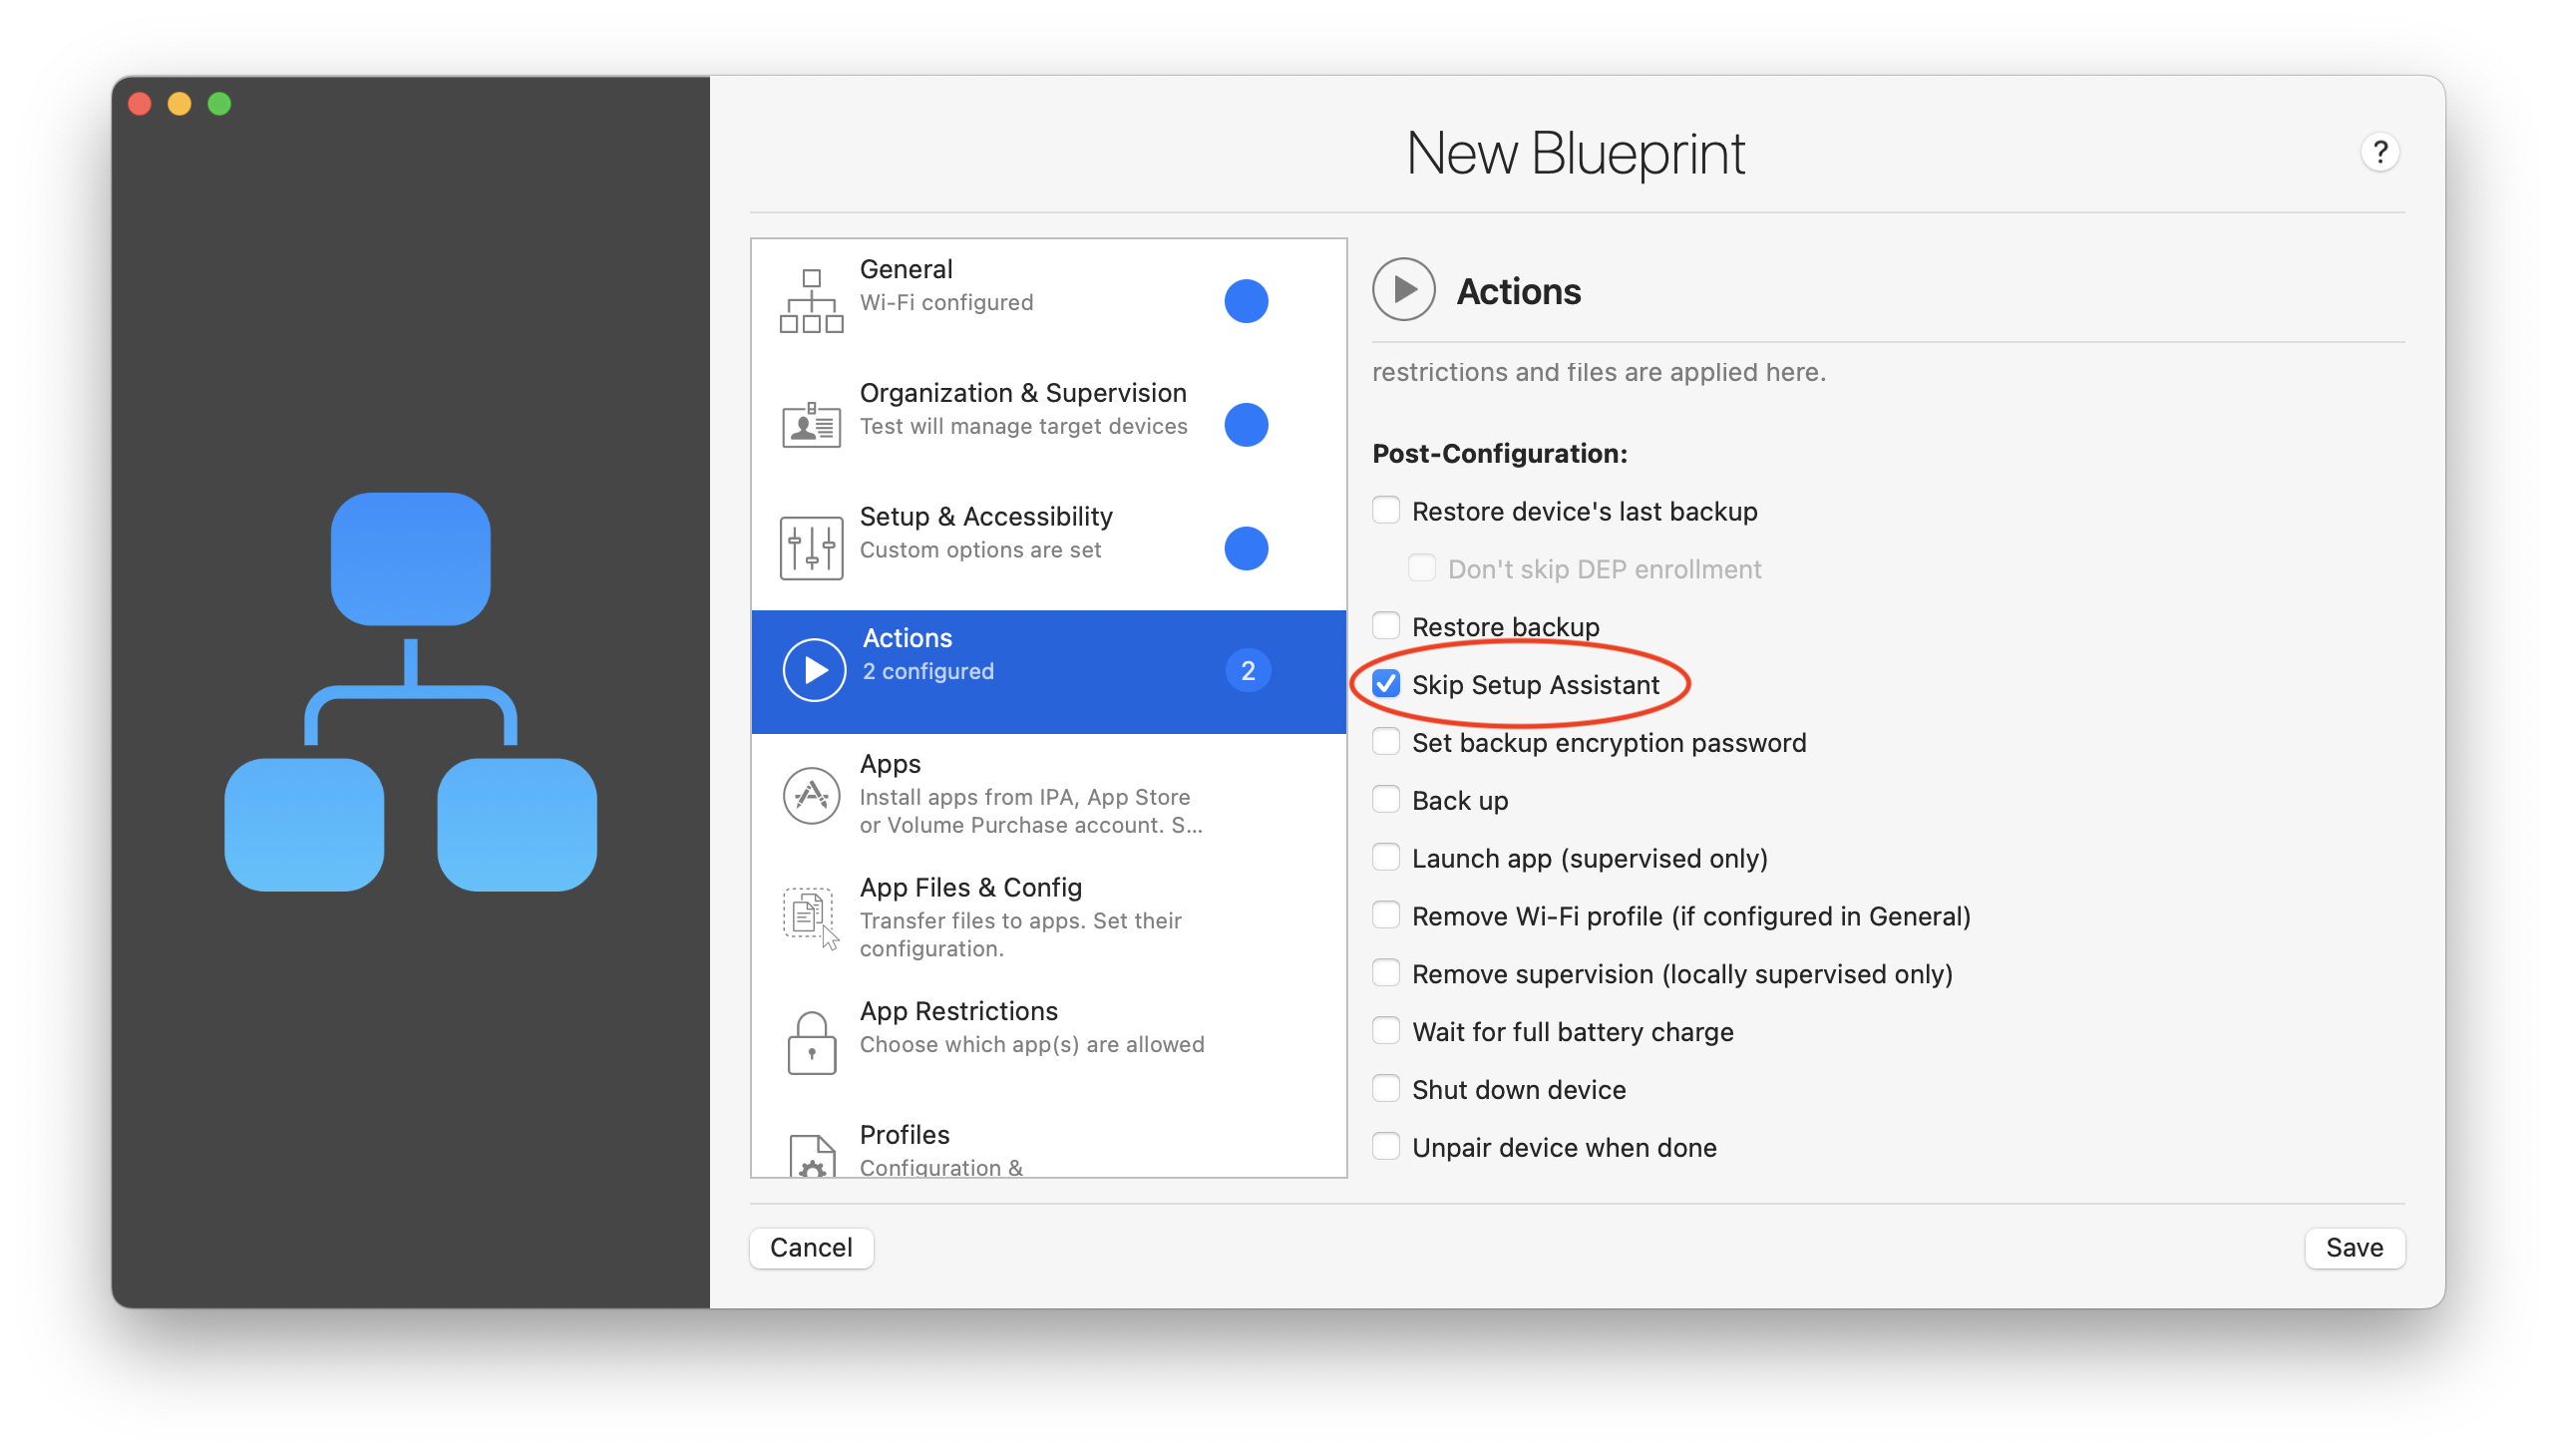
Finally, you can now select Skip Setup Assistant to avoid displaying the iOS Setup Assistant to end users at the end of the process:
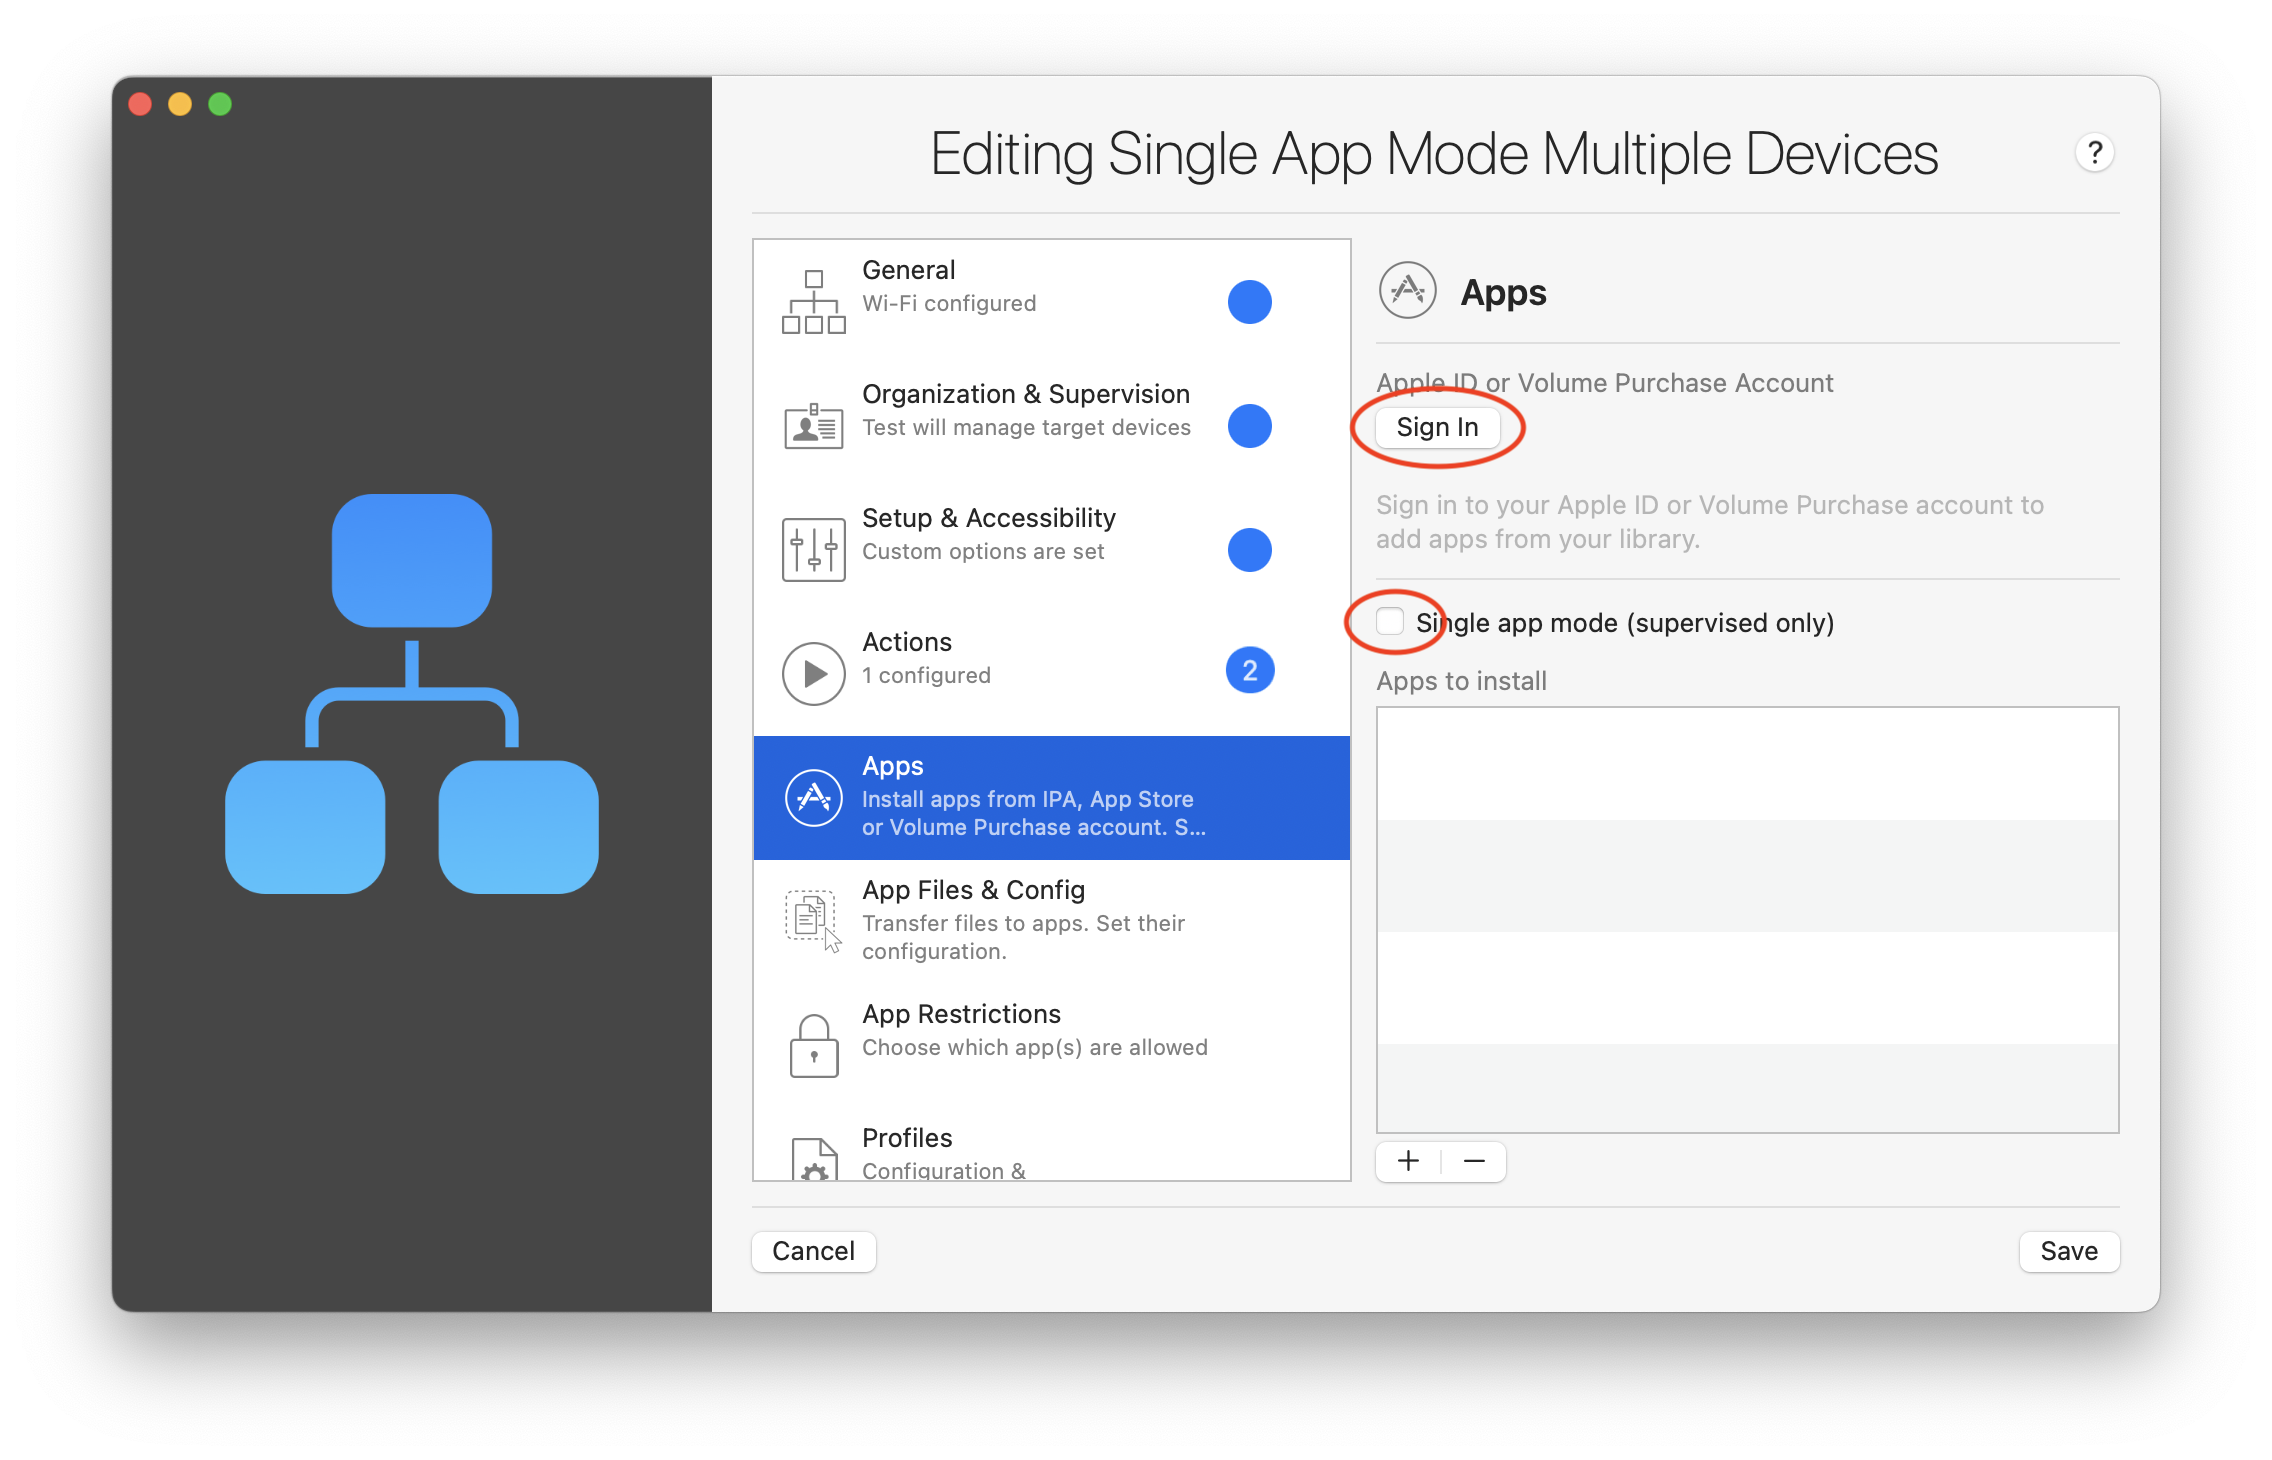
7. Apps options configuration
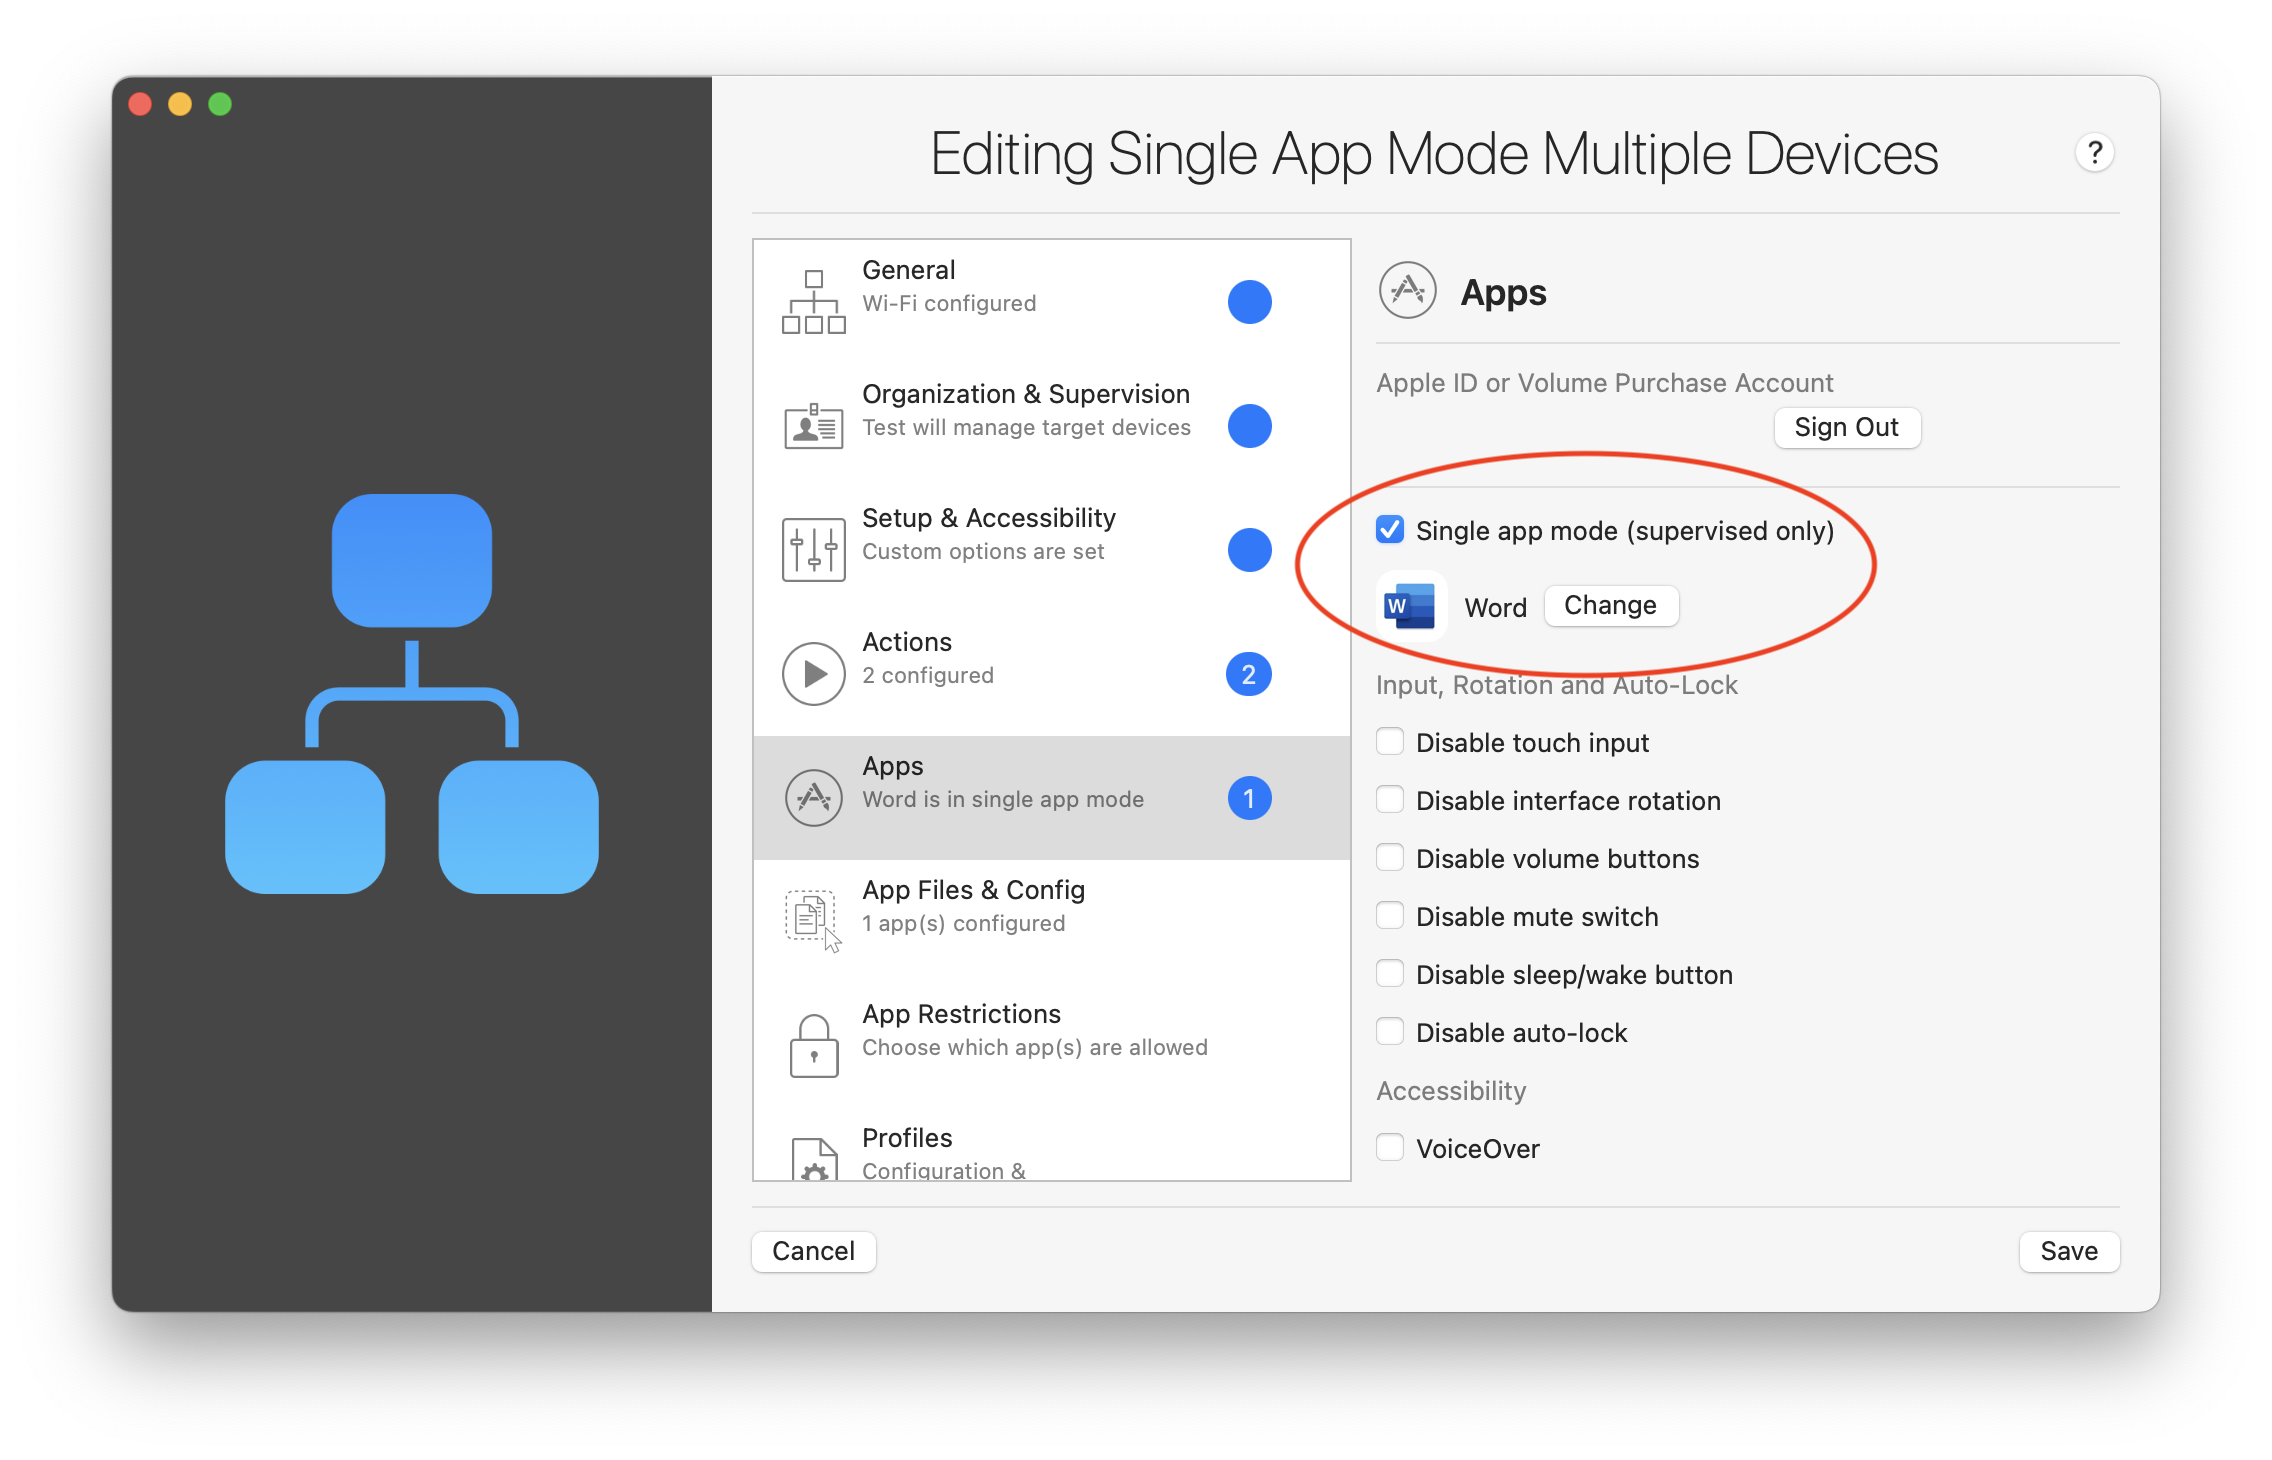
In the Apps section, click on Sign In and use an ABM/ASM credential with a Content Manager role. Once this is done please also select Single app mode (supervised only):
You will then be asked to enter your Volume Purchase token by following the procedure below:

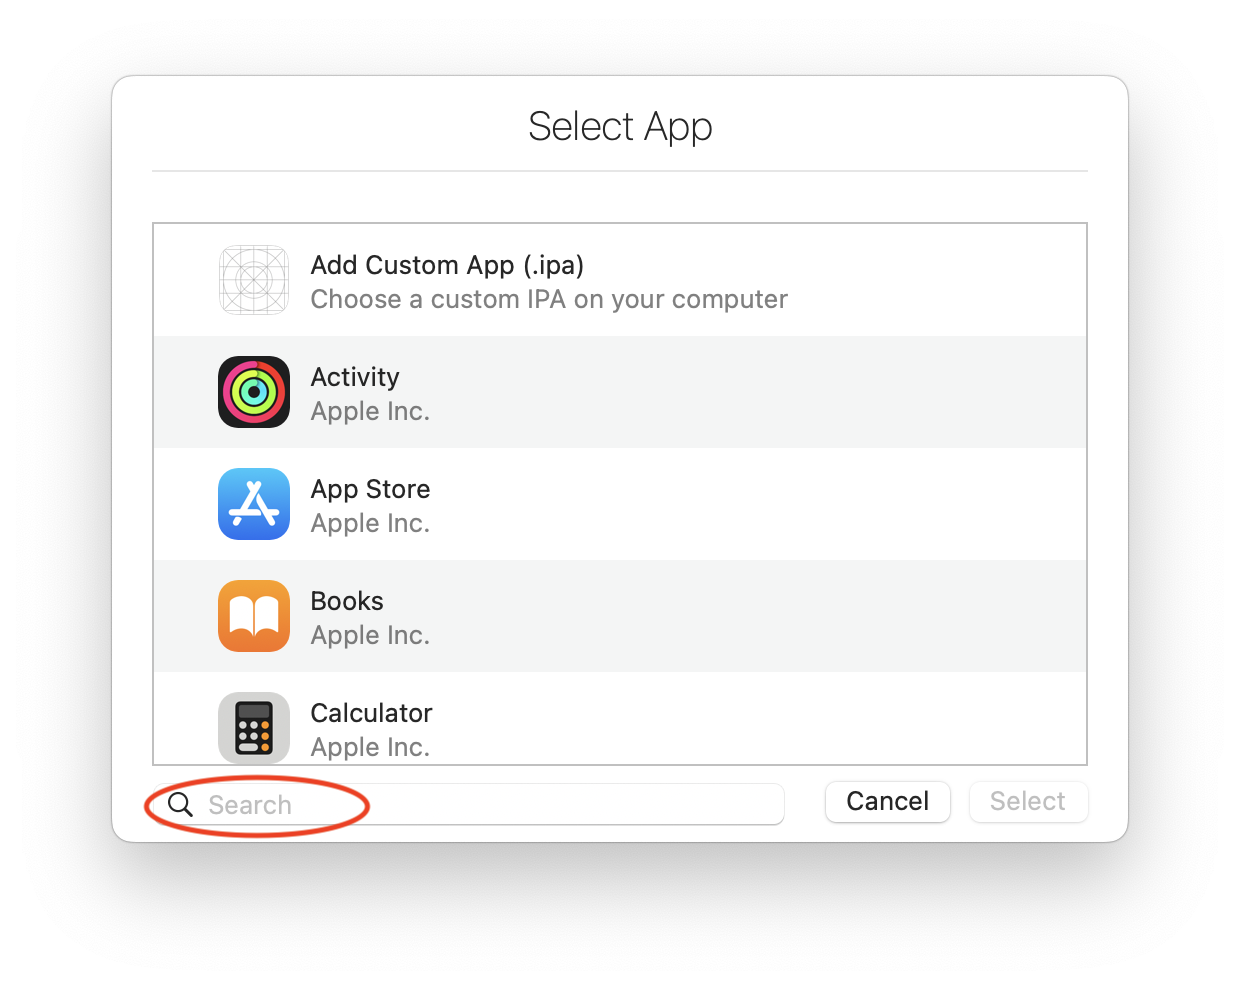
After successfully entering the token, the Select App window will appear and allow you to use a search box to find the application. The window lists applications for which a license was acquired in your ABM/ASM account (this applies for free apps as well) along with preinstalled applications.
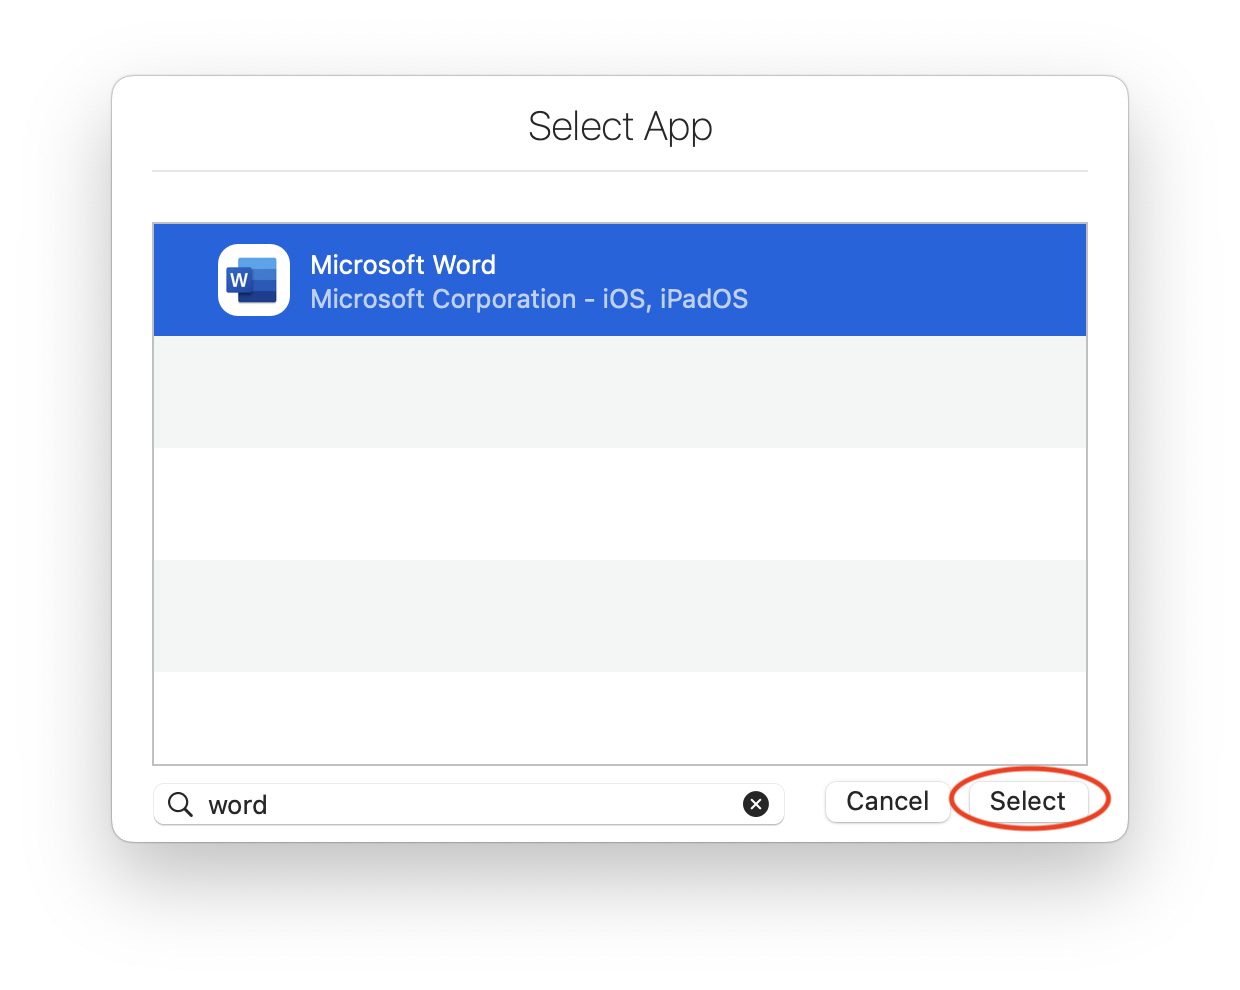
In our example we use Microsoft Word. Click on your chosen App and then click on Select:
Please confirm here that your chosen app, in our case Microsoft Word, has been set:
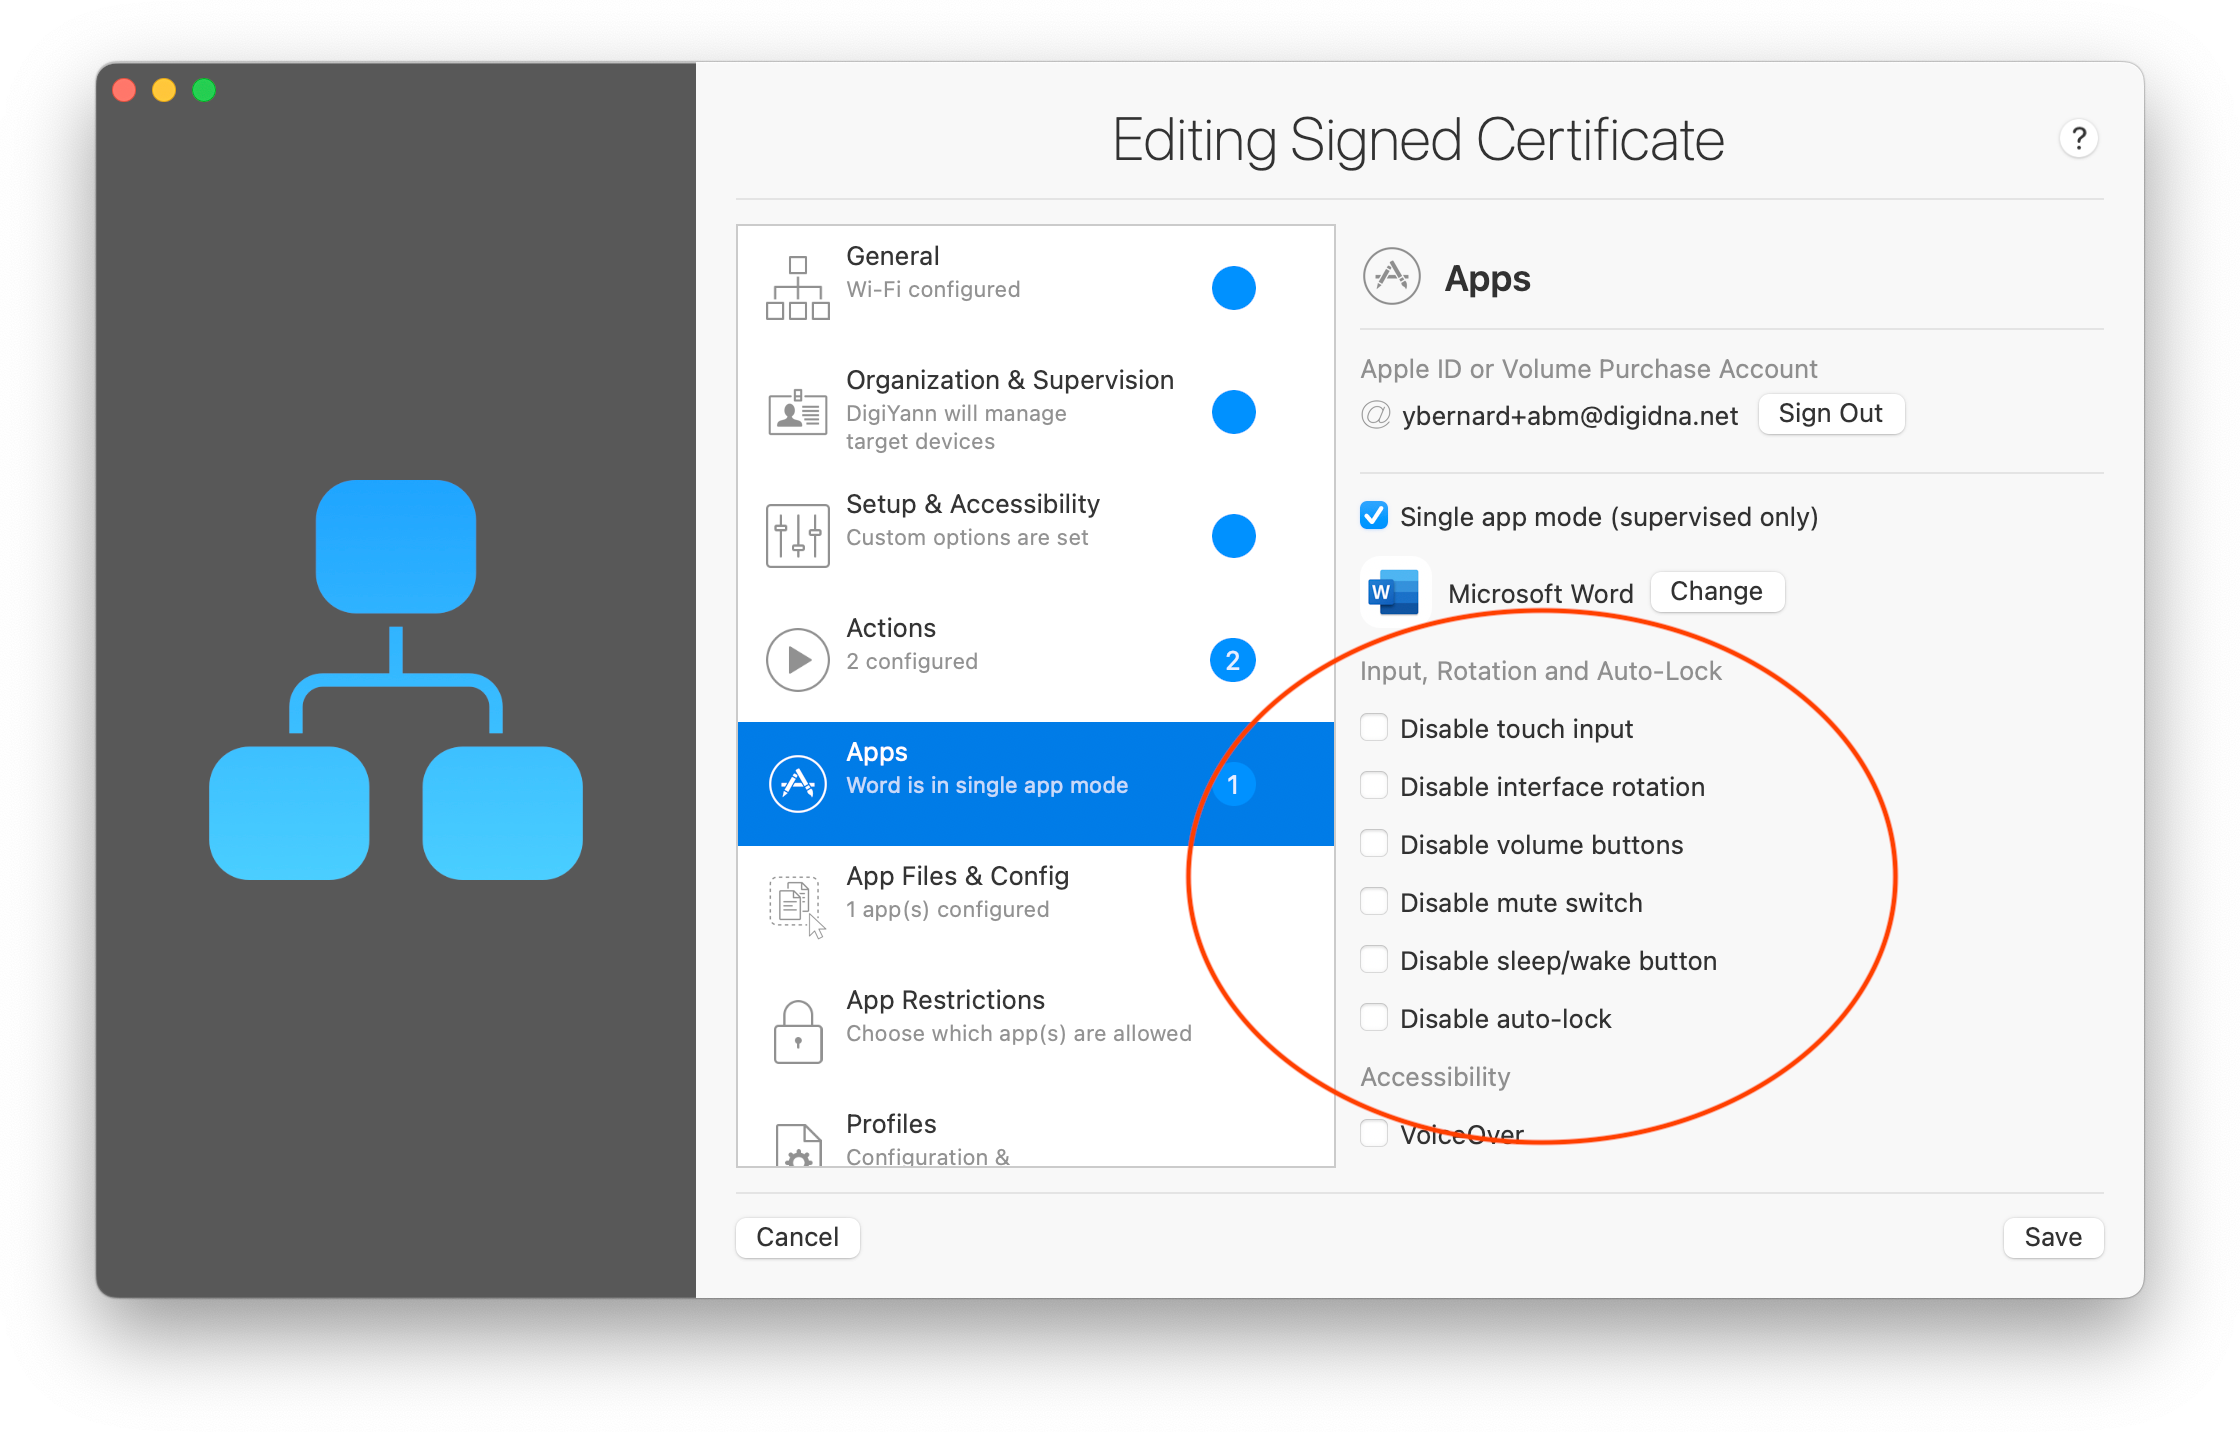
Still in the Apps section, there are several interesting options for the Single App Mode. Using this section you can fine-tune the configuration of your devices with one-click options.
Below are some useful production examples:
Disable touch input: fully disables all touch interactions on the screen.
Disable interface rotation: locks the interface in its current portrait or landscape orientation.
Disable volume buttons: self-explanatory.
Disable mute switch: self-explanatory.
Disable sleep-wake button: prevents users from manually locking the device (and hence turning off the display).
Disable auto-lock: overrides the auto-lock interval temporarily, setting it to never.
The last 2 options enabled together ensure that the device's screen will always be on, locked to your chosen app until the device runs out of battery or you exit Single App Mode.
💡 For advanced users: behind the scenes, iMazing Configurator installs a configuration profile in order to enable Single App Mode. Because it is impossible to read the contents of an installed profile straight from the device, iMazing uses a specific profile naming scheme so that it can identify which profile to remove from the device in order to exit Single App Mode. Consequently, the Exit Single App Mode button is only available if iMazing was used to enable the mode in the first place. You can use the Profiles section of iMazing to manually remove Single App Mode profiles installed by other means.
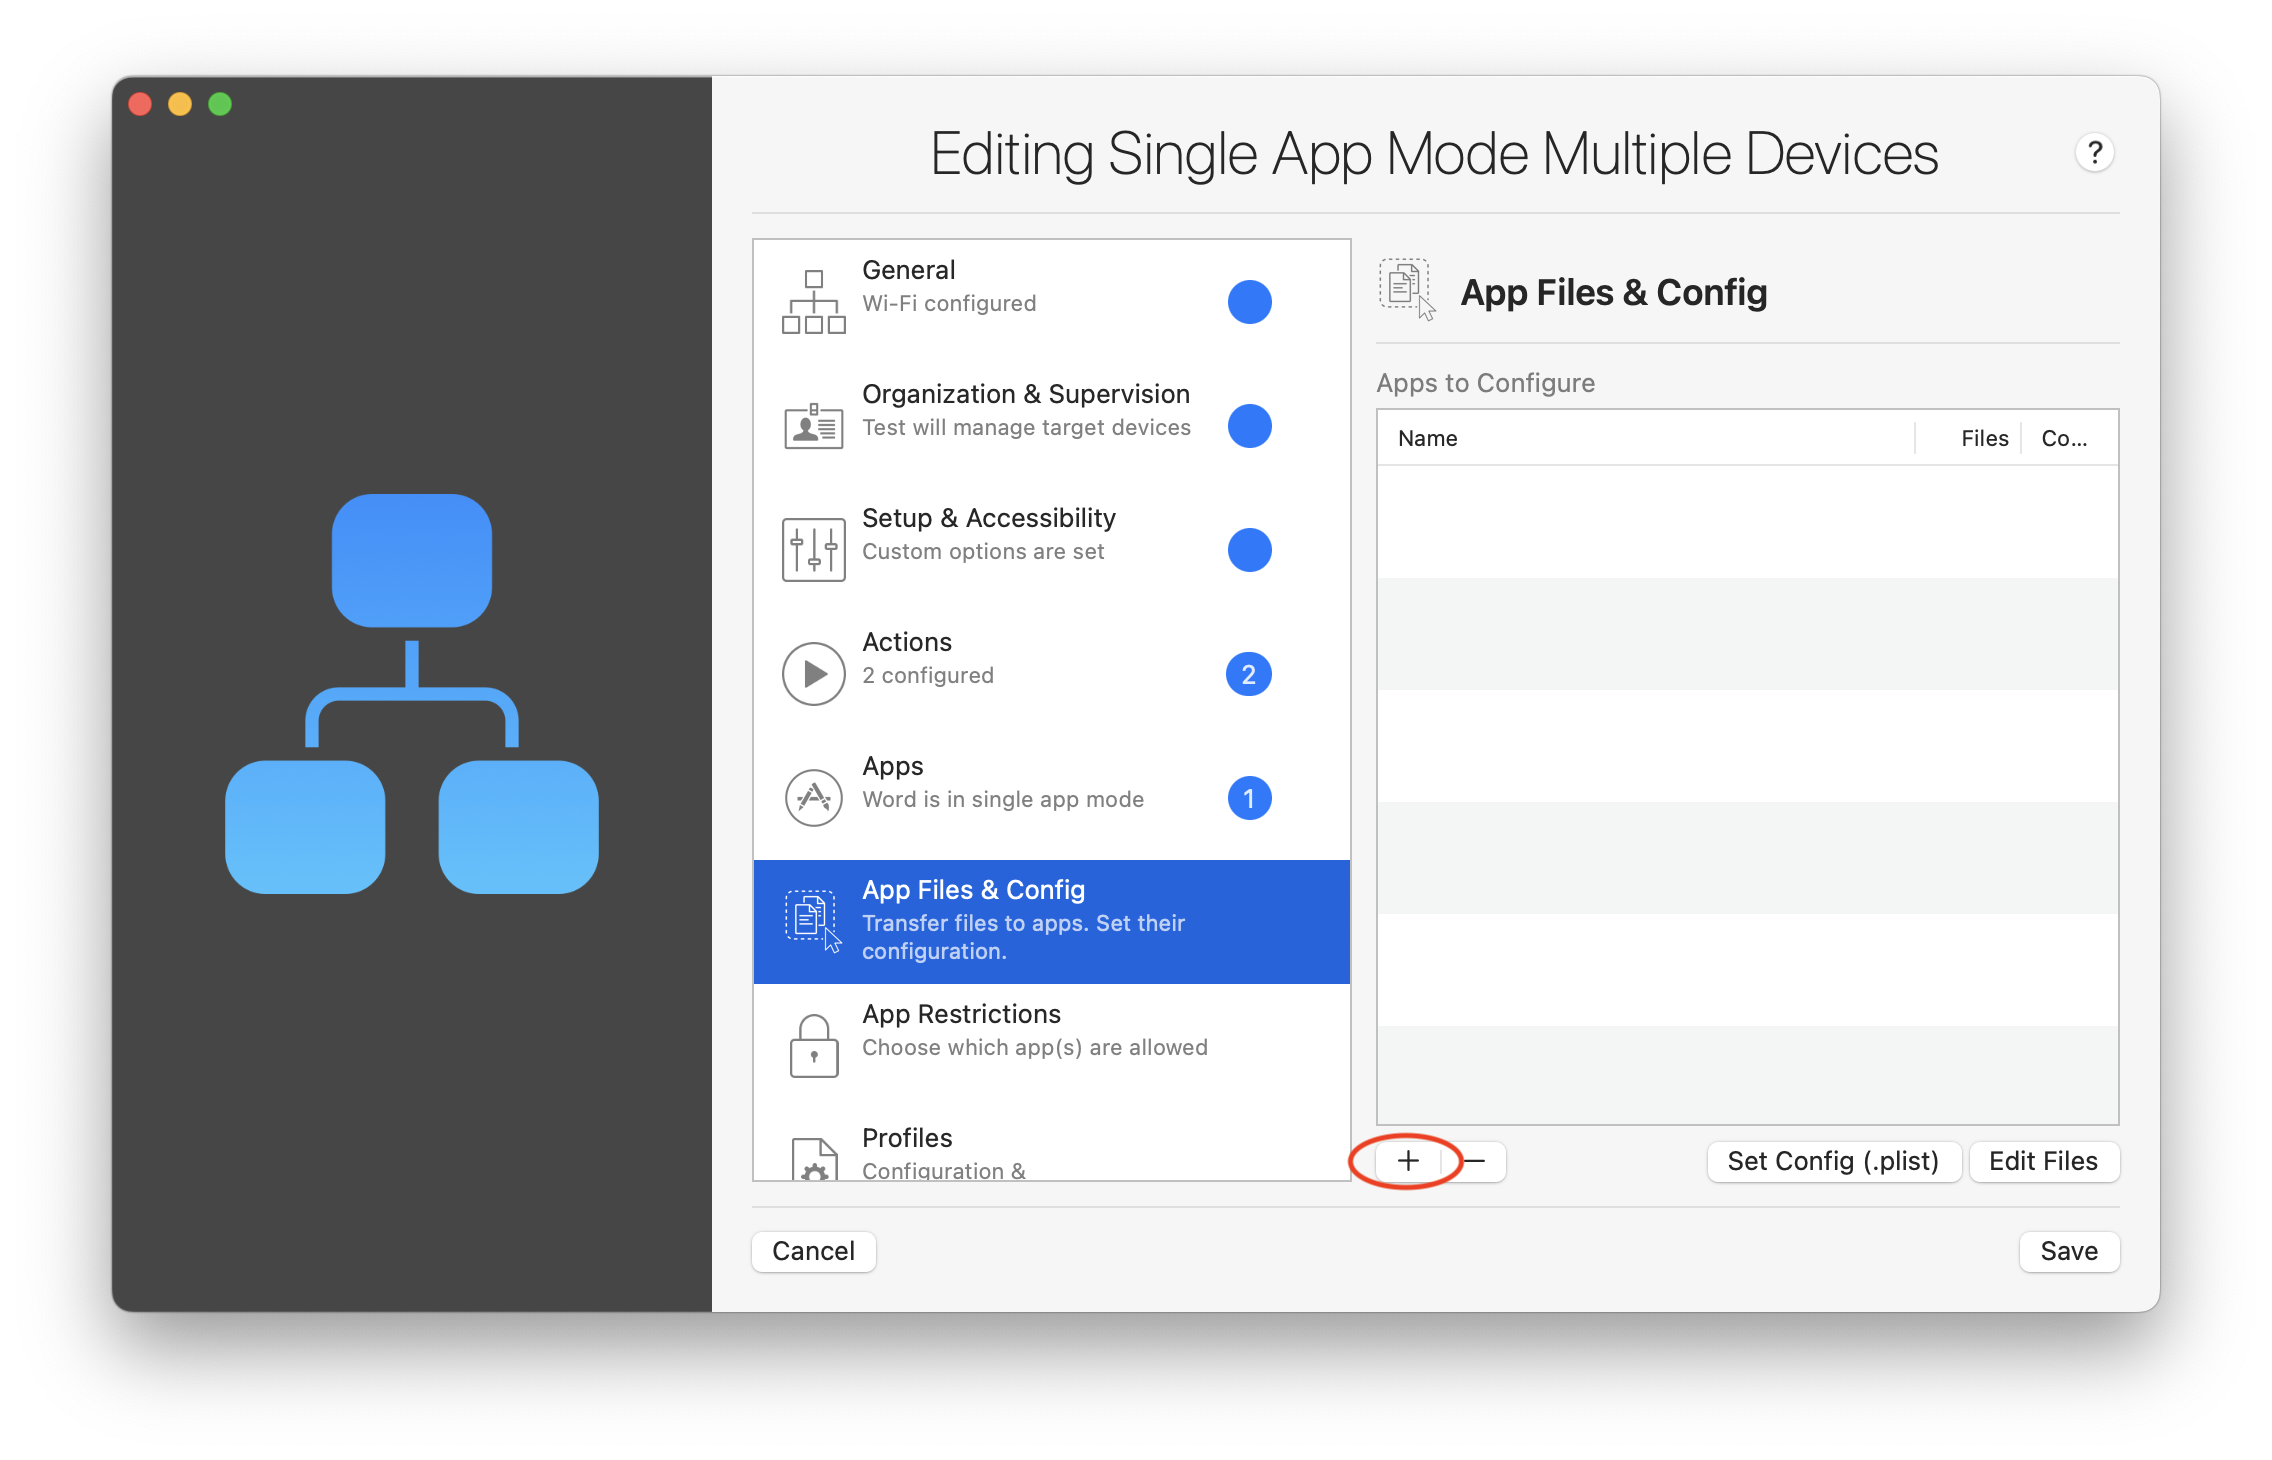
8. App Files & Config options configuration
In App Files & Config you can define the files that you want to provision the single app with. Click on the '+' button at the bottom left of the window if you want to add any:
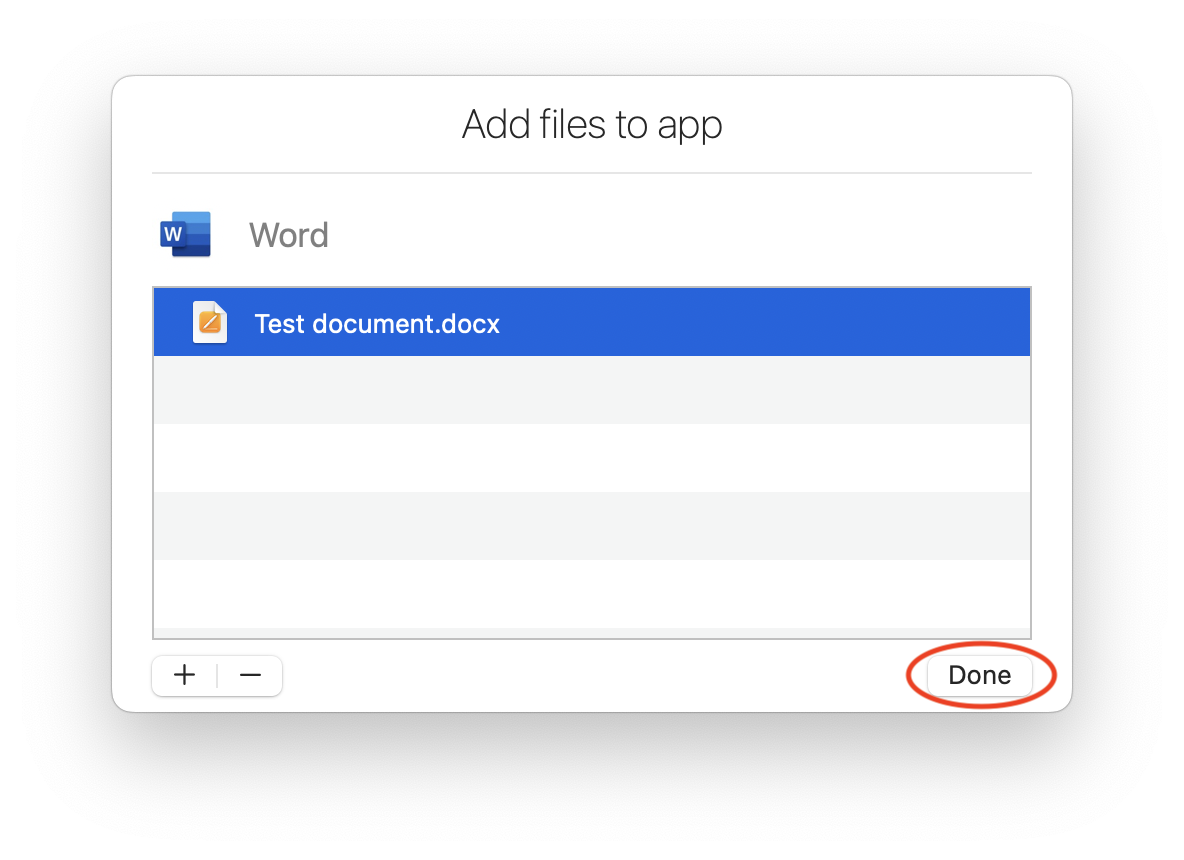
When the Add files to app sheet comes on the screen, click once again on the '+' button:

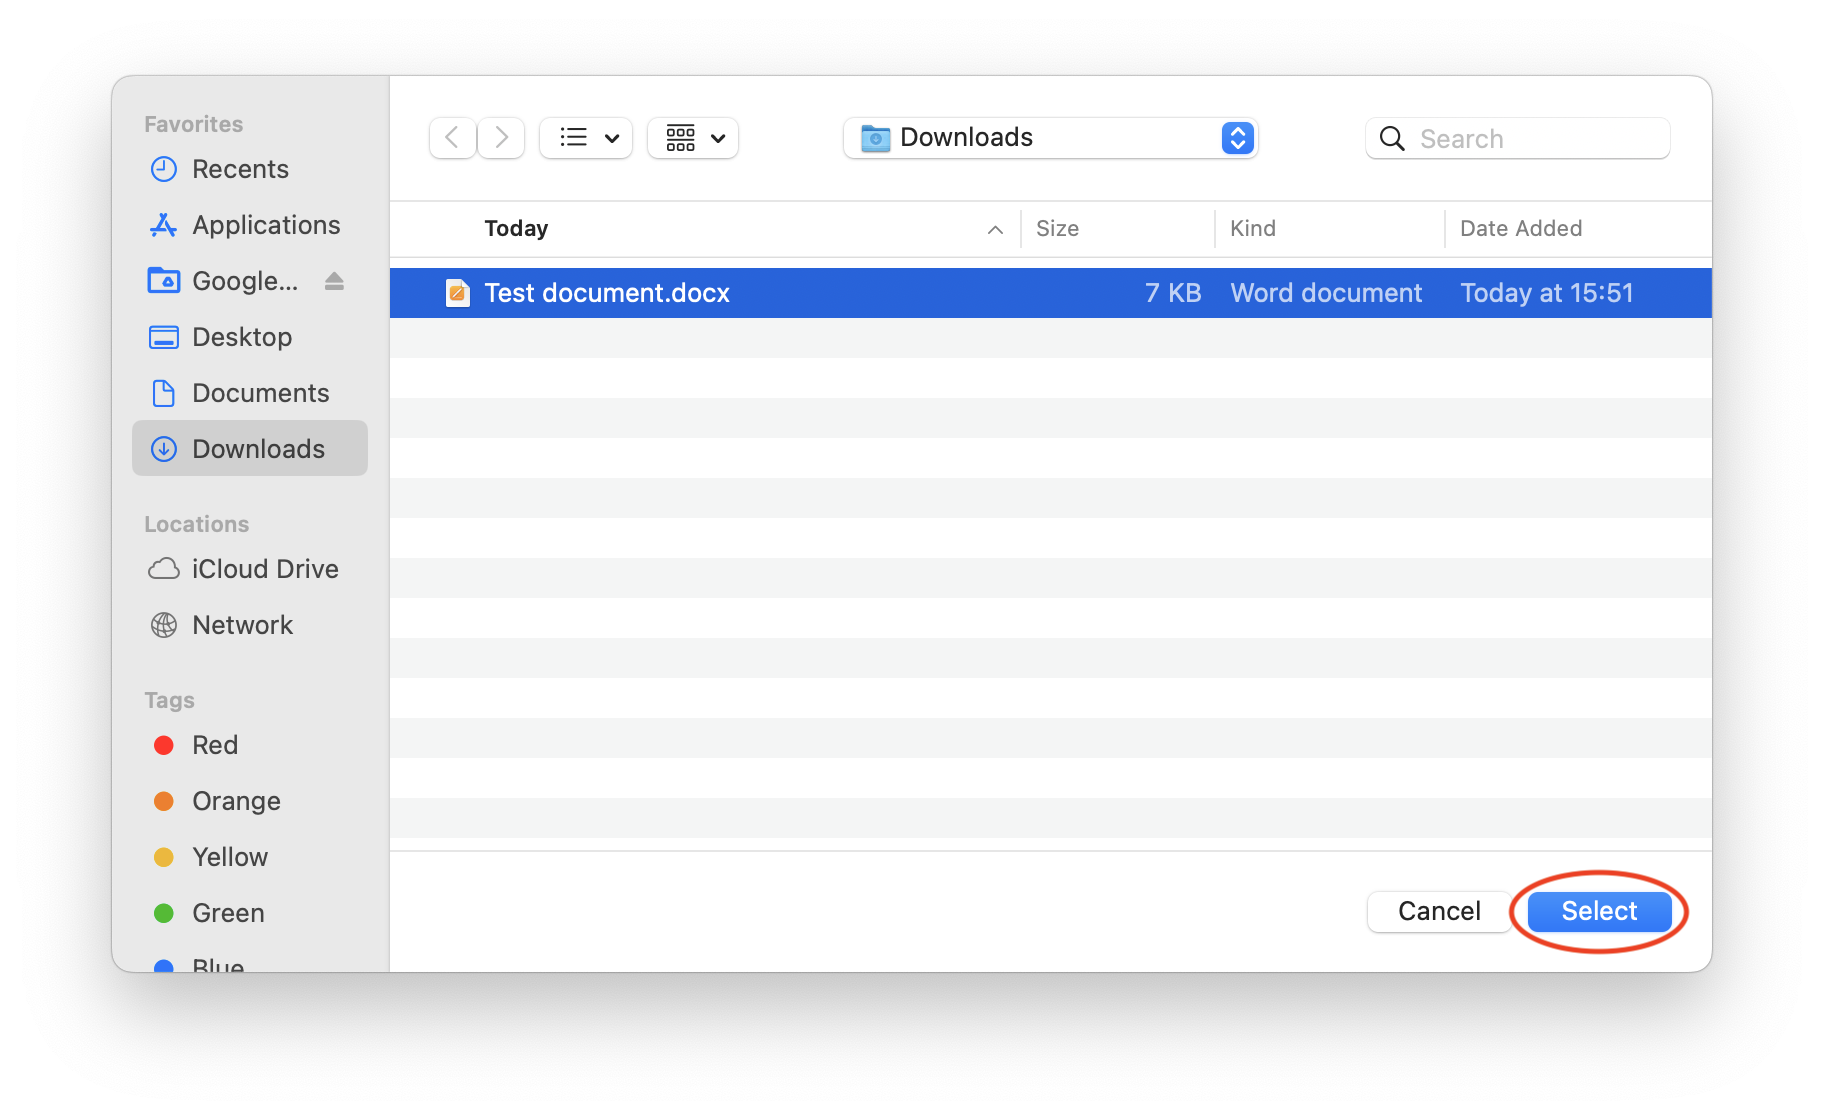
Select the documents that you want to provision onto devices and click Select. In this example we are provisioning the Word app with a Word document:
Finally, click on Done to apply your choice:
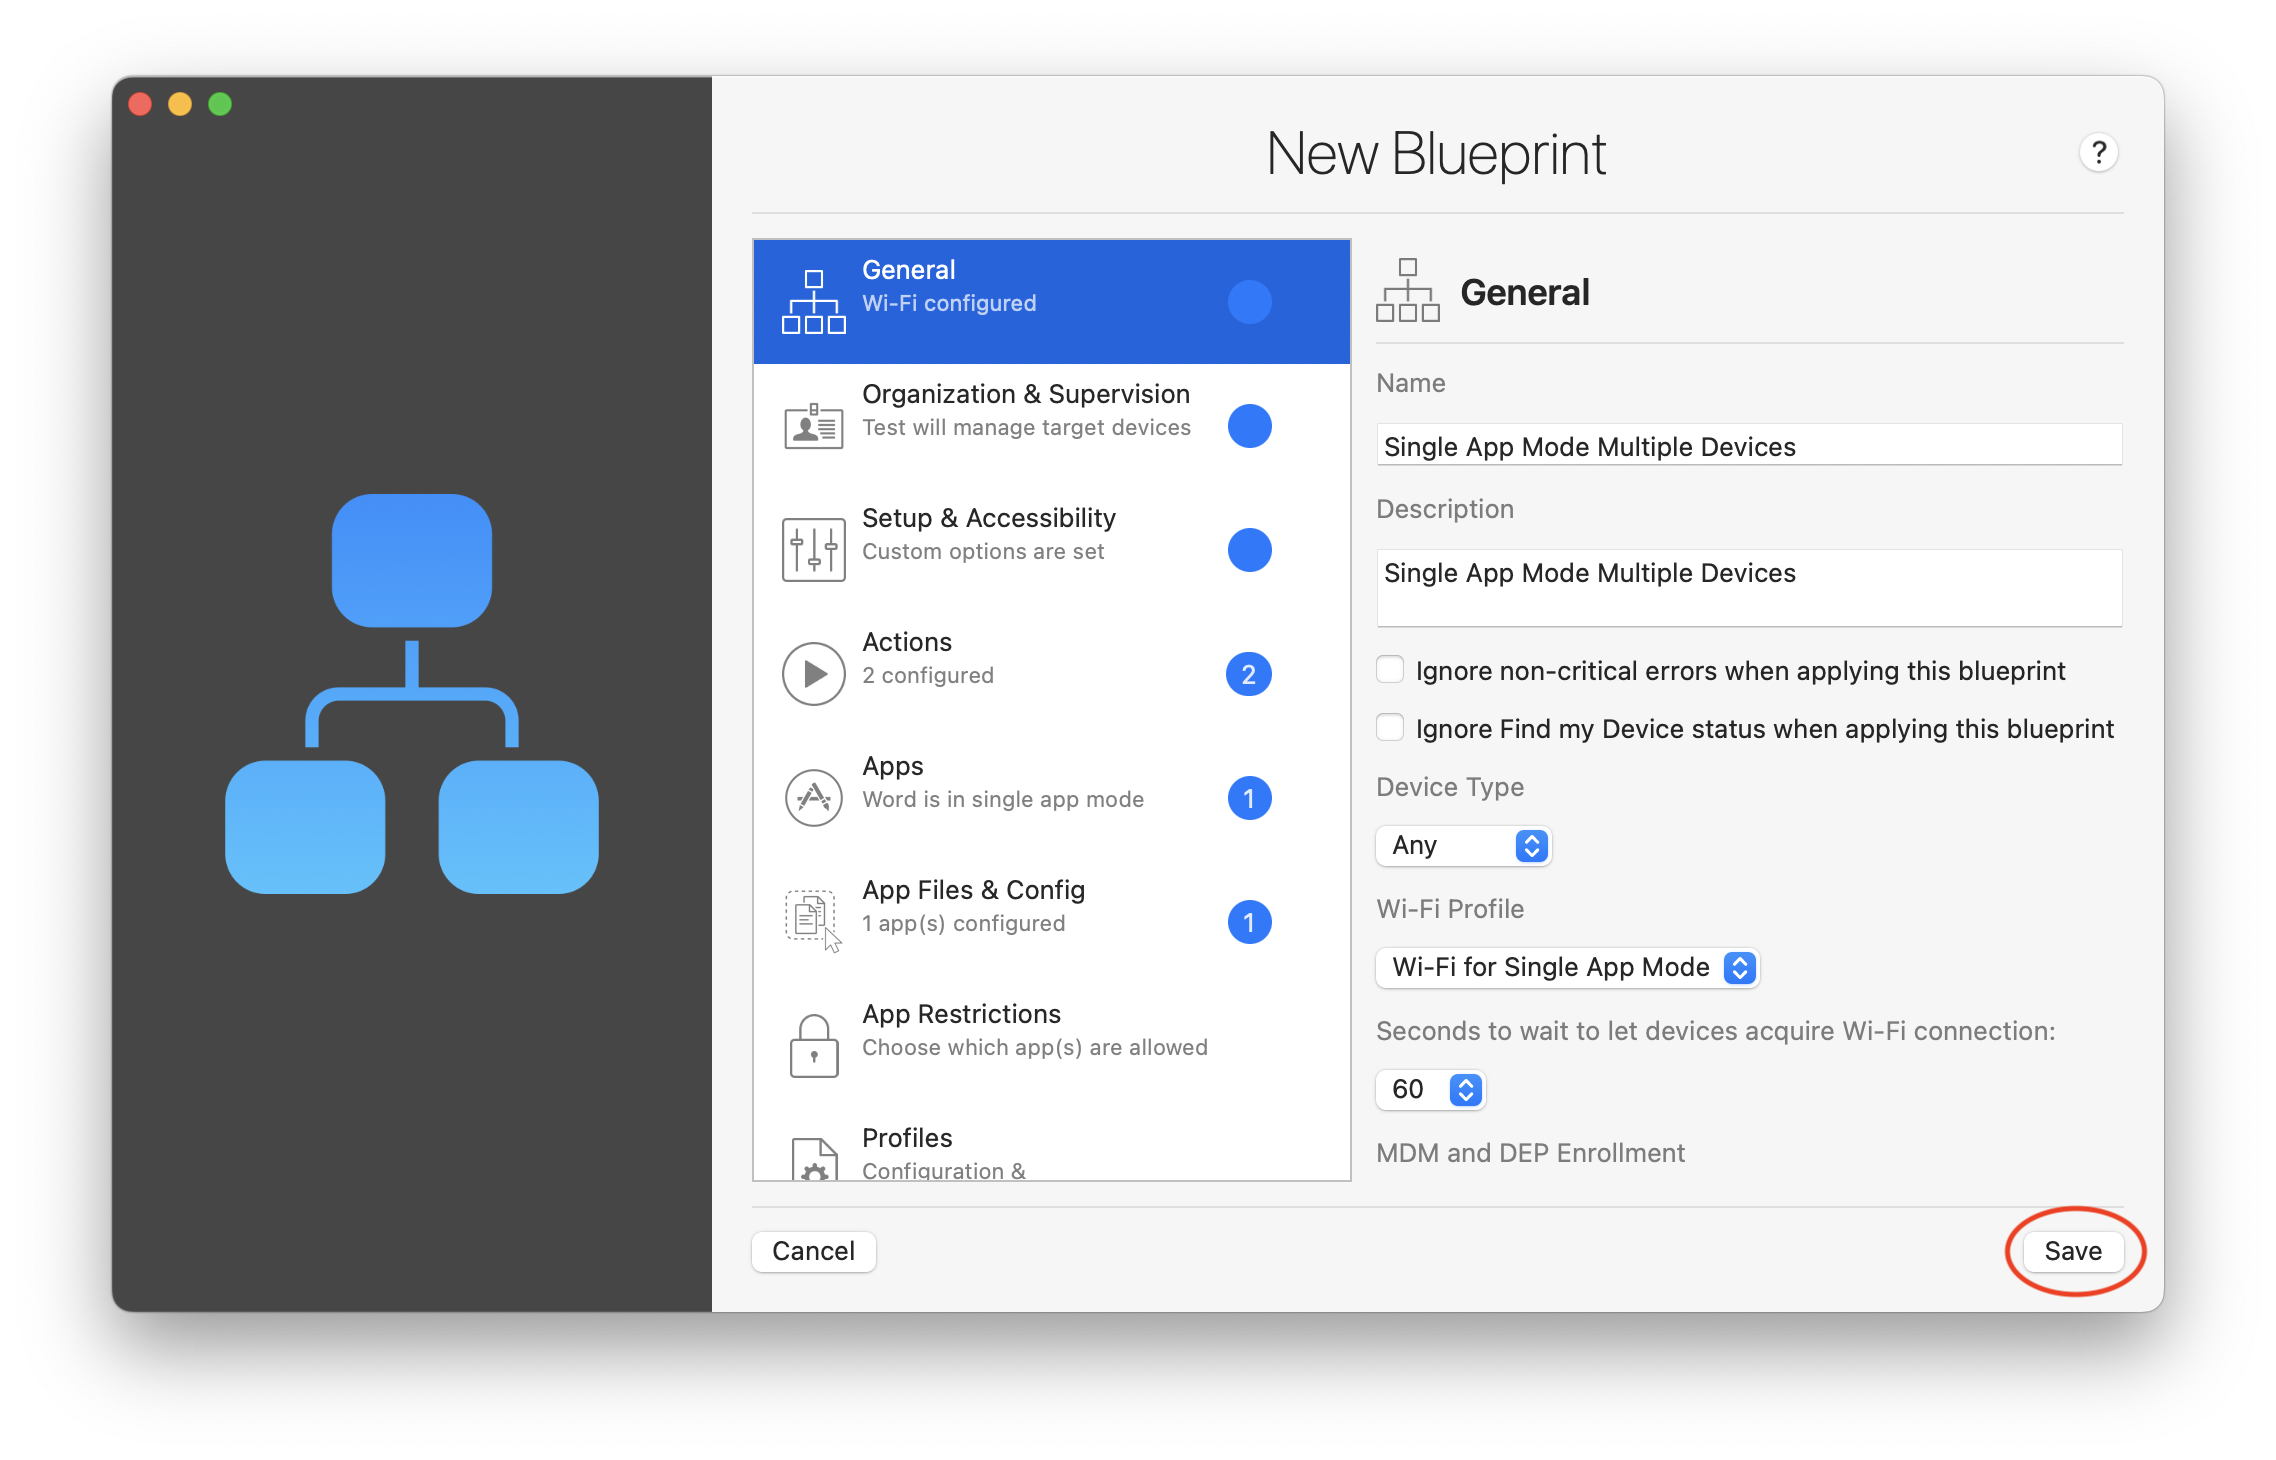
9. Review blueprint configuration
Finally review all of the selected settings and once you are ready click on Save at the bottom right of the screen:
3. Applying the Single App Mode blueprint to multiple devices
3.1. Select the devices to deploy
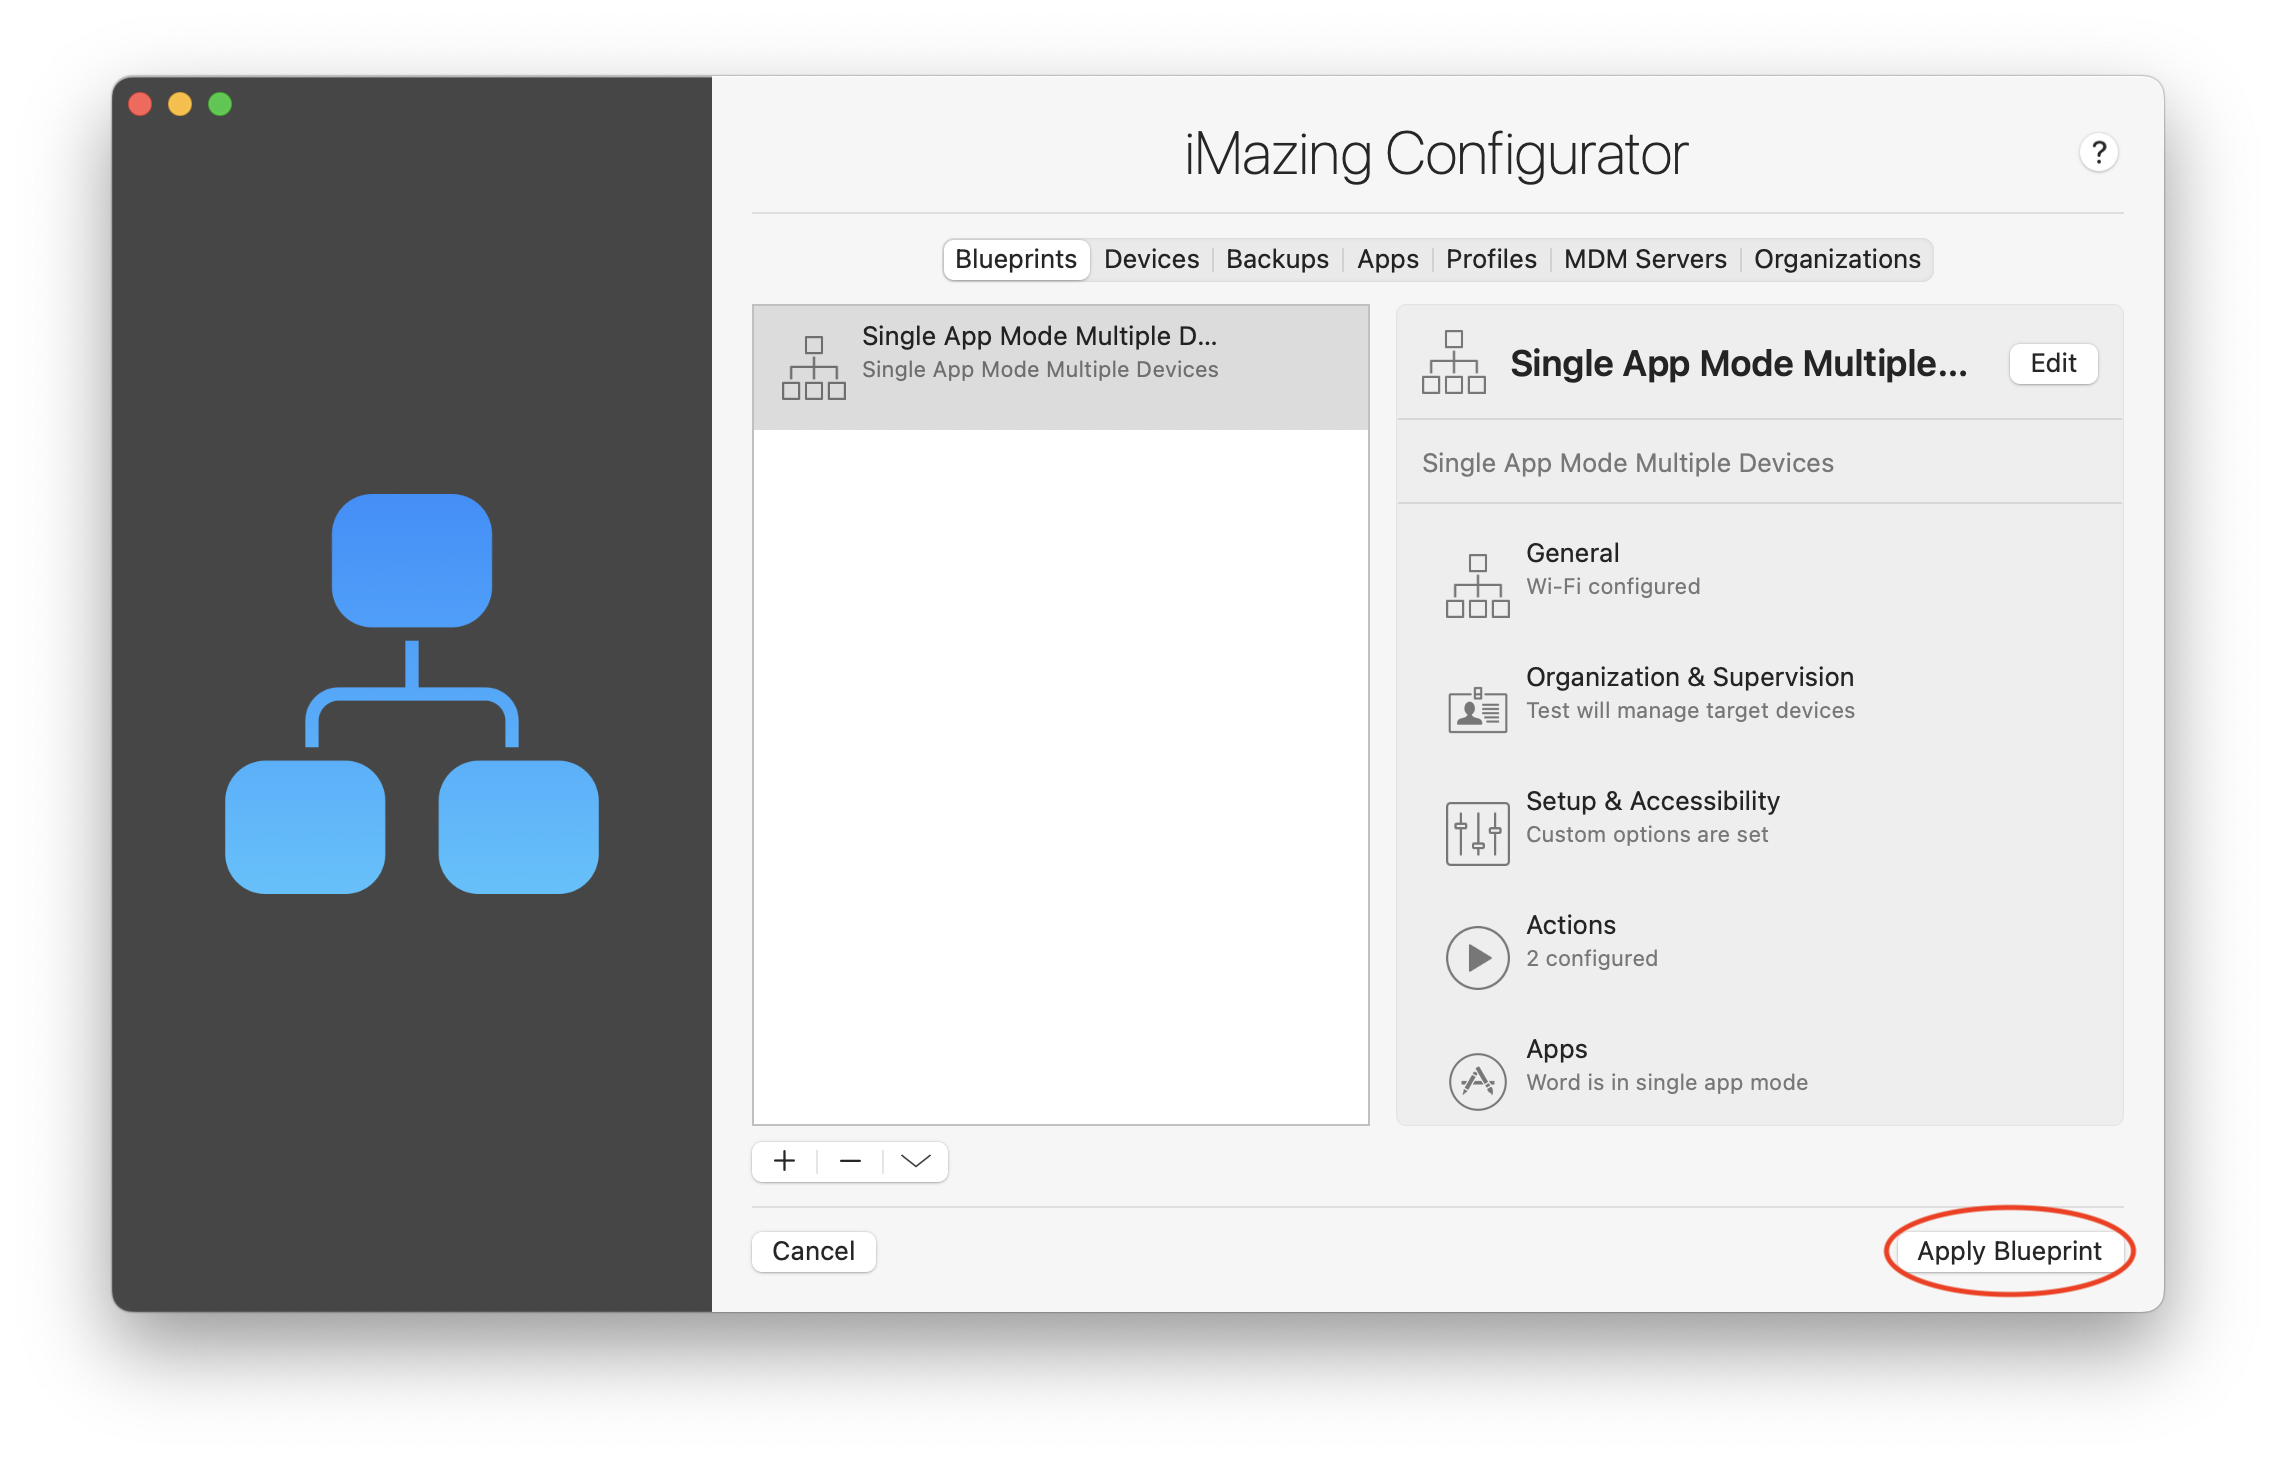
Now that you have your blueprint saved, click on Apply Blueprint at the bottom of the iMazing Configurator blueprint list window:
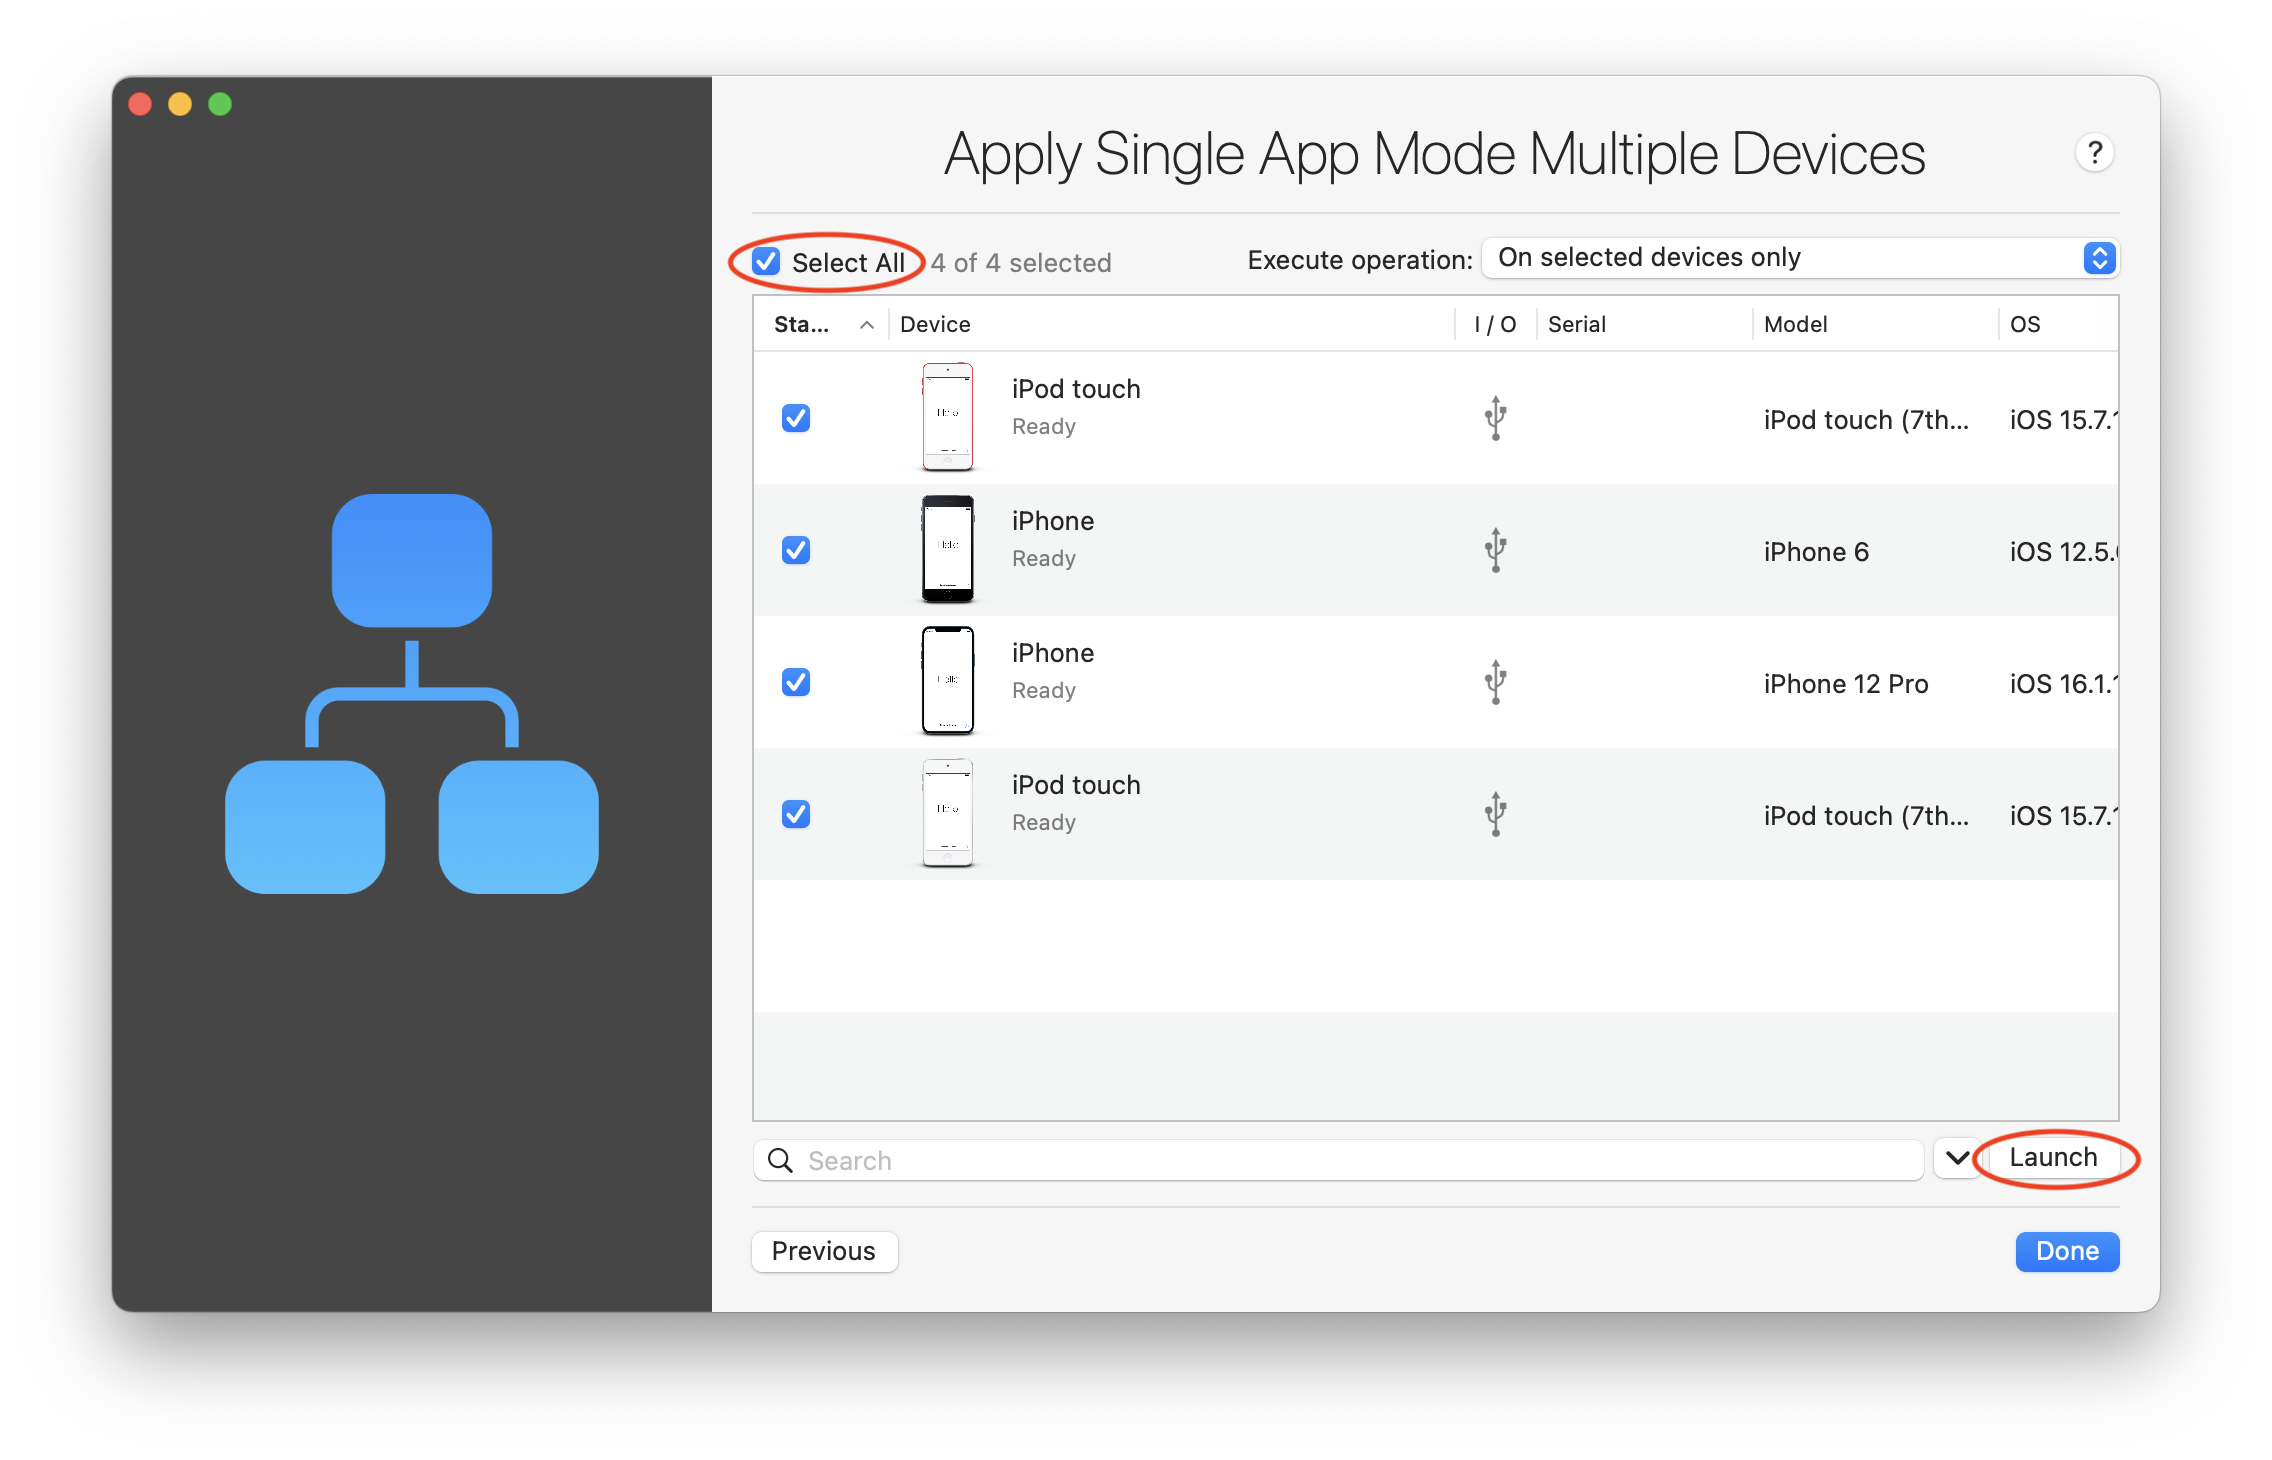
The next window will display a list of all devices currently connected to your computer and that can have this Blueprint applied to. Please select the ones that you would like to enter into Single App Mode or click on Select All.
💡 Important: Pay attention to which devices are selected especially if Select All is ticked. All selected devices will receive the configuration from the blueprint, including a total deletion of device data.
To finalize click on the Launch button near the bottom right of the window:
3.2. Deploy & control
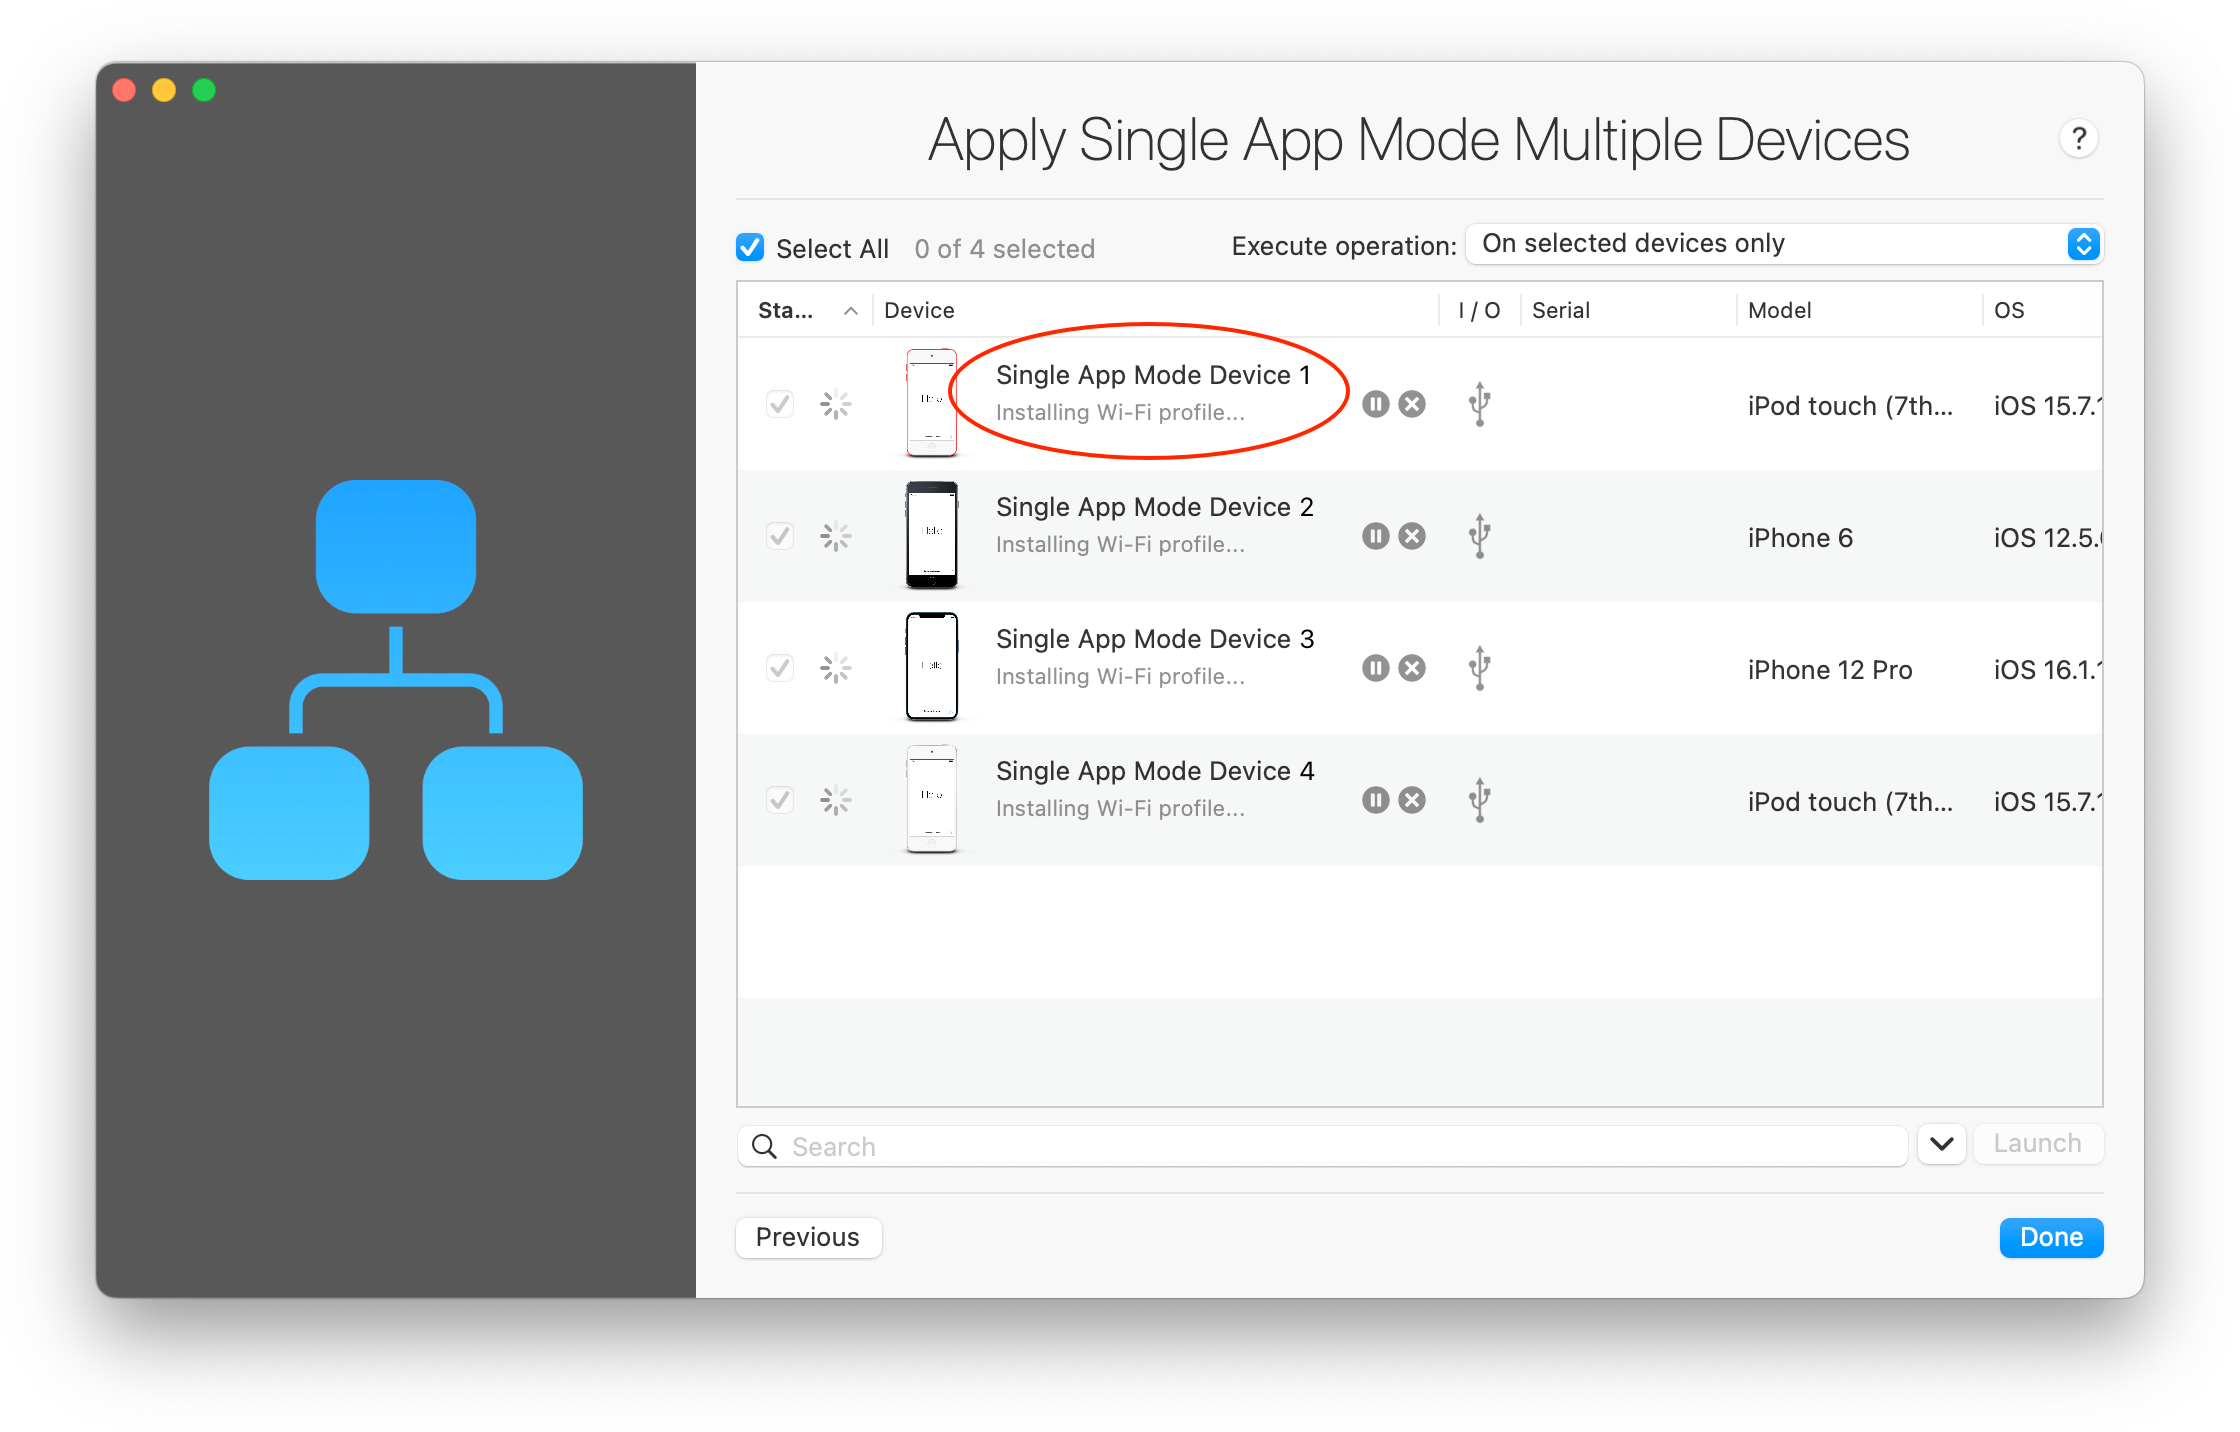
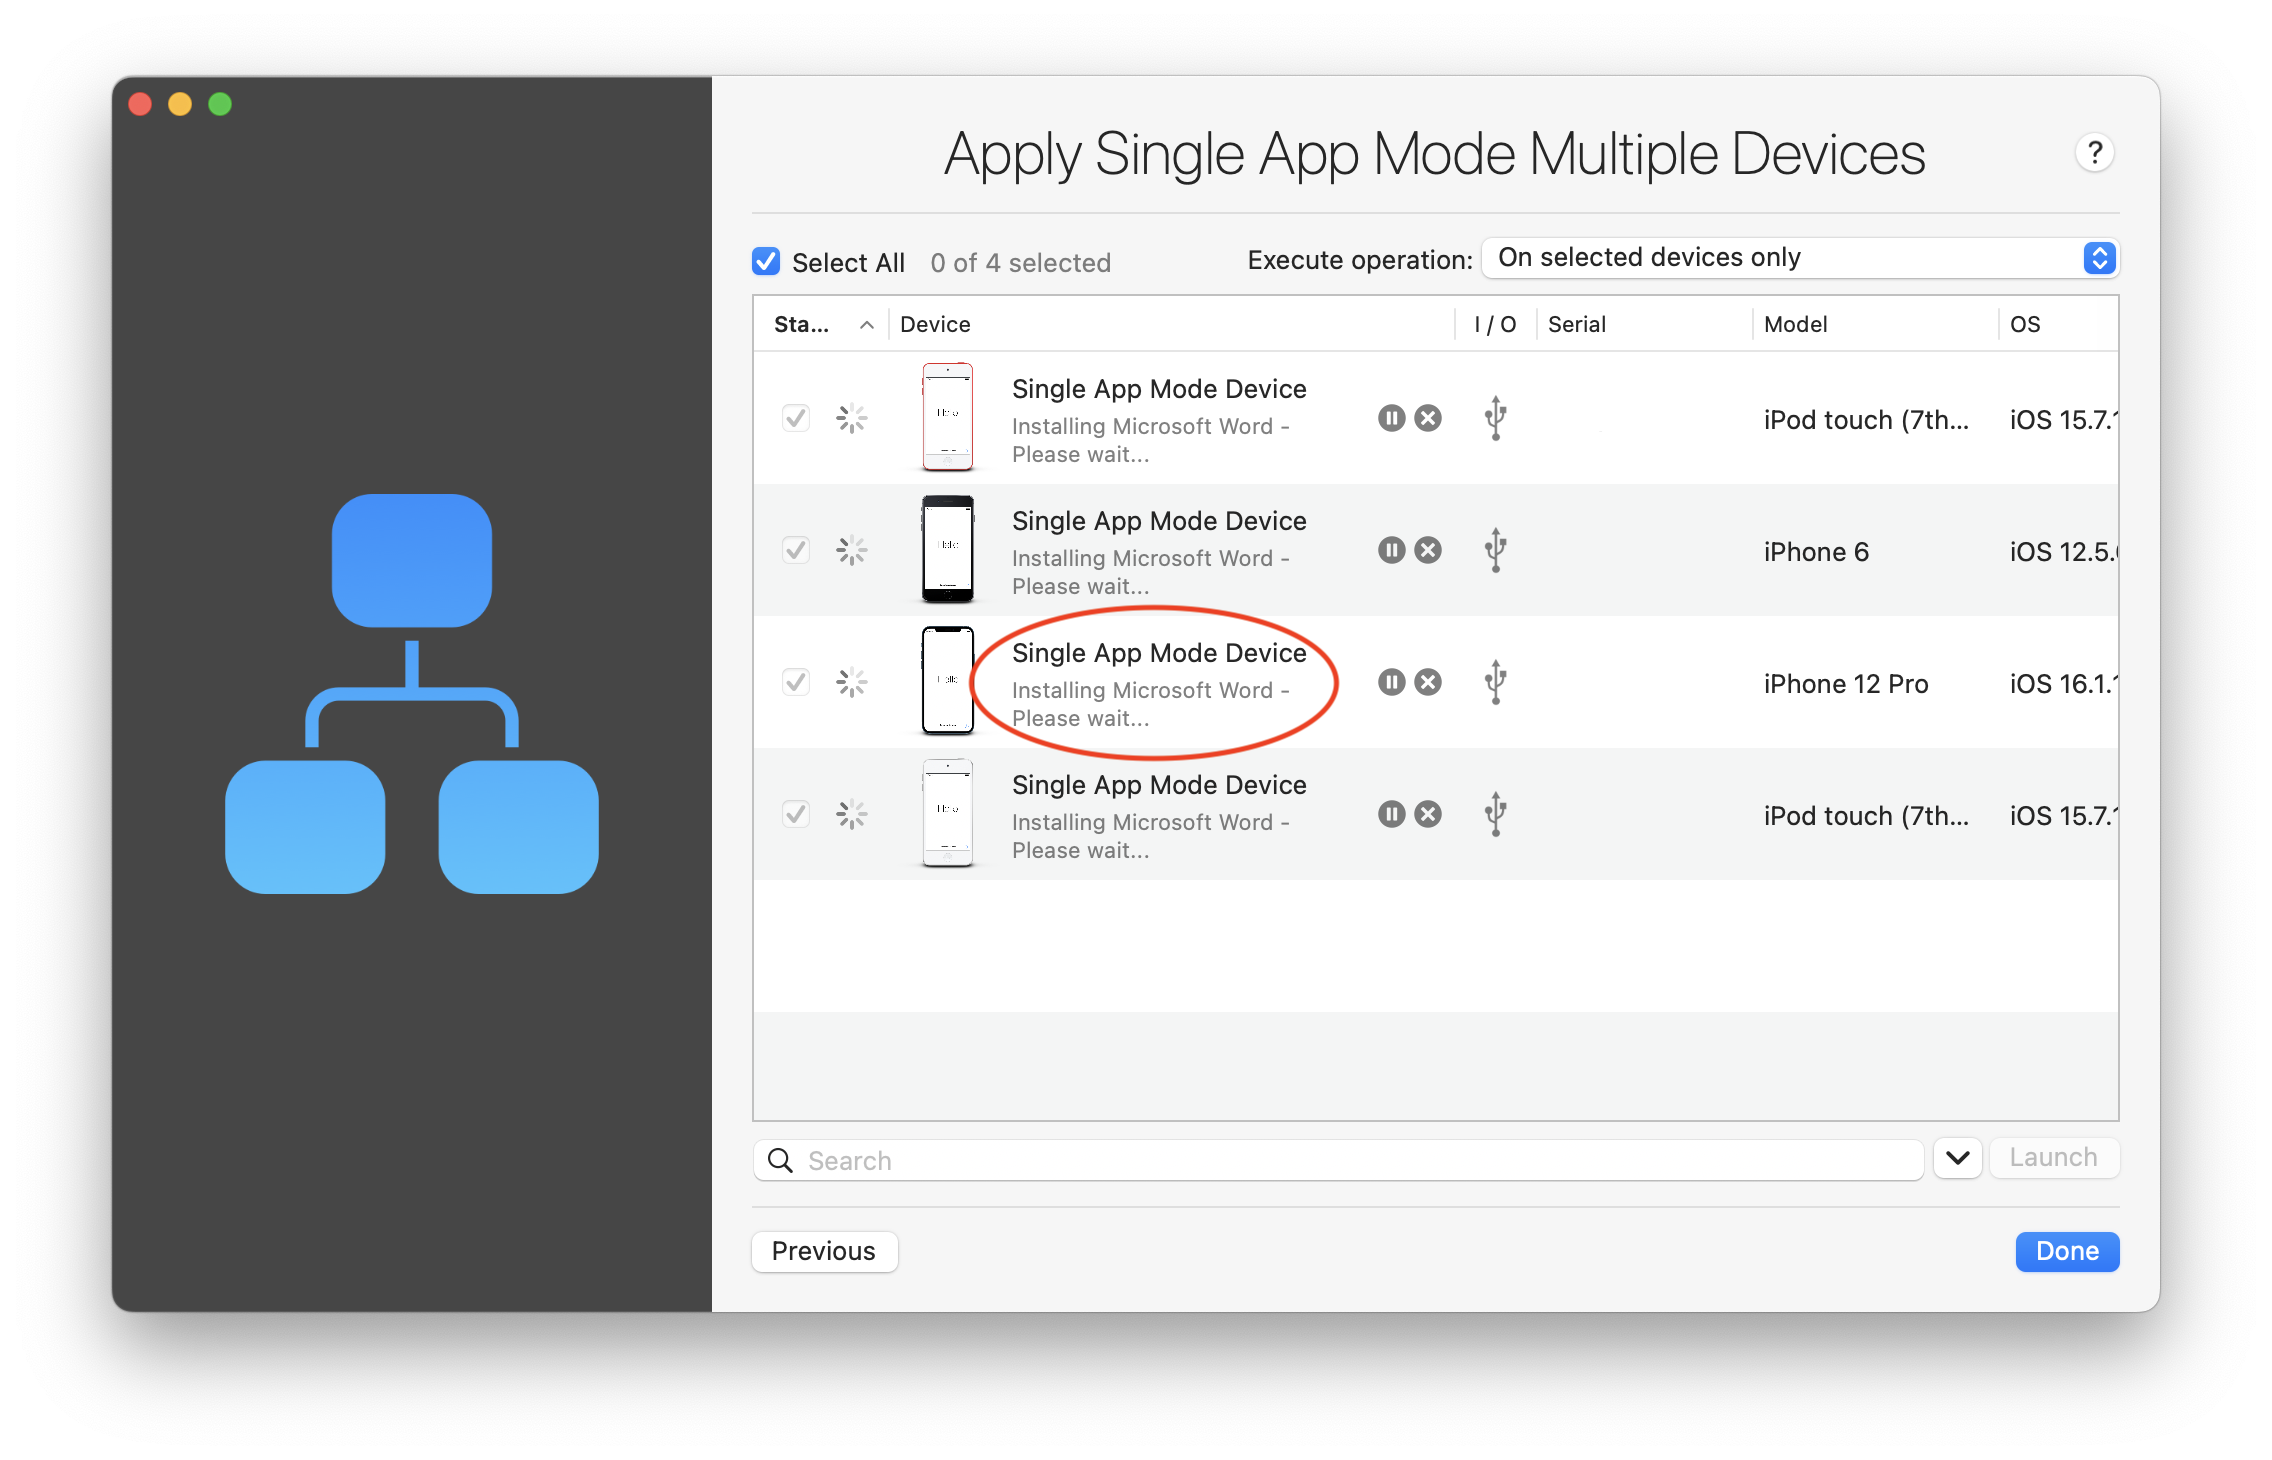
Now that the process has begun, you are able to see its progress on each device in real time. For example the following screenshot was taken at a point after device names have changed according to the blueprint.
Please note that you will be asked for your ABM/ASM credentials once again when the deployment comes to installing the application itself. We suggest to also tick Remember Password to avoid being prompted later again:
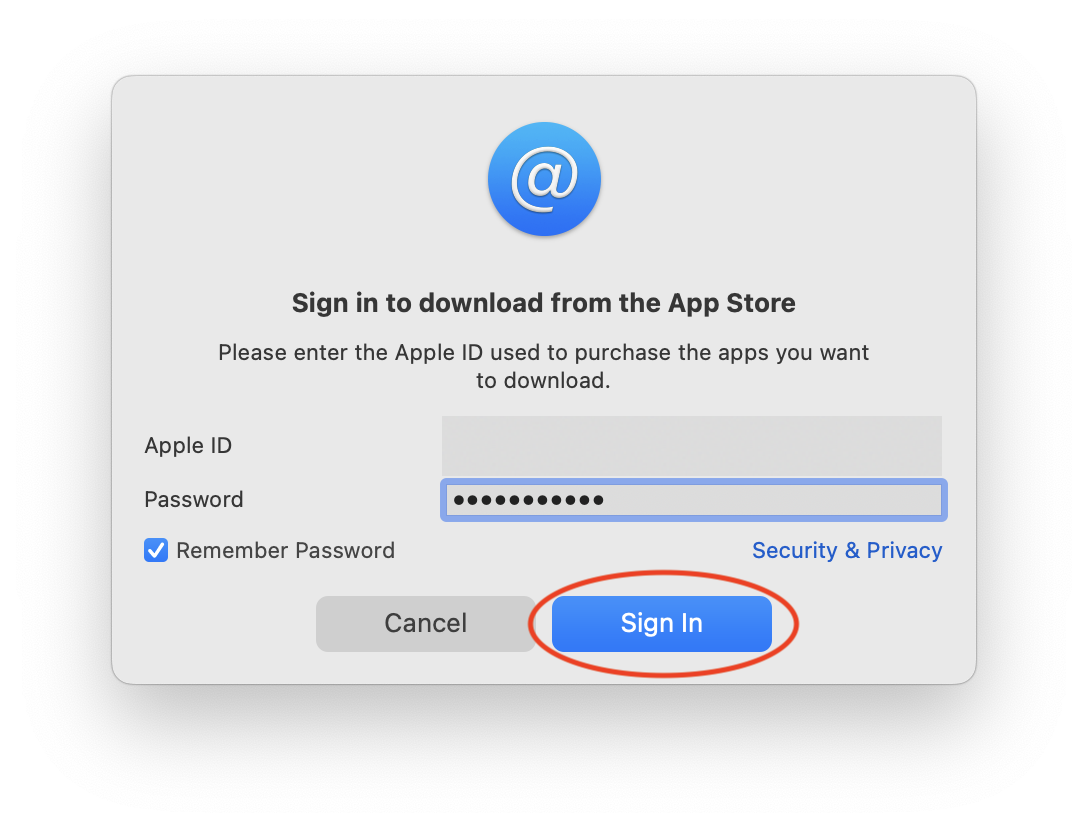
Entering the credentials will allow the chosen app to be installed with proper license:
Remember that we mentioned earlier to make sure that all the devices have an operating system version compatible with the single app. Here you can see that iOS 12 is not recent enough to allow the latest Microsoft Word App to be installed:
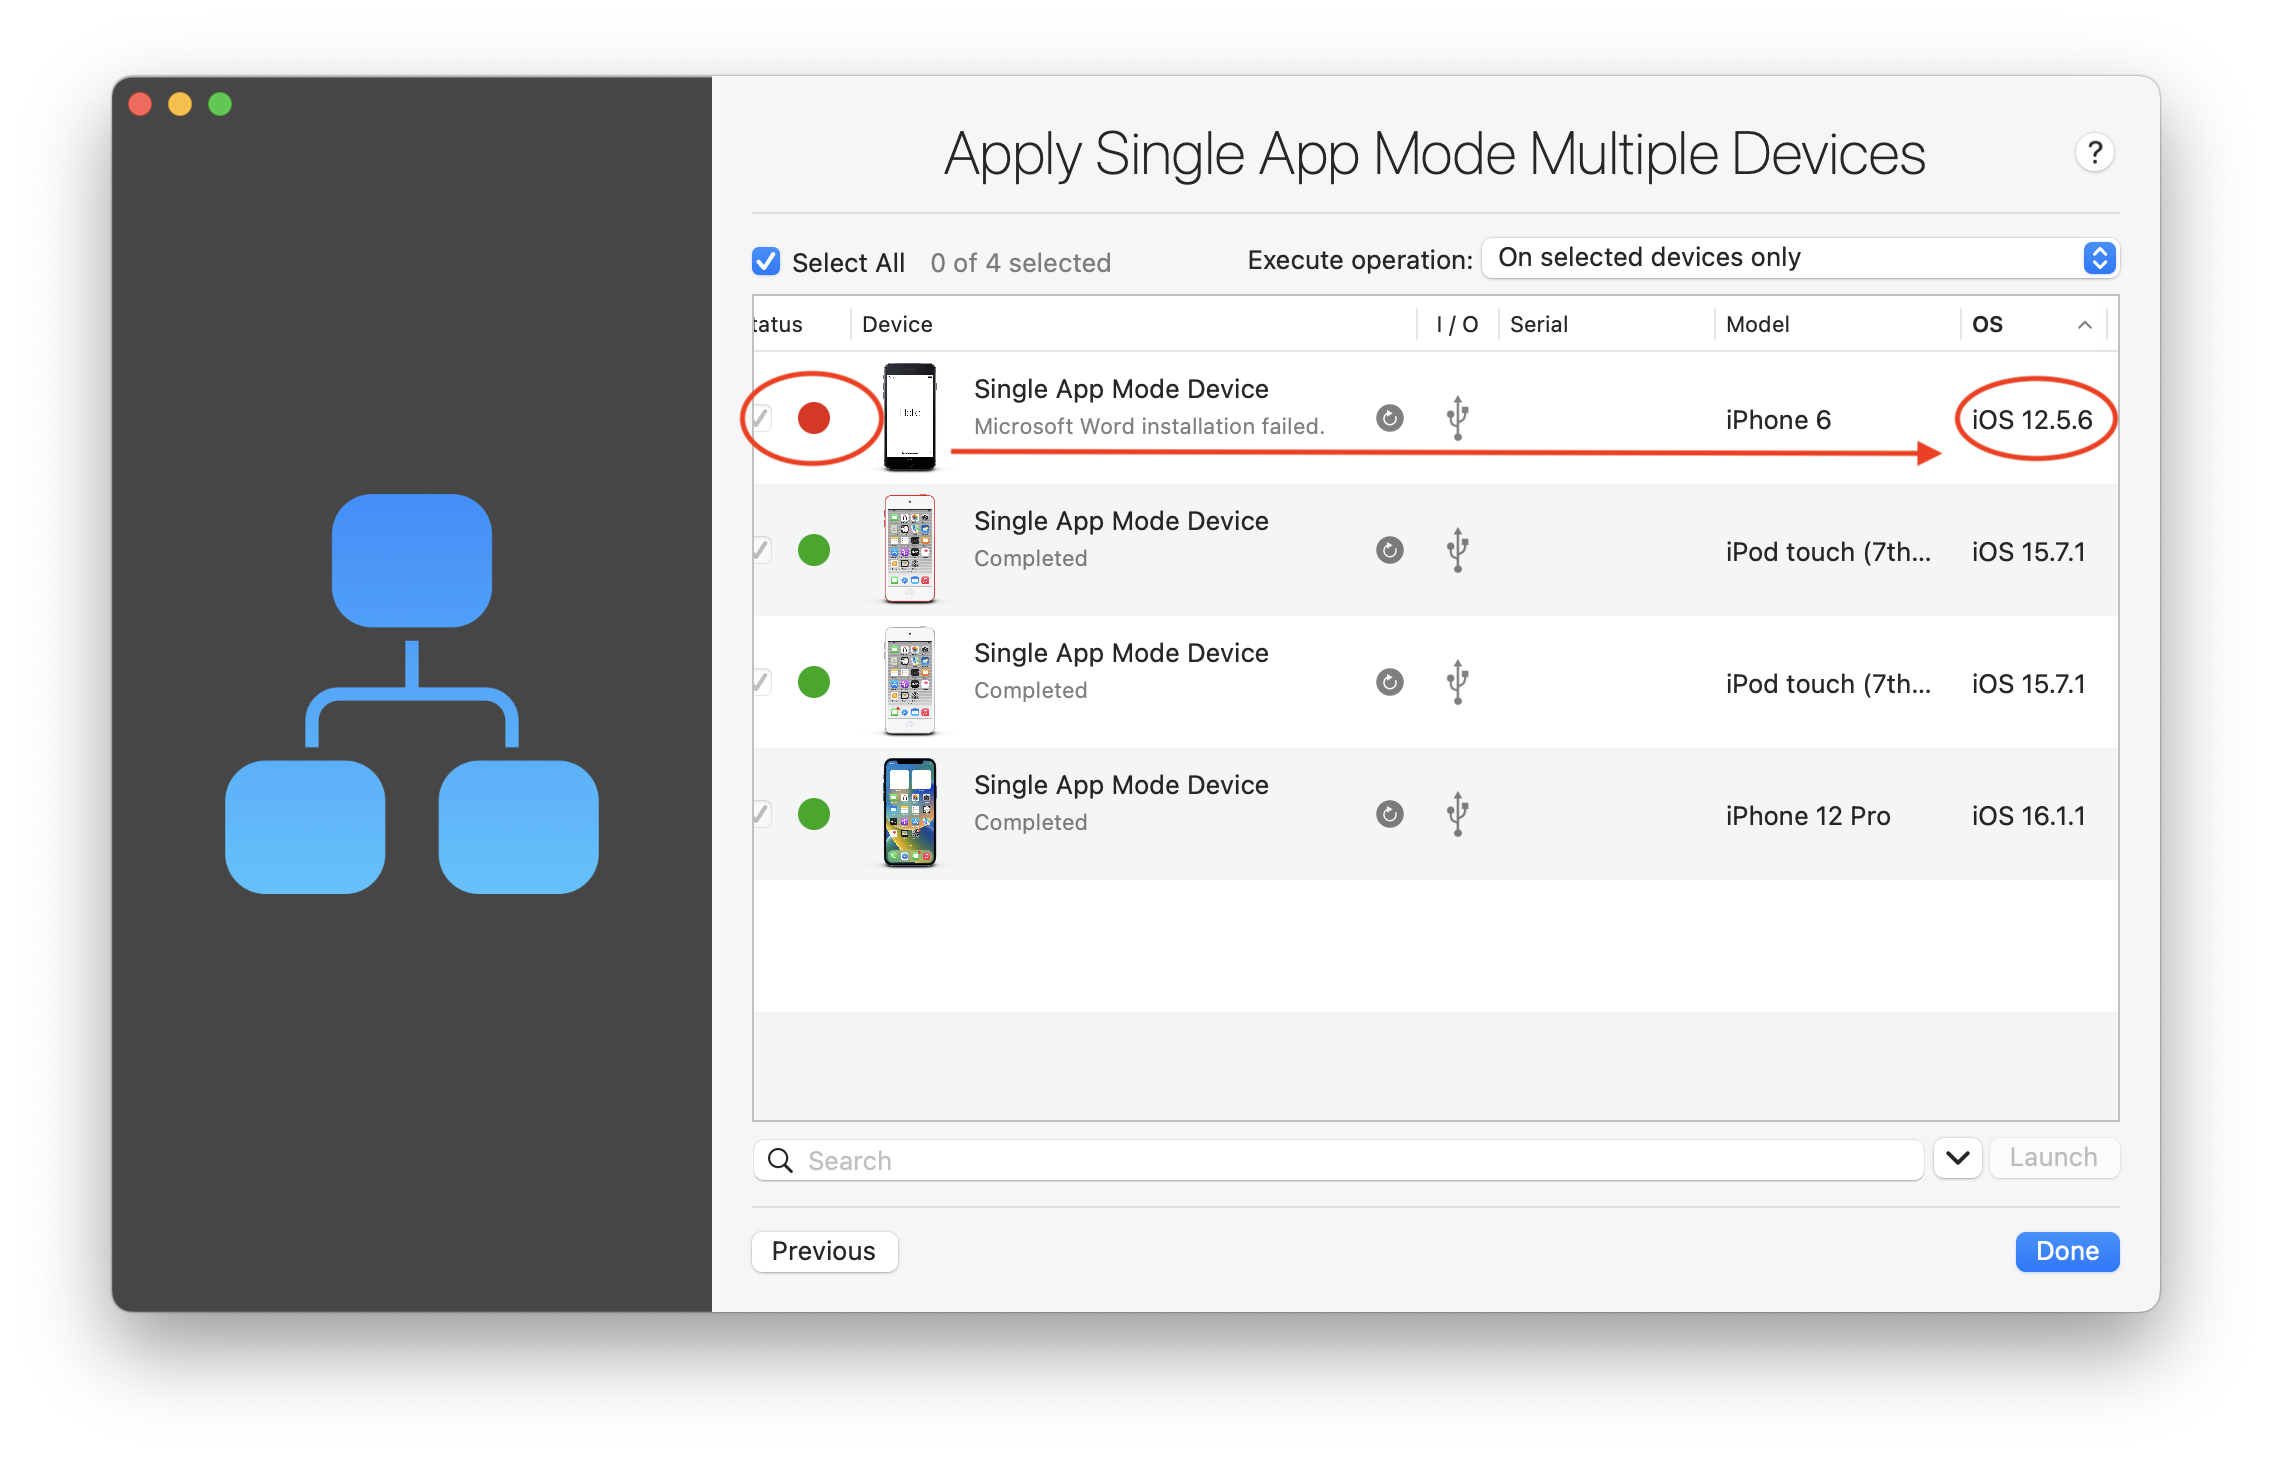
Also in the screenshot above you can see the green indicators next to three devices, signaling that the blueprint has been implemented successfully on them. If you followed this guide all the way up to here – congratulations, you now have Single App Mode devices, and a tool to configure many more.
4. Troubleshooting
Listed below are the three major cases of errors that you may encounter.
4.1. Devices seem to be frozen, stuck, or flashing
If you have not created and deployed a Wi-Fi configuration profile, devices will prompt to manually enter the Wi-Fi password but then will become frozen, stuck, or stuck in a flashing loop. It is because new settings must be applied in a certain order regarding the blueprint configuration.
Most of the time this issue gets fixed by itself after a couple of minutes. However, our advice is to always create and provide a Wi-Fi configuration profile for Single App Mode devices to avoid this behavior.
4.2. Network related error messages
If during your deployment you encounter one of the errors below, it simply means that your devices did not have enough time to acquire network connectivity, which is required in order for devices to connect to the App Store and download the app and its license.
"Guided Access app unavailable. Please contact your administrator"
"InstallProfileSilent failed: Error NSCocoaErrorDomain 4099: Couldn’t communicate with a helper application."
"Installation of profile Test - USB Accessories while locked allowed failed."
To solve this please increase Seconds to wait to let the devices acquire Wi-Fi connection to 60 seconds. See General options configuration above for more information about this setting.
4.3. ABM/ASM and MDM related errors message
During the above steps, you may encounter one of the errors below. If so, follow the advice given for each error to resolve the issue.
"This device is supervised and requires to access its supervision identity in order to pair it with this computer. Please import the supervising organization in iMazing's Library and try again.".
In this case the error message does not describe the actual error, which is that the Organization, or Supervision Identity of the device is not imported as an Organization into iMazing.
There are two options for working around the error:
- If your MDM provider allows downloading of the supervision identity, you can import it into iMazing to allow the app to finish the process.
- If not, iMazing Configurator will not be able to communicate with the device. Instead, use iMazing Profile Editor to create a Single App Mode profile, and push that using your MDM portal.
"There is no license for this device. Please purchase Microsoft Word from the App Store on your device or associate a license to the device via the Volume Purchase program in Apple Business or School Manager (Apps & Books).".
This error message typically occurs when trying to install an app to an iOS/iPadOS device as part of the blueprint, and the Volume Purchasing account has no more licenses left for allocation to the device. To resolve this error, the admin needs to log into their ABM/ASM portal and purchase more licenses for the app in Apps and Books. This applies to free apps as well as paid.

Enterprise License Information Request
Thank you! We'll be in touch shortly.