Music & Videos
Transfer music from an iPhone, iPad, or iPod to your Mac or PC

💡iMazing 3
This guide is not yet complete or updated for iMazing 3. An update will be available soon.
If you have an iPhone, iPad, or iPod (touch, classic, nano...), you probably have quite a bit of music on it: songs you purchased directly from the iTunes Store, or synced from your Mac or PC. There may be times when you need to get it back. Your computer may have crashed, or gotten stolen, and you may not have a backup. Or somehow you accidentally deleted a song or an album from your music library, but it's still on your device.
In this case, you'll want to get your music off your iPod or iOS device and on to your Mac or PC. Sounds easy, but Apple doesn't give you any way to do this. Fortunately, iMazing can help.
With iMazing, you can copy music files from your iPhone, iPad, or iPod to your computer, retaining all their metadata: each track's name, artwork, and even ratings and play counts. In this guide, we'll describe how to export music neatly into folders on your Mac or PC, or external drive. If you need to export music to iTunes for Windows or to your Mac's music library, please follow this other guide instead.
Here is how to transfer music from your iPhone (or iPad, or iPod) to a computer:
- Launch iMazing and connect your device to your Mac or PC.
- Click the Music icon.
- Select the music you want to export
- Click Export to Folder
- Select a target location and confirm
Before you begin
Download and install iMazing on your Mac or PC computer.
In-Depth Tutorial
1. Launch iMazing on your computer and connect your device
Download and install iMazing. Launch the app, and connect your device to your Mac or PC.
2. Select your device in the iMazing's sidebar, then select Music
iMazing loads your device's music library, and displays it's contents, including playlists and filters for albums, genres and artists:
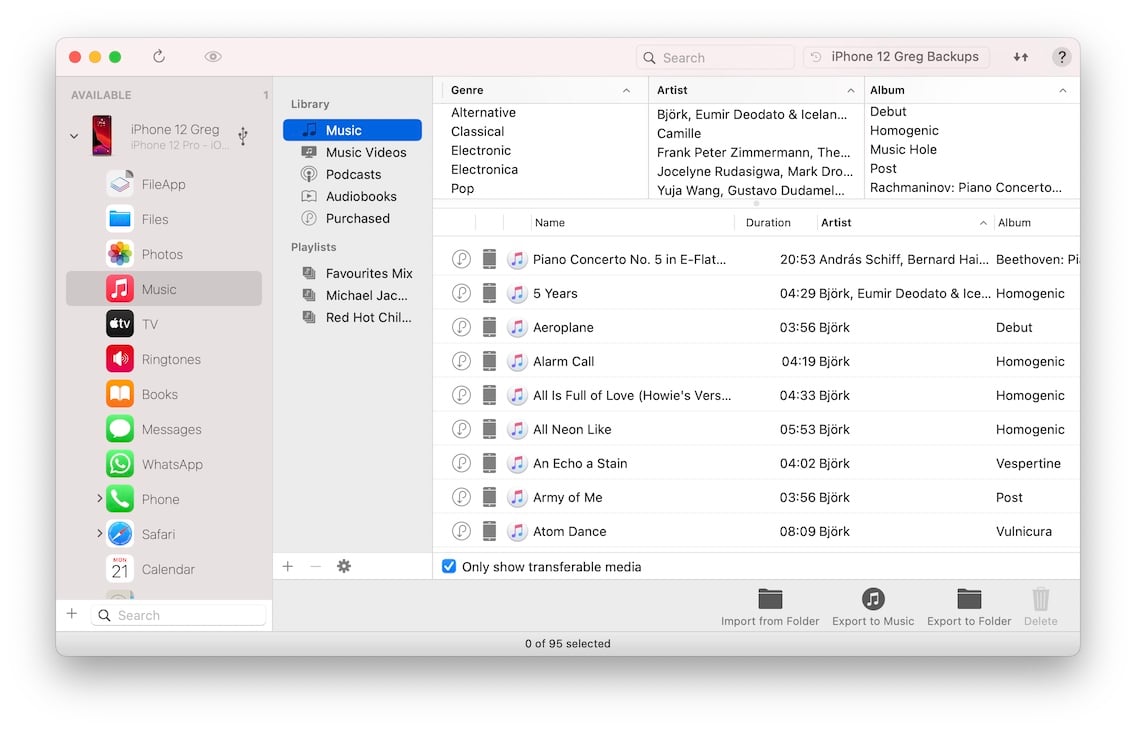
3. Select the music you want to export
To copy a specific album or song use the Genre/Artist/Album filters and search bar to narrow down displayed tracks, and select the ones you wish to export.
⚡ Quickest workflow: if you only have a few tracks to export, you can simply drag and drop them out of iMazing and onto your desktop, no further steps required!
To copy a playlist select it in the left sidebar and do not select any specific tracks.
To copy your entire library don't select anything and jump straight to step 4.
💡 Tip: when no tracks are selected, iMazing considers that your selection is equivalent to all the tracks matching your current filters. This makes it easier to export a playlist (just select the playlist itself), or a specific album (just select the album). You also get the opportunity to review your selection in the export options window before launching the operation.
4. Click Export to Folder
Once your happy with your selection, click the Export to Folder button in the bottom toolbar. iMazing will display the following export options window:
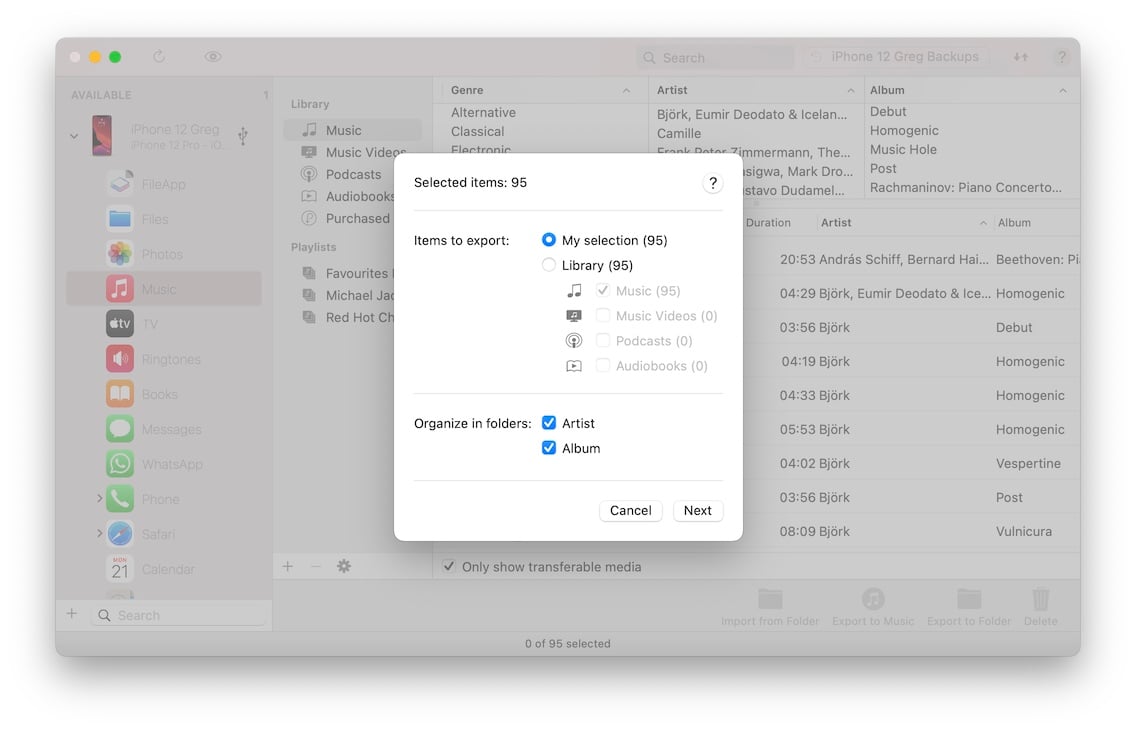
5. Customize your export and confirm
The export options window lets you review how many items will be exported – remember that no selection will result in all currently filtered tracks being exported here. You can also easily change your mind here and opt to export everything - simply click the Library radio button instead of My Selection, and check the types of items you wish to include in the export.
Finally, you can customize how the exported files will be organized in a folder structure. Unless you're only copying a few tracks, it's a good idea to keep the default options as they are, i.e. folders for artists and albums. So each artist has a folder with their name; inside these folders, iMazing places folders with the names of their albums; and the files are placed inside these album folders.
Once your happy with your export options, click the Next button at the bottom of the options window. iMazing will display a save panel where you choose the target folder in which you want your files to be transferred:
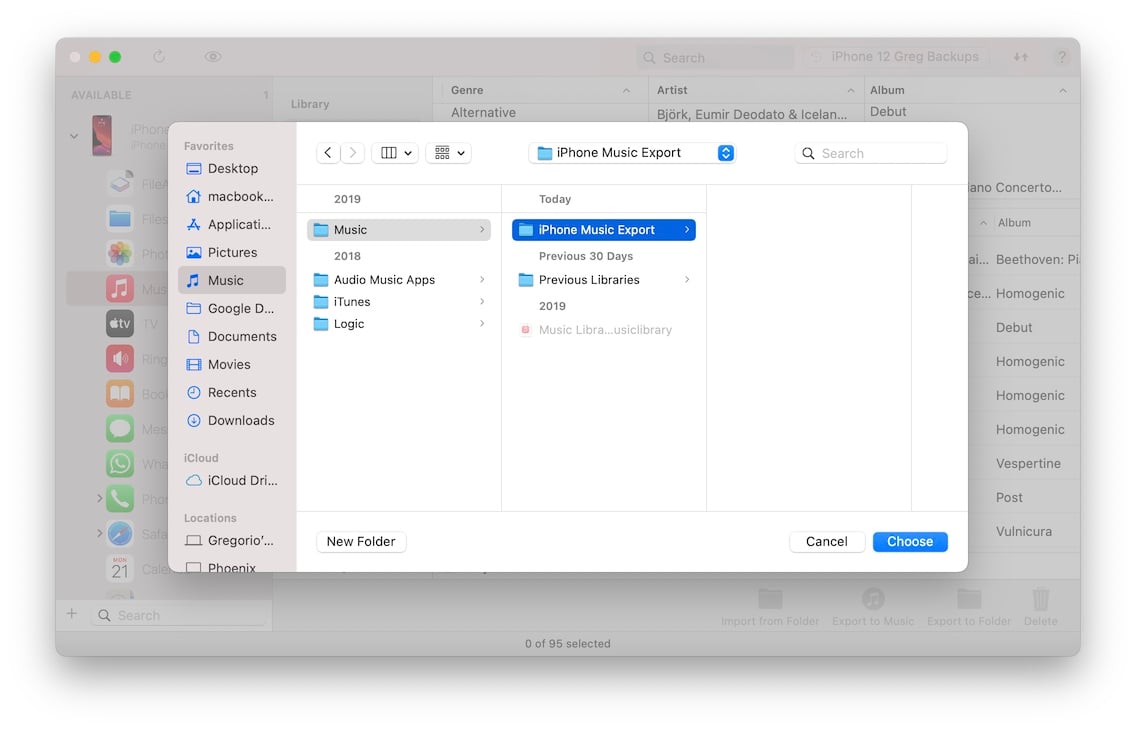
Pick a folder and confirm. iMazing starts transferring the music, reporting progress in the Operations Window.
Going further
If you tell the Music Export Wizard to organize your files in folders, they can be easier to sift through. If you check both Artist and Album, iMazing stores files in the following folder structure:
Artist 1
Album 1
Track 01
Track 02
…
Album 2
Track 01
Artist 2
…
If you uncheck Only Show Transferable Media, just above the toolbar, iMazing will shows your device's entire music library, including tracks which you cannot transfer. Tracks may be impossible to transfer for a couple different reasons:
- iCloud Music tracks that aren't downloaded cannot be copied, because they are not on your device. If you do want to export music that's in your iCloud Music Library, you should download it first to your device, or use iCloud on your computer as well. Those tracks are identifiable by a cloud icon.
- Apple Music tracks cannot be copied because they are always DRM protected, meaning that they are encrypted and will not play at all once exported. This is why iMazing lists them as non-transferrable. Those types of tracks are identifiable by an Apple logo icon.
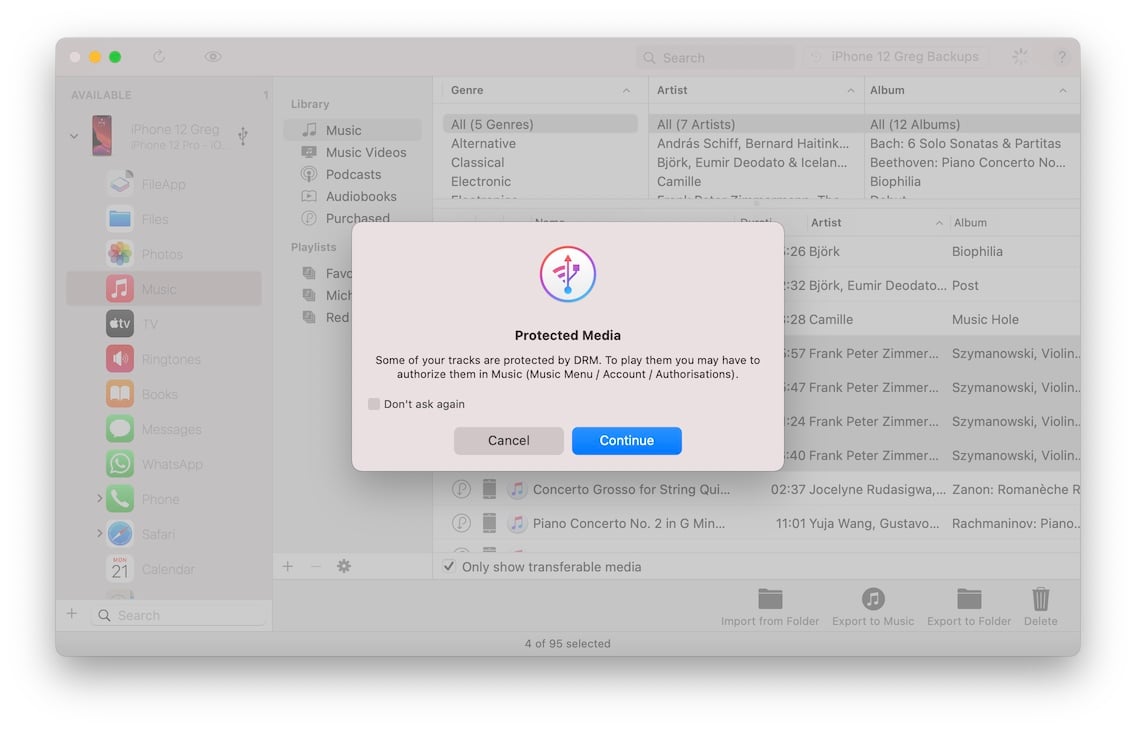
Speaking of DRM, sometimes tracks that you've purchased via the iTunes store may also be protected and unreadable. This is rather rare since Apple changed stance quite a few years ago on this matter, and most purchased tracks are now DRM free. If a track you've selected for export is DRM protected, iMazing will display the following warning:

Related Articles
- This guide for iMazing Version 2.
- Transfer music from an iPhone, iPad, or iPod to iTunes or Music
- Transfer podcasts between iPhone, iPad, or iPod and Mac or PC
Support Center
Related Videos

Enterprise License Information Request
Thank you! We'll be in touch shortly.