Getting started with iMazing Account
Updated on Mar 9, 2026
Reading time ~9 minutes
The iMazing Account platform allows you manage your iMazing licenses within an organization and assign them to users. It will soon provide additional advanced features, such as the ability to remotely configure and customize iMazing, delegate tasks to users, and guide them through tasks for a comprehensive, streamlined experience. These new features will be available this year.
In this guide you'll learn how to distribute iMazing licenses to your colleagues or clients and manage your license pool.
- Creating an account
- Logging into iMazing Account
- Organization options
- Assigning an iMazing license to a new end-user
- Assigning an iMazing license to yourself or an existing user in your organization
- Adding more devices to an existing assigned license
- Understanding the status of your license pool (Main Licenses)
- Purchasing more devices when your license pool is exhausted
- Understanding automatic license device unlinking after 90 Days with Business Subscriptions
- Other important information about Roles and Licenses
Creating an account
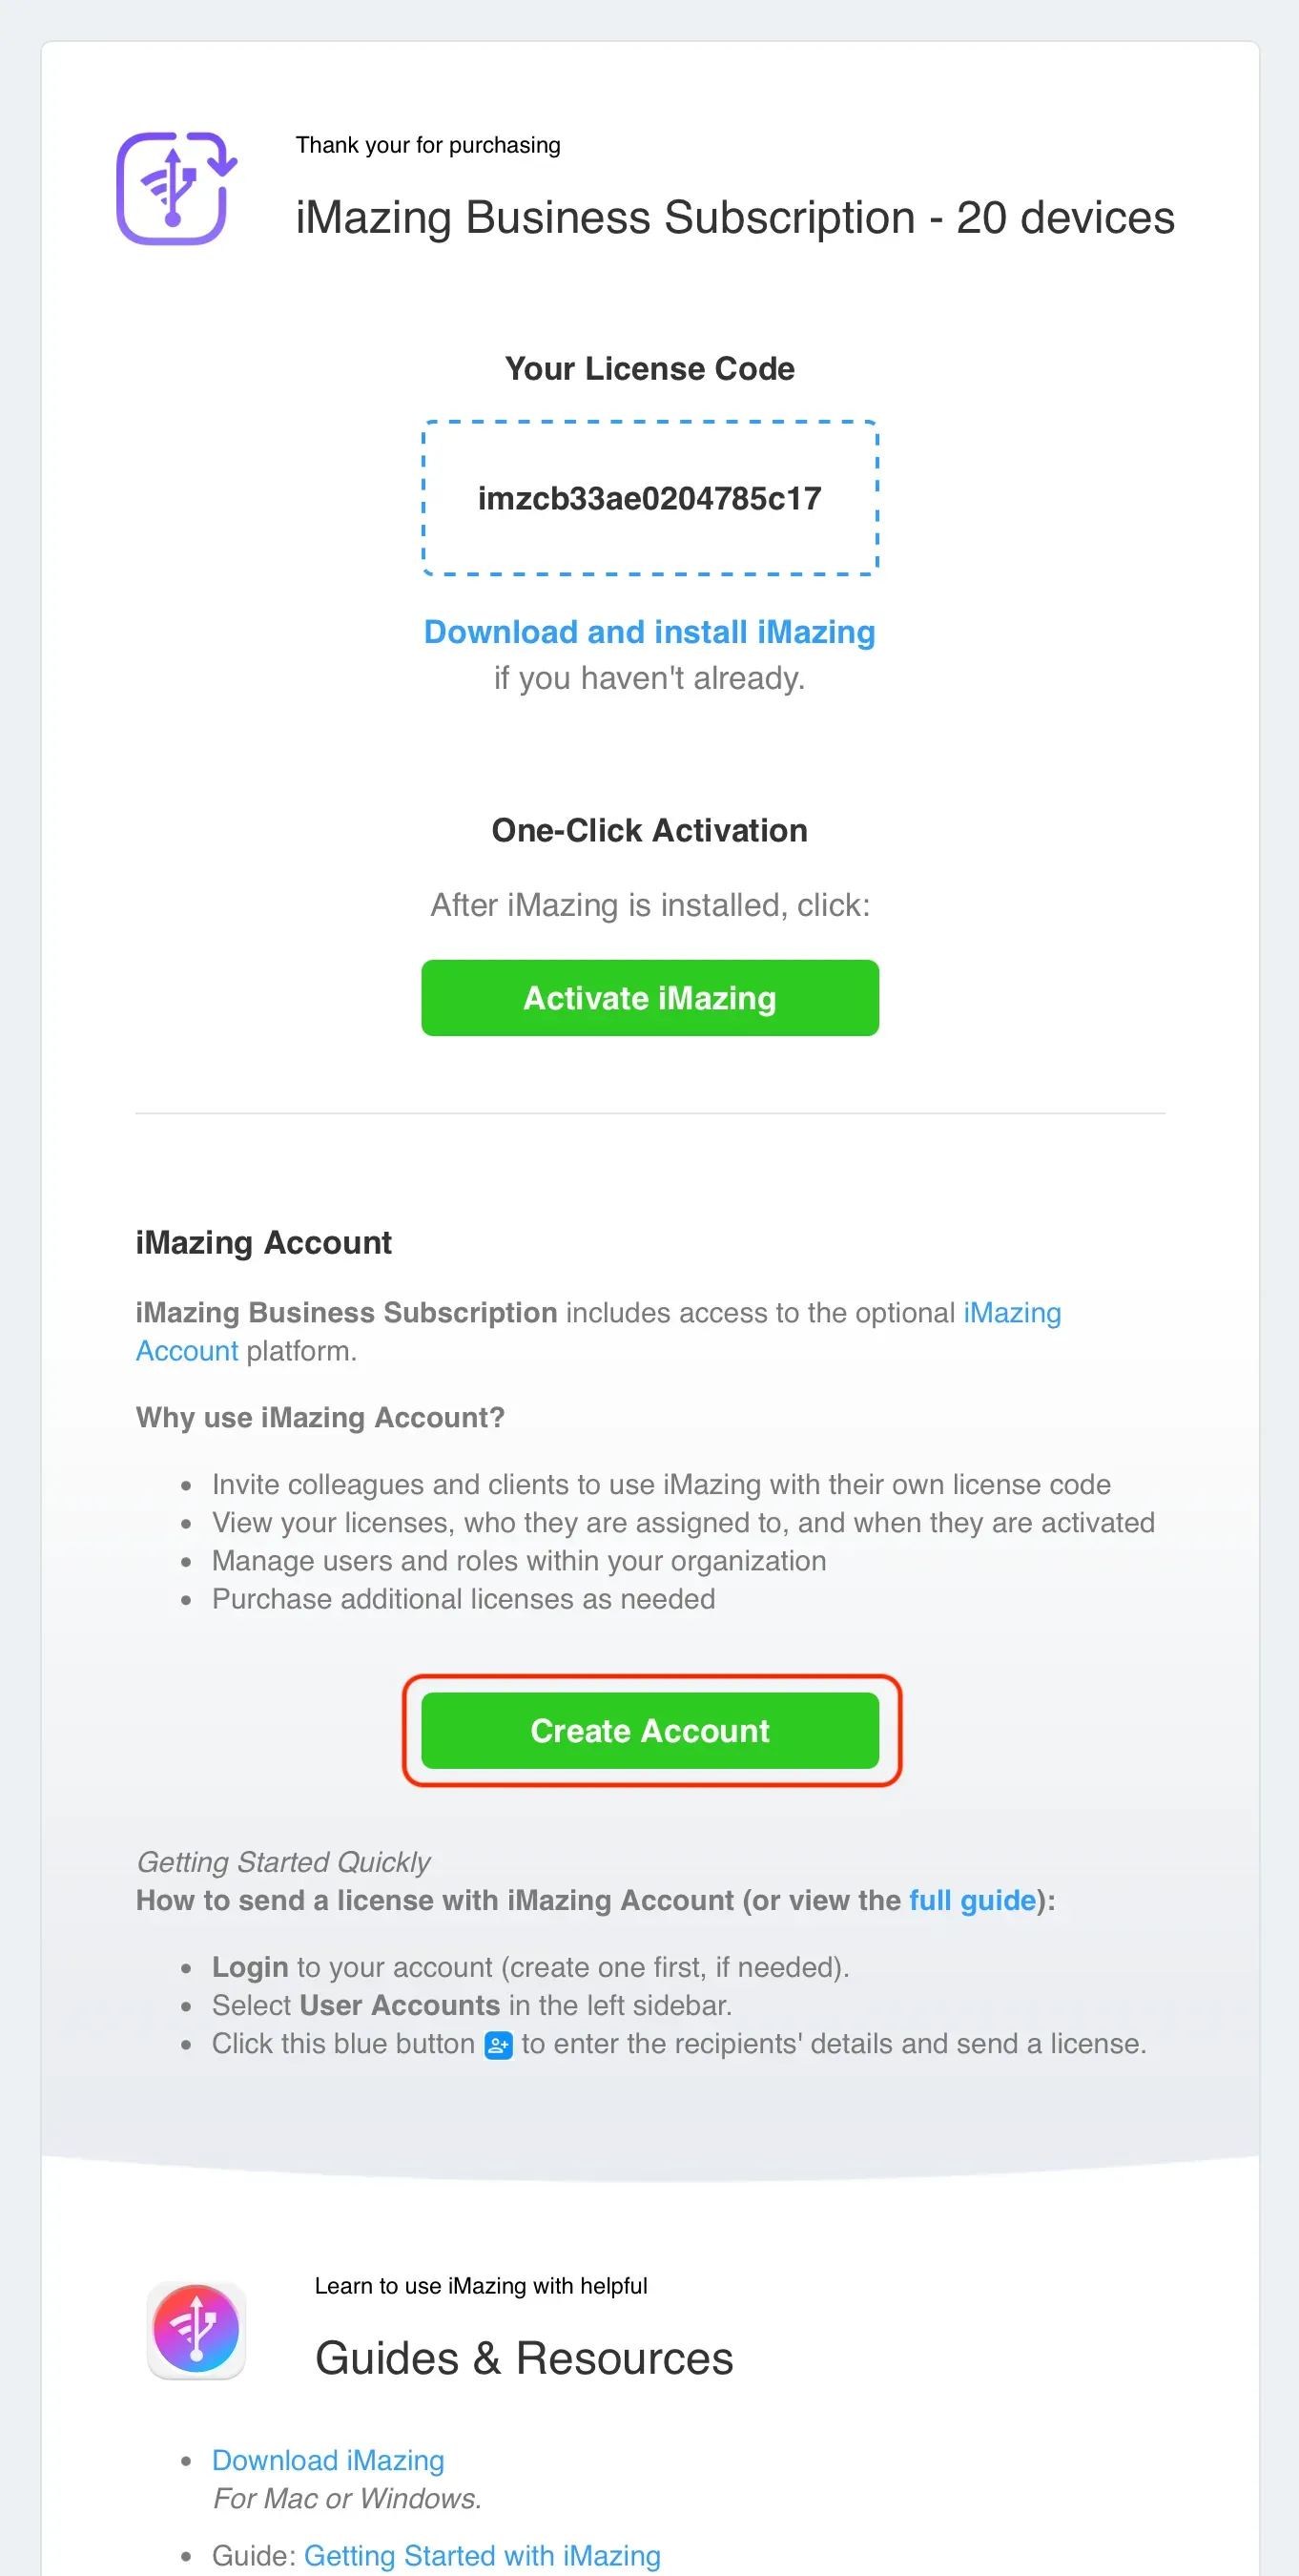
Upon purchasing an iMazing Business Subscription, a confirmation email will be sent to the email address used for the purchase. This email contains an invitation to create an organization account if one does not already exist.
An organization account is a collective account for your organization. It holds the licenses that your organization purchases, and it includes user accounts for you, your colleagues, and your clients. You can assign licenses to these users, and if you want to use iMazing on your personal computer, you can assign a license to your own account.
To create the account, click the Create Account button in the body of the email.
In the browser window that opens, you will be requested to fill in your organization details. At minimum, you must enter the organization name and your desired interface language. You can also select what authentication methods users in your organization (you and your colleagues) will be allowed to use. You can restrict accounts to user and password combinations only, third-party identity providers (signing in using a Google, Microsoft, or Apple accounts), or allow both. Click Continue to move on to the next step.

If you allowed email and password combinations, the next step will be to specify a password for your user account, so that you could use it to log in. If you also allowed third-party identity providers, specifying a password will not prevent you from using either.
Your user account will be set as the owner of the organization account, but you can add other owners later and also transfer ownership.

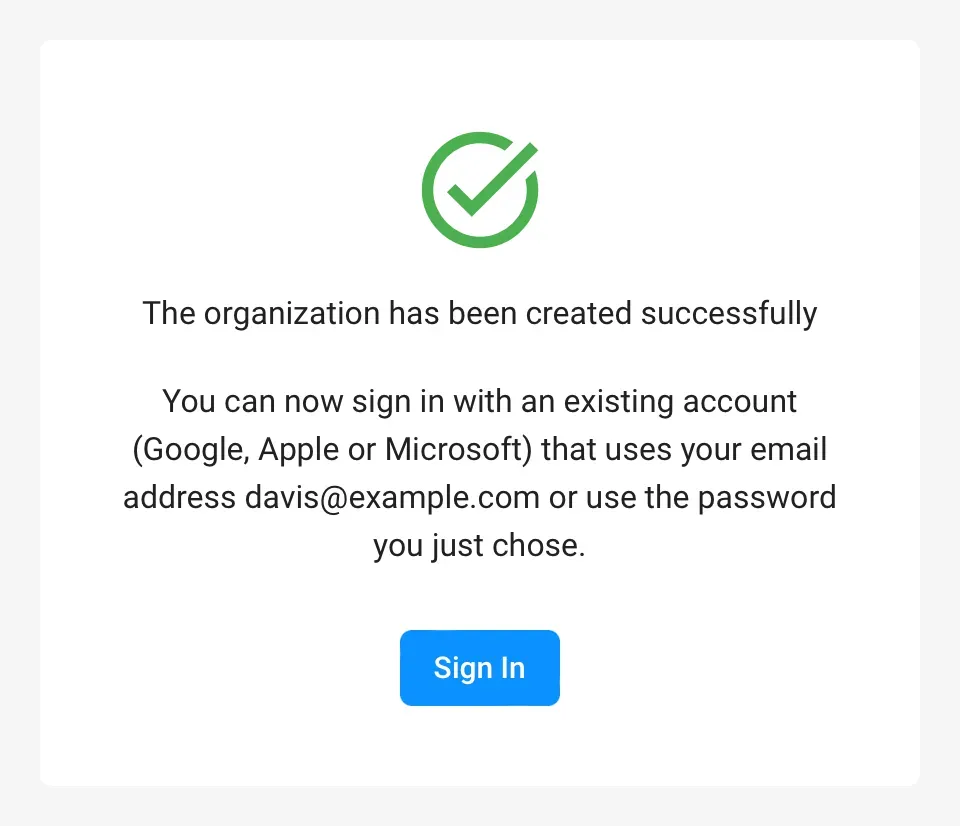
After successfully completing the above steps both your organization account and your user account will be created and you will see a confirmation message.
Logging into iMazing Account
After following the instructions in the above step, you will be redirected to the login page. If your account has already been created, you can go to the login page at the following address:
Log in using an identity service provider (Google, Microsoft or Apple)
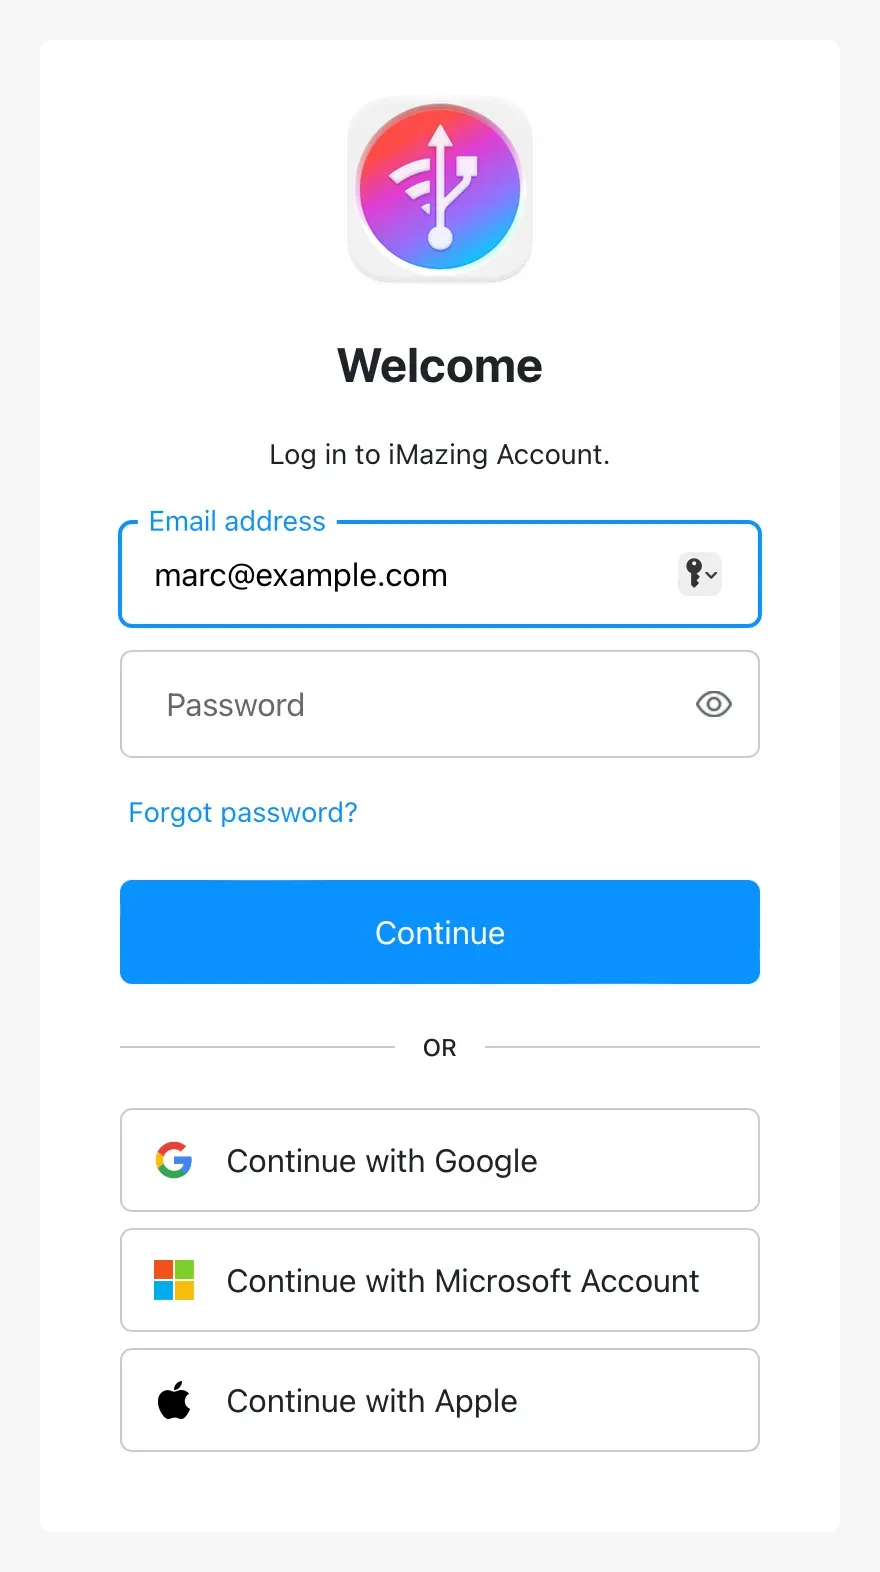
To log in using your Google Account, Microsoft Account, or Apple ID, simply click on the selected provider from the list on the bottom of the login form.
If you are not already logged into your identity provider, you will be requested to log in. Depending on the identity provider, you may be required to follow a number of additional steps.
Note: Your identity service provider account must be associated with the email address used when purchasing iMazing.
Log in using an email and password combination
Enter the email address that you've used when purchasing iMazing together with the password that you've specified in the above steps, and click Continue.
First login
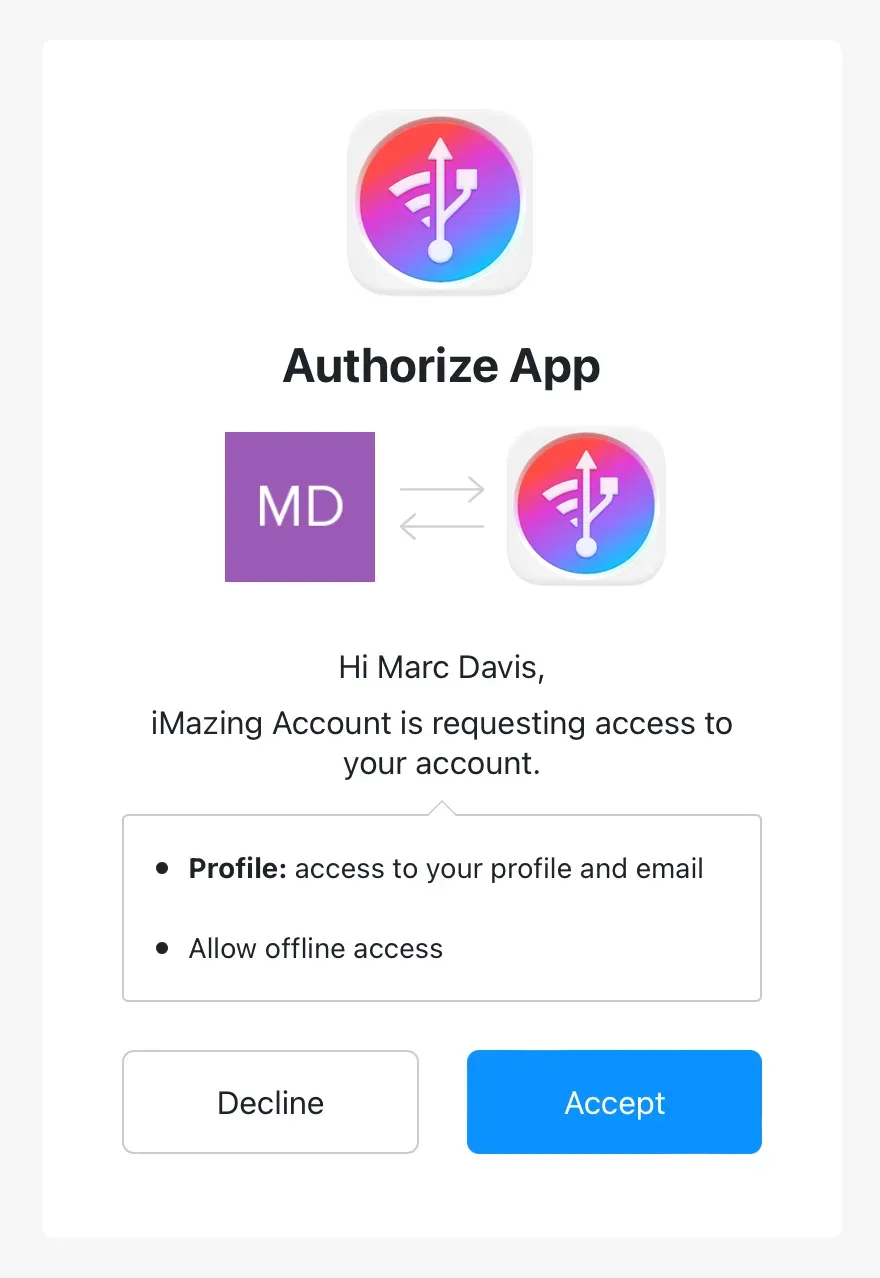
Regardless of the method that you choose, on first login you will be asked to approve the use of your newly created account with the iMazing Account website. The two are separate services so this is a required normal step.
Organization options
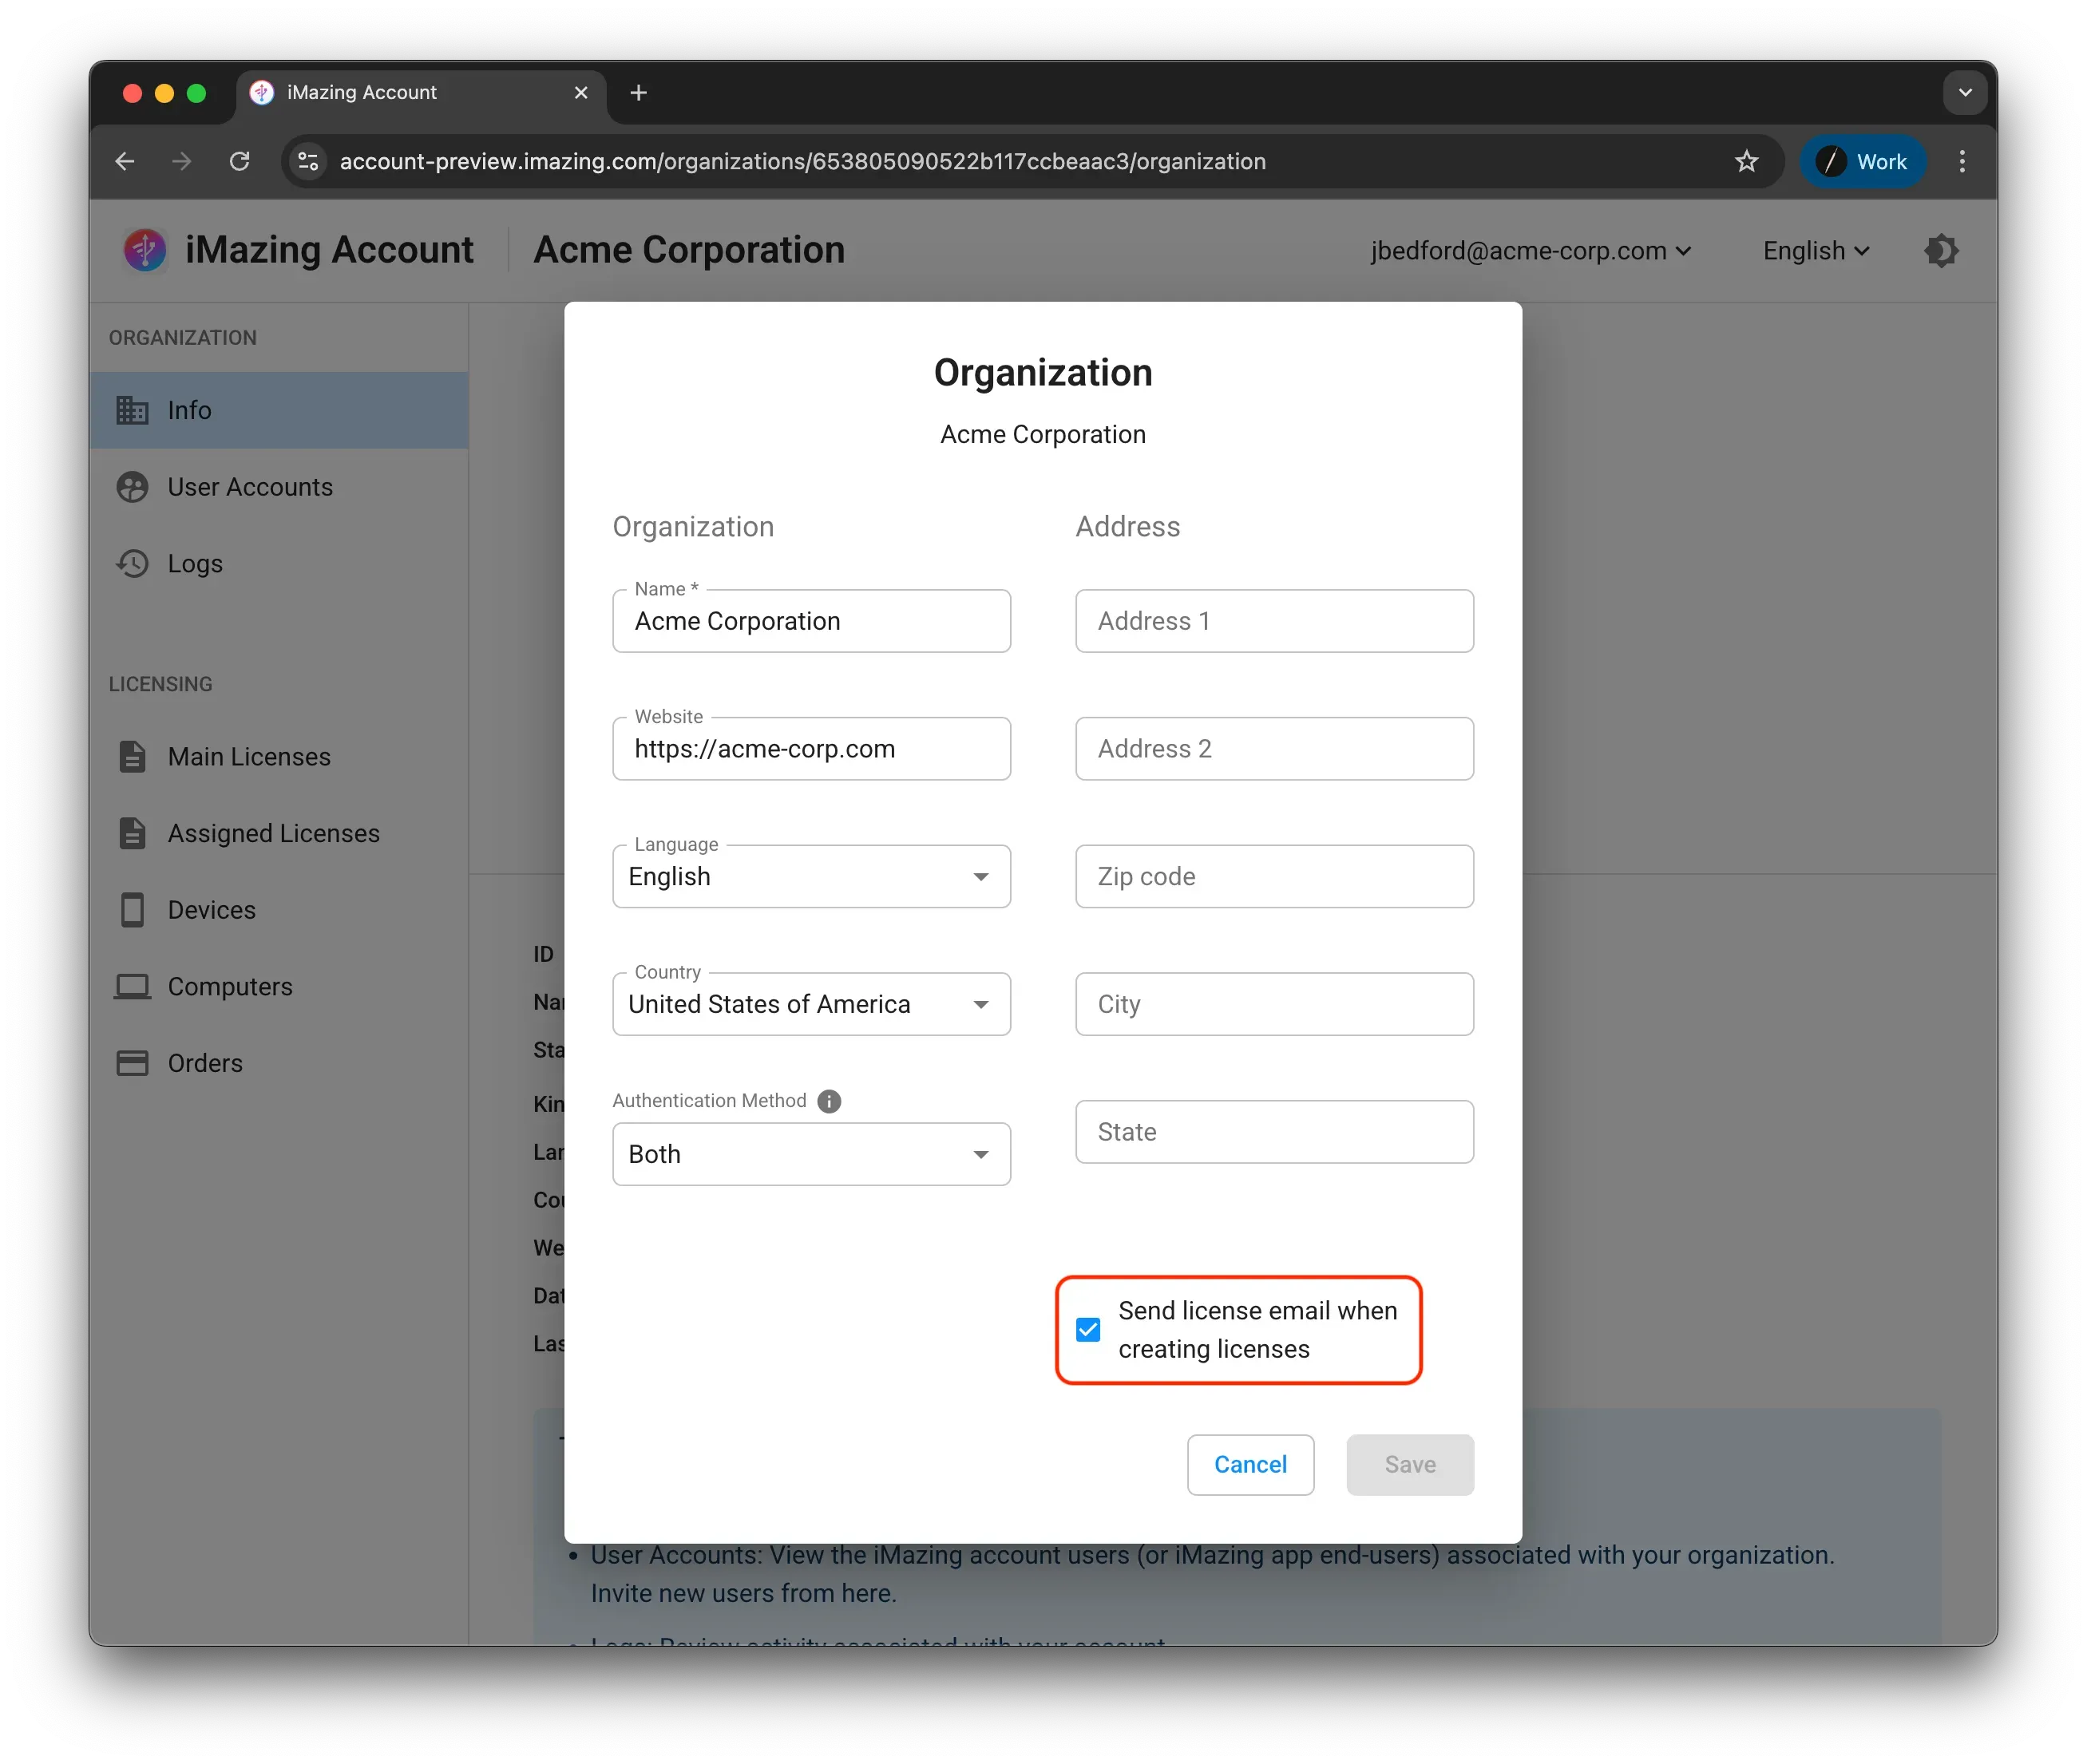
The Info section allows you to manage your organization's details. You can edit these details by clicking the Edit Organization button.
An important feature is the Send license email when creating licenses option. If this option is enabled, emails containing iMazing license codes will be automatically sent to new user accounts upon creation and license assignment.
Assigning an iMazing license to a new end-user
Once logged into iMazing Account, you will be able to assign licenses to end-users.
To do so, go to User Accounts section. All of the existing user accounts in your organization will be listed there, including your own user account which will be marked as Owner. If this is the first time you invite a user, only your account will appear on the list.
To begin inviting new users, click on the + button.

In the form that will pop over, fill in the user's information, including their name and email address. If the user needs to connect more than one device to iMazing, adjust the Number of devices field accordingly.
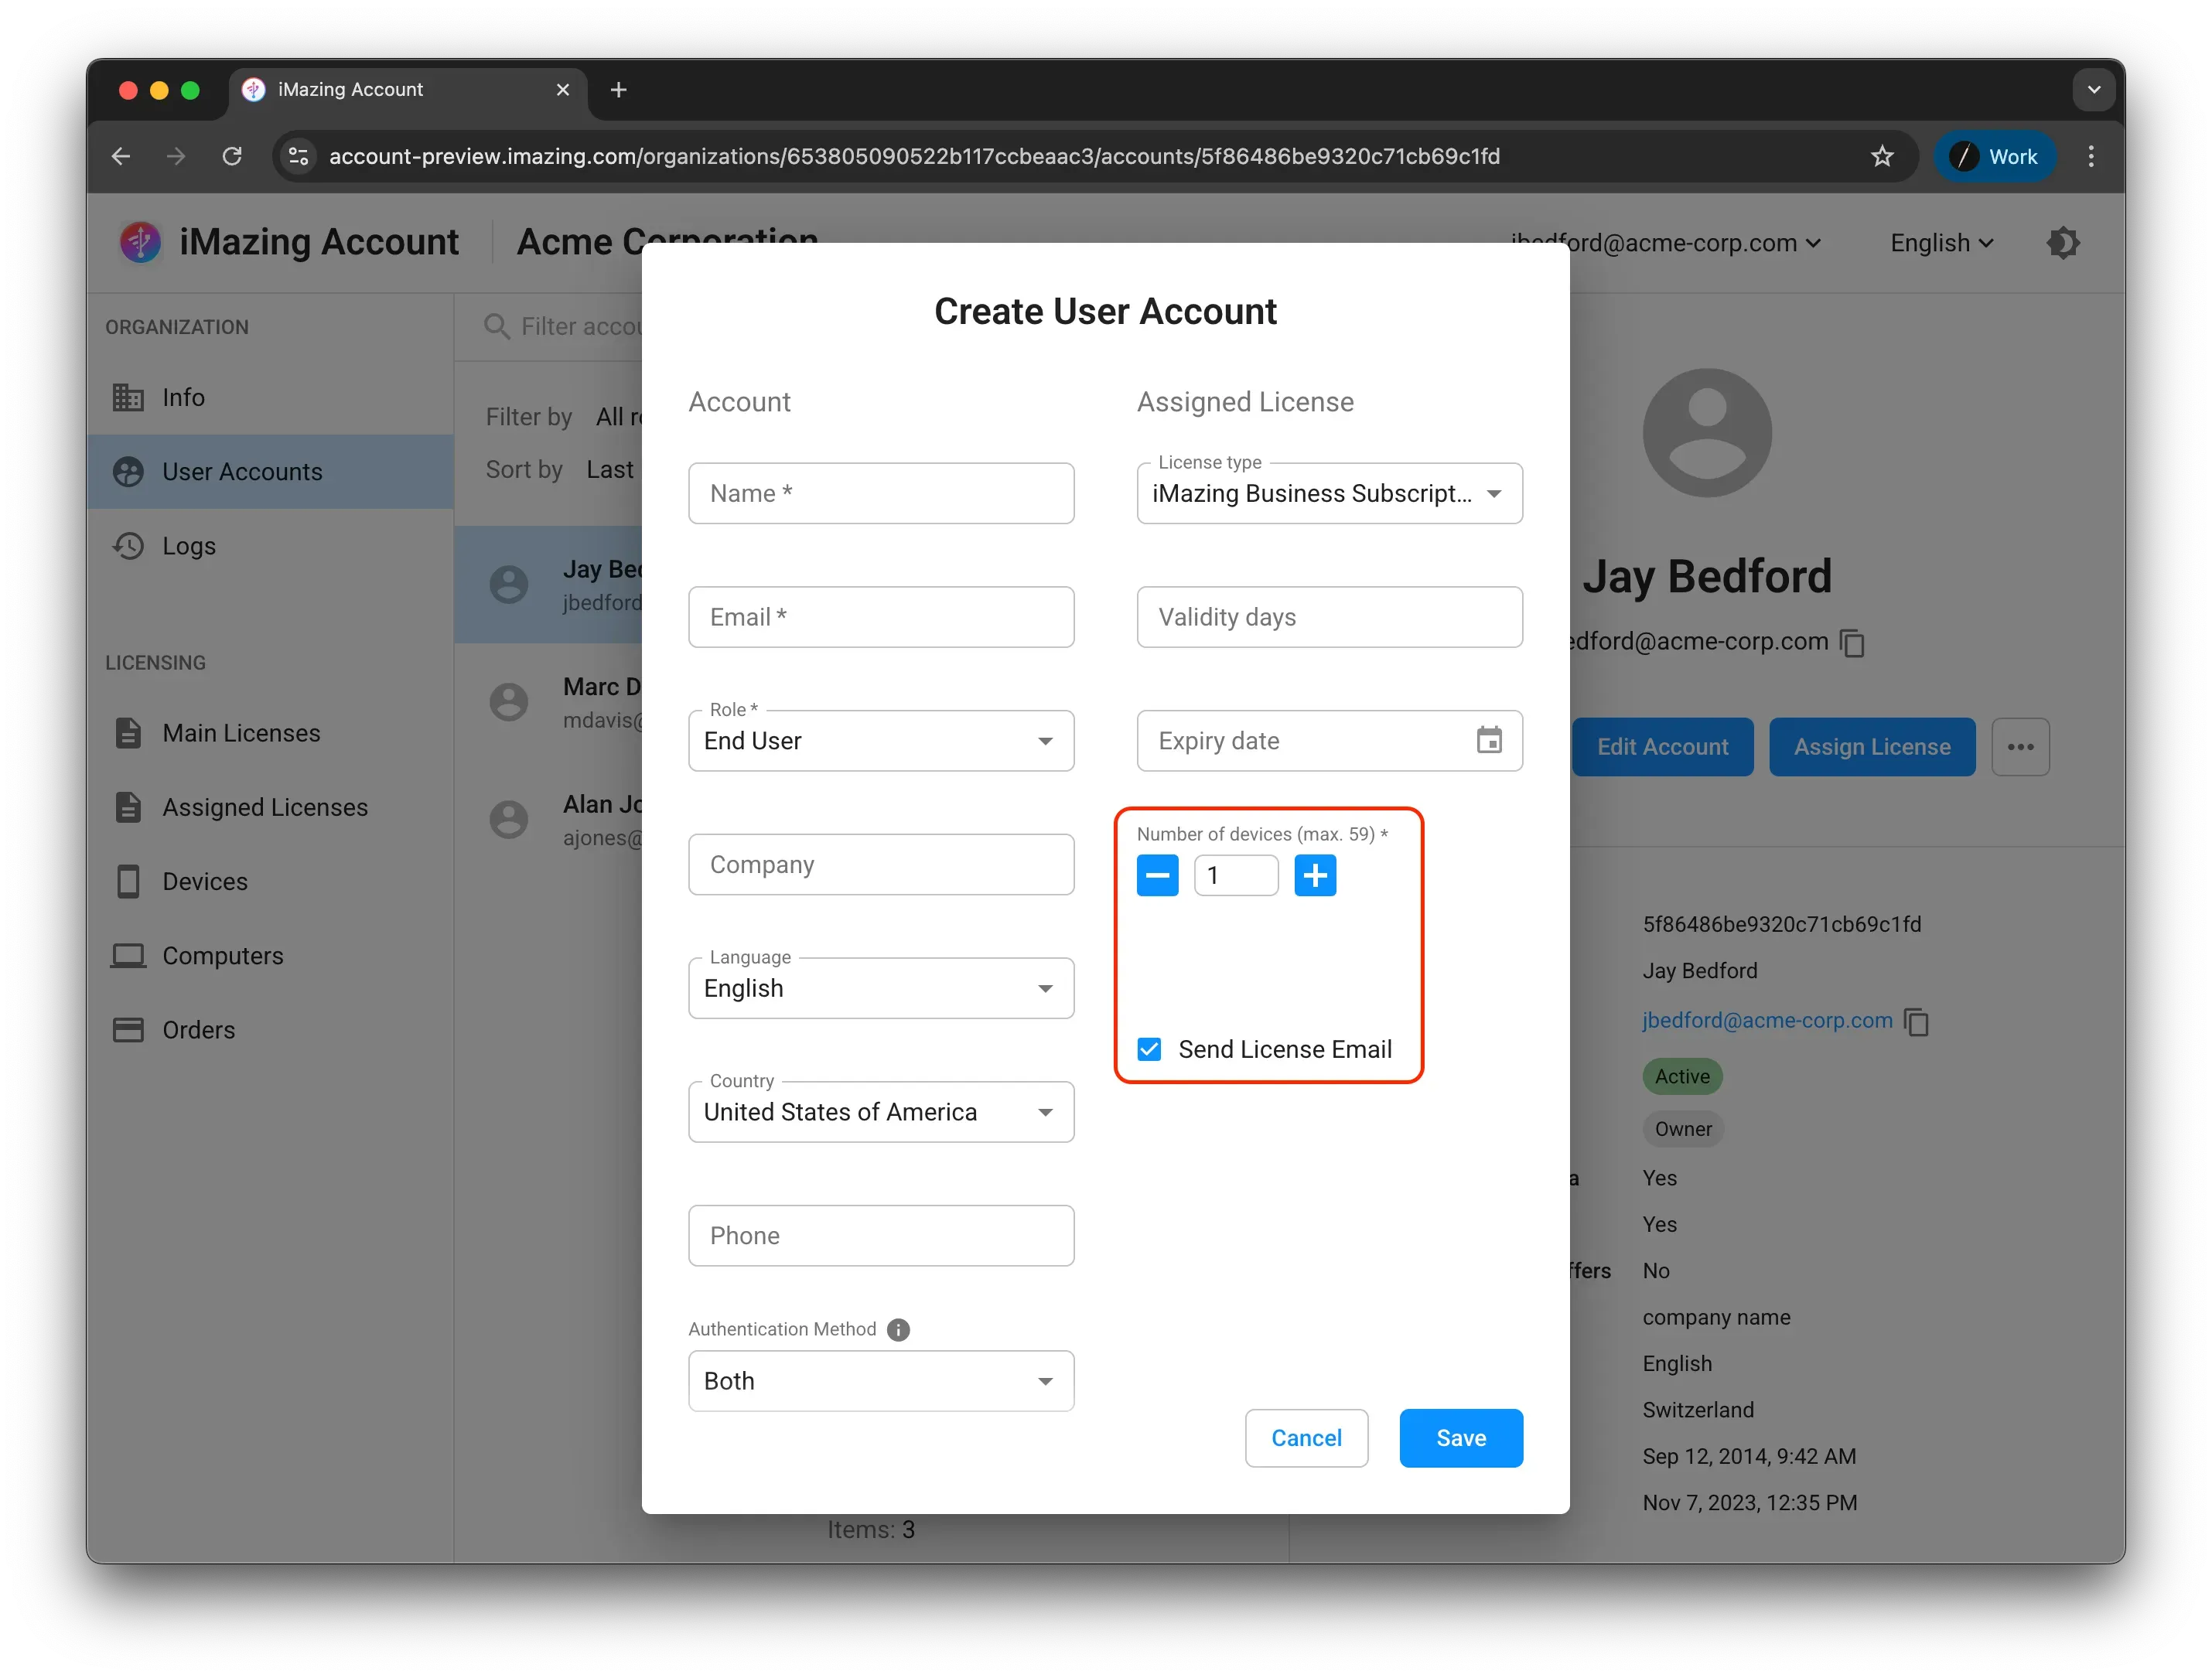
To automatically send an invitation with the user's license to the newly created account's email address, select the Send License Email option. The email will contain an iMazing license activation code, a link to download iMazing, and links to our guides on how to use iMazing.
When clicking Save, the account will be created and one or more iMazing licenses will be reduced from your pool of purchased licenses (in section Main Licenses) and assigned to the new user account.
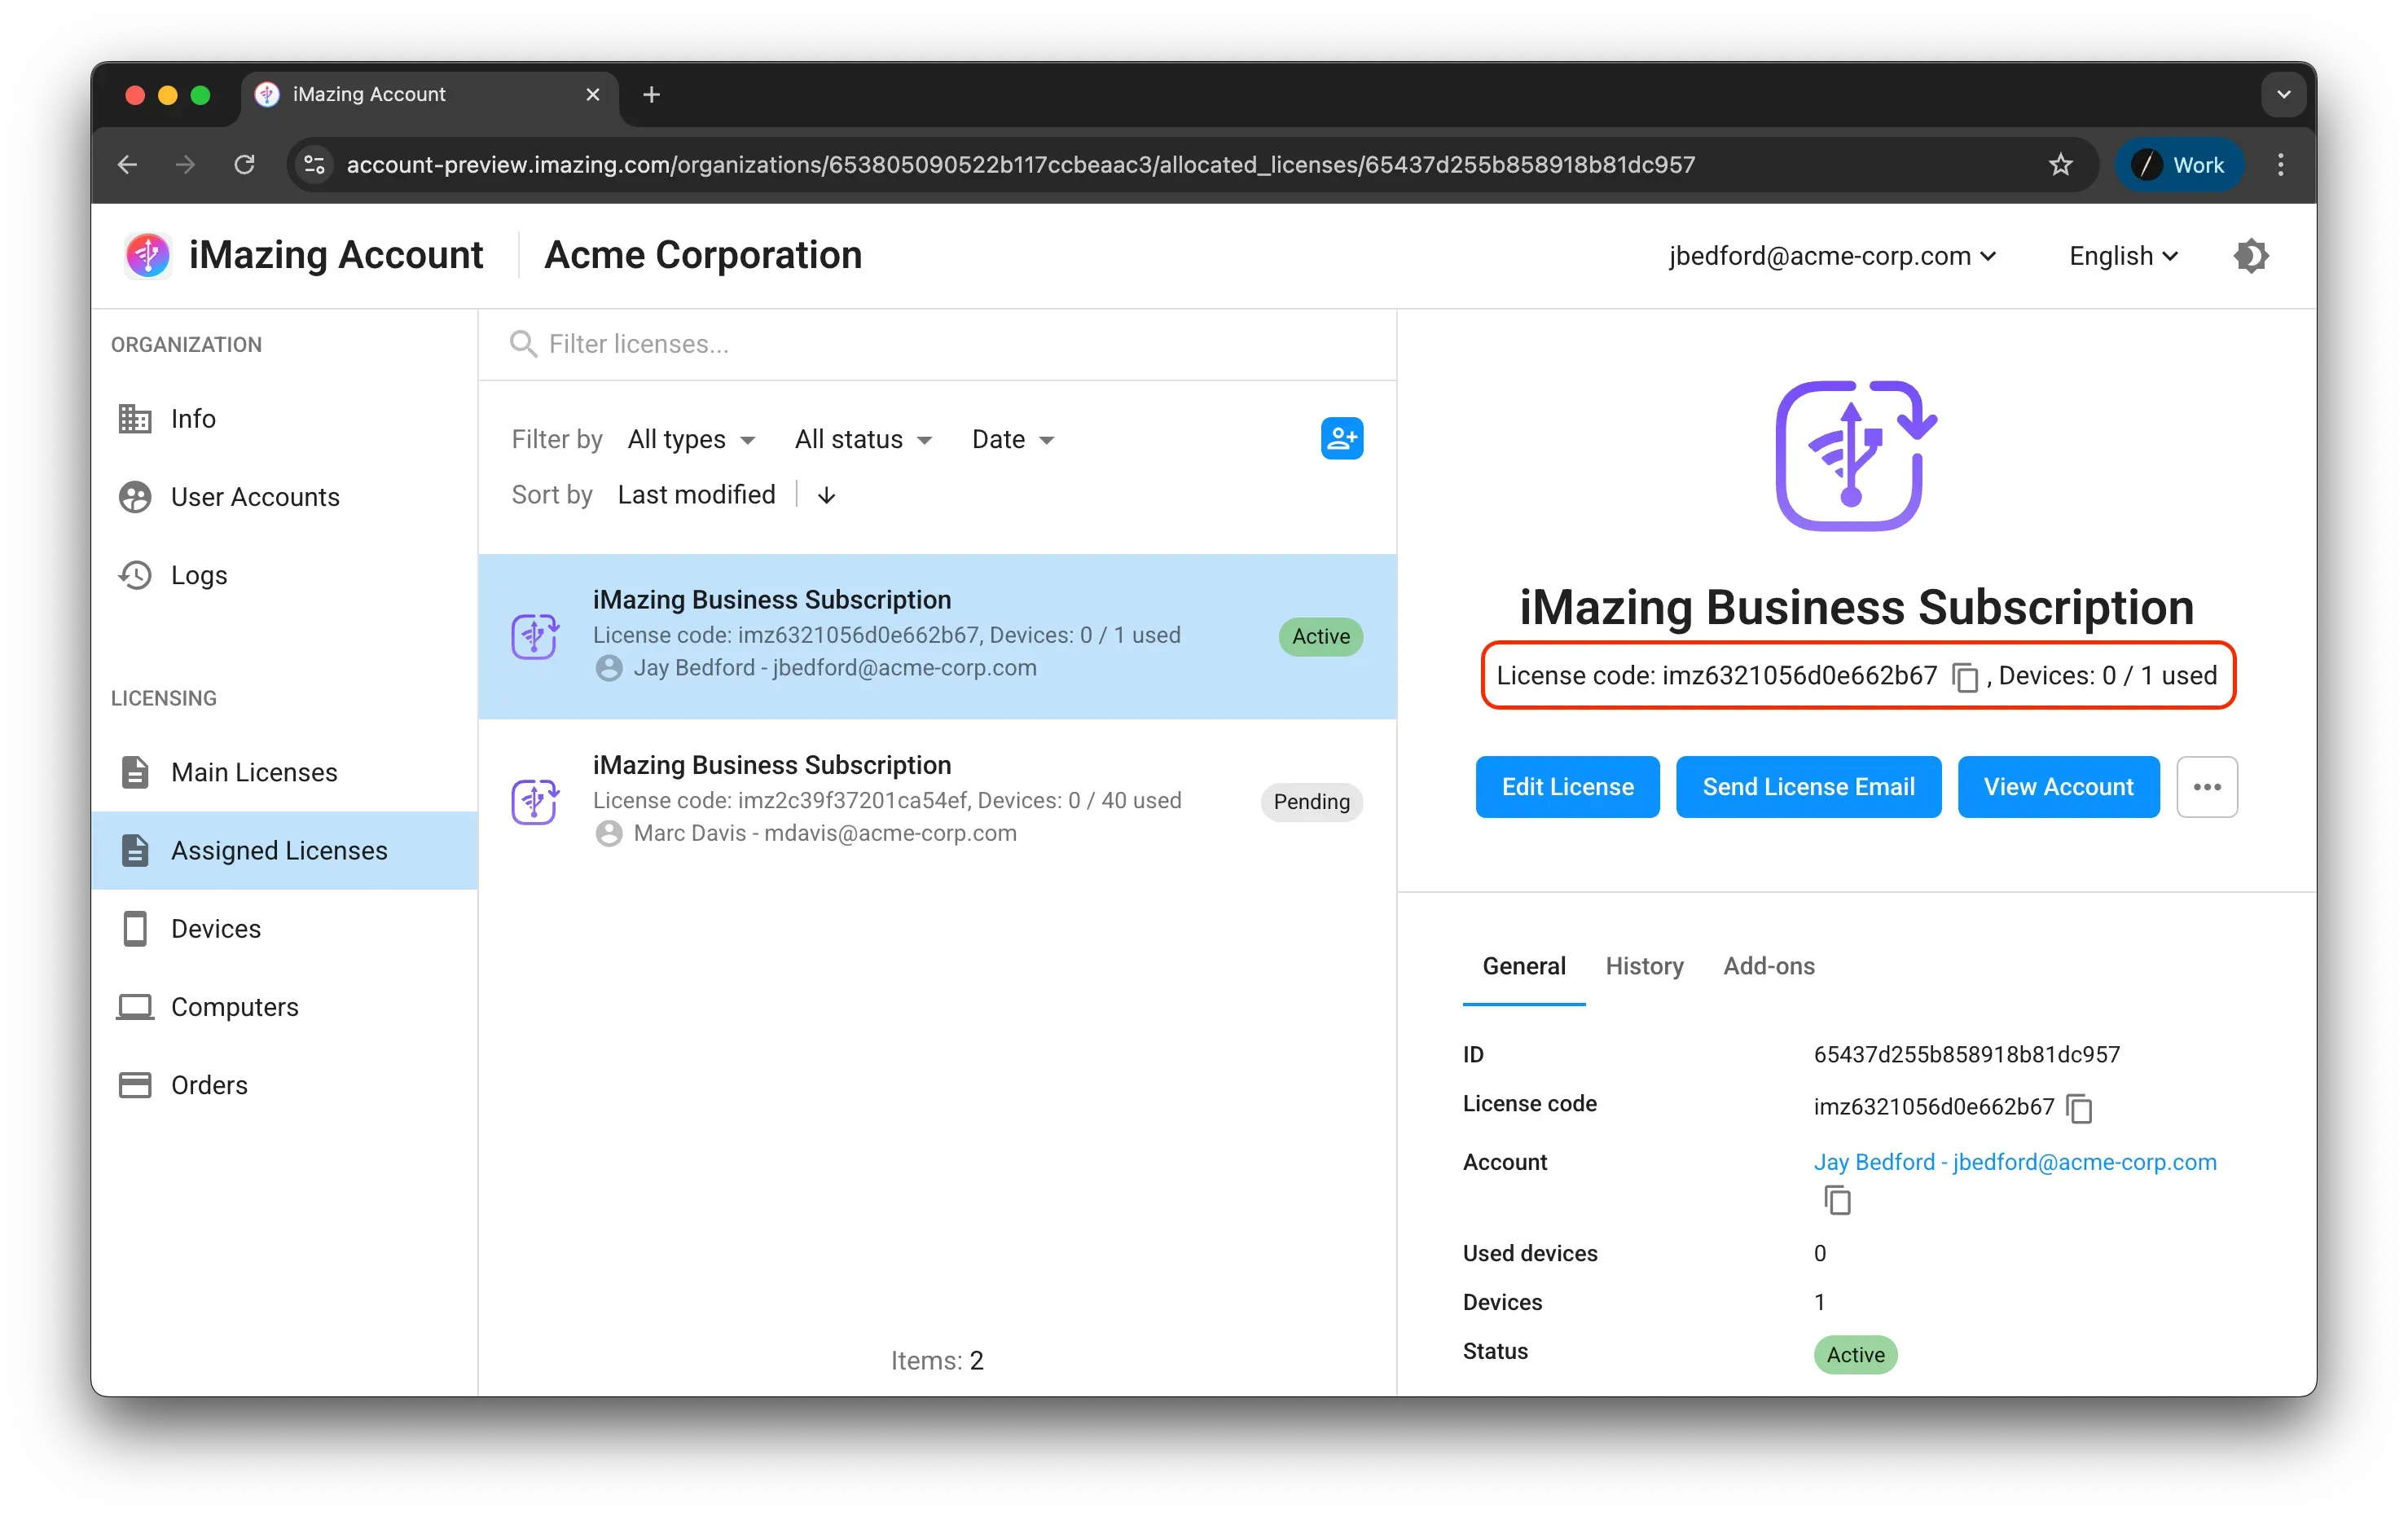
In the Assigned Licenses section, you will see the license you just assigned along with its details, including the License code and number of Devices.
Note:
- Users with the End User role can only activate iMazing and use it with their assigned license, but cannot log into the iMazing Account. For more information, see 9.1. User roles for more details.
- To learn more about license Validity days and Expiry date, refer to 9.3. License Fields: Validity days and Expiry date
Assigning an iMazing license to yourself or an existing user in your organization
There may be situations where you want to use one of your purchased iMazing licenses with your own account or another existing account in your organization, rather than sending it to a new end-user.
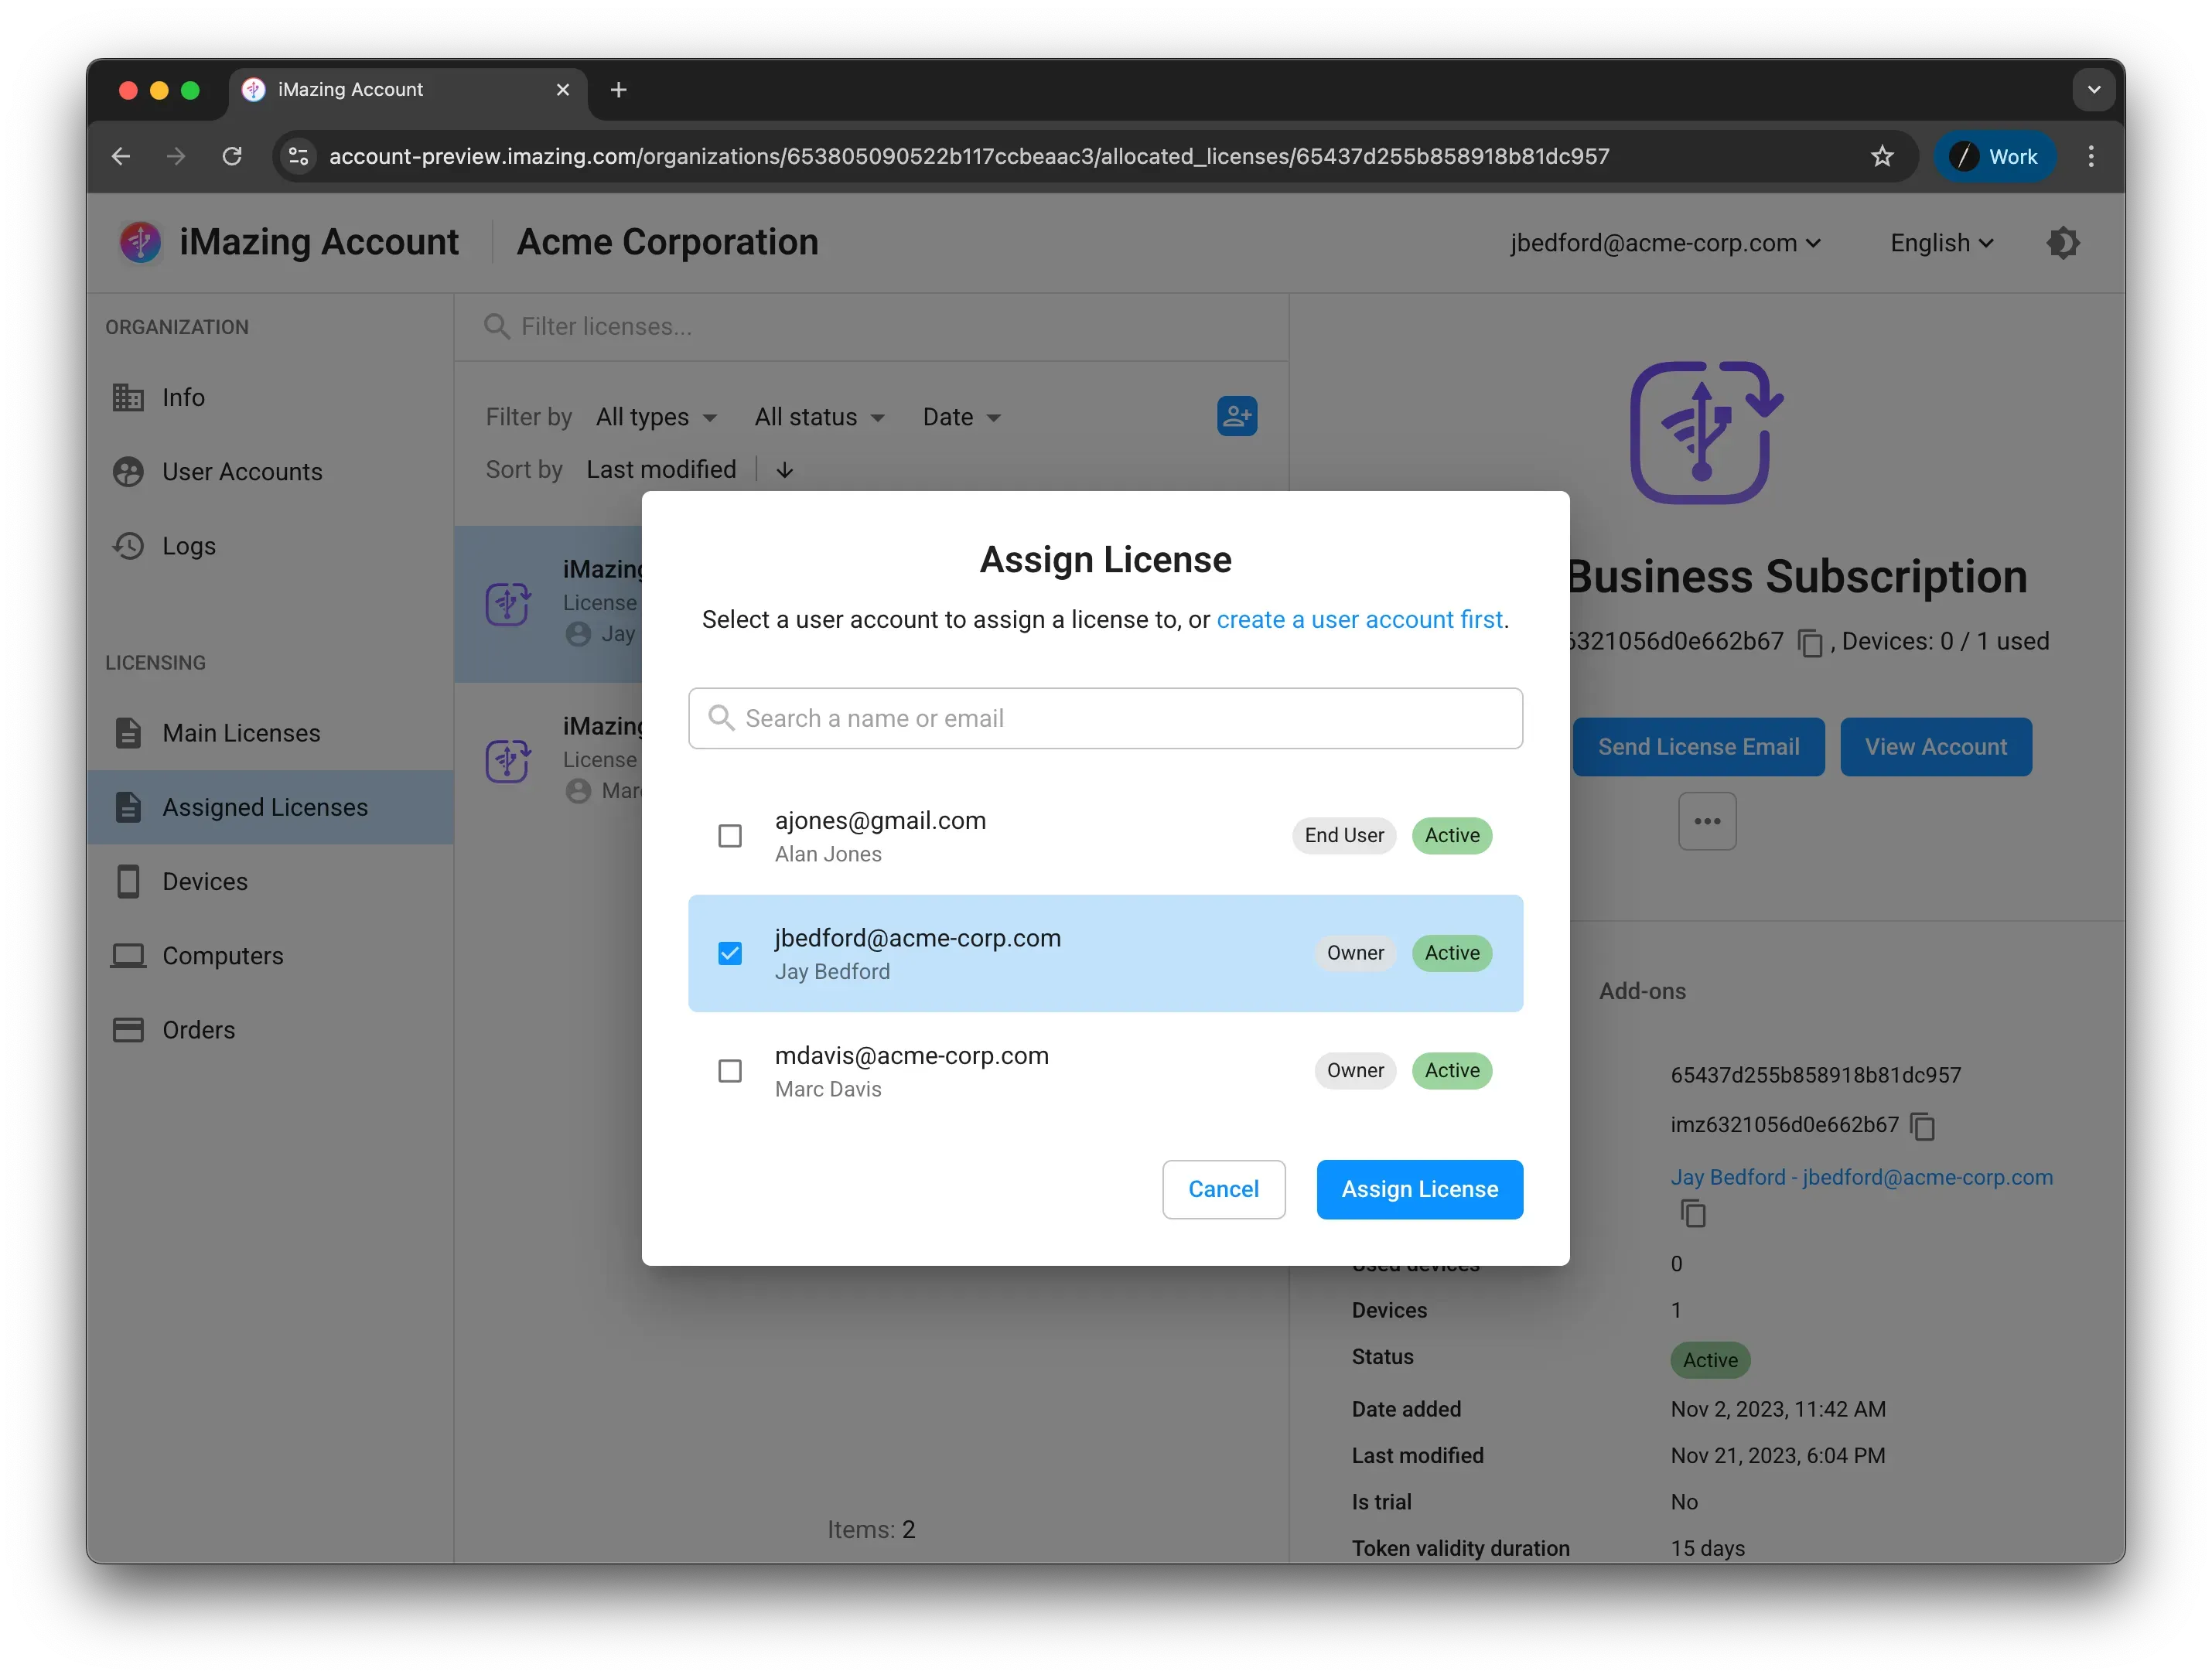
In the Assigned Licenses section, click on the + button and select Assign License to Existing Account.
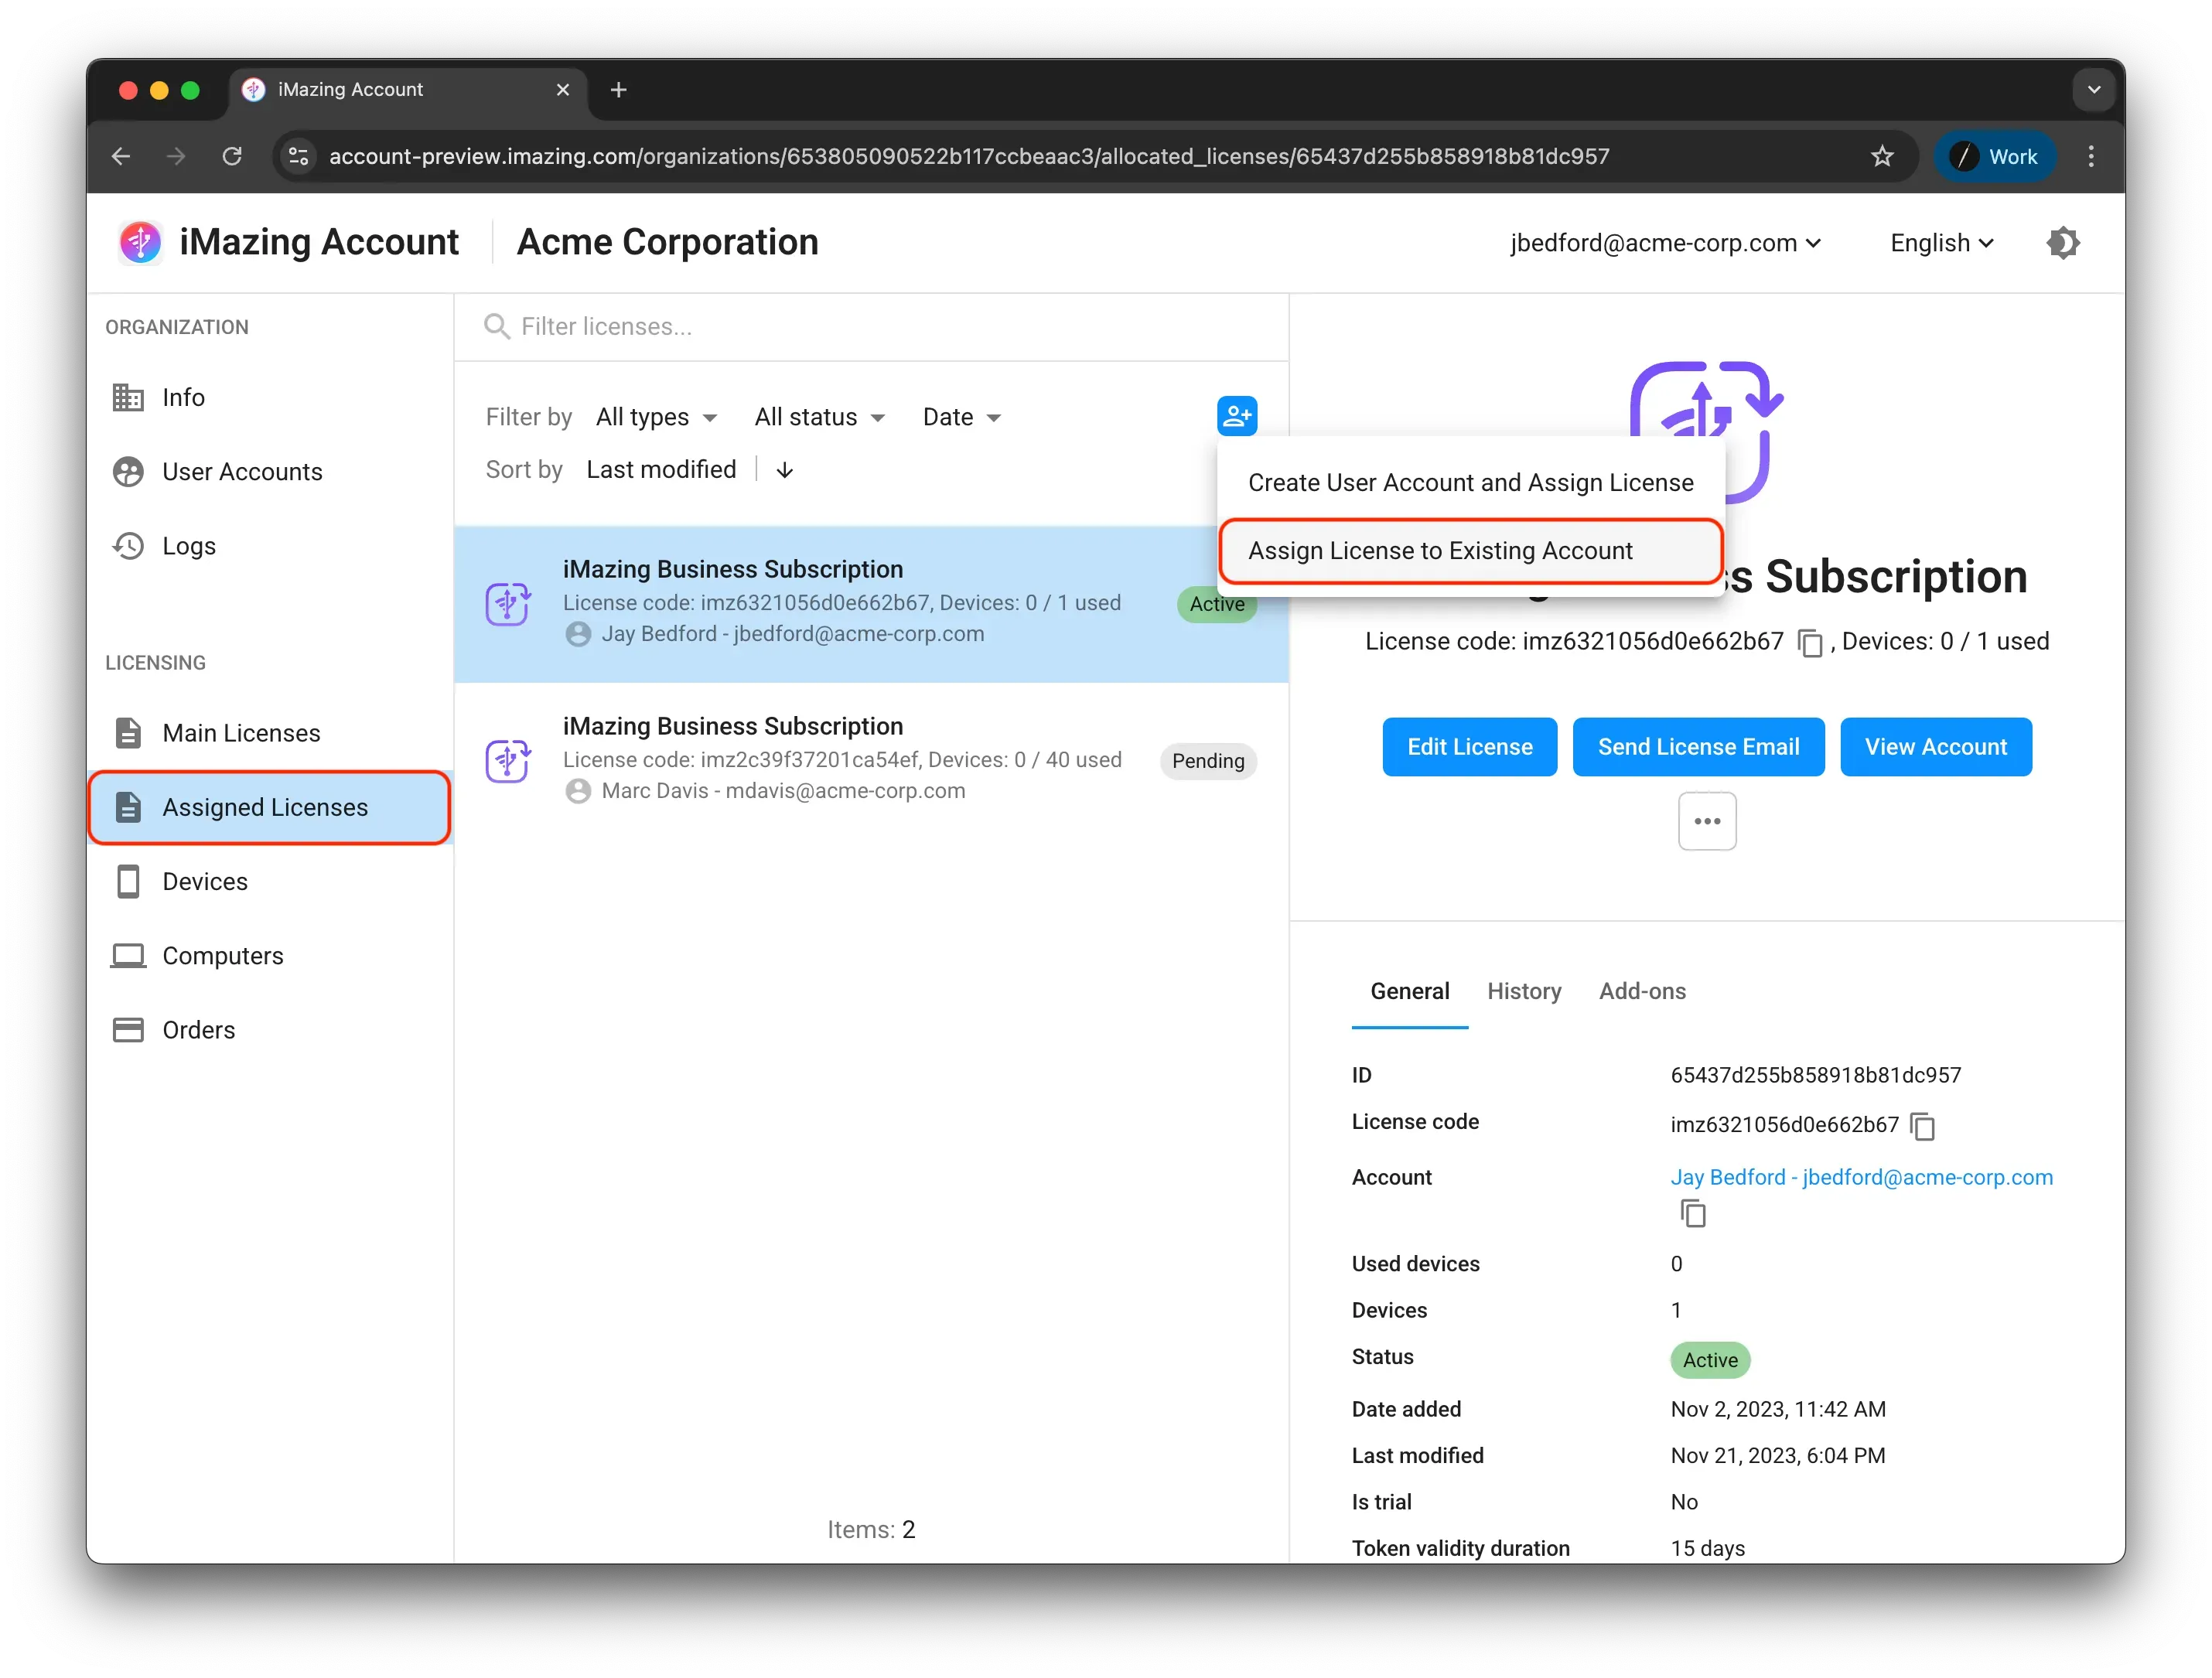
Select the user to whom you want to assign a license:
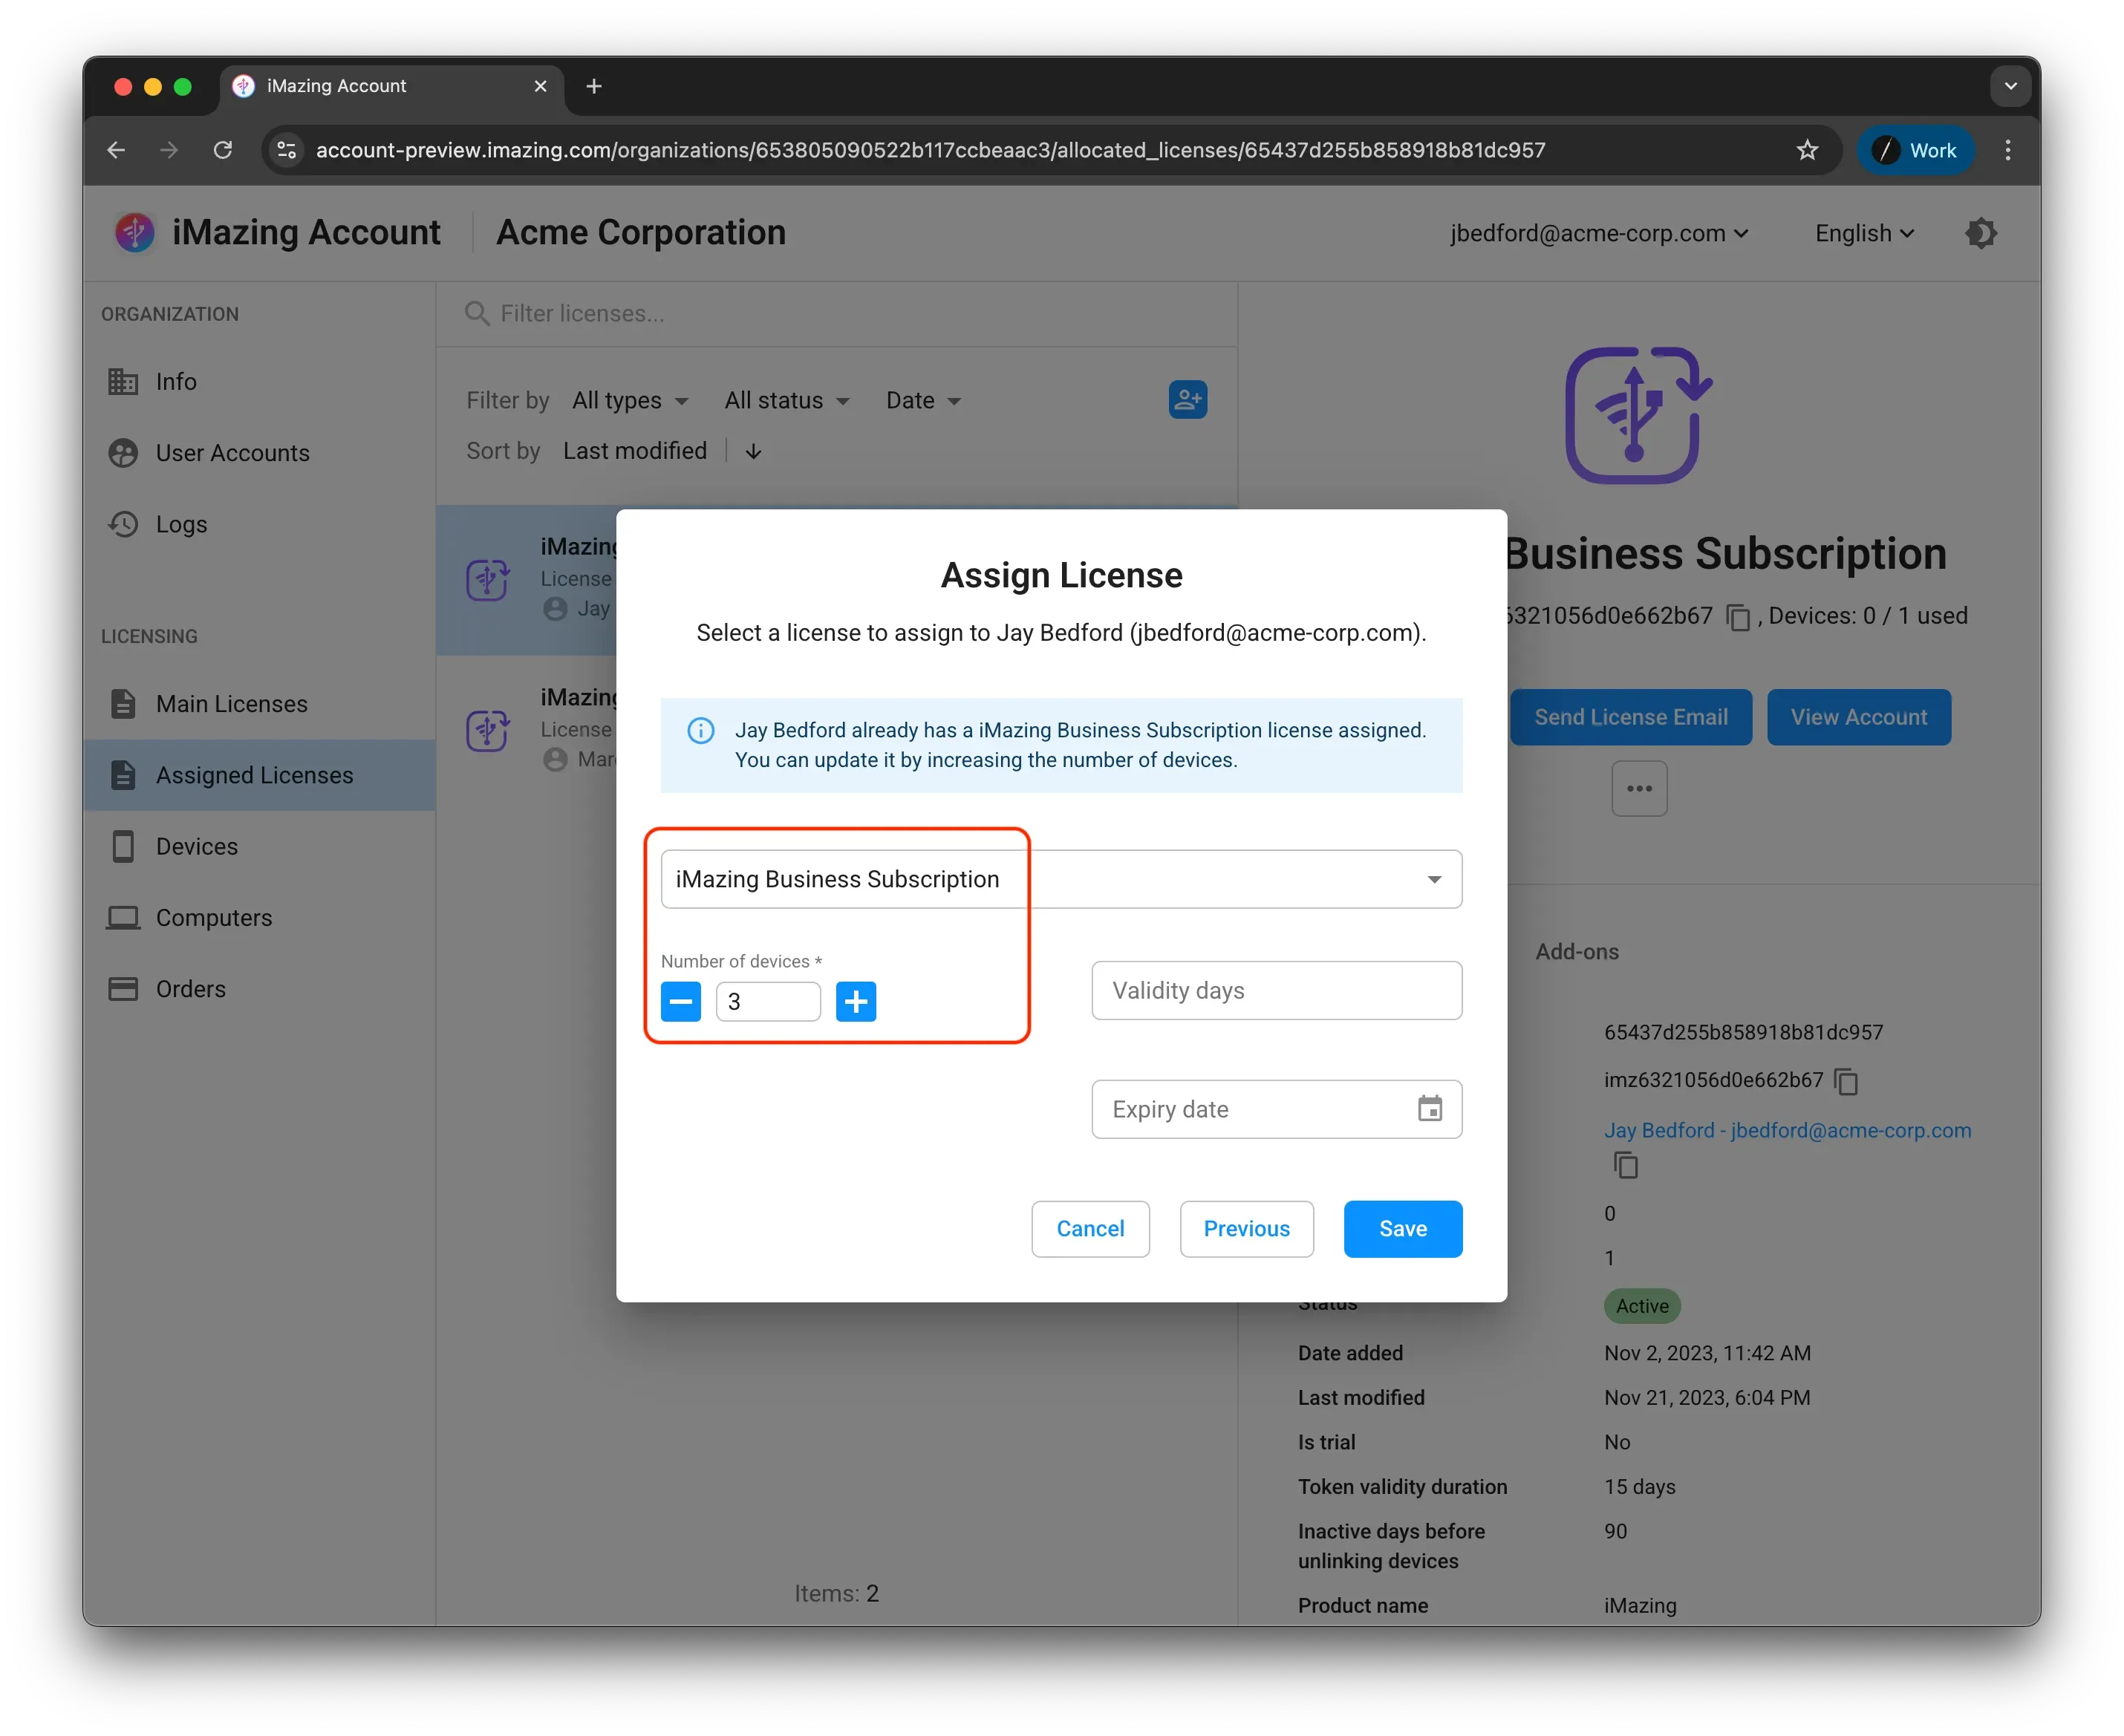
Choose a license to assign to the selected user and specify the number of devices this user will connect to iMazing:
Adding more devices to an existing assigned license
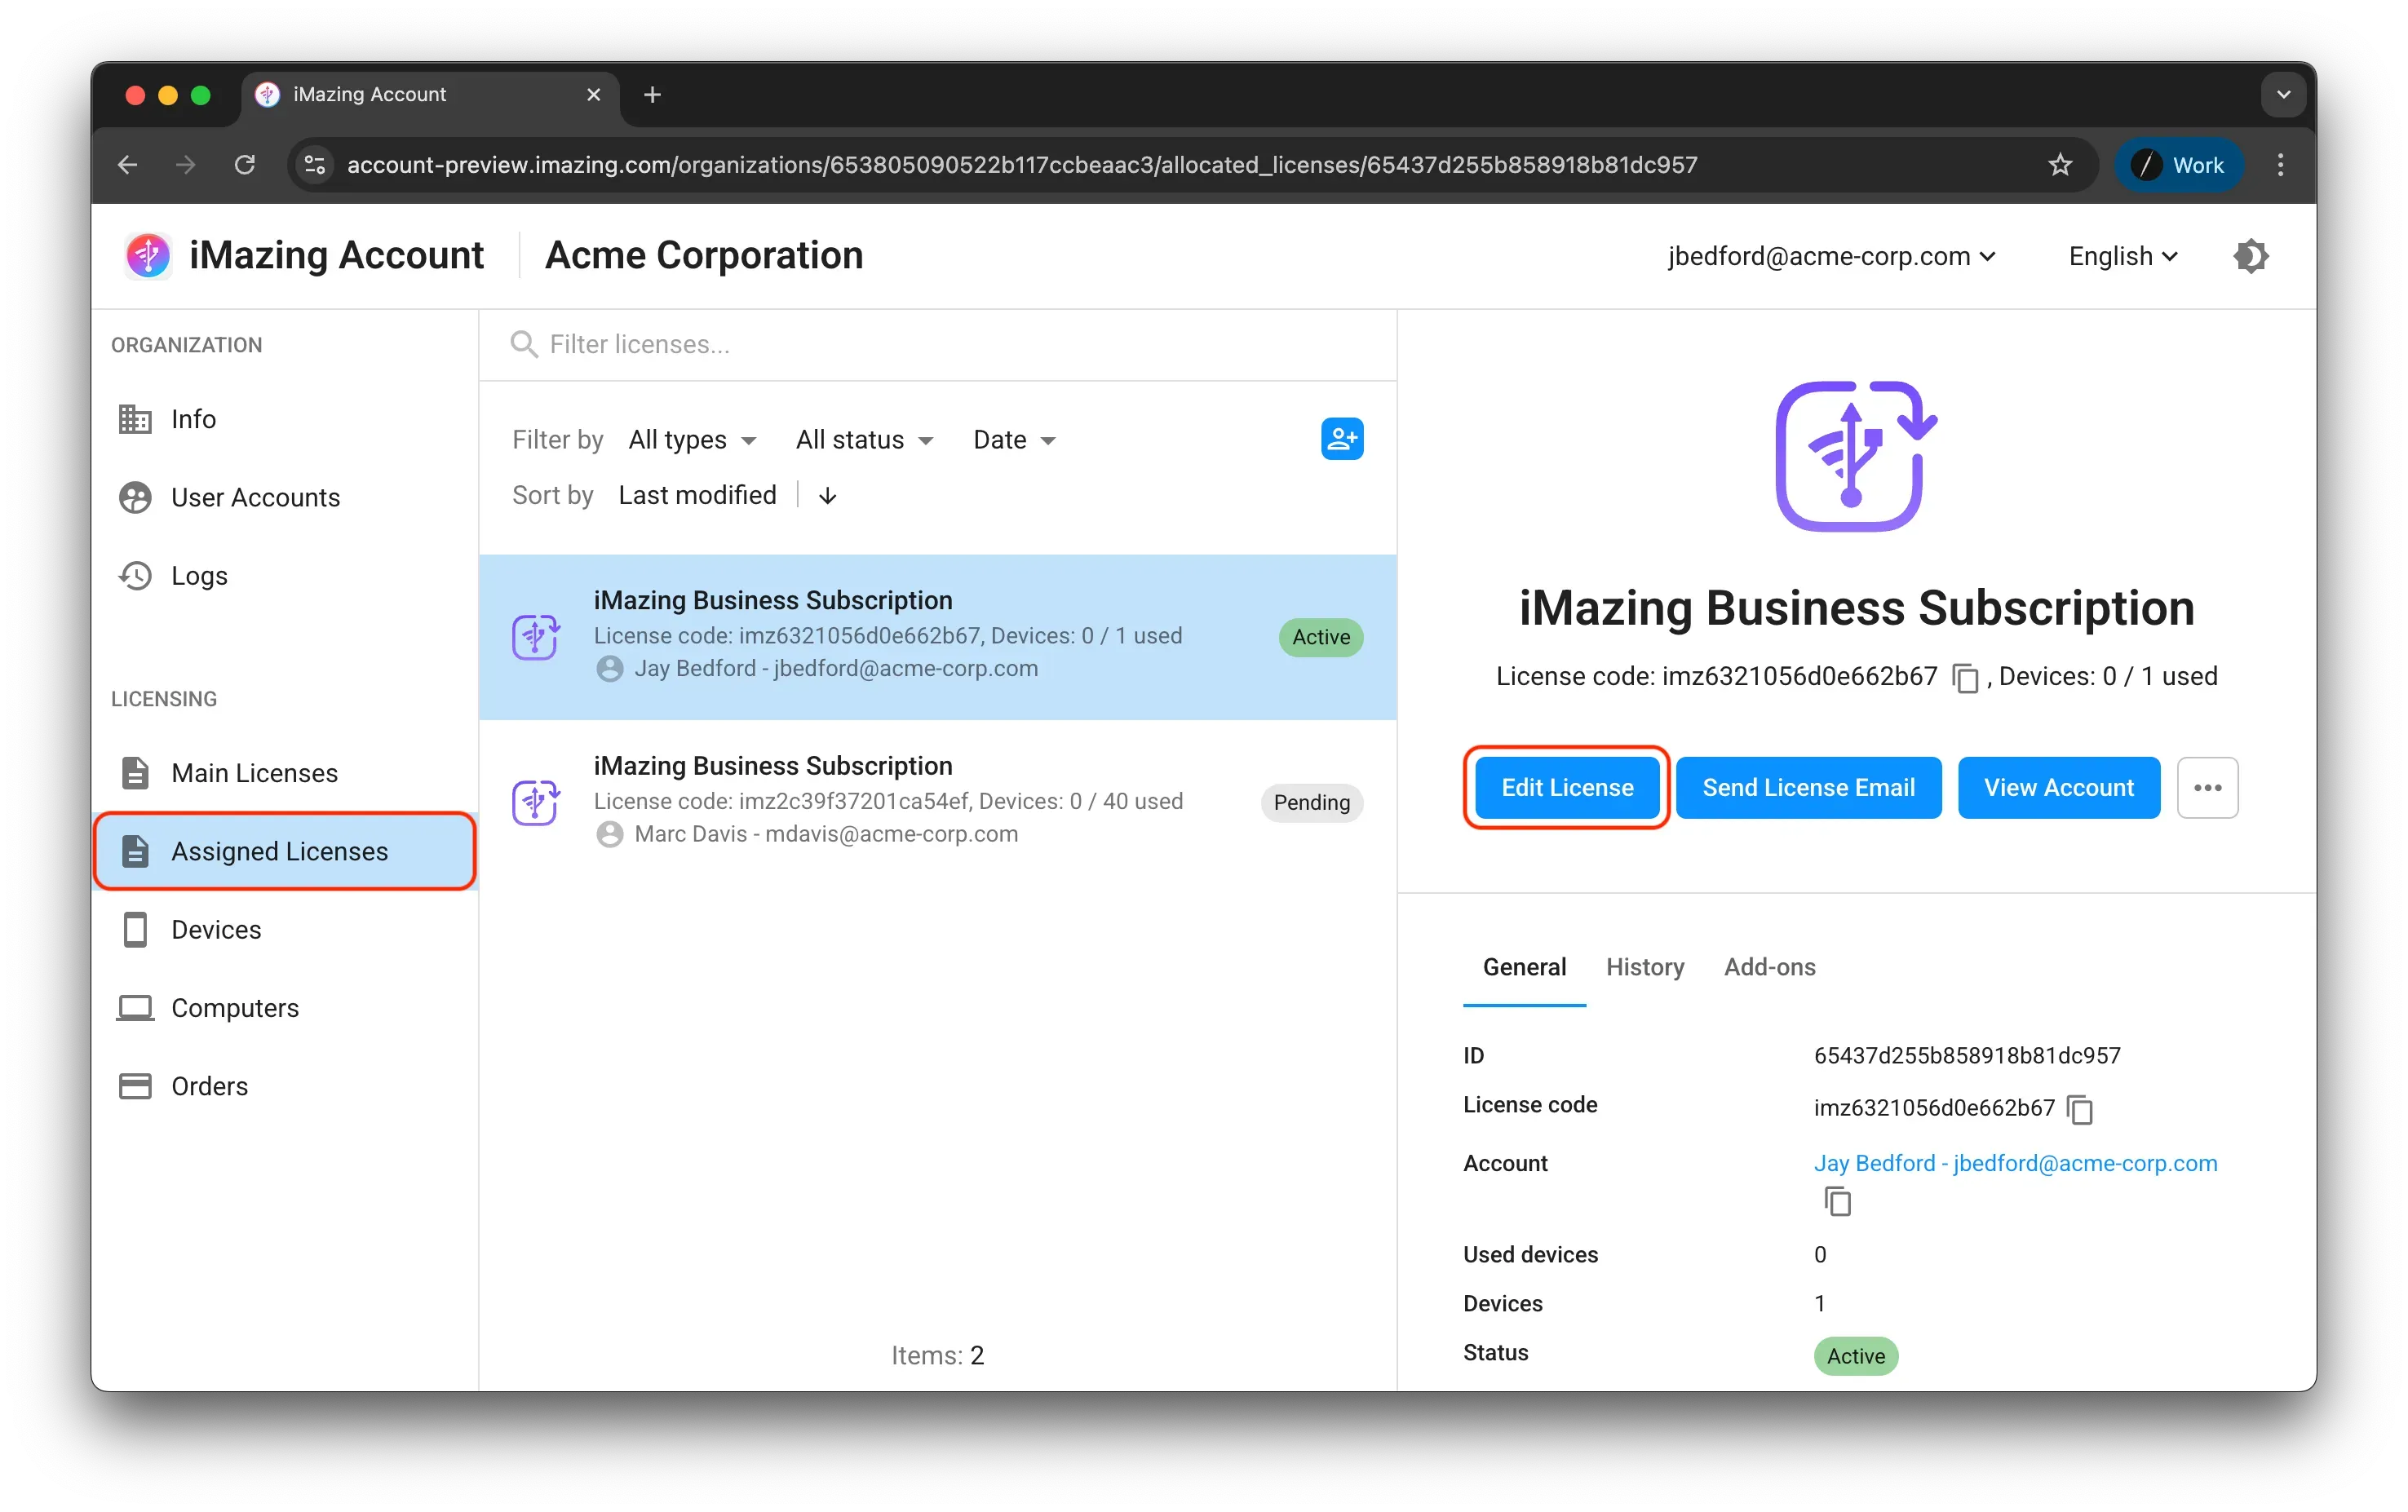
You can add more devices to an existing assigned license by either following the flow explained in: 5. Assigning an iMazing license to yourself or an existing user in your organization or by going to the Assigned Licenses section, selecting the Assigned License of your choice, and clicking the Edit License button.
Understanding the status of your license pool (Main Licenses)
Purchased iMazing licenses are first assigned to the organization. Then they can be assigned to a user, whether at new account creation or by adjusting the number of devices for an existing user as mentioned previously.
You can determine the number of licenses your organization has available for assignment by visiting the Main Licenses section. The available licenses will be listed under the name of the license.

When assigning a license to a end-user, the license will draw from the organization main license count, and will appear on the end-user account as Pending. When the end-user uses their license code to activate iMazing, the license becomes Active.
With the iMazing Business Devices license (legacy plan), licenses in Pending state can be removed from user accounts and returned to the organization for reassignation to another client. But once activated, the license can no longer be used for activation with another device.
With the iMazing Business Subscription, you can remove and reassign the license to another account anytime.
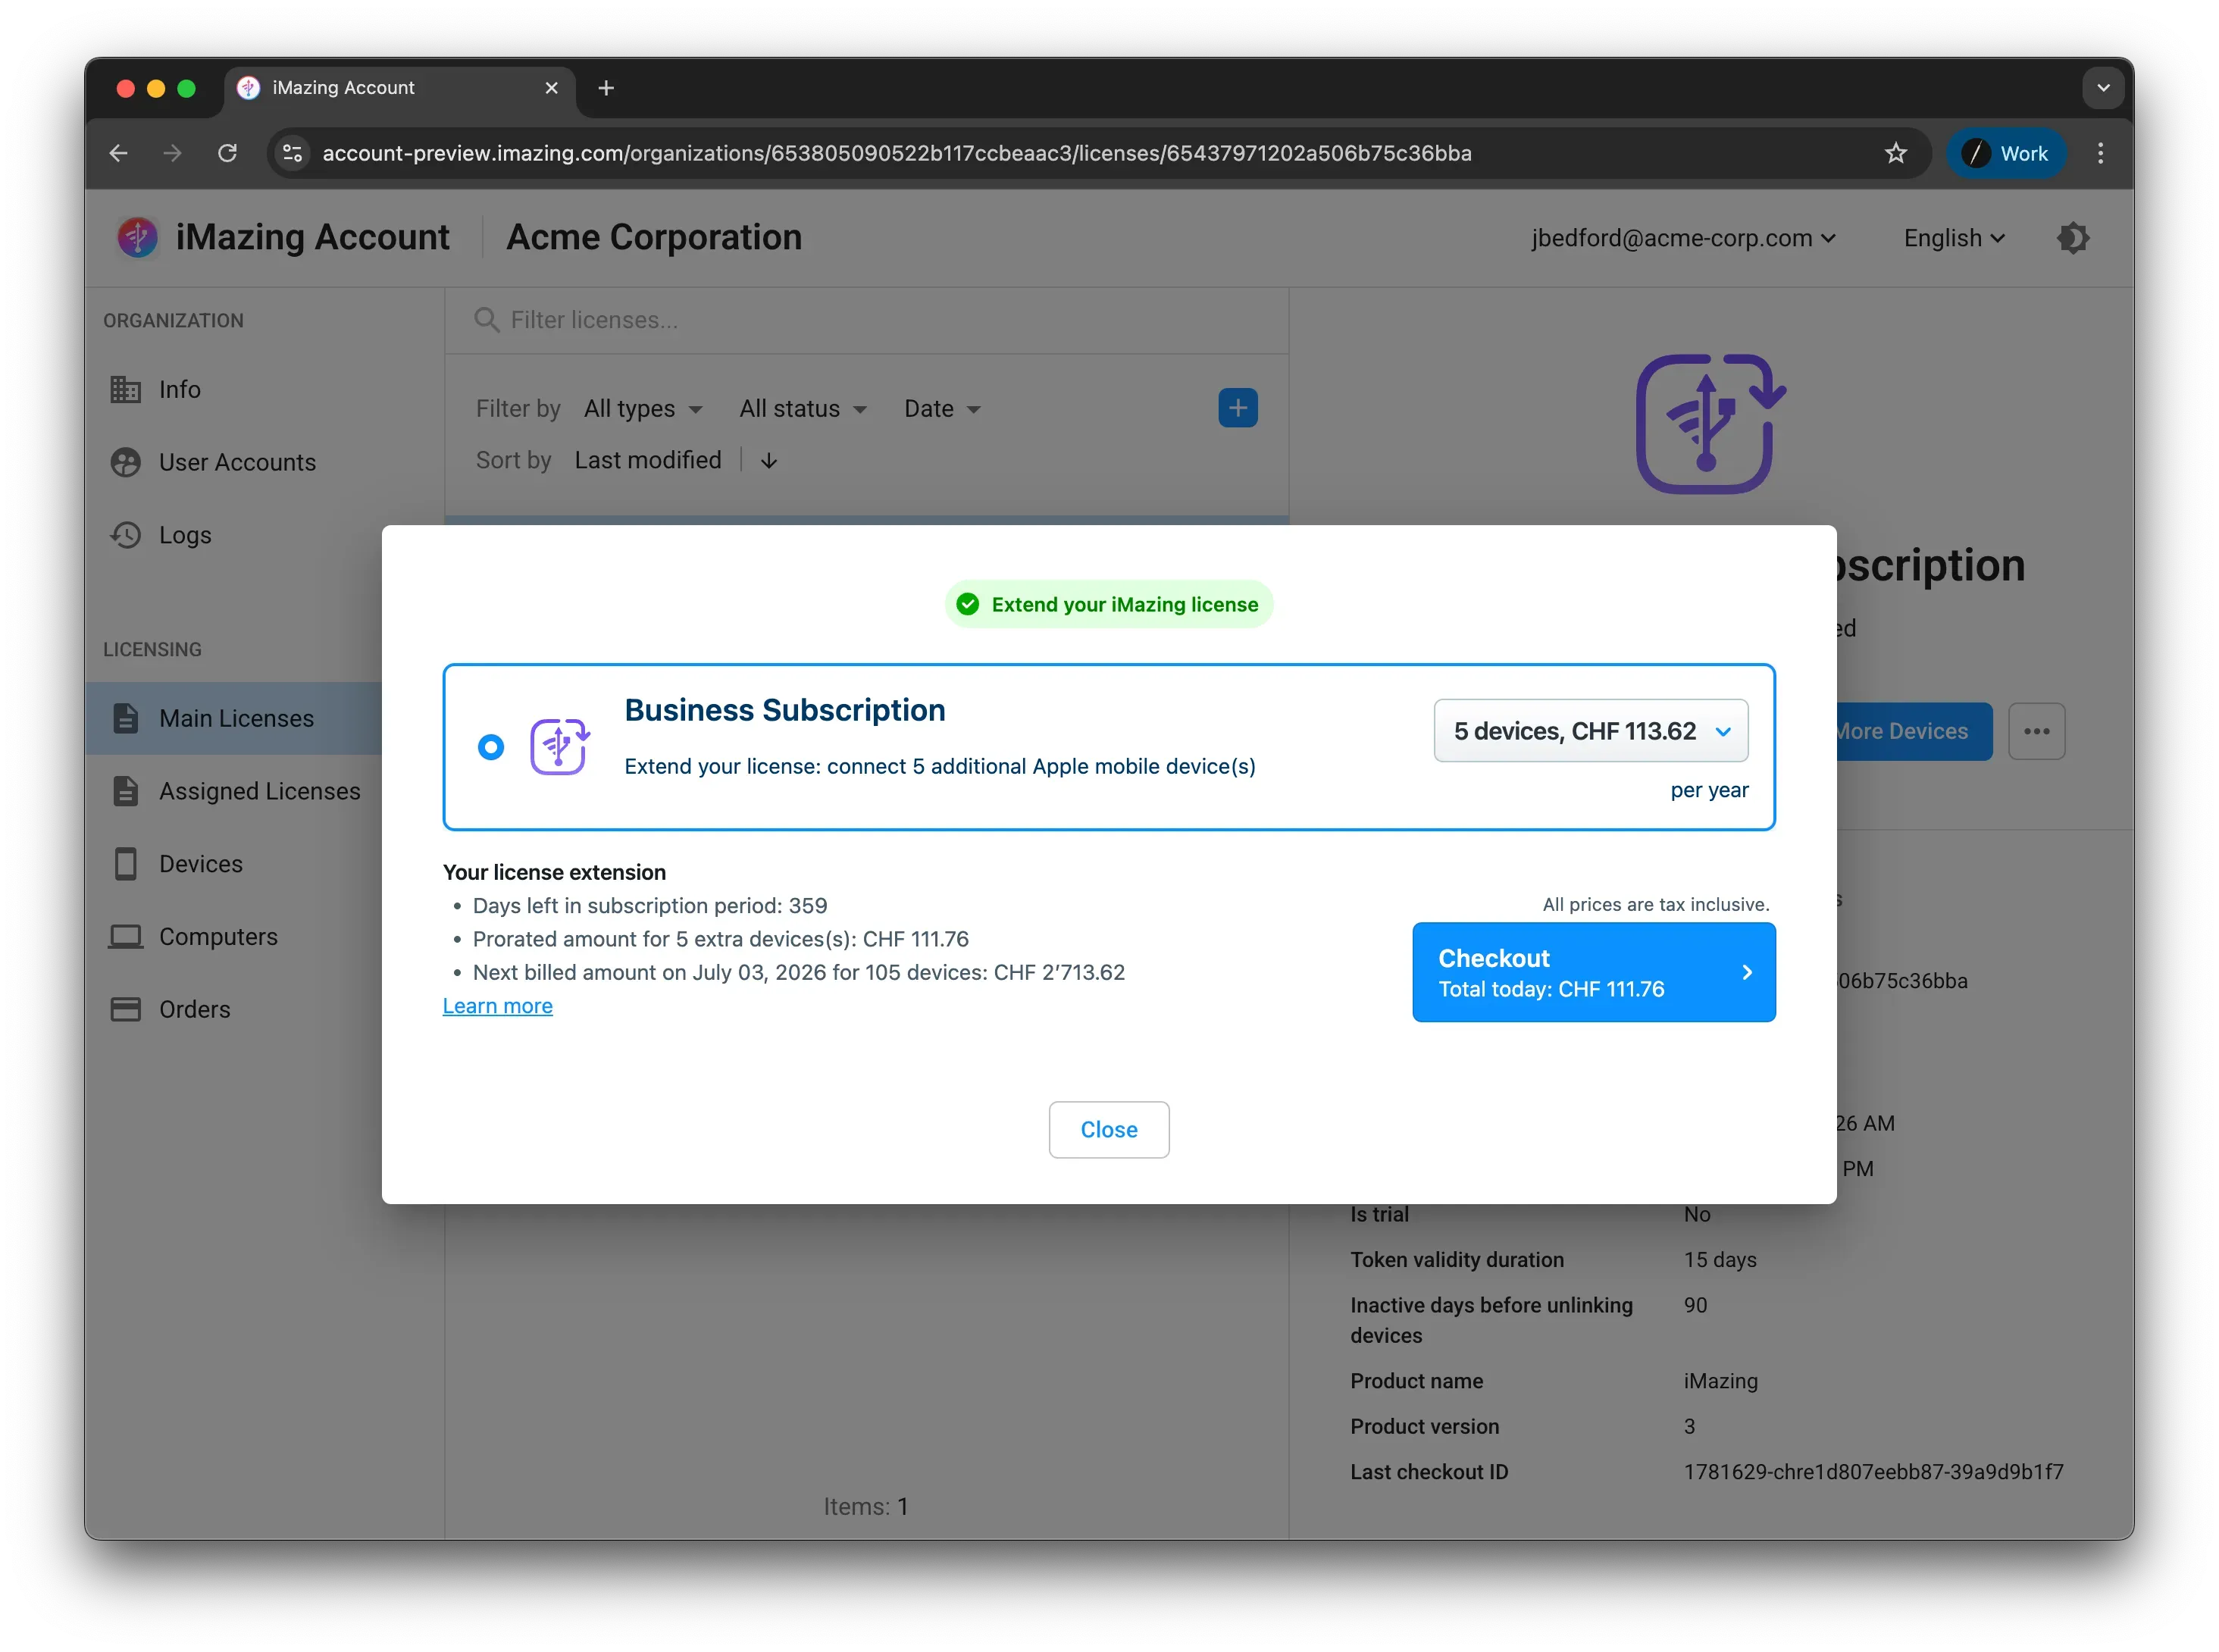
Purchasing more devices when your license pool is exhausted
Once you have assigned all of the purchased iMazing device licenses in your organization and they have all been activated by users, assigning further licenses to users will require making an additional purchase.
To purchase additional licenses, go to the Main Licenses section of your organization account, and select the iMazing main license of your choice, if not already selected. Then, click the Buy More Devices button on the right pane.
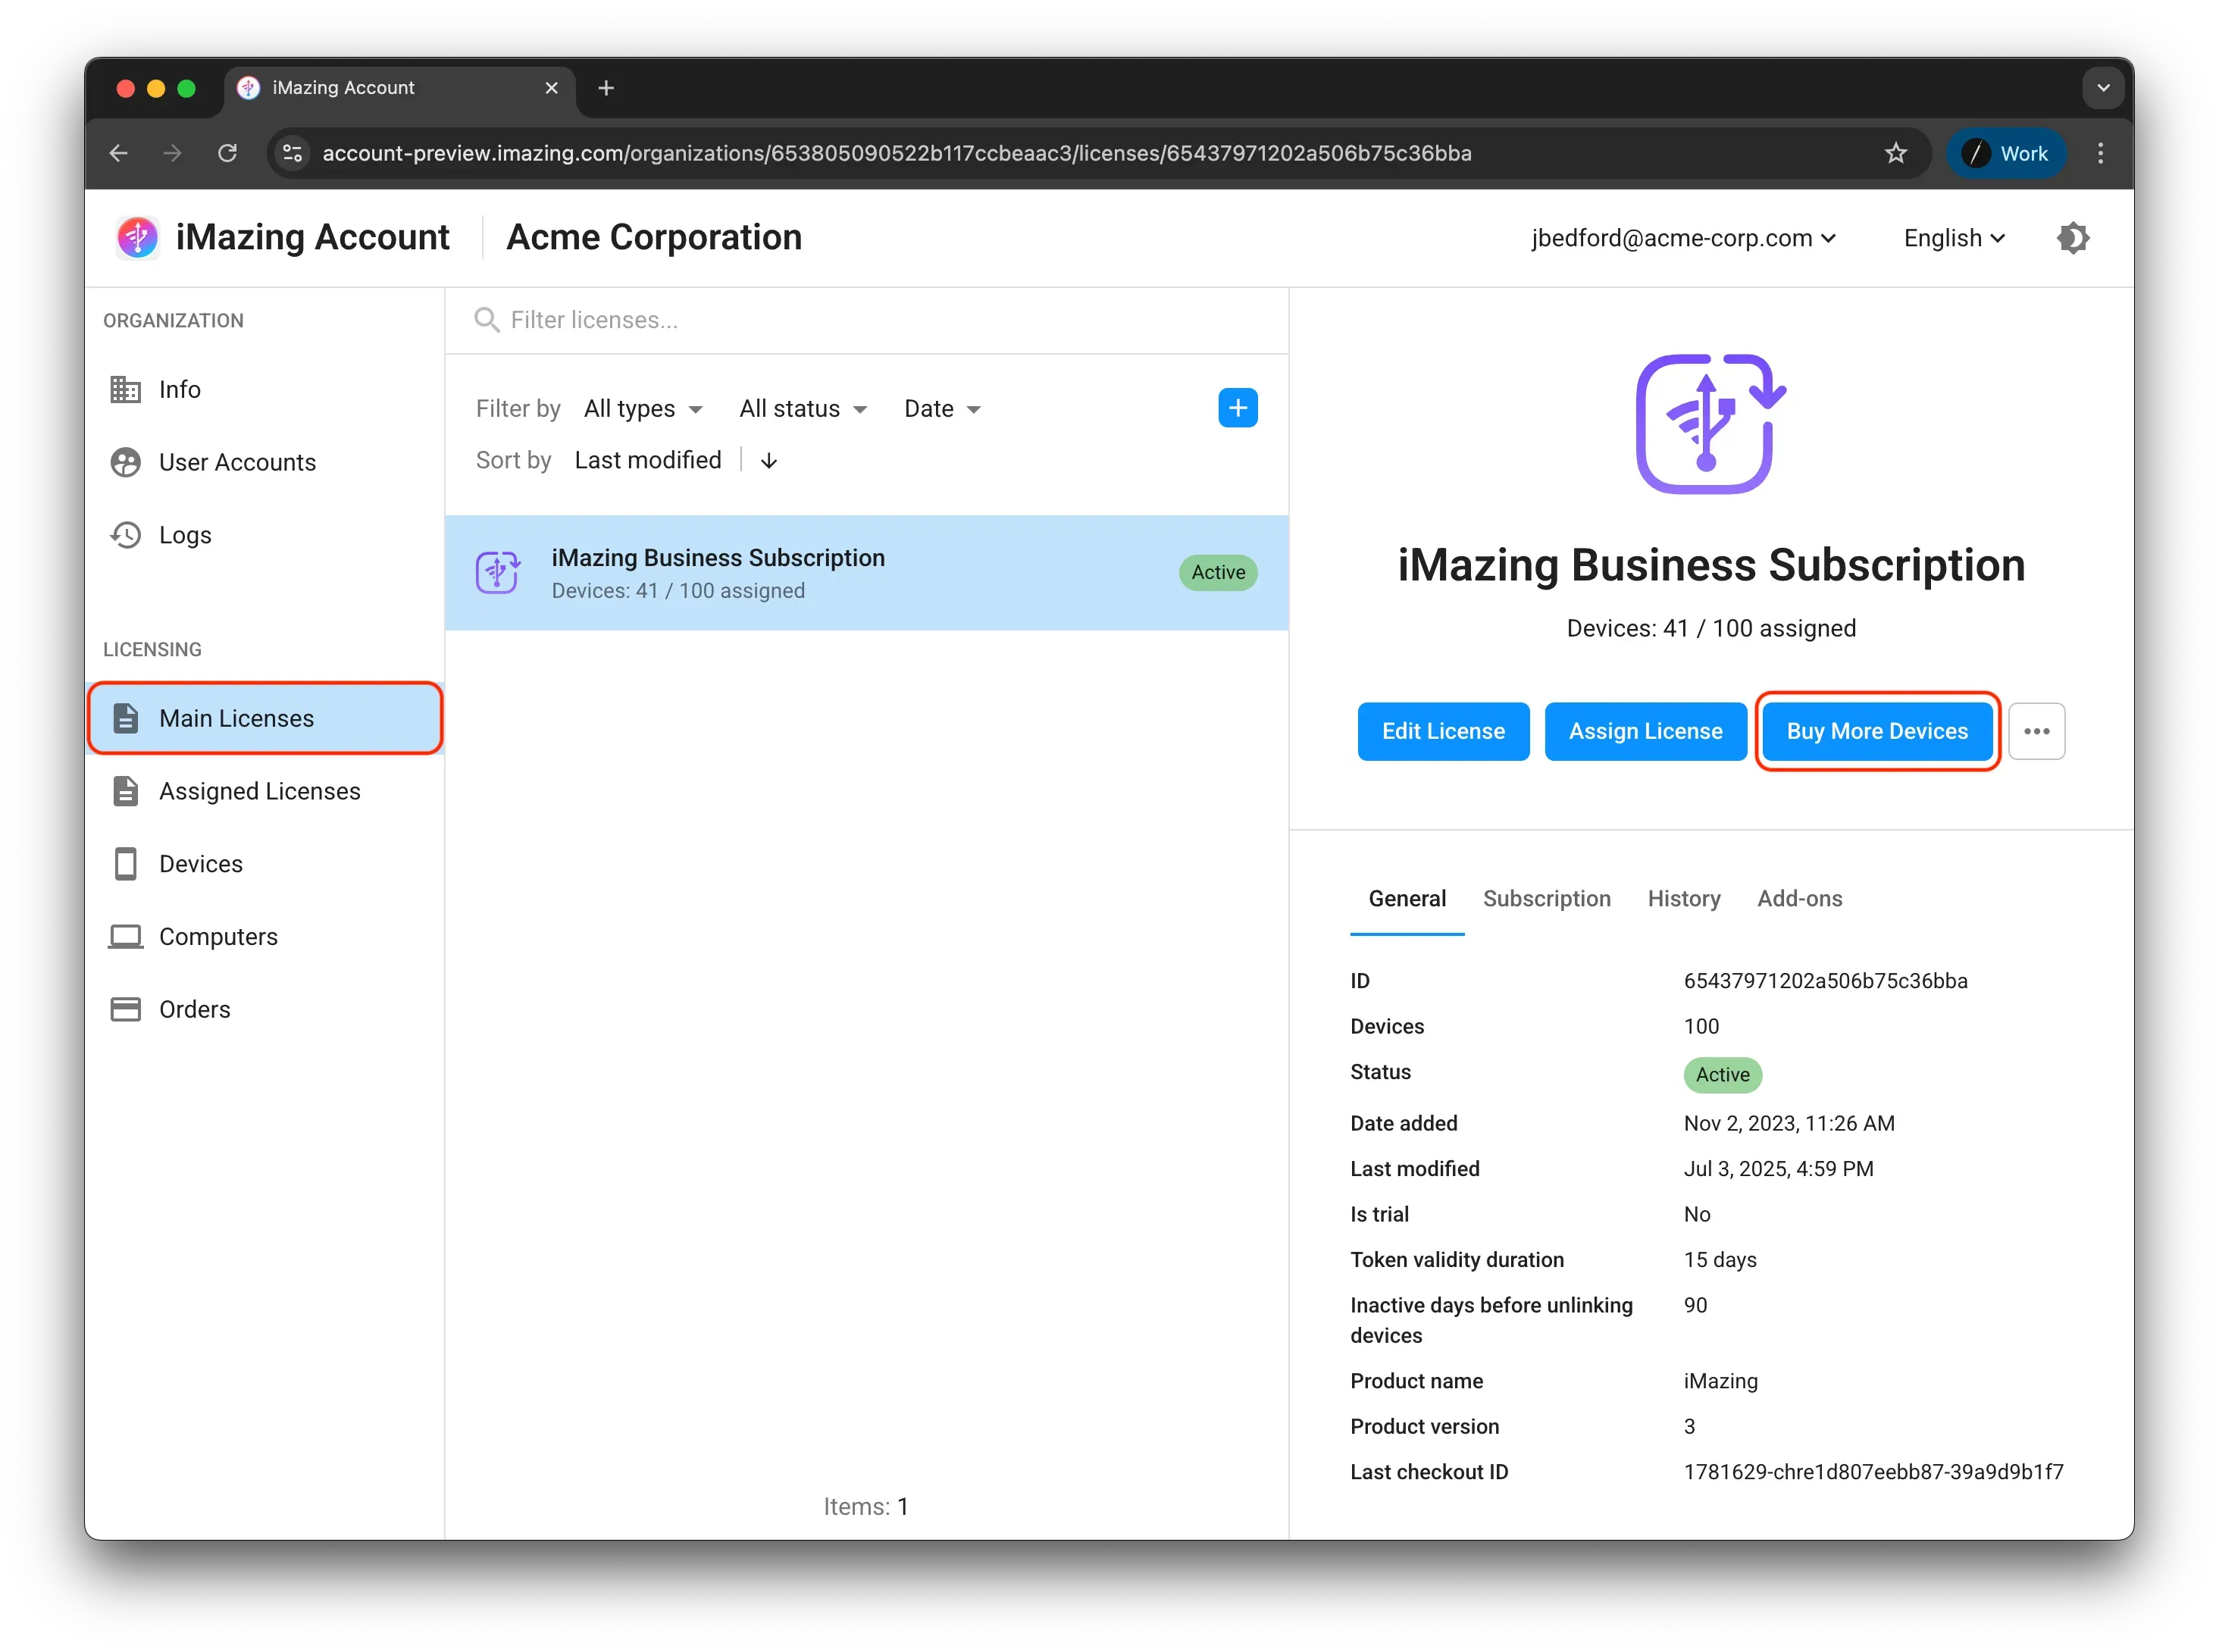
The iMazing store will pop over, enabling you to select the devices tier you are interested in, and to complete the checkout just as you did on your first purchase.
Understanding automatic license device unlinking after 90 Days with Business Subscriptions
With the iMazing Business Subscription, devices are automatically unlinked from their license if they haven't connected to iMazing for 90 days. This frees up license device slots assigned to your users.
Before you can delete an assigned license or the associated user account, all devices must be unassigned. Once a device is unlinked from an assigned license, you can reduce the number of device slots for that license, returning the slot to the main license pool for reassignment. After all devices are unlinked from a license, you can delete the assigned license or even remove the user account itself.
Setting an expiry date for an assigned license ensures that device slots return to the main license pool when the license expires, provided the devices have been automatically unlinked after 90 days of inactivity. In other words, once a license expires and all its linked devices have been unlinked, all associated device slots automatically become available in the main license pool.
Other important information about Roles and Licenses
User roles
- Owner: The super admin of the organization who can manage users and licenses, view orders, and purchase additional licenses. Multiple owners can be created.
- Administrative: This role can create new end-users and assign licenses to them.
- Technical: This role can manage users and licenses but cannot manage owner user accounts.
- Billing: This role can only view orders and purchase additional licenses.
- End User: These users cannot log into their iMazing Account. They can only use iMazing with their assigned licenses.
Differences between an iMazing Business License and an iMazing Business Subscription
Here's what you need to know about the differences between an iMazing Business License and an iMazing Business Subscription:
- iMazing Business License: Devices are linked to this license for their lifetime. This means that once a device has been linked to a license, it cannot be unlinked.
- iMazing Business Subscription: Devices can be unlinked from the subscription. If a device has not been connected to iMazing for more than 90 days, it will be automatically unlinked from the subscription and will not count towards the total available device slots.
License Fields: Validity days and Expiry date
- Validity days (optional): This is the number of days the license will remain active after the license code has been used to activate iMazing.
- Expiry date (optional): This is the fixed date until which the license will remain active. You should not set this field if the Validity days field is set.
Note: These two fields are only available with the iMazing Business Subscription. They are not available with the iMazing Business License. This is because devices are linked to the Business License for their lifetime, so they do not expire and cannot be unlinked.
What will happen to my license if I began using it before creating my organization account?
If you activated iMazing using the license code provided in the email sent after your purchase and before creating your organization, the devices linked to your license or subscription will be assigned to your user account (owner account with the email used to purchase) upon creating your organization account.
To add more devices to your user account, please refer to: 6. Adding more devices to an existing assigned license