Restore macOS on an Apple Silicon Mac in DFU Mode
Updated on Jun 16, 2026
Reading time ~6 minutes
iMazing can restore macOS on Apple Silicon Macs connected in DFU (Device Firmware Update) mode. This is an alternative to Apple Configurator 2 and the built-in Finder restore (macOS Sonoma 14 or later). The host computer can run macOS or Windows.
Before you begin
Requirements
- A host computer running iMazing. The host can be a Mac (macOS Sierra or later) or a Windows PC (Windows 7 or later).
- A USB-C to USB-C cable that supports data and power. The cable included with your Mac works. Do not use a Thunderbolt 3 or Thunderbolt 4 cable (marked with a lightning bolt icon).
- The target Mac to restore: any Apple Silicon Mac (M1, M2, M3, M4, or M5).
- An internet connection on the host computer. iMazing downloads the macOS firmware during the restore.
Important: By default, iMazing reinstalls macOS without erasing user data, apps, or settings. If you check Erase device before installing, all data on the target Mac is permanently deleted.
Identify the DFU port on your Mac
The DFU port is the specific USB-C port the Mac uses for low-level communication in DFU mode. Using the wrong port prevents the host from detecting the Mac.
Laptops
Model | M1 / M2 / M3 | M4 / M5 | M4 / M5 Pro / Max |
|---|---|---|---|
MacBook Air (all sizes) | Leftmost port, left side | Rightmost port, left side | N/A |
MacBook Pro 14" | Leftmost port, left side | Rightmost port, left side | Leftmost port, left side |
MacBook Pro 16" | Leftmost port, left side | Leftmost port, left side | Right-side port |
MacBook Neo | N/A | Leftmost port, left side | N/A |
Desktops
Model | M1 / M2 / M3 | M4 / M5 |
|---|---|---|
Mac mini | Leftmost port, rear panel | Middle port, rear panel |
iMac (all sizes) | Rightmost port, rear panel | Rightmost port, rear panel |
Mac Studio | Rightmost port, rear panel | Rightmost port, rear panel |
Mac Pro (tower) | Port farthest from power button, top panel | Port farthest from power button, top panel |
Mac Pro (rack mount) | Port closest to power button, front panel | Port closest to power button, front panel |
Important: The DFU port location changed on several models starting with M4. On the MacBook Pro 16" with M4 Pro or M4 Max, Apple support article 120694 indicates the left-side port, but multiple independent reports indicate the right-side port works instead. Apple has not confirmed this discrepancy. If the host does not detect your Mac, try the port on the opposite side.
Note: For the most current port locations, see the Apple support article on identifying the DFU port on your Mac.
Enter DFU mode
Connect the USB-C cable between the DFU port on the target Mac and any USB-C port on the host before entering DFU mode.
Enter DFU mode on a MacBook Air, MacBook Pro, or MacBook Neo
- Shut down the target Mac completely.
- Connect the USB-C cable from the DFU port to the host computer.
- Press and release the power button (Touch ID), then immediately press and hold all four keys together: Left Control + Left Option + Right Shift + Power (Touch ID).
- Hold all four keys for 10 seconds.
- Release Left Control, Left Option, and Right Shift. Keep holding Power.
- Hold Power for 10 more seconds (about 20 seconds total from step 3).
- Release Power. The screen stays black. The host detects the Mac in DFU mode.
Tip: Timing is critical. Use a stopwatch or count steadily. If the host does not detect the Mac, shut down and retry from step 1.
Enter DFU mode on a Mac mini or Mac Studio
- Disconnect the power cable from the target Mac.
- Connect the USB-C cable from the DFU port to the host computer.
- Press and hold the power button on the target Mac.
- Reconnect the power cable while holding the power button.
- Hold the power button for about 10 seconds, then release. The host detects the Mac in DFU mode.
Enter DFU mode on an iMac
- Disconnect the magnetic power cable from the target iMac.
- Connect the USB-C cable from the DFU port to the host computer.
- Press and hold the power button on the back of the iMac.
- Reconnect the magnetic power cable while holding the power button.
- Hold the power button for about 10 seconds, then release. The host detects the iMac in DFU mode.
Enter DFU mode on a Mac Pro
Tower: Follow the procedure in section 3.2, using the DFU port on the top panel (farthest from the power button).
Rack mount: Follow the procedure in section 3.2, using the DFU port on the front panel (closest to the power button).
Restore macOS with iMazing
Open iMazing on the host computer. The target Mac appears in the Devices section as the model name with "in DFU mode" below it.
The Reinstall macOS screen opens automatically.
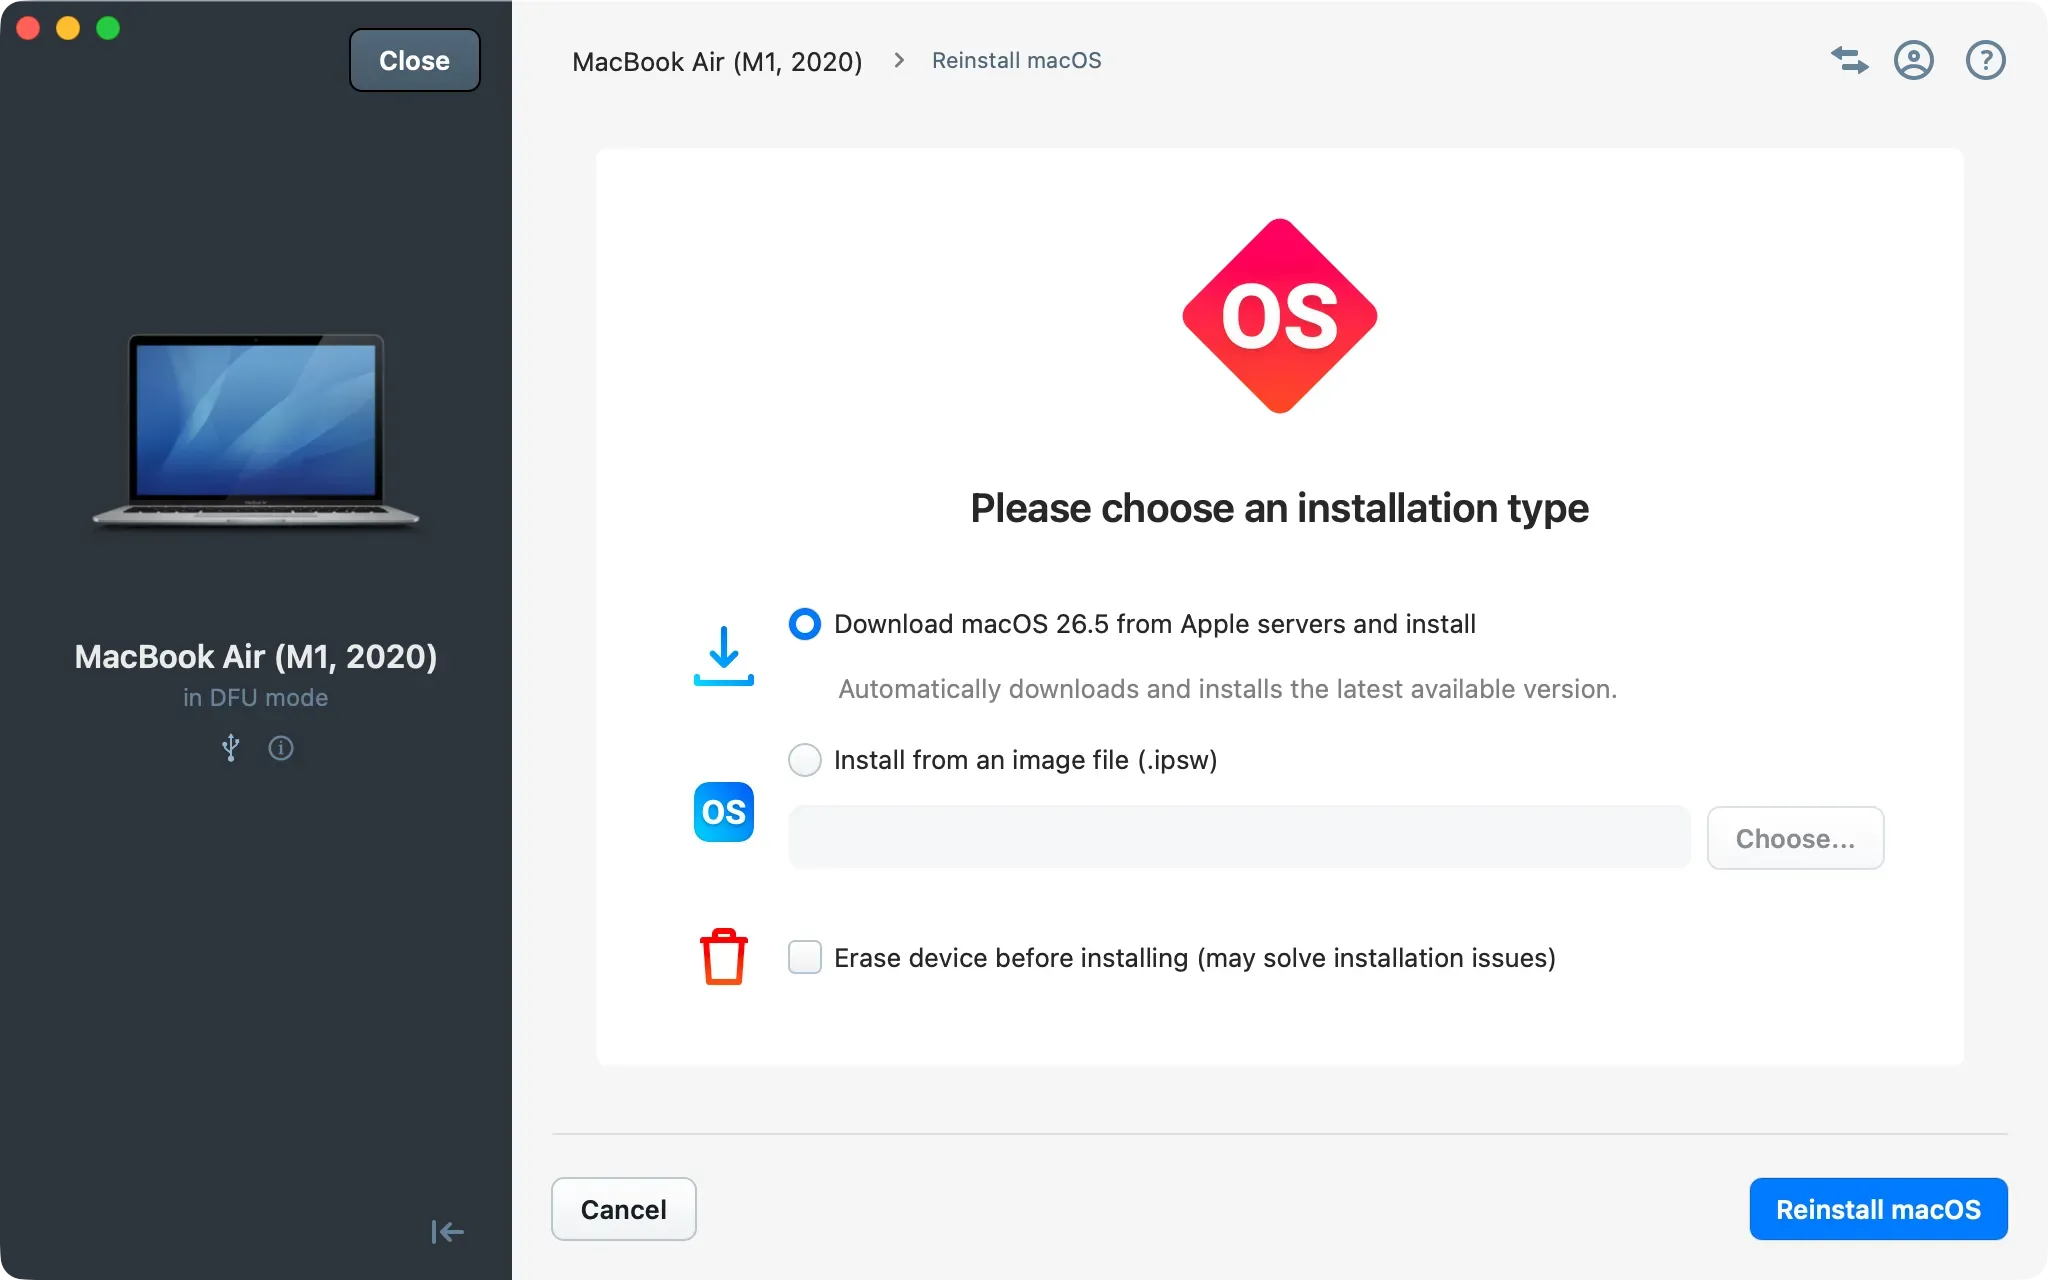
- Select an installation type:
- Download macOS from Apple servers and install (selected by default): downloads and installs the latest available macOS version. Requires an internet connection on the host.
- Install from an image file (.ipsw): select a local
.ipswfirmware file. Use this if you already downloaded the firmware or need a specific macOS version.
- To wipe the target Mac completely before reinstalling, check Erase device before installing. This resolves installation issues caused by corrupted system files.
- Click Reinstall macOS. iMazing downloads and installs macOS on the target Mac.
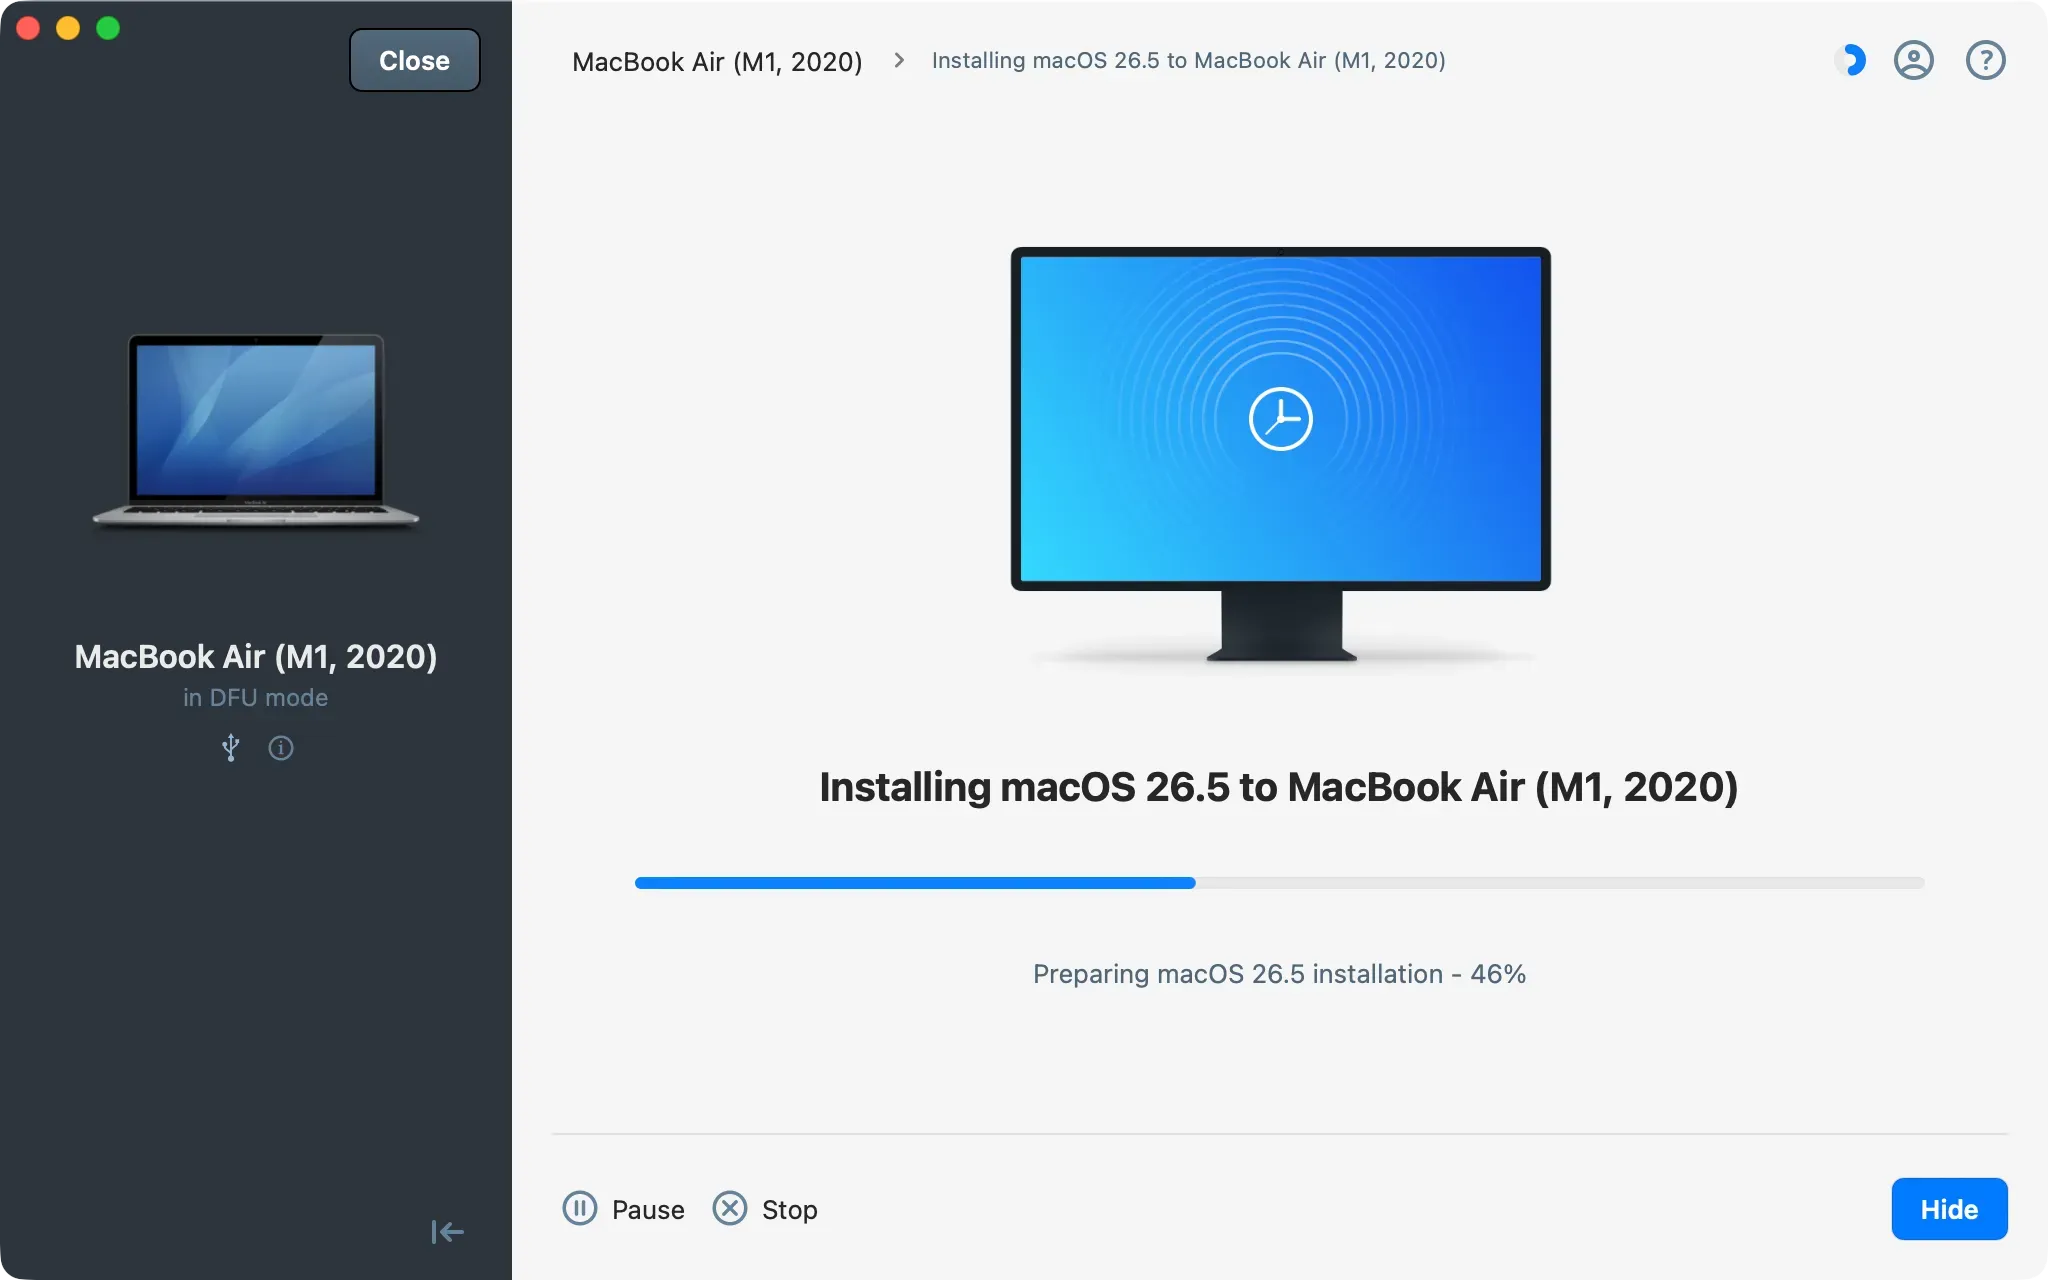
- When the installation completes, close the confirmation dialog.
The target Mac restarts:
- Without erase: the Mac boots into macOS Recovery (Recovery Assistant). User accounts and data are preserved. Select an administrator account, enter your password, and click Next.
- With erase: the Mac boots into macOS Setup Assistant, where you set up the Mac as new.
Important: If Find My Mac was enabled before the restore, Activation Lock persists after a full erase. The Mac requires the original Apple Account and password at Setup Assistant. This is an Apple security feature tied to the device hardware. Turn off Find My Mac before erasing to avoid this.
What to keep in mind
- By default, restoring macOS preserves user data, apps, and settings. Back up important data before using the Erase device before installing option.
- Use a USB-C cable that supports data transfer. Thunderbolt cables (marked with a lightning bolt or "3" / "4") do not work for DFU connections.
- The DFU port varies by model and chip generation. Starting with M4, several models use a different port than their M1/M2/M3 predecessors. Refer to the table in section 2.
- If the host does not detect the Mac in DFU mode, verify the cable, check the port, and retry the key sequence. Entering DFU mode can be tricky, and you may need several attempts before it works.
- Avoid running a VPN or virtual network adapter on the host during the restore. These can interfere with the firmware download.