iMazing 2 Mac Beta FAQ
If you're trying out iMazing 2 and are coming from iMazing 1, you'll find that a few things have changed. This FAQ's aim is to answer questions such as ‘Where did the ‘Backups’ section go?
For a more in-depth look at new features, please check our iMazing 2 Beta QuickStart Guide.
Where’s the main toolbar gone? And the File System section?
We’ve moved the main actions to the main window, just above the list of datasets:

I can’t find the ‘Backups’ button in the sidebar, where did you hide it?
Your old backups are shown in the sidebar. You can add backups from custom locations using the ‘+’ button. New iMazing 2 backups are accessible from each device’s main window, in the top toolbar:
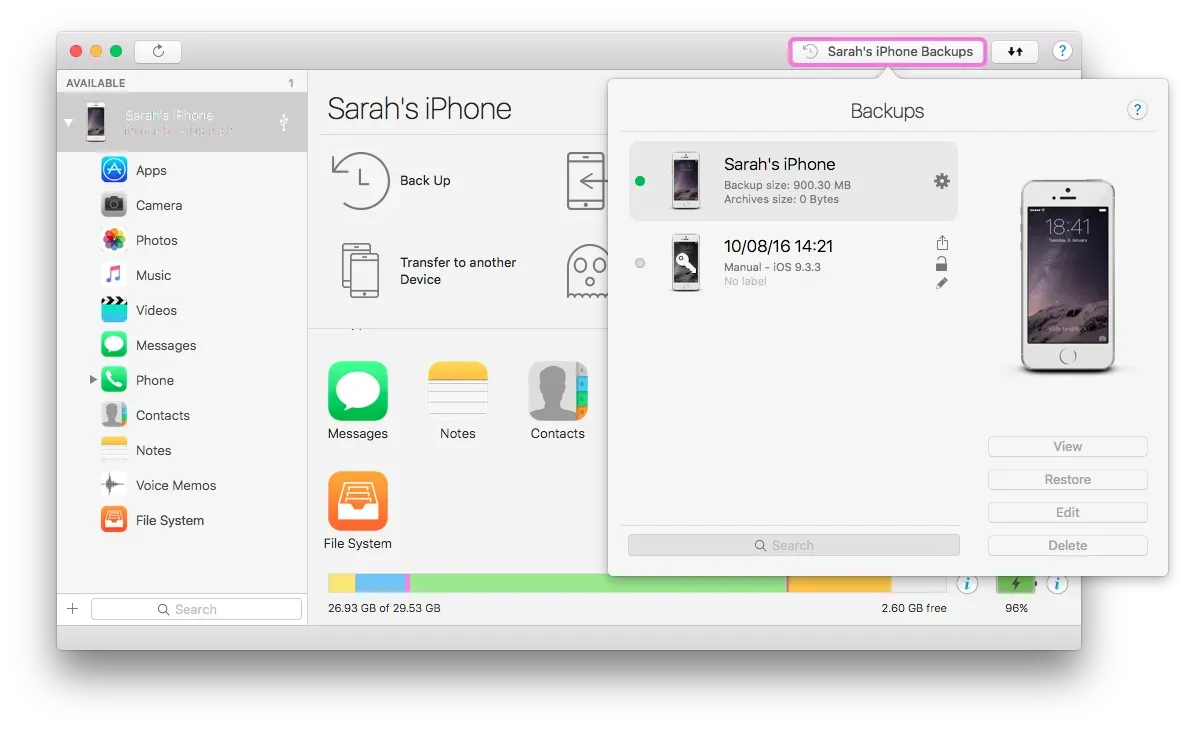
Backups made with iMazing 1 or iTunes appear in the sidebar, tagged with a backup icon, if they are in your main backup location. Start backing up with iMazing 2, and all your new backups will be optimised for minimum disk usage and accessible from the Backups popover of each device.
What's the difference between opening and importing a backup?
When you add a backup folder or backup disk to the sidebar, you’ll have the option to ‘Open’ or ‘Import’: import will copy the backup to your default backup location, Open will simply mount it and allow you to browse it.
In the new Backups popover, I can’t see the size of each backup, why?
iMazing 2 backups are optimised to use much less space than normal backups. Because of this, it is impossible to display the size of a single backup: deleting it will only free up space occupied by files which exist in no other backup of the same device.
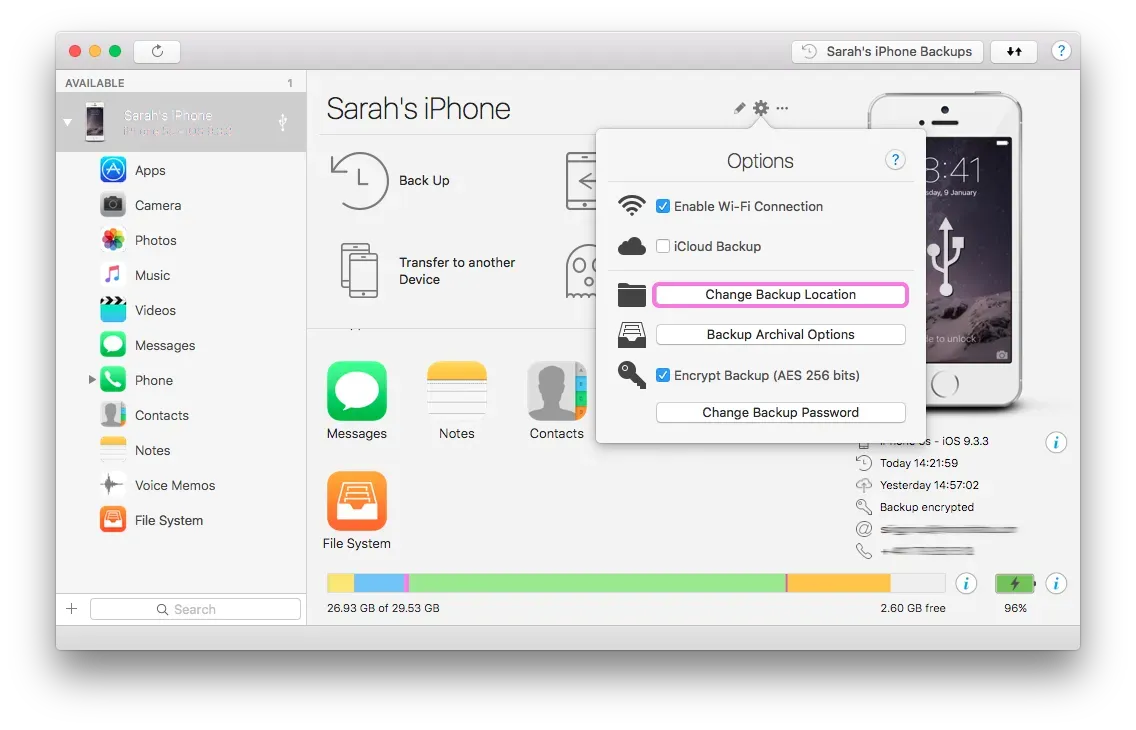
I’ve changed my backup location in the Preferences window, and nothing happened. What's wrong?
Backup locations in iMazing 2 are now per device, allowing you to back up your iPhone to your computer, but your iPad to an external drive for example.
The Default Backup Location setting in the Preferences window simply changes which location is used by default when you start backing up a new device. To change the specific backup location of a device, open the device settings popover and click Backup Location