Safely try iOS 15 beta – and downgrade back to iOS 14 if needed
The iOS 15 developer beta is out, and according to our early testing, it's one of the most stable major iOS betas we've seen. The public beta is likely just a few weeks away, and you may be planning on installing it on a personal device. In this article, we'll cover important topics regarding backing up safely before you make the jump, the upgrade process itself, and downgrading back to iOS 14 without losing data if you change your mind before the final release of iOS 15 and iPadOS 15 in September. Let's dig in!
1. Backup, Backup and Backup
We cannot repeat this enough: the iOS 15 beta may be particularly stable, but it still is a beta. Installing it on a personal device is actively discouraged by Apple, and a strictly at your own risk endeavour. So back up before you take the plunge, it doesn't take much time and it's 100% free if you back up locally.
1.1 Local Backup
You can back up locally with iMazing or with Apple's Finder (macOS) or iTunes (Windows). Backing up in iMazing is 100% free and comes with a lot of perks over Finder/iTunes backups:
- iMazing lets you back up to an external drive in order to preserve your computer's precious internal storage
- iMazing backups are fully browsable, so you can access and recover data from backups
- iMazing backups are versioned, which lets you keep backing up after you install the beta without overwriting your last iOS 14 backup
- iMazing doesn't make you choose between iCloud and local backups: you can do both. Not so with iTunes/Finder.
Here's what a snapshotted backup looks like in iMazing, note that you can toggle at will between the iOS 14 backup and the iOS 15 beta one:
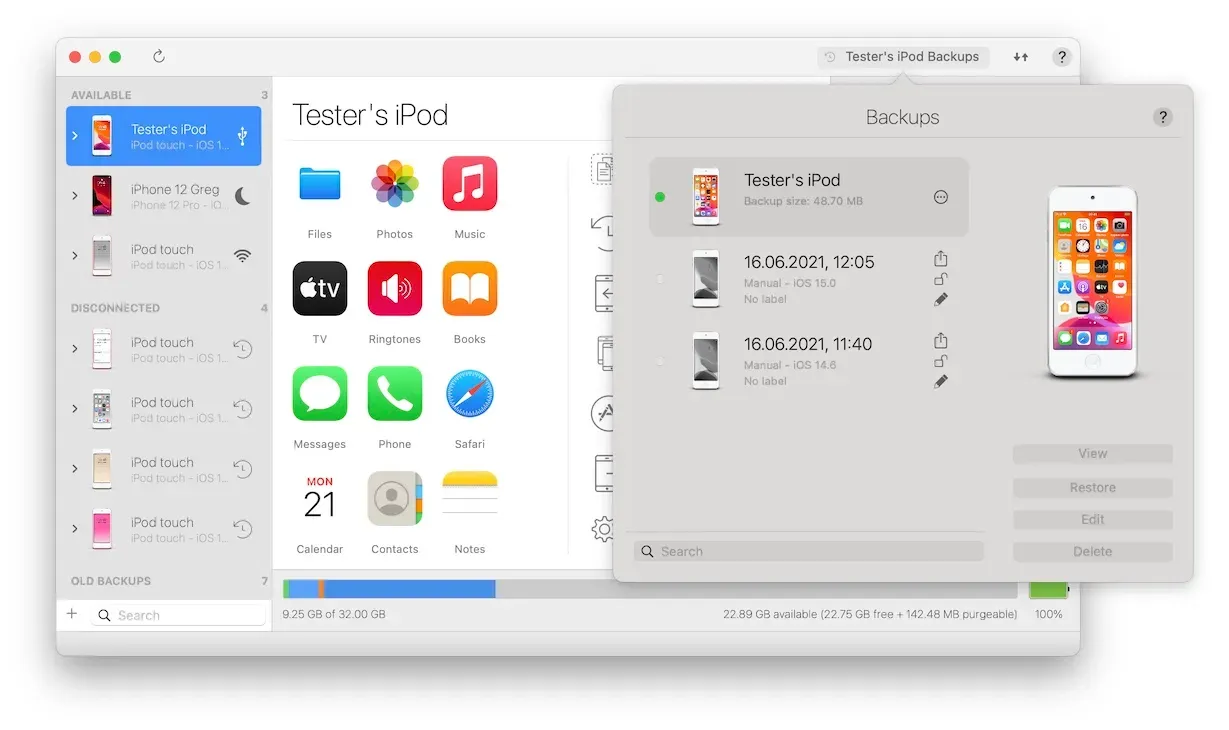
⚡ Pro tip: You can click the lock icon of the iOS 14 backup to make sure that this snapshot is never automatically cleaned by iMazing. By default, iMazing will start cleaning older snapshots after 1 month – that's adjustable in the settings too.
Download iMazing on your Mac or PC, no registration needed and no backup limitations in the free version. Need help with iMazing backups? Take a look at our iMazing backup guide.
1.2 iCloud Backup
Contrary to backing up locally, backing up to iCloud is not free since you need to pay for enough iCloud storage to host your data. If you're already backing up to iCloud, simply make sure that your iCloud backup is up to date:
- Open the Settings app on your iPhone or iPad
- Navigate to your Apple ID account (top of the list) -> iCloud -> iCloud Backup
- Check that your backup is up to date, and tap Back Up Now if it isn't
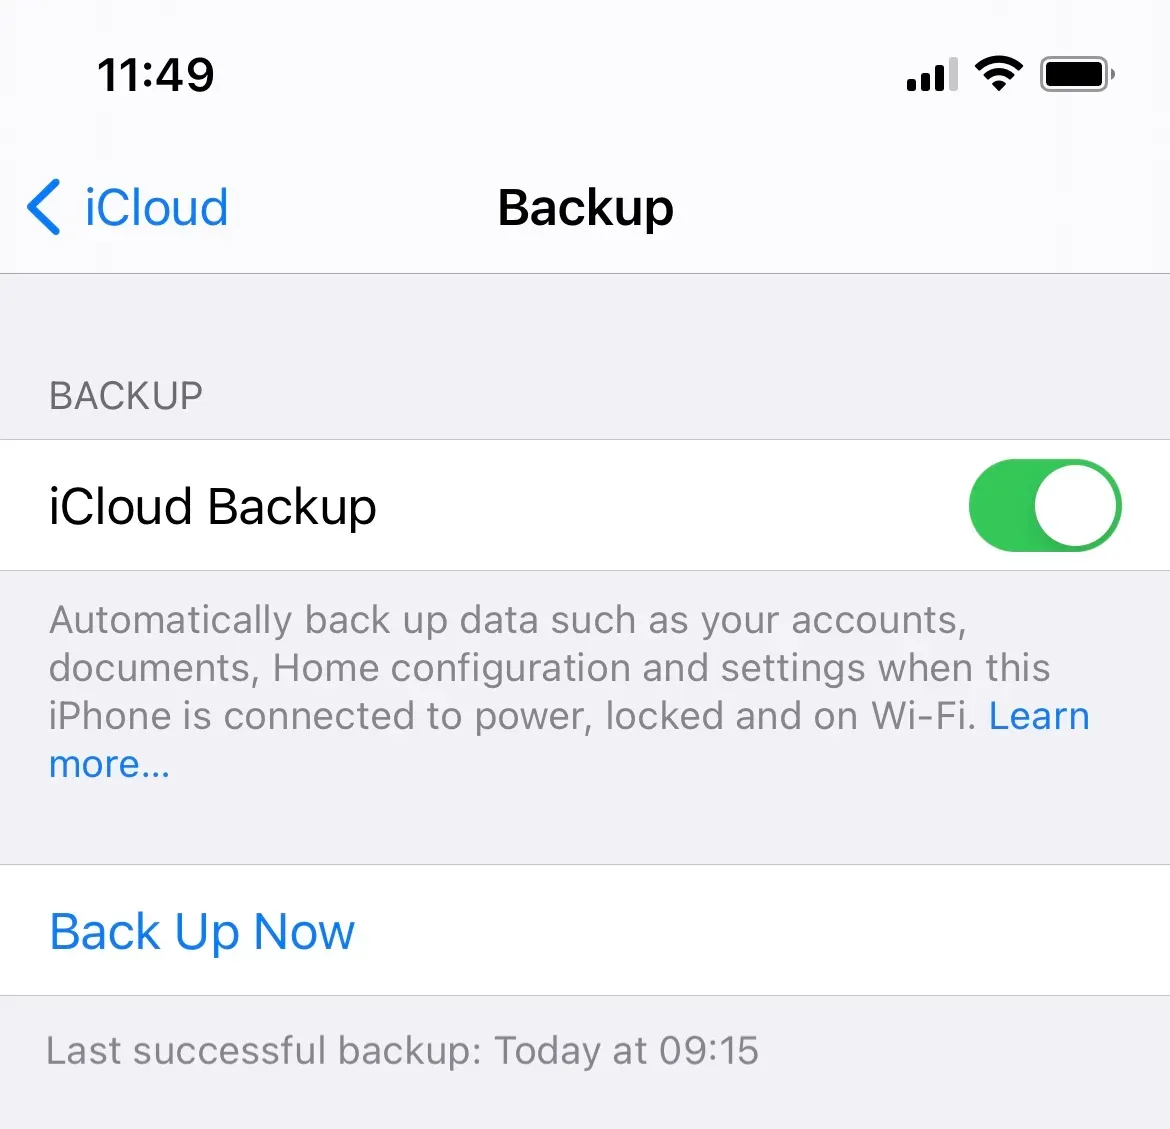
⚠️ iCloud backups don't let you control which backup snapshot will be kept and for how long. You also can't dig into your baked up files and content. For these reasons, we recommend backing up locally before installing the beta, even if your iCloud backup is up to date.
2. Installing the iOS 15 Beta
Now that your data is safely backed up, it's time to time to install the beta. Or not quite – let's take a moment to assess the risks first.
2.1 Risk Assessment
If things go wrong and you end up having to downgrade back to iOS 14.6, you could be facing data loss even if you've backed up your device. The problem is that new data that you generate with iOS 15 may be incompatible with iOS 14.6, forcing you to restore your iOS 14.6 backup and lose newer data. Now, fortunately iOS 15 is surprisingly similar to iOS 14.6 and in our tests, downgrading from iOS 15 has been largely successful, with only the following data types not making it through:
- Contacts and calendars of the On my iPhone account
- Messages if iCloud isn't enabled for the Messages app
- Voice Memos if iCloud is not enabled for the Voice Memos app
There may be more data that doesn't make it across a downgrade from later betas, we cannot tell yet. But as a rule of thumb, local data is at risk, iCloud data and synced contacts and calendars not so much. 3rd party application data is also largely safe.
2.2 Developer or Public Beta?
Developers get early access to the beta via the Apple Developer Program ($99 per year). About a month later (usually by mid-July), Apple opens up the beta to the public. If you're not a developer and plan on installing the beta on a personal device, we strongly advise waiting for the public beta – see this article for additional reasons to wait before you jump in.
Sign up for the public beta: https://beta.apple.com/sp/betaprogram/
2.3 Install the Beta: Over the Air
The most convenient way to install the beta is to download and install Apple's Beta Software Profile. Here's how:
- With the device you wish to install the beta on, head to https://developer.apple.com/download/ for the developer beta or https://beta.apple.com/sp/betaprogram/ for the public beta.
- Download the beta profile
- Confirm installation of the profile in the Settings app: in the General section, scroll down all the way and tap Profiles. Then, tap the profile and finally tap the Install button at the top right of the screen.
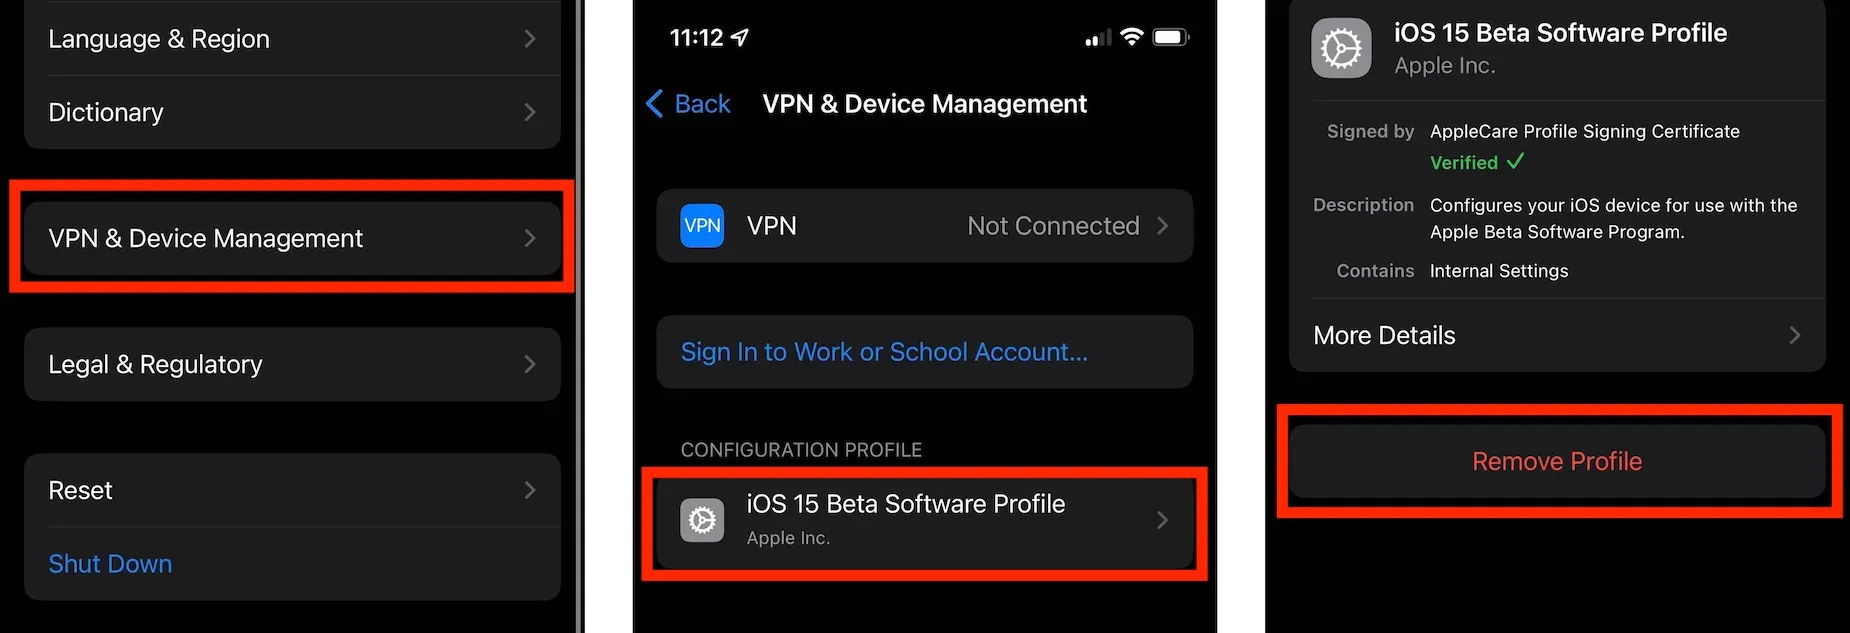
Once the beta profile is installed, you'll receive iOS beta updates over the air just like standard iOS updates. If at some point you'd like to opt out of the beta program, simply remove the profile. This is a tiny bit harder than it looks since in iOS 15, profiles are found in another part of the Settings app's General section, the new VPN & Device Management settings group:
2.4 Install the Beta: With IPSW Image File
If you prefer more control over the beta installation process, you can also download the IPSW image file and install it on your devices with the Finder or iMazing. Registered developers should simply head to https://developer.apple.com/download/ and download the appropriate IPSW file for their device:
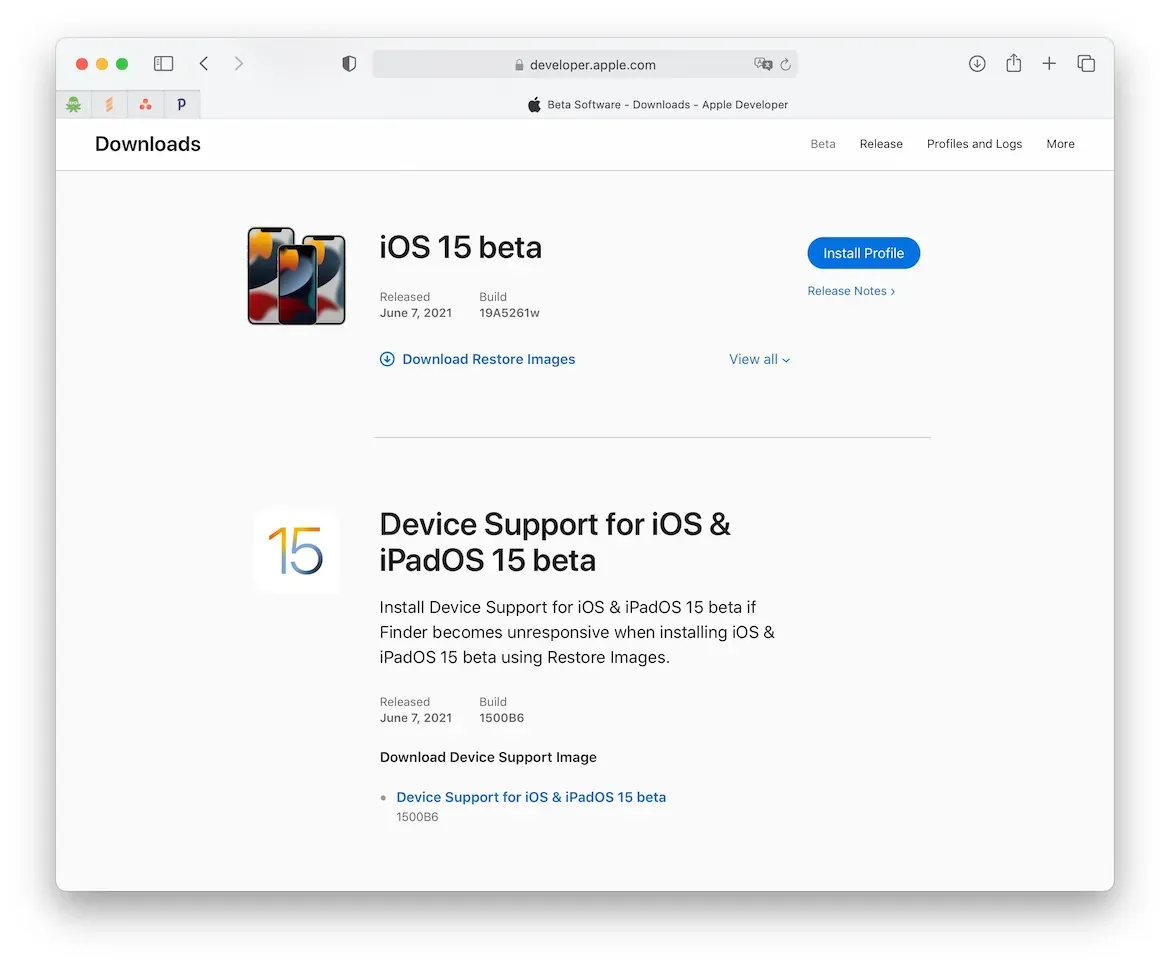
⚡ Notice that for the first time, a package named Device Support is also available. Before installing the IPSW, make sure you download and install that package, it will add iOS 15 beta support to the required drivers on your Mac. On Windows, there is no official iOS 15 beta support before the final release in September.
Once you've downloaded the IPSW image file, you can install it with the Finder or with iMazing. In the Finder, select your connected device, hold the alt key and click on the Update button. An open panel will pop up to let you pick an IPSW file.
In iMazing, the process is more straightforward: simply select your device in the left sidebar and click on the Update iOS button in the actions list:
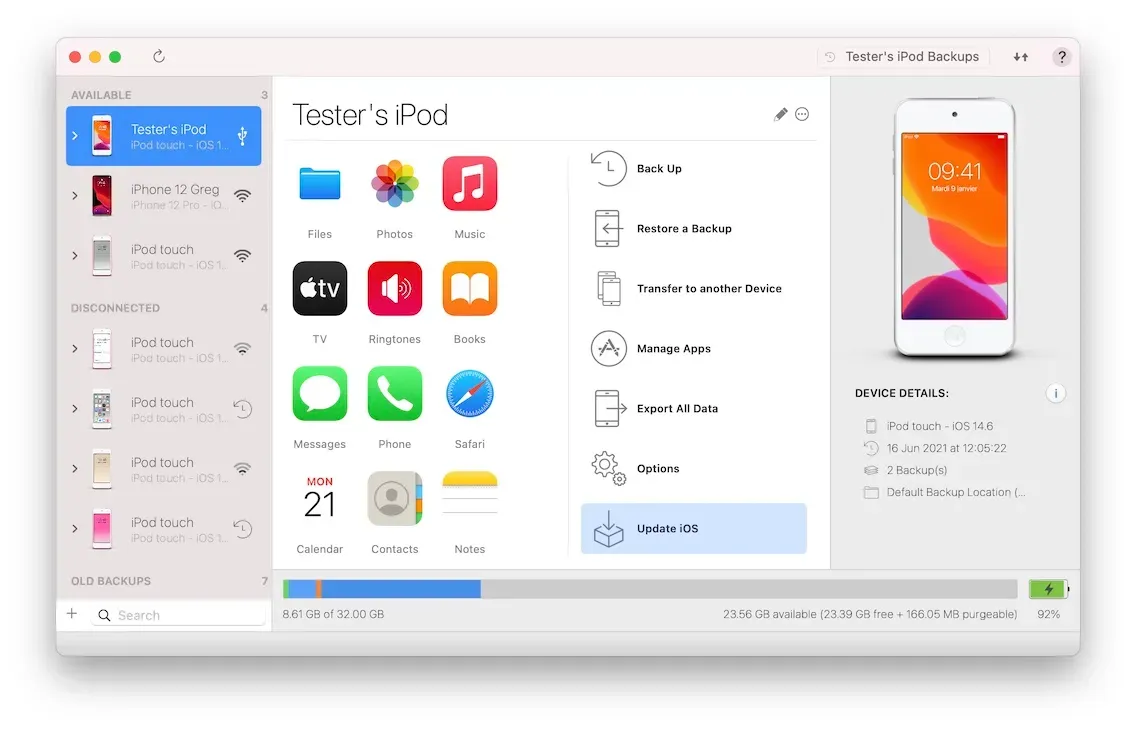
In the following screen, you can choose the IPSW package you wish to install, and optionally back up your device before updating:
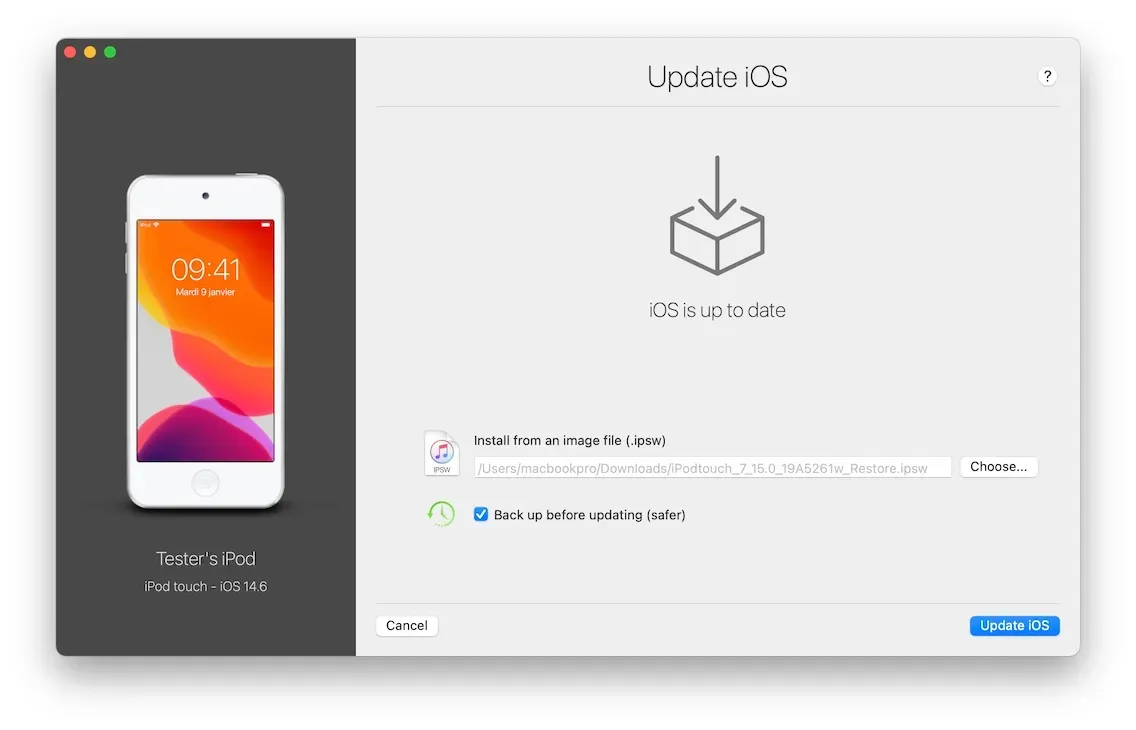
After you've confirmed, you will need to enter your passcode on the device to validate the update.
3. Downgrading back to iOS 14
Maybe an app you depend on isn't compatible with the iOS 15 beta yet, or maybe you're simply hitting too many bugs and hangs to your taste – no problem, you can downgrade back to the latest signed iOS 14 version (iOS 14.6 at the time of writing). As we wrote above in the risk assessment paragraph, you may lose some data on the way so backing up before you downgrade is again a must. We strongly advise you to back up with iMazing to be 100% sure that your iOS 14.6 backup isn't overwritten. If you do lose some local data, you'll always be able to access it via iMazing's backup browser, without even having to restore the backup first.
3.1 Downgrade to iOS 14 with iMazing
Downgrading with iMazing is very simple, just connect your device to your Mac or PC and click the Reinstall iOS button in the actions list:
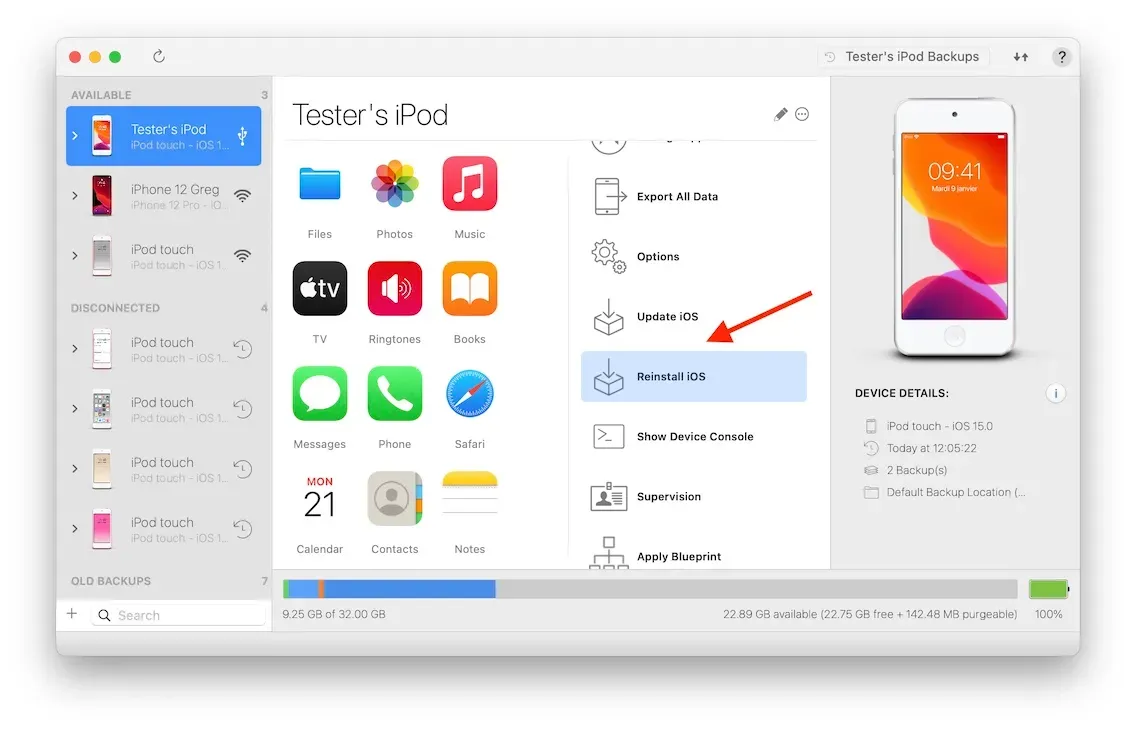
In the following screen, you have the option to erase before installing. Try to leave it off at first, and iMazing will attempt to reinstall iOS whilst preserving your data.
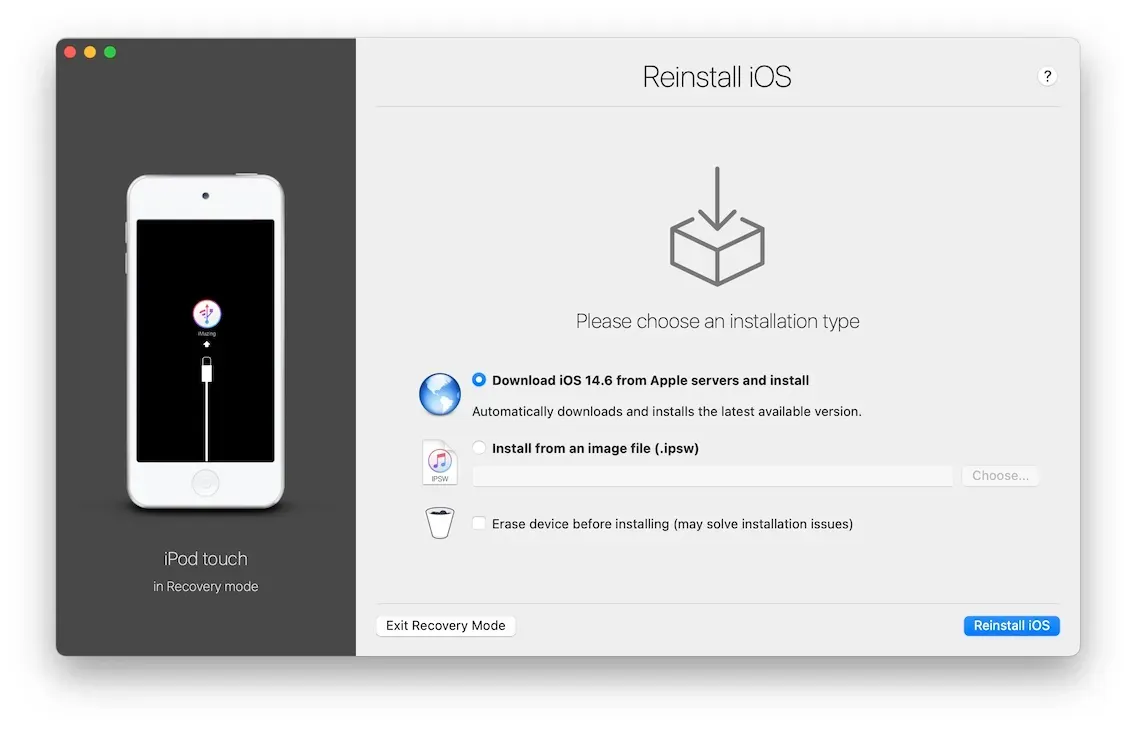
Click the Reinstall iOS button to confirm and let iMazing download the latest non-beta iOS version and install it on your device. You will be prompted for your passcode on the device as well, just as you were when installing the beta.
Once the operation completes, your device will reboot and display an Attempting data recovery message. This is normal: iOS 14 is dealing with data formatted with iOS 15 which it doesn't recognize. Let iOS do its work, and when iOS has fully rebooted, check your photos, messages, calendars, contacts, notes, bookmarks, voice memos and voicemail to make sure that everything is there. If anything is missing, don't panic: you've followed this guide and should have both your last iOS 14 backup and your most recent iOS 15 one to pull data from. You can use iMazing to browse the data and export it in various formats. You can also restore your iOS 14.6 backup, although in that case you won't restore the most recent data.
3.2 Downgrade to iOS 14 with the Finder
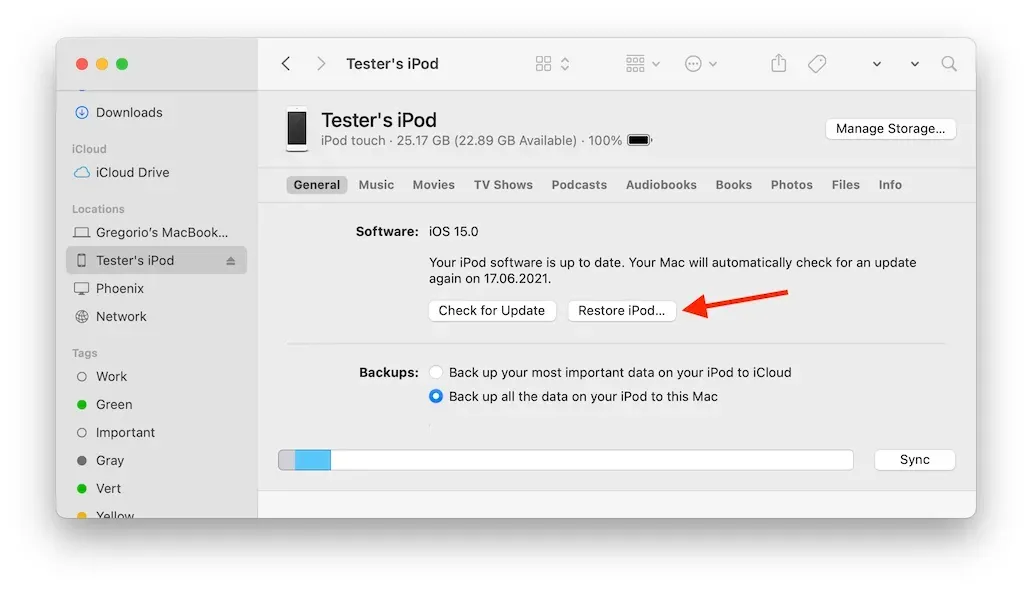
Downgrading with the Finder is achieved by Restoring the device, which has nothing to do with restoring a backup. It's a full OS reinstall procedure which wipes all data. Simply connect your device to your Mac, launch the Finder and hit the Restore button:
You'll see a warning: take heed, the Finder is about to wipe your device clean.
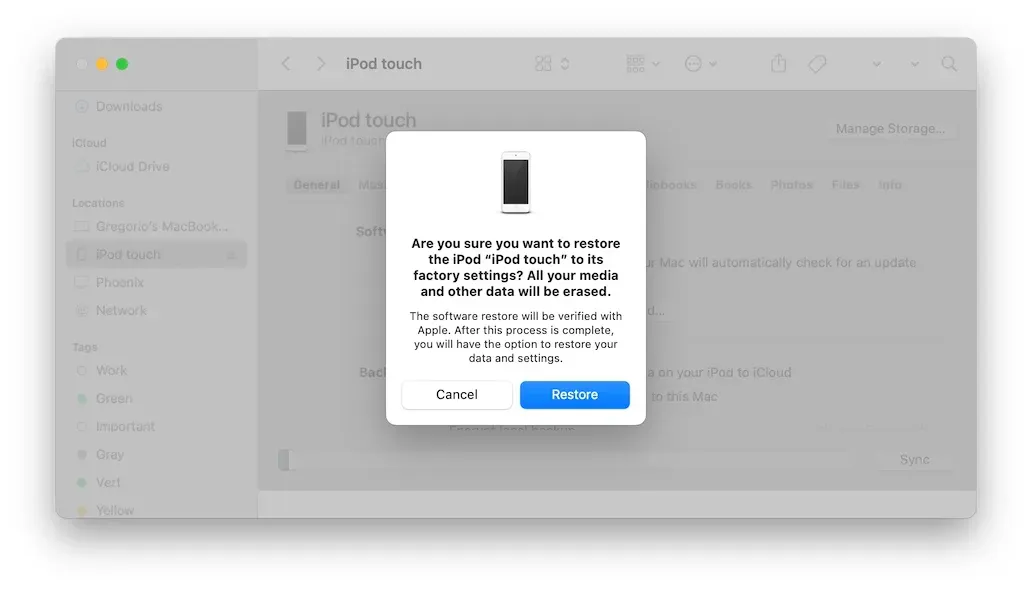
After the operation completes, go through the setup assistant on your device and set it up from an iCloud backup or from a local backup. Warning: you won't be able to restore iOS 15 backups, the Finder won't display them when restoring to a device running a lower iOS version.
We do have a trick to force the restore downstream of a backup, but incompatible data types mentioned in the risks section of this article won't make it through. Here again, iMazing is your friend: you can browse and extract backup contents, including of Finder backups. Messages, contacts, calendars, notes, photos… pretty much everything can be displayed by iMazing and recovered.
We hope that this guide will help you enjoy the iOS 15 beta. If you've followed our advice, your mind should be at ease and your data kept safe! And if the worst happens, our tech support team is hugely experienced and eager to help, so don't hesitate to get in touch.
Happy beta testing,
iMazing Team