Put iPhone, iPad and iPod touch in Single App Mode (Kiosk Mode)
Updated on Mar 9, 2026
Reading time ~4 minutes
Single App Mode (also known as kiosk mode) locks your business' iPhone, iPad or iPod touch devices to display a unique app. It is a very powerful iOS feature which enables using Apple's mobile devices as single purpose digital tools in your business or institution. Use cases include:
- Lock iPad to a point of sales (POS) app like Square for cashiers
- Lock iPod touch to a restaurant management app like TouchBistro to manage bookings and orders
- Use Apple's Photos app on an iPad to showcase a photography or art portfolio
- And more…
Starting with version 2.12, iMazing features straightforward tools to help you put your devices in Single App Mode without any prior IT knowledge. Whether you're managing your iOS and iPadOS devices from a Mac or a Windows PC, follow the guide and start making the most of your devices right now.
Here's how to put iPhone, iPad or iPod touch in Single App Mode:
- Launch iMazing and connect your device to your computer
- If your device isn't supervised yet, use iMazing's Supervision wizard to supervise it now
- Open the Supervision wizard and click on Enable Single App Mode
- Select the app of your choice and confirm
Check out the following video to see the entire supervision and single app mode process:
Before you begin
Download and install iMazing
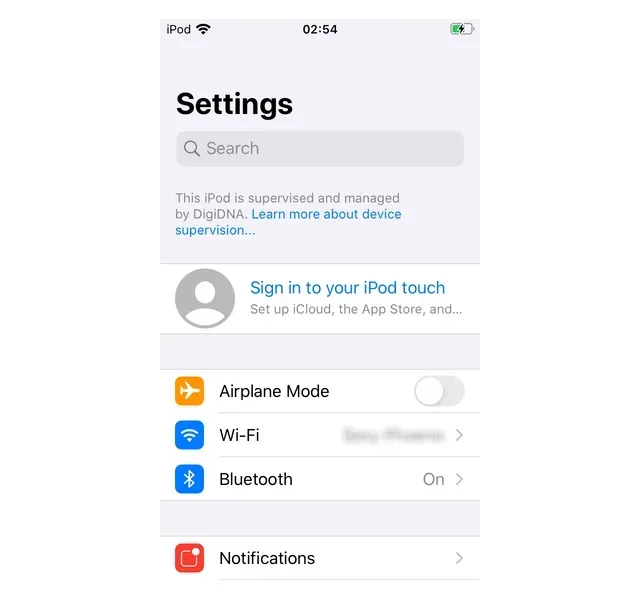
Make sure that the iPhone, iPad or iPod touch is supervised. To check, you can launch the Settings app on the device itself and look for the disclaimer:
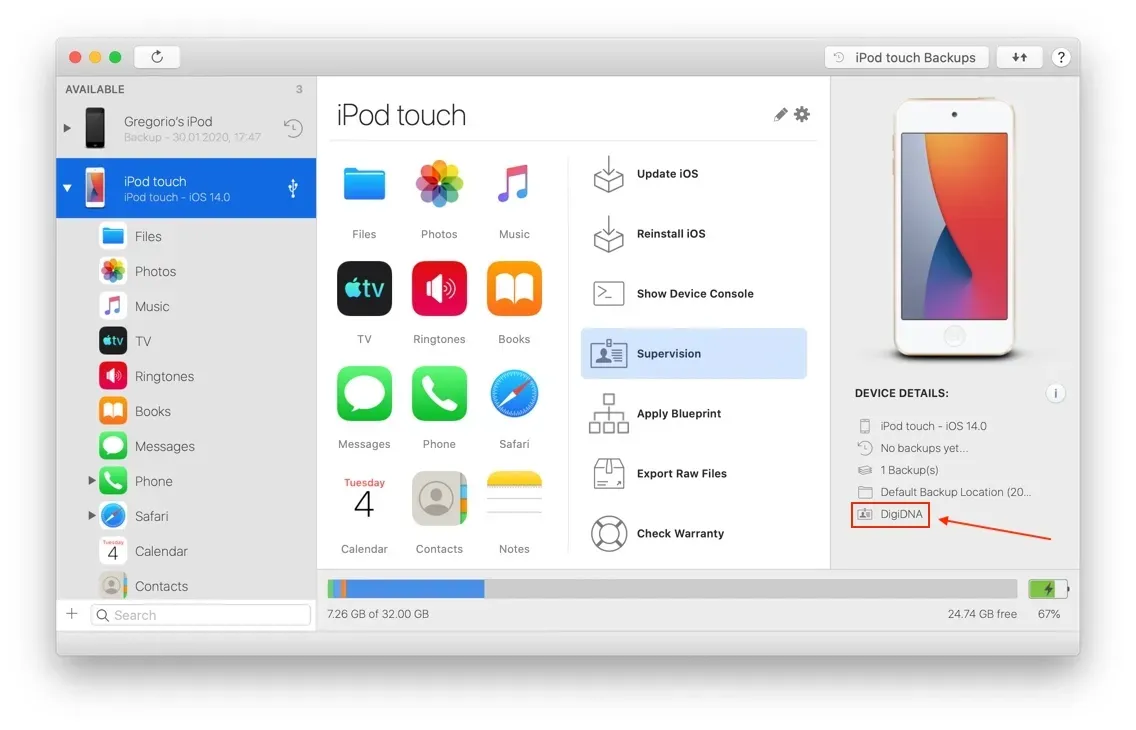
Alternatively, connect the device to iMazing and look for the supervising organization field under Device details:
If the Apple mobile device you want to put in Single App Mode isn't supervised yet, follow our How to supervise iPhone, iPad and iPod touch guide first.
In-Depth Tutorial
Launch iMazing and connect your device
If you've already connected your device to iMazing previously, you can use Wi-Fi connectivity to enable Single App Mode – no need to plug the cable.
Scroll down in the Actions list and click Supervision
Single App Mode is a setting available on supervised devices only. Supervised device settings are found in the Supervision wizard:
Scroll down to the bottom of that screen to reveal the Enable Single App Mode checkbox:
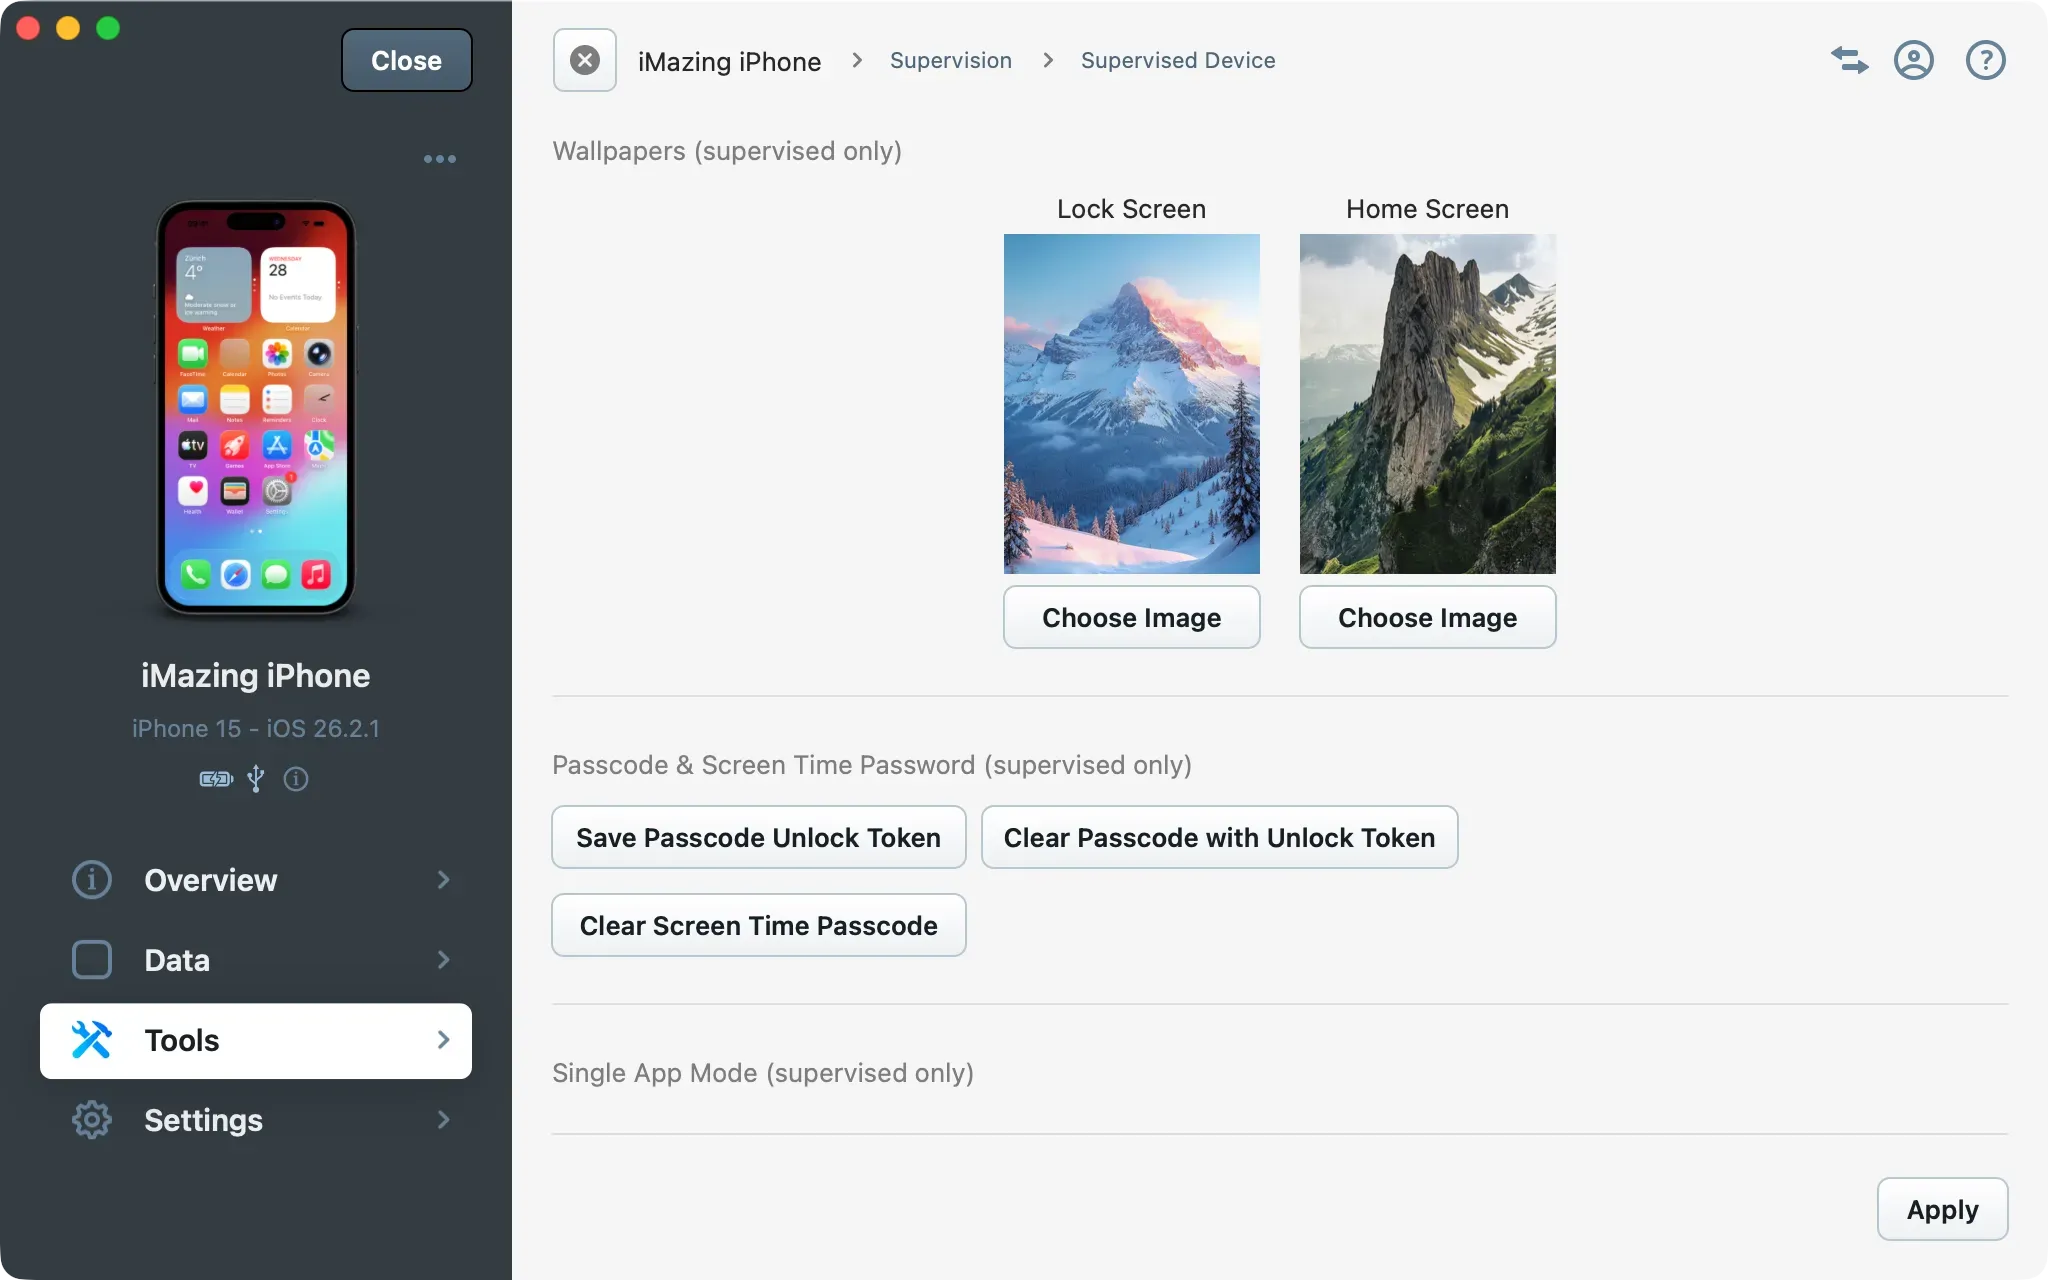
Check the Enable Single App Mode checkbox
iMazing will display a list of apps currently installed on the device:
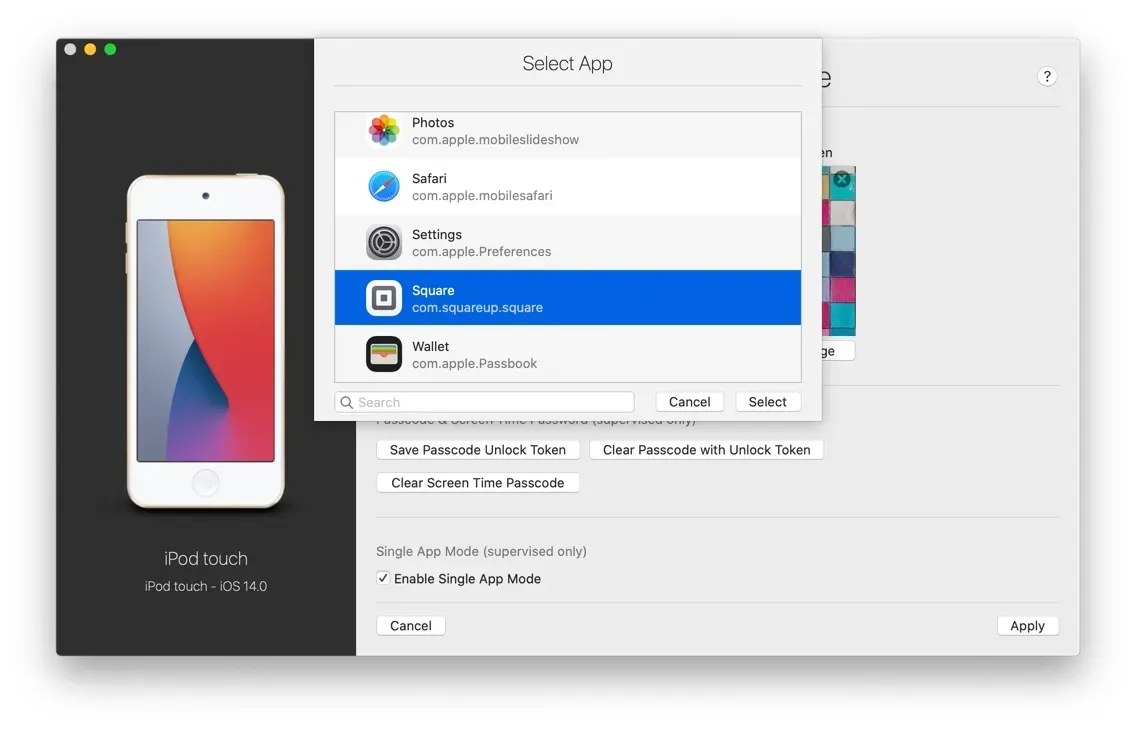
Choose an app and confirm
Select the application of your choice (including Apple apps such as Photos, Books or Music) and click Choose to confirm. Scroll down a little to reveal additional options:
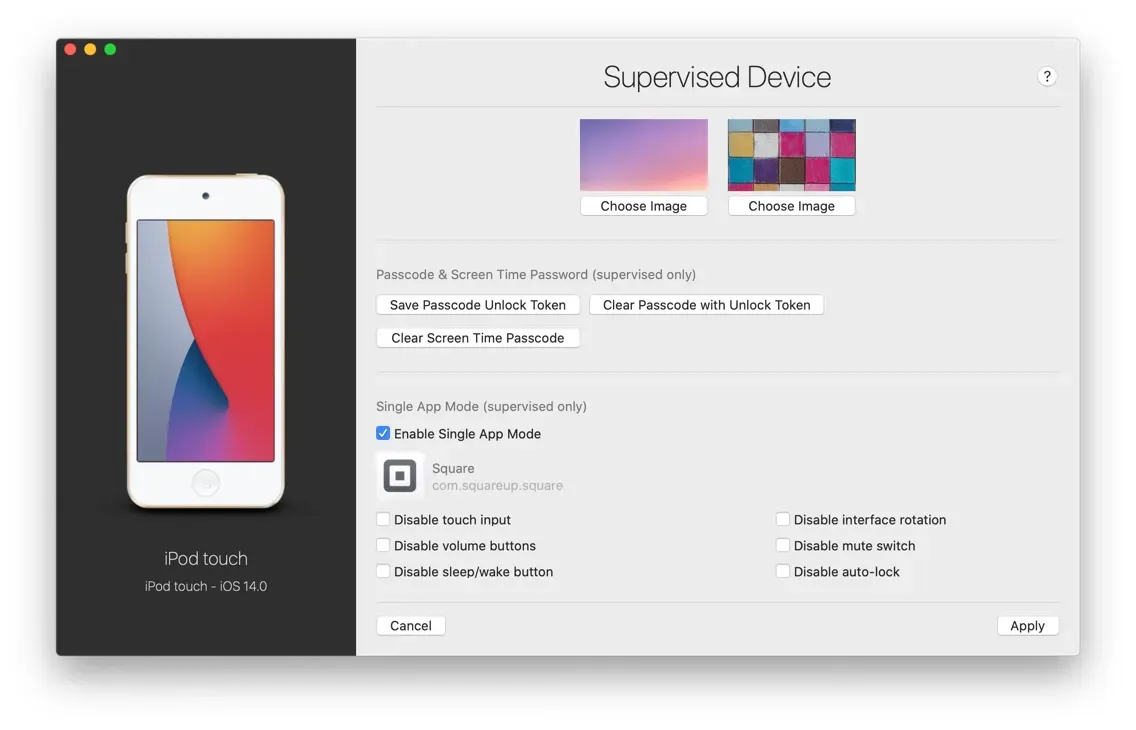
Configure Single App Mode options
Single App Mode options let you disable touch and hardware inputs, as well as prevent the device from locking. The following options are available:
Disable touch input: fully disables all touch interactions on the screen. Disable interface rotation: locks the interface in its current portrait or landscape orientation. Disable volume buttons: self-explanatory. Disable mute switch: self-explanatory. Disable sleep-wake button: prevents users from manually locking the device (and hence turning off the display). Disable auto-lock: overrides the auto-lock interval temporarily, setting it to never.
The last 2 options enabled together ensure that the device's screen will always be on, locked to your chosen app until the device runs out of battery, or you exit Single App Mode.
Click Apply
Once you've chosen an app and configured Single App Mode options, click the Apply button at the bottom right of the wizard and iMazing will put your iOS device in Single App Mode.
Exit Single App Mode
If the device is already in Single App Mode, iMazing will display an Exit Single App Mode button:
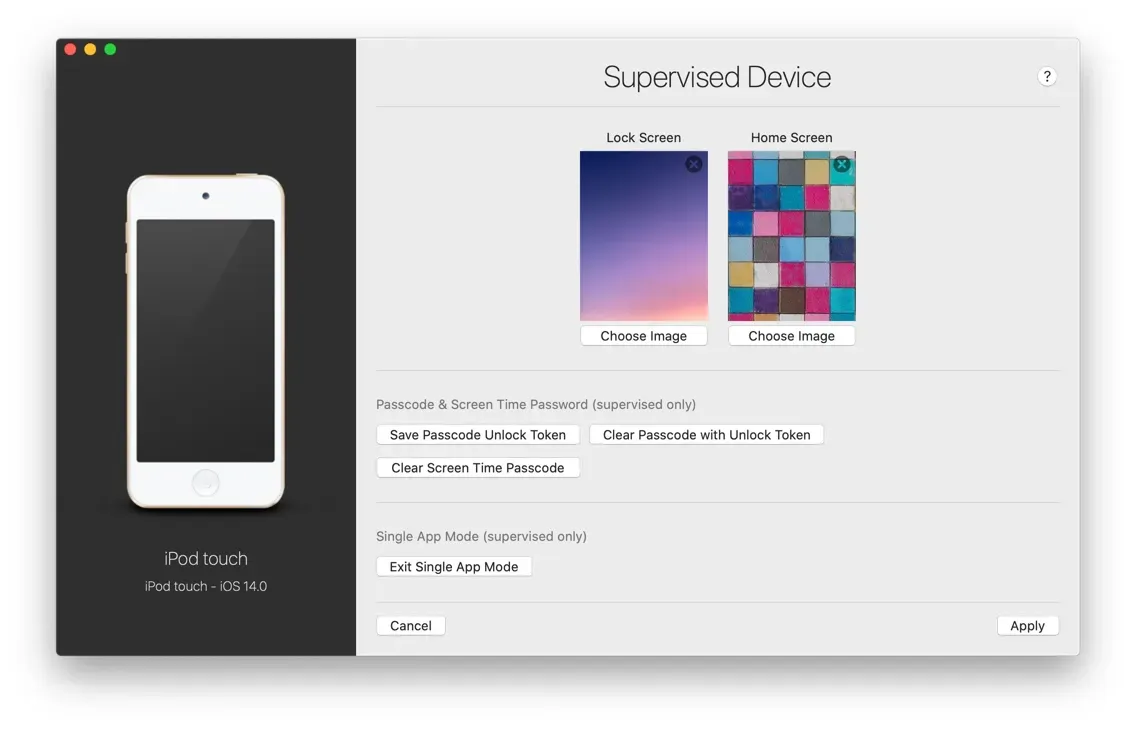
Simply click the button and wait a few seconds. You can now access the home screen of your device again, and launch any app.
Advanced users: behind the scenes, iMazing installs a configuration profile in order to enable Single App Mode. Because it is impossible to read the contents of an installed profile straight from the device, iMazing uses a specific profile naming scheme so that it can identify which profile to remove from the device in order to exit Single App Mode. Consequently, the Exit Single App Mode button is only available if iMazing was used to enable the mode in the first place. You can use the Profiles section of iMazing to manually remove Single App Mode profiles installed by other means.
Going Further
The Supervised device settings wizard contains quite a few other options besides Single App Mode. Please refer to our Managing Supervised Devices guide for more information.
For managing iOS devices in bulk, iMazing Configurator features powerful automation tools that will suit more advanced workflows.