Getting started with iOS configuration profiles
Updated on Mar 25, 2026
Reading time ~6 minutes
In this guide, we'll learn how to use iMazing to locally configure supervised iPhone, iPad and iPod touch with configuration profiles. Configuration profiles contain hundreds of settings, many of which are only relevant to professional ITs. We'll ignore those and focus on settings useful to small businesses which don't require advanced IT skills. Let's get started!
Requirements
This guide requires that you already have a supervised iPhone, iPad or iPod touch, and a licensed copy of iMazing installed on your computer.
No supervised device? Head to How to Supervise iPhone, iPad and iPod touch
If you're only getting started with using iMazing to manage your business' Apple mobile devices, please read our blog post on the subject for a quick overview of what iMazing has to offer:
Make the Most of your Business' Devices with Supervision
In a rush? The following video quickly covers iMazing's supervision features:
Profiles in iMazing
Connect your supervised device to iMazing and select it. Click Data to view all available datasets, then scroll down to find the Profiles icon.

Device Profiles
Click on the profiles icon and iMazing will show a list of profiles currently installed on the device:
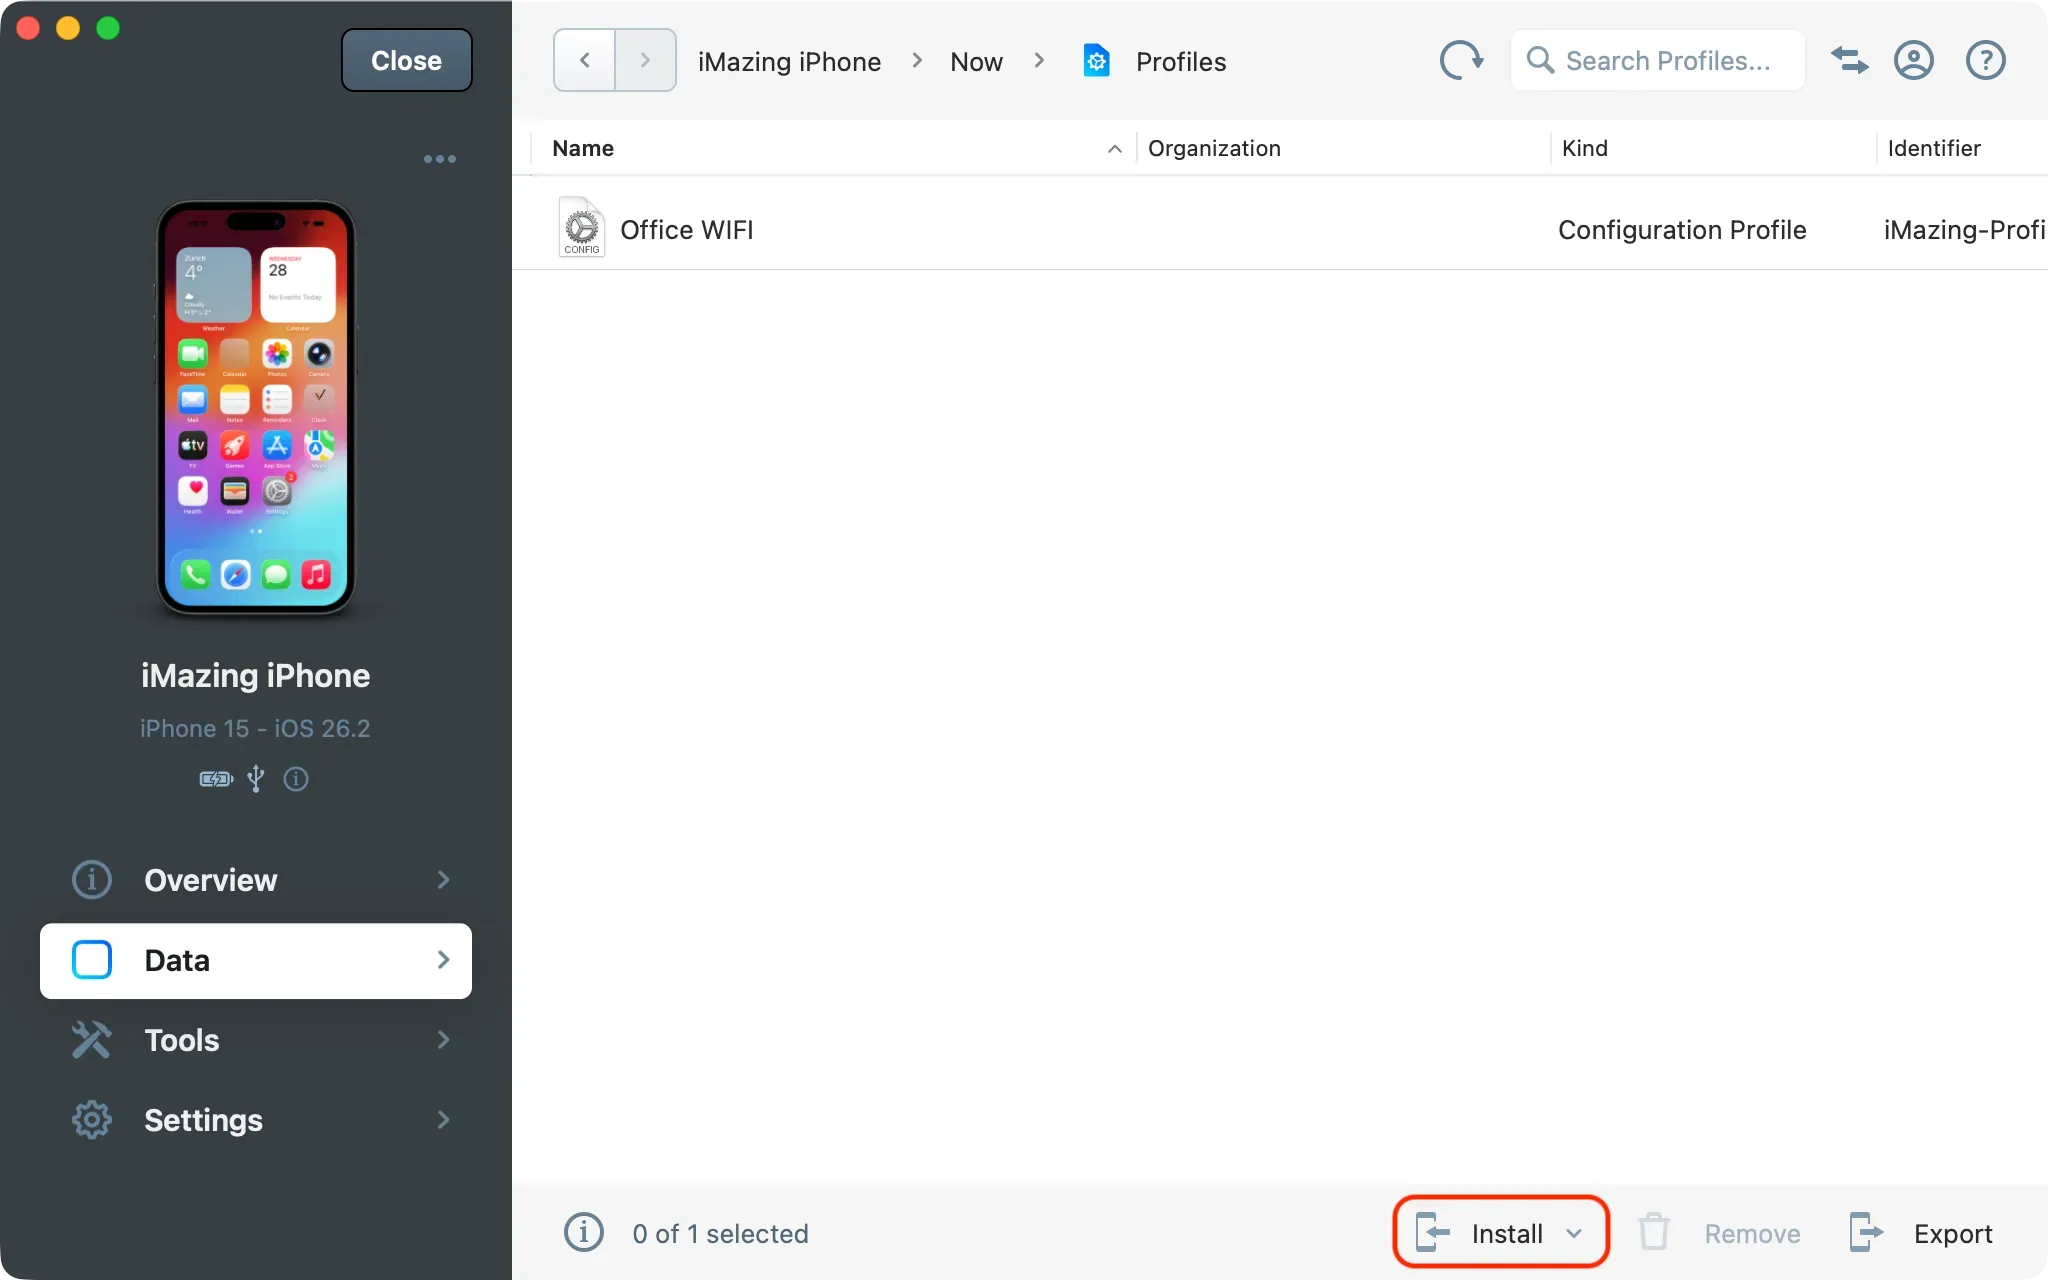
In the bottom toolbar, click on Install from Library.
Profile Library
iMazing now displays its profile library where you can pick one or more profiles to install:
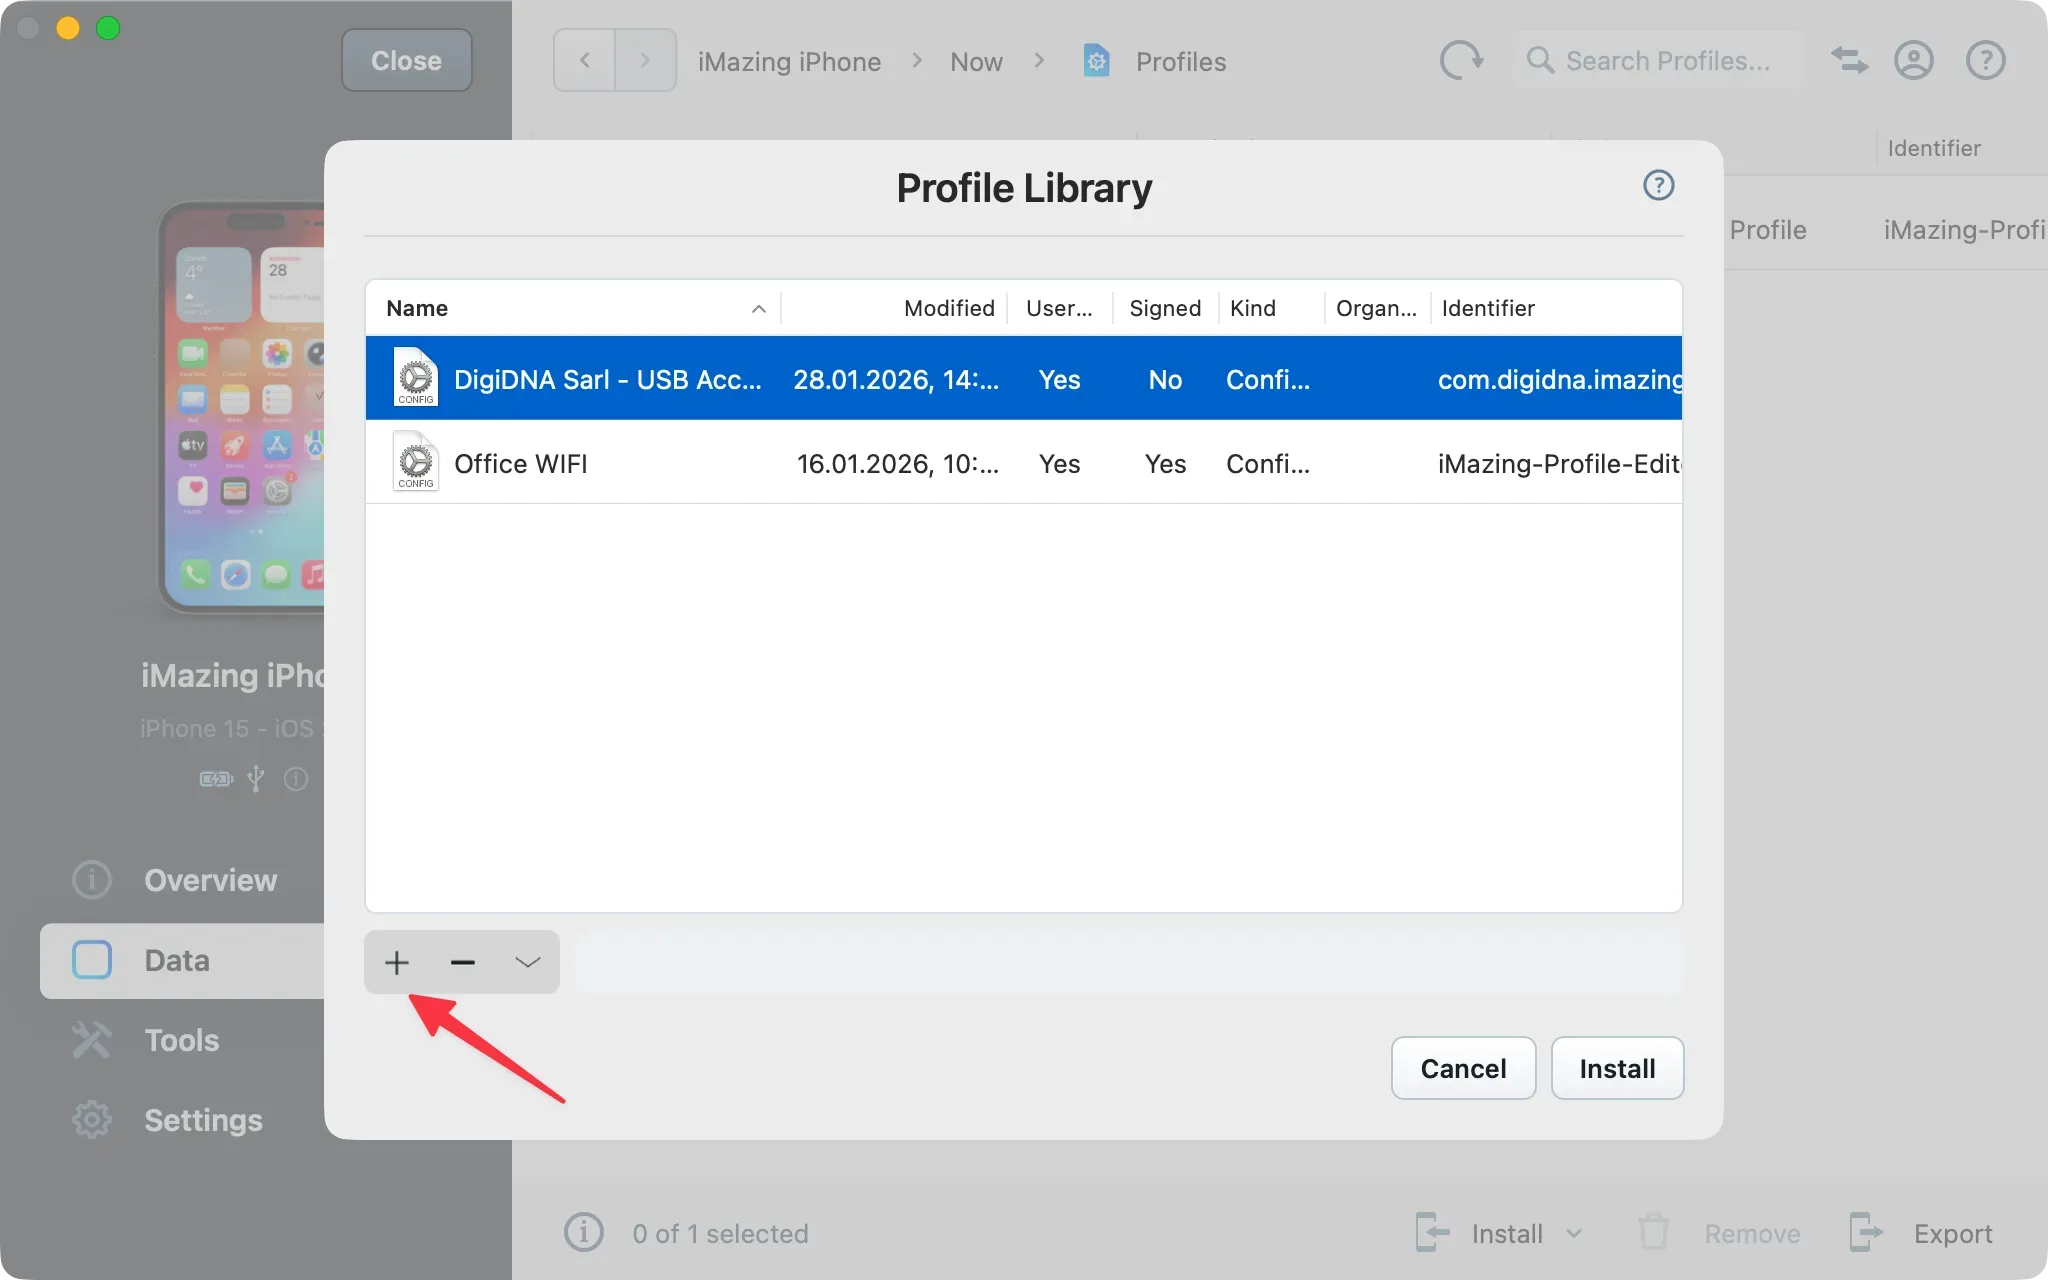
Your profile library will be empty at first. Simply click the + button to create a new configuration profile.
Your first configuration profile
When you create or edit a profile in the profile library, iMazing automatically launches the profile editor in a new window with the General section of the sidebar selected.
General Section

The 2 most important fields here are:
- The profile's name – pick a descriptive one since that's what you'll see in iMazing's profile library.
- The Prevent users from removing this profile checkbox. If you don't check it, your users will be able to remove the installed profile from the Settings app of their device.
Adding a preference group
Below the General section in the sidebar, you'll find a whole set of preference groups. You have to add a preference group to the profile in order to configure its settings.
Let's add the Restrictions preference group:
- Select the Restrictions item in the sidebar
- Click the Add Configuration Payload button in the main view
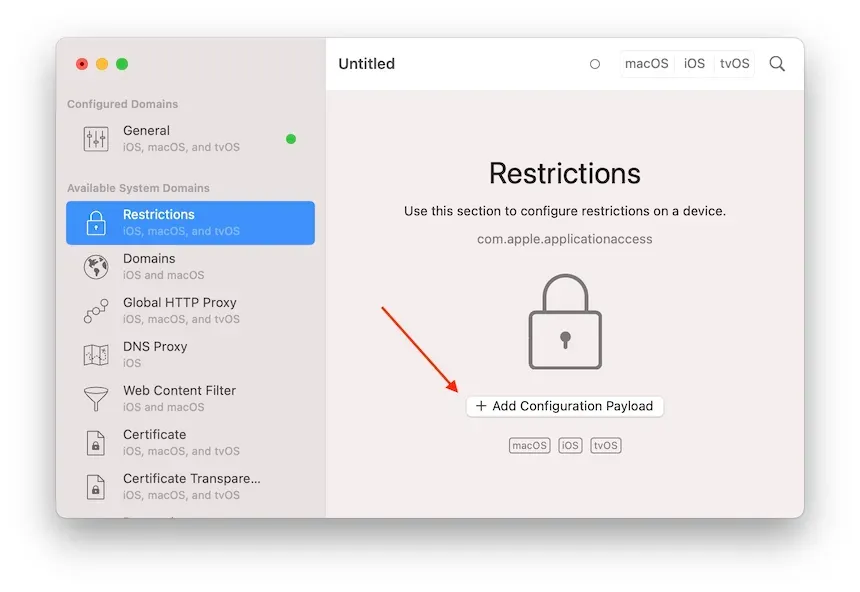
Configuration Payload is the technical term for a preference group. A single profile can contain multiple preference groups, or just a single one, it's up to you to organize your profiles the way you see fit.
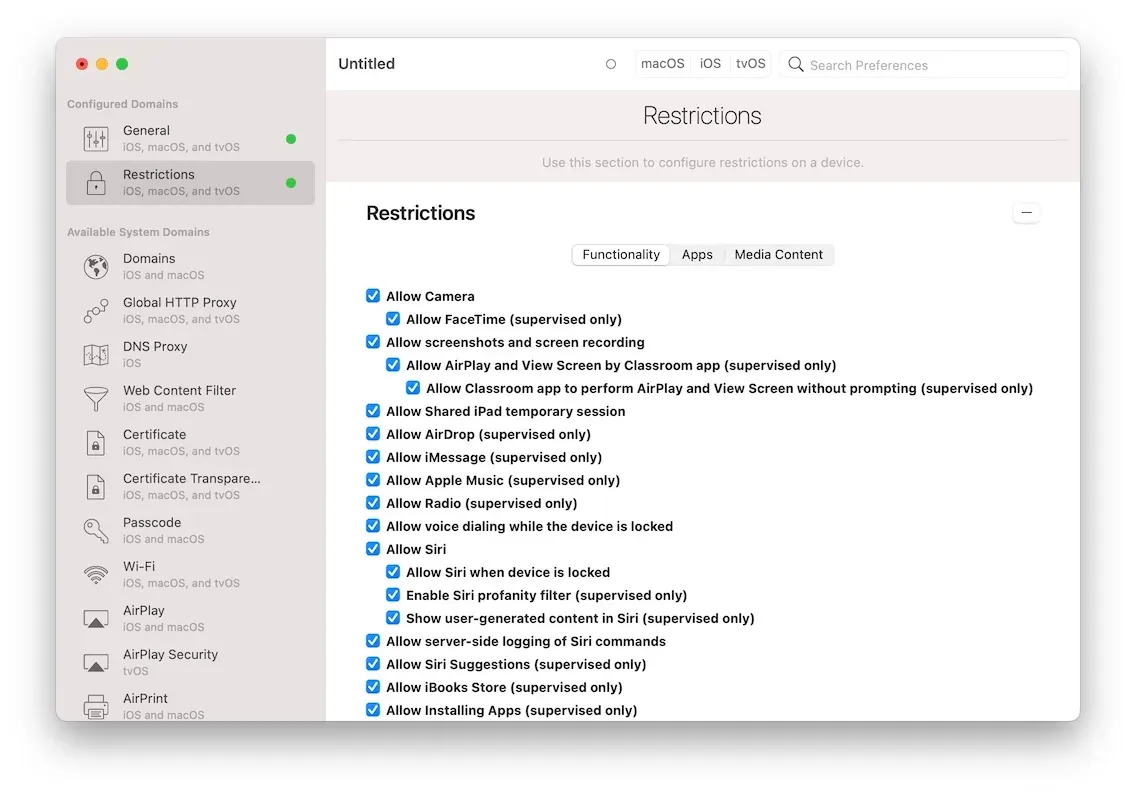
Once added to the profile, the preference group jumps to the top of the sidebar and the main view displays all the settings of the preference group:
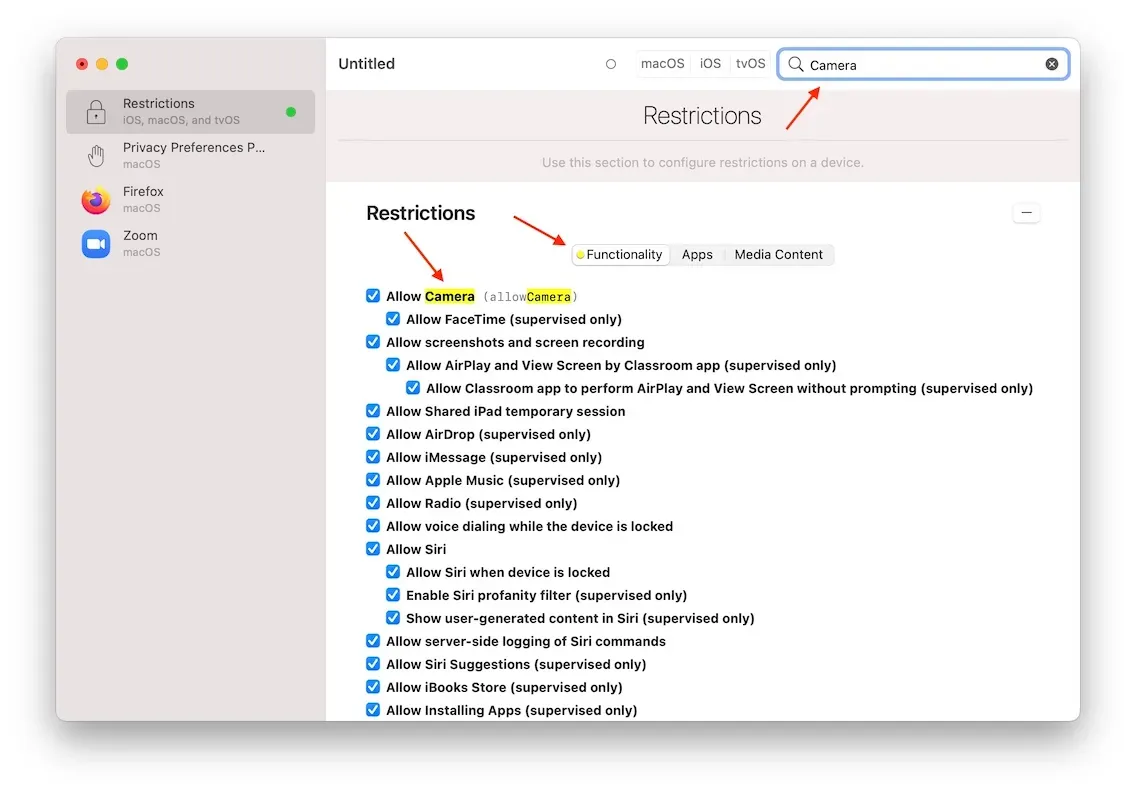
Searching for a specific setting
There are quite a few preference groups available, each containing potentially hundreds of settings. Fortunately, our profile editor features deep search: just type in the search box and iMazing will show only matching preference groups as well as highlight matching settings in yellow:
Most useful iOS preference groups
There are nearly 40 different preference groups available. We'll focus on the 7 most useful for small businesses – none of them require advanced IT skills.
Restrictions
The Restrictions preference group is one of the largest. You'll find settings there to disable just about any feature of the device: block the Camera, Siri, Airdrop, whitelist or blacklist apps and much more. Here are a few particularly important restrictions worth knowing about:
Allow modifying passcode
Default value: true Disable this option to make sure that the user cannot change the passcode.
Allow modifying Wallpaper
Default value: true Disable to ensure that your company branded wallpapers are permanently set.
Allow host pairing
Default value: true Disabling host pairing means that the device won't be able to connect to unauthorized computers. The computer which supervised the device is by default authorized. Import the supervising organization in iMazing running on other computers to authorize them.
This setting is also available when supervising a device. If you disabled host pairing at supervision time, you cannot re-enable it via a profile.
Force encrypted backups
Default value: false Enable this option and local backups will fail until the user has enabled backup encryption.
Web Content Filter
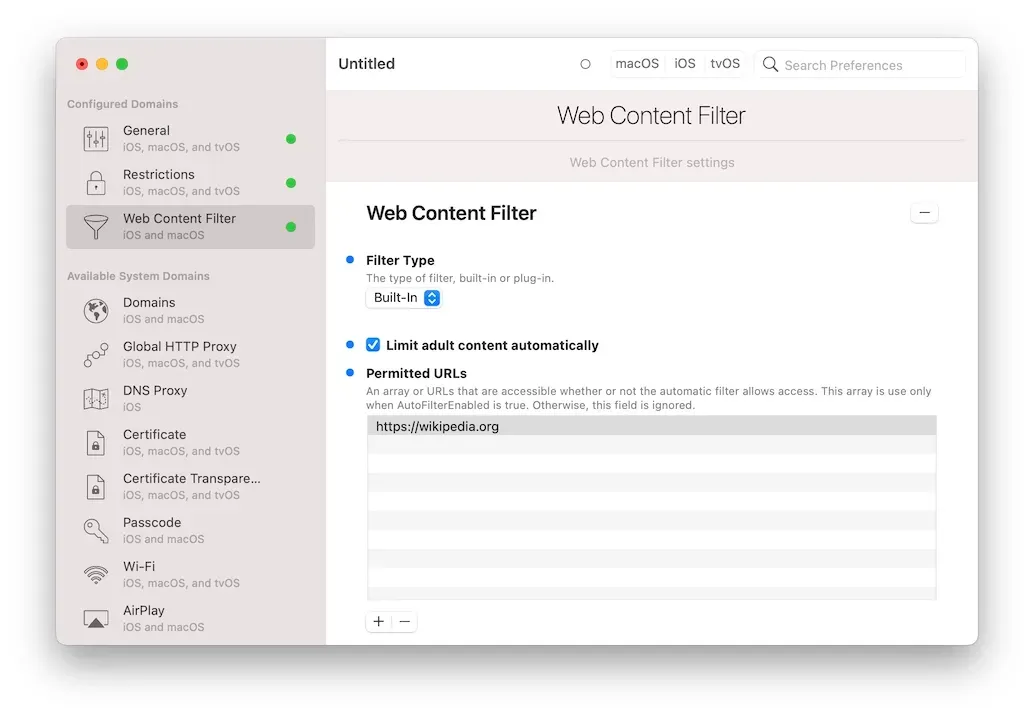
This preference group is very simple: adding it will activate Apple's built-in iOS Adult web content filter. You can additionally add allowed URLs which you want to guarantee access to, and ban additional URLs.
Passcode Policy
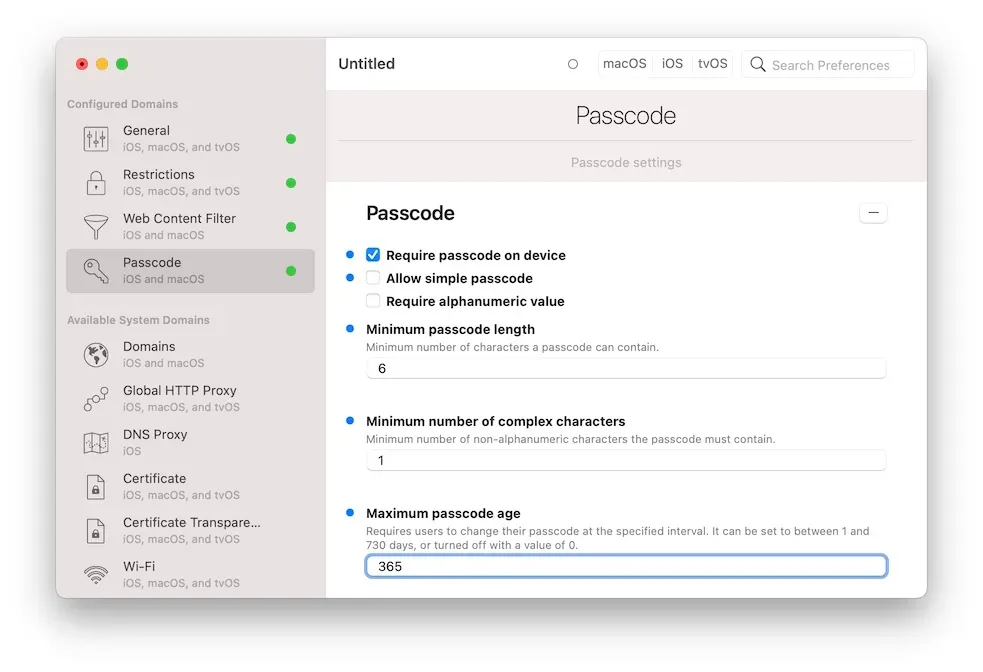
Use this preference group to guarantee a minimum of security. In the example above, we've configured the following policies:
- Require passcode (a passcode must be set by the user)
- Don't Allow simple passcode (the user cannot pick non secure passcodes like 1234 or 1111)
- Minimum passcode length of 6 characters
There are more complex rules to play with too, such as requiring complex characters or even enforcing a regular change of the passcode.
Wi-Fi Configuration
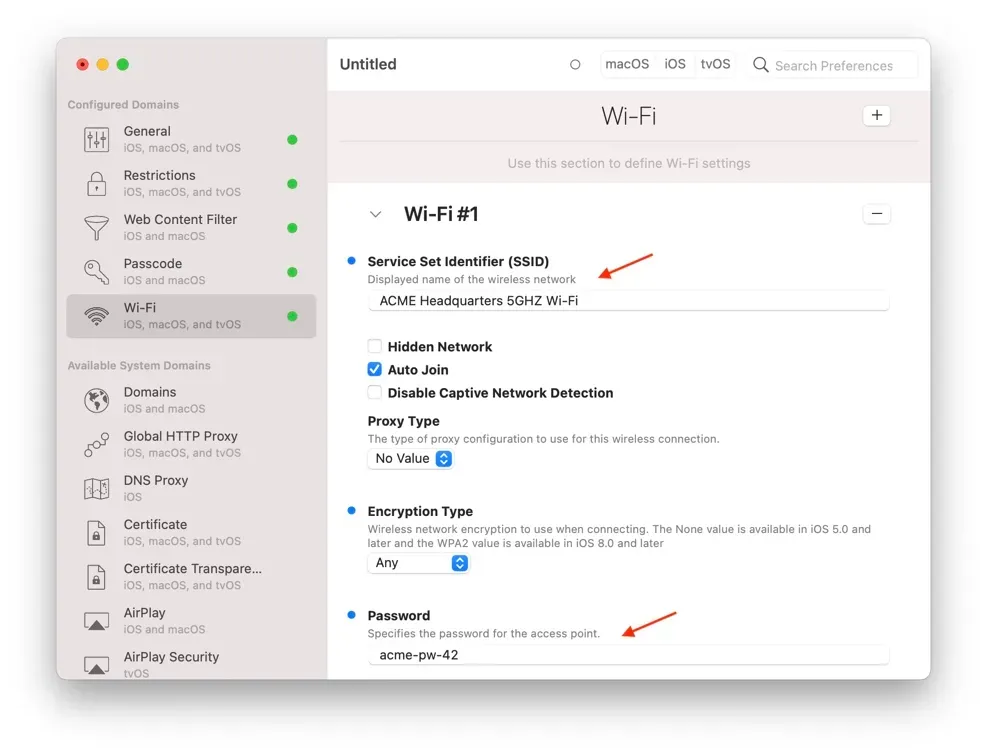
This preference group simply configures access to a Wi-Fi network. Lots of advanced settings there, but in most cases you'll only have to fill the SSID (network name) and Password fields, just like in the example above.
Lock Screen Message
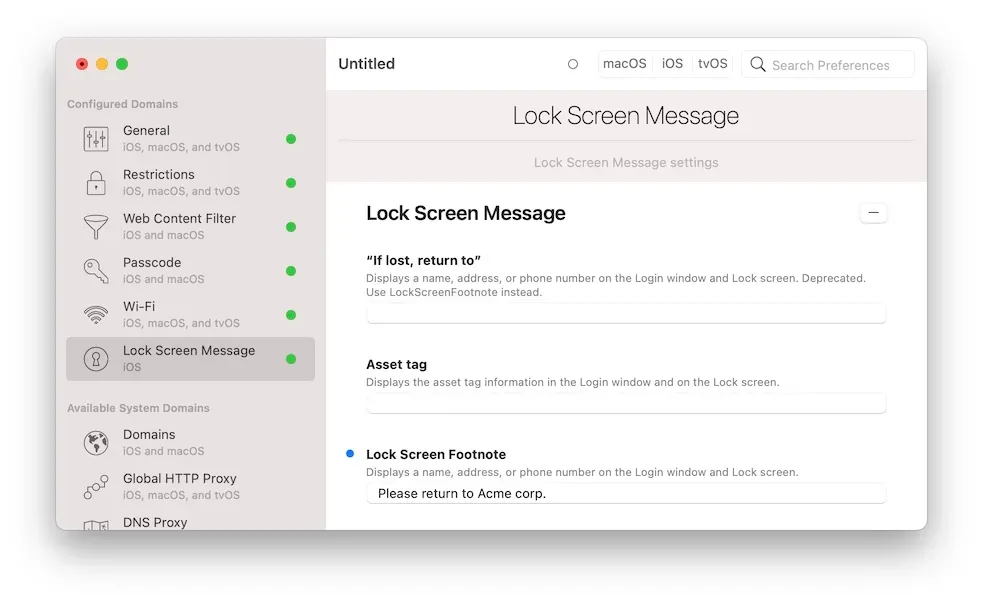
Fill in the Lock Screen Footnote field here to add a custom message to the device's lock screen. The other fields are legacy fields for older iOS versions.
Web Clips
You can add a link to any website right there on the device's home screen, as if it were an app. Tapping the web clip 'app' will open Safari at the configured URL. Below, we're configuring a web clip which will point to iMazing's Guides page.
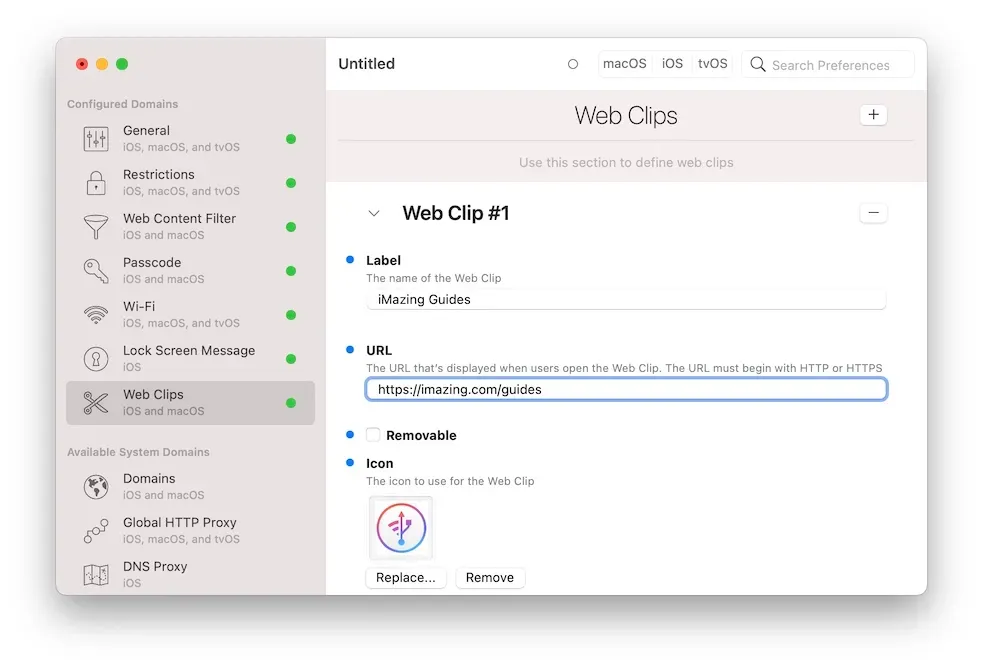
The icon must be in PNG format, with a
.pngfile extension.
Single App Mode
Single App Mode can be configured manually, but iMazing features a direct way to put supervised devices in supervised mode that's much more convenient. Please refer to our How to put iPhone or iPad in Single App Mode guide for more info.
Save and install the profile
Saving your Profile
Once you've finished configuring the profile, save it (File menu, Save). Profiles you created or opened from iMazing's profile library will automatically be saved to the library, and iMazing will display a confirmation dialog. If you've opened iMazing Profile Editor directly and not from within iMazing, you'll get a standard Save dialog.
Installing the Profile
You can now close the profile editor and return to the profile library, where the new profile has appeared:
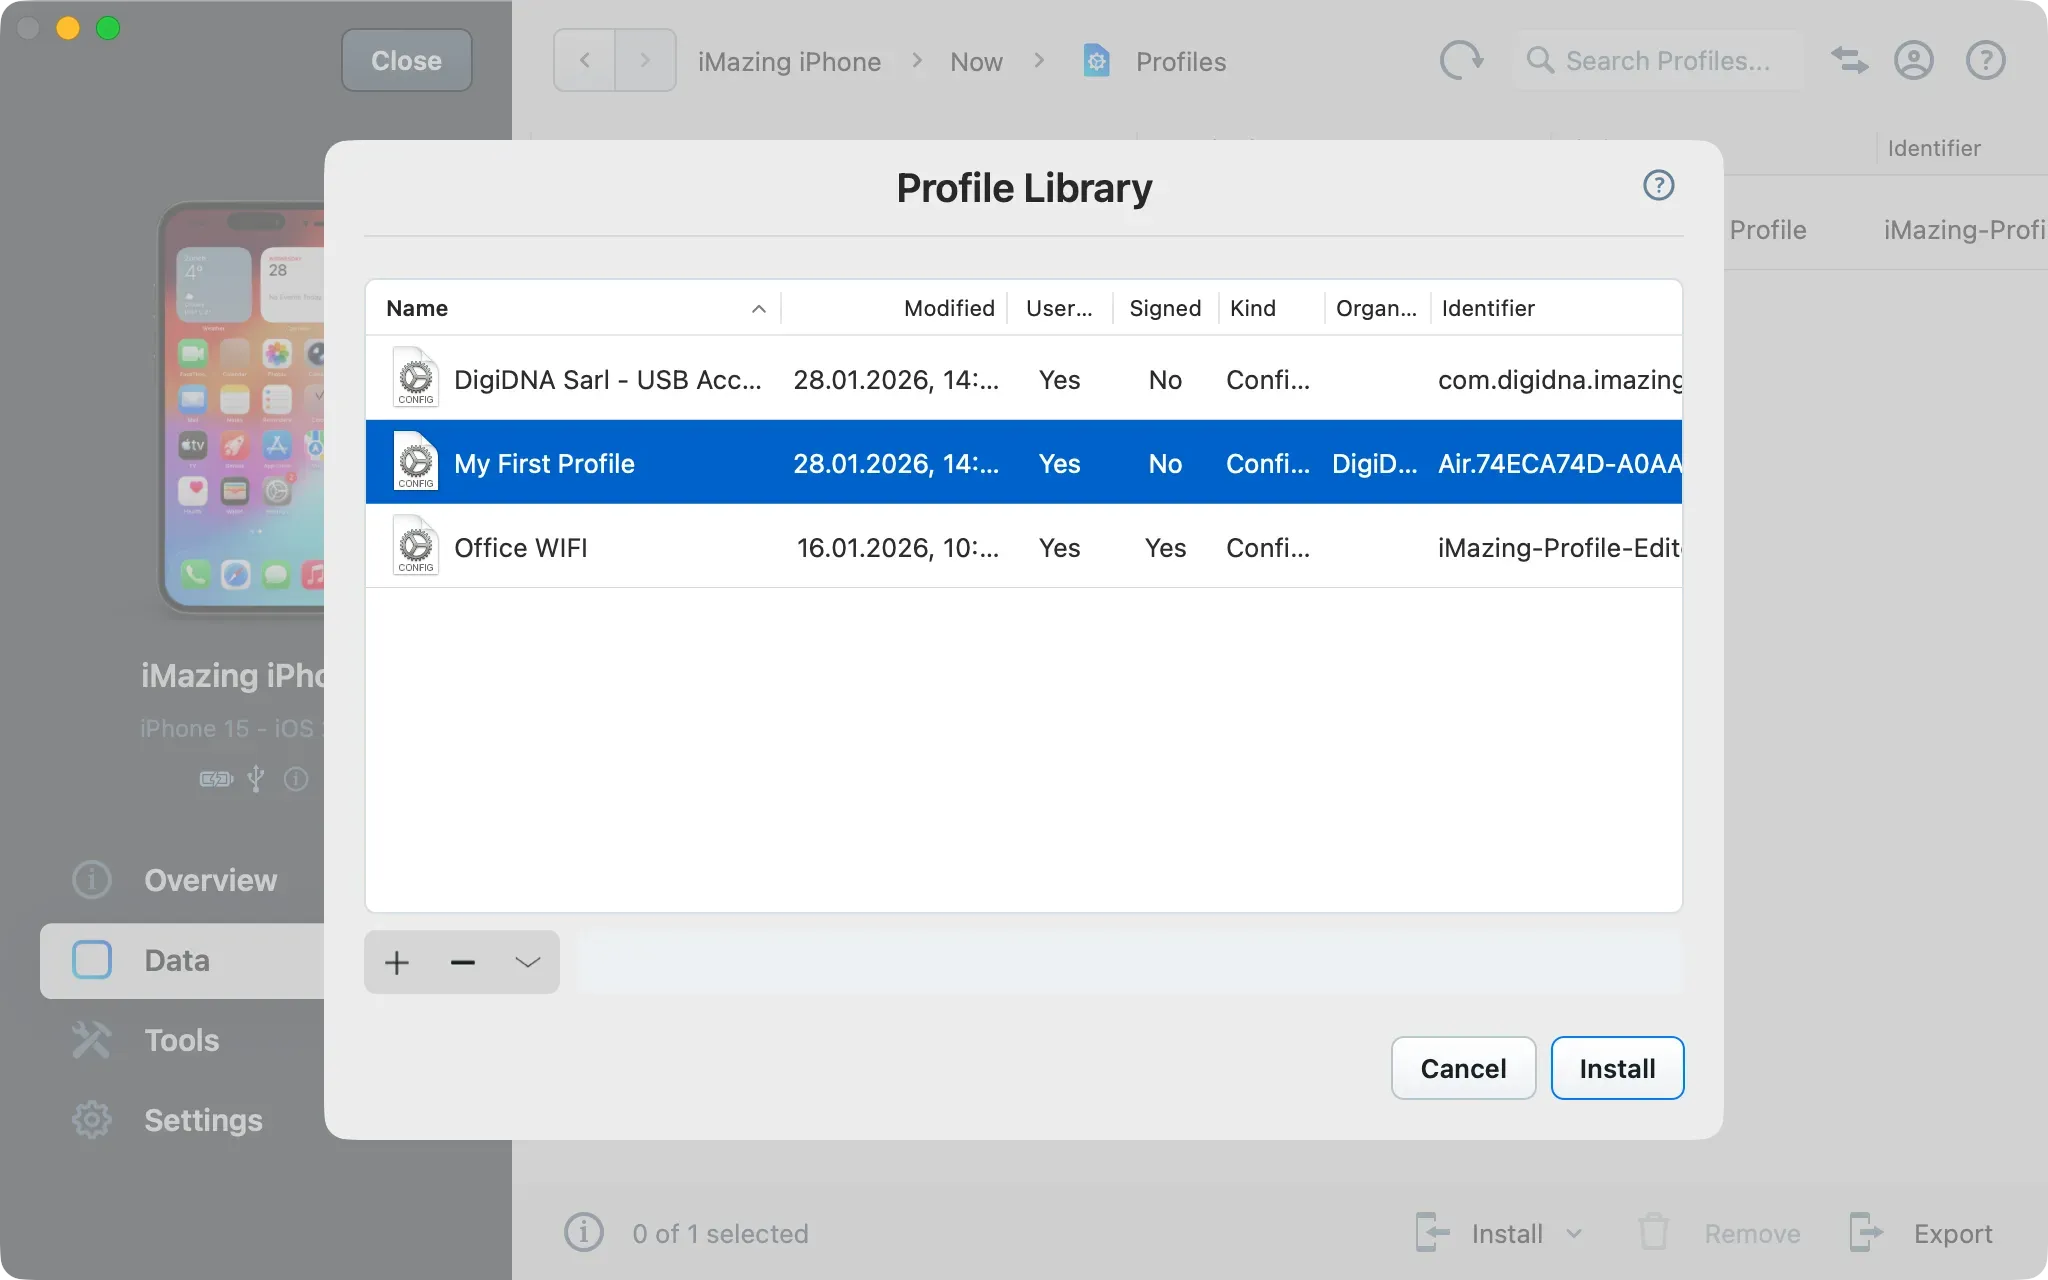
Select it and click Install to install it to the target device and see the results immediately.
Modifying the Profile
You can quickly change the profile and re-install it:
- Click on Install from Library again
- In the profile library, double click the profile you wish to edit
- Make your changes in the profile editor and save
- Install the edited profile from the library
- iMazing will display an overwrite prompt, confirm.
This tight integration between the profile editor, the library, and device profiles will let you quickly test configurations and find the right settings for your business.
Non-supervised devices
Configuration profiles can also be used on devices which haven't been supervised, but in a much more restricted manner:
- After iMazing uploads the profile to the device, it must be installed manually in the Settings app.
- The device's passcode is required.
- The profile is always removable by the user.
- All supervised only settings are ignored.