Use iMazing Configurator to bulk migrate iPhones or iPads registered in AB or ASM to a different MDM solution, while preserving their data
Updated on May 27, 2026
Reading time ~4 minutes
The purpose of this guide is to assist in the bulk migration of iPhones or iPads from one MDM solution (ex: Jamf) to another (ex: SimpleMDM) while keeping devices registered in Apple Business or Apple School Manager and preserving their data.
Background
In this scenario, your company wants to replace its current MDM solution with another one. As an IT administrator, you need to prepare a migration plan. To perform this operation, use the Configurator feature of iMazing to create a blueprint that you can then apply to your devices in bulk.
Preparing your migration
- You may want to first unenroll the managed devices from the current MDM solution. In general, you should find an "Unenroll" button next to the devices in the MDM dashboard.
Important: Unenrolling devices from an MDM can impact deployed configurations on devices and potentially associated data. Therefore, we advise that you read the documentation of your MDM solution before proceeding.
- Connect to Apple Business or Apple School Manager to decommission the devices from the old MDM solution. If the entire fleet is to be moved to a new MDM, it is possible to use the "All devices" function instead of selecting the devices one by one:
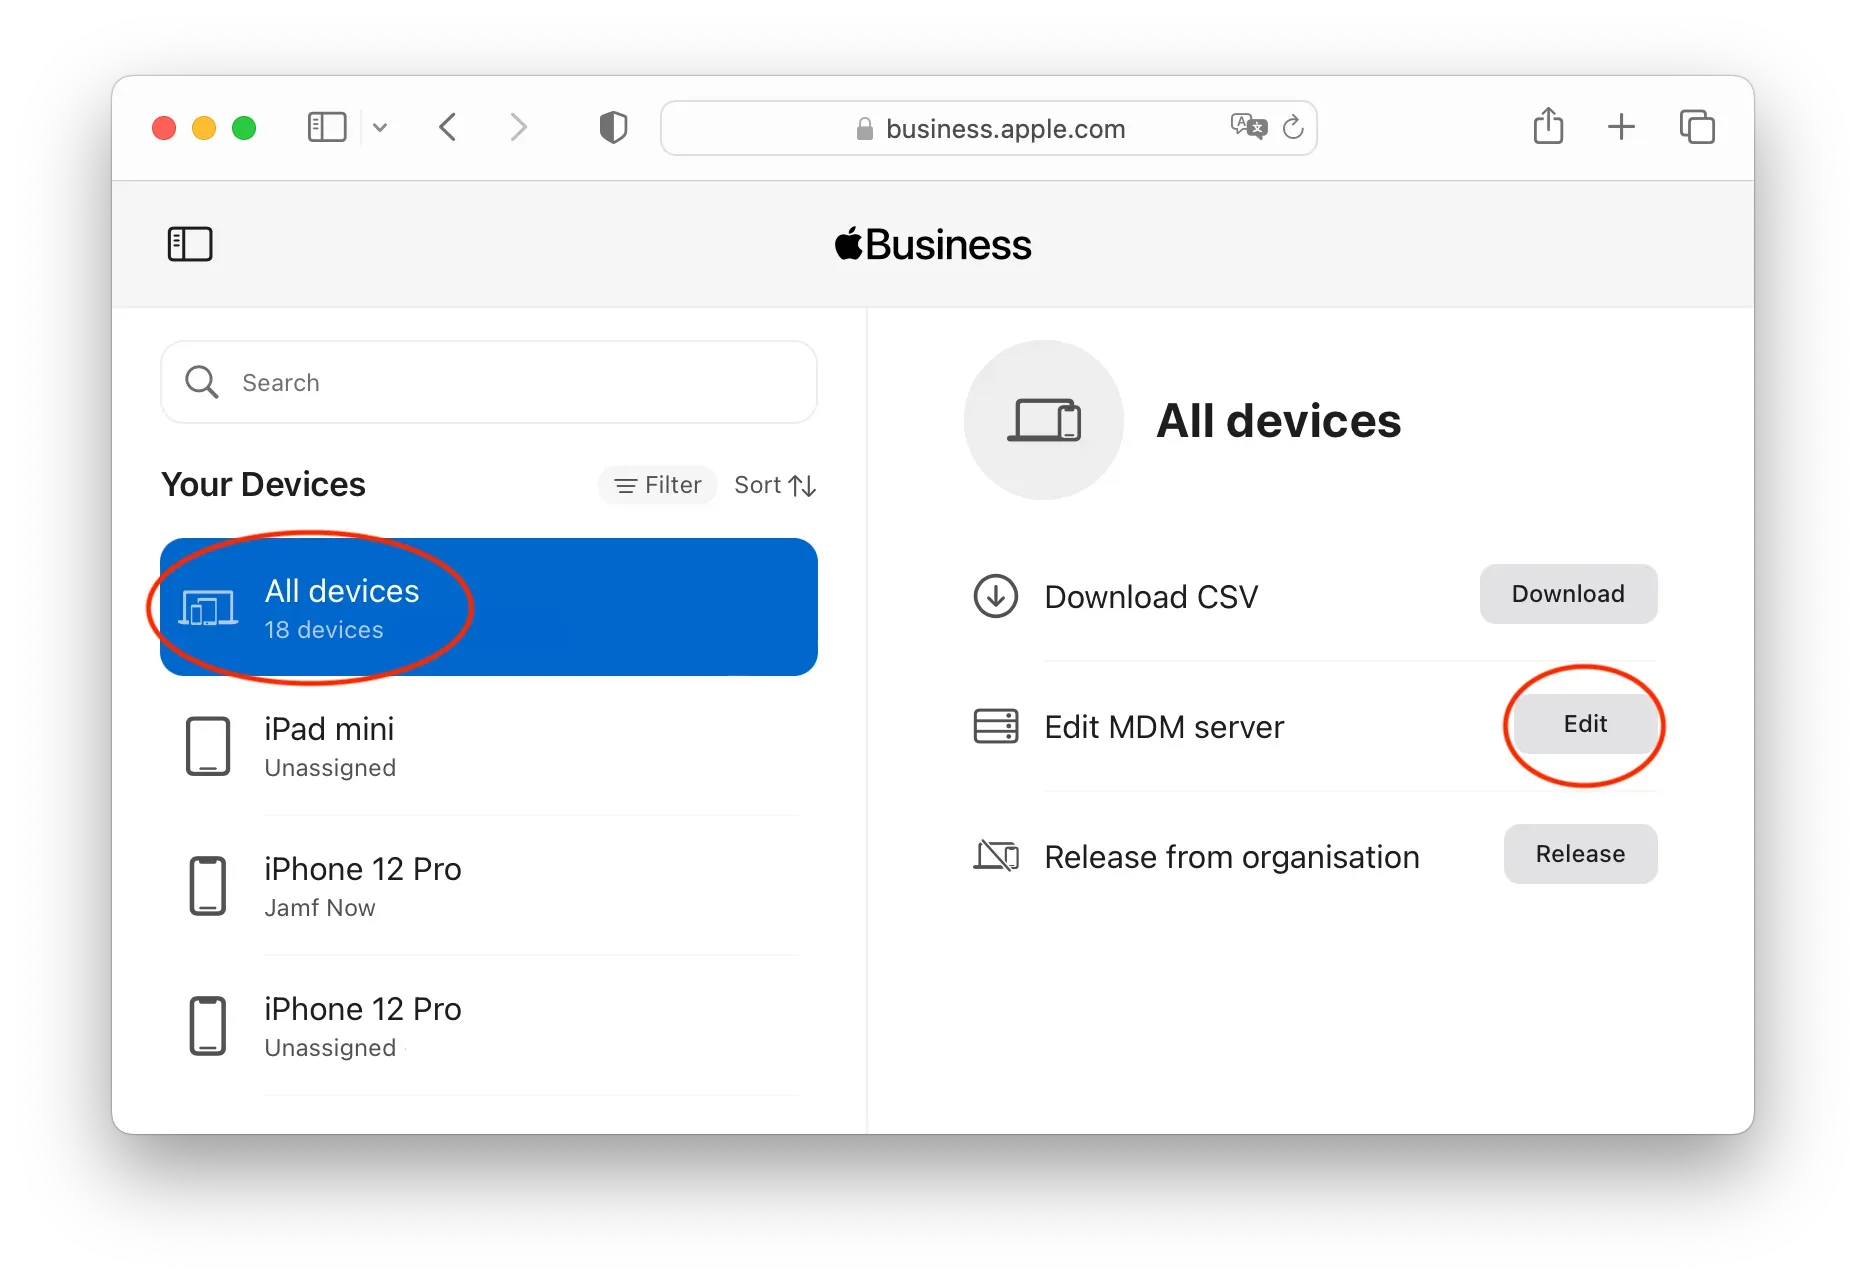
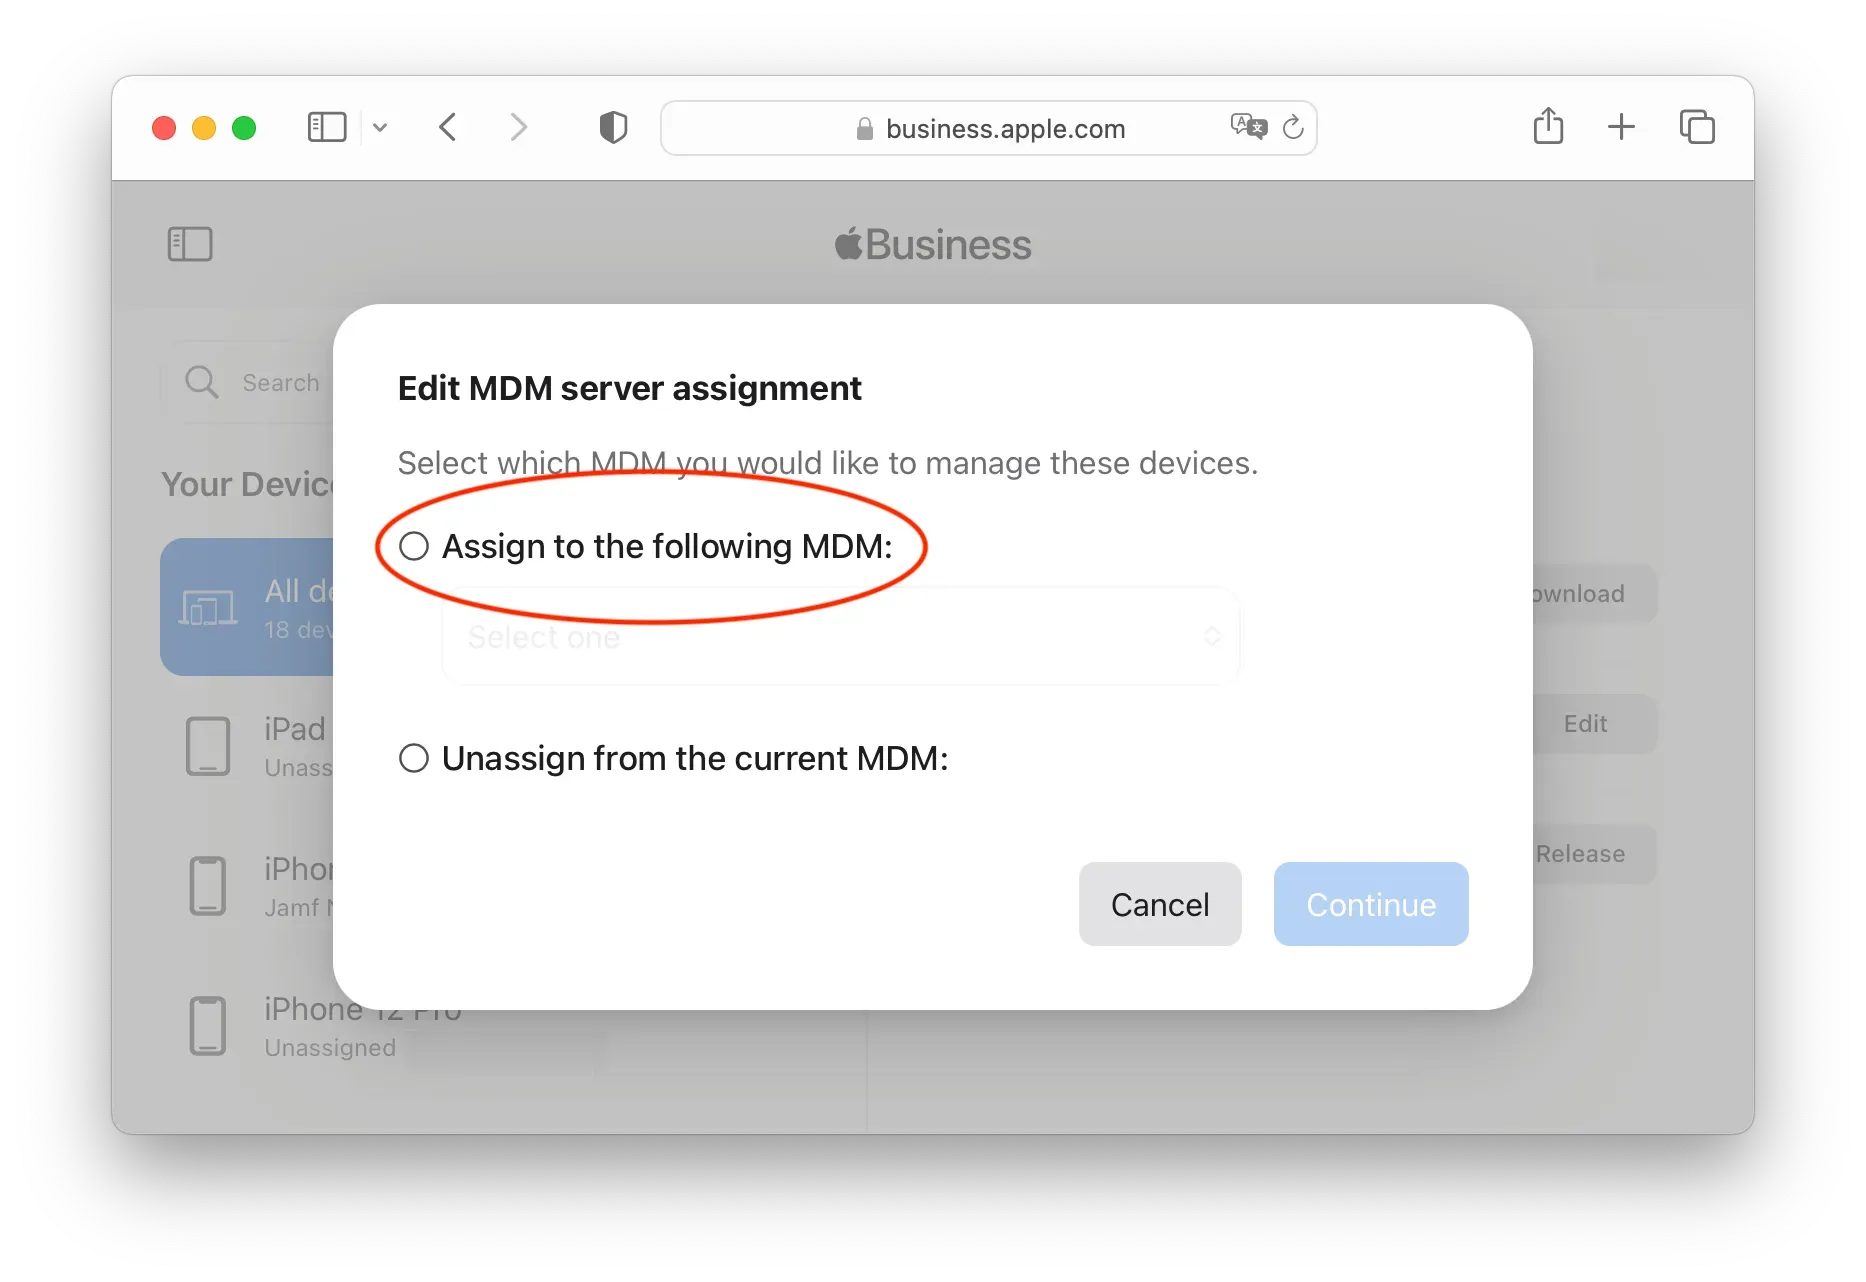
- Finally, the following choices are left to the discretion of the administrator: "Assign to another MDM solution" or "Unassign" from the current solution:
Create a blueprint with iMazing Configurator
- Navigate to the Blueprint section under the Configurator menu from iMazing's home screen.
- Click on the '+' sign at the lower left corner to create a new blueprint:

- Under General, name your blueprint and add a description. You can leave the default device type (any) or select a specific device type:
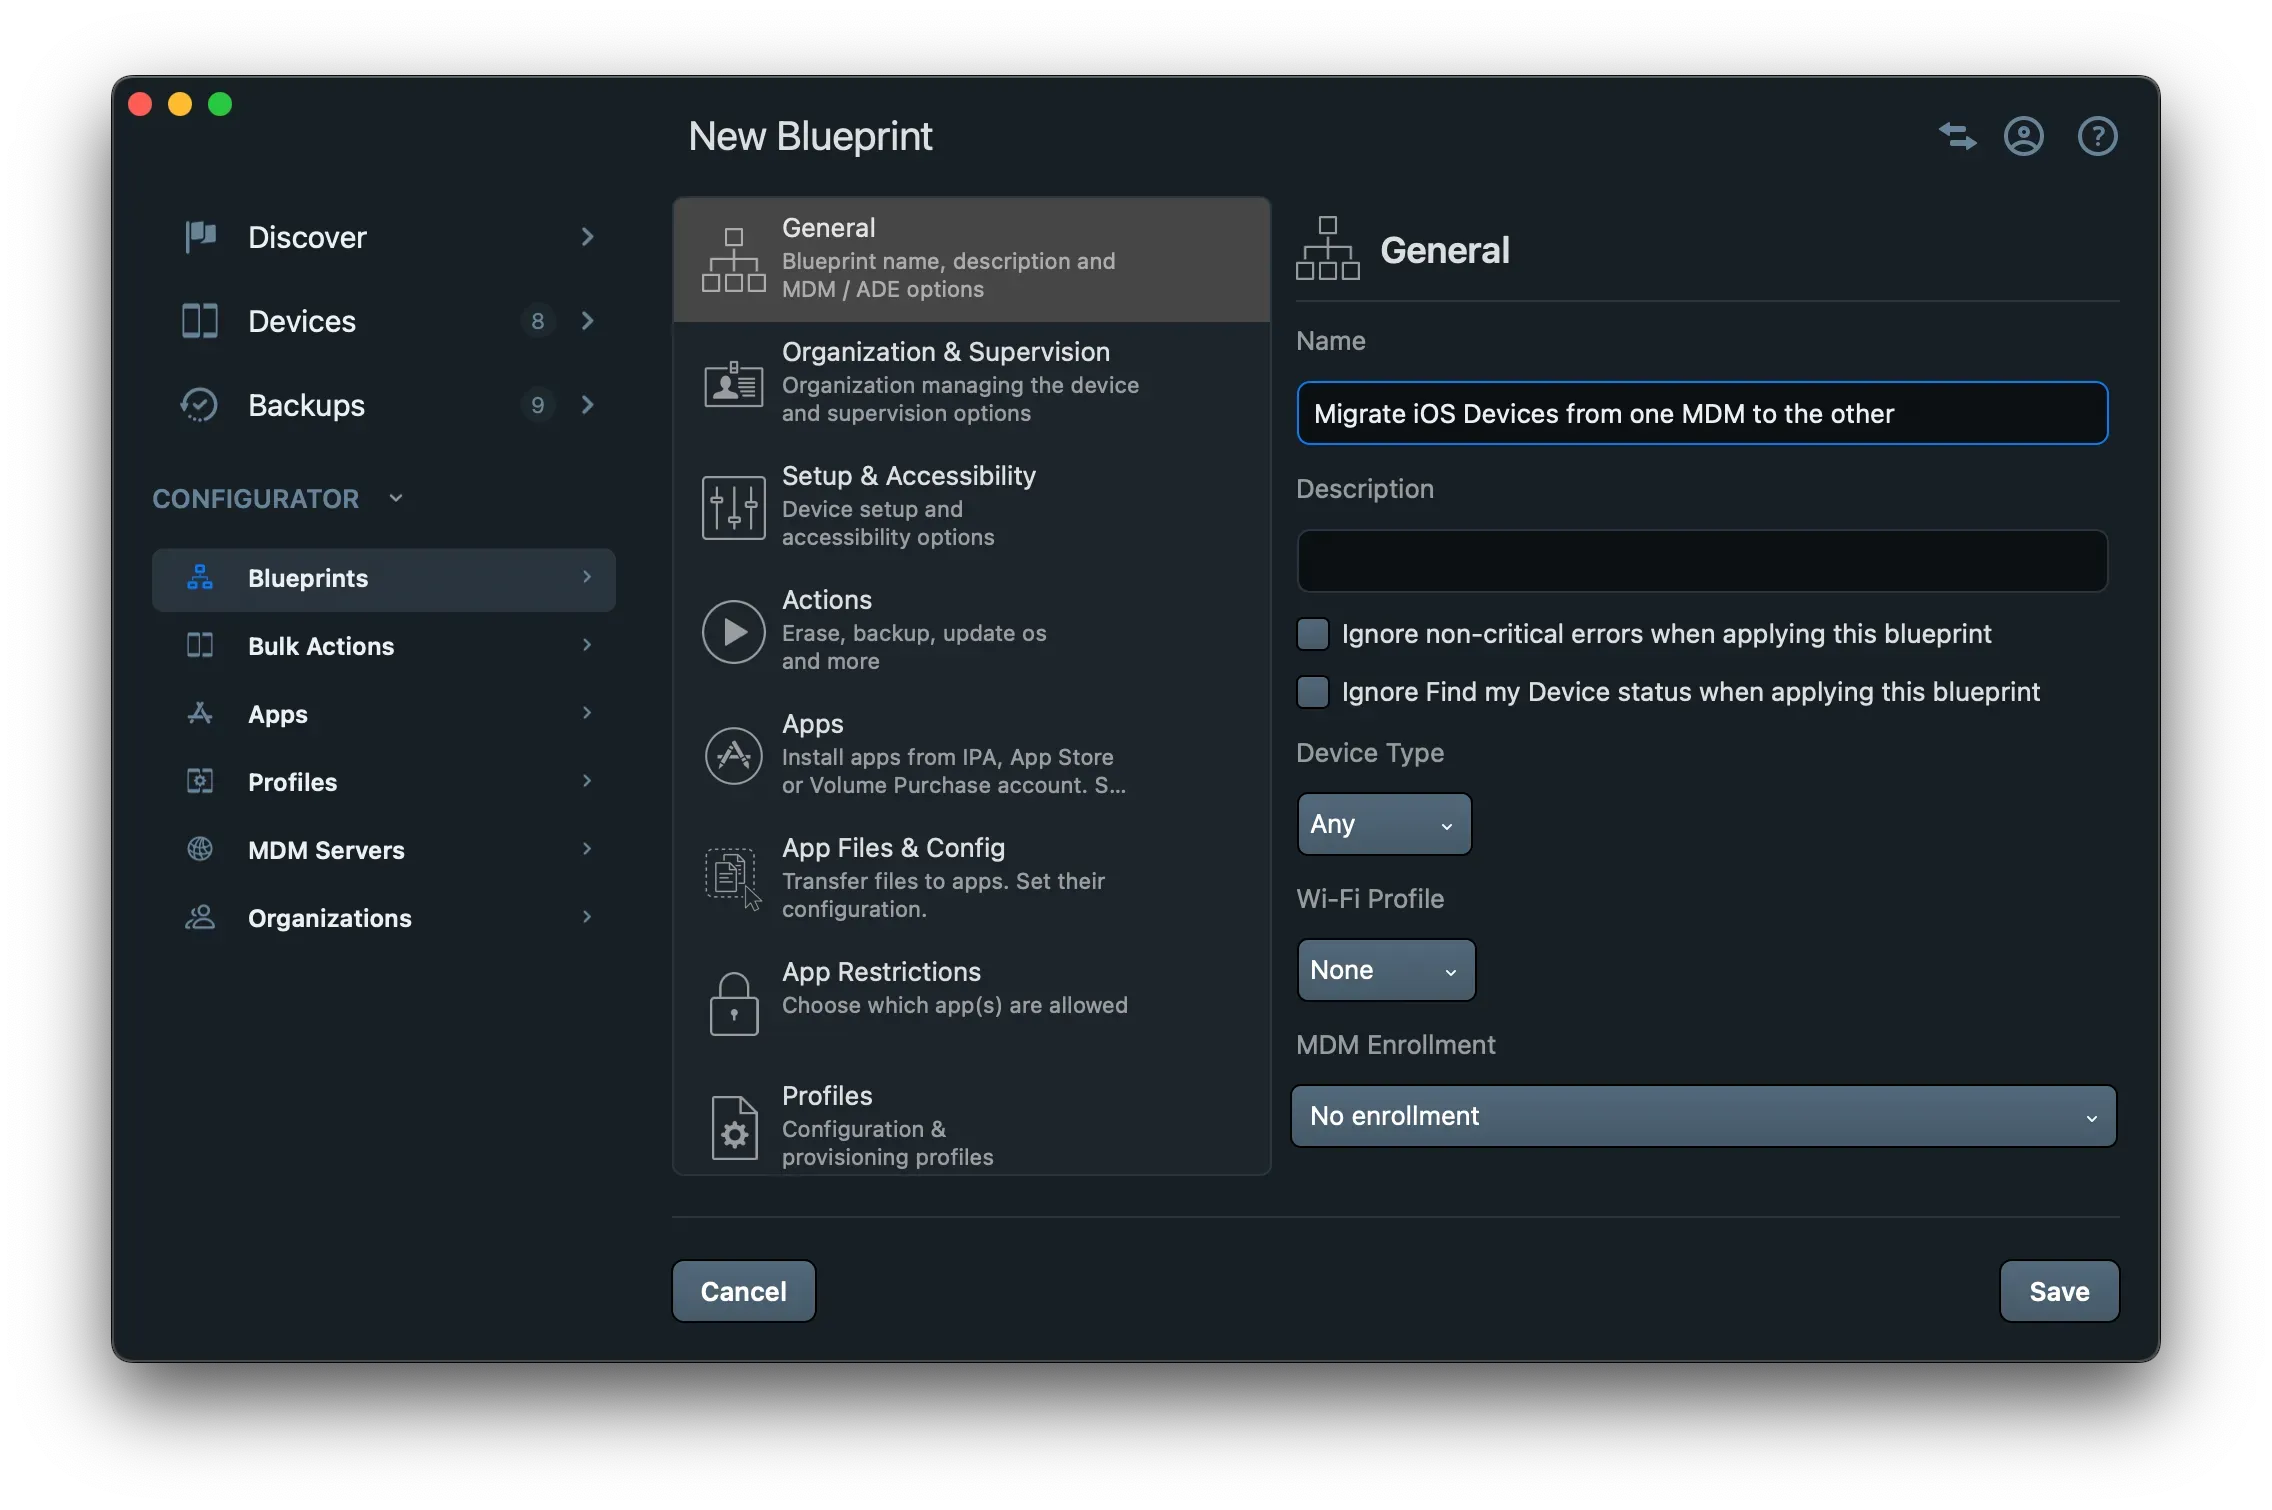
- Make sure to choose No Enrollment (which is the default value).
- Now, go to the Actions section in the left menu and select the following options: Backup, then under Set backup encryption status, select Encrypt this backup and define a password:
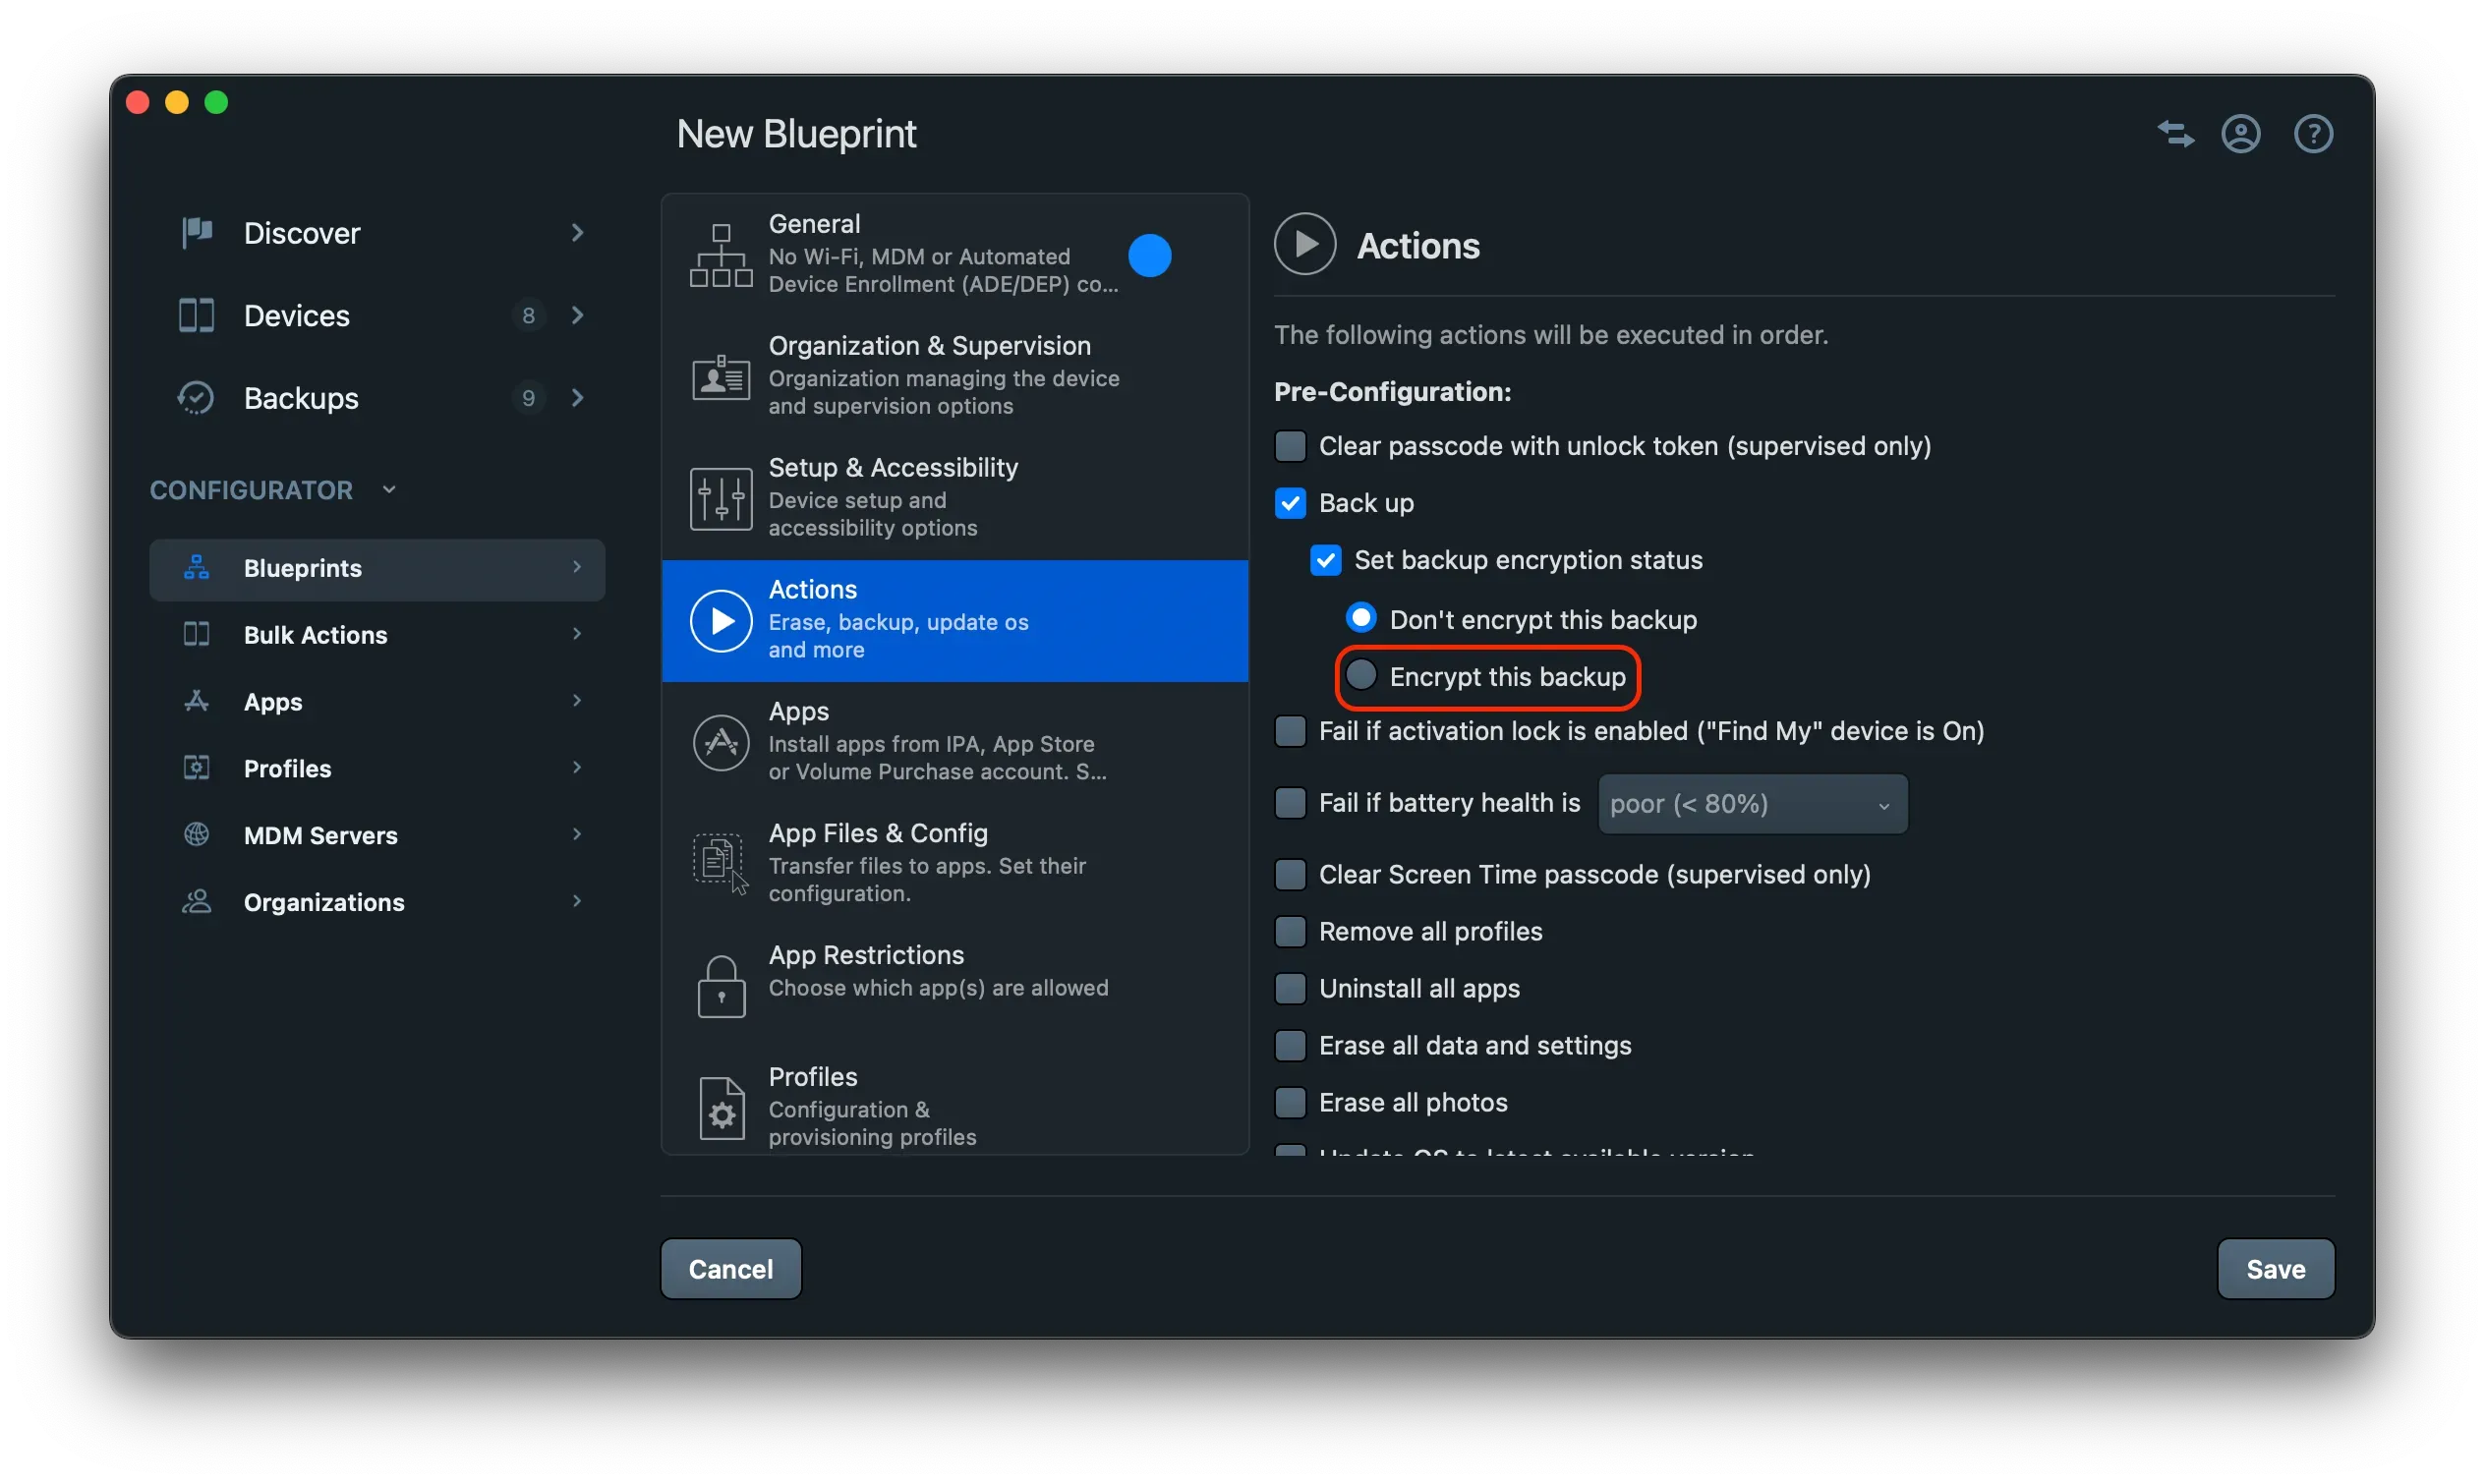
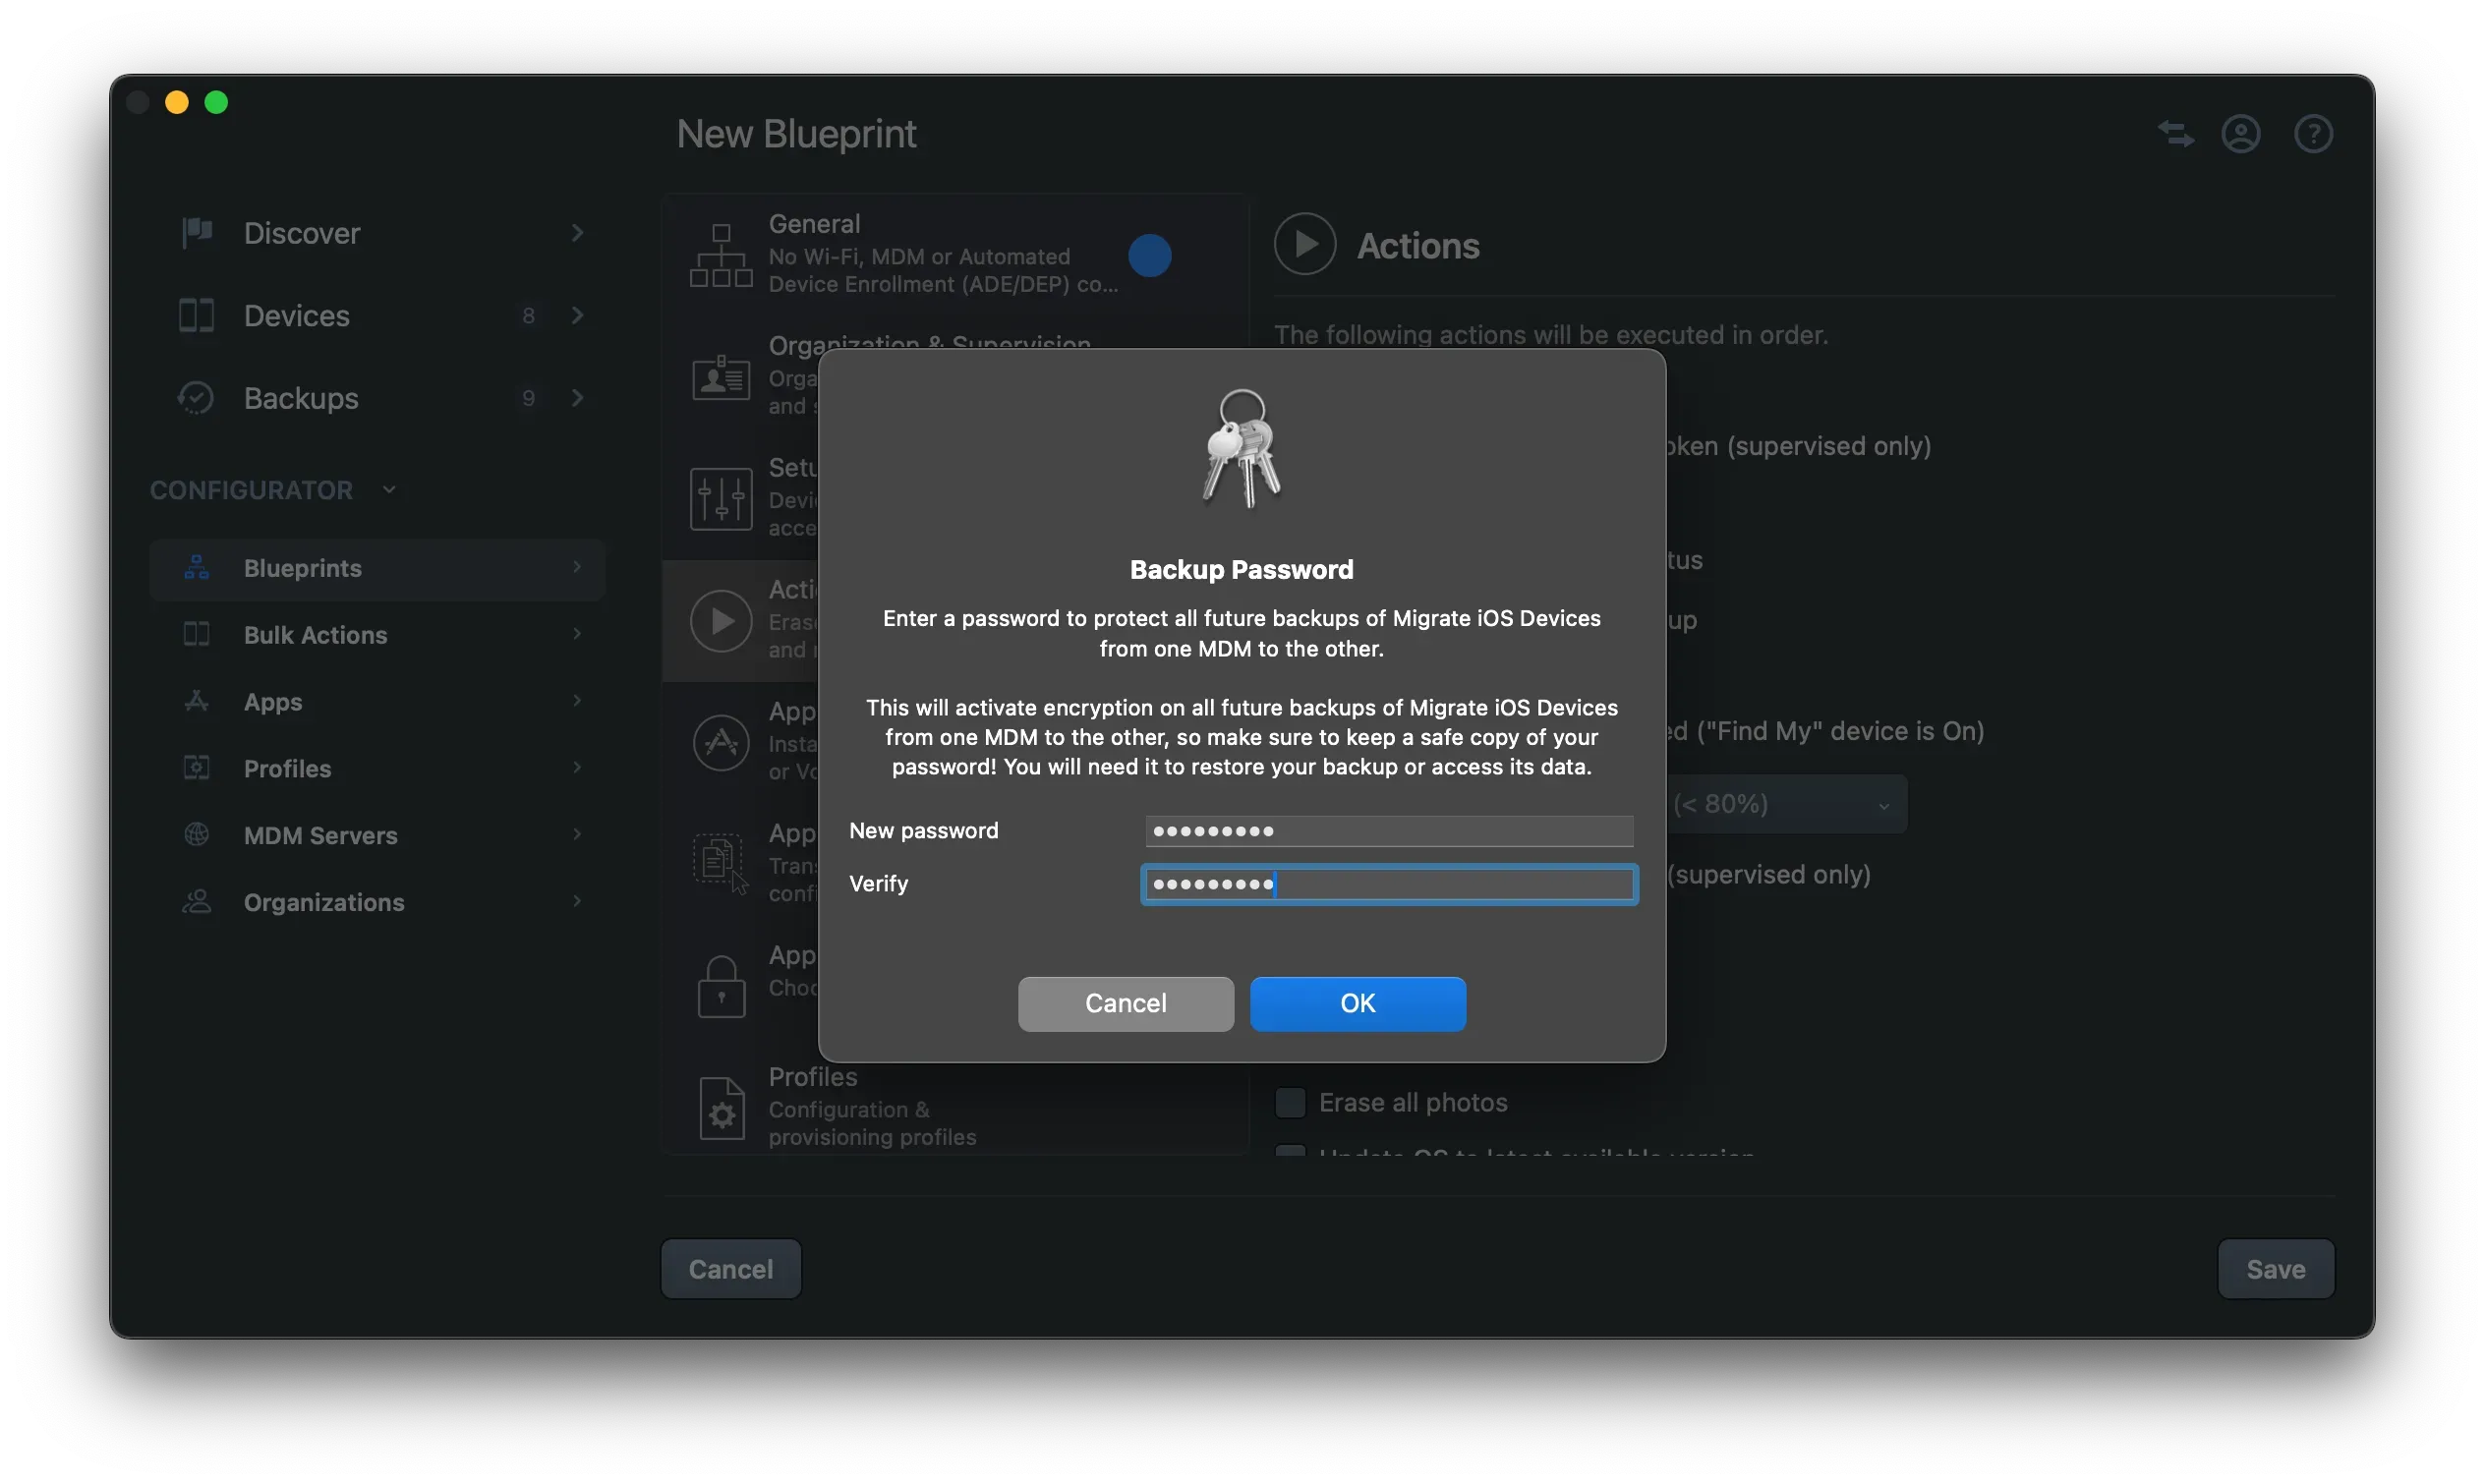
If you don’t set the encryption status to "Encrypt this backup", the passwords and other items stored in the keychain won’t be transferred. Also, Safari and Health data won’t be transferred. Learn more about Backup Encryption in iMazing
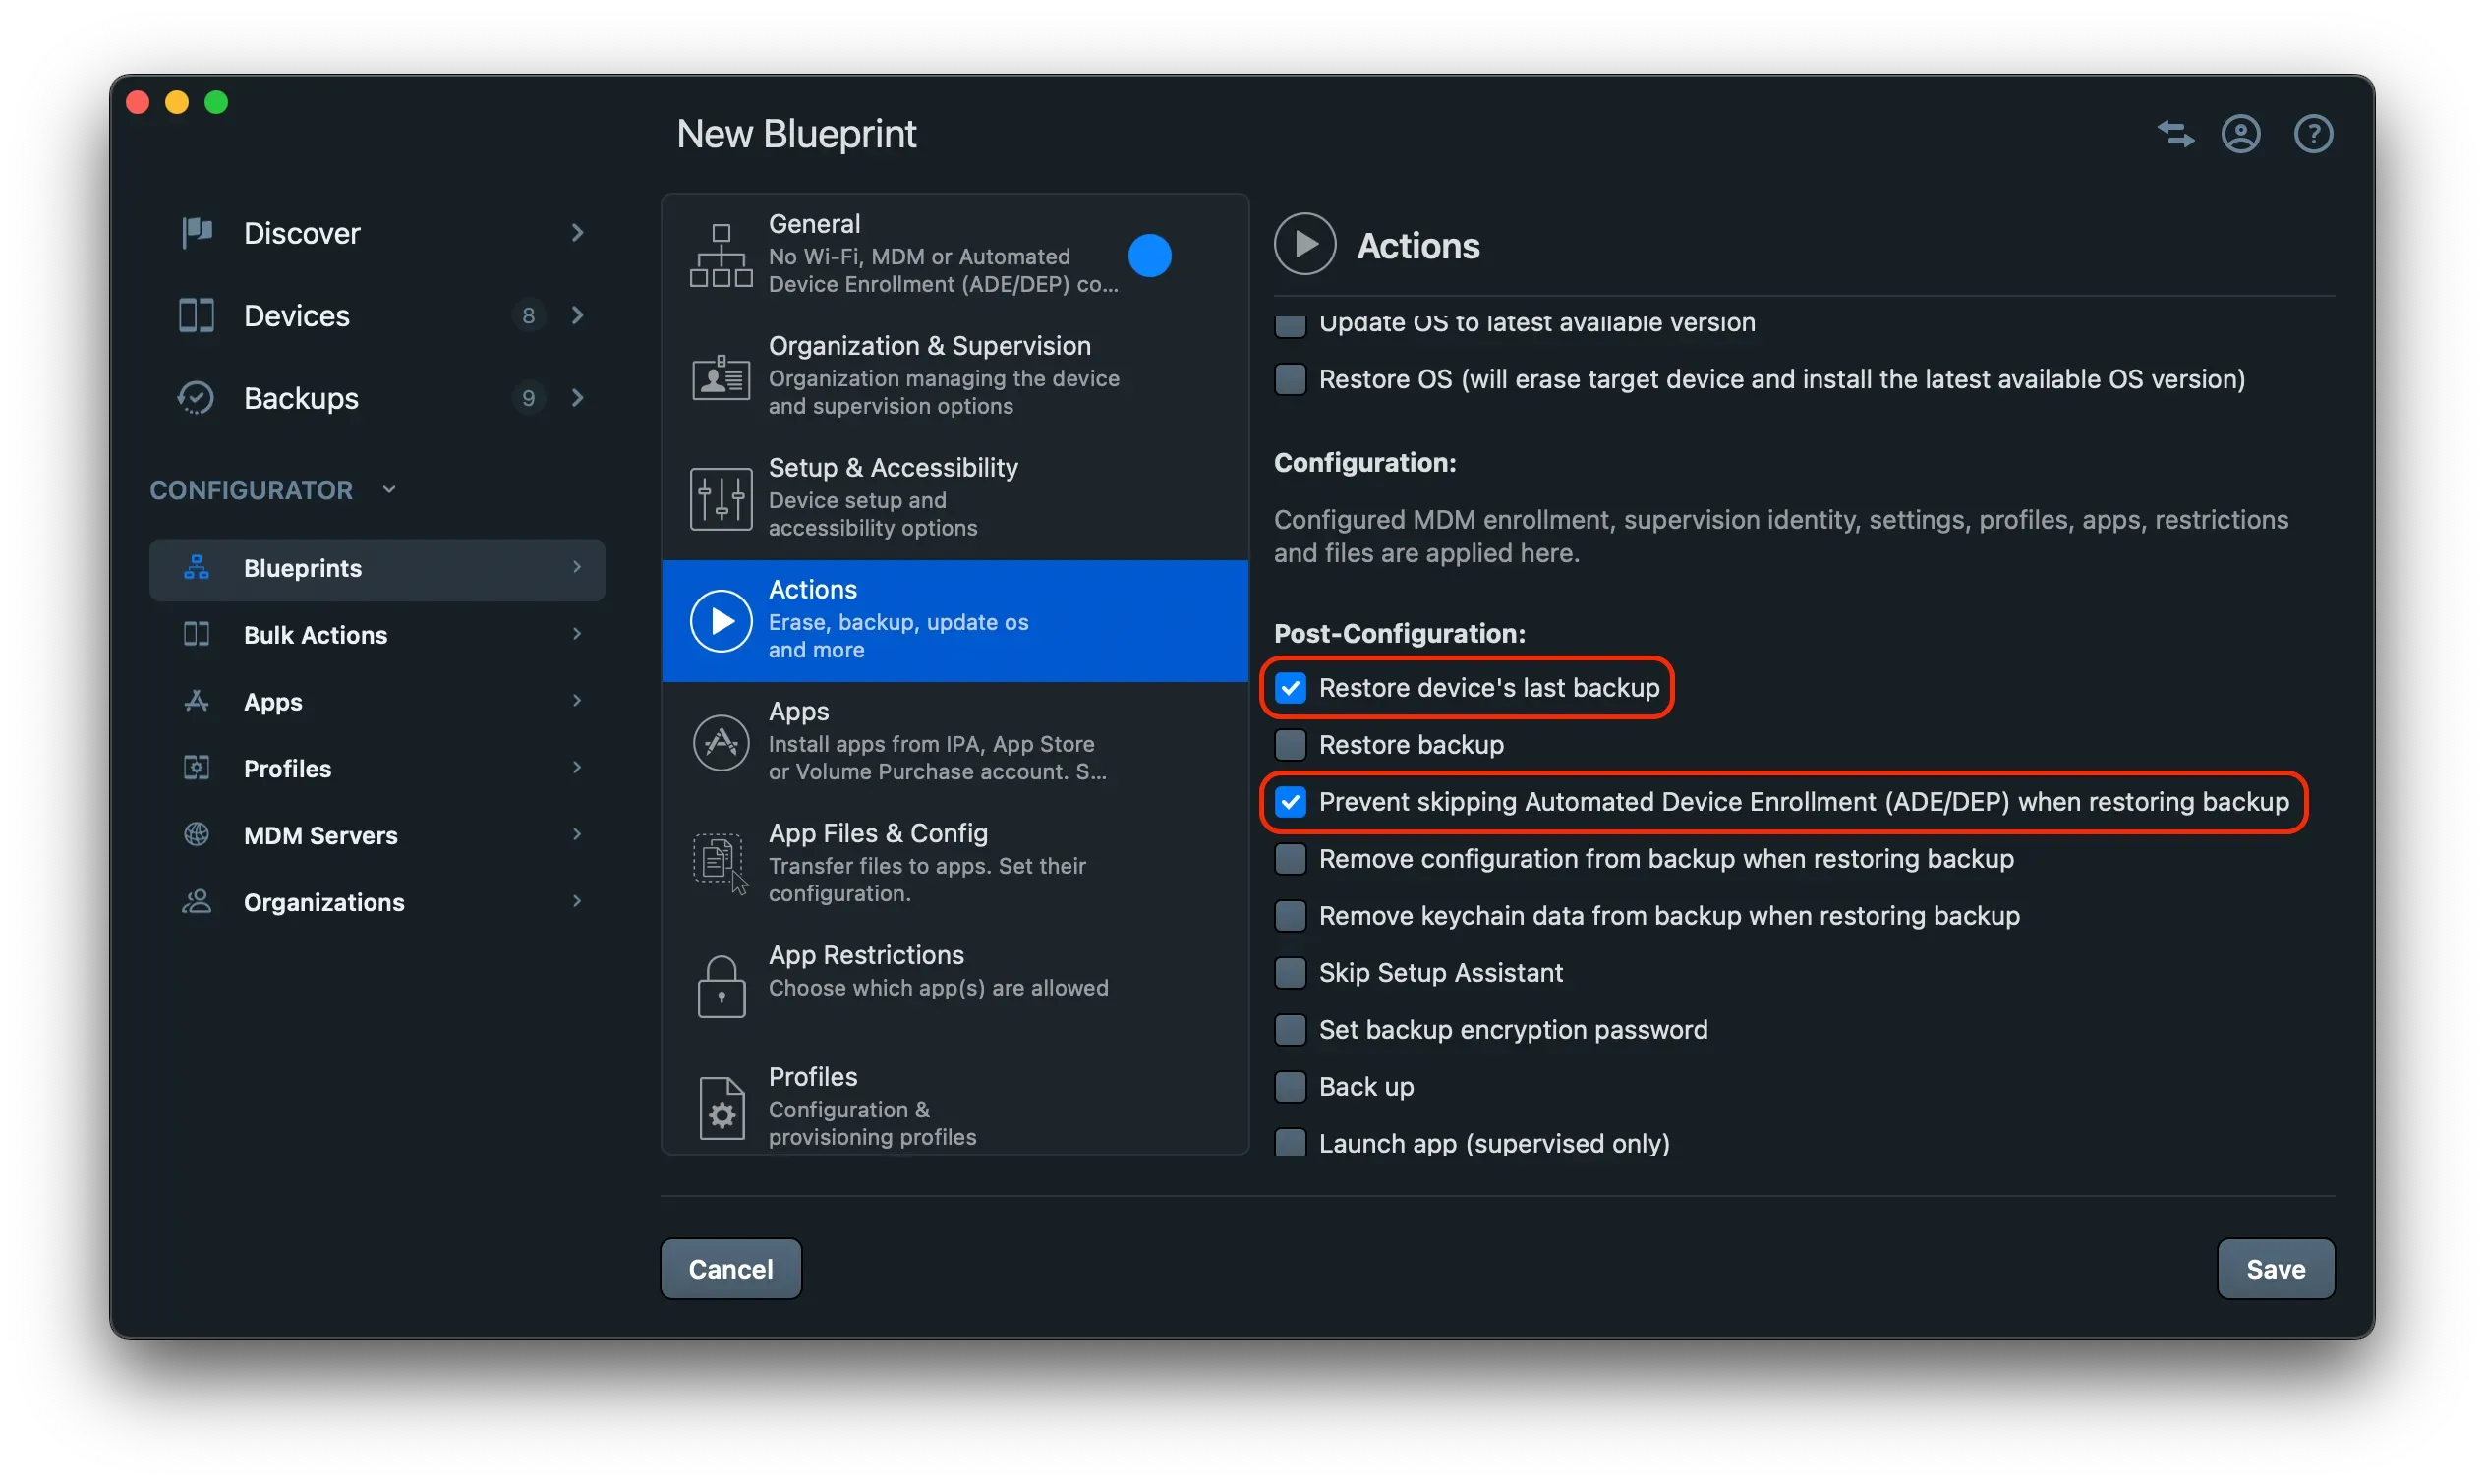
- The last preparation step is to select Restore device's last backup and Prevent skipping Automated Device Enrollment (ADE/DEP) when restoring backup and click Save at the lower right of the window:
Applying the blueprint to migrate your devices
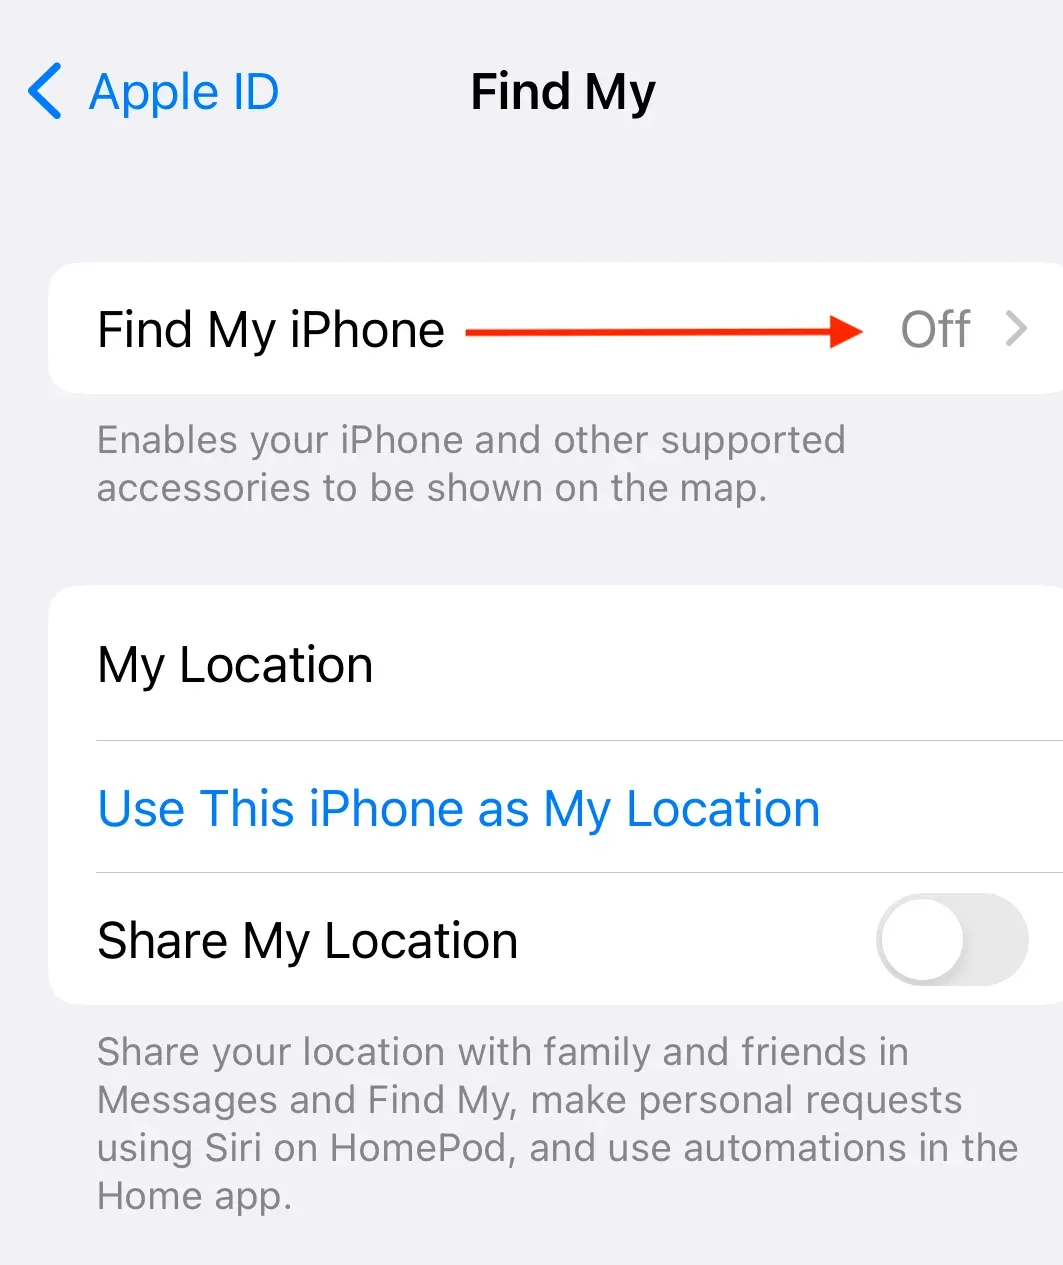
- To prevent your migration from not working or too many user interactions while applying the blueprint, make sure to tell your users to turn off "Find My iPhone/iPad" on each device that they would like to migrate. Otherwise, your users will have to disable "Find My iPhone/iPad" while the blueprint is applied. Disabling this setting requires users to enter their Apple ID password. On the device, go to Settings, then Apple ID, iCloud, Media and Purchases. Finally, click on Find My and make sure the feature is turned off:
- If a passcode is configured on the devices, we also advise you to tell your users to turn their passcode off before the migration, otherwise they will have to enter their passcode several times while the blueprint is applied.
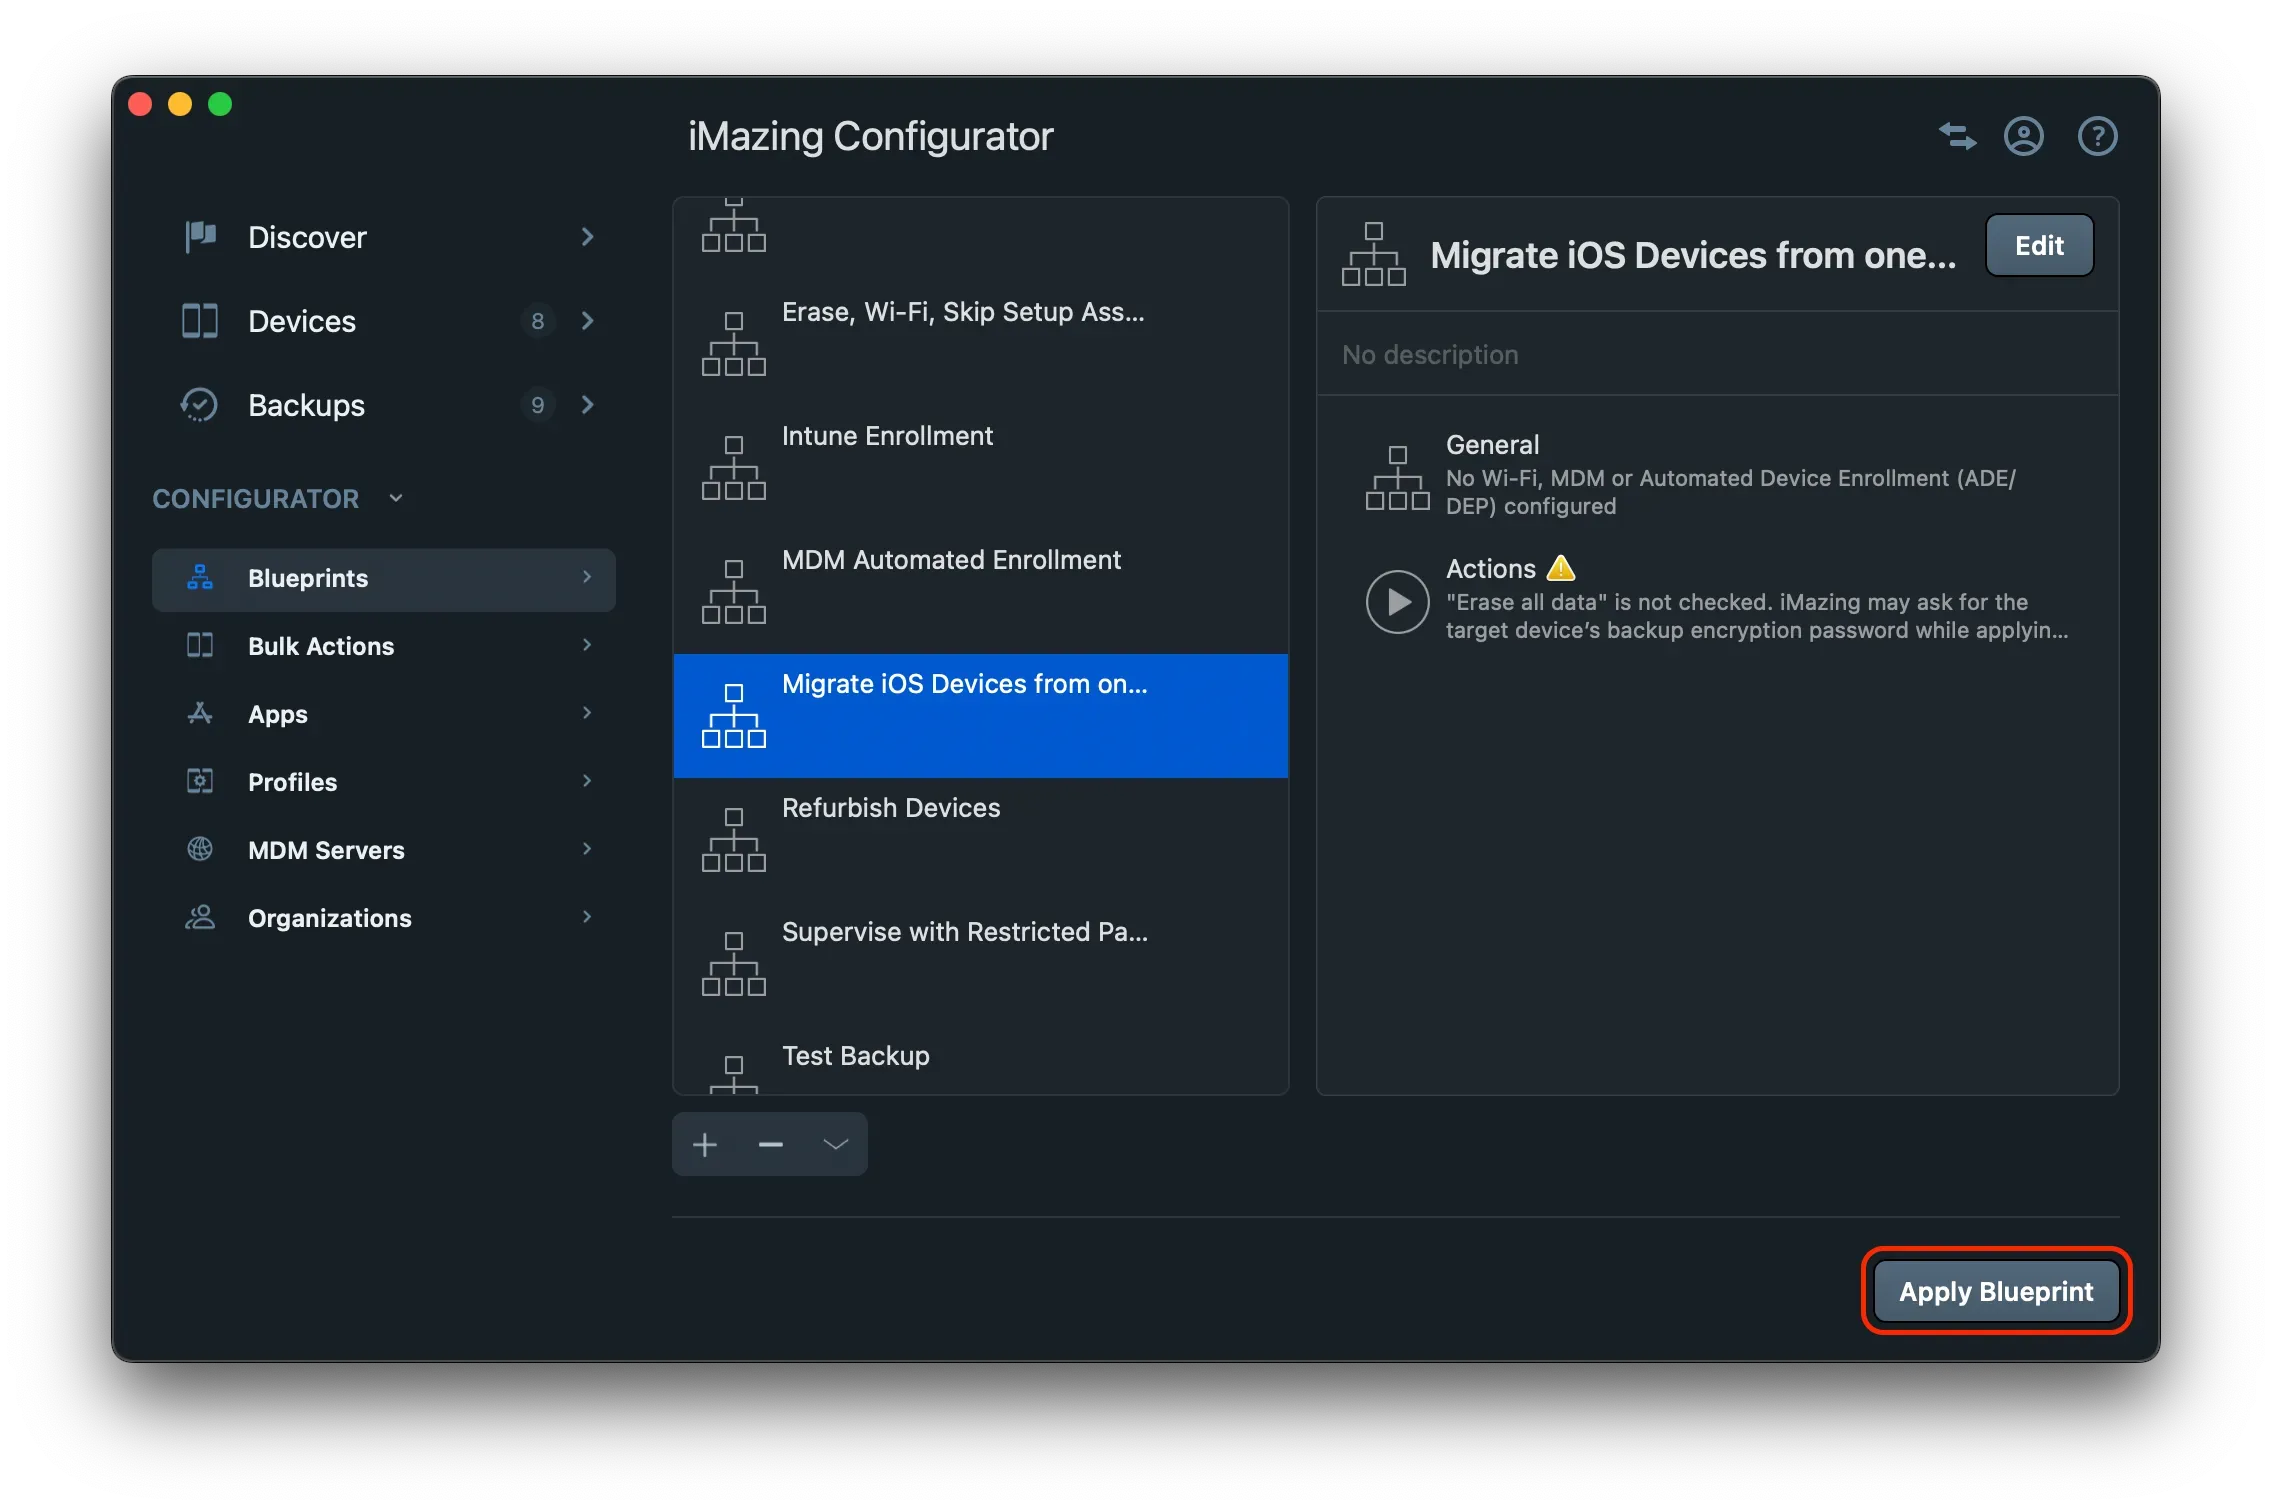
- To continue with the migration, click the Apply Blueprint button at the lower left of the window and select your target devices. When you are ready to migrate, click the Launch button (note that you can choose Select All if you have several devices):
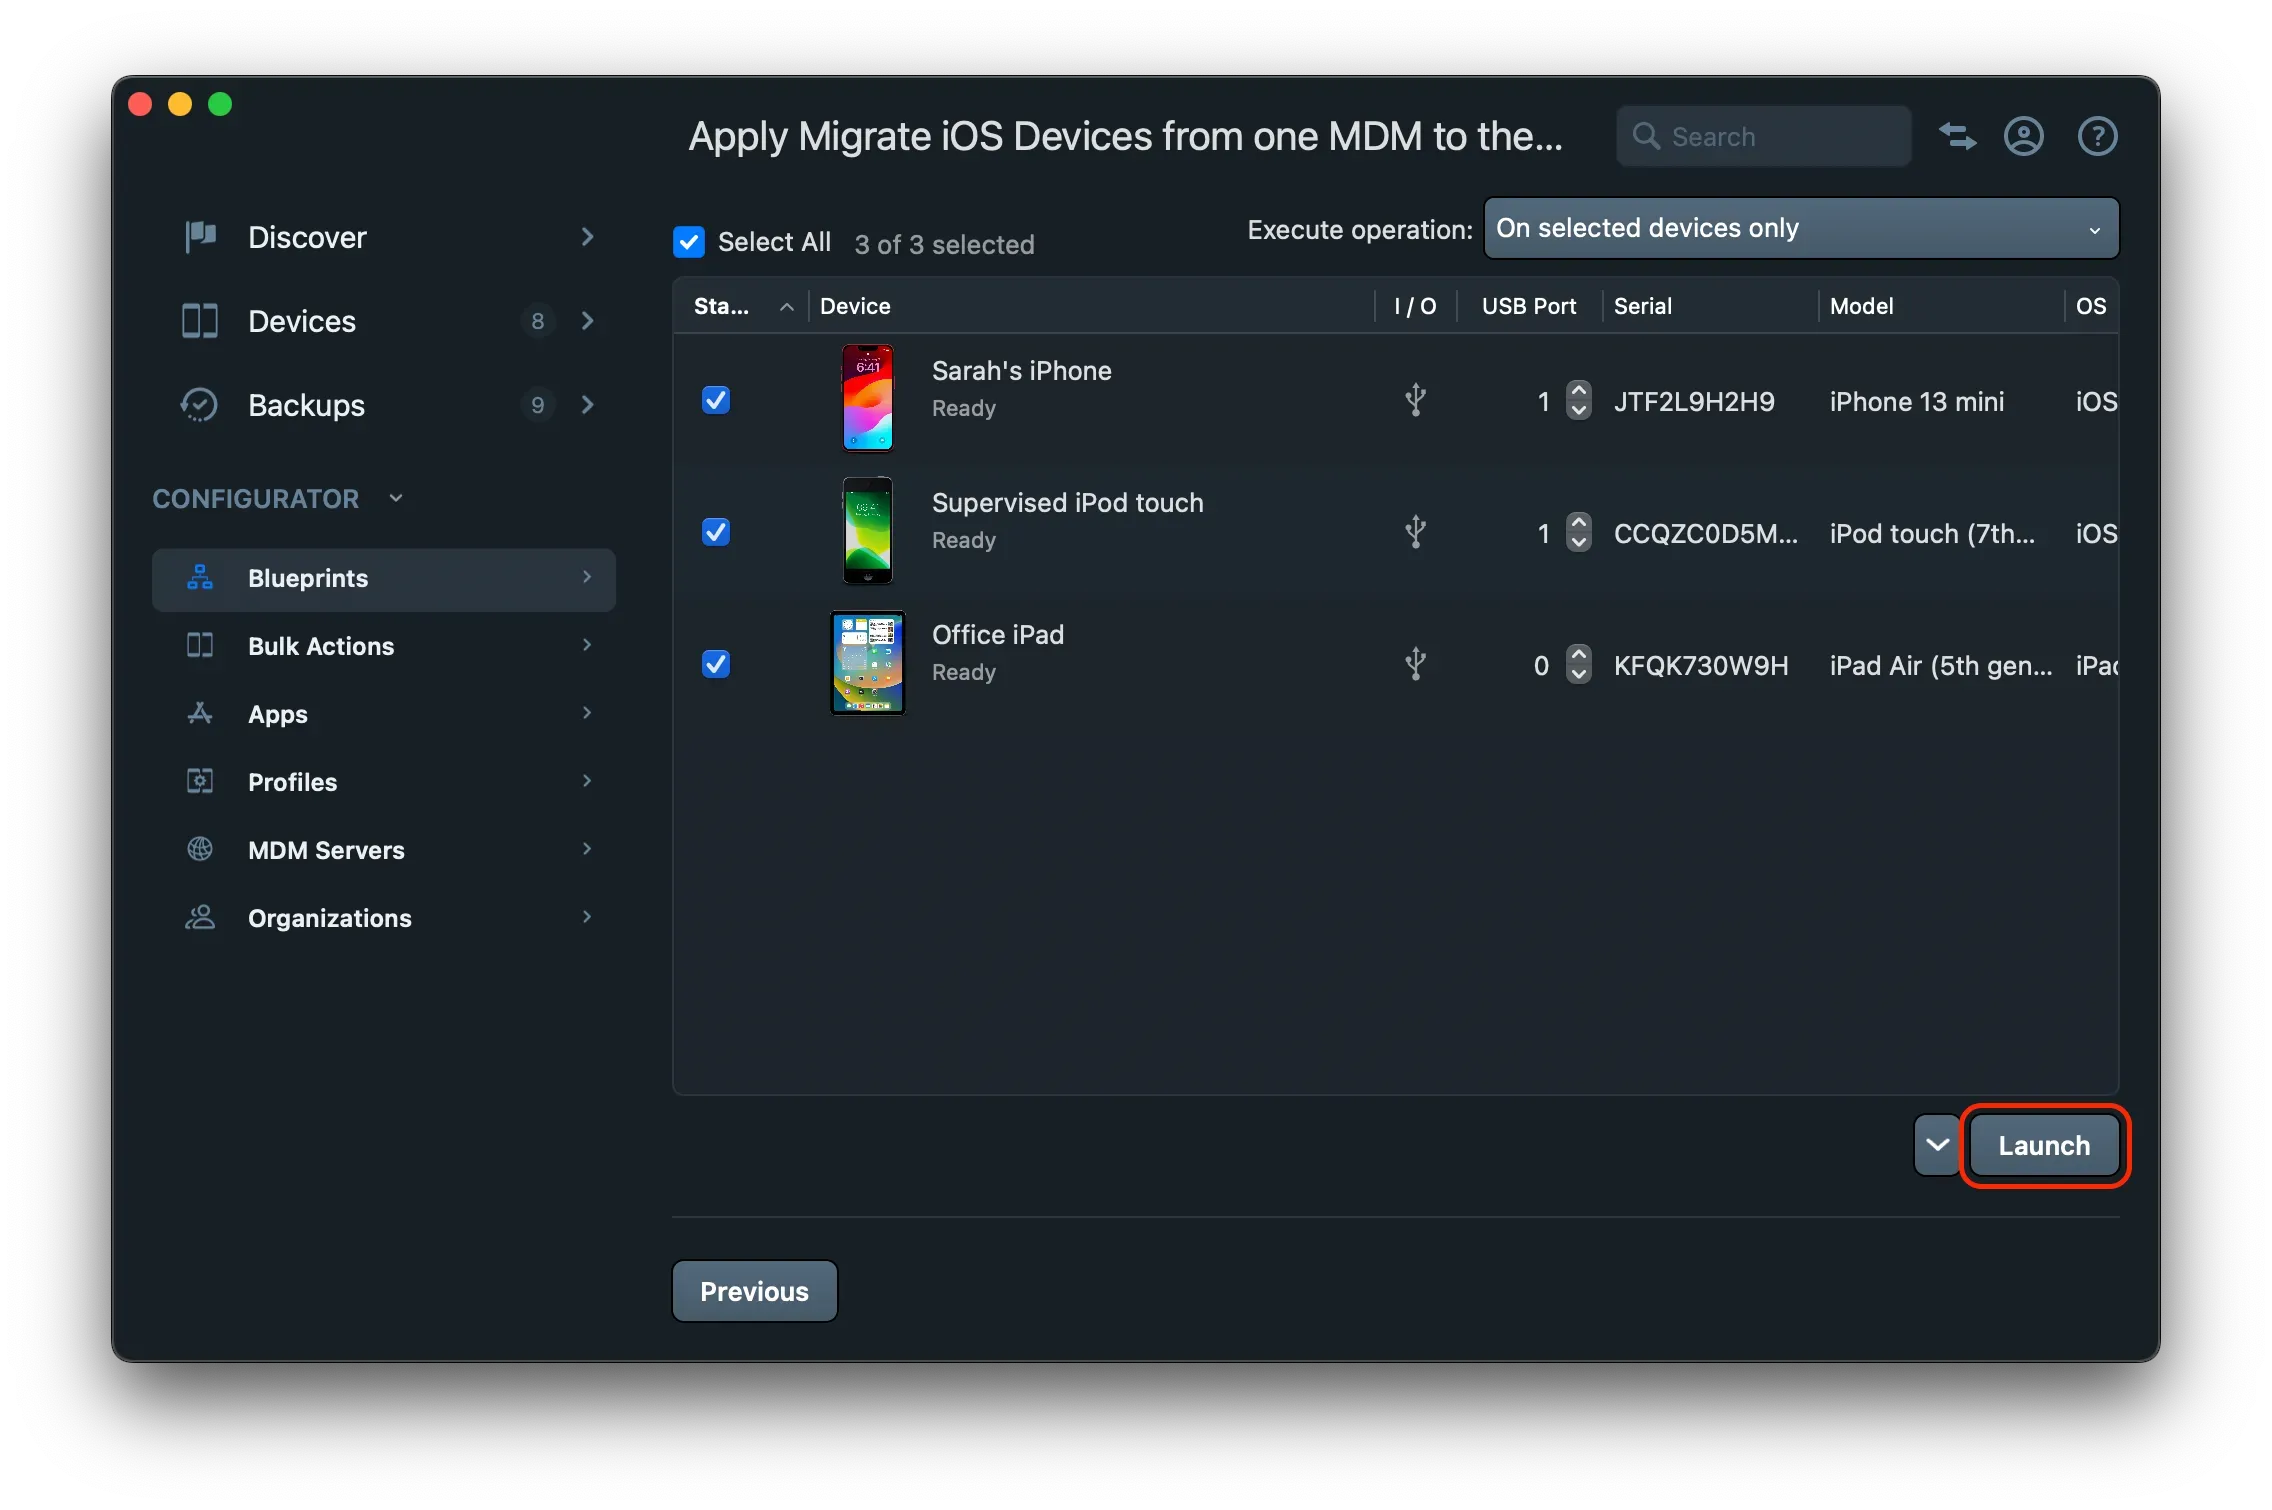
There are two options in the Execute Operation drop-down menu. You can choose to execute the operation only on selected devices (meaning devices that have been previously connected to your station and selected for blueprint application), or you can automatically execute it on all devices connected via USB (meaning every newly connected device will be included in the blueprint deployment). Also, note that we have added a USB port number mapping feature, to define the port number of a given connected device; the port number mapping allows IT pros to better identify on which port devices are connected to, for a specific USB hub.
Next steps for the end-user to follow
After the blueprint has been successfully applied and the device has restarted, the end-user will need to follow the iOS Setup Assistant steps:
- A Restore Completed screen is displayed by the Setup Assistant. Tap Continue.
- If the restored backup does not include any preset Wi-Fi networks, your users will need to choose one in order for their device to access the internet.
- Once the device is connected to Internet, a screen will appear indicating that Device Management is available for this device.
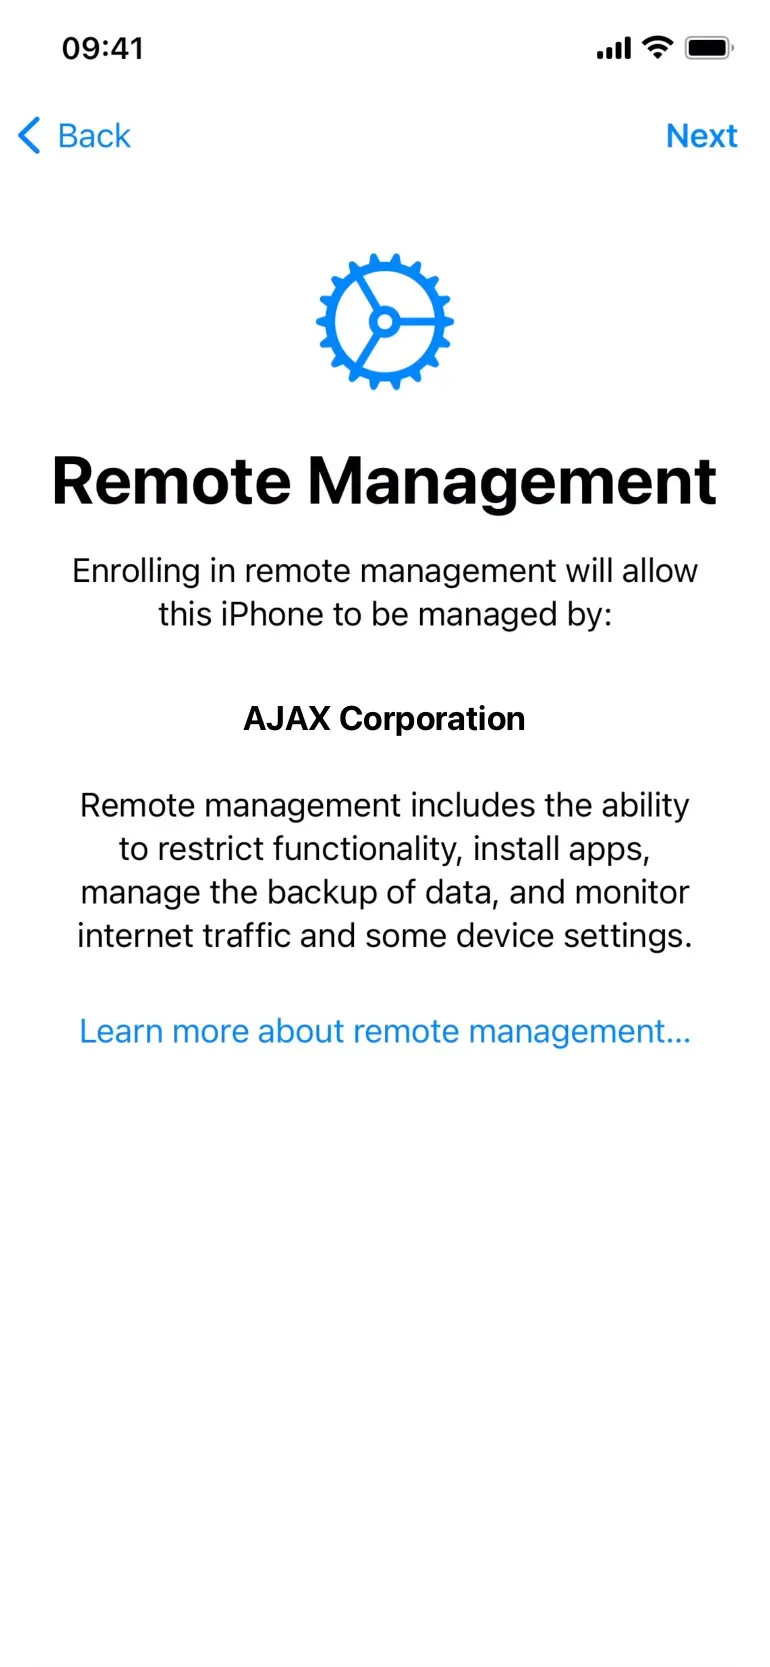
- Tap Next in the top right corner of the screen.
- The iPhone/iPad Configuration screen will briefly appear before the configuration is applied from your new MDM solution.