Register multiple iOS devices in AB/ASM and enroll them in Intune while preserving their data using iMazing Configurator
Updated on May 27, 2026
Reading time ~7 minutes
The purpose of this guide is to assist with bulk migration of iPhones or iPads (that were purchased in-store) from one MDM solution, such as Jamf, to Microsoft Intune while registering them in Apple Business (AB) or Apple School Manager (ASM) and keeping their data.
Background
In this scenario, your company plans to replace its current Mobile Device Management (MDM) solution with Microsoft Intune. The goal is also to centralize the device fleet in Apple Business/Apple School Manager (AB/ASM) for accounting purposes.
In this example the devices were not purchased as part of any AB/ASM plan, you will need to register them manually and in bulk using Apple Configurator for Mac. This process involves automatically wiping the devices, which will cause the loss of any local data.
After the migration, business data that is synced with servers, such as emails, calendars, cloud drives, and shared folders, will be retrieved automatically from servers.
However, you will need to back up and restore valuable local data in bulk from devices, such as text messages, pictures, and non-synced data.
To accomplish this task, you can use iMazing Configurator to create two blueprints that can be applied to devices in bulk. This will allow you to back up and restore data more efficiently.
In addition, if you want to have the ability to continue to manage your device locally with iMazing Configurator afterward, you will need to generate a Supervision Identity in iMazing Configurator and create an Enrollment Program Token in Intune with this identity.
Pre-requirements
Before following the procedure outlined below, refer to the official Apple workflow and ensure that you have prepared the necessary items:
- AB/ASM account with the role of Administrator or Device Enrollment Manager
- Microsoft Intune adapted role such as Intune Administrator
- Supervision Identity in iMazing Configurator (exported as both .p12 and .cer format), if you want to continue to manage devices locally after the migration.
- Apple computer
- Adequate storage capacity to hold multiple backups
- Apple Configurator
- iMazing Configurator
- USB cable (several cables and a USB hub for bulk migration)
- Wi-Fi profile (if your corporate’s one is not already configured on the devices you want to manage before backing up them)
Define whether you need to unenroll your devices from the current MDM or not?
- Before enrolling devices in a new MDM solution, it is considerate as best practices to unenroll them from the current solution but this is not mandatory.
- It's essential to decide whether or not you want to back up your devices still under MDM management before migrating to a new solution. It is strongly recommended that you carry out tests before migration, and check the behavior of restored applications and data.
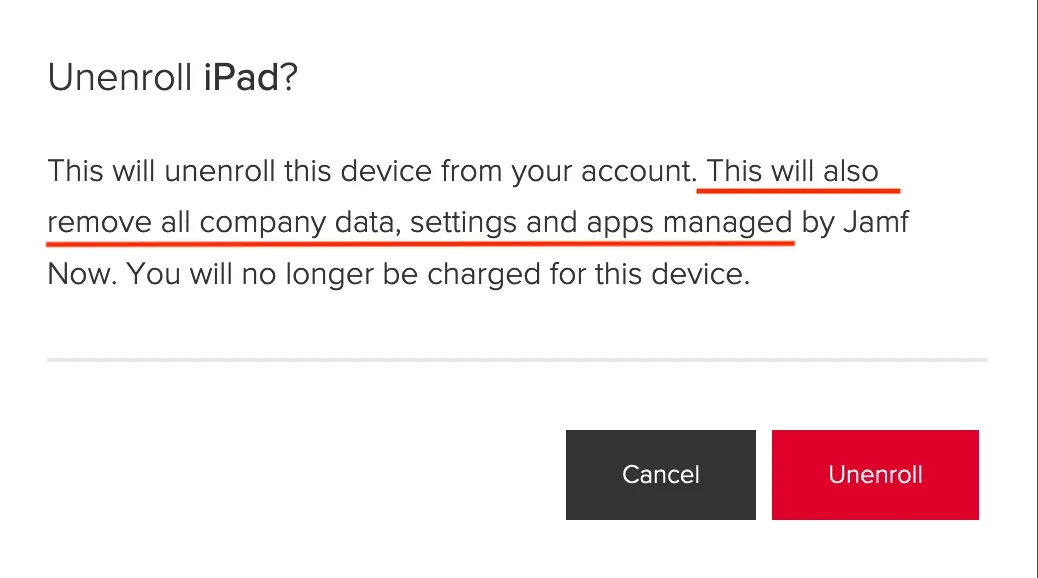
Important: Unenrolling devices from an MDM can impact configurations deployed on those devices and potentially associated data. Therefore, we advise that you read the documentation of your MDM solution before proceeding. Below is an example from the Jamf Now console
Important: Depending on your own scenario, you may choose to save devices that are still enrolled. As a result, you may need to define upstream how to manage applications that are currently managed and their data. Thanks to our product, iMazing Configurator backs up data from managed applications and then restores them to devices once they have been enrolled on the new MDM.
As the purpose of this guide is to automate the process as much as possible, we will explain you how to bulk back up devices in the next section.
Back up devices using iMazing Configurator and a blueprint
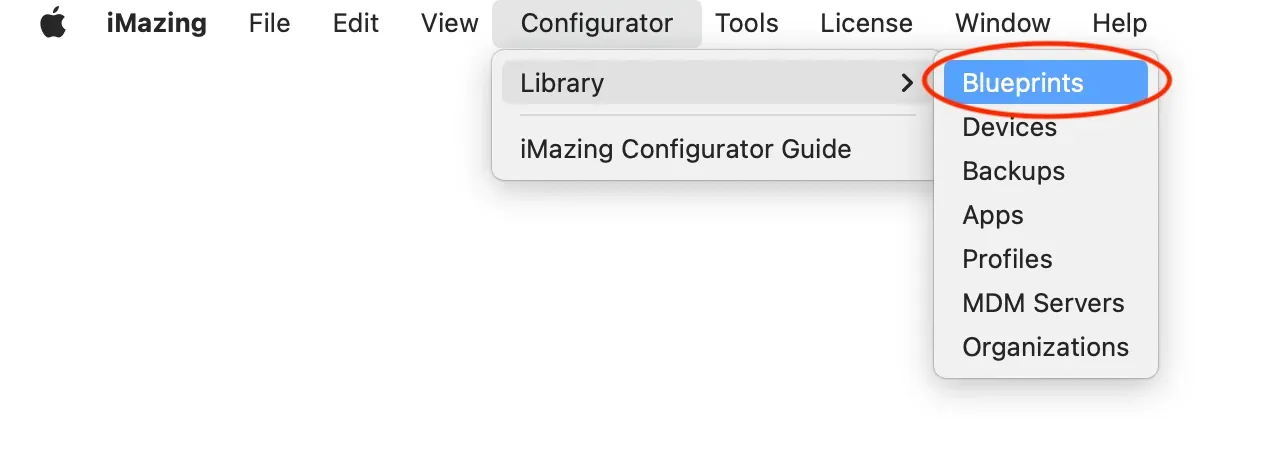
- In the iMazing menu bar, under Configurator, choose Blueprints:
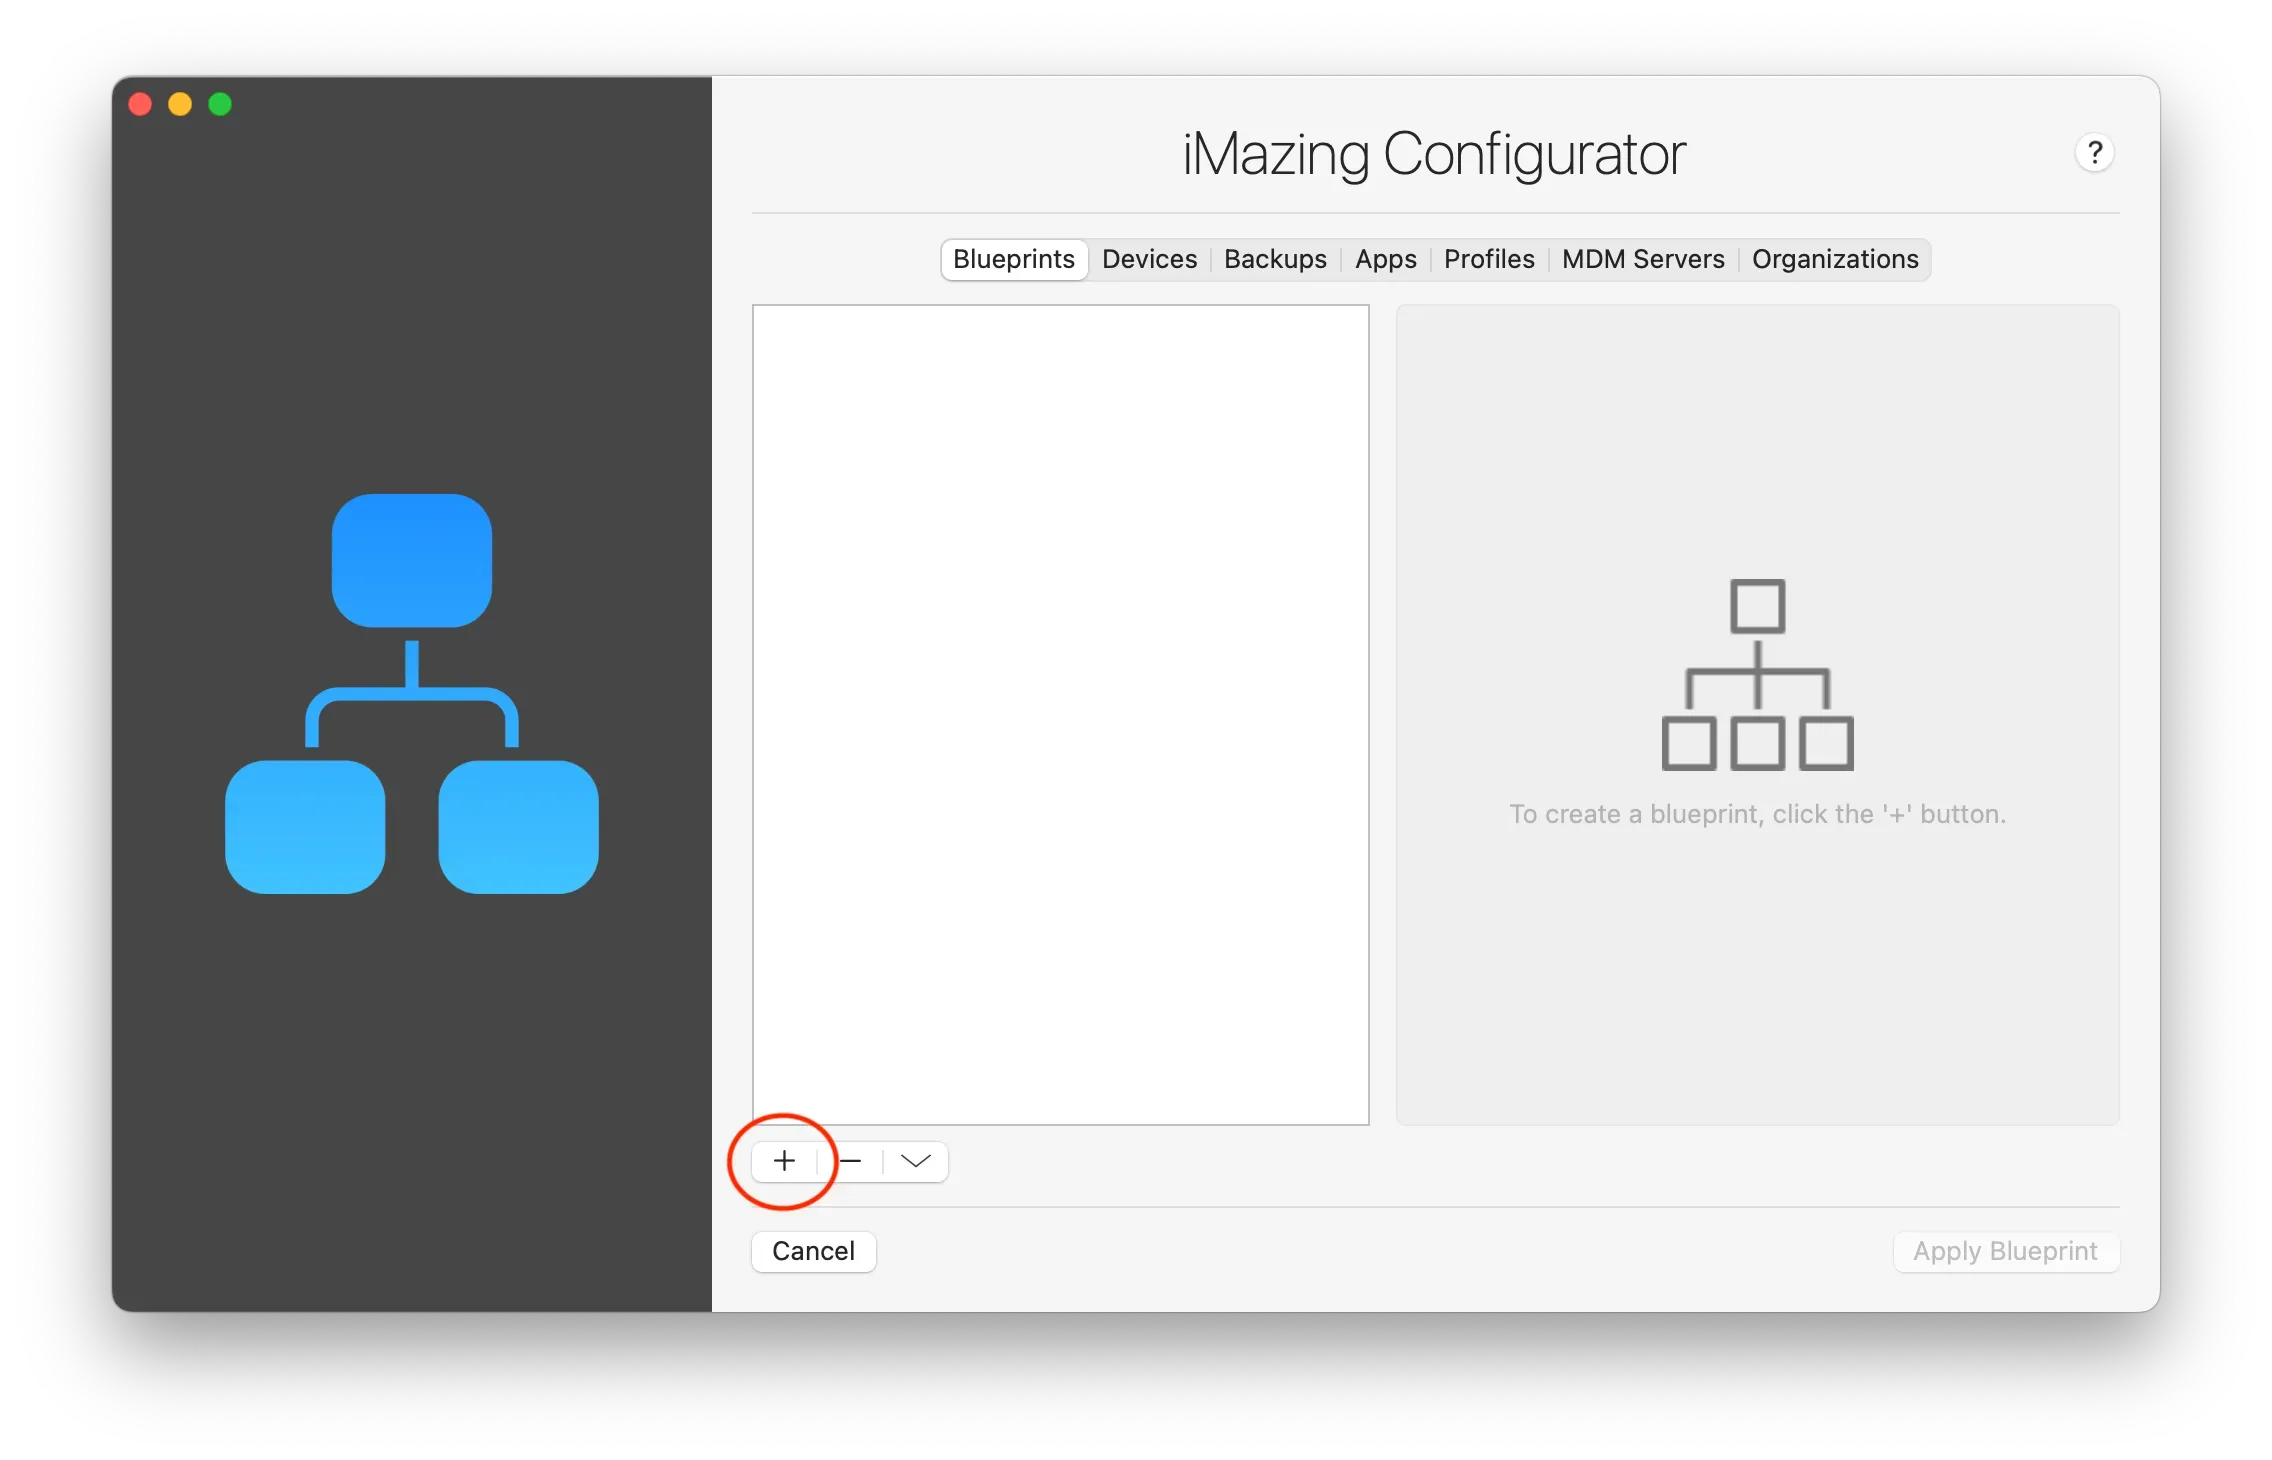
- Click the '+' sign at the lower left of the window:
- Under General, name your blueprint “Back Up Devices” and add a description. You can leave the default device type (any) or select a specific device type:

- Make sure to choose No Enrollment (which is the default value).
- Now, go to the Actions section in the left menu and select the following options: Backup, then under Set backup encryption status, select Encrypt this backup and define a password:
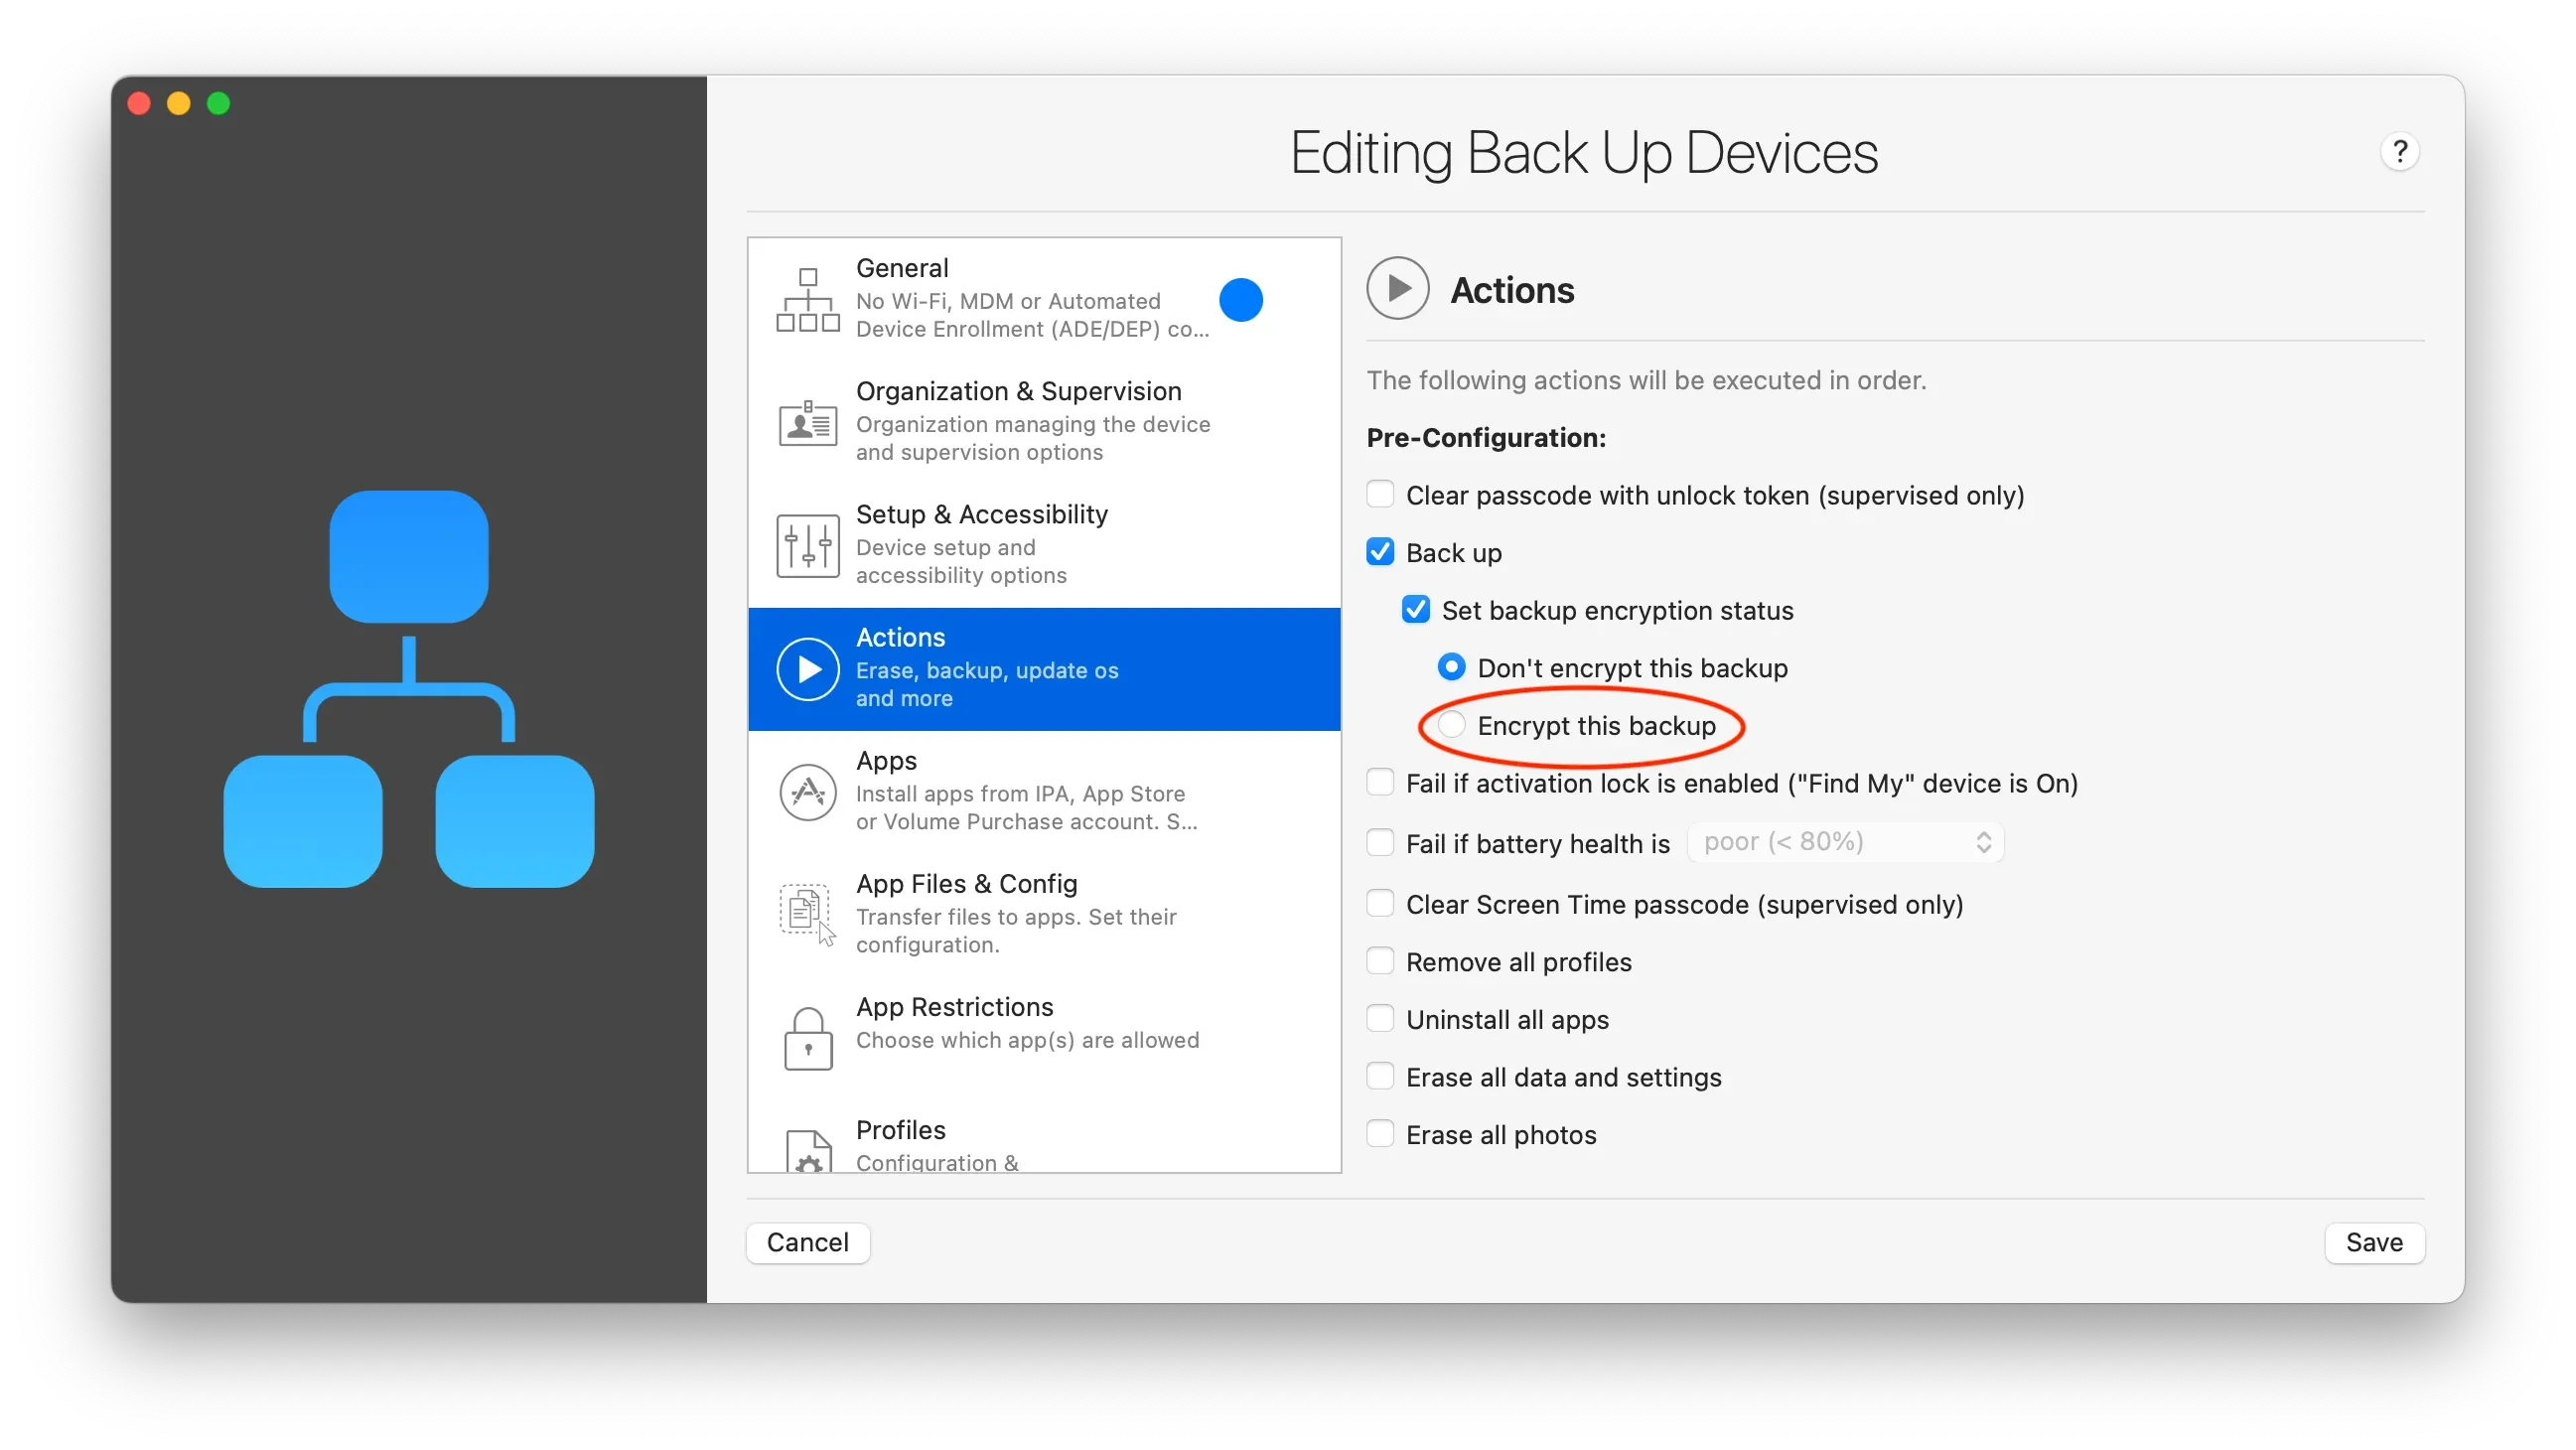
Important: If you don’t set the encryption status to "Encrypt this backup", Safari history, Call history and Health data won’t be transferred. Depending on your own scenario you may not need to use encryption. Learn more about Backup Encryption in iMazing
- When you are ready, click Save.
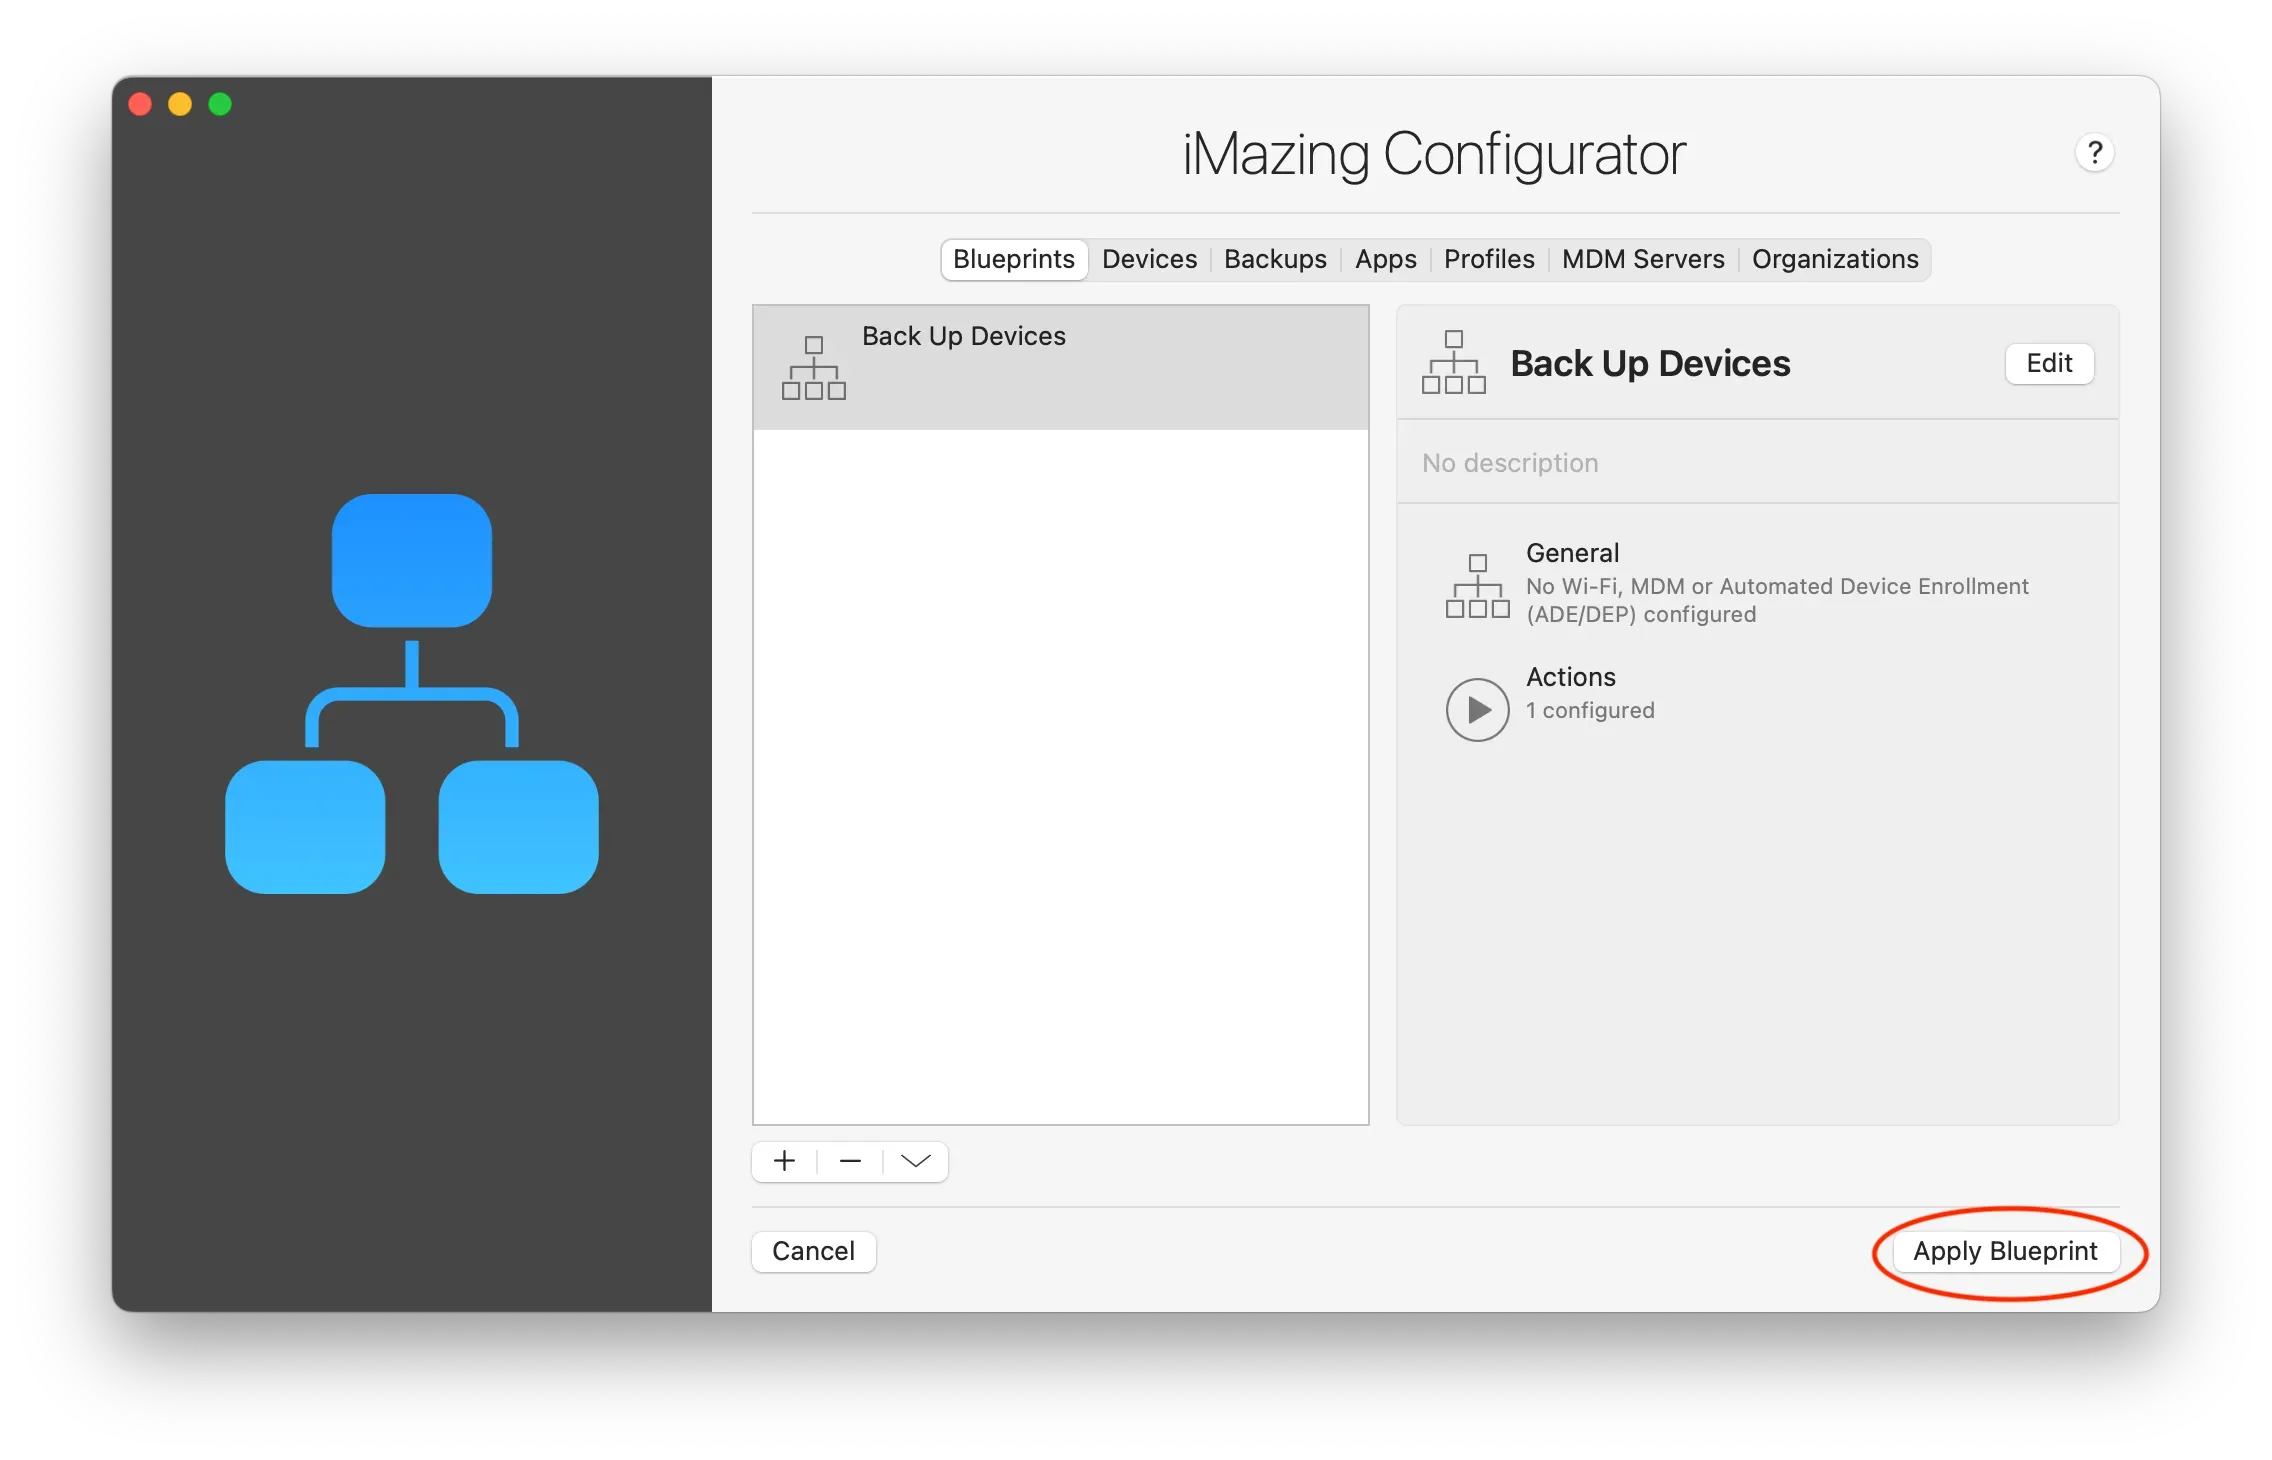
- To continue with the migration, click Apply Blueprint button at the lower right of the window and select your target devices. When you are ready to back up your devices, click the Launch button (note that you can choose Select All if you have several devices connected):
Important: There are two options in the Execute Operation drop-down menu. You can choose to execute the operation only on selected devices (meaning devices that have been previously connected to your station and selected for blueprint application), or you can automatically execute it on all devices connected via USB (meaning every newly connected device will be included in the blueprint deployment).
Register devices in Apple Business or Apple School Manager with Apple Configurator
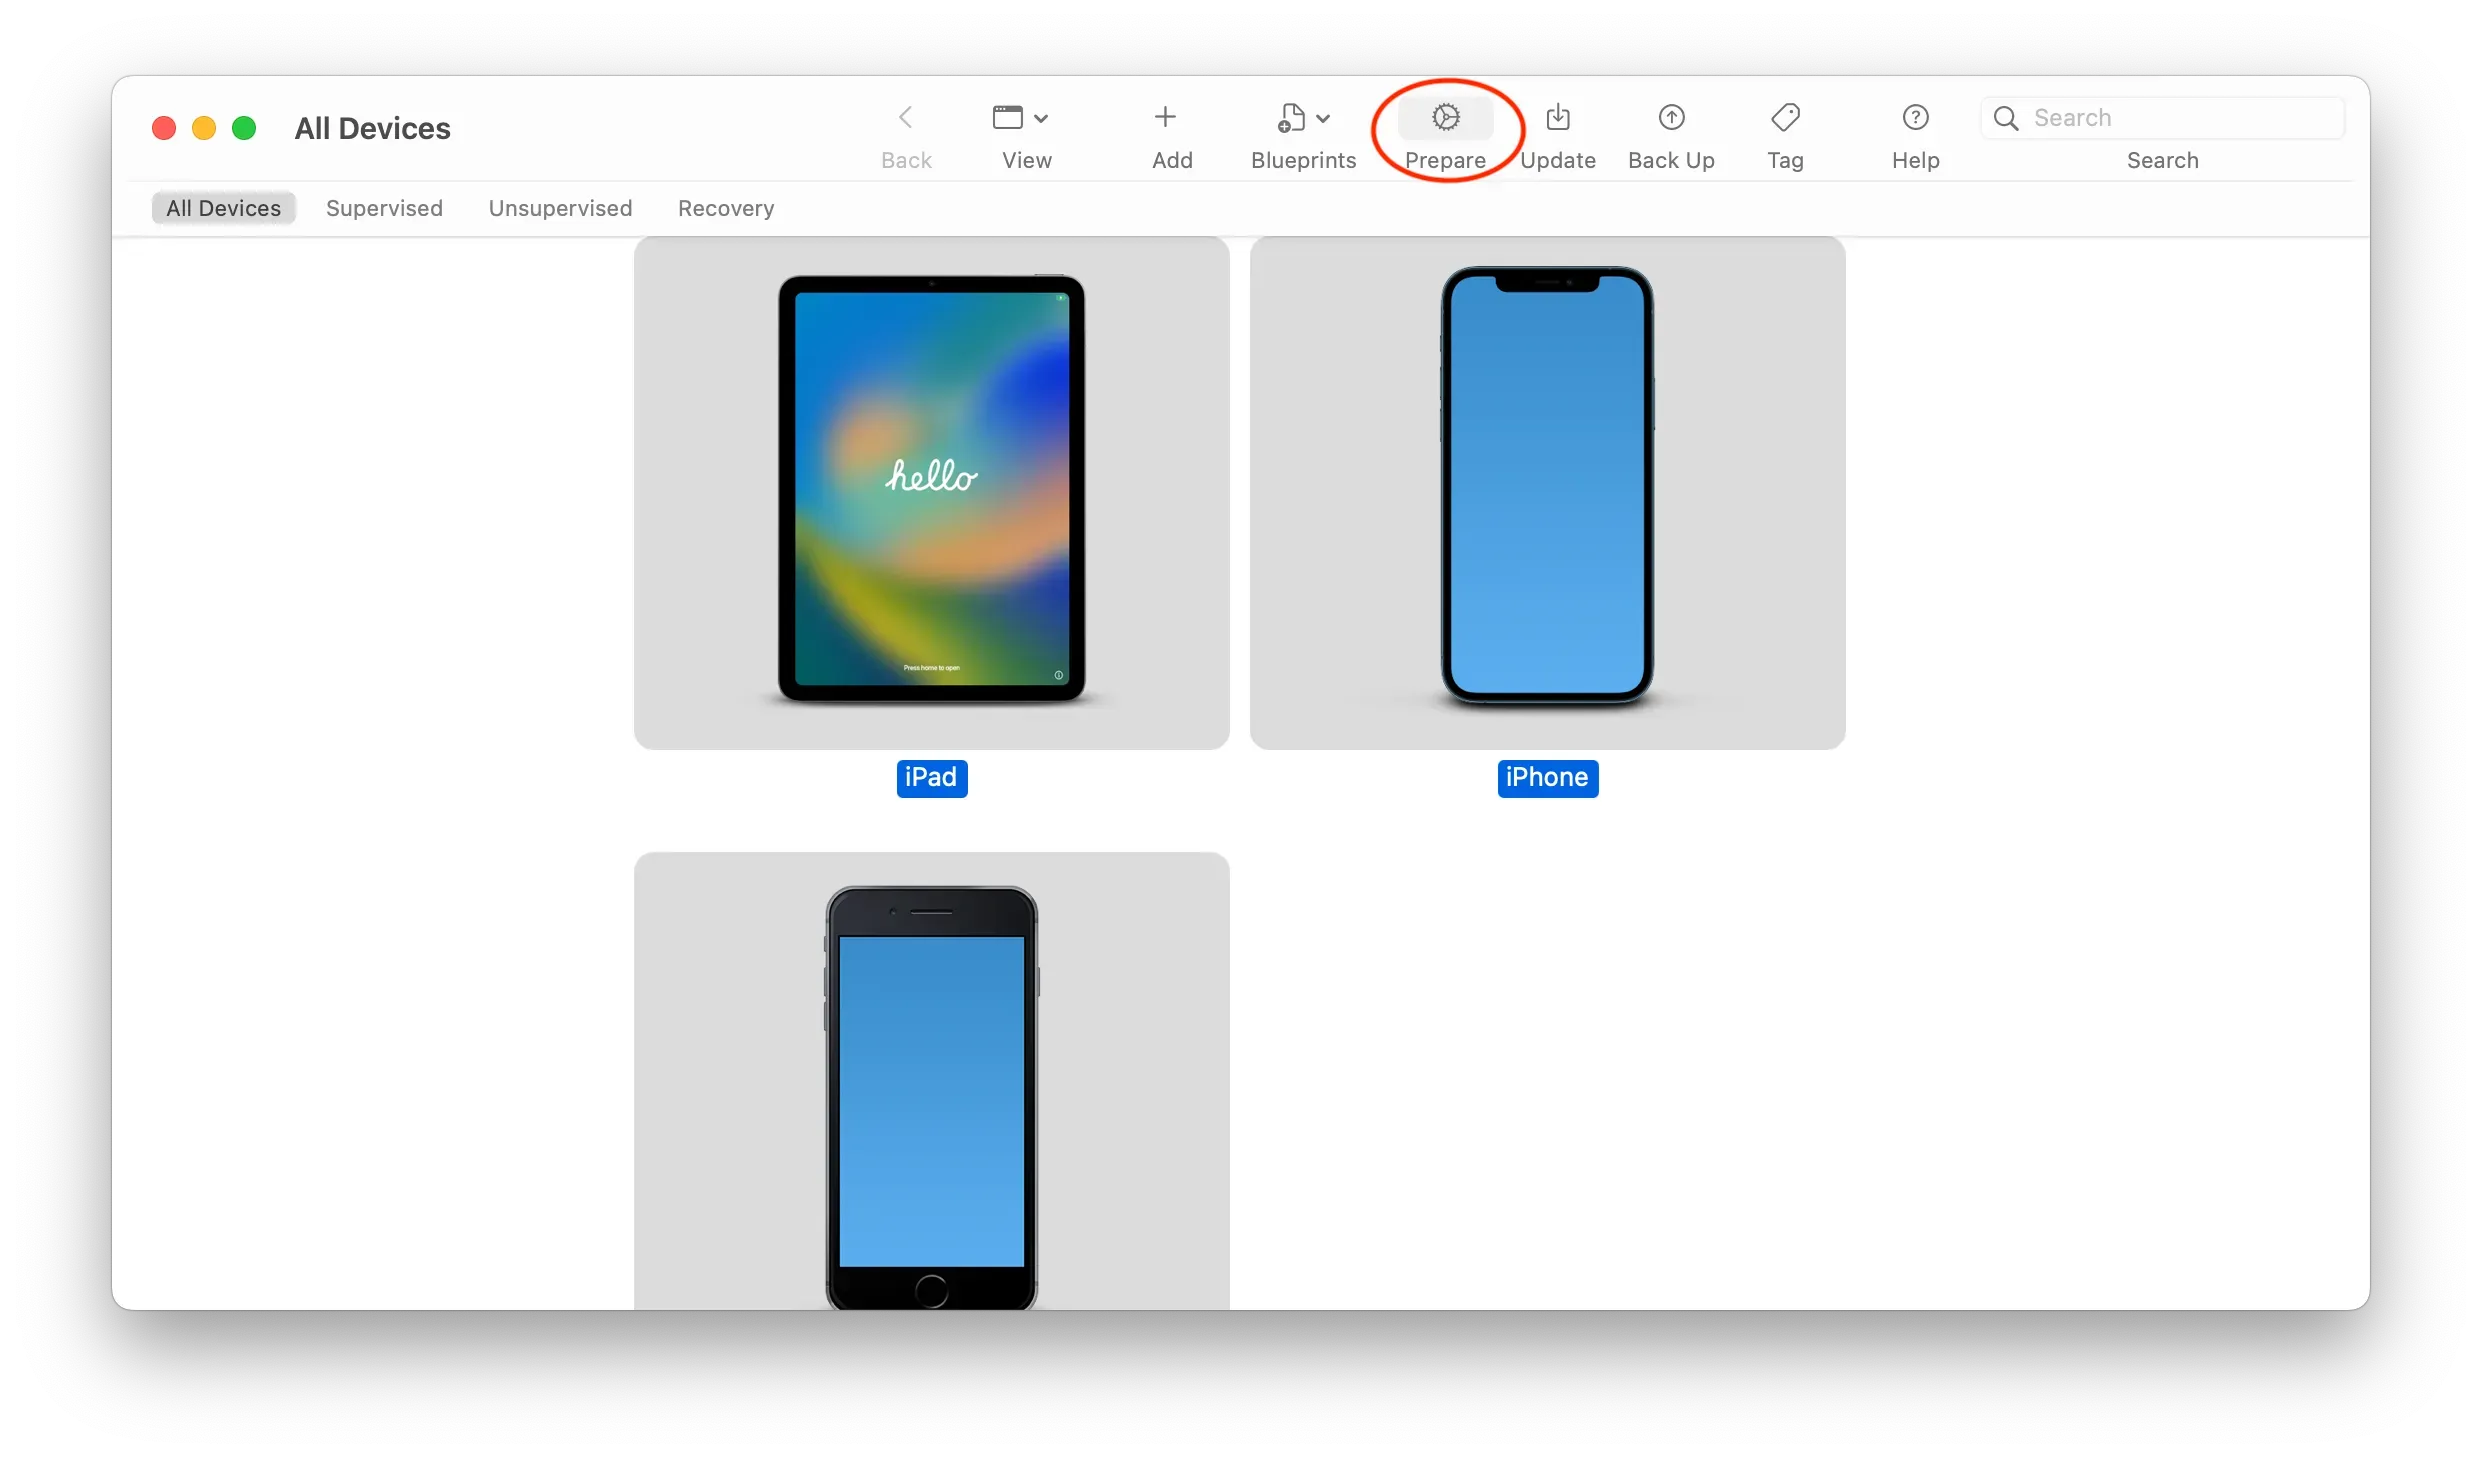
- Launch Apple Configurator and connect your devices to your computer using a USB hub. Select all the devices and click on Prepare:
- Once Prepare Devices windows appears select Manual Configuration, tick Add to Apple School Manager or Apple Business and Allow devices to pair with other computers if you want to let this option available to use other computers (like end user's one):
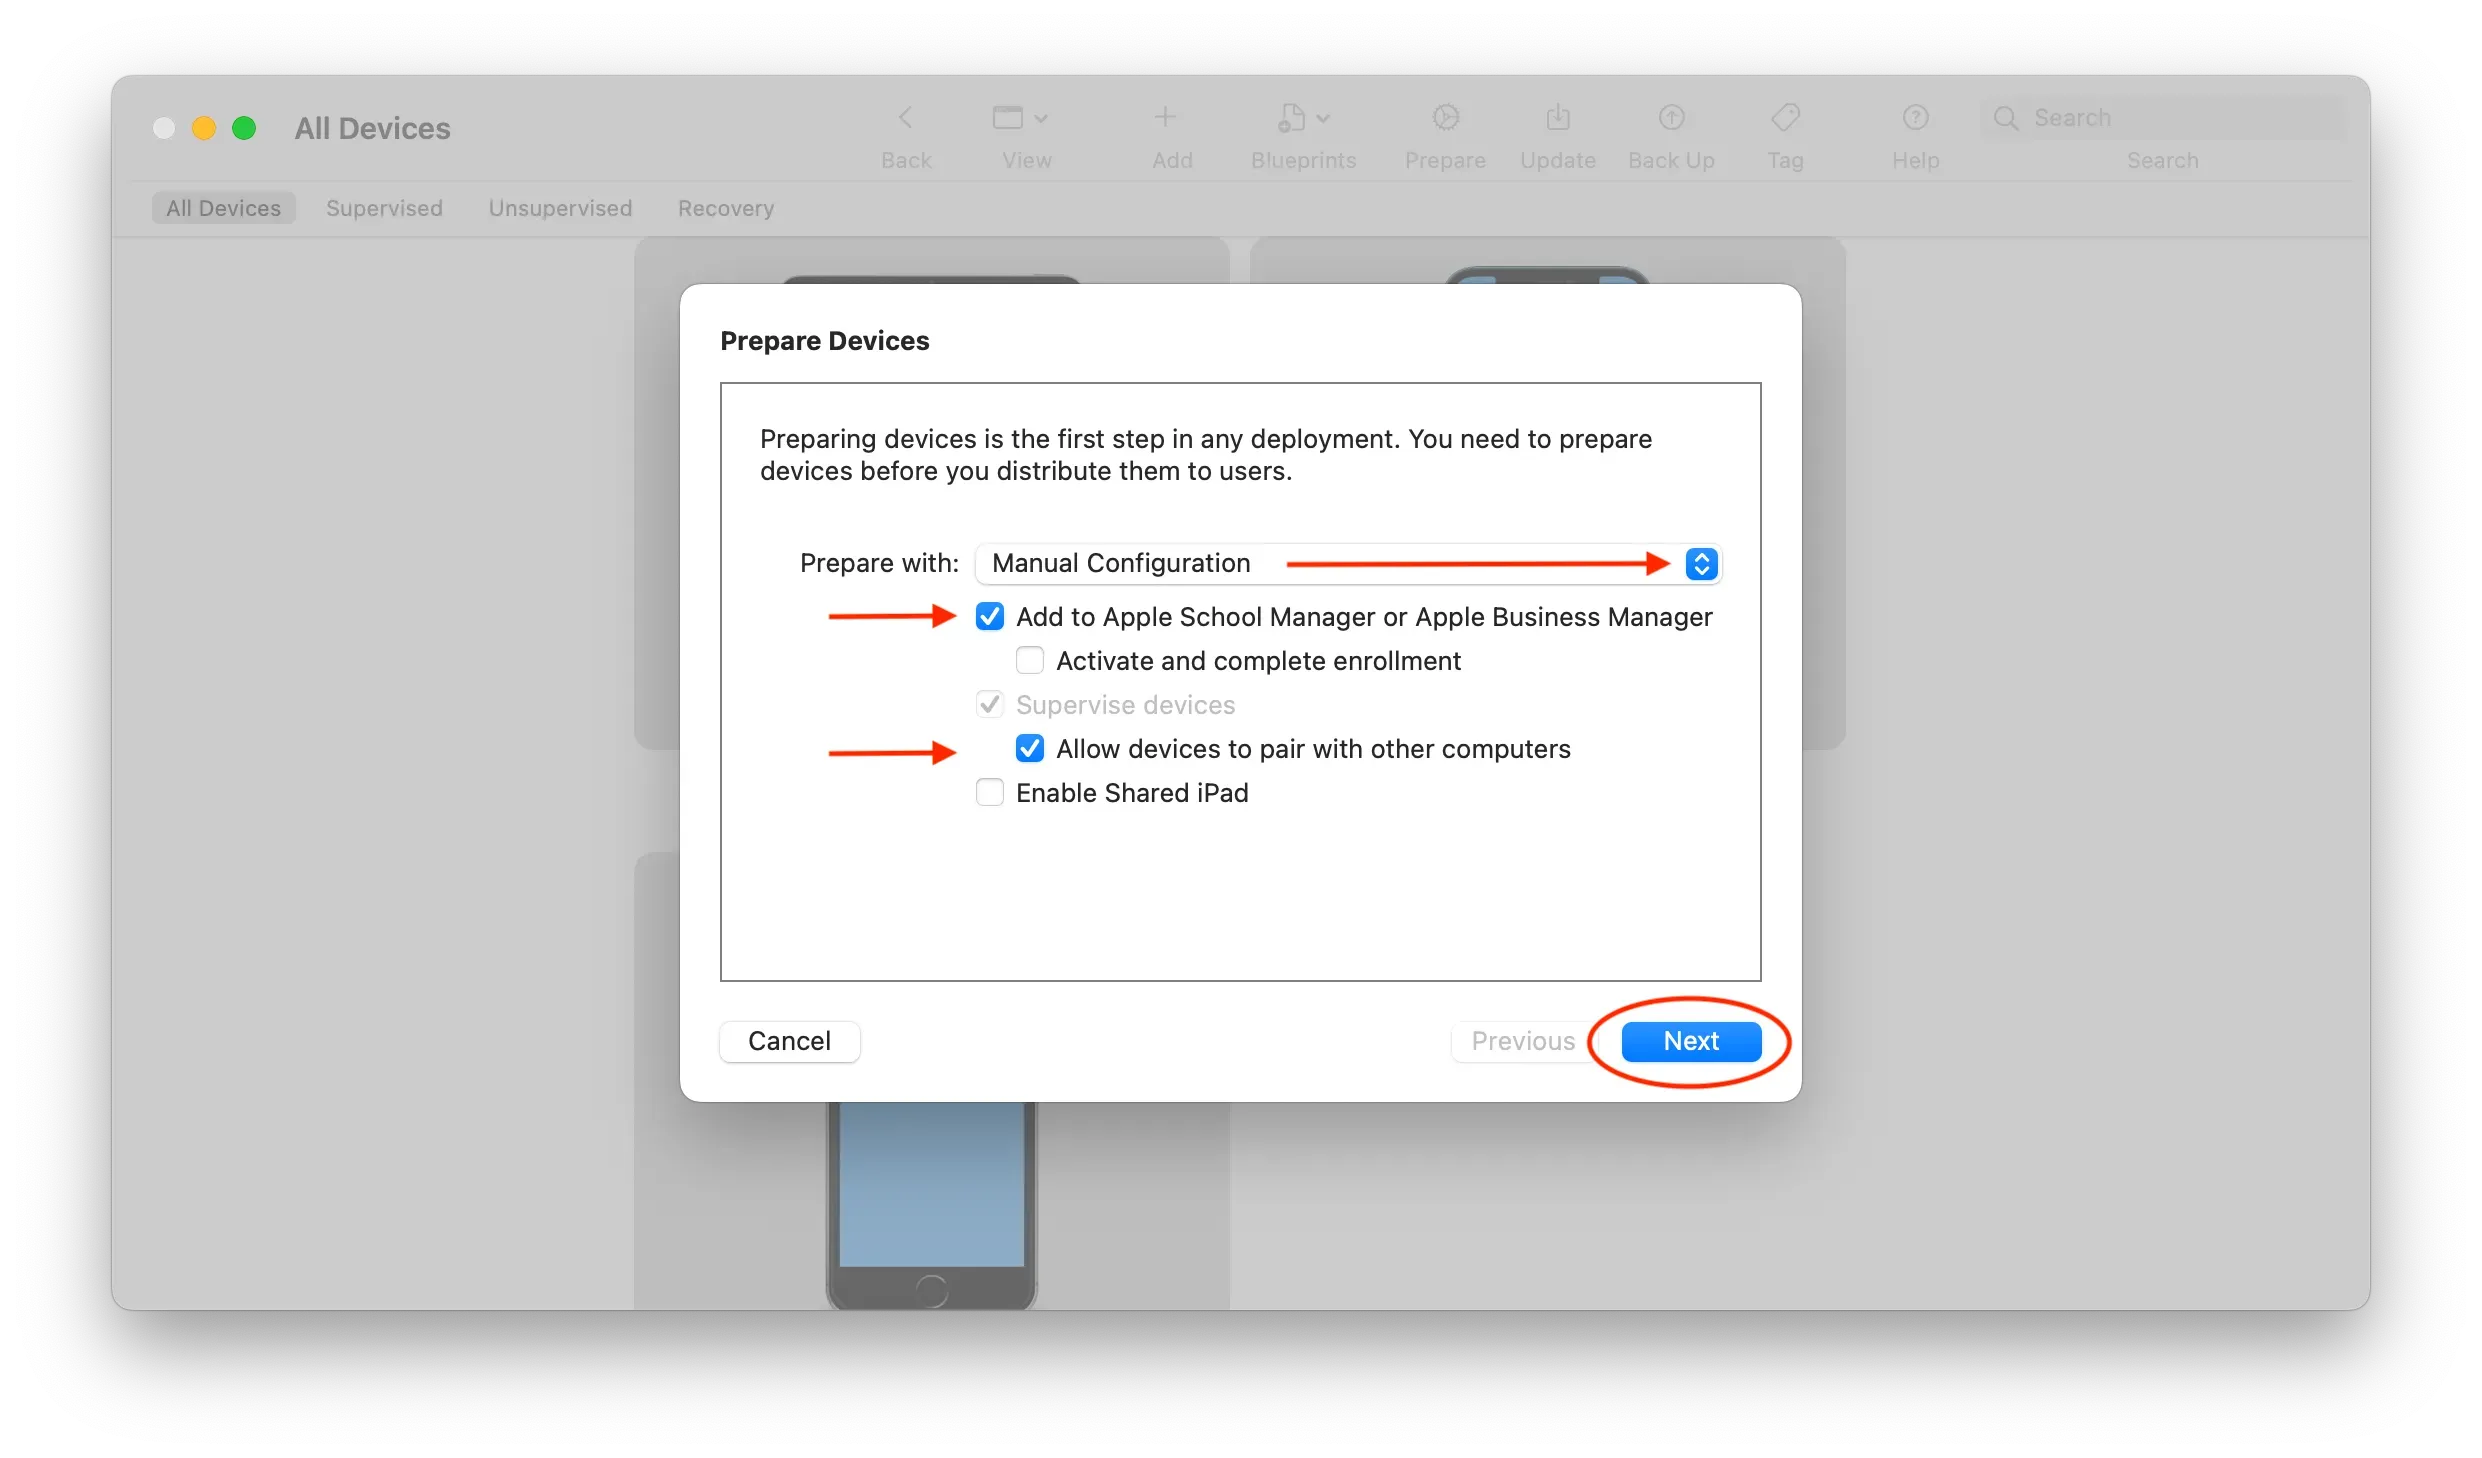
- When you are ready to continue click Next.
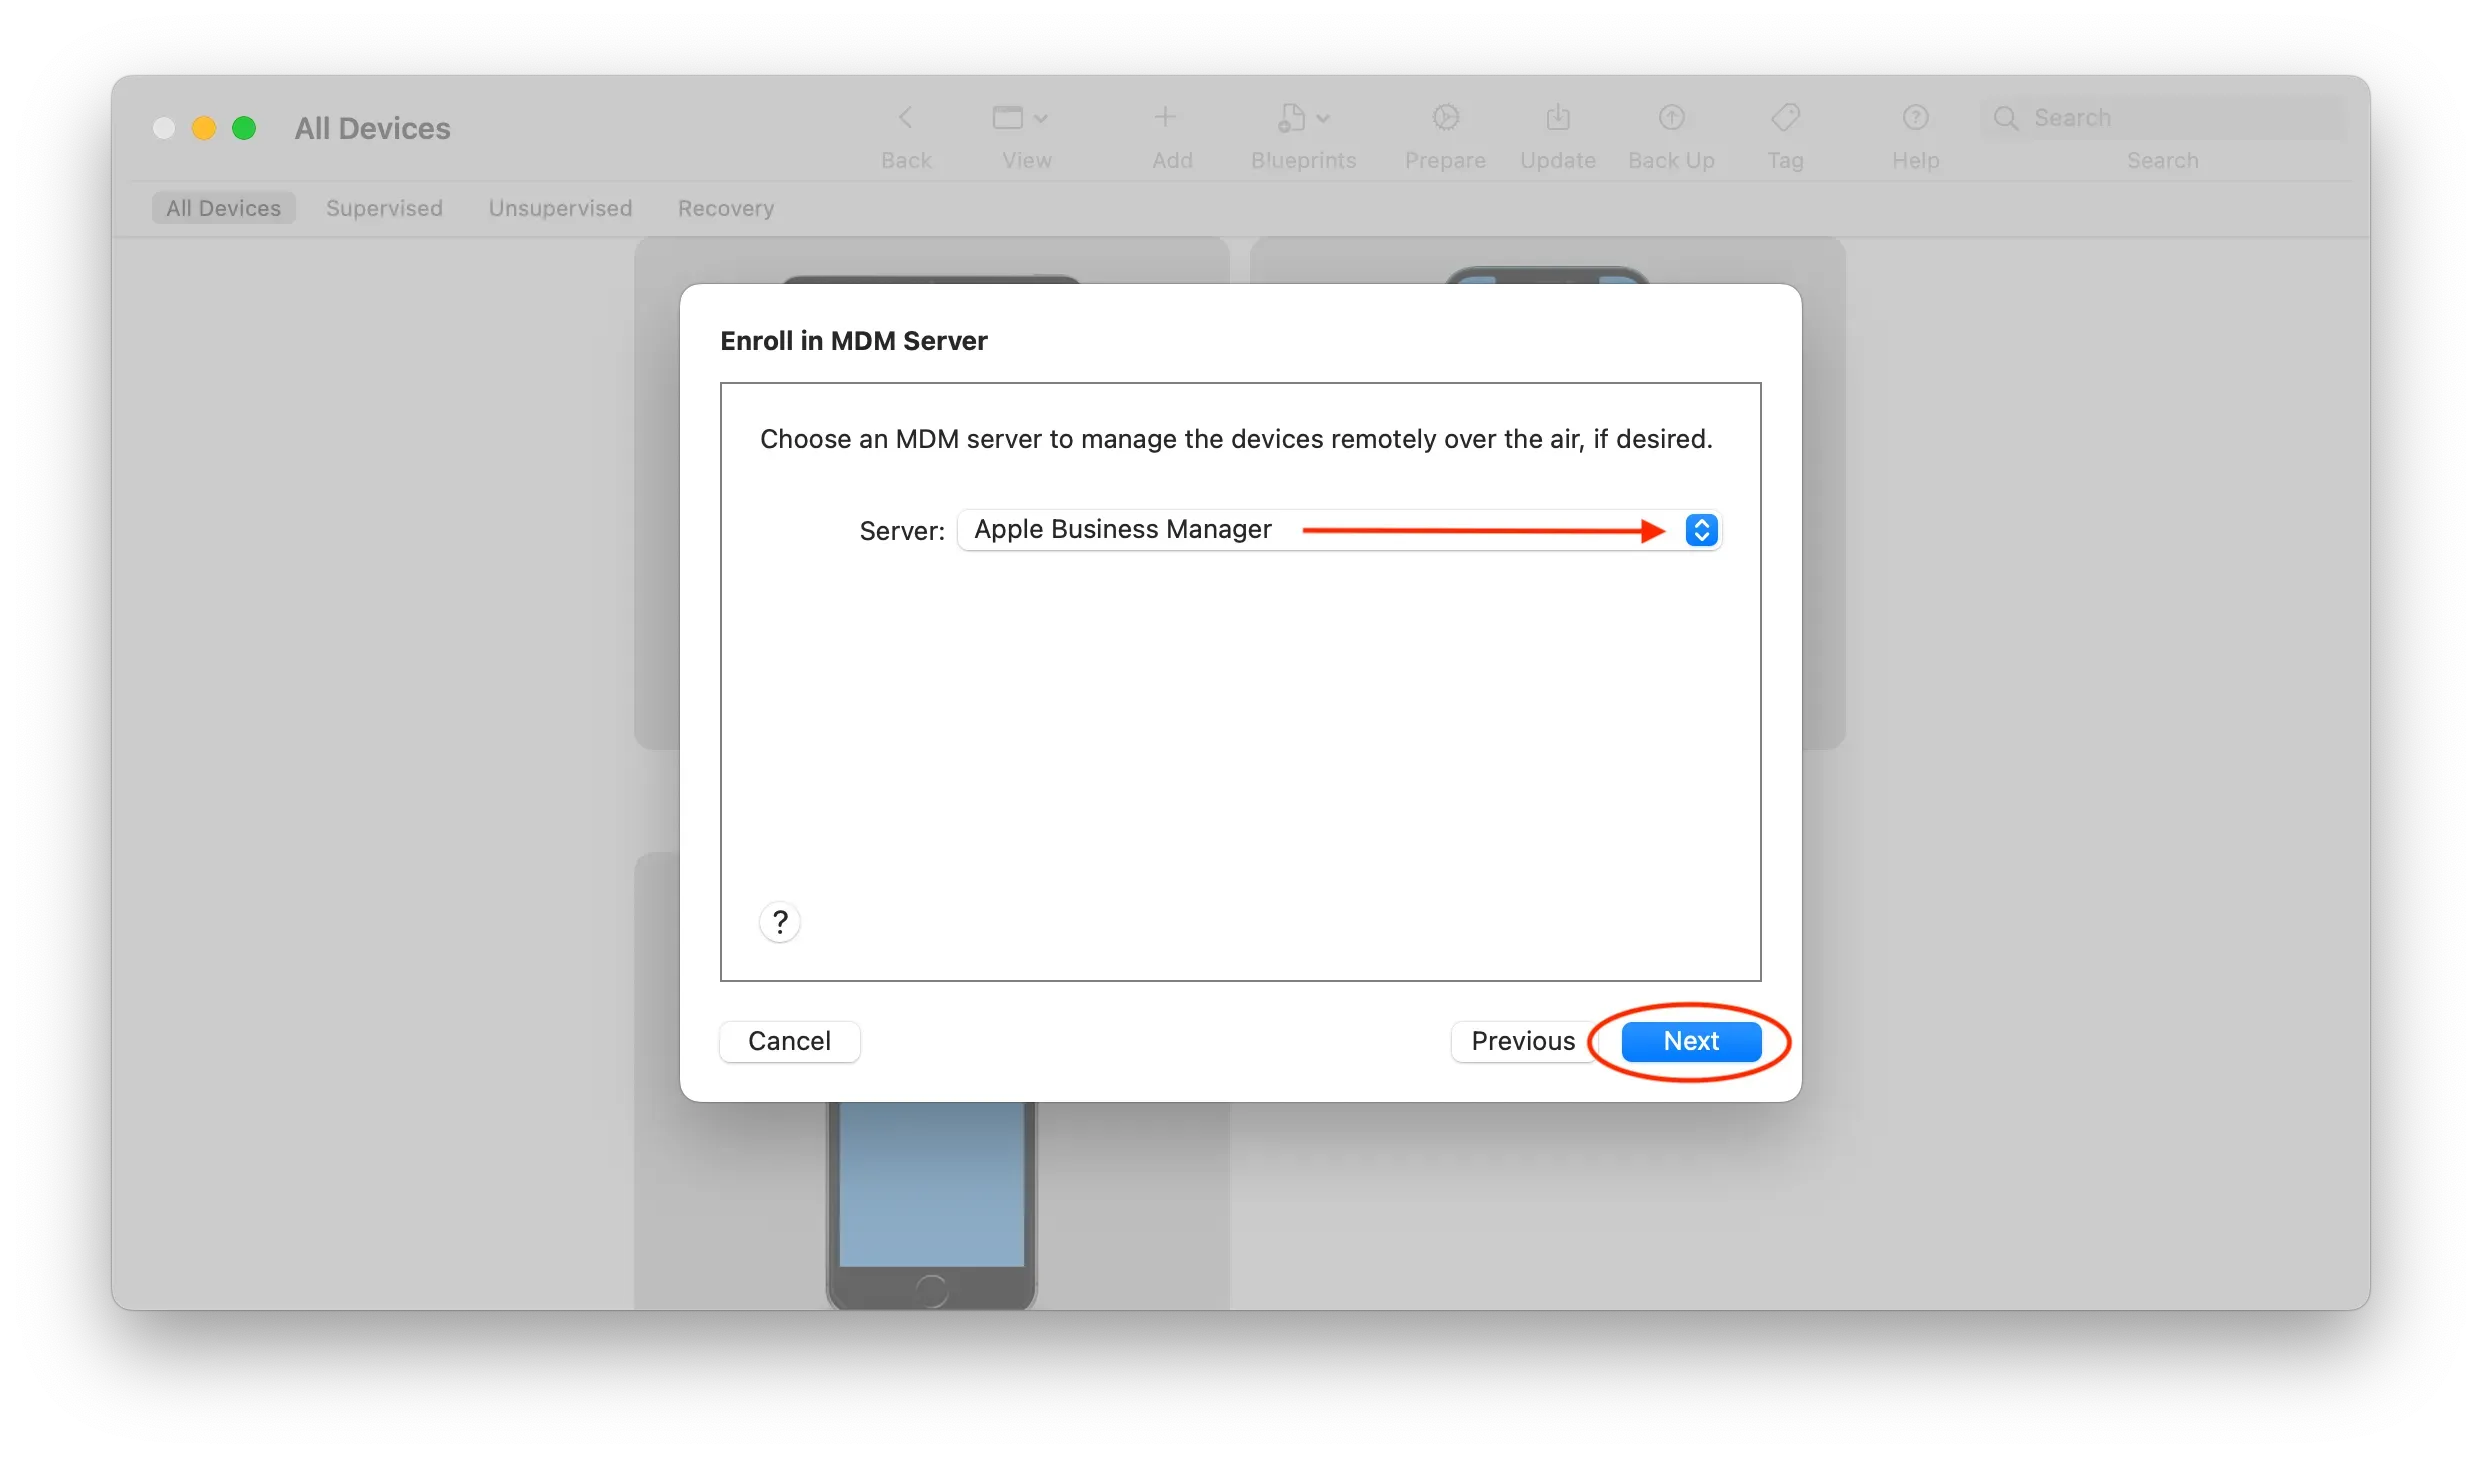
- Select an MDM server in the list and click Next. Please note, this step is shown as required by Apple Configurator, but you can create a fake MDM server because this step is actually not important and won’t be used to enroll your devices afterward:
- In Assign to Organization, select an organization. As for the previous step you need to create an organization in Apple Configurator, but this won’t be the one managing your devices afterward so you can create a fake one:

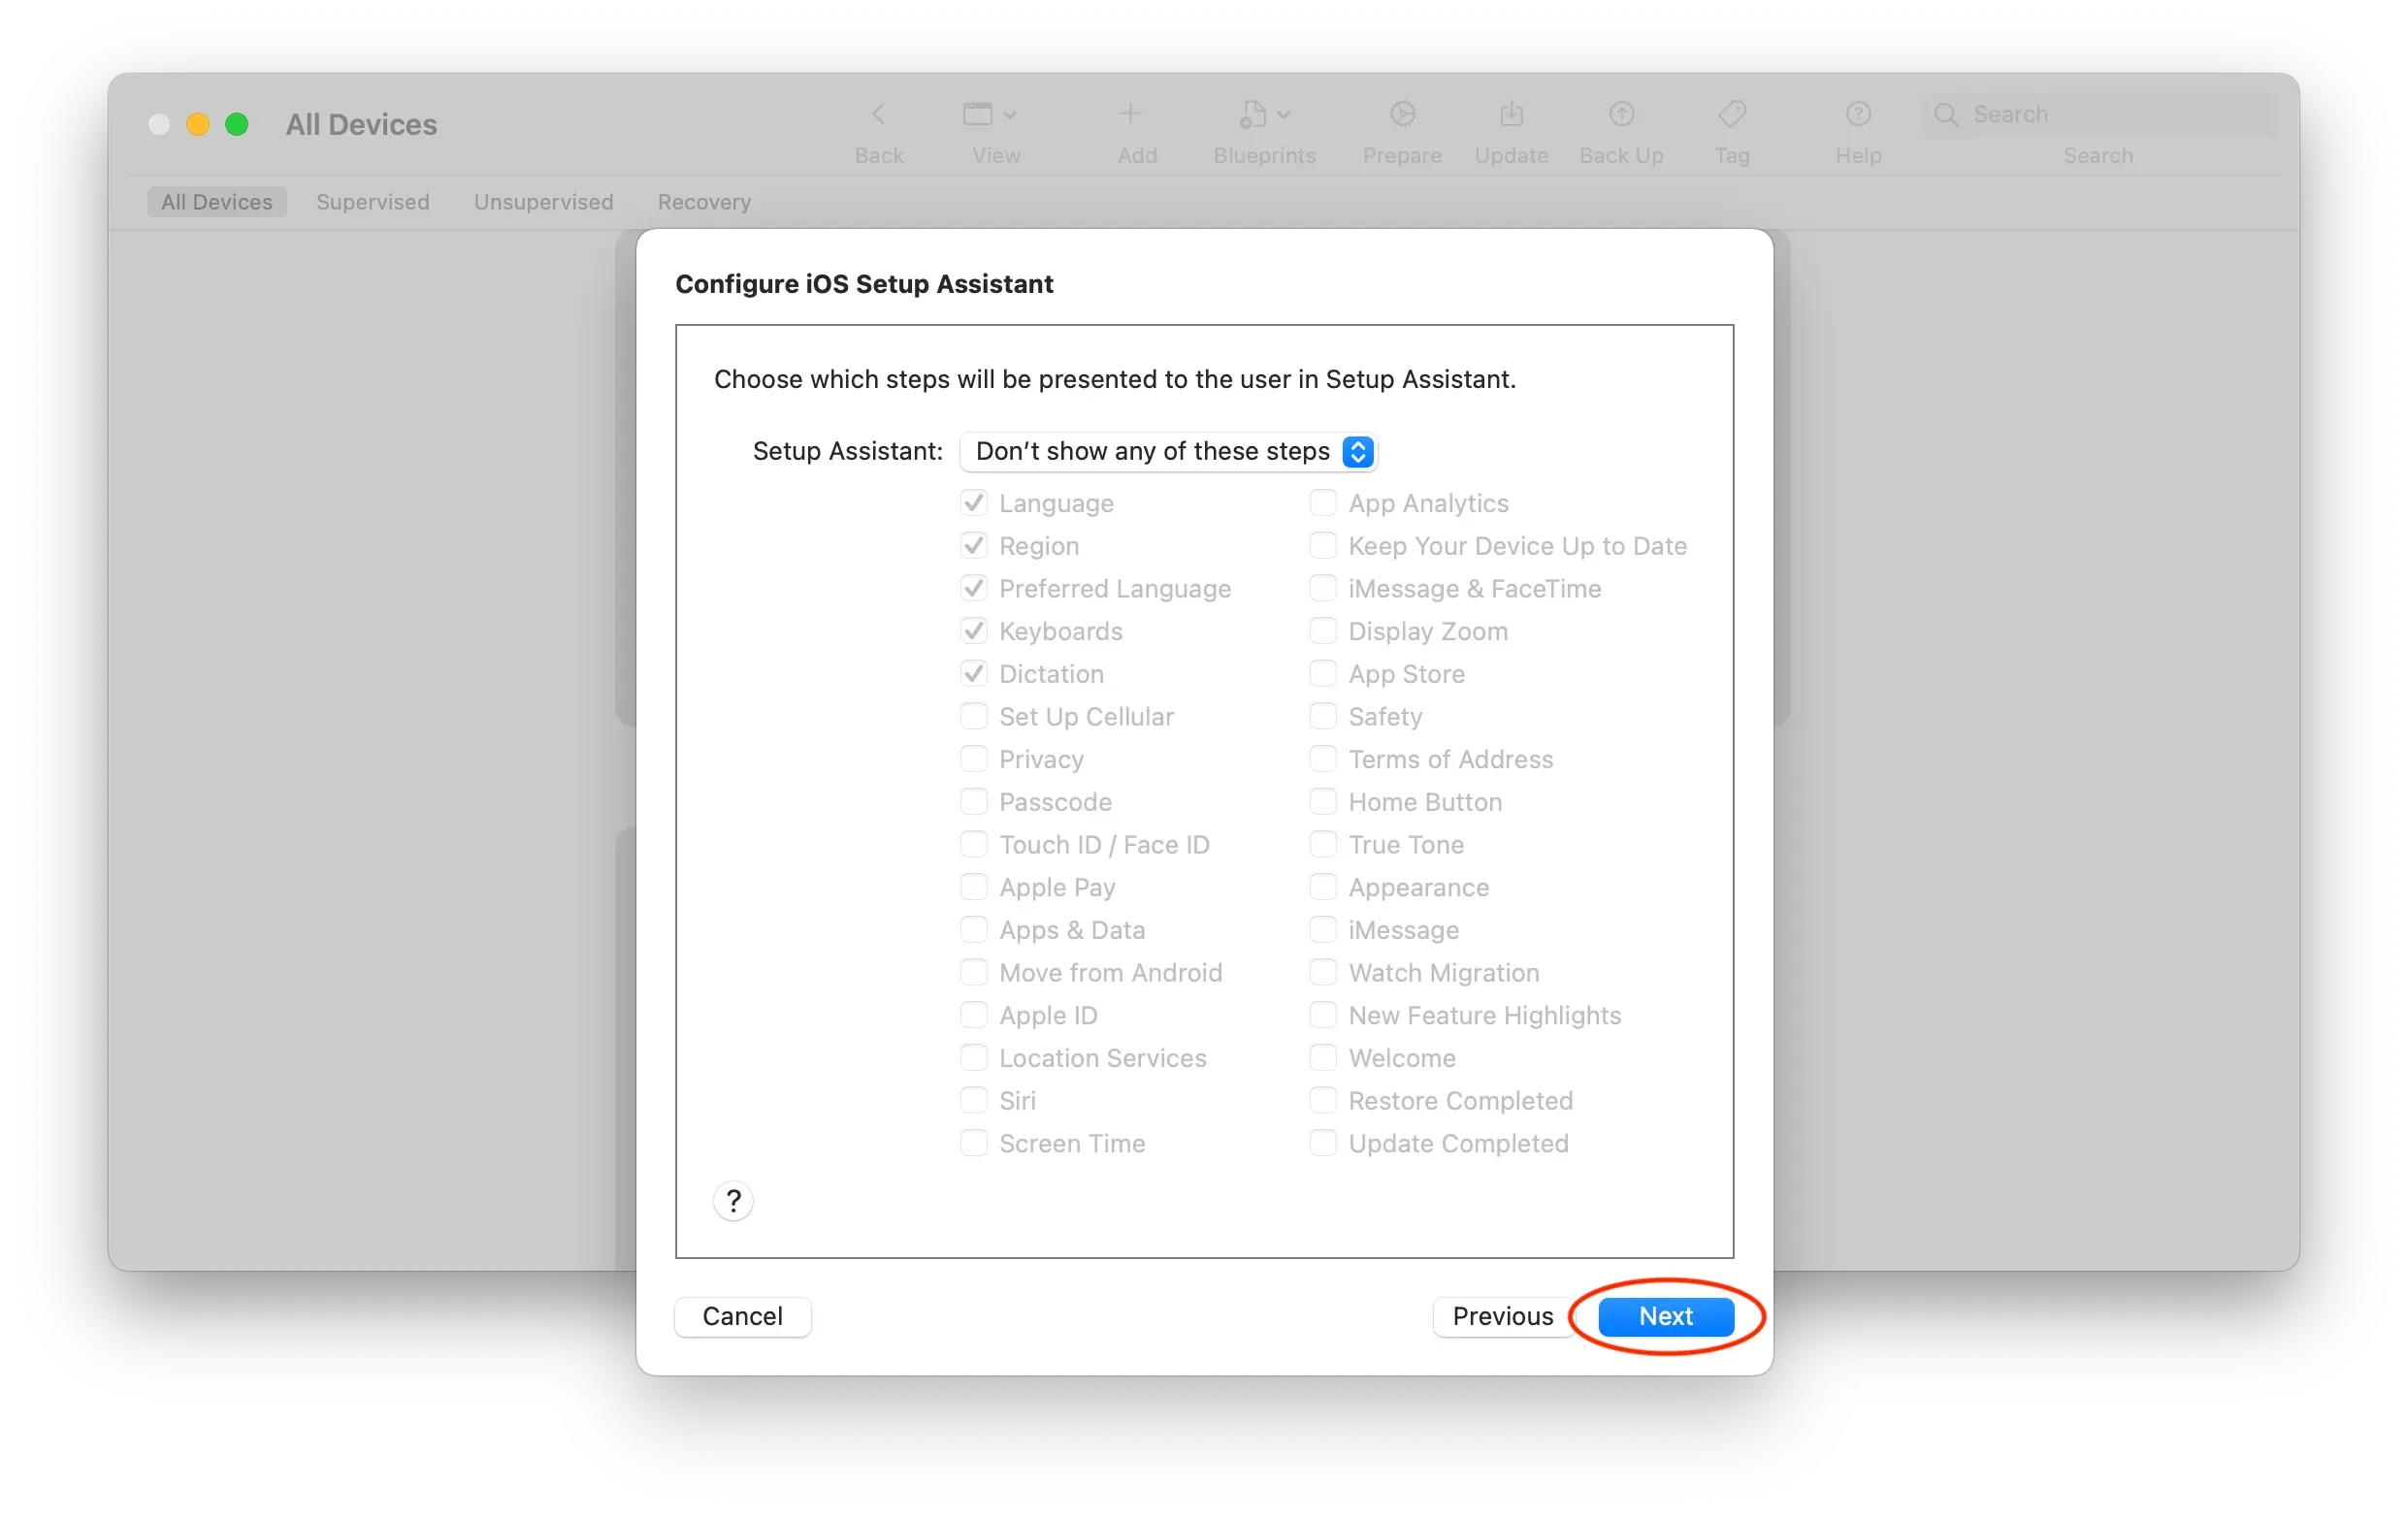
- In Configure iOS Setup Assistant click Next:
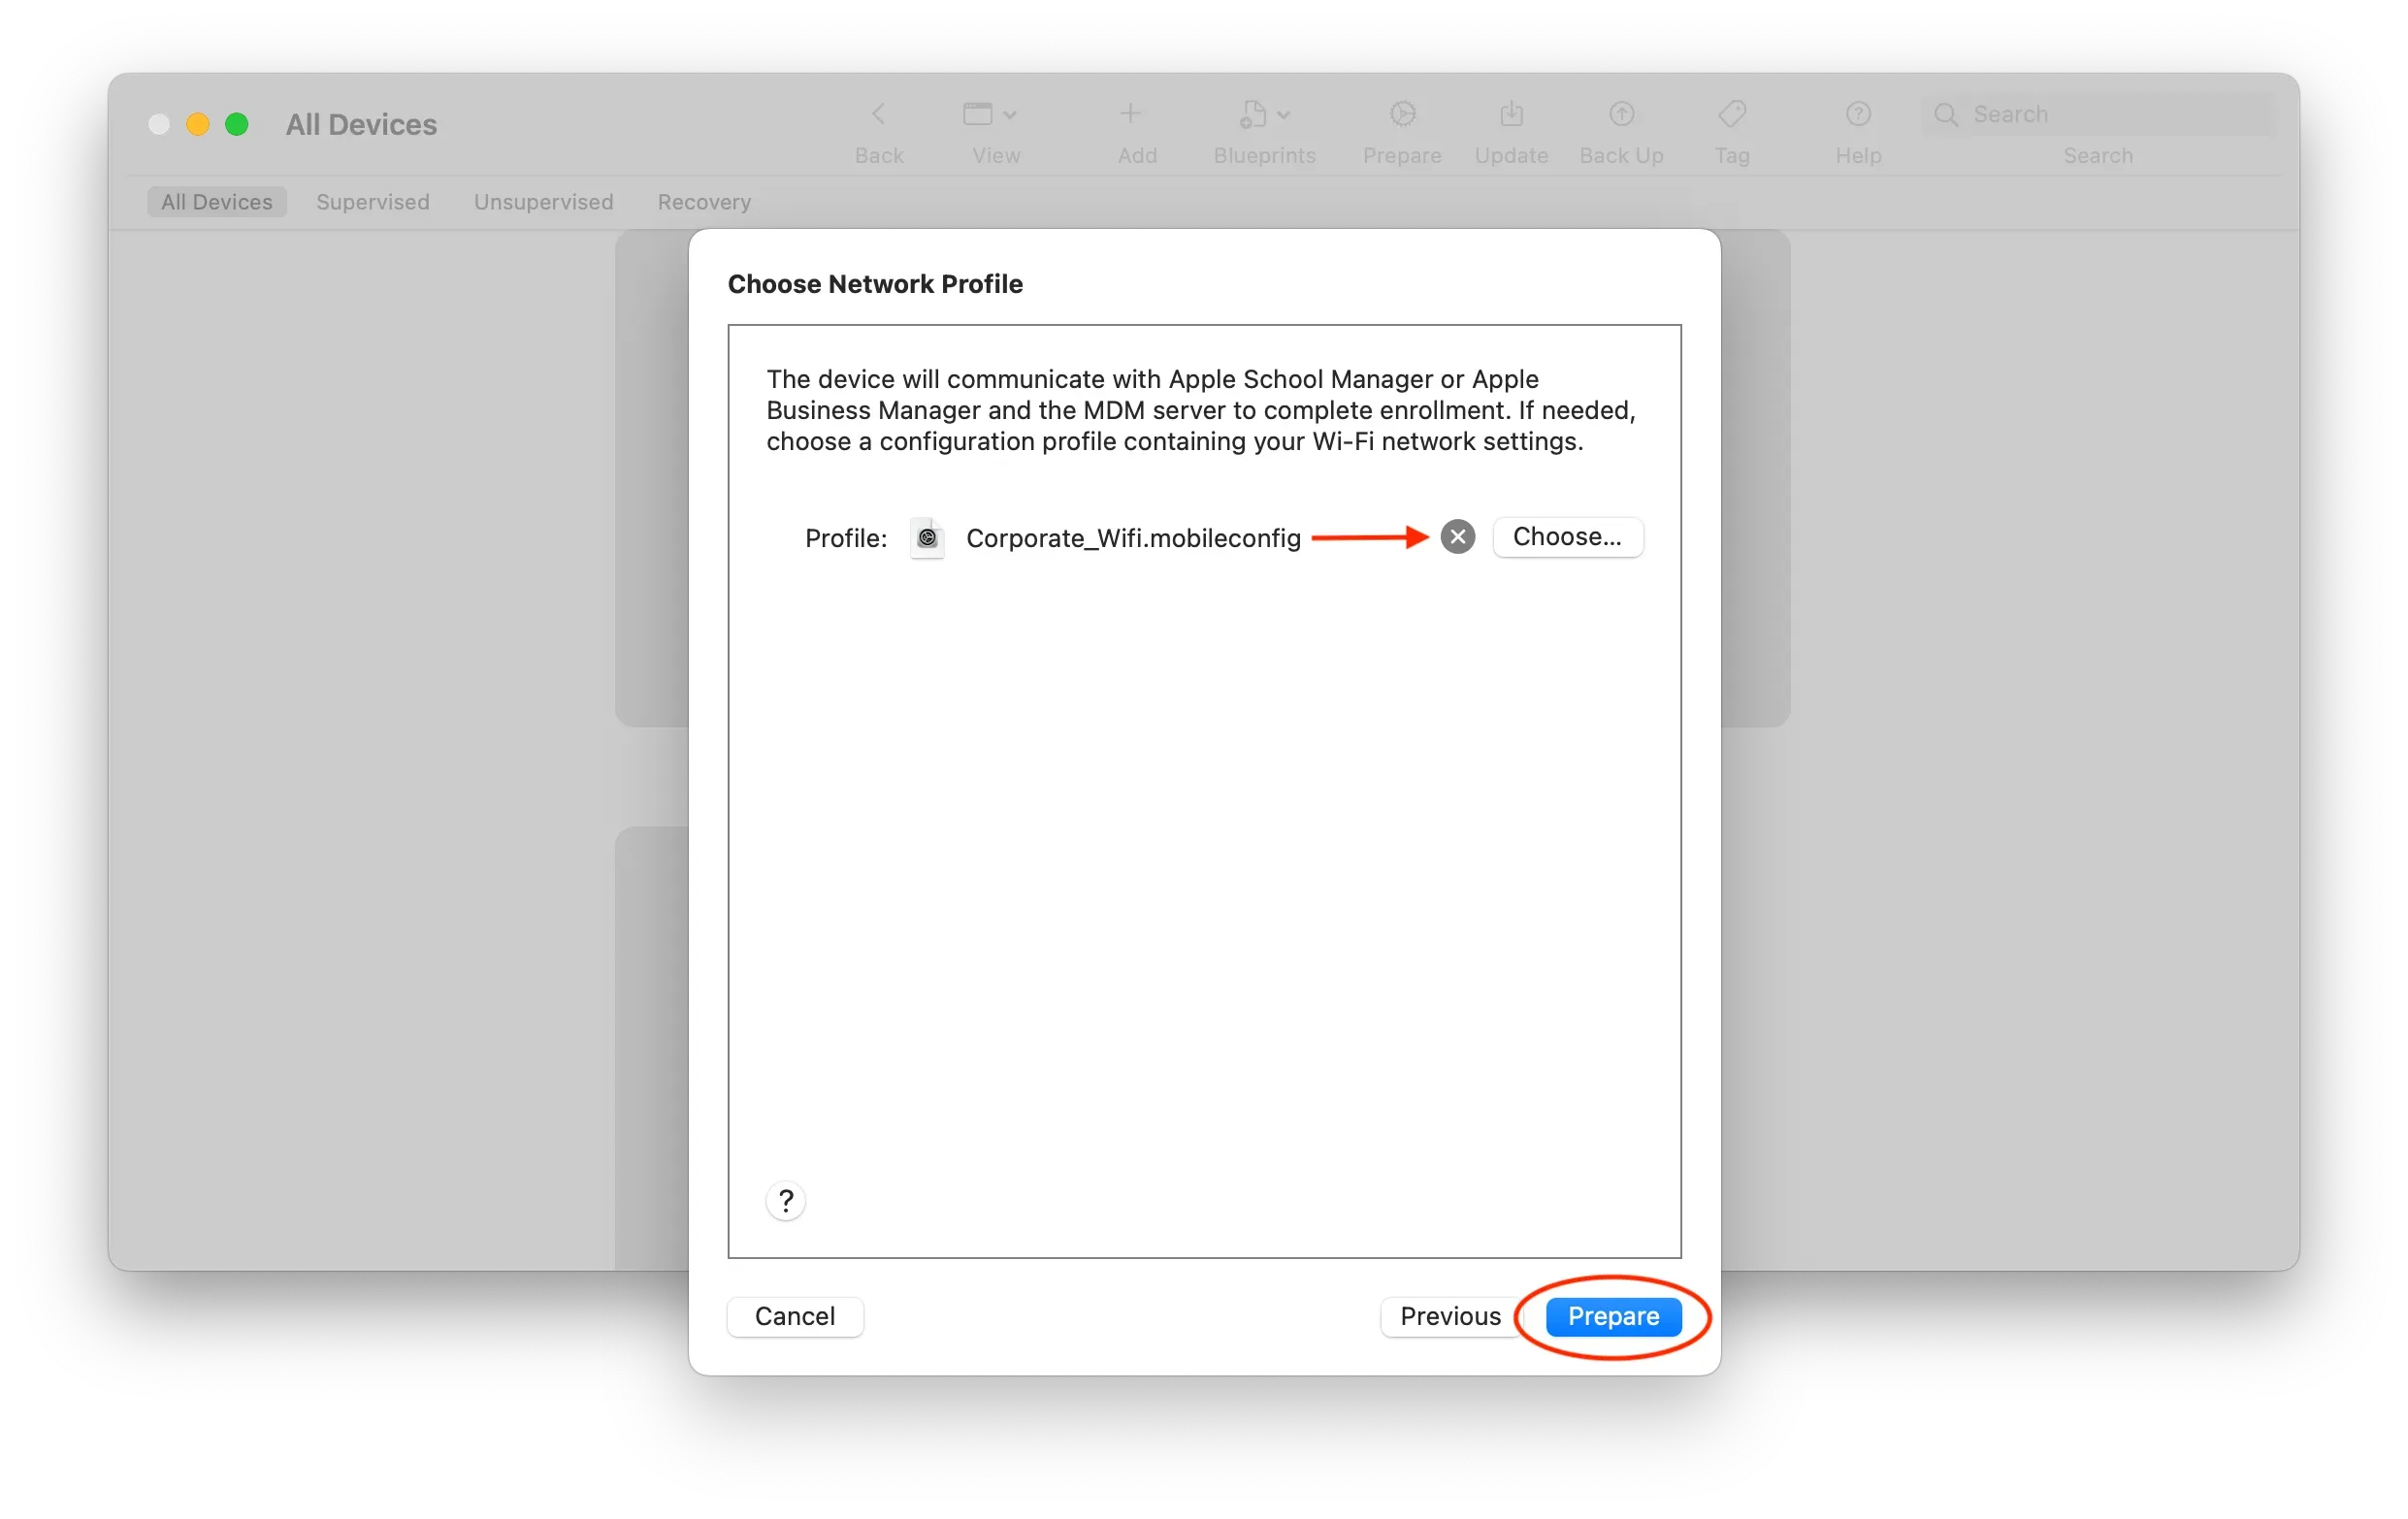
- As for the previous steps you need to select a Wi-Fi profile in Apple Configurator and click Prepare. However, this profile won’t be used by your devices afterward so you can also create a fake one:
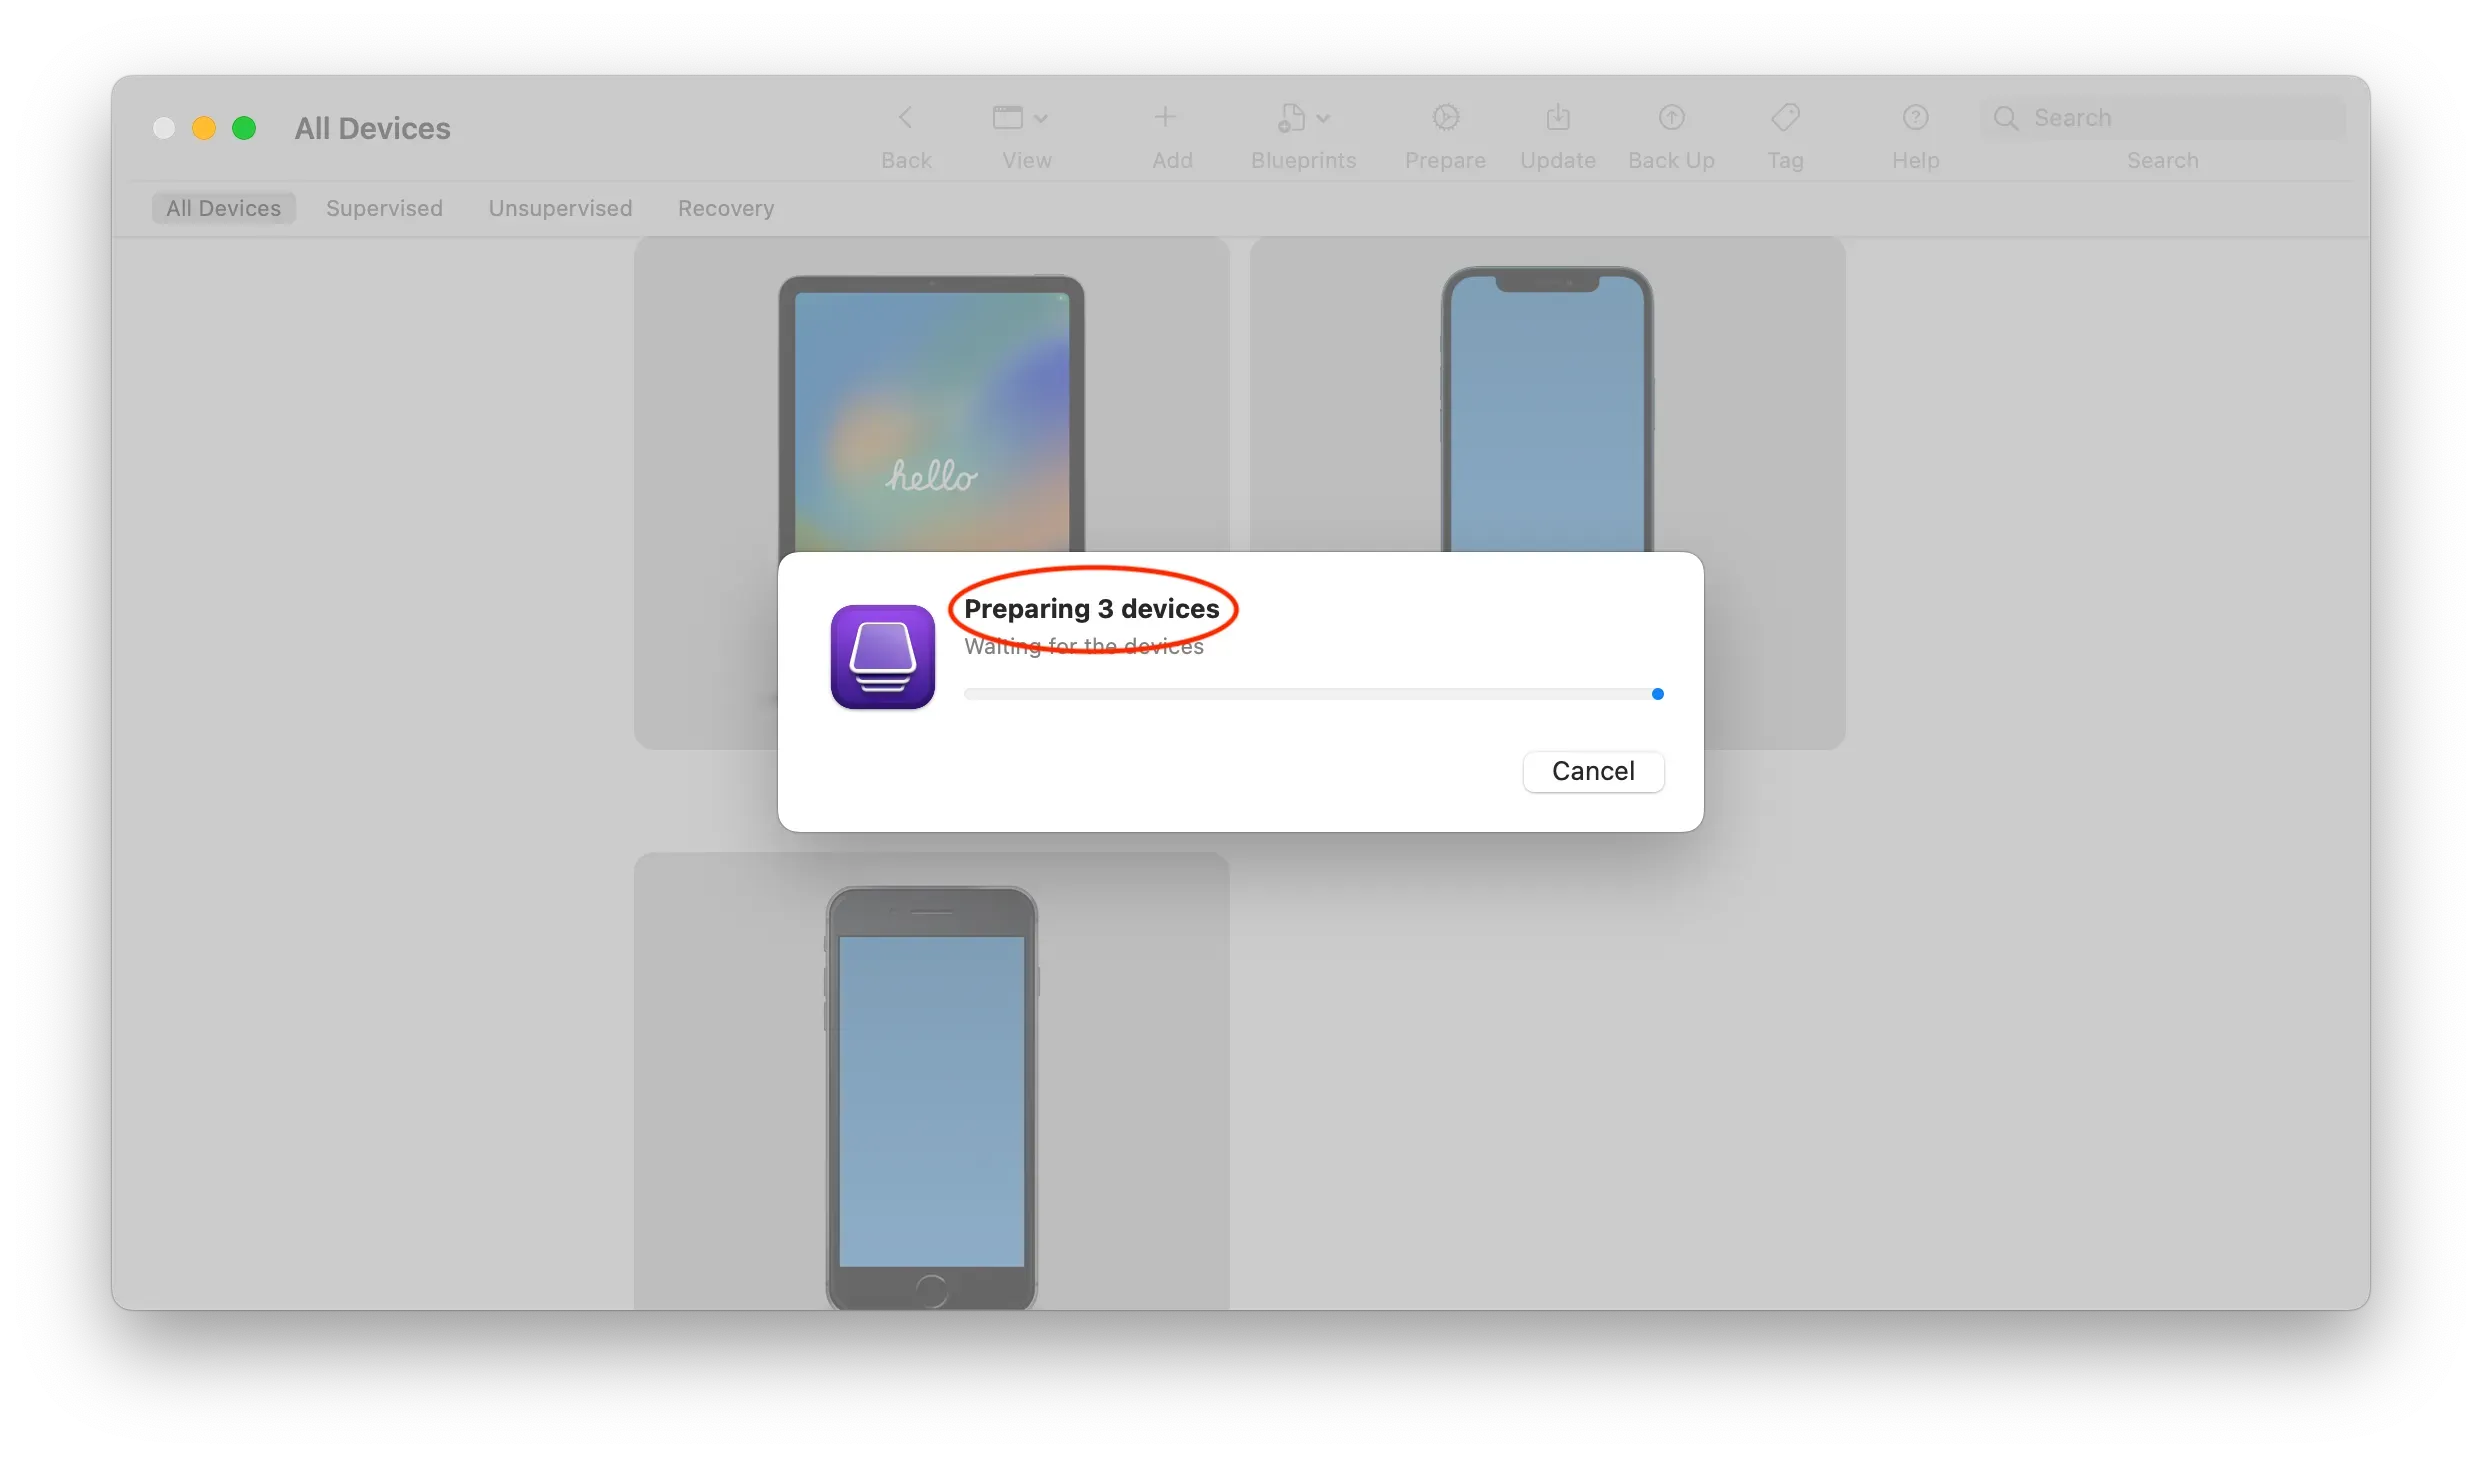
- As a result, Apple Configurator will launch the devices preparation:
Assign your devices to your new MDM solution in AB
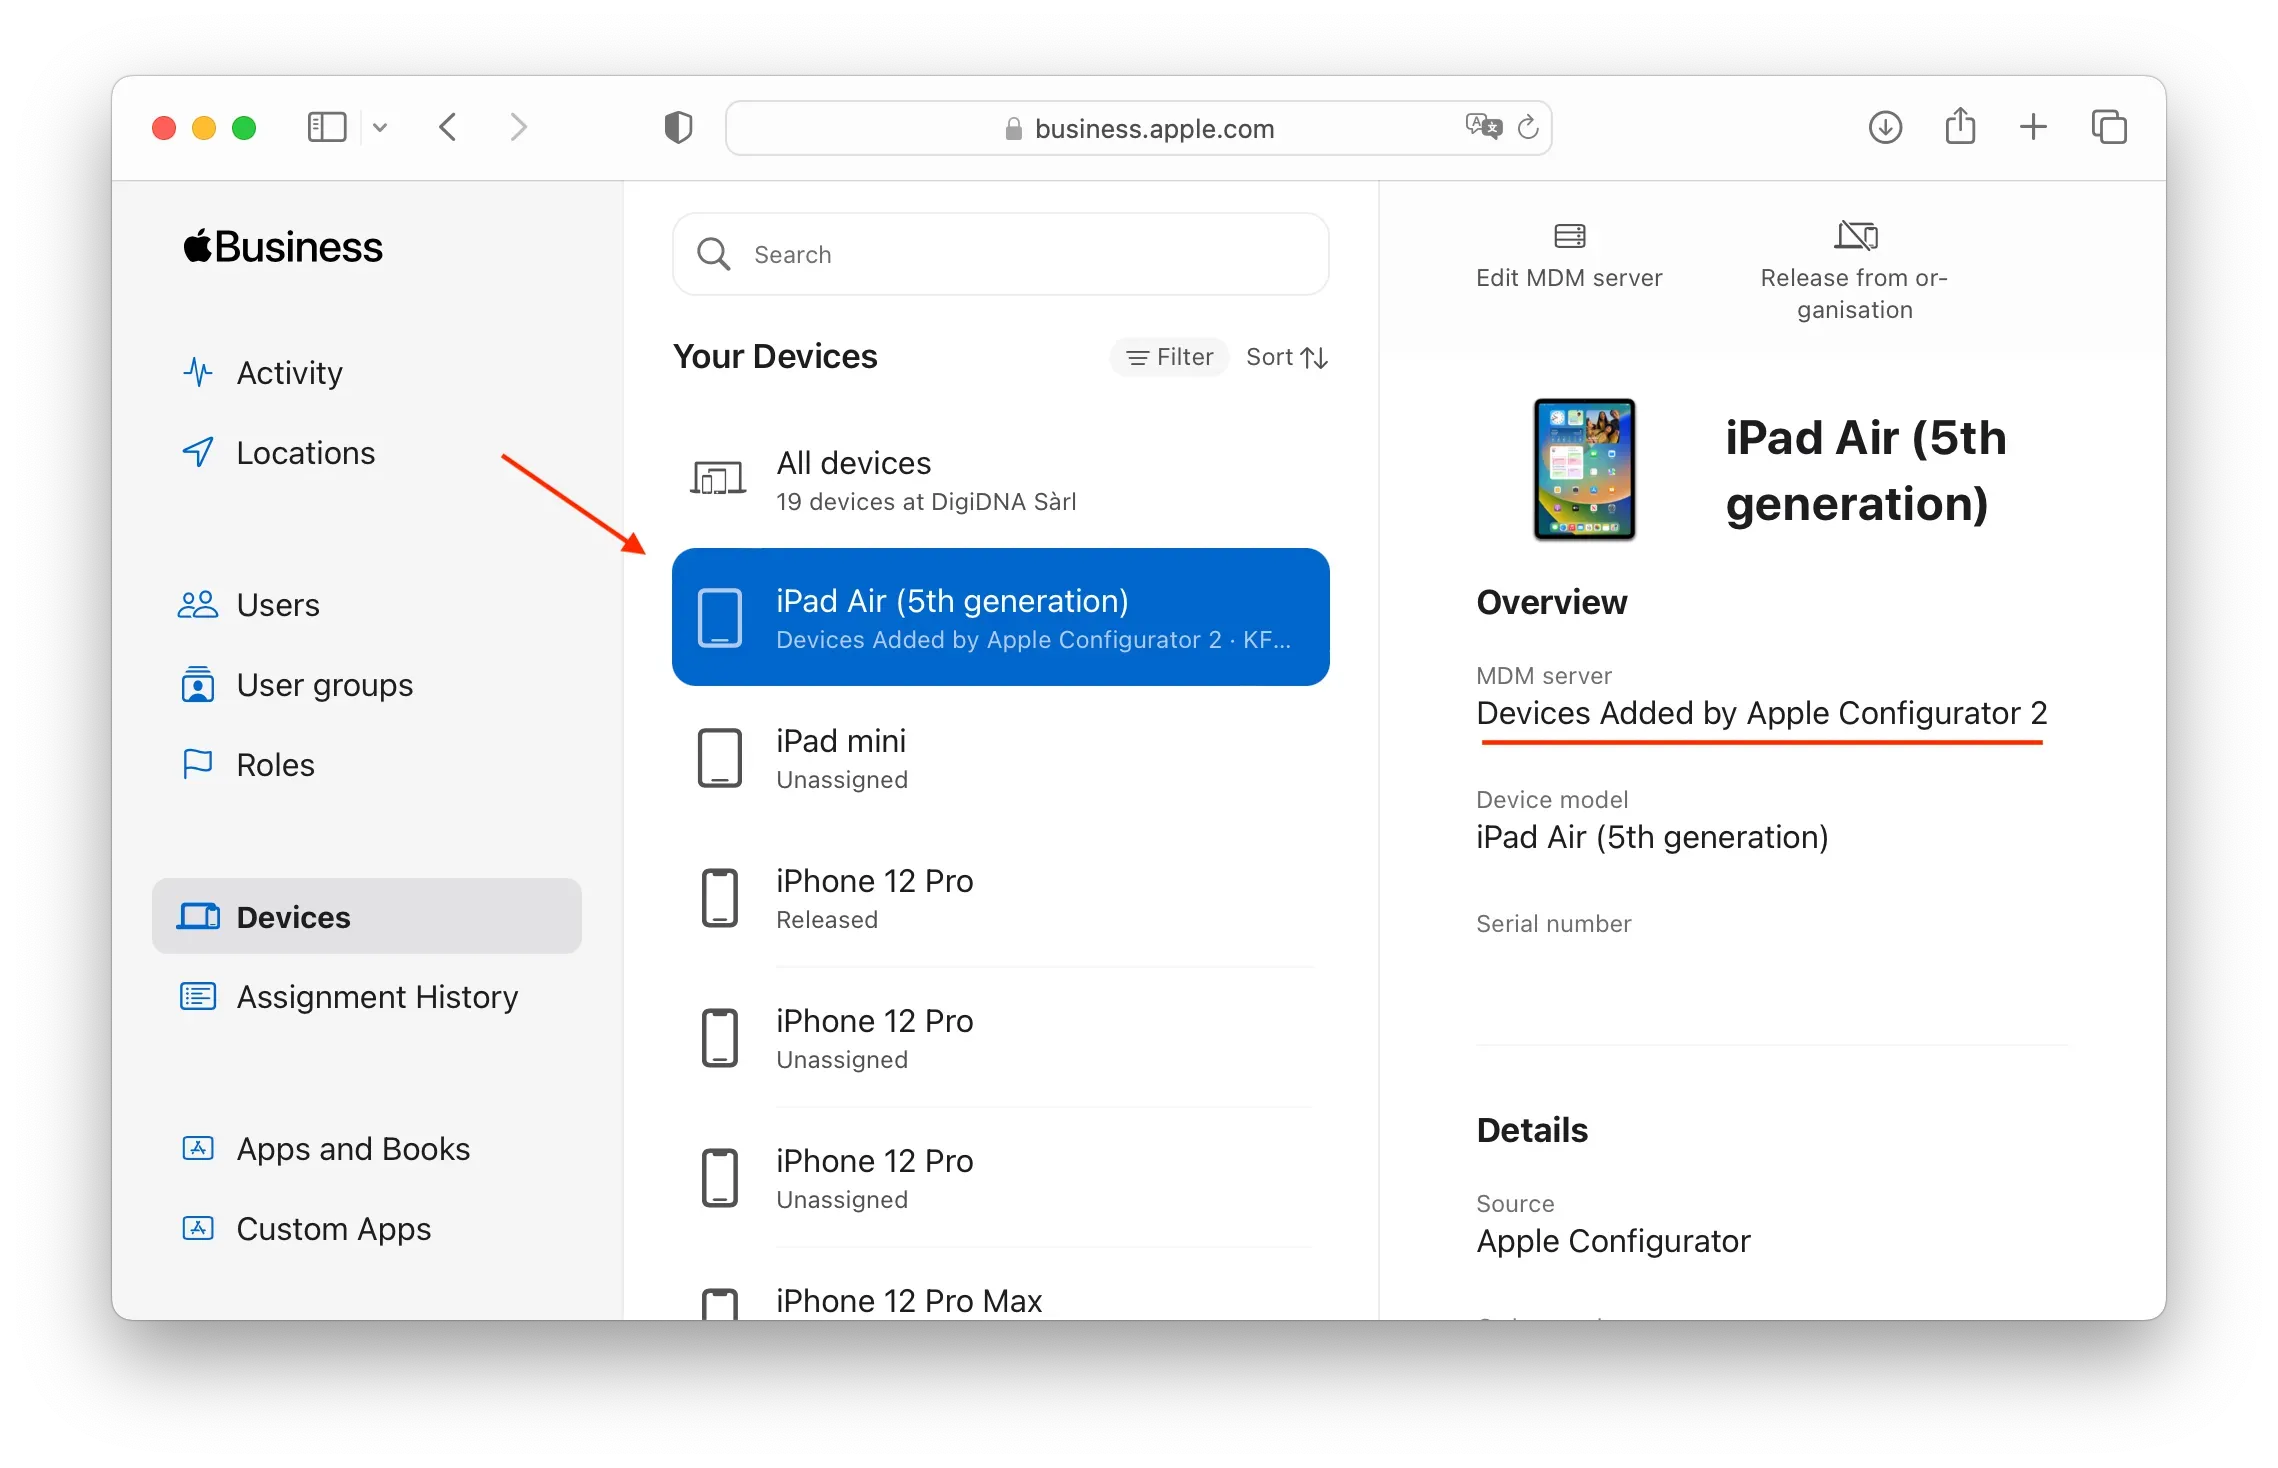
Important: *For better visual comfort in this guide, we will only display one of the three devices that have been registered in AB. However, please note that you can select multiple devices or *All Devices* in the Devices section and assign them all to the new MDM.*
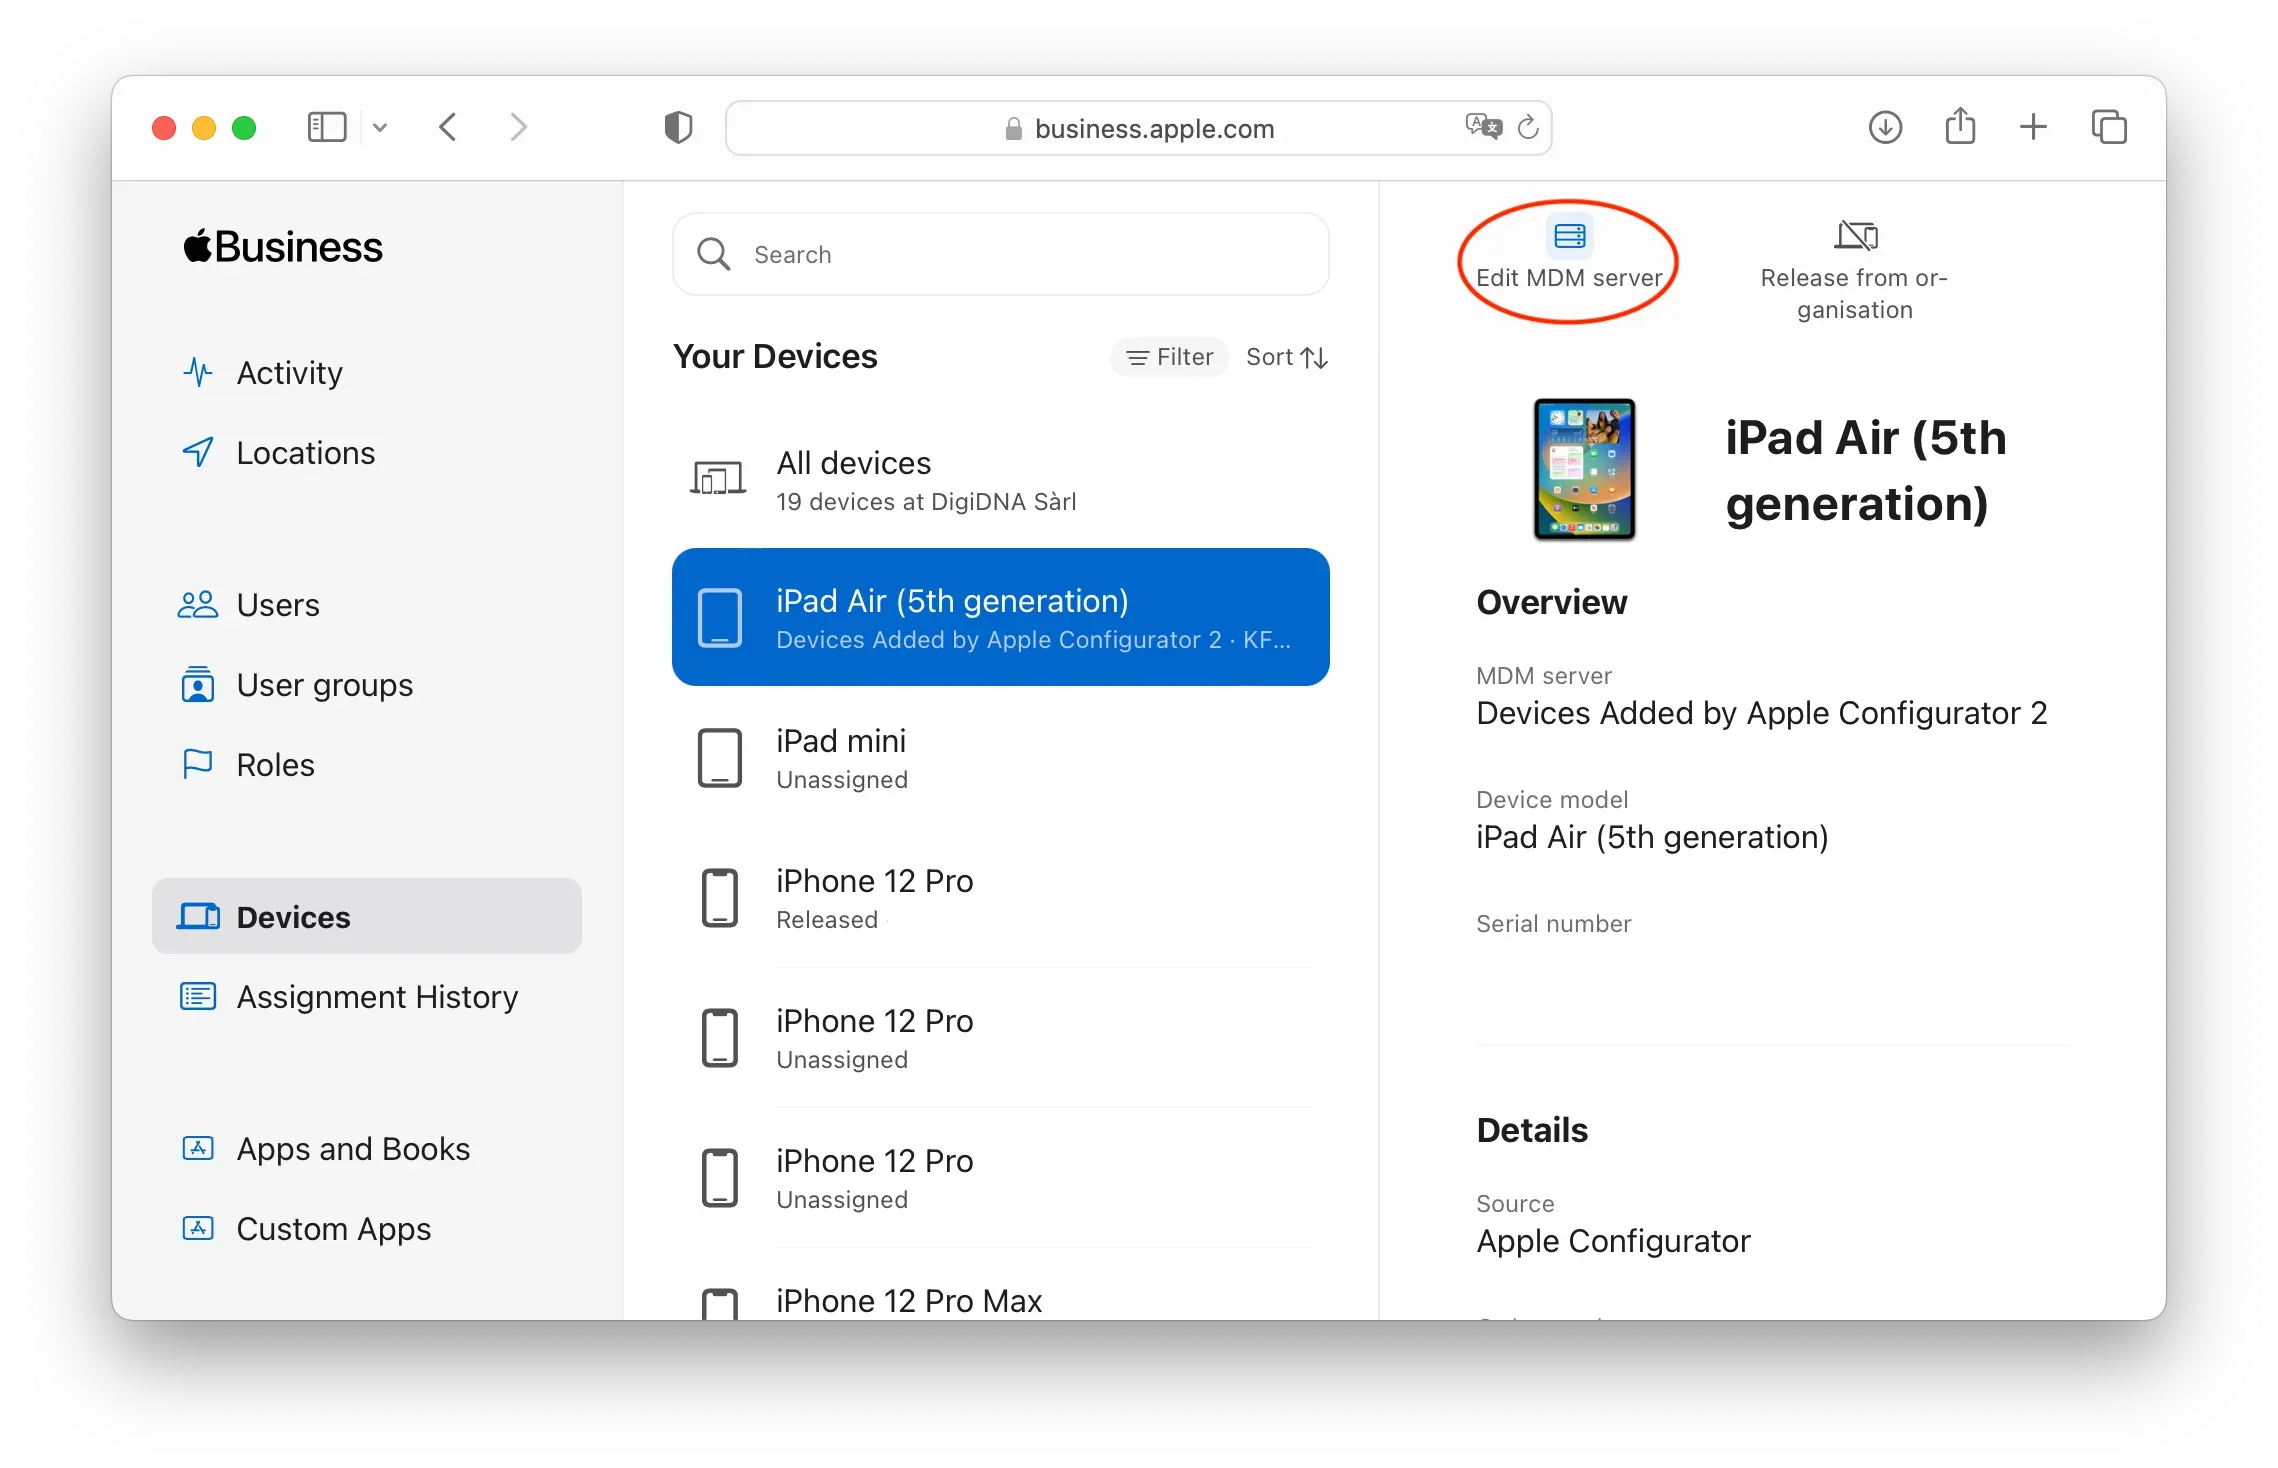
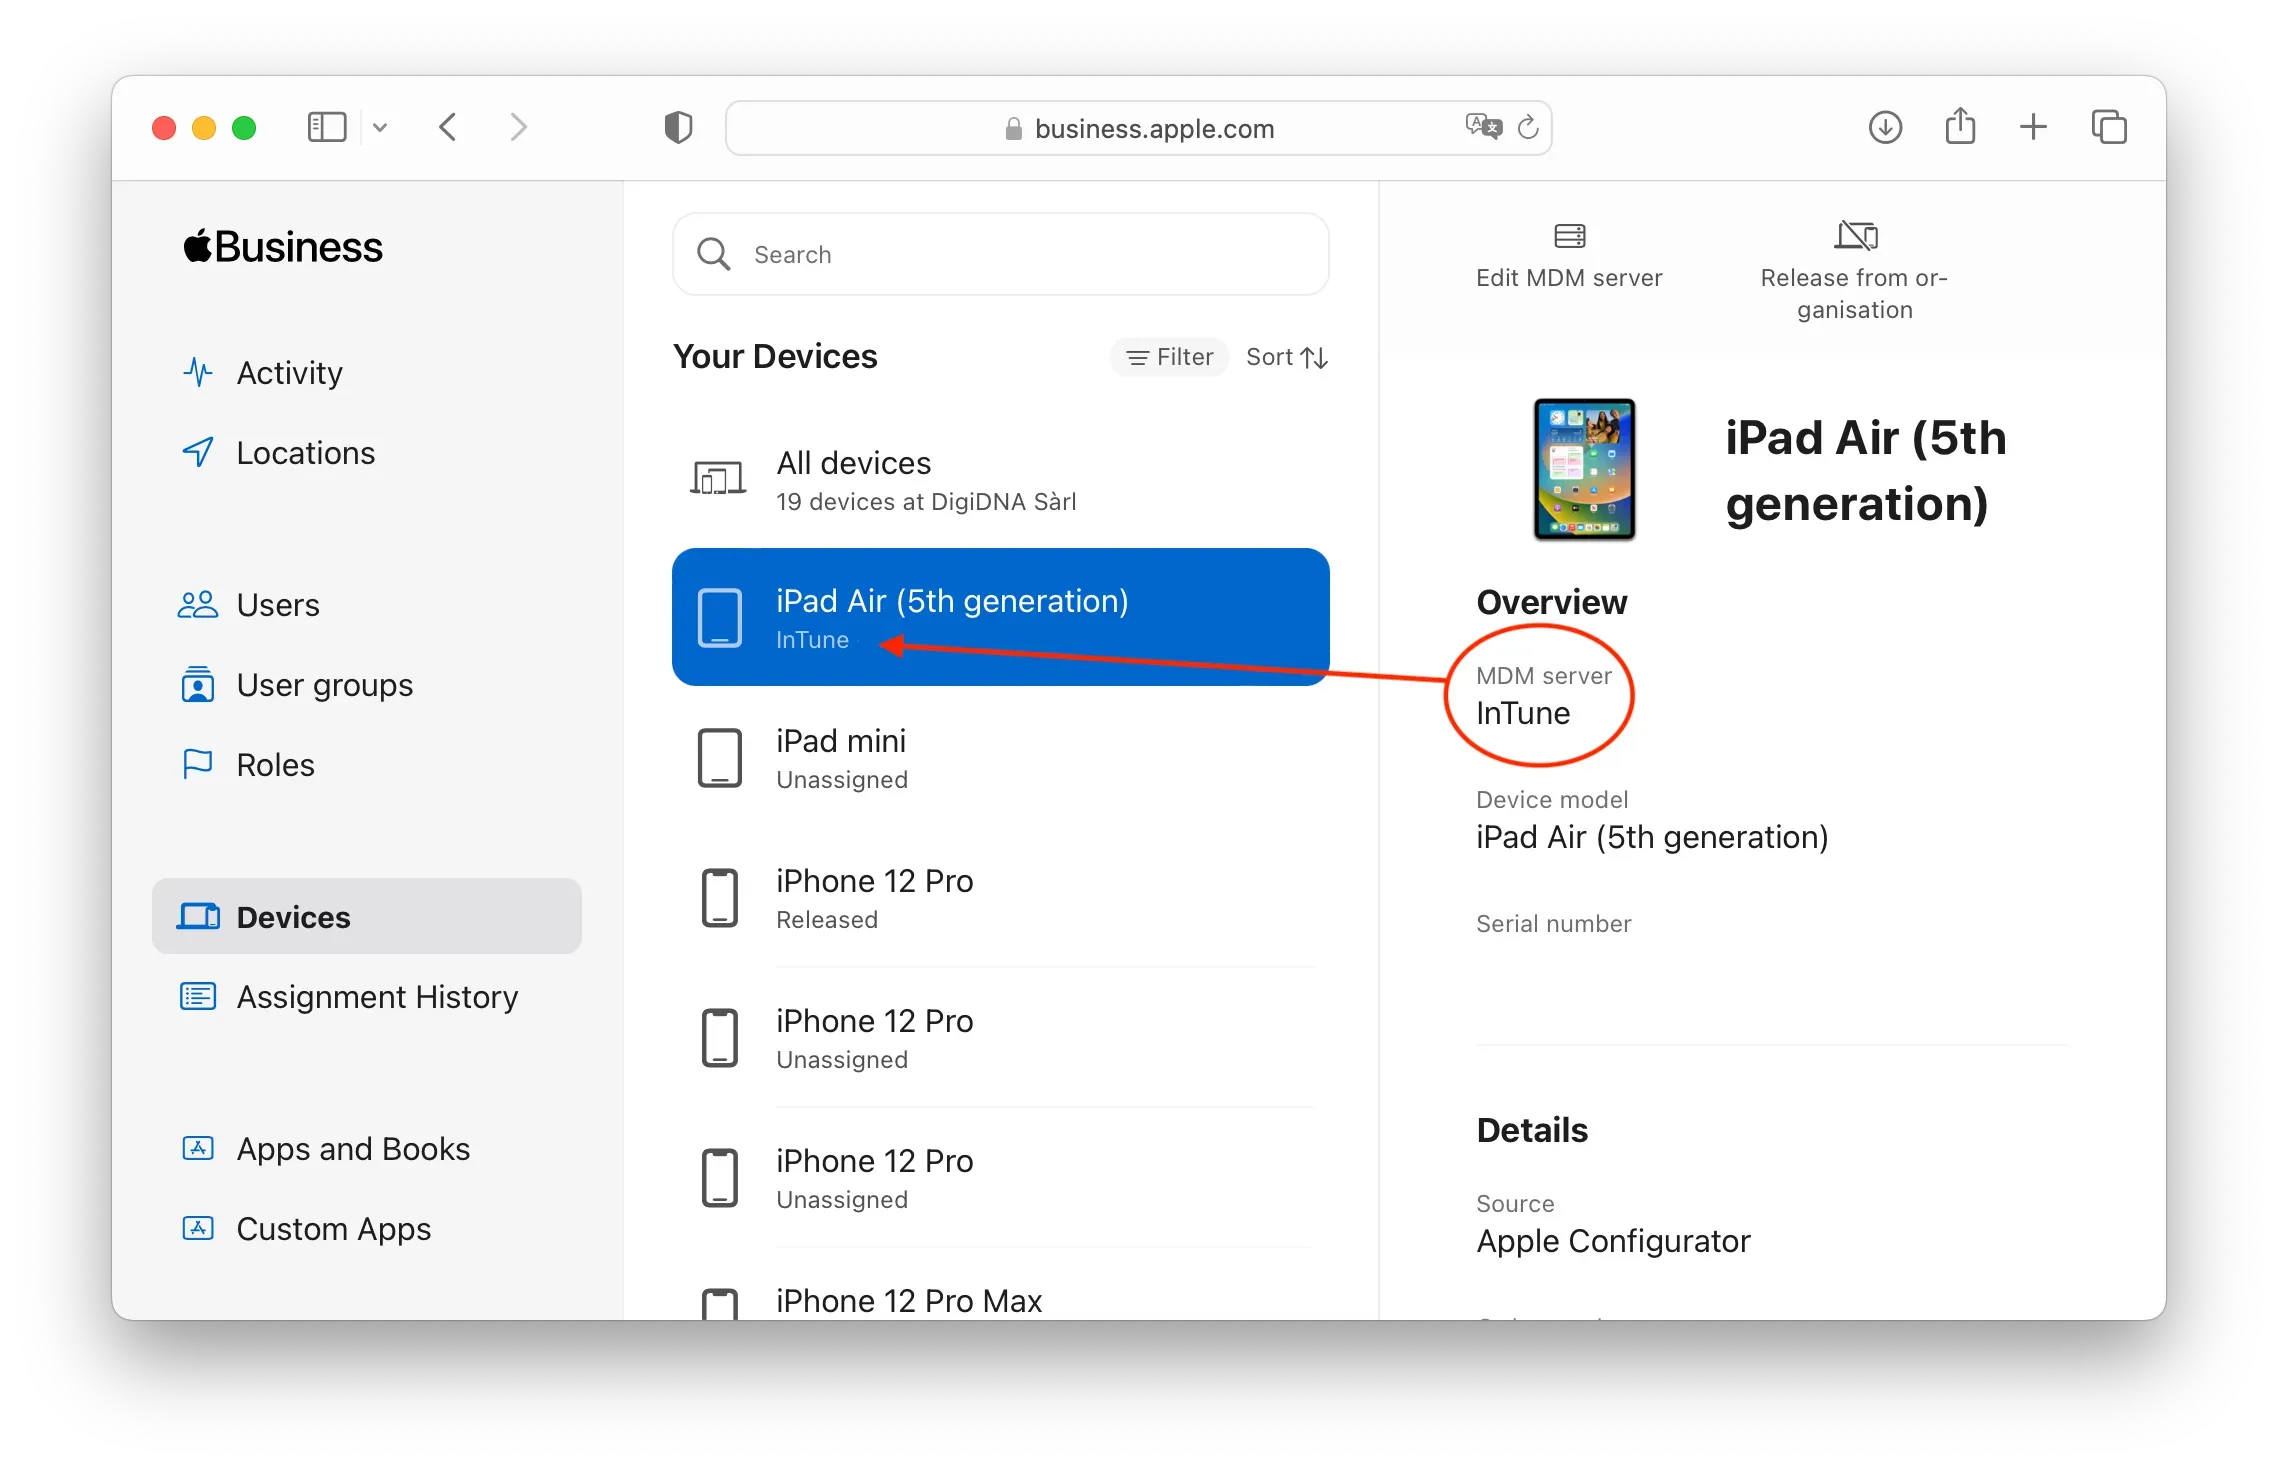
- Log in to the Apple Business portal and navigate to the Devices section. Check that a new iPad has been added to the fleet using Apple Configurator:
- Select Edit MDM server:
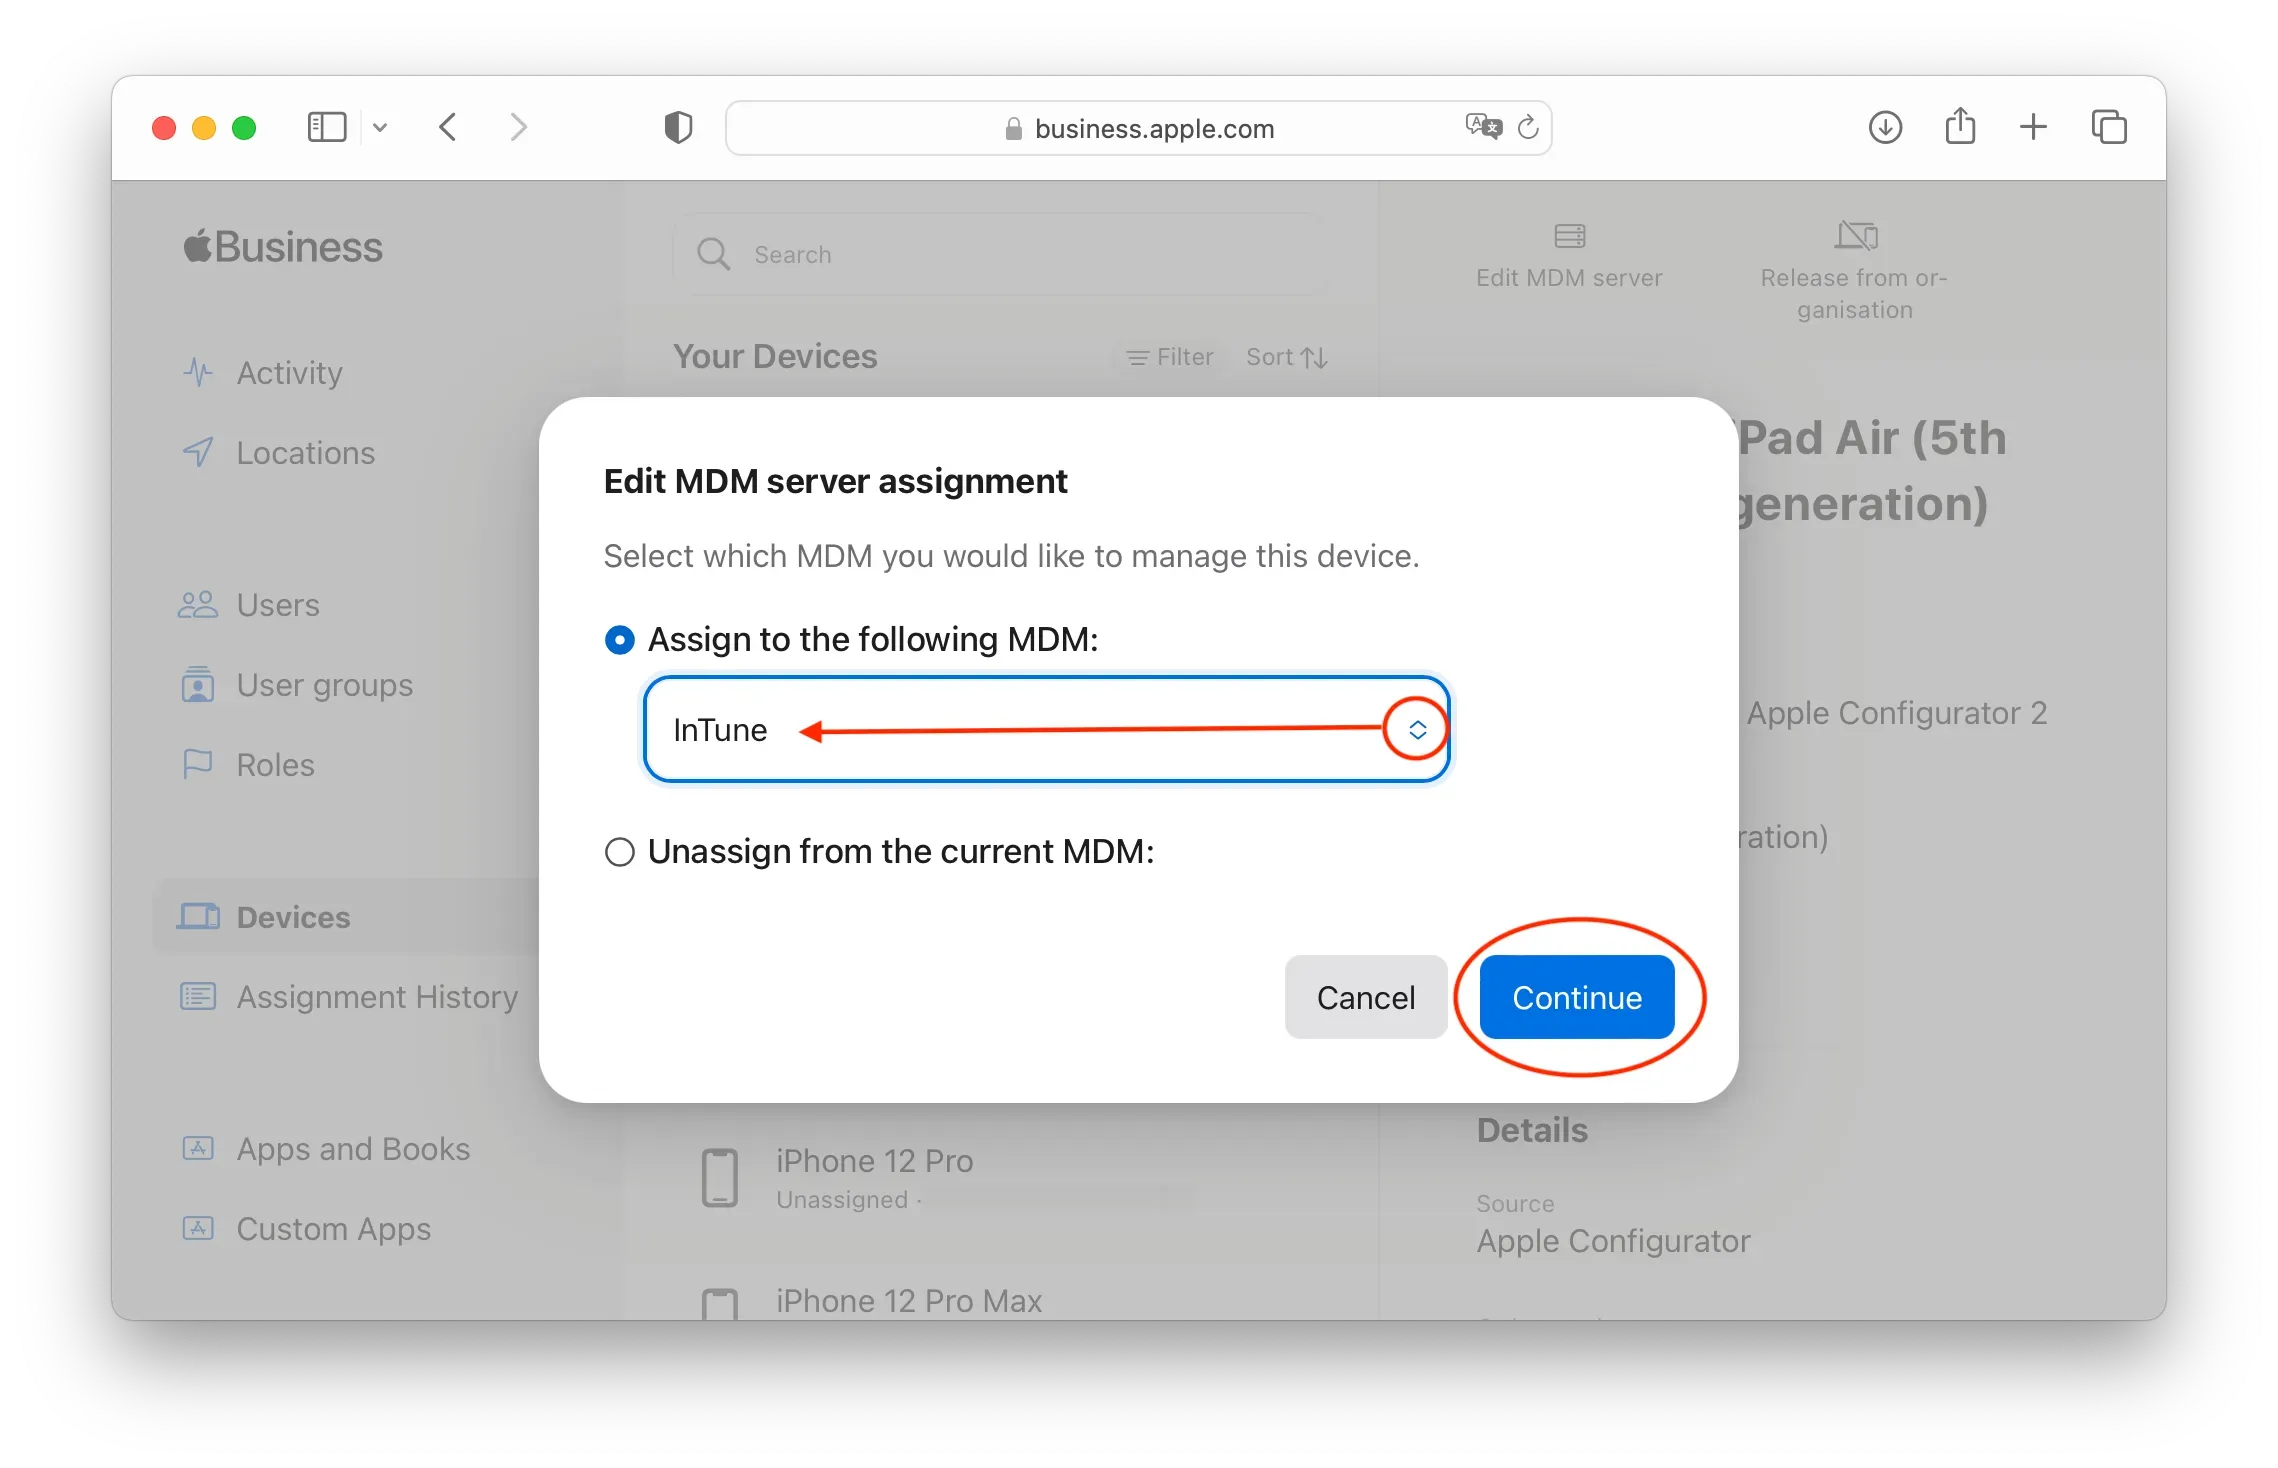
- In the drop-down menu, select Intune and click on Continue:
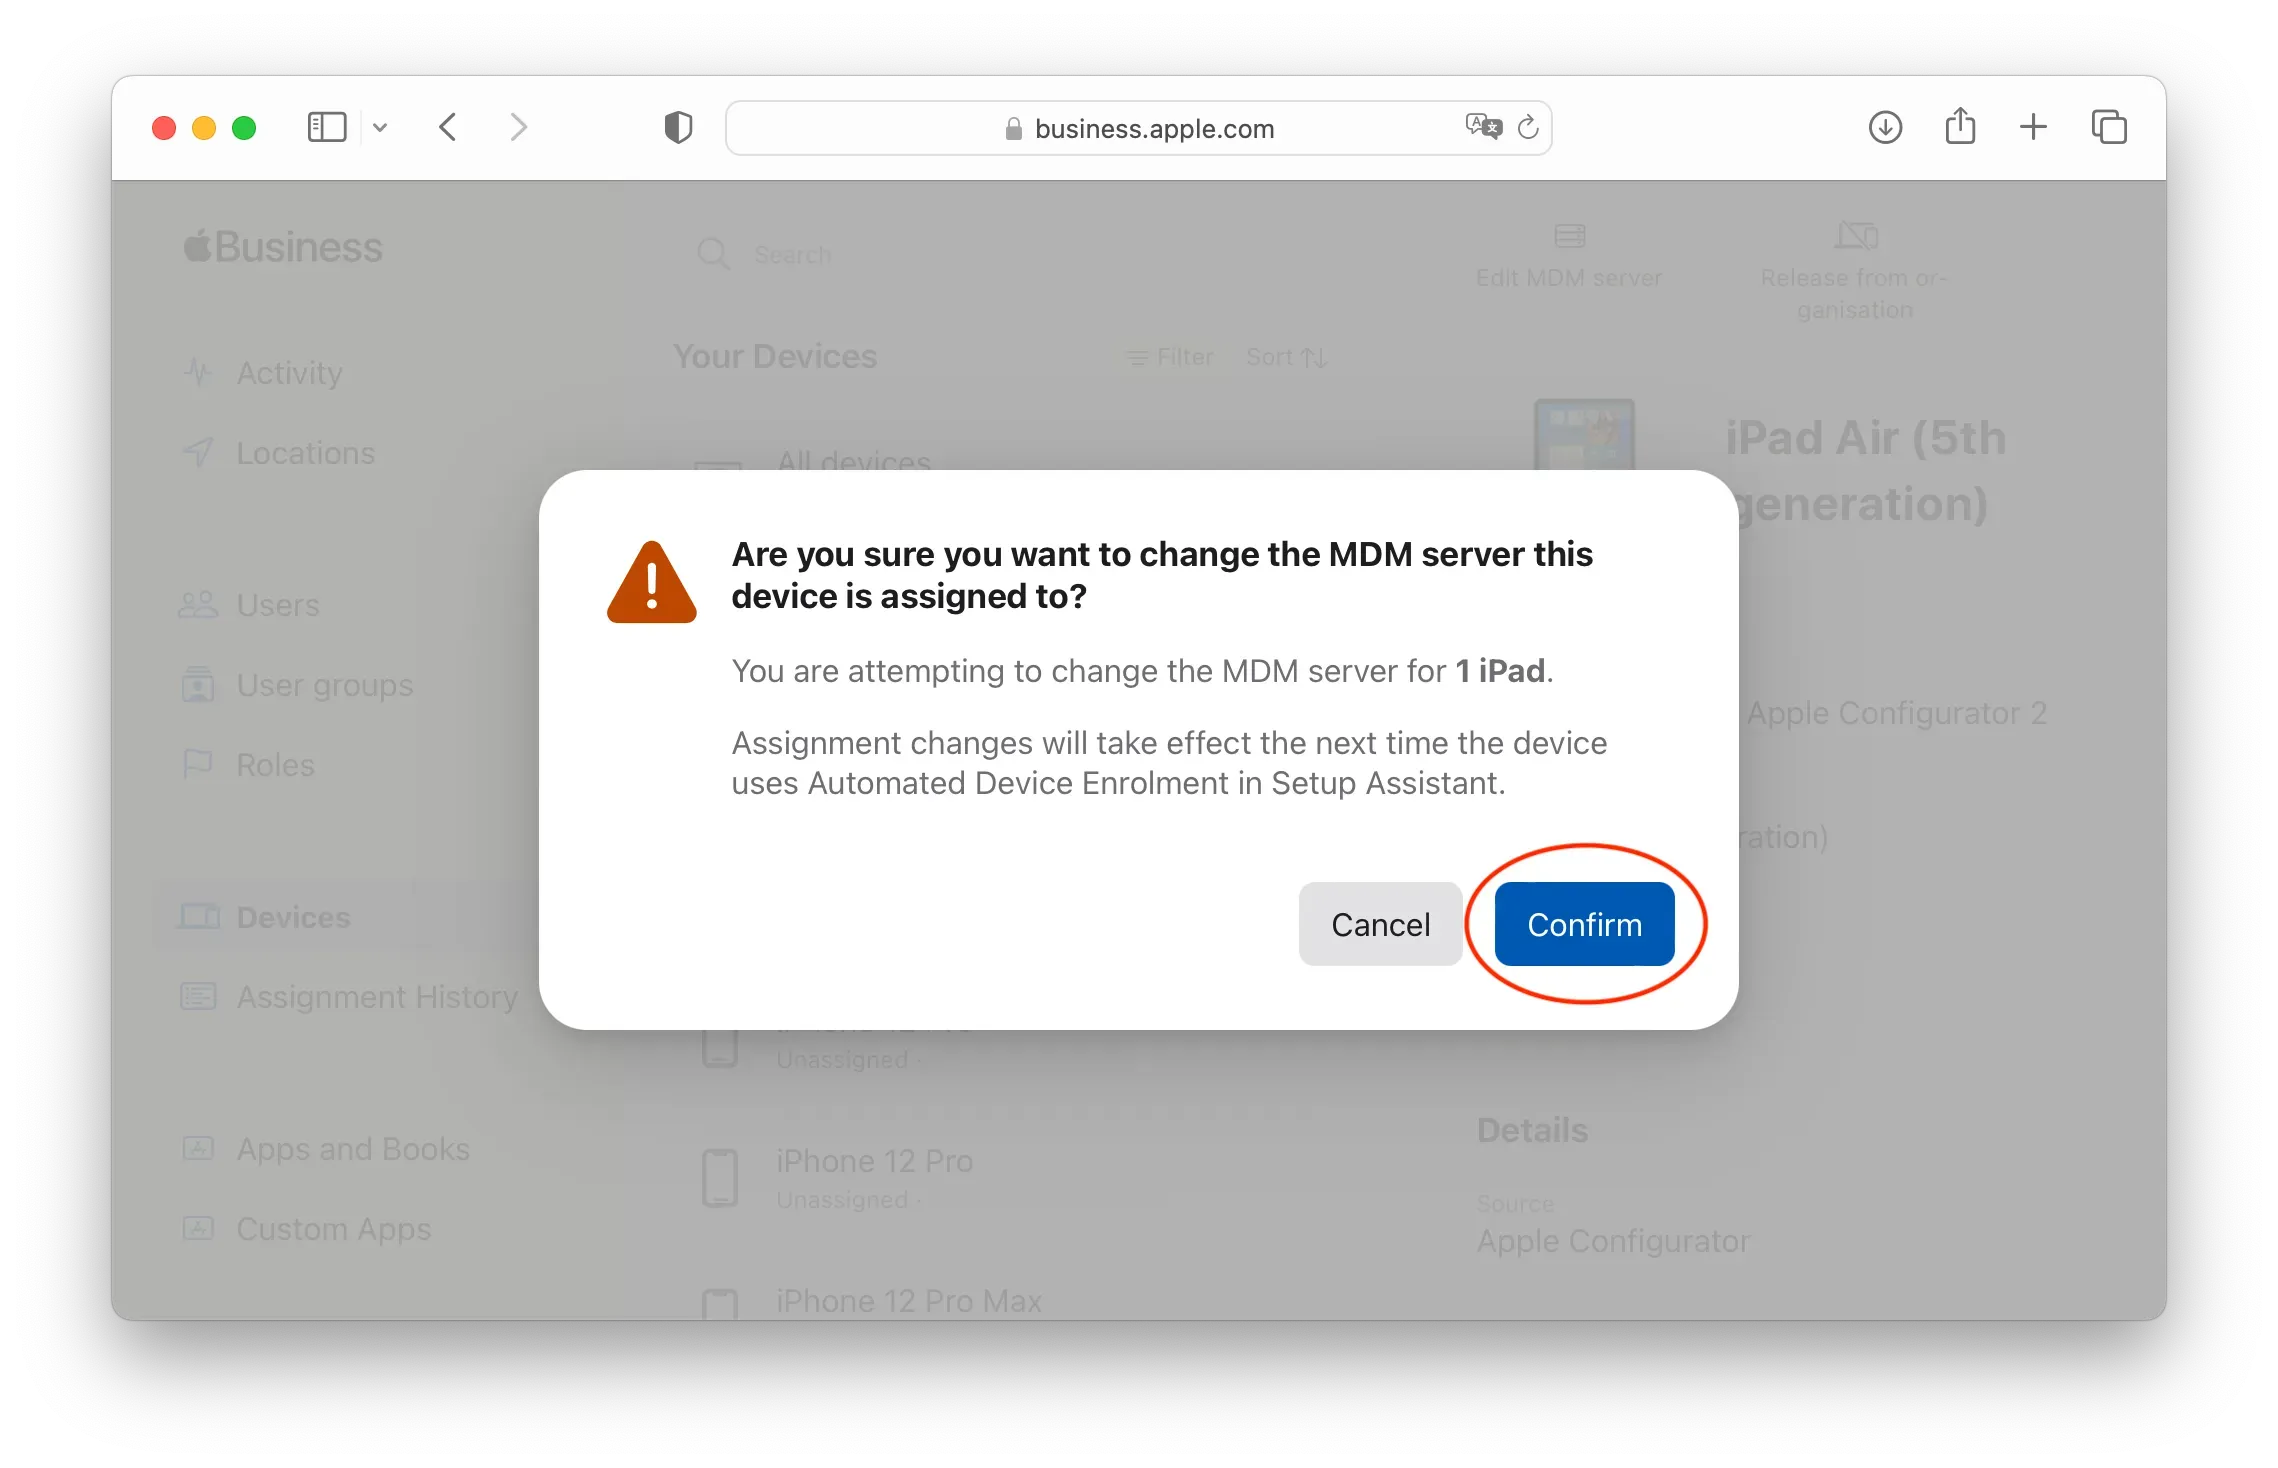
- Your MDM server is going to be changed, click Confirm:
- Check that the MDM assignment has been updated:
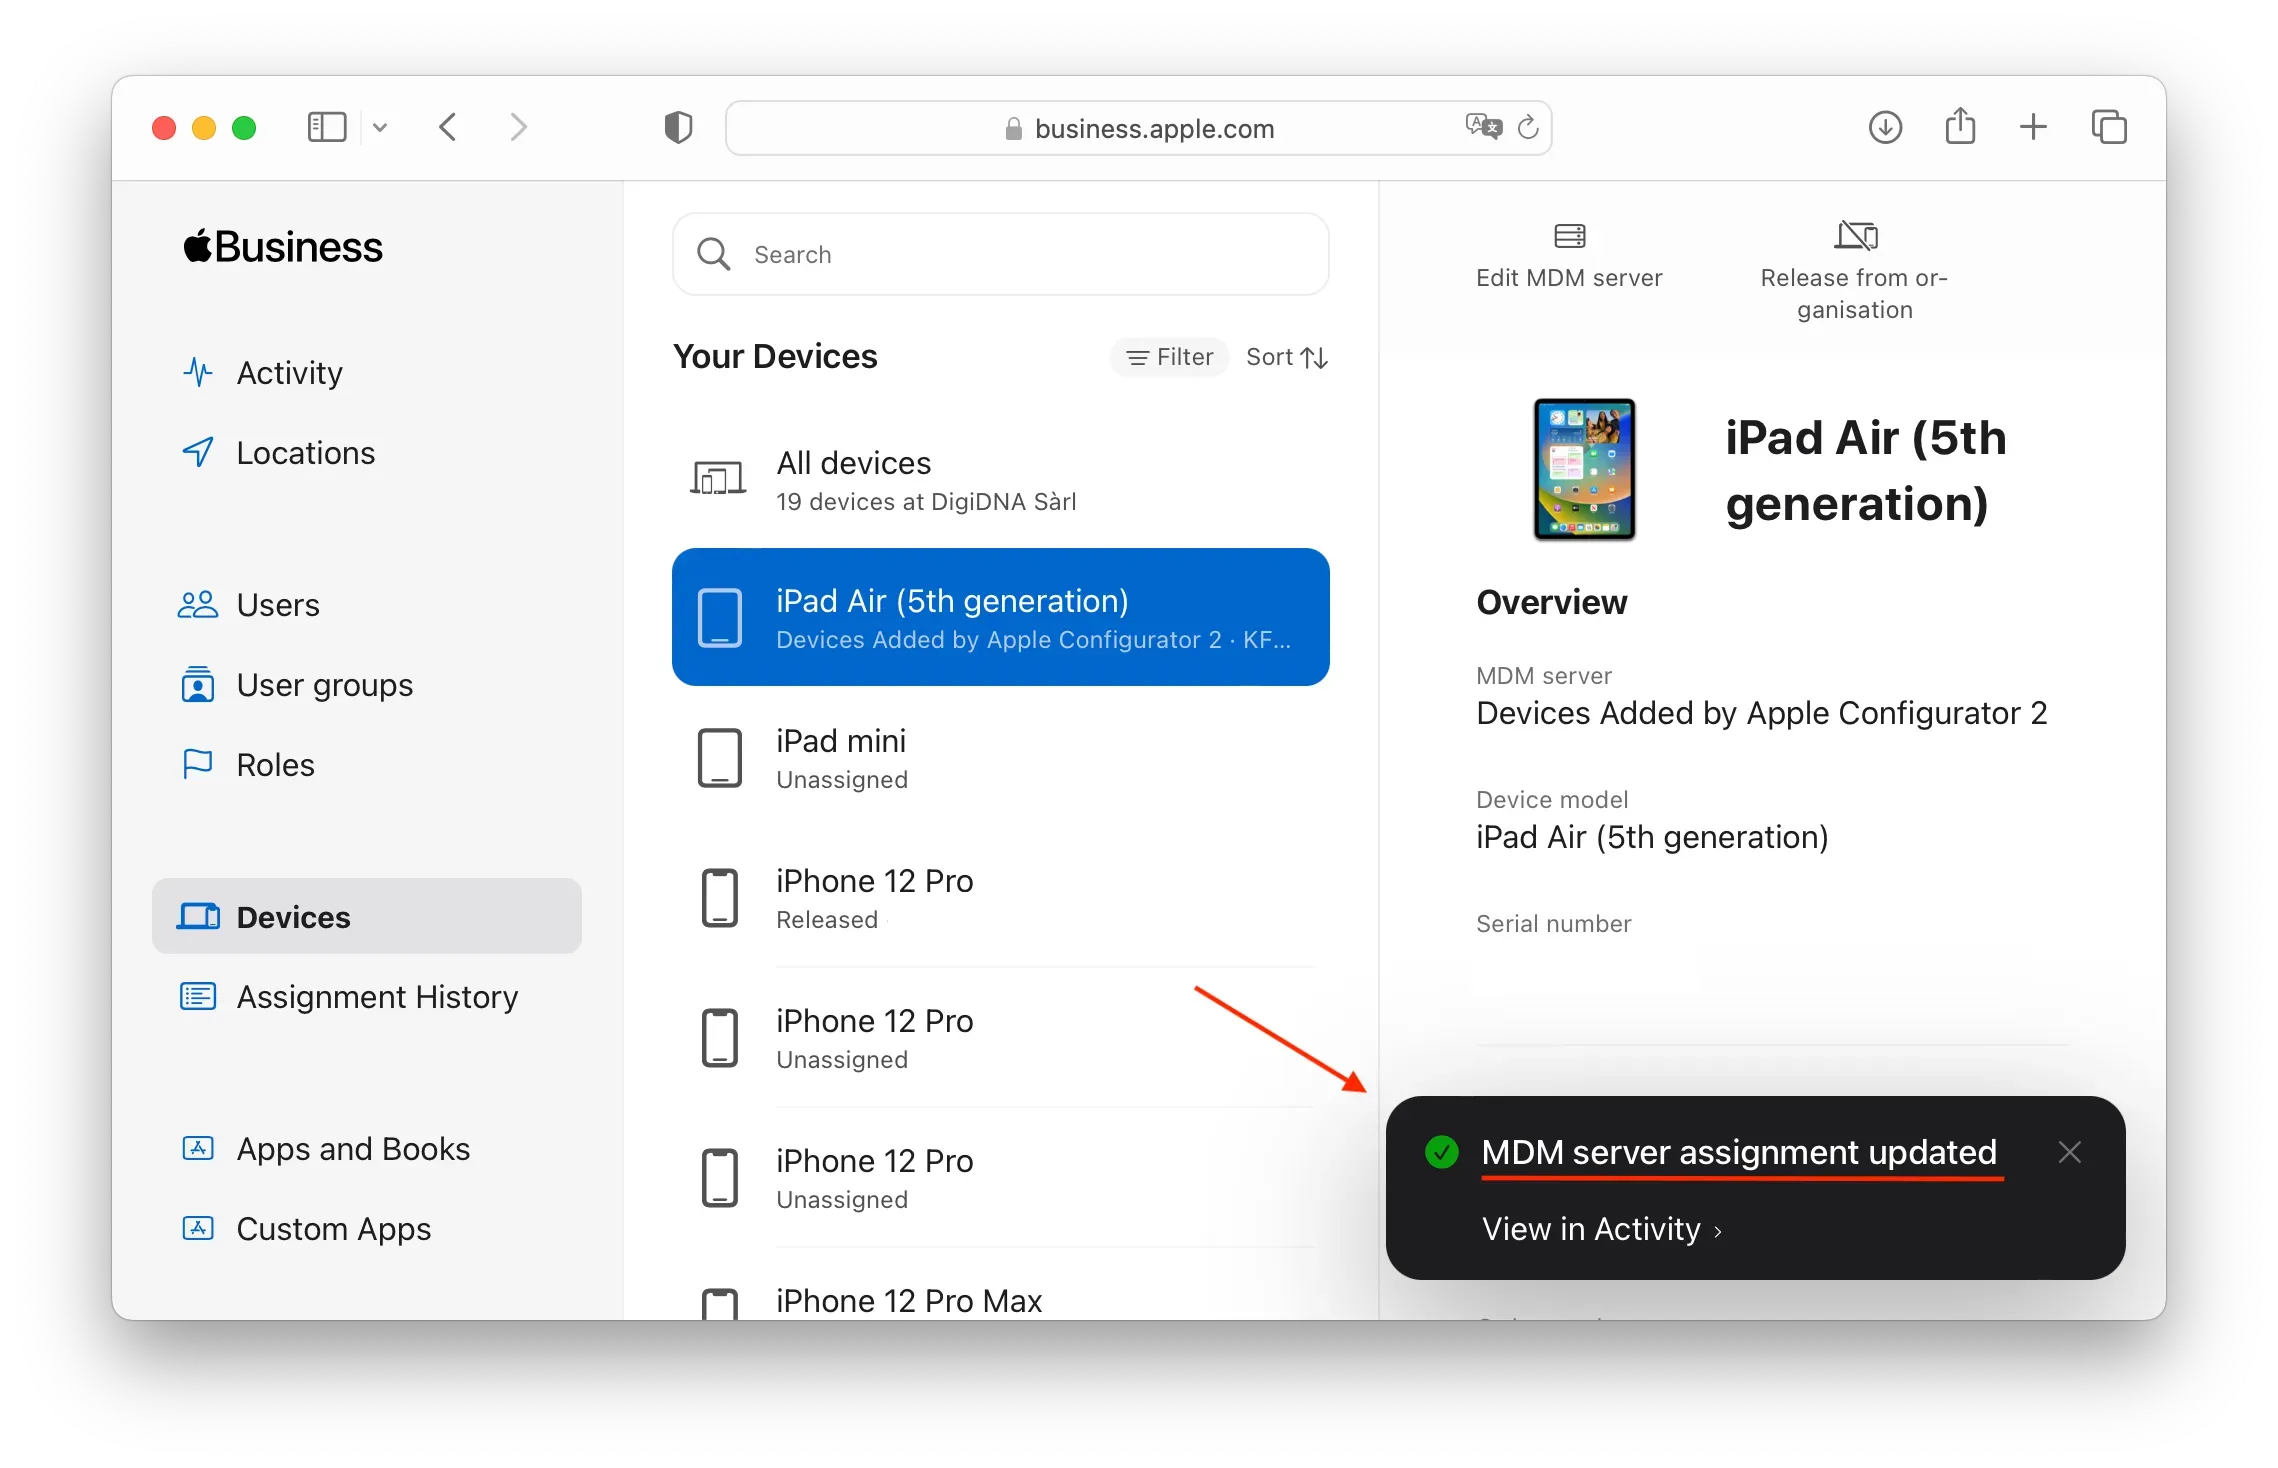
- Your device has been assigned to Intune and is now ready to be enrolled using ADE:
Prepare your Intune MDM for Automated Device Enrollment
Please follow the instructions in the article below to learn how to configure Automated Device Enrollment in Intune. This will enable you to continue managing your devices locally with iMazing or iMazing Configurator after the data migration. Note that this step is optional, and you can skip it if you don't want to manage your devices locally afterward.
Restore your data on the freshly enrolled devices
- Launch iMazing.
- Connect your devices with a USB hub and select Configurator > Library > Blueprints:
- From iMazing Configurator window click on the '+' icon in order to create a new blueprint:
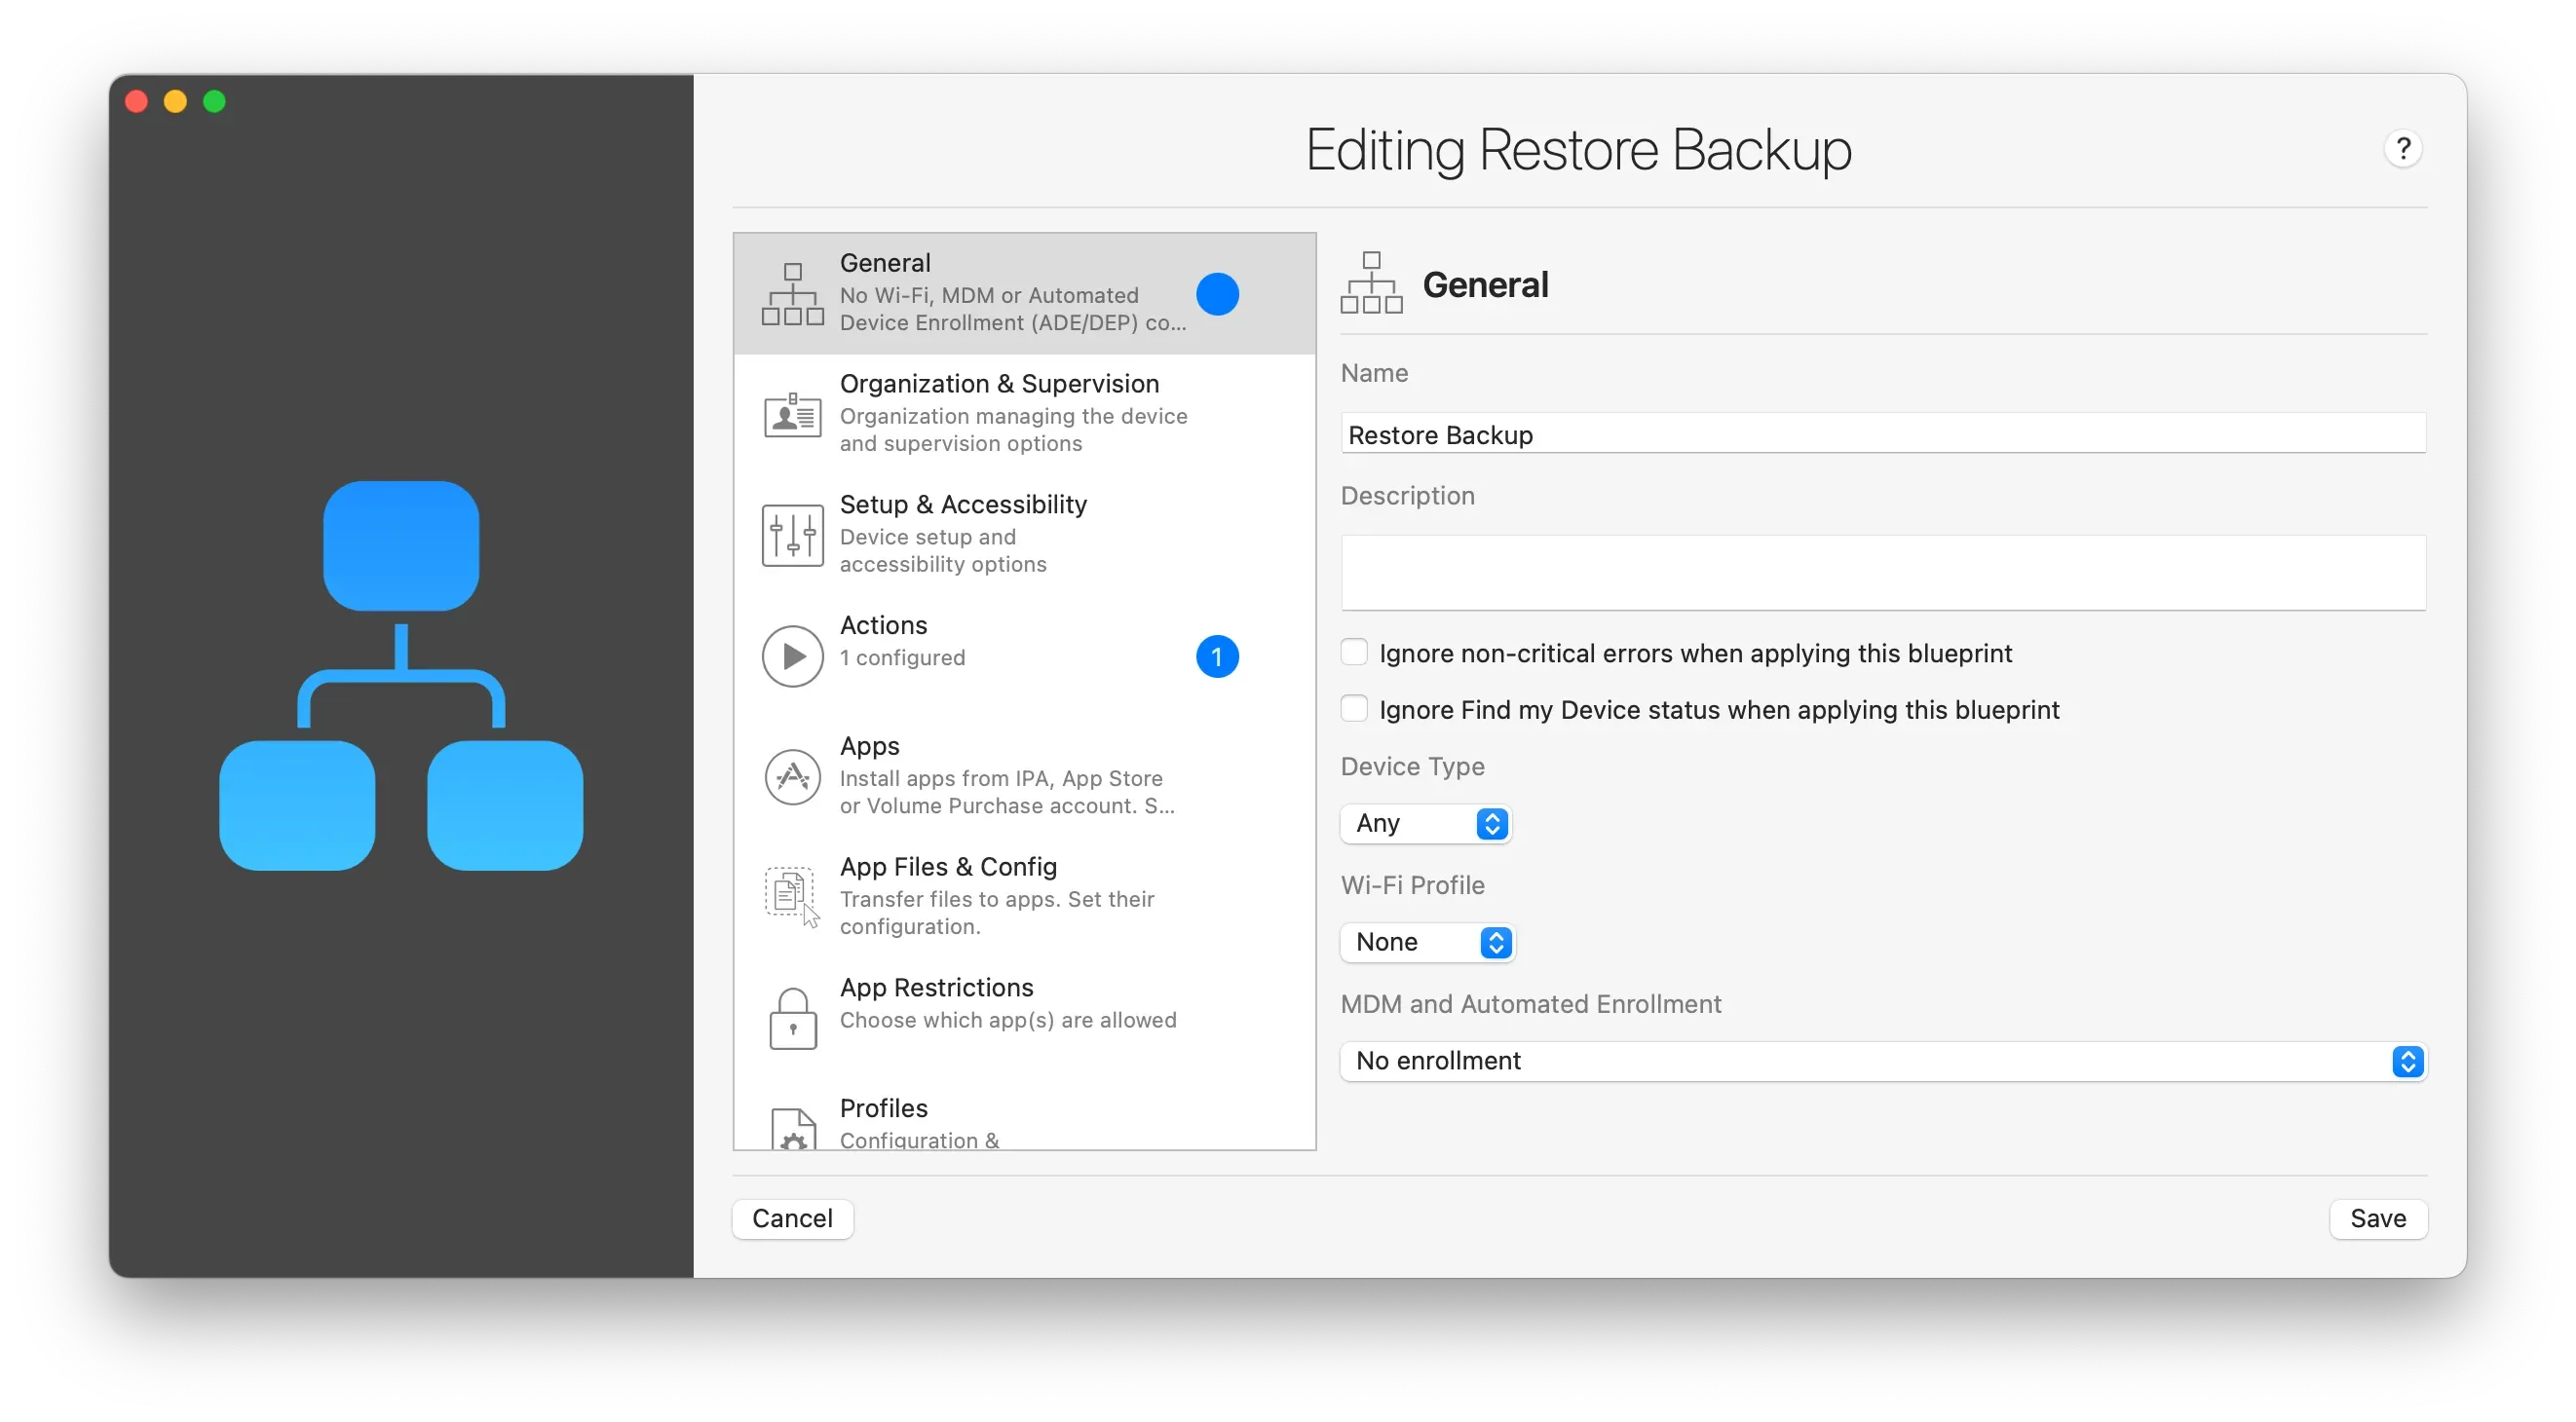
- In the General section of New Blueprint enter a name “Restore Backup” and possibly a description that would help another IT administrator understand what the blueprint is about:
- Go to the Actions section. From there, select both Restore device's last backup and Prevent skipping Automated Device Enrollment (ADE/DEP) when restoring backup. Finally, click Save:
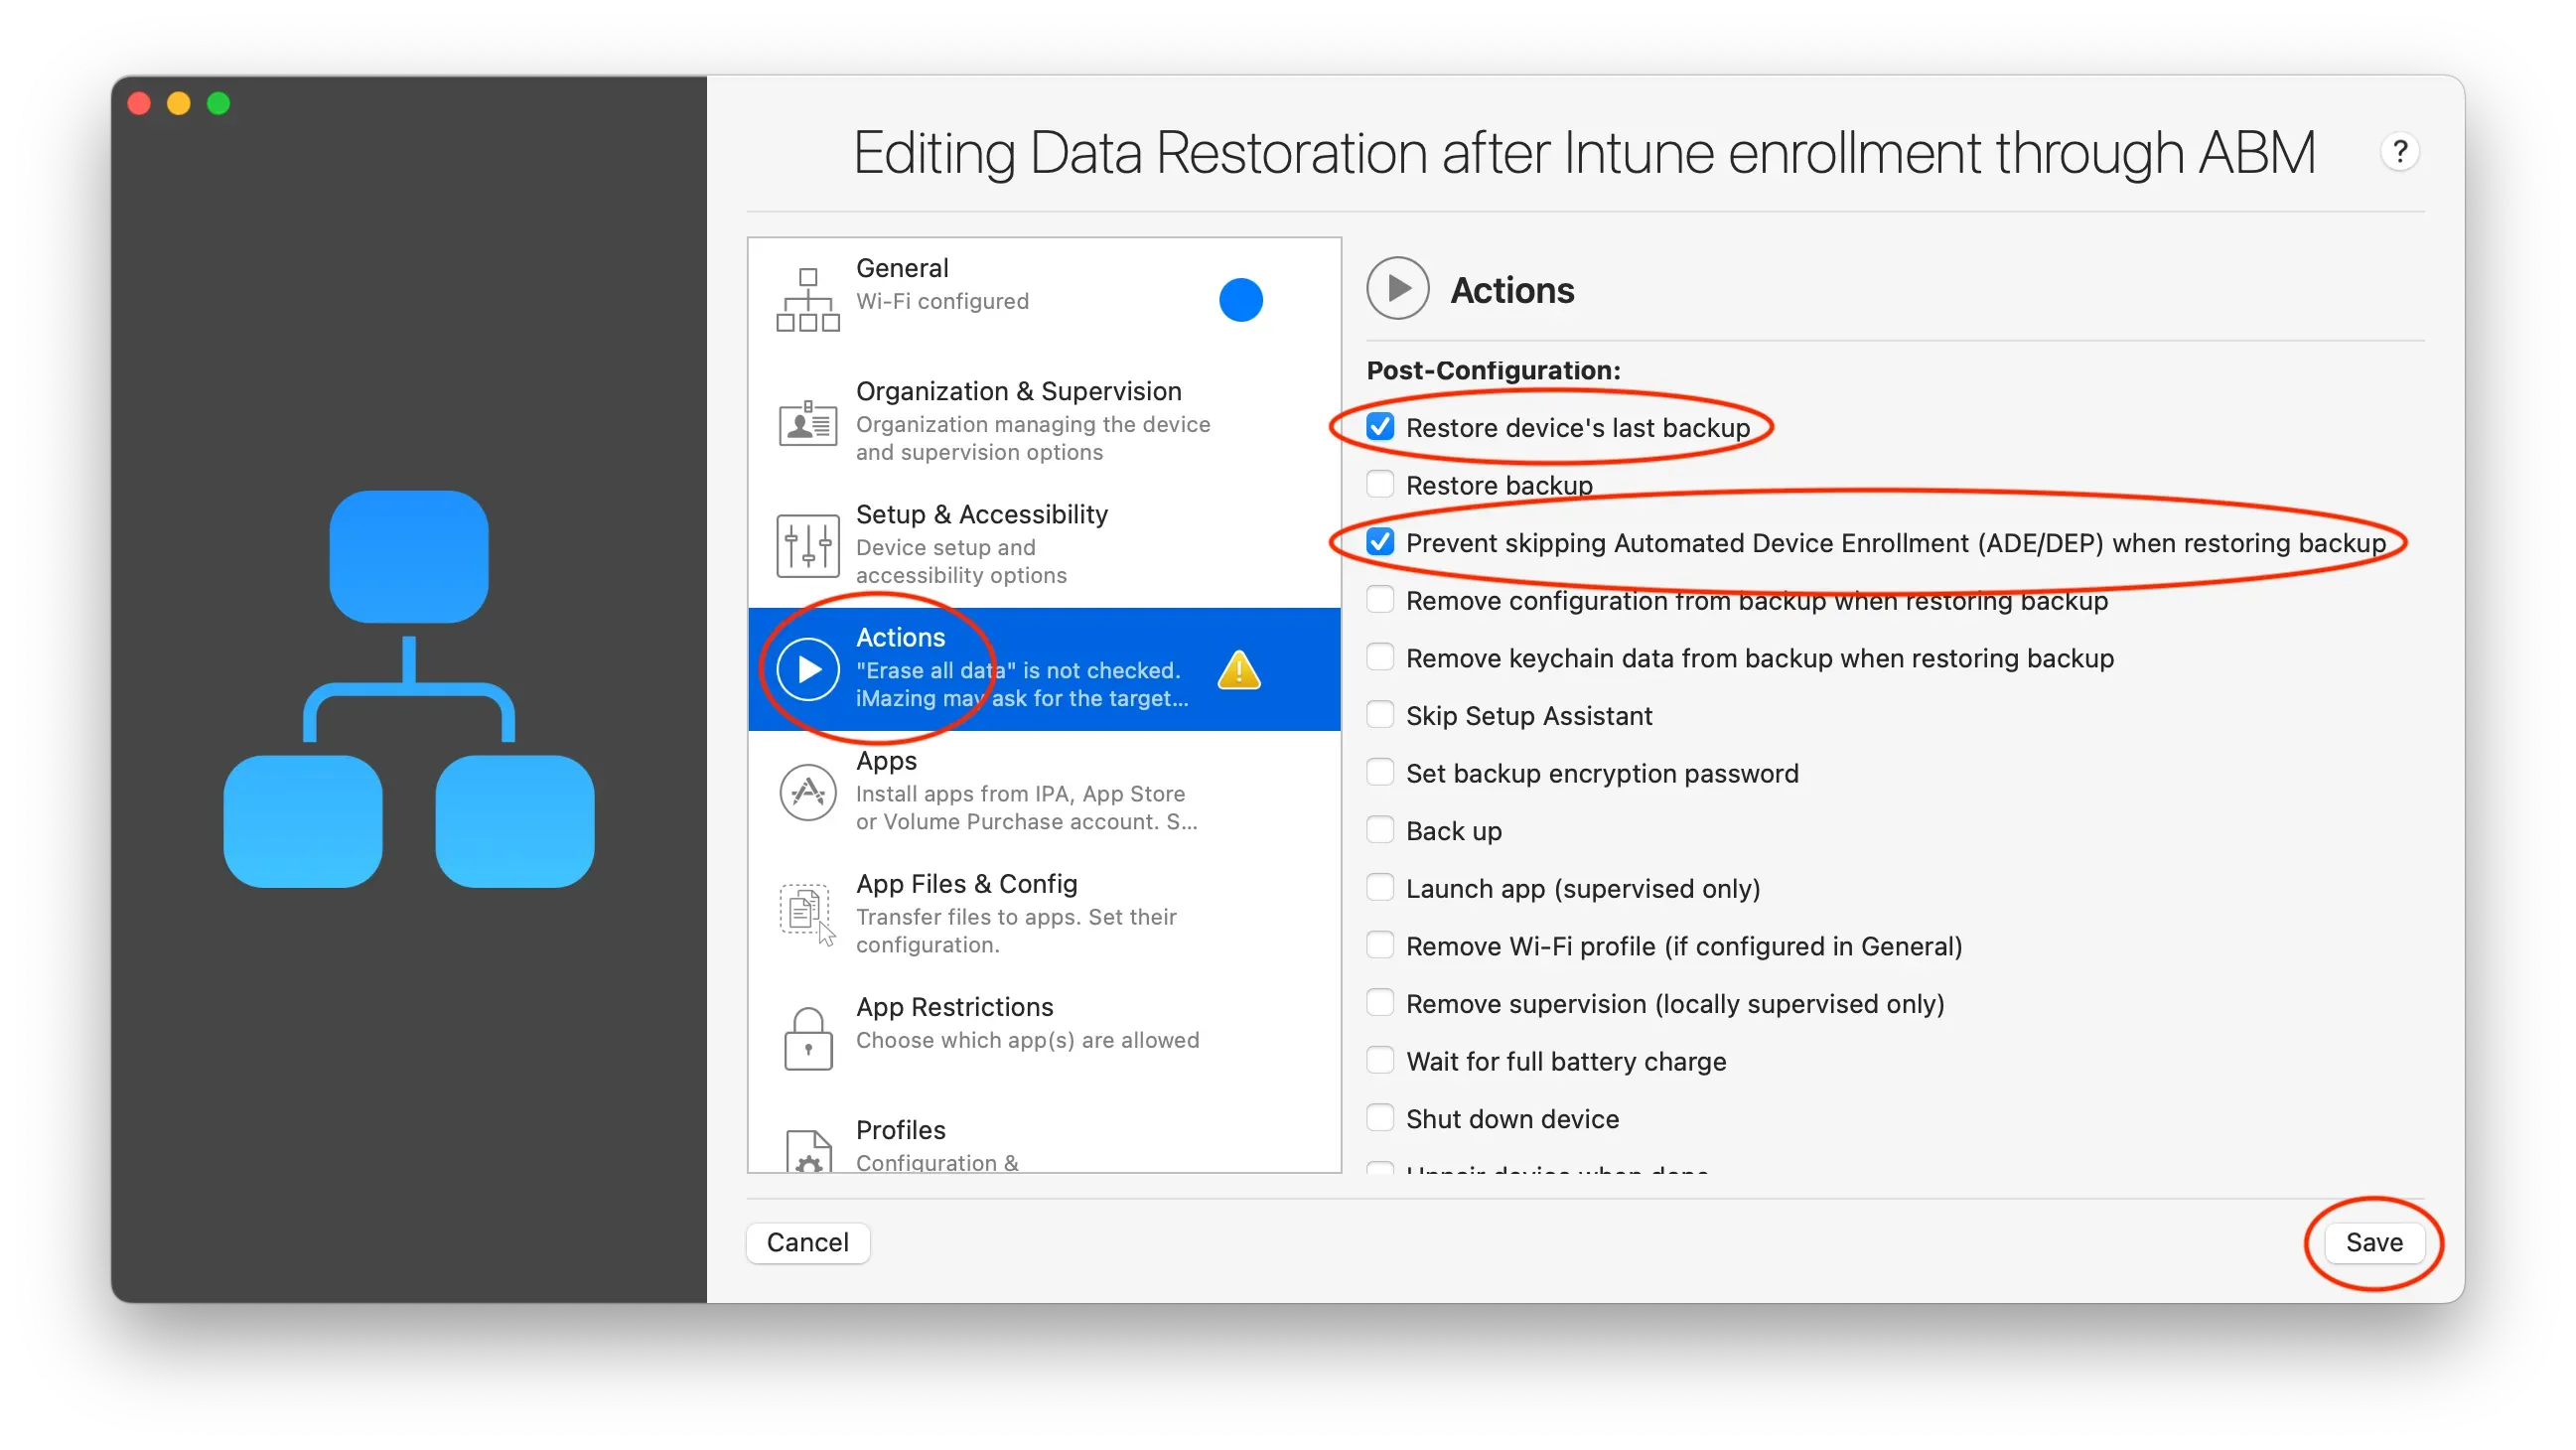
Important: Note that if you backed up your devices when they were still under the management of your previous MDM, data from previously managed applications will be restored using the iMazing Configurator mechanism.
- To continue with the migration, click the Apply Blueprint button located at the lower right corner of the window:
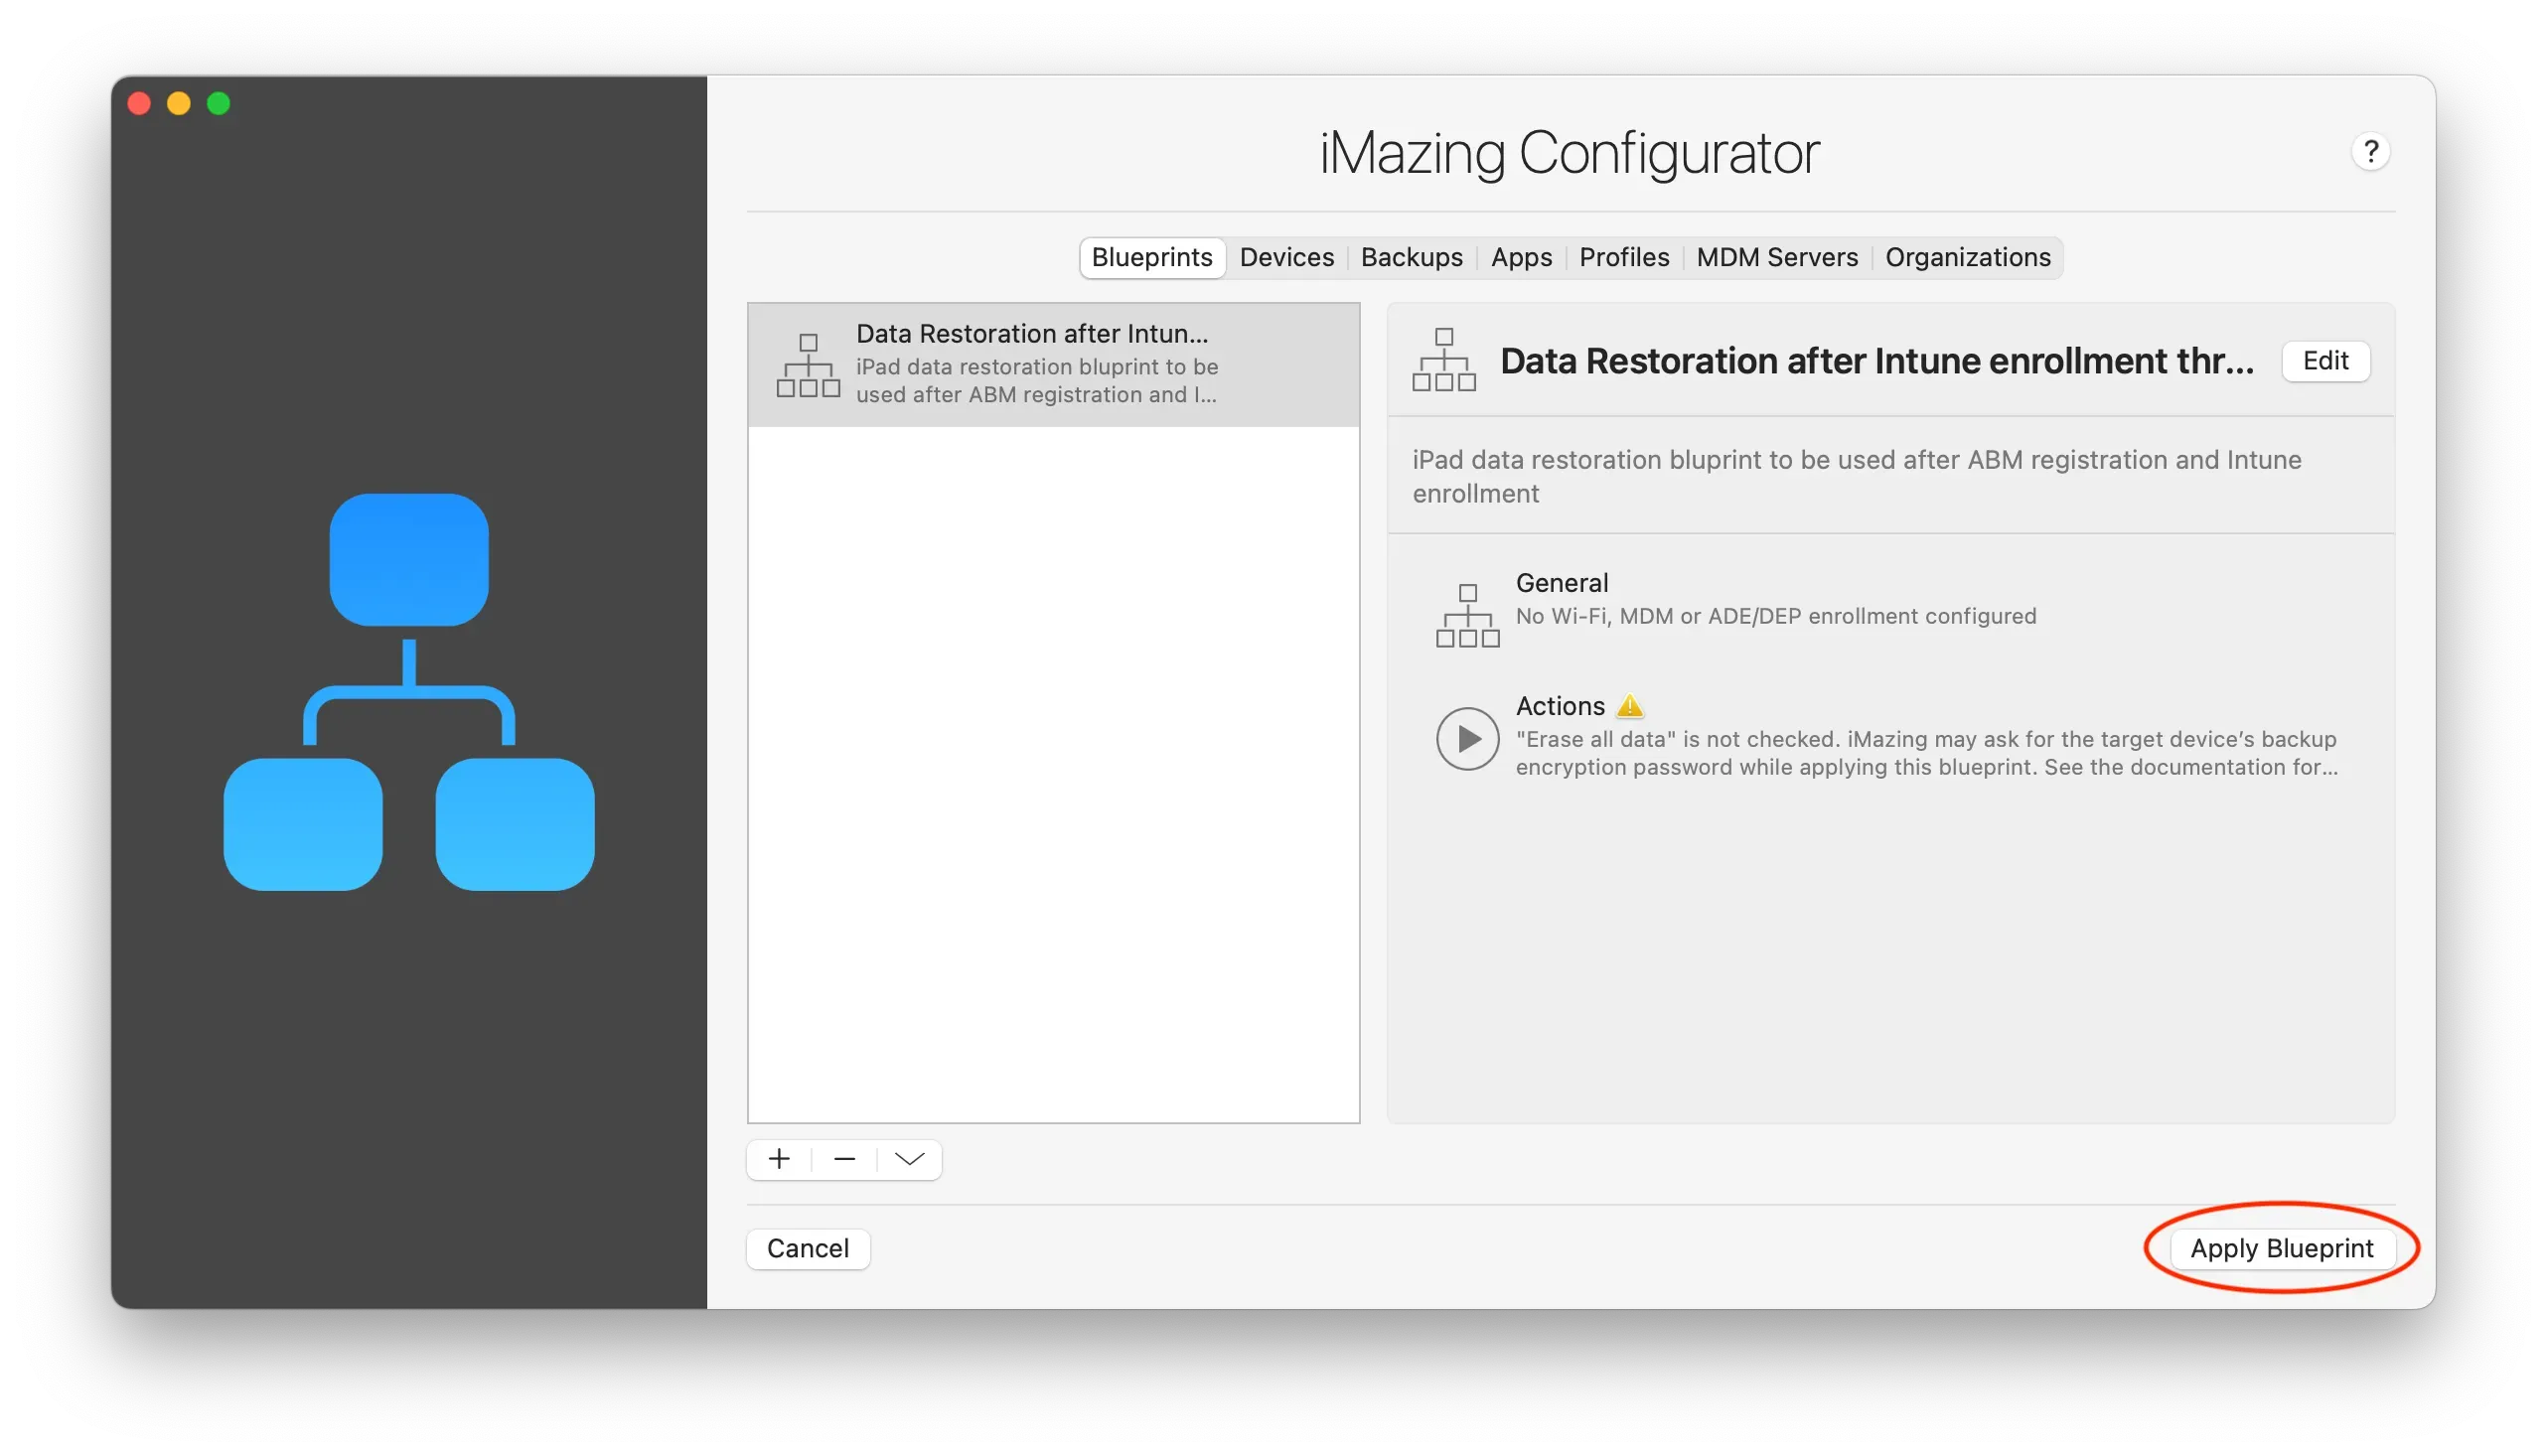
- Once you are ready, select your devices and click the Launch button. Note that you can choose Select All if you have multiple devices:
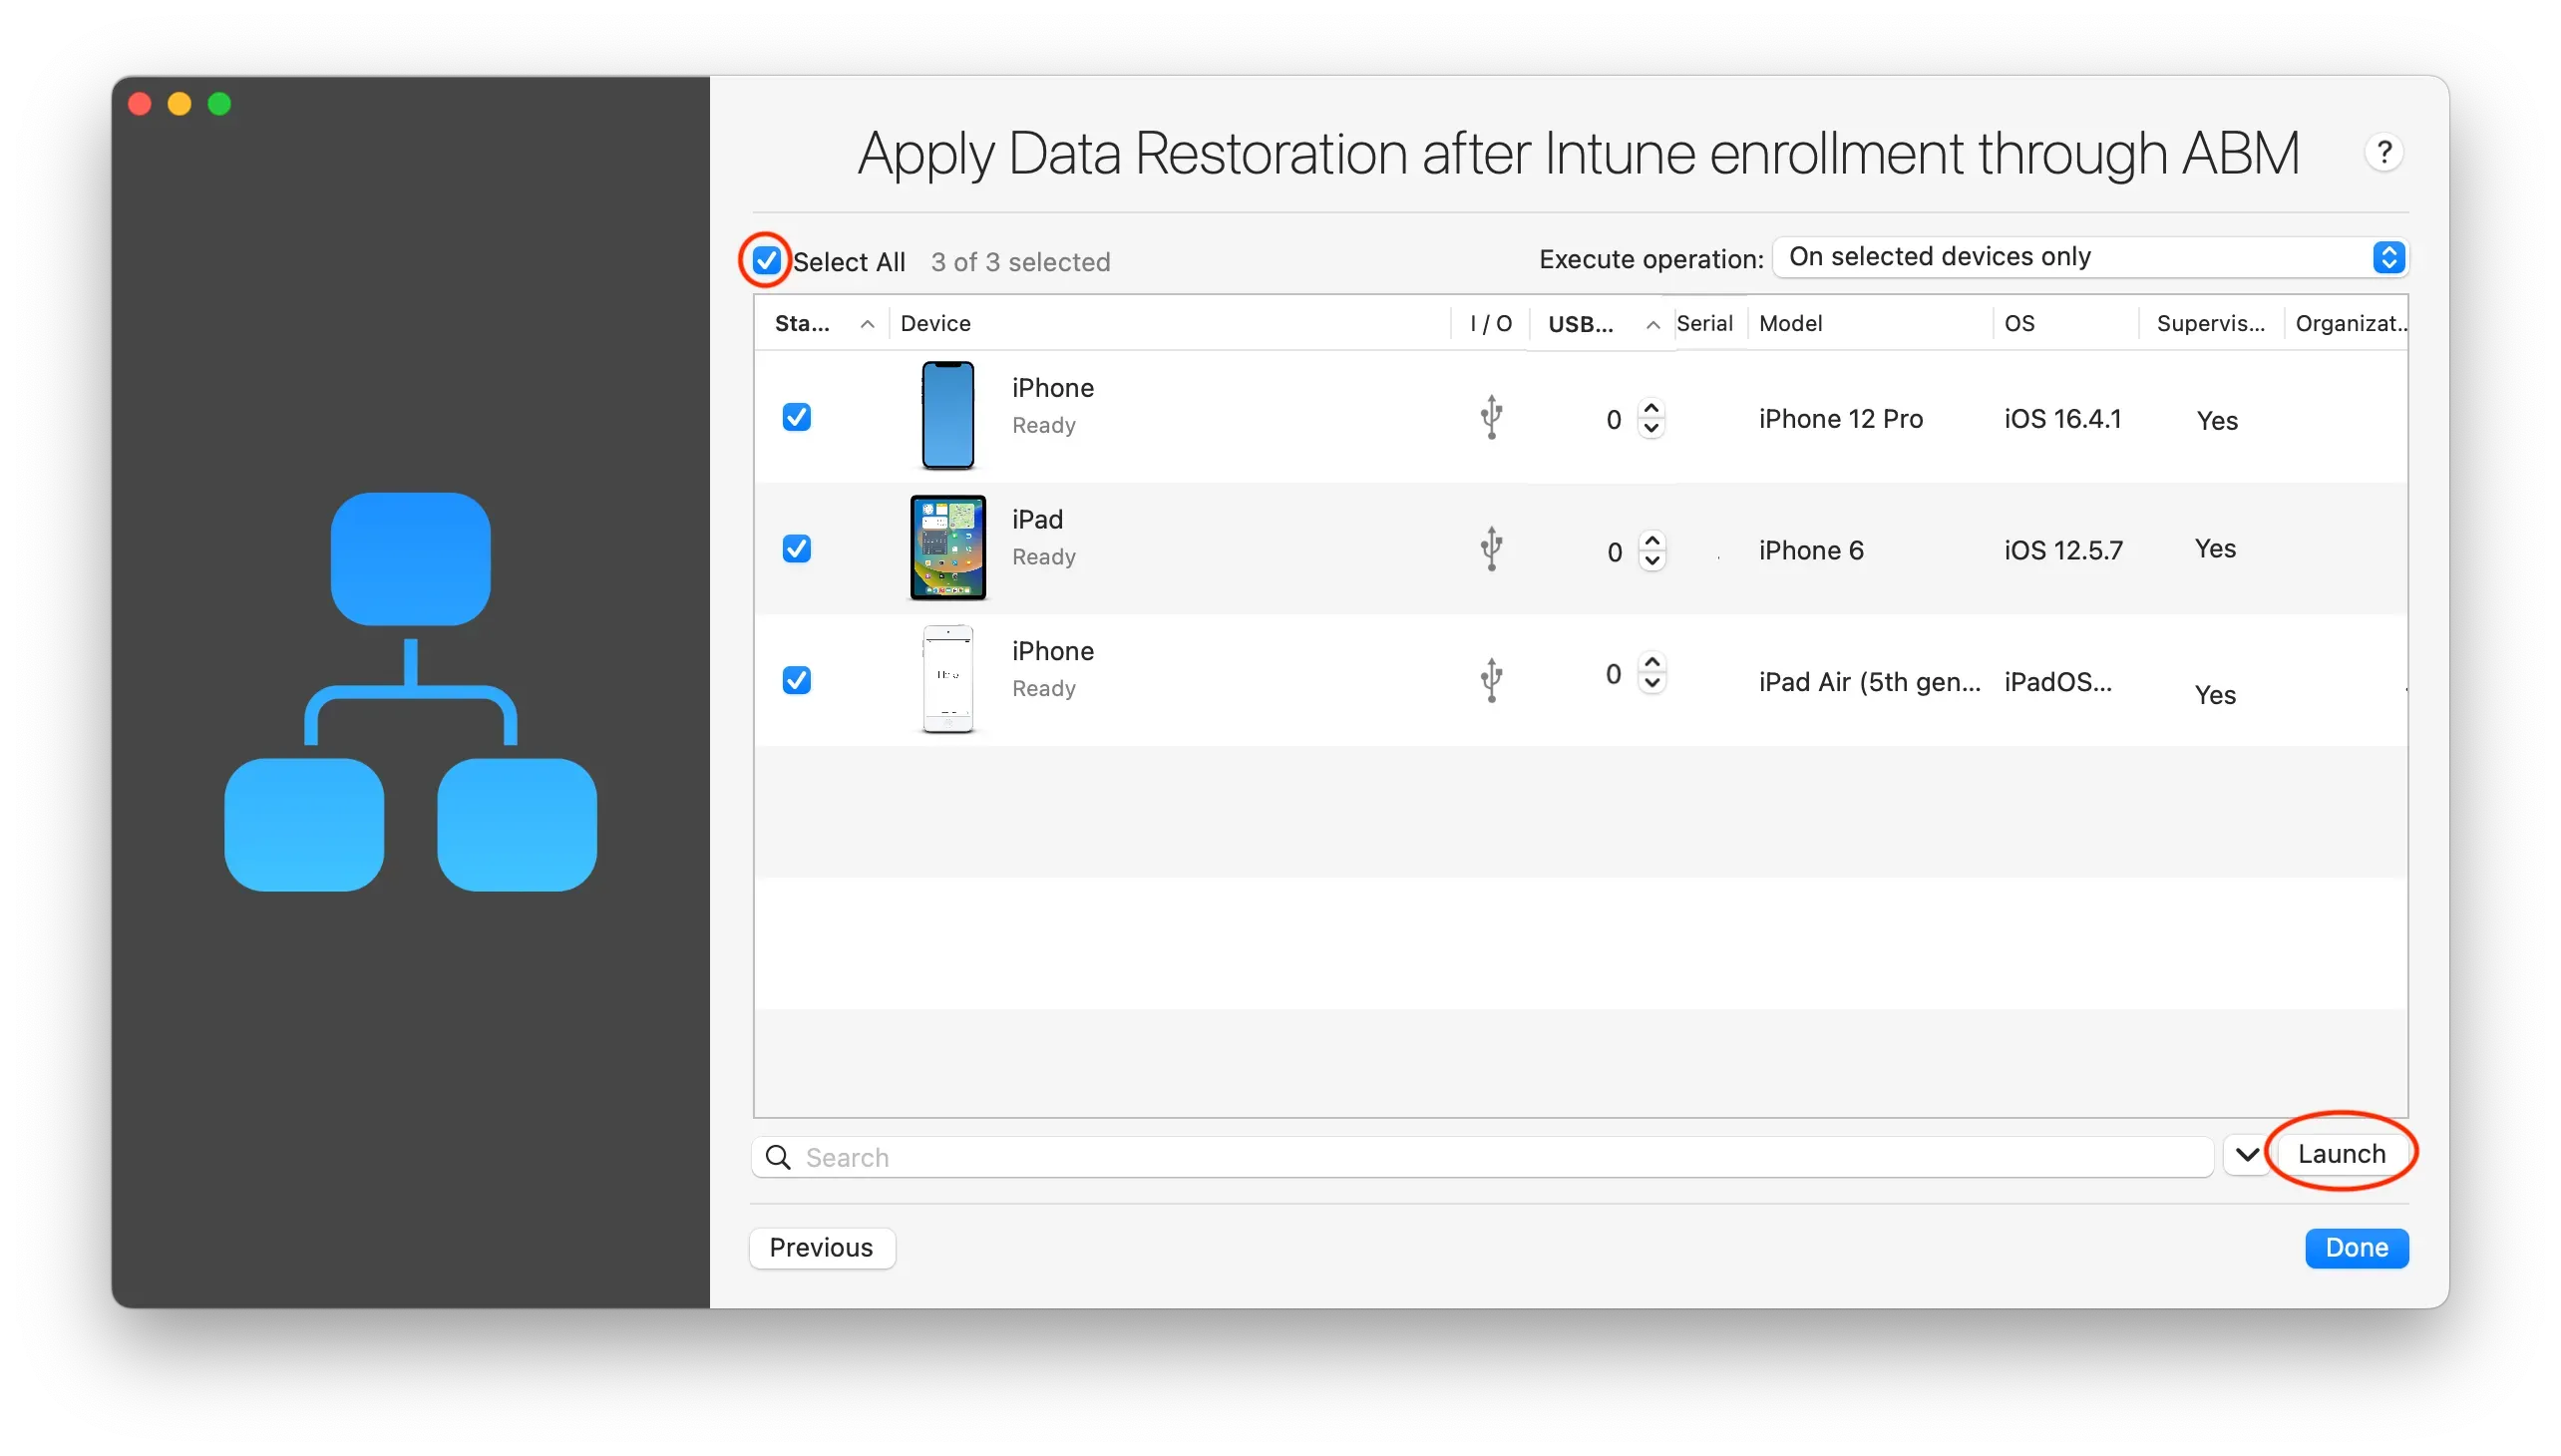
Important: There are two options in the “Execute operation” drop-down menu. You can choose to execute the operation only on selected devices (meaning devices that have been previously connected to your computer and selected for blueprint application), or you can automatically execute it on all devices connected via USB, meaning every newly connected device will be included in the blueprint deployment. Also, we have added a USB port number mapping feature, to define the port number of a given connected device; the port number mapping allows IT pros to better identify on which port devices are connected to, for a specific USB hub.
Once the backups have been restored to your devices, they will restart. After they are connected to internet, end-users will see the "Device Management" screen in the iOS Setup Assistant. At this point, the enrollment configuration will be deployed from ADE, making your devices manageable by Intune with their original data.