Create a backup-based template/image to deploy a configuration to multiple iOS/iPadOS devices using iMazing Configurator
Updated on Mar 11, 2026
Reading time ~4 minutes
The purpose of this guide is to walk you through the process of creating a backup-based template/image for deployment purposes using iMazing Configurator.
Background
In this scenario, your organization aims to apply the same configuration to multiple iOS/iPadOS devices. Each device will become a clone of the device used to create your template/image.
This scenario is useful when you want to avoid creating complex configurations, either due to a small number of devices or the lack of an IT administrator capable of building configurations manually.
To do this, you'll need to configure one device and use it as a template for the others. You can accomplish this by using iMazing Configurator to create a reusable image (backup) and apply it to the other devices with a blueprint.
Prepare your backup image
For best results, we recommend starting with a device that has been freshly installed or previously erased.
This ensures that you prevent the deployment of any unnecessary data from the source device.
If you want to also install apps that are not pre-installed with iOS or iPadOS, you will need an Apple ID to authorize its installation on your device.
We recommend creating a dedicated Apple ID for this purpose to avoid sharing passwords and content with others.
Note that this scenario will also work if you install apps using the Volume Purchase available in Apple Business Manager or Apple School Manager.
Refer to: How to use Apple Volume Purchase (VPP) with iMazing to install apps to devices and manage licenses in bulk for more details.
Before beginning, ensure that other devices are compatible with this one, particularly in regard to their iOS/iPadOS version.
Prepare your source device with iMazing
- Once you have set up the source device, launch iMazing, connect your device to your computer with a USB cable. Unlock your device and pair it.
- Select your device in iMazing and choose Back Up in the device Tools section, or simply right click your device to access the Backup Up action. This will back up your device, including all configurations and apps state:
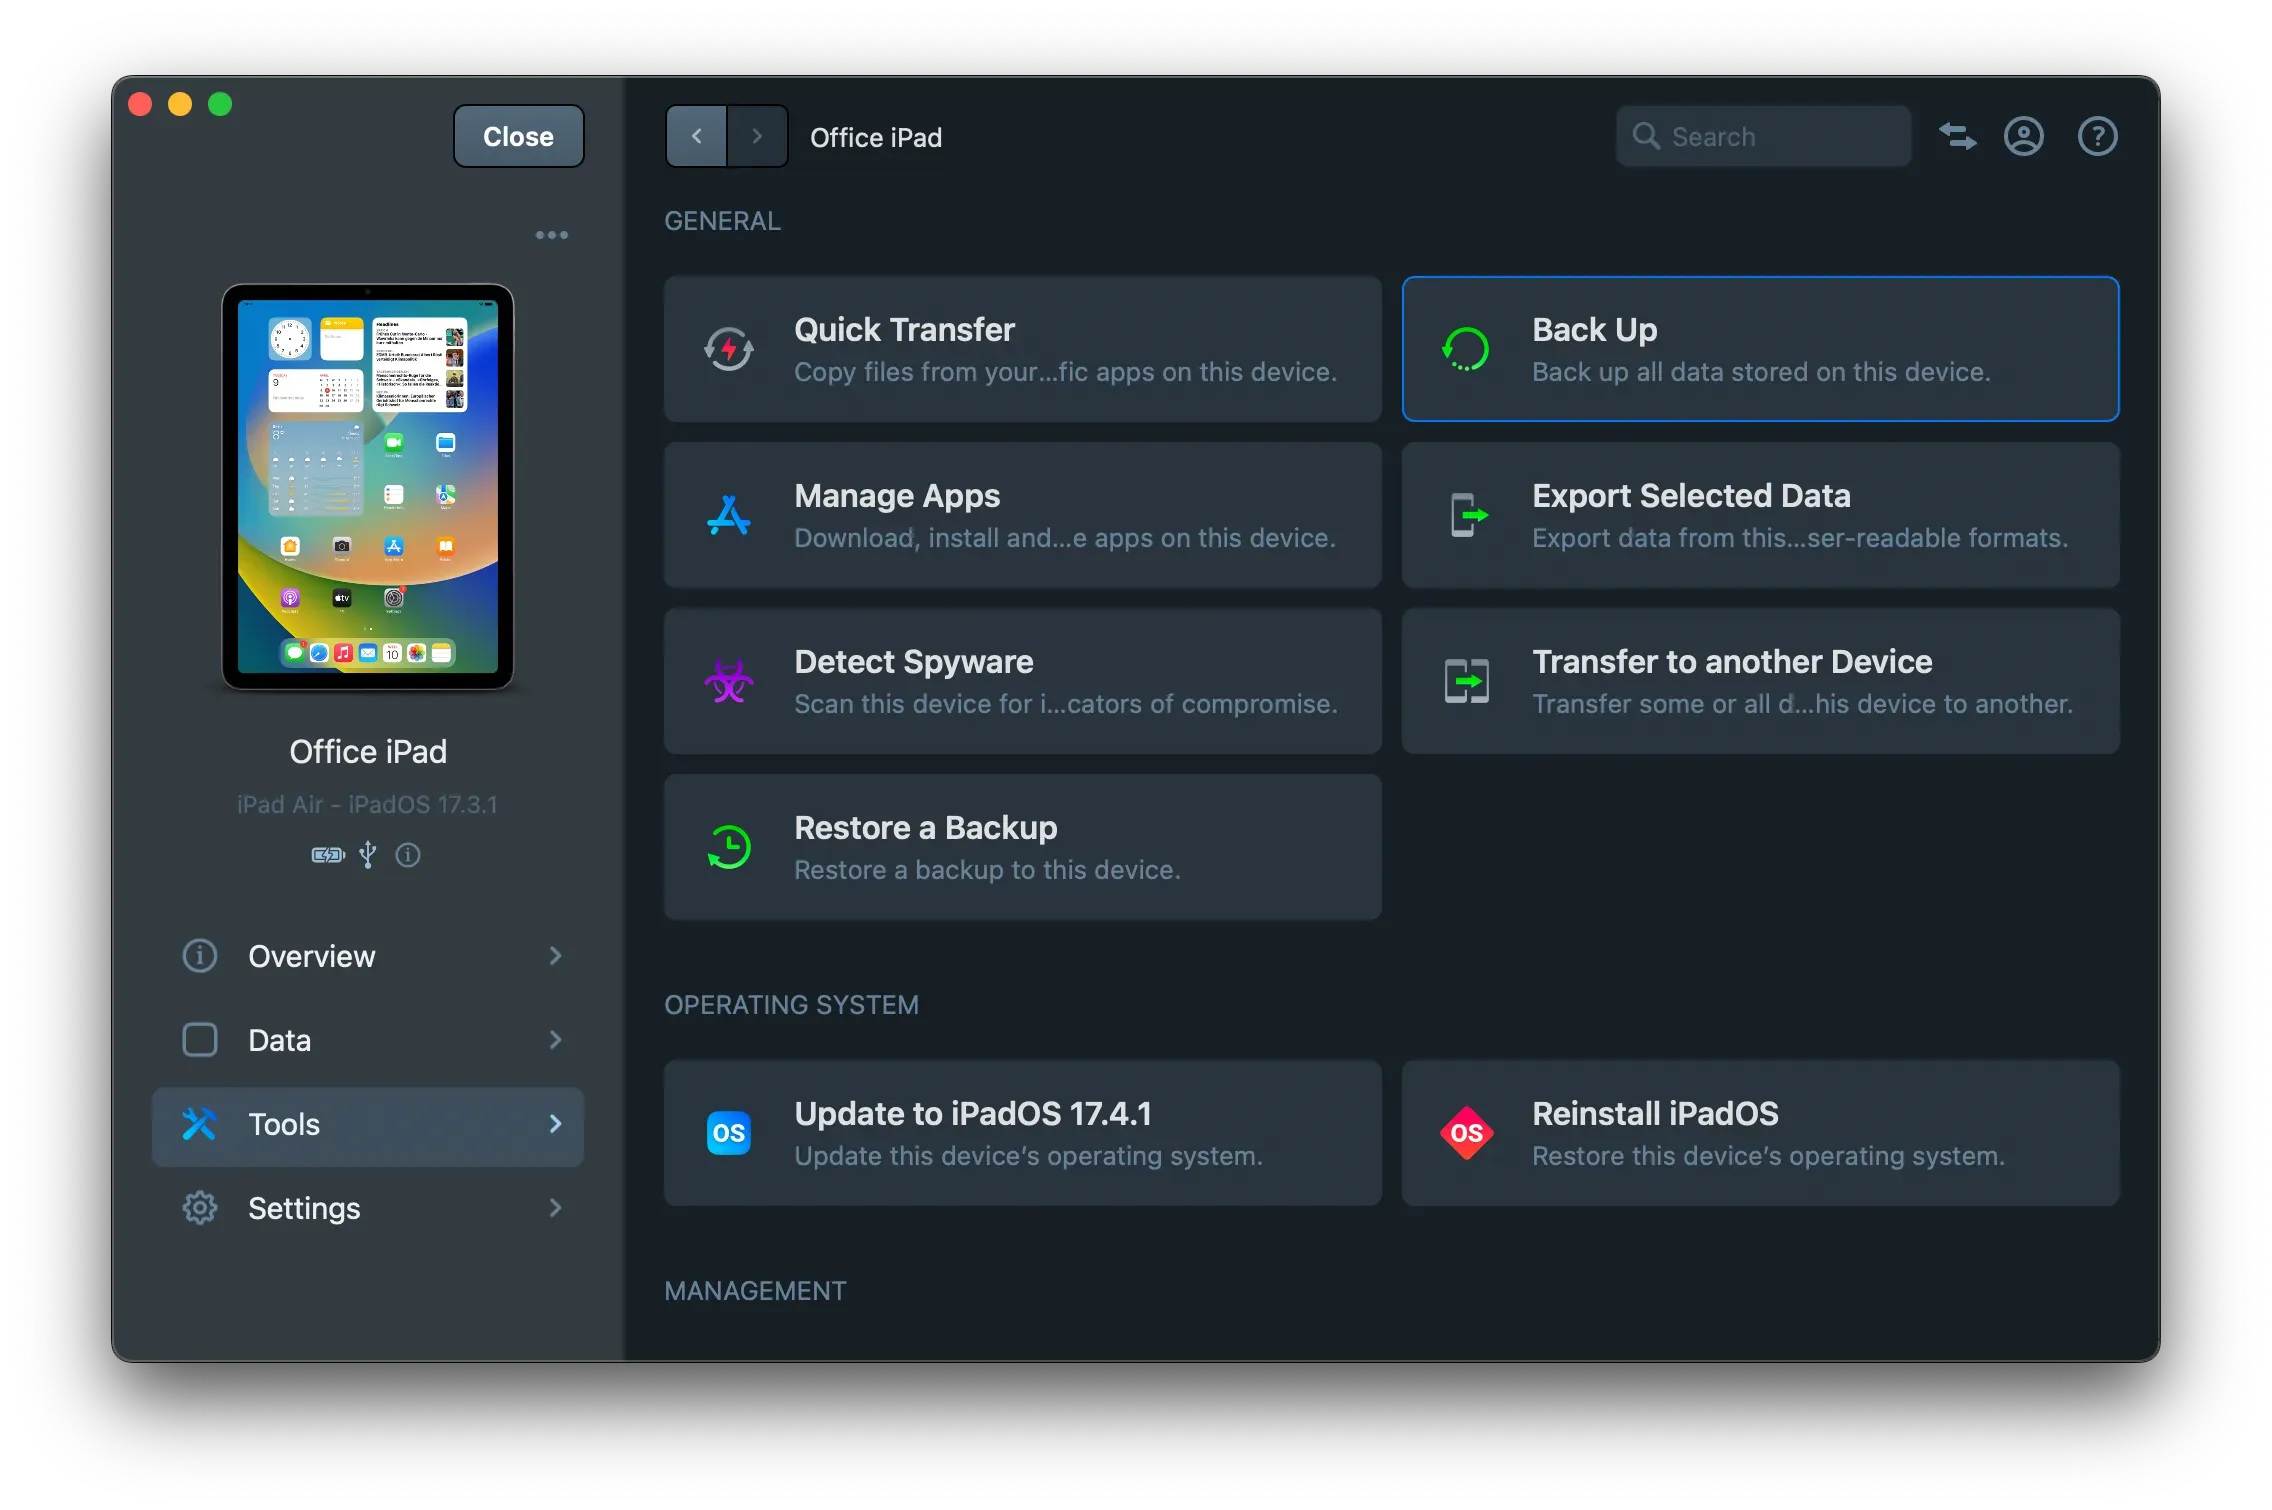
Important: If you don’t enable Backup Encryption, passwords and other items stored in the device iOS keychain won’t be transferred. Also, Safari and Health data won’t be transferred. Learn more about Backup Encryption in iMazing.
Create a blueprint with iMazing Configurator
- Navigate to the Blueprint section under the Configurator menu from iMazing's home screen.
- Click on the '+' button, located in the lower left corner of the blueprint list.

- In the General section, assign a name to your blueprint.
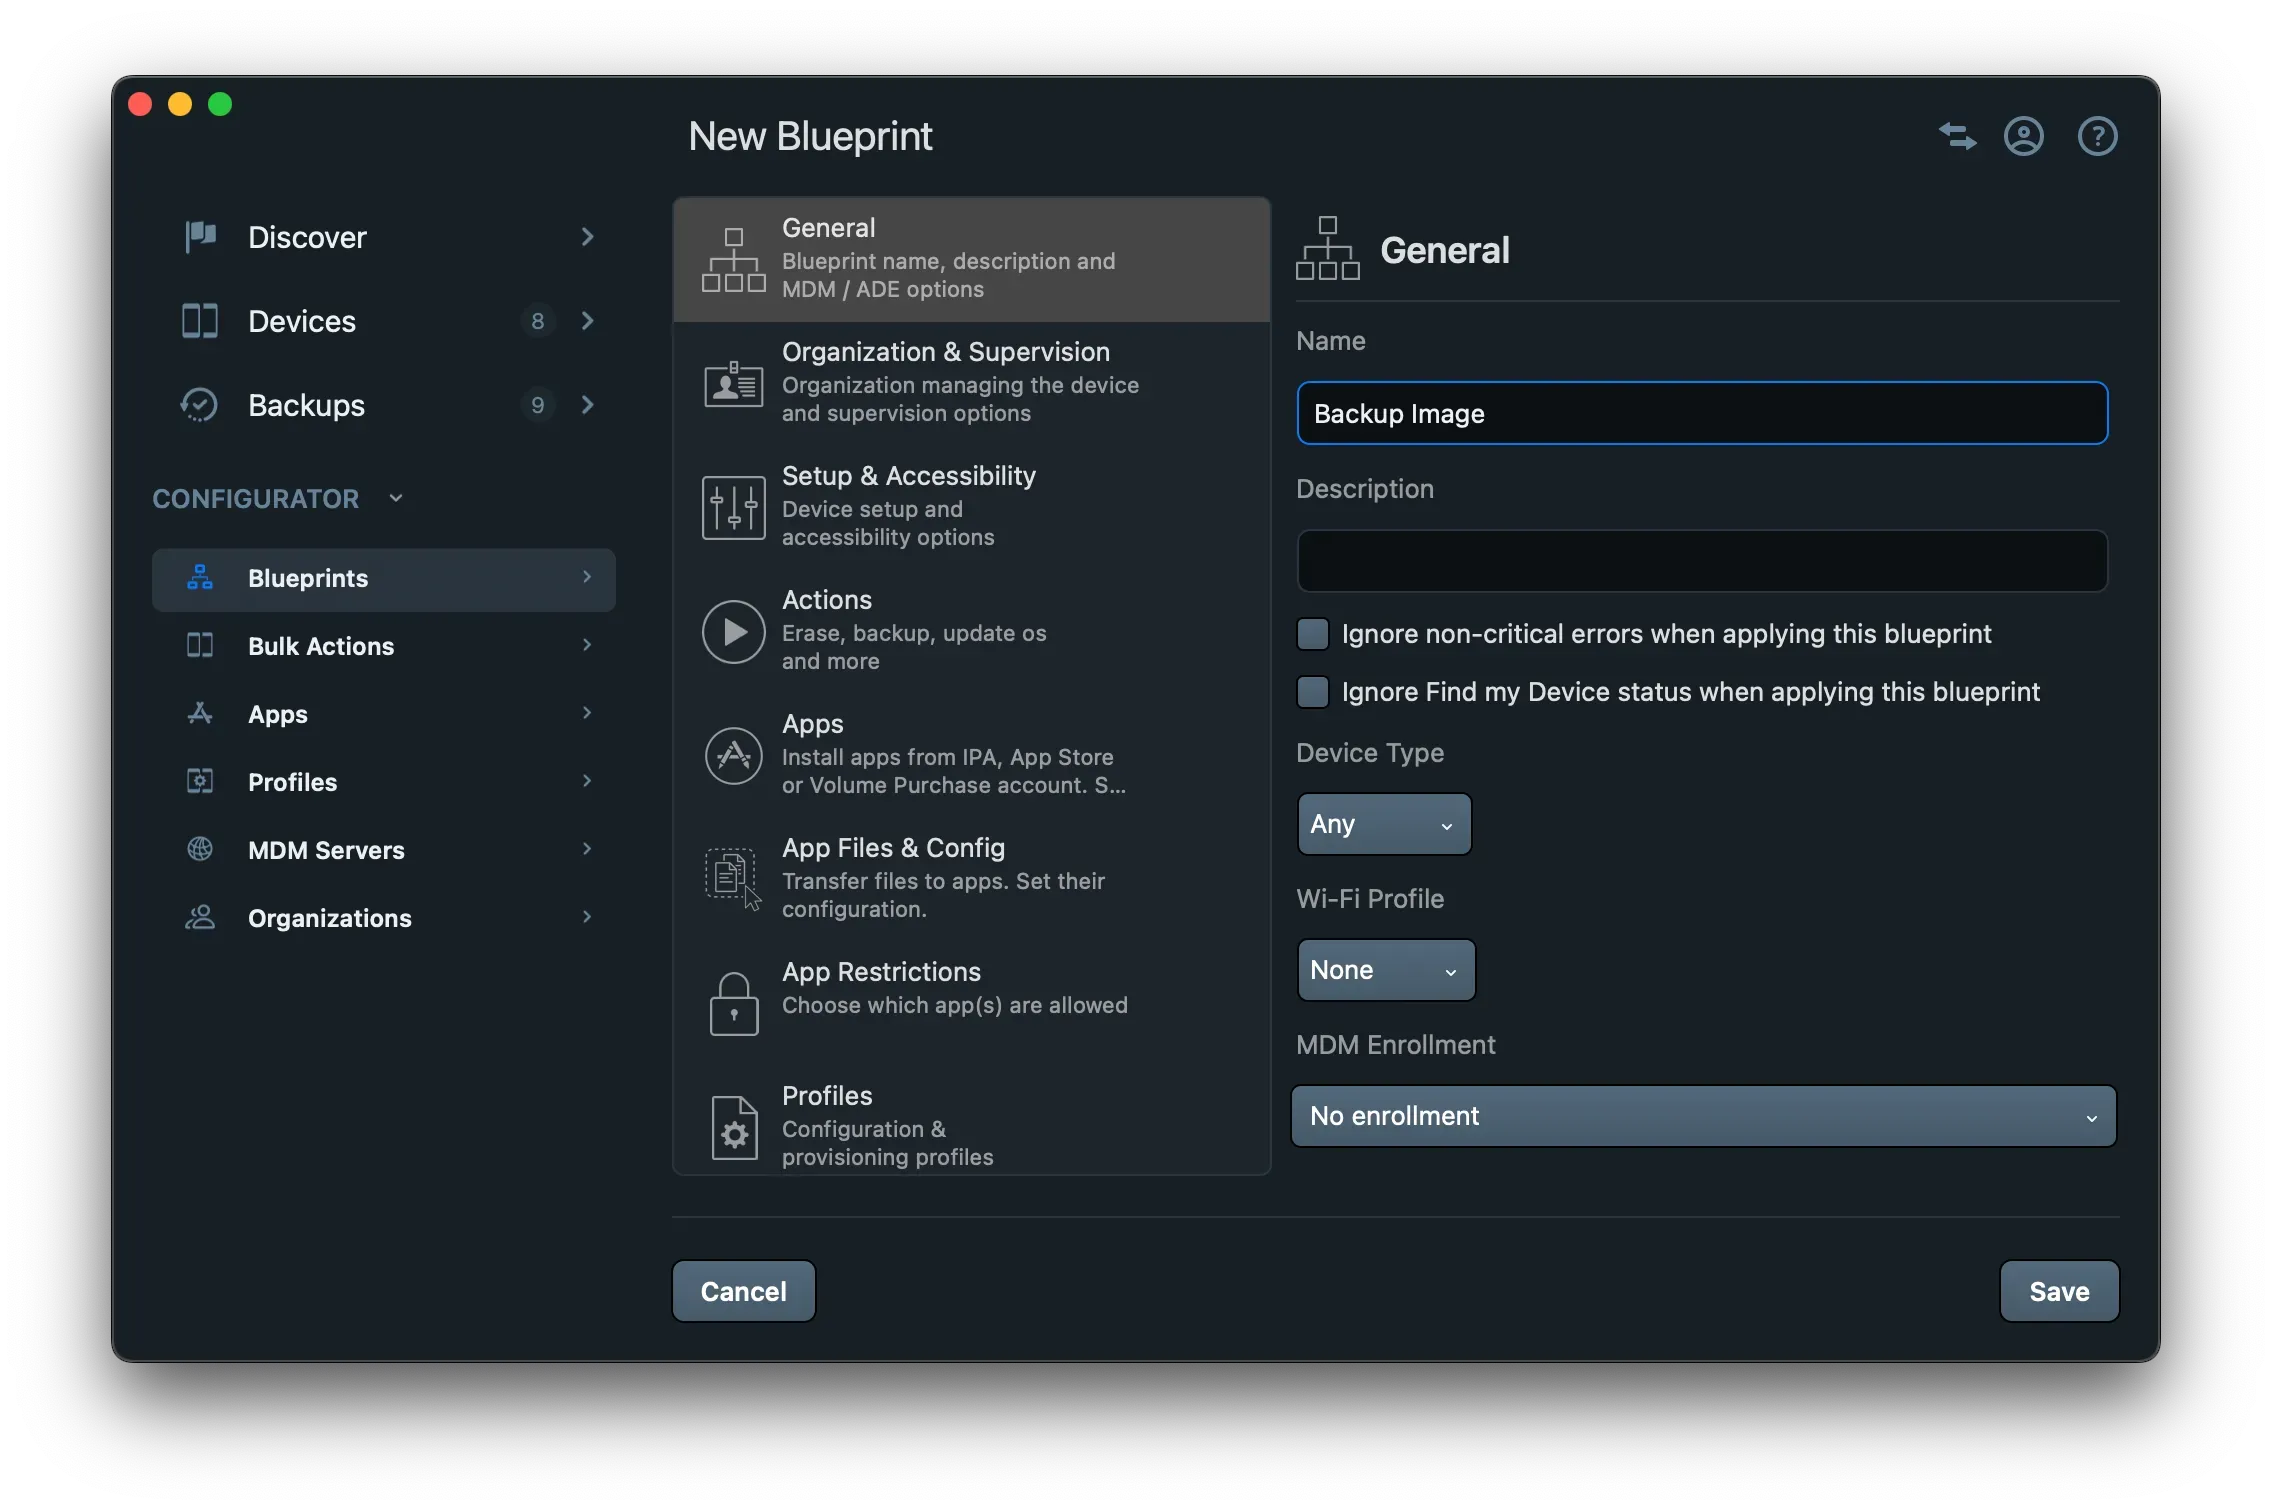
There may be slight differences between Apple devices. If you plan to deploy only one type of device (e.g., iPads), it is recommended to set the default Device Type accordingly.
- As your source device should already have a configured Wi-Fi network that is included in the backup, there is typically no need to select a Wi-Fi profile but select one if you need to.
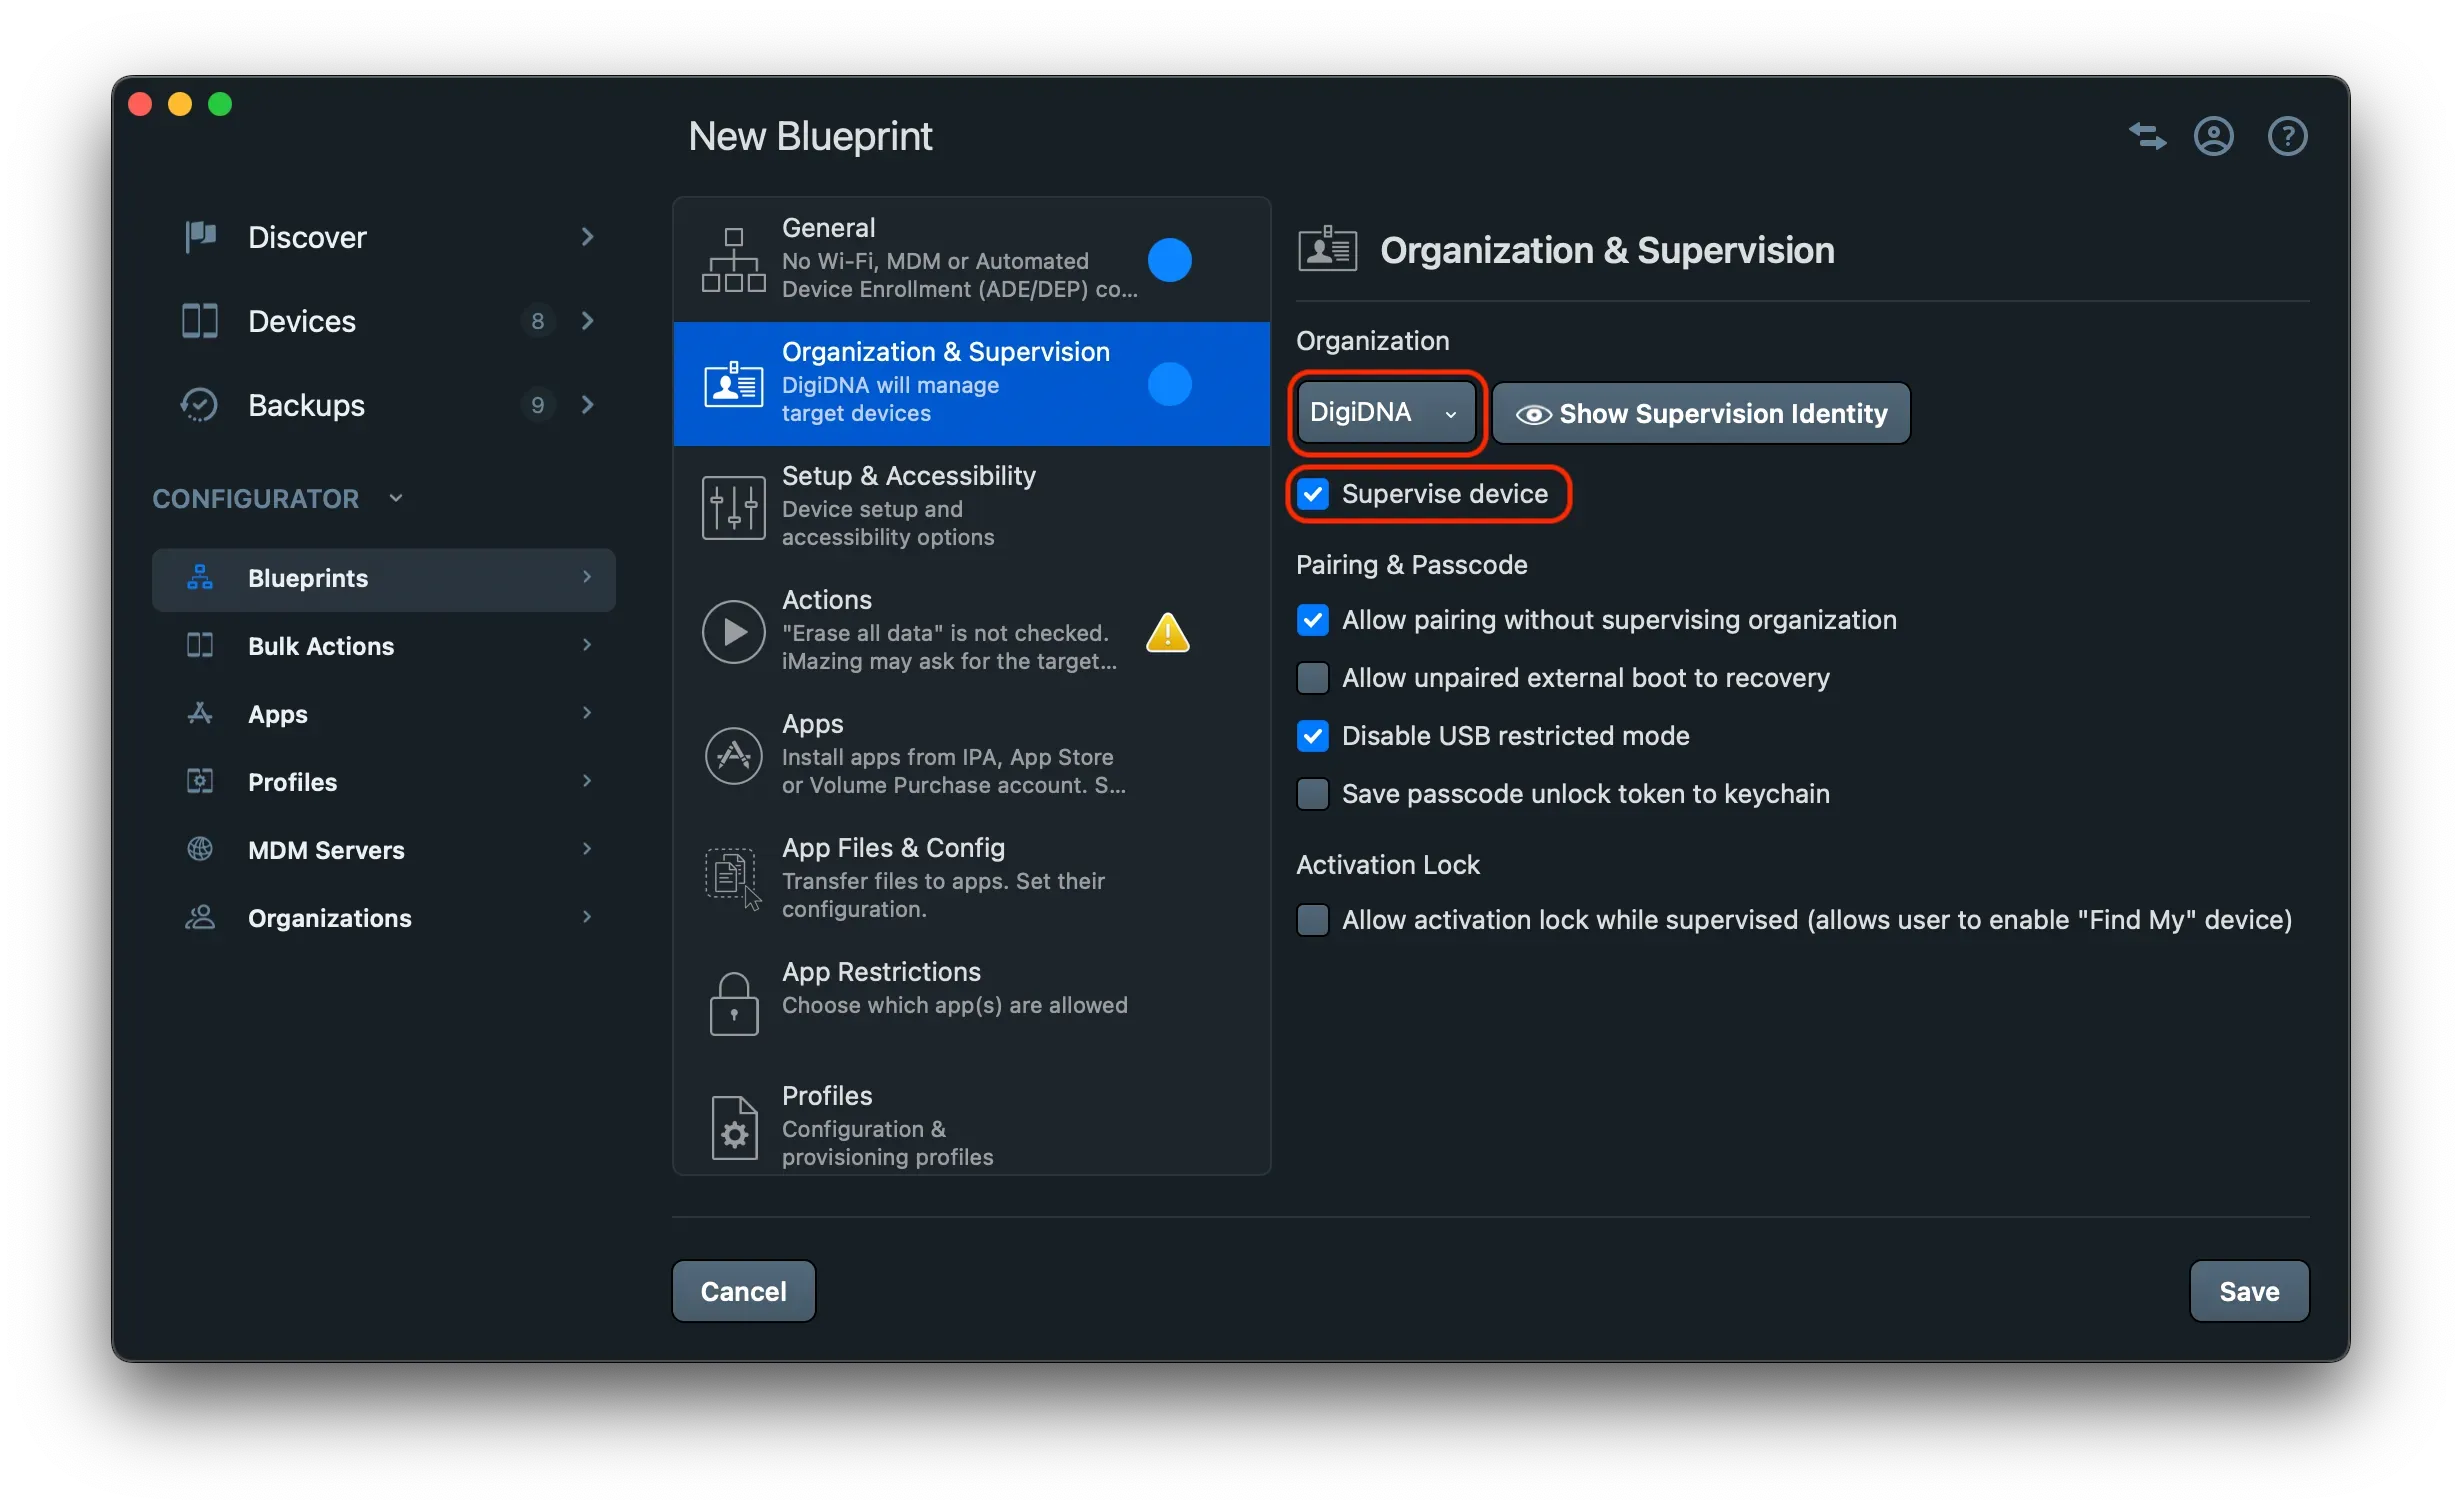
- Navigate to Organization & Supervision and select a supervising organization from the Organization drop-down menu and check the option Supervise device. This step is optional. However, it's beneficial if you wish to apply other advanced configurations only available with supervision such as Single App Mode, or to bypass the iOS Setup Assistant steps on your target devices once the backup is restored.
- If there is no need to alter the language, region, or other settings in the Setup & Accessibility section, proceed to the Actions section.
- In Actions under Post-Configuration, select Restore backup and choose the source source device backup that has been created at the beginning of this guide using the drop-down menu. Depending on your scenario, you may also want to select Skip Setup Assistant, especially if you've previously chosen Supervise device:


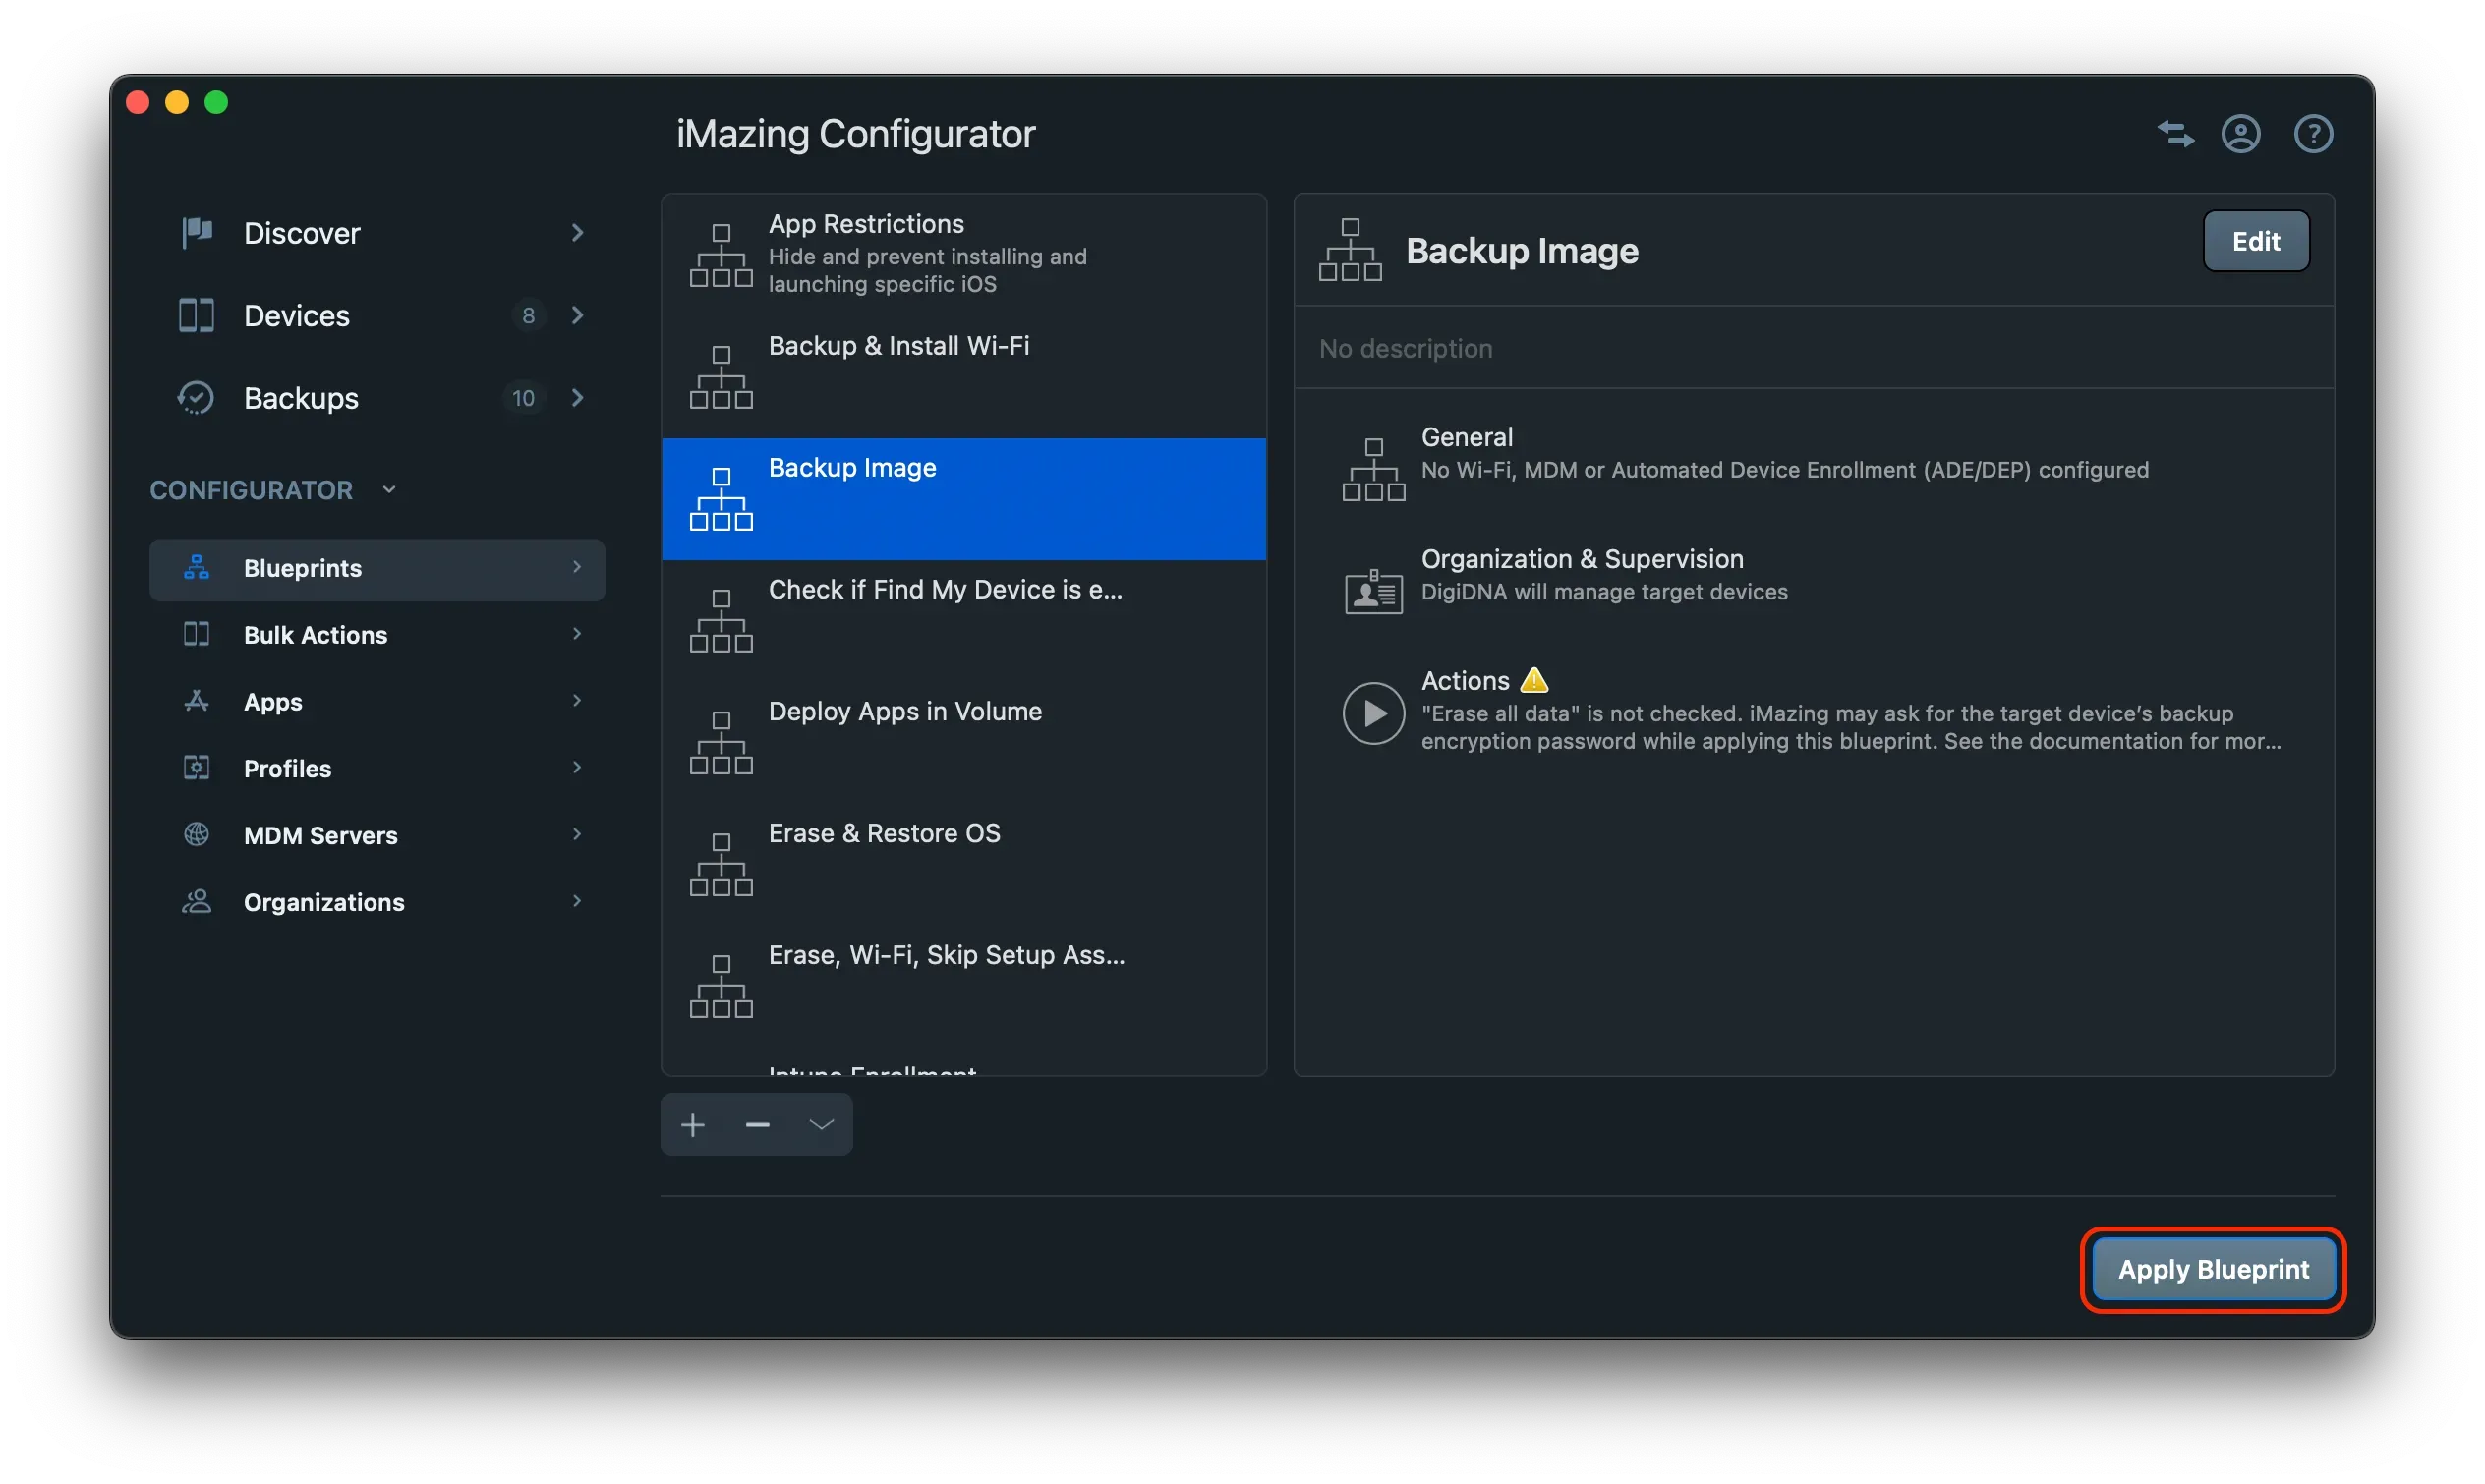
- If you don’t need to modify any other settings click on Save.
- You are now ready to deploy your backup image to other devices, click on Apply Blueprint:
- Select the devices that you want to use as targets and finally click on Launch:
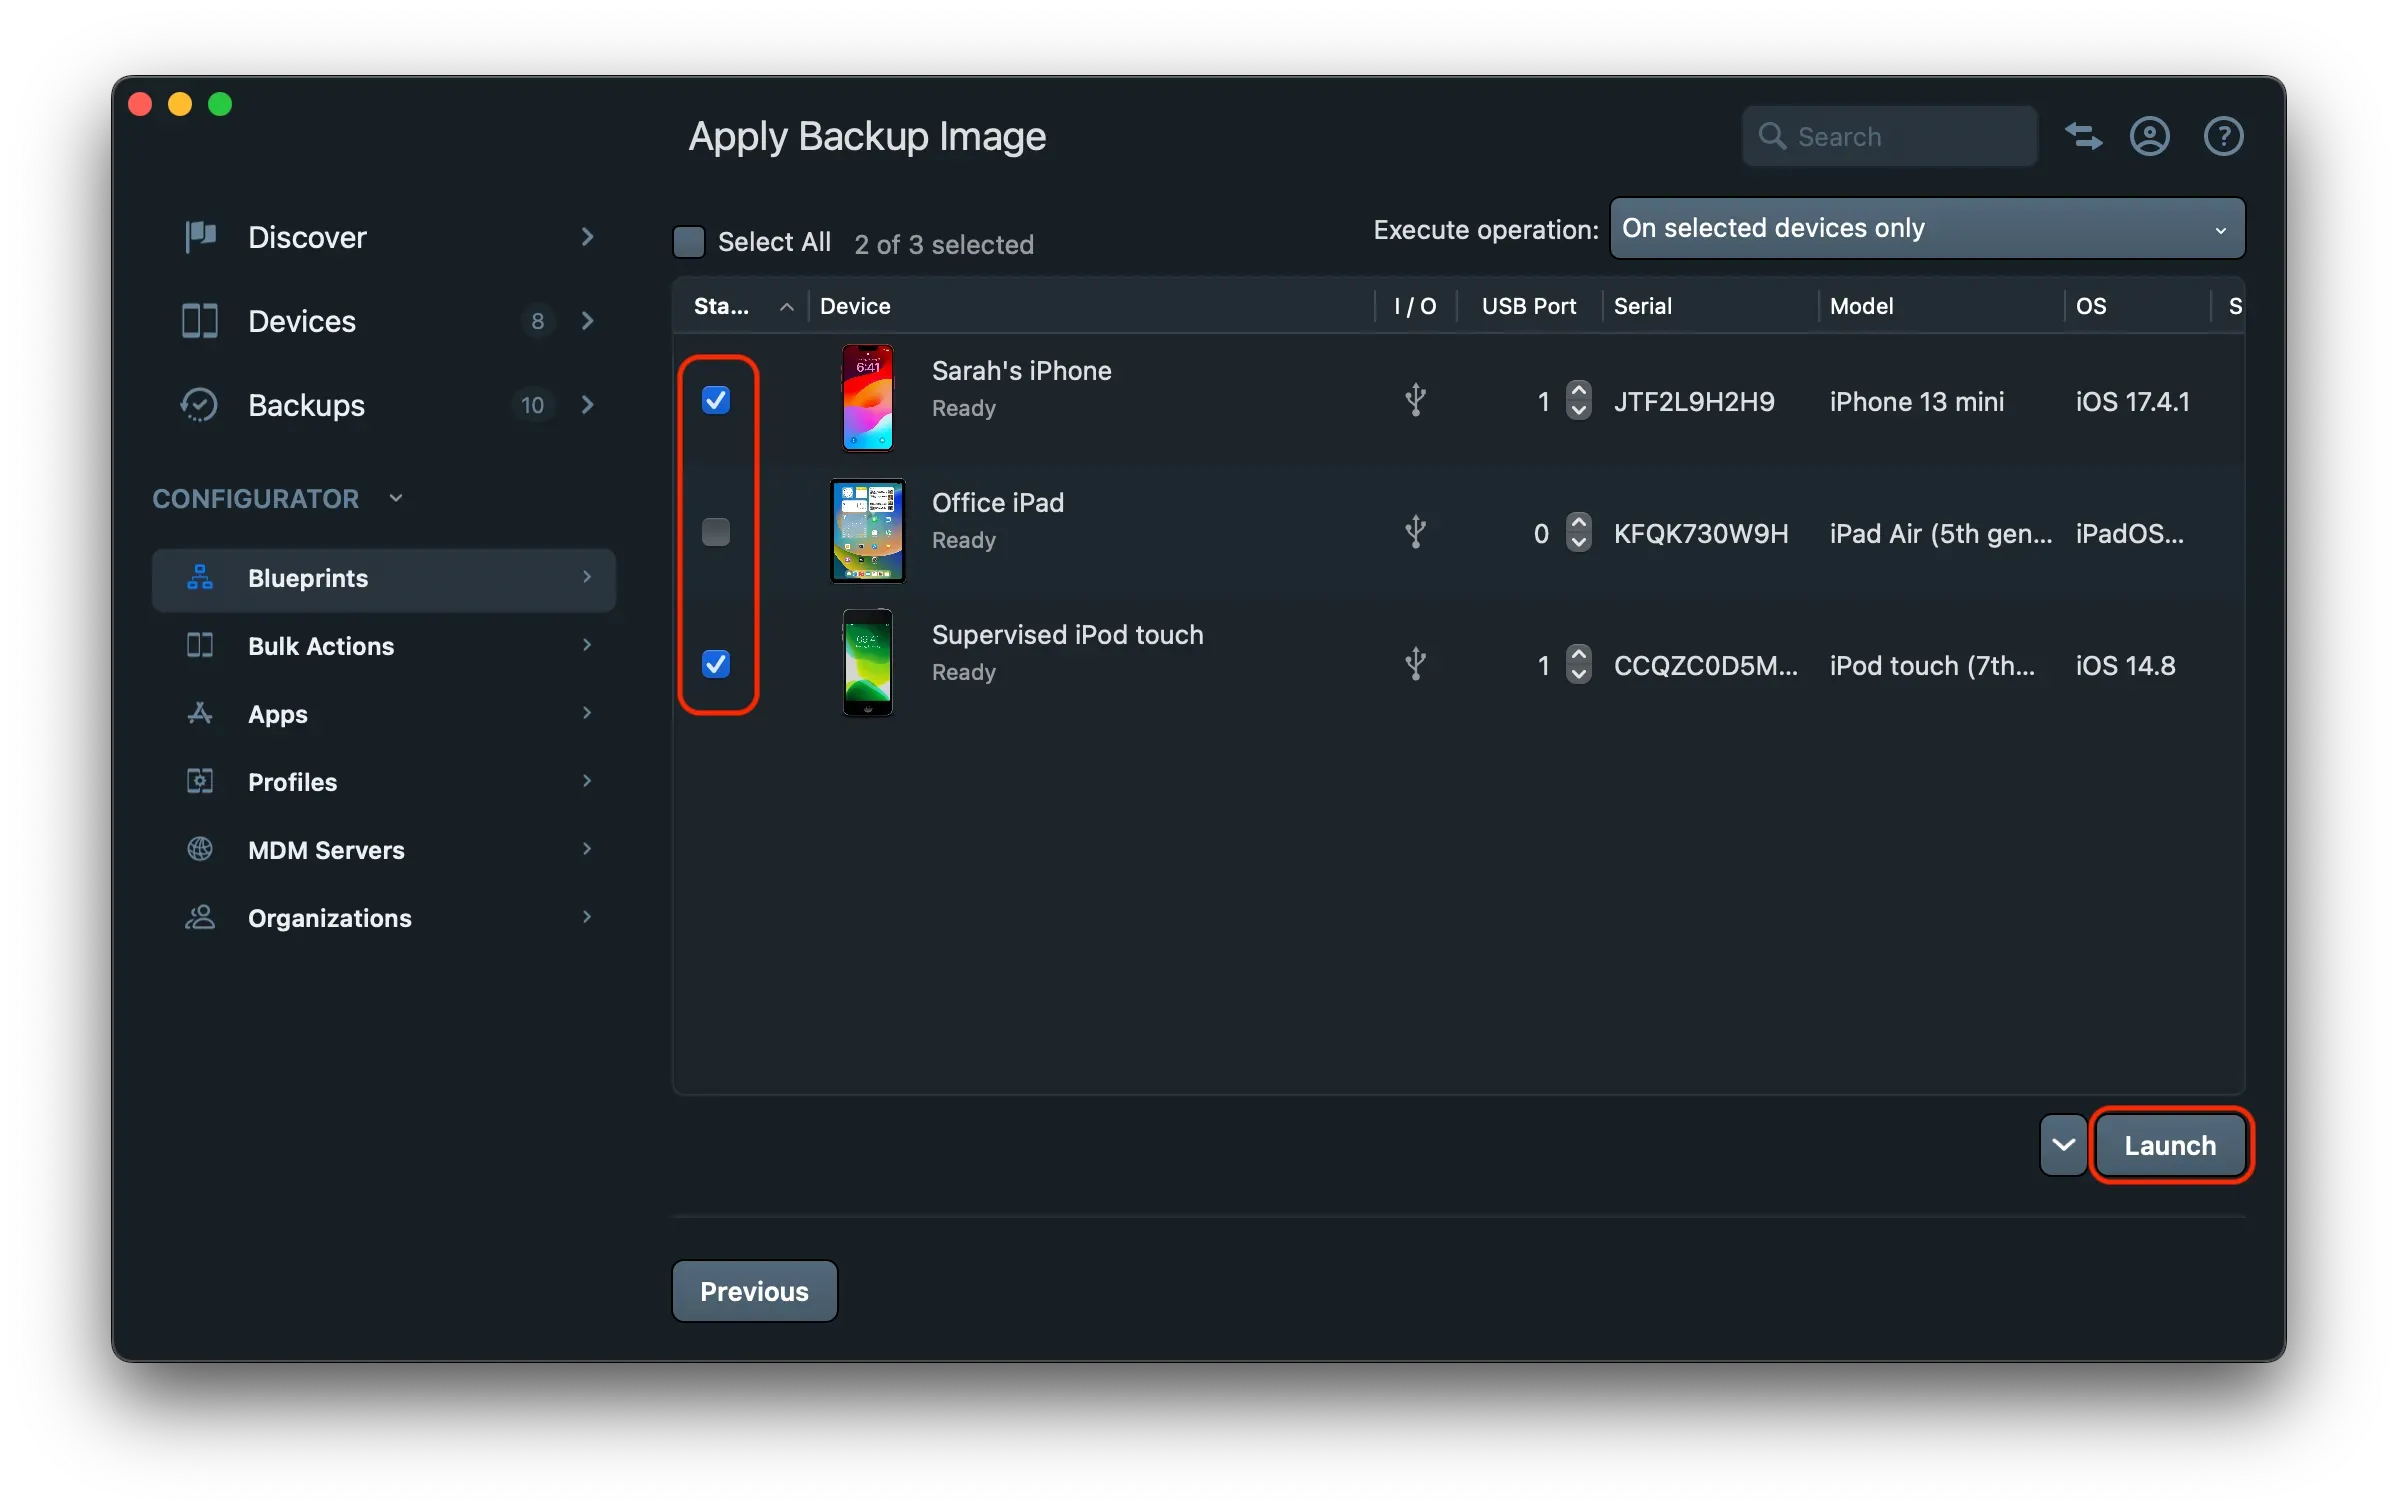
There are two options in the “Execute Operation” drop-down menu. You can choose to execute the operation only on selected devices (meaning devices that have been previously connected to your computer and selected for blueprint application), or you can automatically execute it on all devices connected via USB. Every newly connected device will be included in the blueprint deployment.
- After applying the blueprint to the selected devices, they will restart and the backup image will be applied.
Congratulations! You have successfully cloned a device onto several other devices.