Reinstall or restore iOS on a malfunctioning iPhone or iPad
Updated on Jun 17, 2026
Reading time ~4 minutes
When an iPhone or iPad crashes, gets stuck in a boot loop, or shows a black screen, the iOS operating system may need to be reinstalled. With iTunes or Finder, reinstalling iOS requires erasing the device, meaning all data not contained in a backup is lost. With iMazing, you can reinstall iOS on a malfunctioning iPhone or iPad while trying to preserve its data, even when no backup is available.
Here's how to reinstall or restore iOS on a malfunctioning iPhone or iPad:
Before you begin
Understand Device Modes
Before reinstalling, identify which mode your device is in. The options available to you differ depending on the mode.
Normal Mode
The device is functional. You are reinstalling iOS to resolve a software issue: unexpected app crashes, sync errors, or persistent glitches.
Note: Unlike Recovery or DFU modes, Normal mode allows you to back up your device before reinstalling. It is strongly recommended to do so. Learn how to back up your device with iMazing.
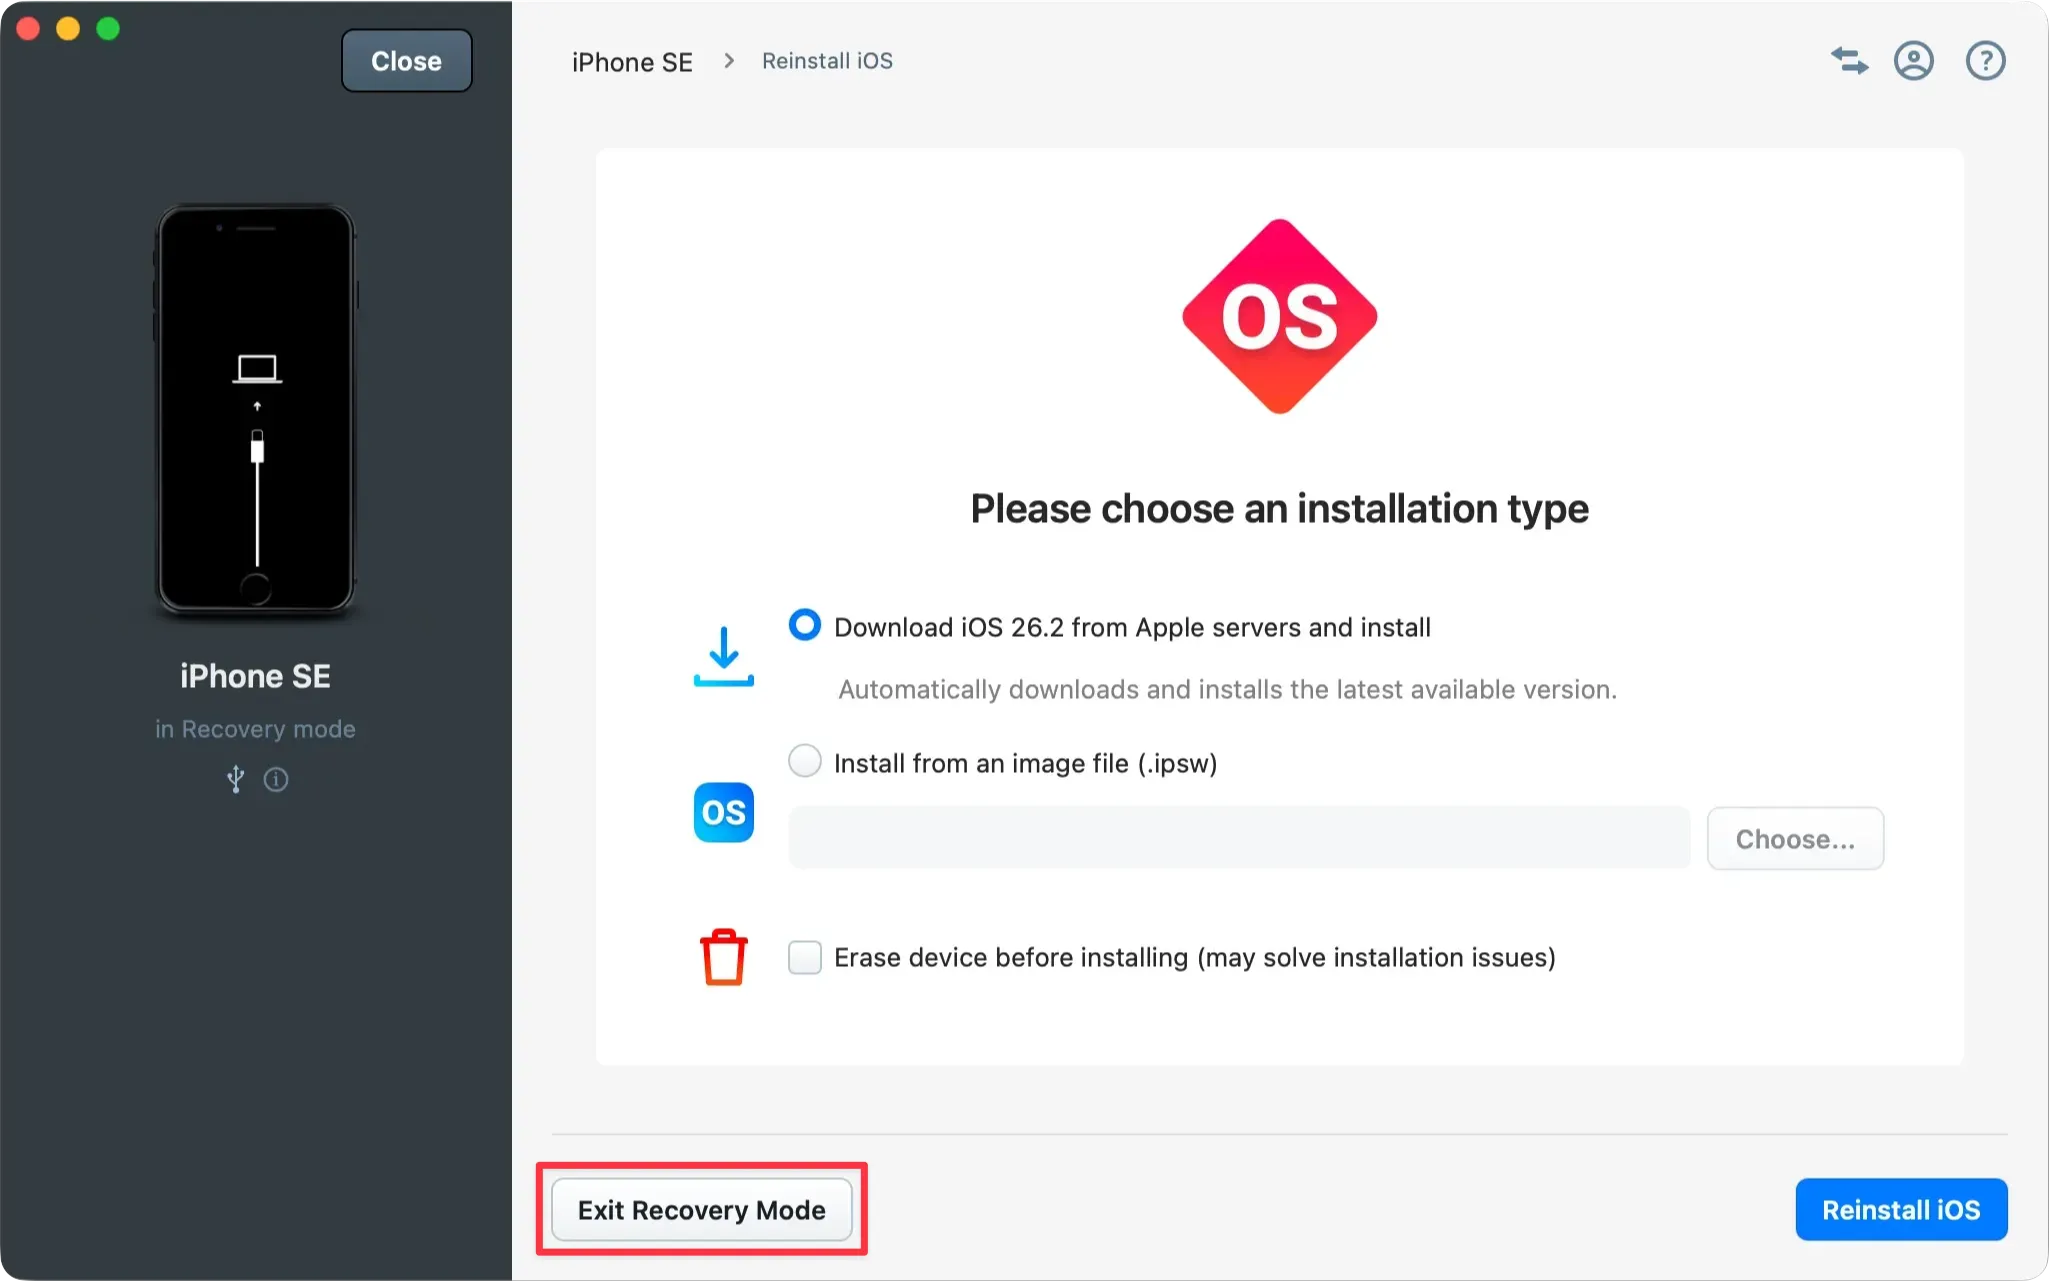
Recovery Mode
The device cannot be used normally. The device displays a cable and computer icon prompting you to connect to iTunes or Finder. iMazing can interact with the device in this state but cannot back it up.
Important: When connecting a device in Recovery Mode, iTunes (Windows) or Finder (macOS) may automatically open and prompt you to restore the device. Click Cancel and close the window before proceeding with iMazing.
Start by attempting to click on Exit Recovery Mode from iMazing's Reinstall iOS screen. If it fail to exit, proceed to Reinstall iOS.
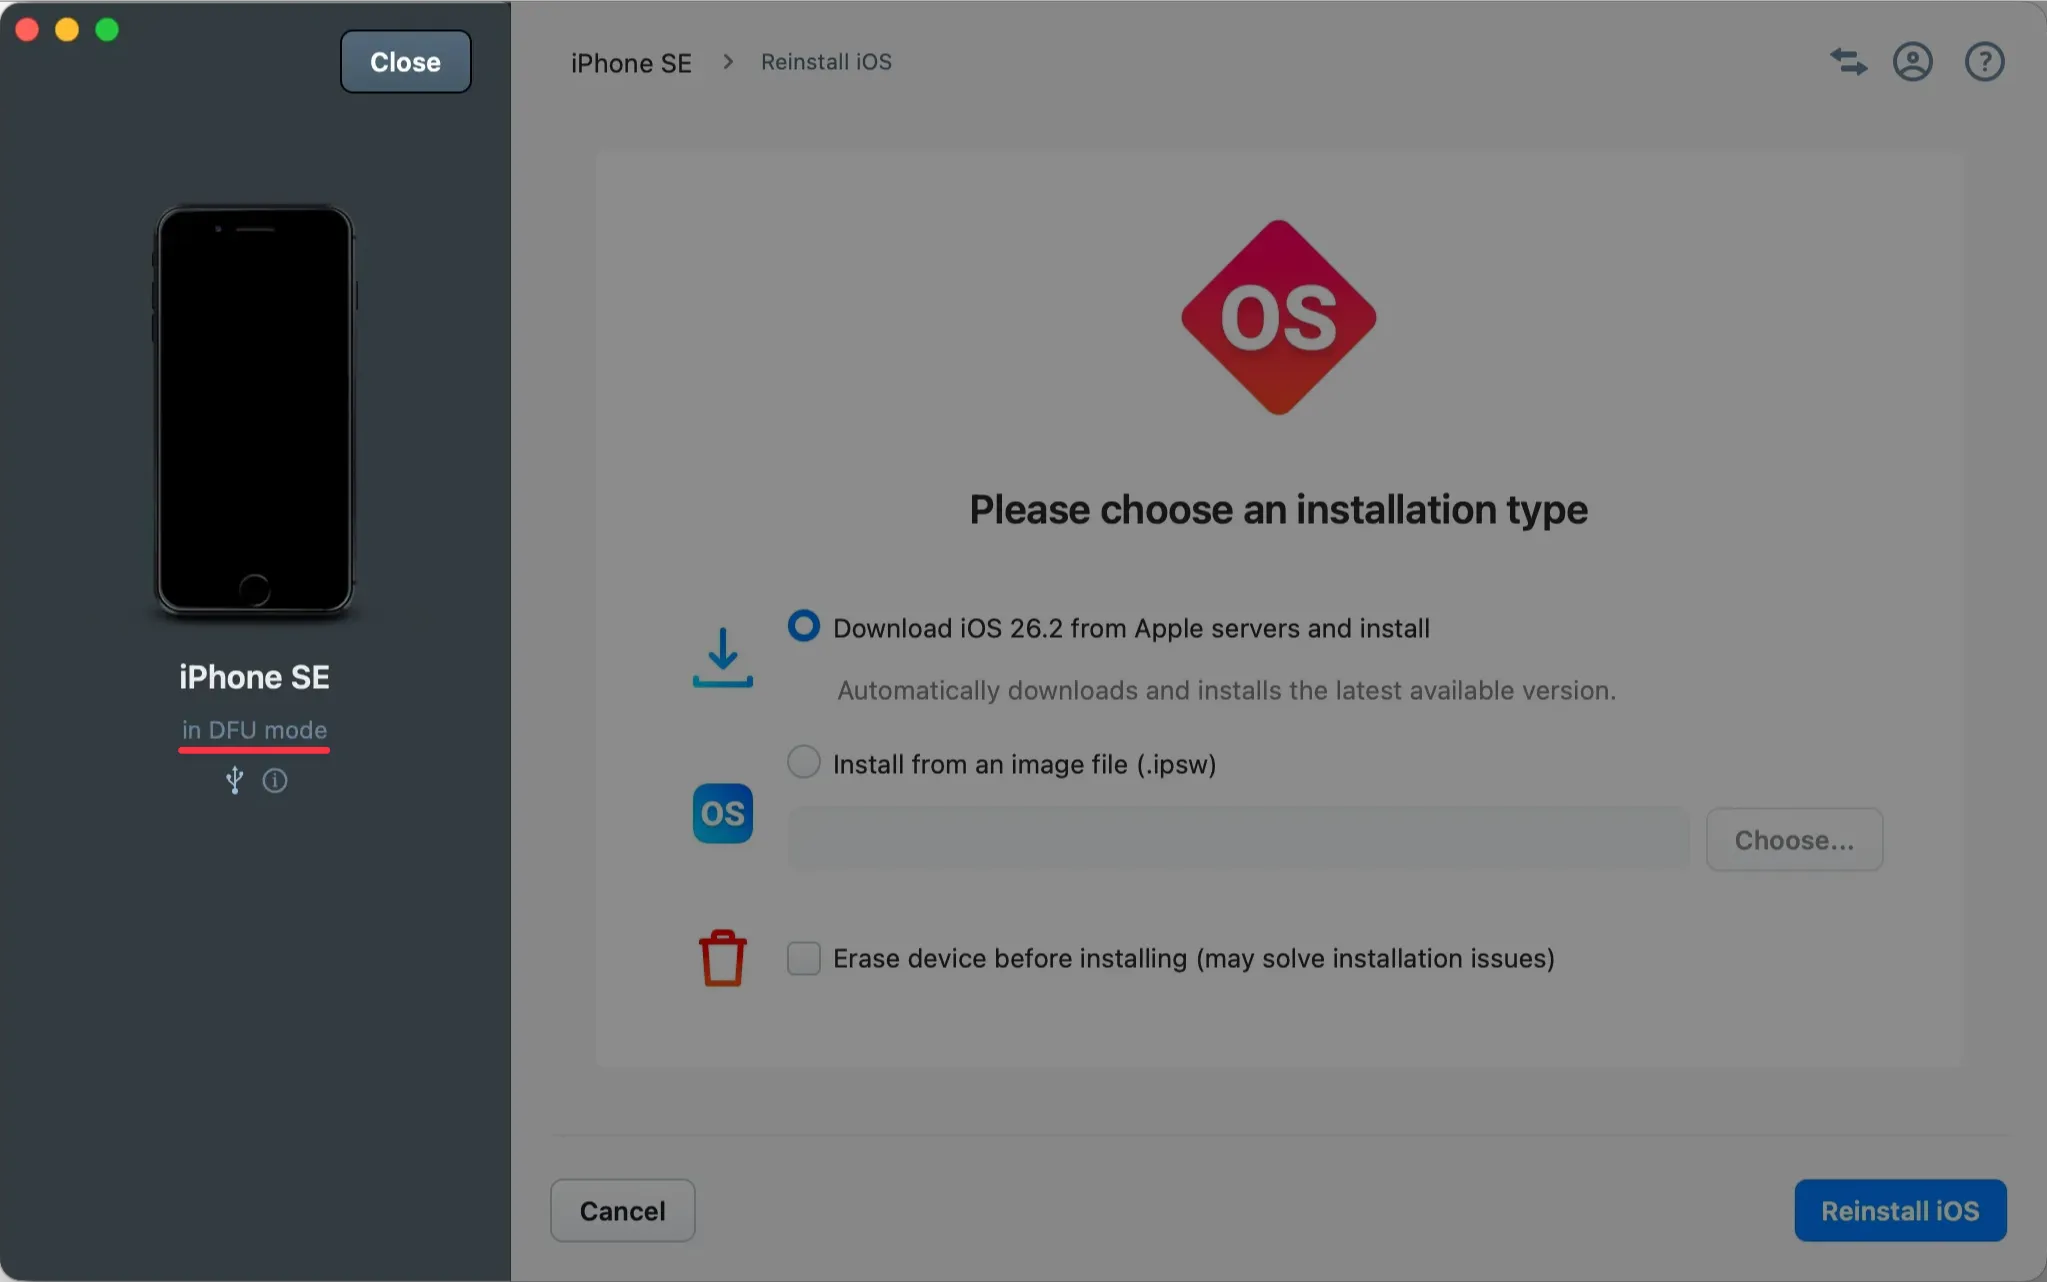
DFU Mode
DFU (Device Firmware Update) Mode is the last option when Recovery Mode reinstallation has failed. In DFU Mode, your iPhone or iPad screen will display nothing but a completely black screen. To enter DFU Mode, follow the instructions in How to Put an iPhone or iPad into DFU Mode.
Reinstall iOS
Connect your device to your Mac or PC via USB.
If iMazing displays the Reinstall iOS screen automatically, your device is already in Recovery or DFU Mode. Proceed to section 2.1.
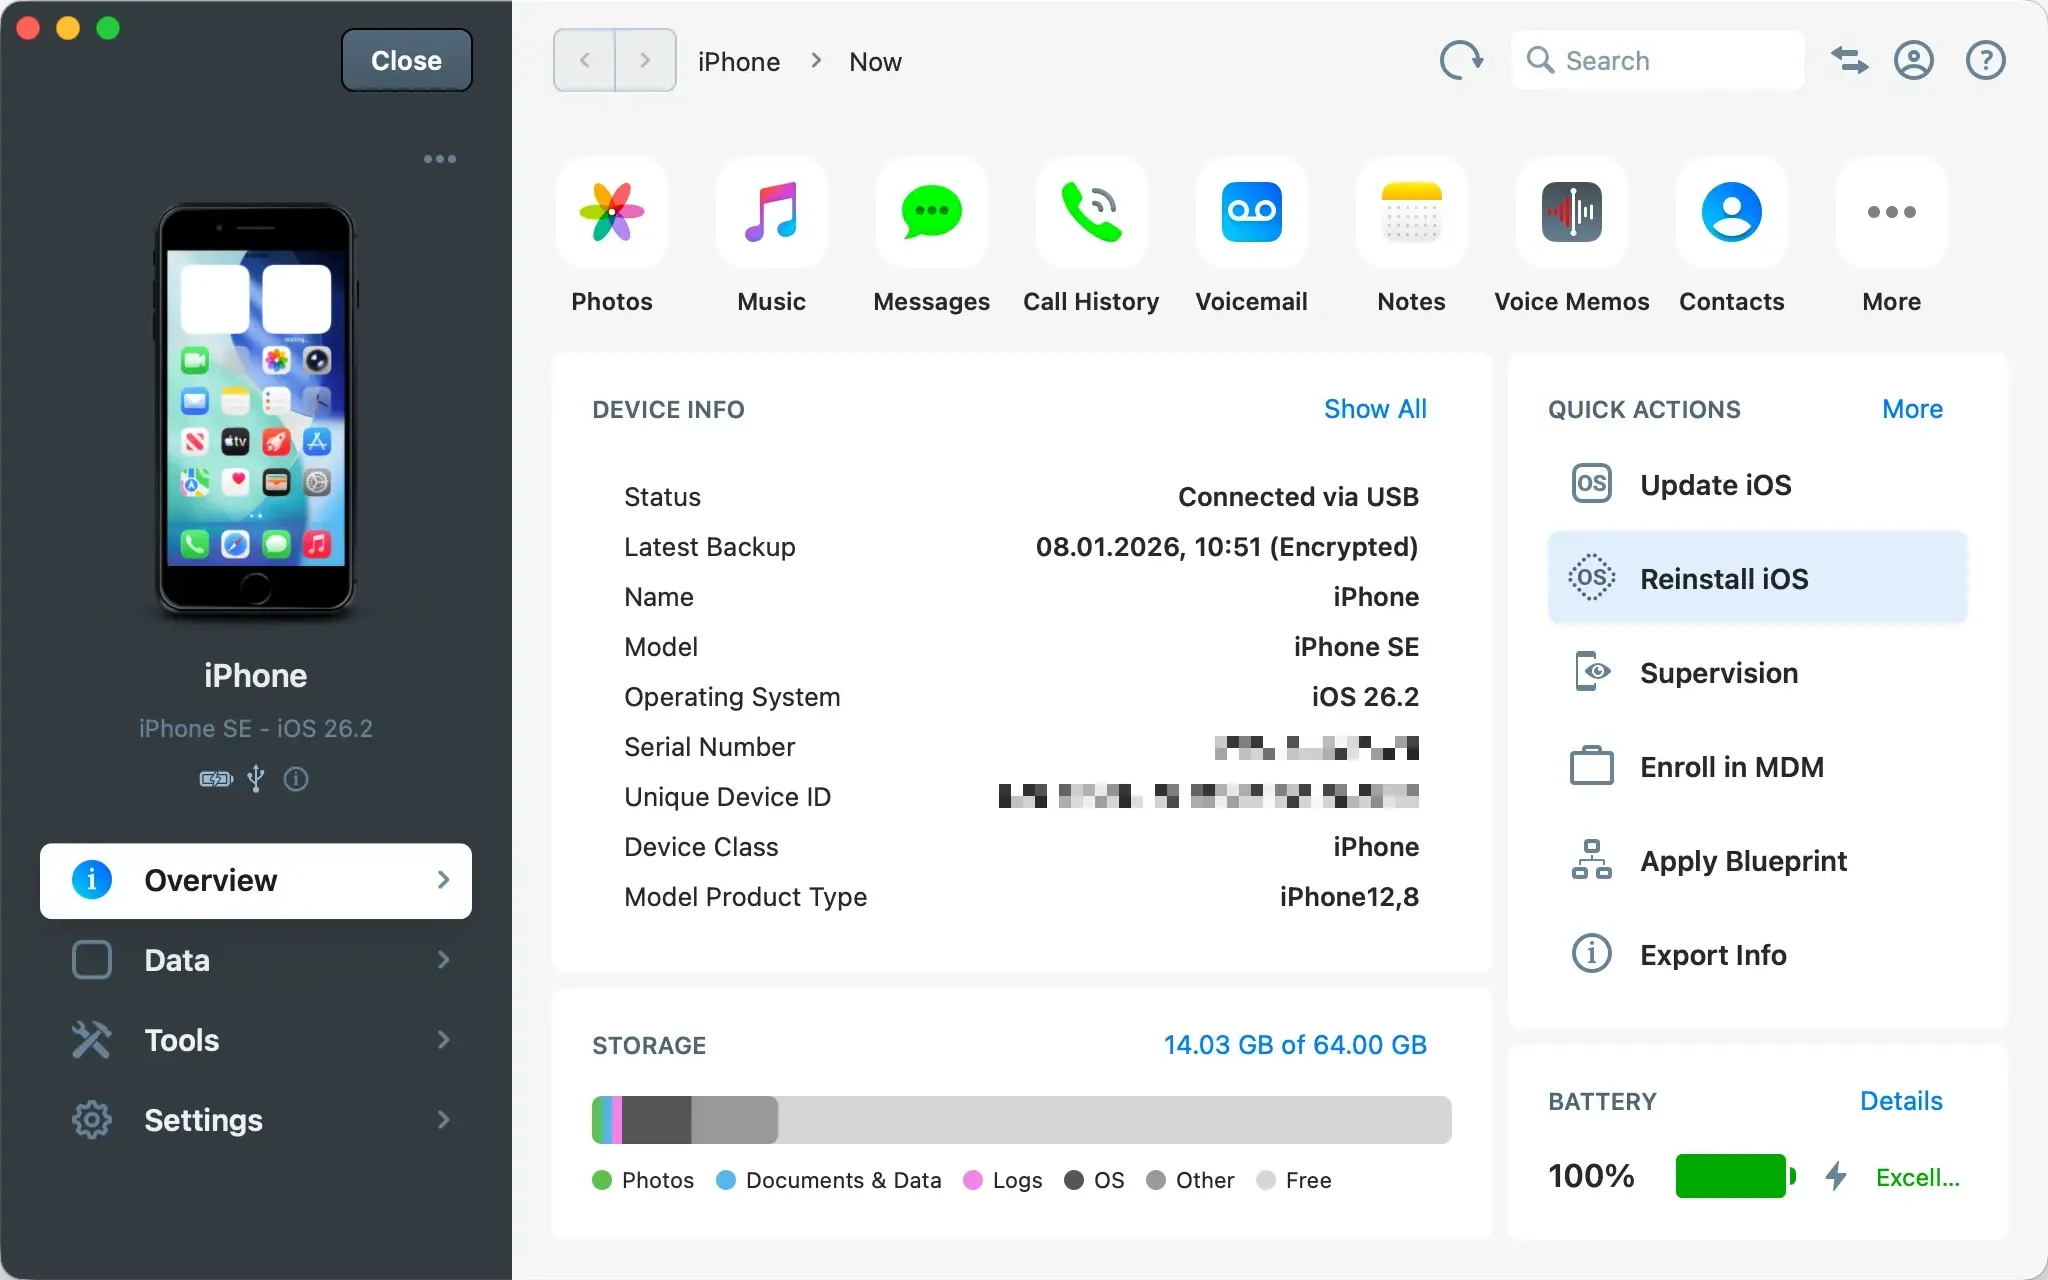
If not, select your device from the Devices list on the Home Screen, go to Overview, and click Reinstall iOS in the Quick Actions panel.
Data preservation is not guaranteed. If you have a recent iMazing, iTunes, or iCloud backup, make sure it is accessible before proceeding. If you have no backup, make sure to leave Erase device before installing disabled, which gives iMazing the best chance of keeping your data intact.
Choose an Installation Source
Install from Apple's Servers
This is the default option. iMazing will download the latest version of iOS for your device model directly from Apple. Unless you have a specific reason to install from an IPSW file (for example, an IPSW file for an iOS beta version you pre-downloaded from the Apple Developer Program), leave this setting unchanged.
Click Reinstall iOS to proceed.
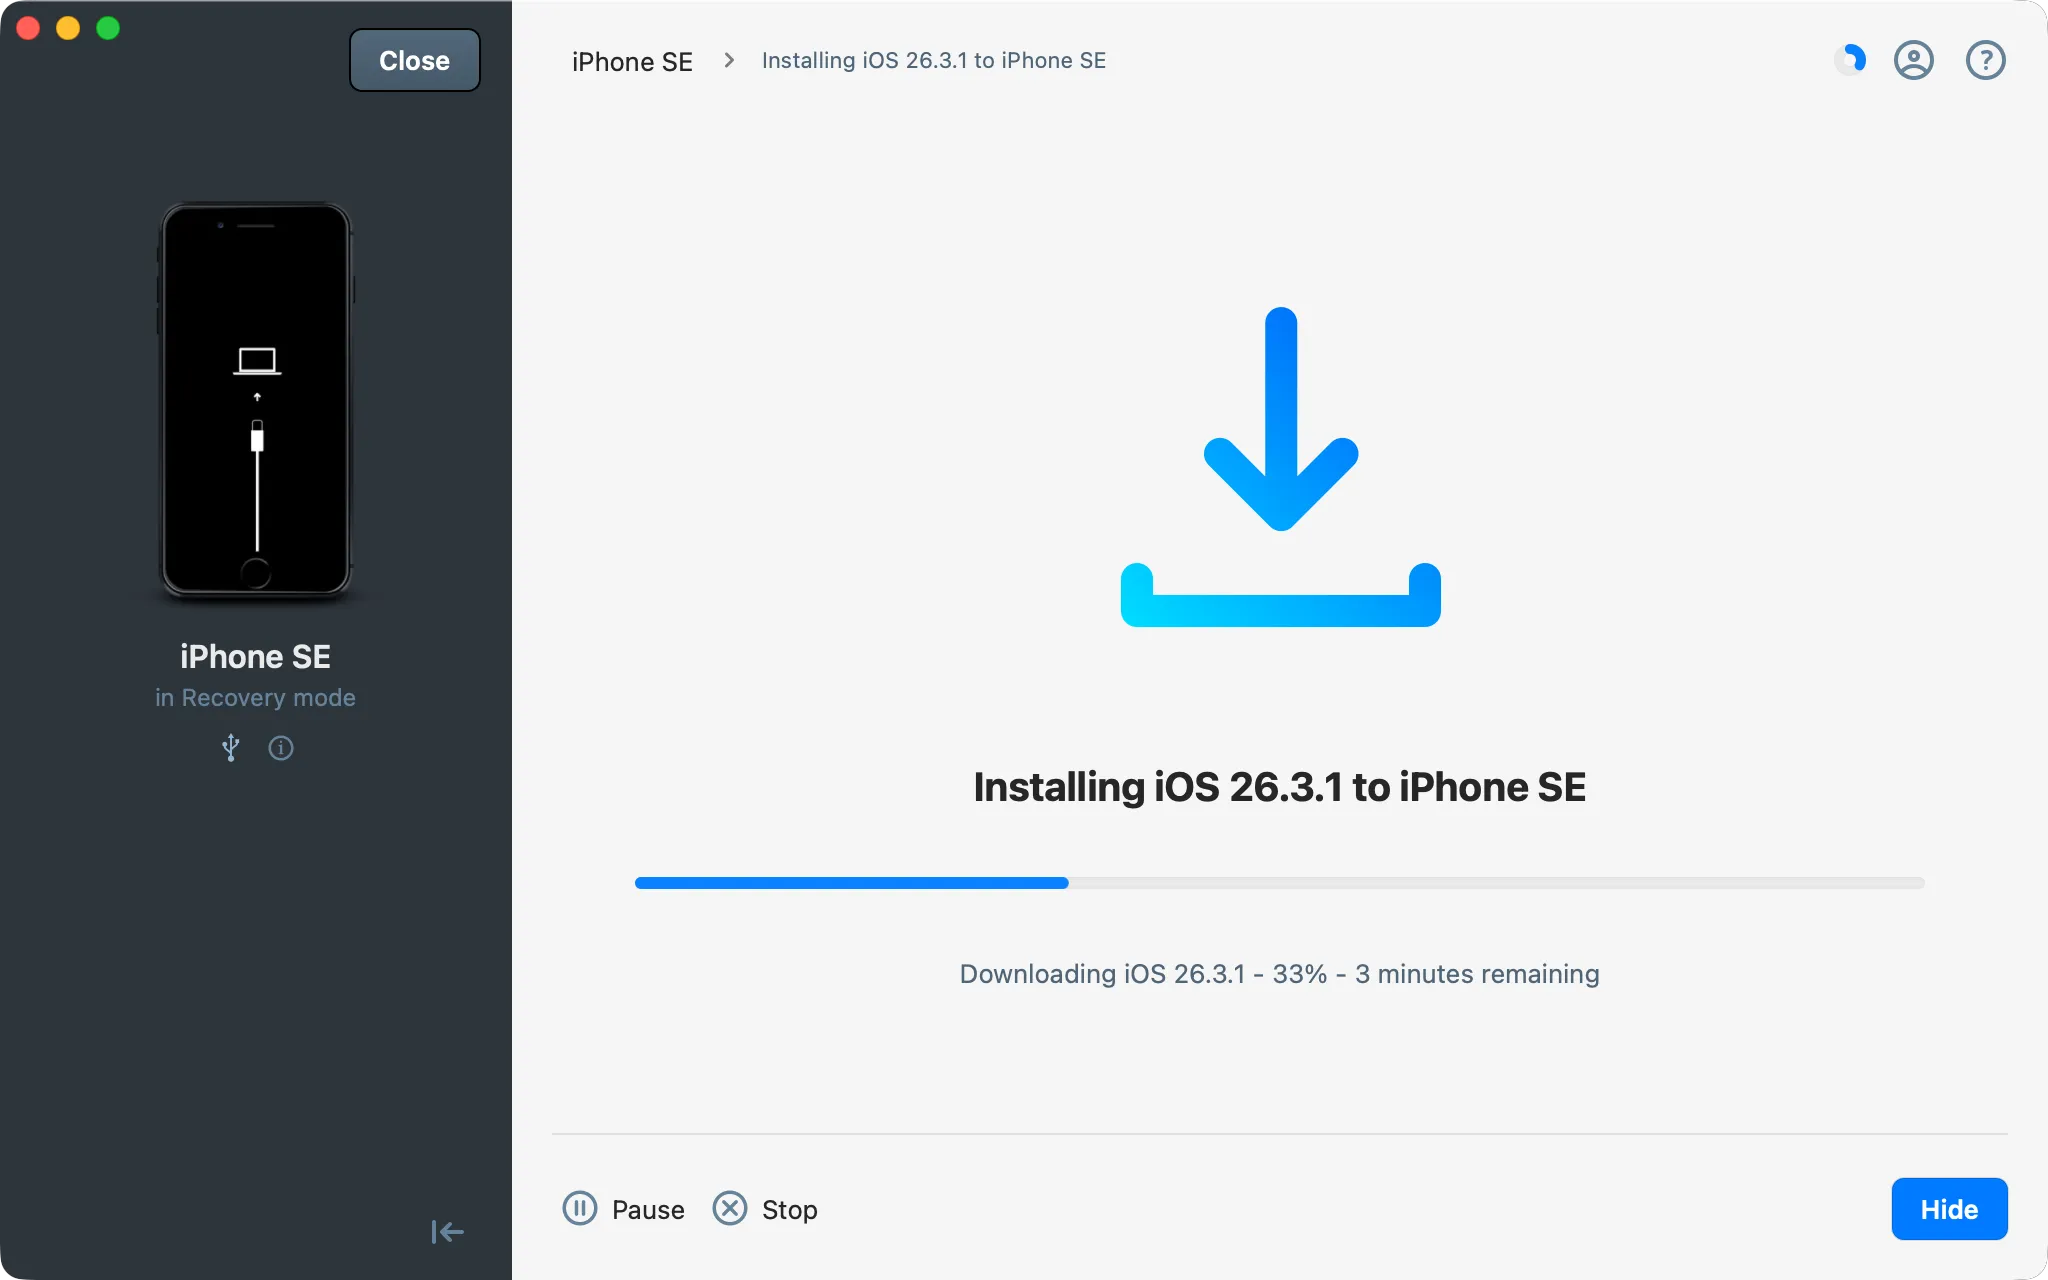
Note: The iOS installation package is between 2 and 3 GB. Download time depends on your internet connection.
Install from an IPSW File
Use this option only if you already have the correct IPSW file for your device model. In the dialog, locate your .ipsw file, click Select, then click Reinstall iOS.
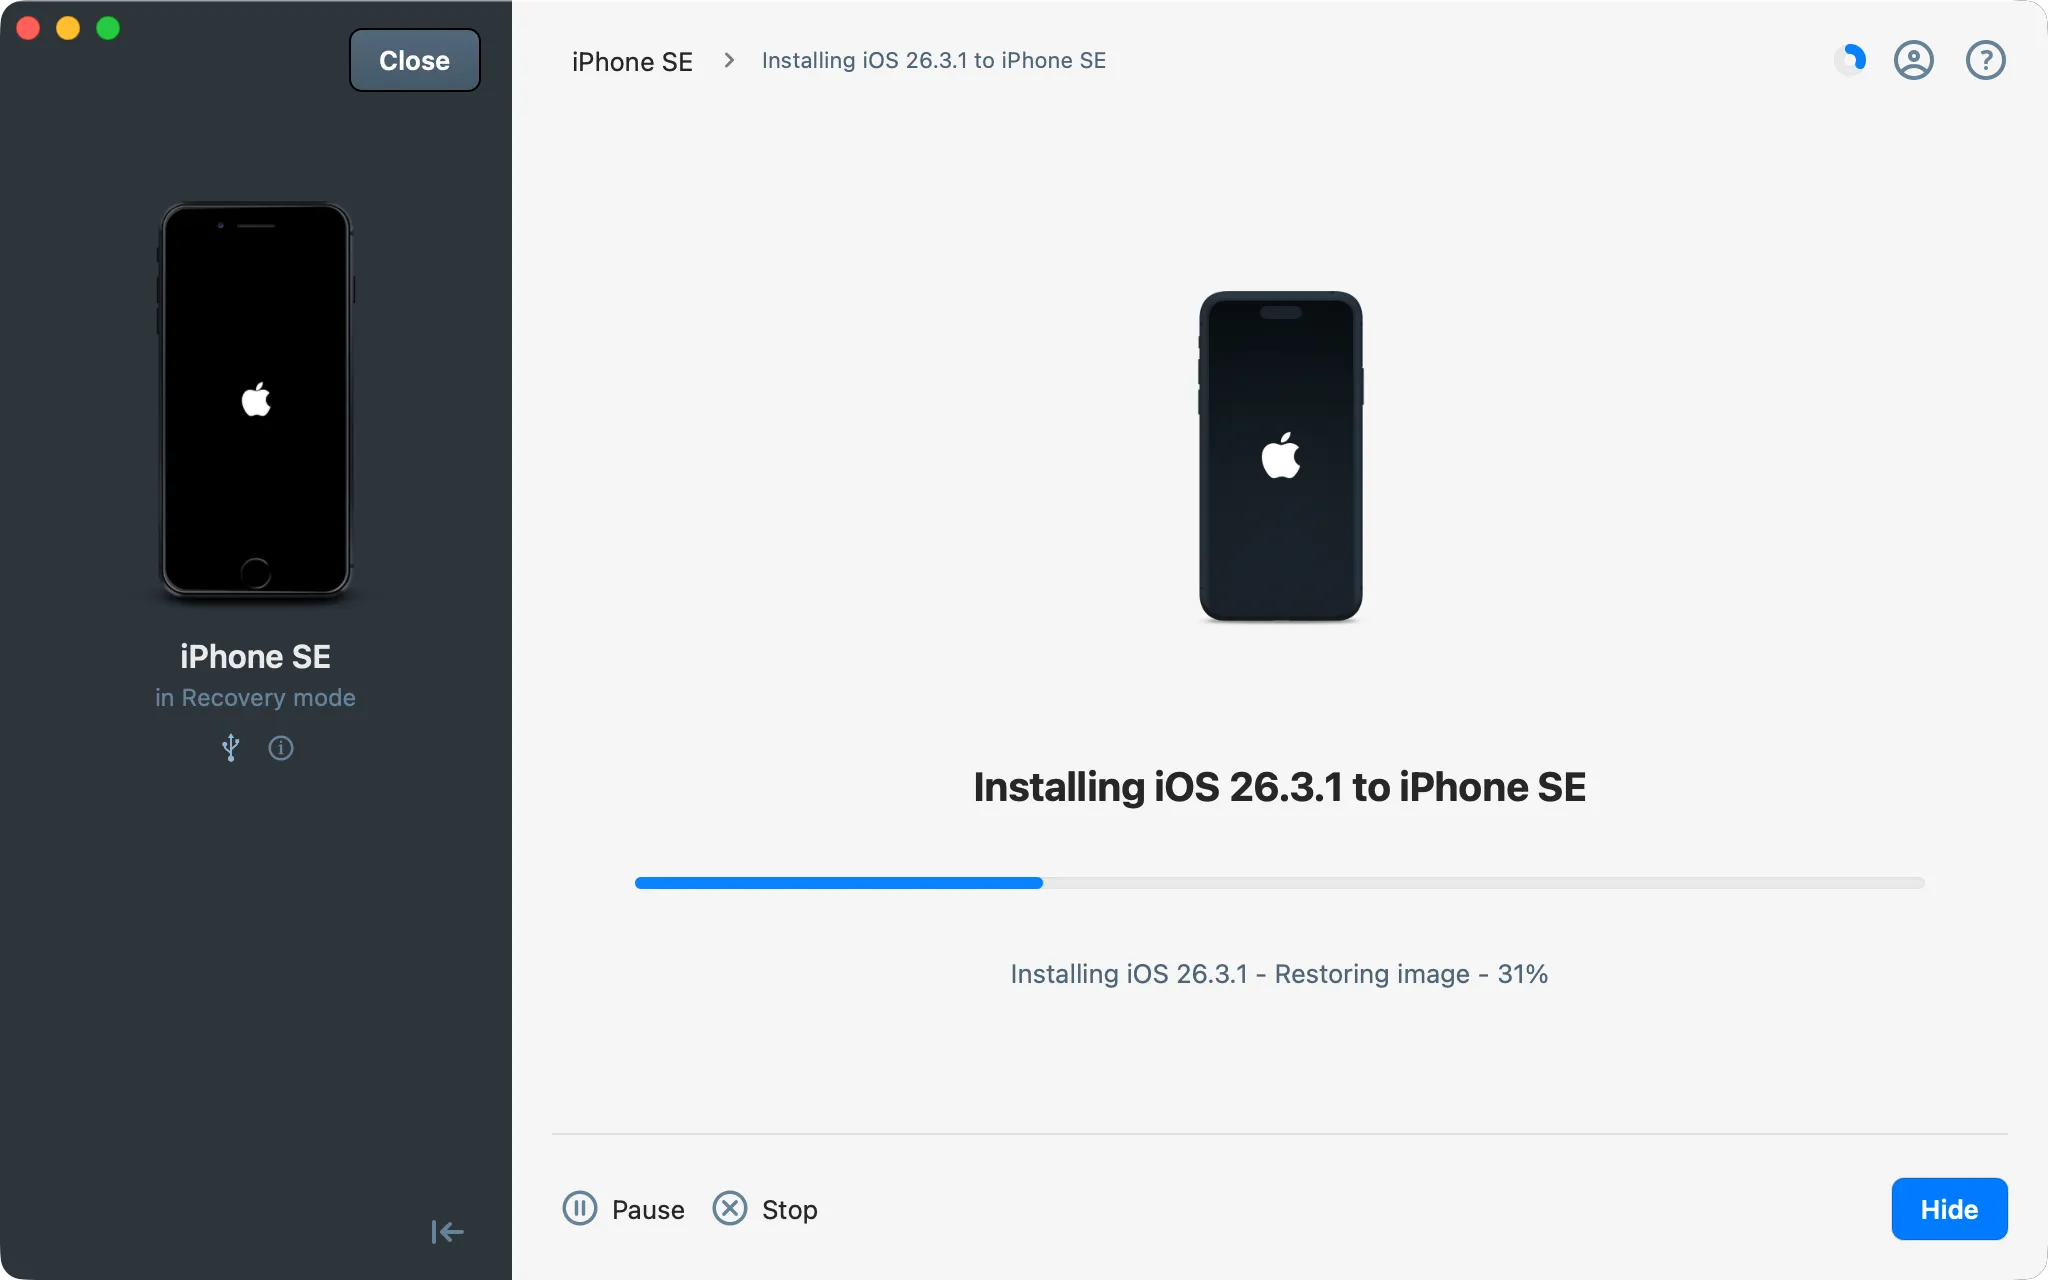
Monitor Installation Progress
Do not disconnect the device during this process. When installation is complete, enter your device passcode. If prompted, tap Trust to allow iMazing to complete the installation.
Going Further
On Windows, if an error occurs during reinstallation, open iMazing Preferences > General and click on Reinstall Mobile Device Services.
On macOS, first ensure your system is fully up to date; if it isn’t, install any available updates.
Restart both your computer and your device, then retry the reinstallation.
If the error persists, enable Erase device before installing in the Reinstall iOS screen, then click Reinstall iOS.
Important: This will permanently erase all data on the device. Only proceed if you have exhausted all other options.
For additional troubleshooting steps, refer to Apple's iOS update and restore error guide.
If you would like to learn how to protect yourself from this situation in the future, refer to these guides: