Transfer data from your old iPhone or iPad to a new one
Updated on Mar 11, 2026
Reading time ~6 minutes
Unboxing a new iPhone or iPad is exciting. Setting it up and transferring data from a previous device is less so. Since iOS 13, Apple has simplified migration with a direct device‑to‑device transfer option. This works well in many cases, but there are situations where it is not sufficient or not ideal:
- In case anything goes wrong during transfer, having a local backup with iMazing protects your data and allows you to recover it easily.
- When you would like to choose what to transfer, either for a thorough spring cleaning or because you do not have enough space on the new device, iMazing offers multiple levels of customization.
- Apple’s direct transfer option fails or is unavailable.
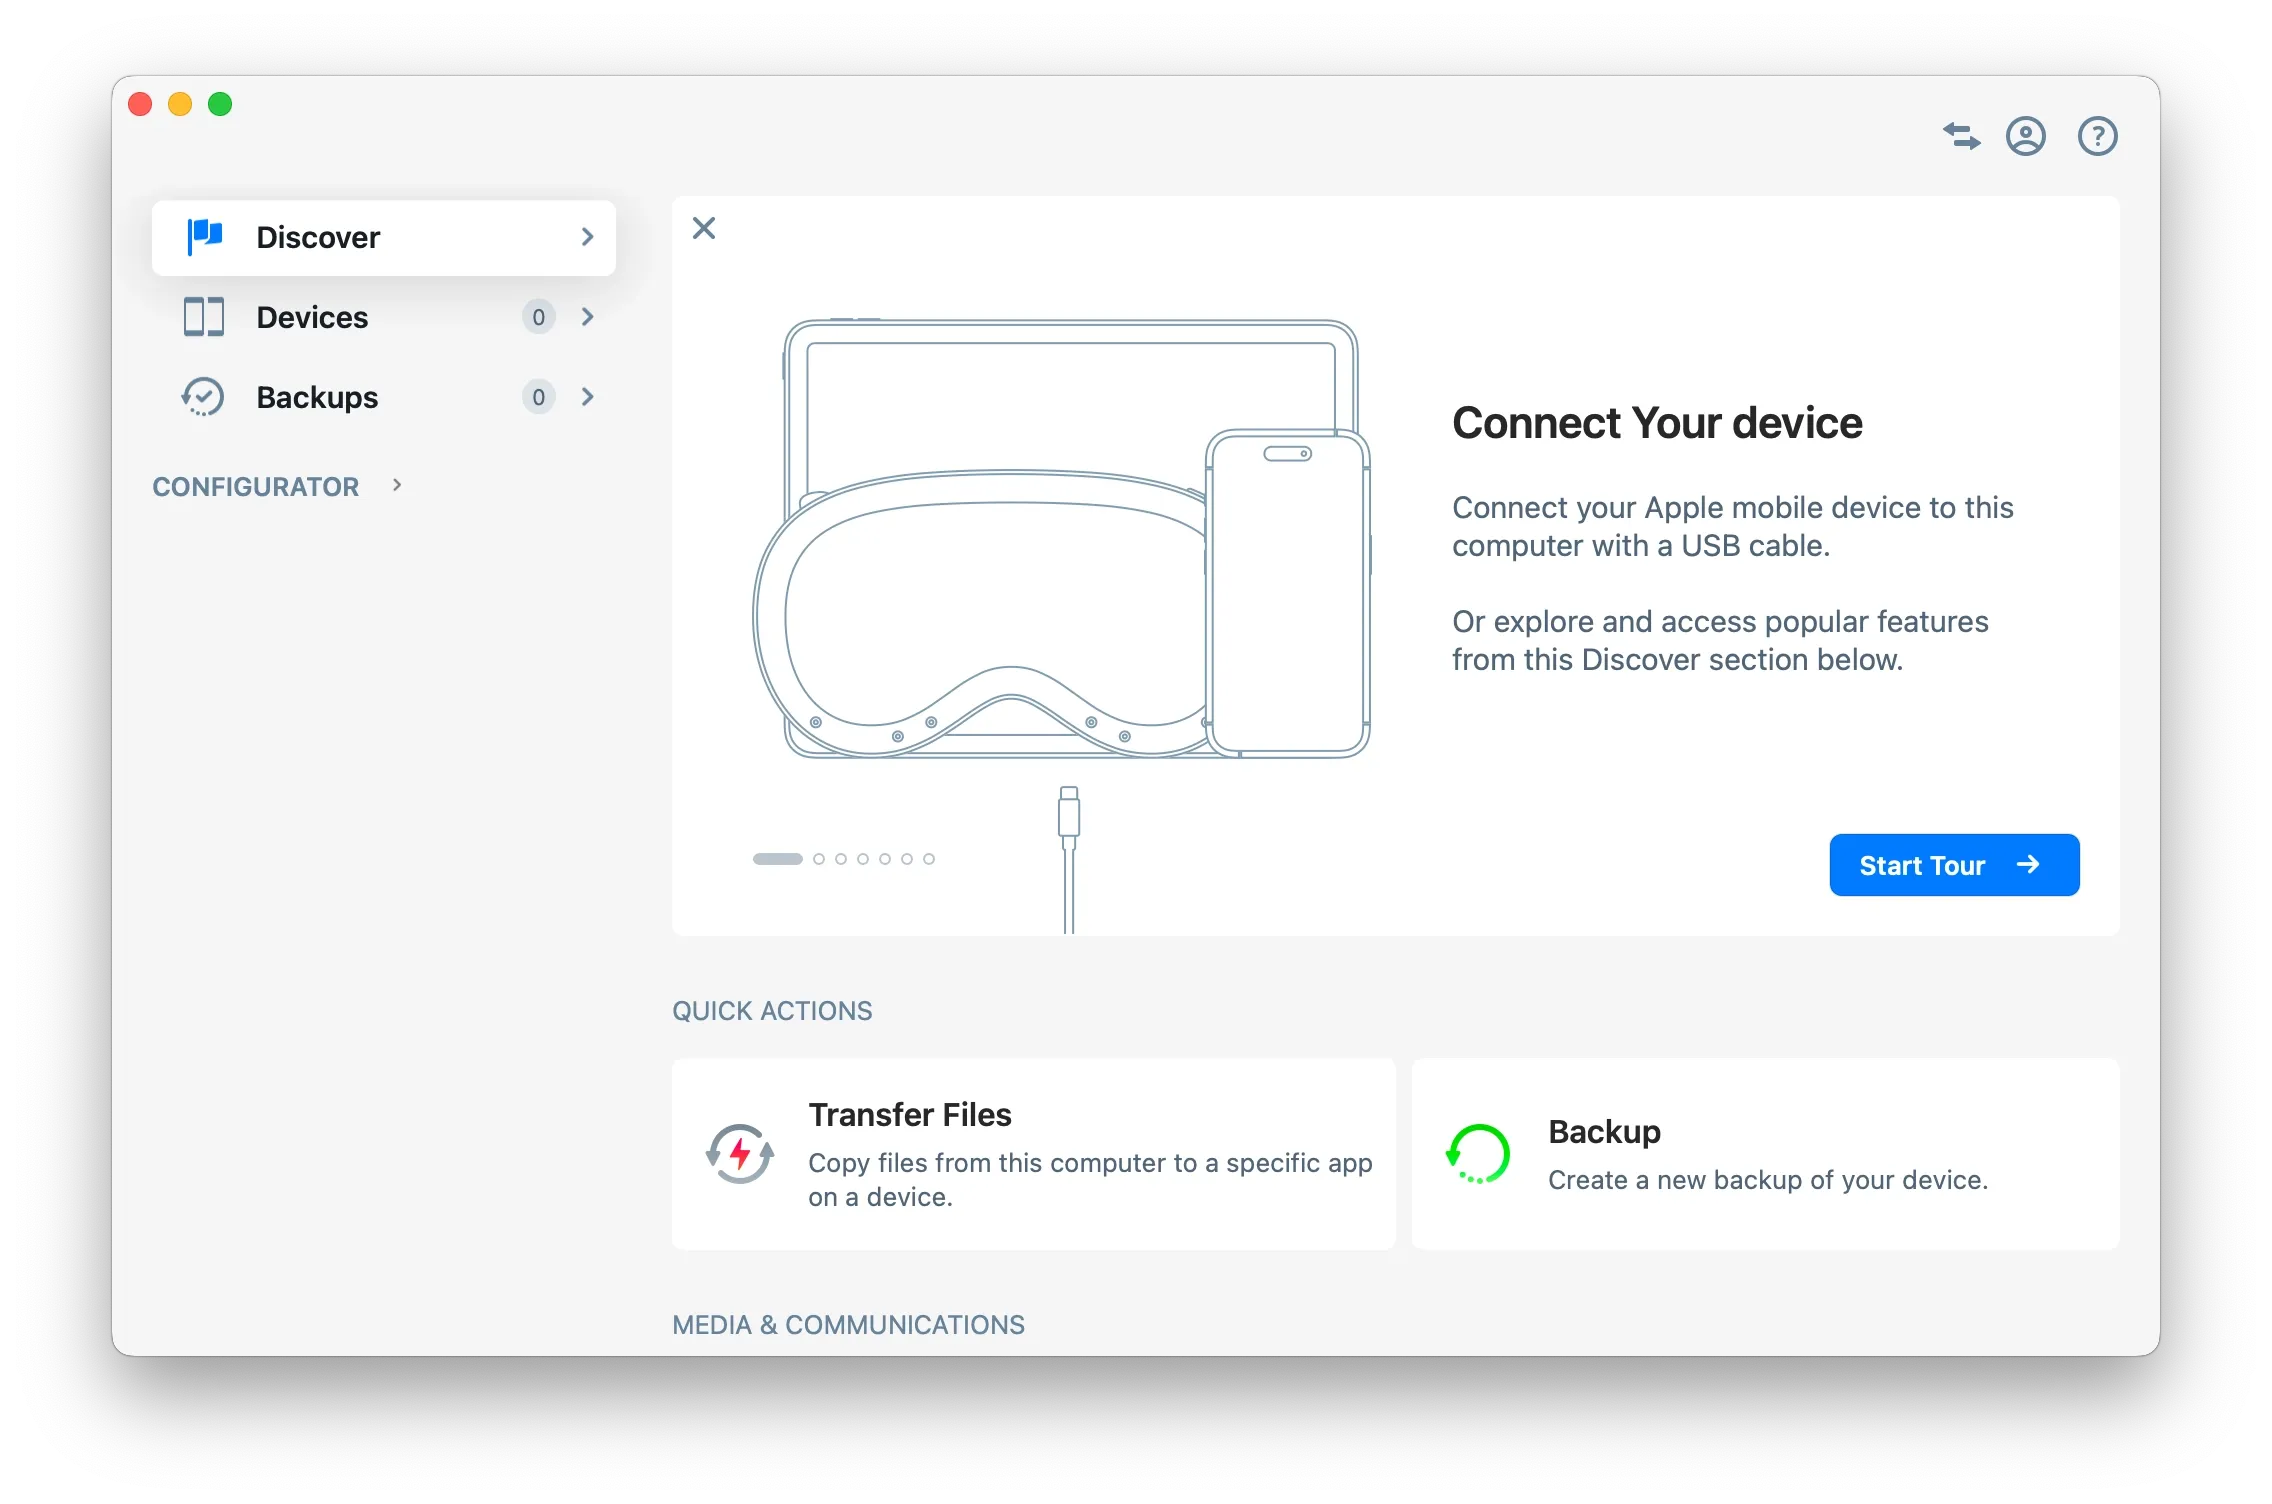
iMazing's Transfer to another Device wizard will guide you every step of the way. All you have to do is connect your old and new iPhone or iPad to your PC or Mac, and follow iMazing's instructions. Let's get started.
Here's how to transfer data from an iPhone, iPad or iPod Touch to another device:
Before you begin
Always make sure you are running the latest iMazing version, to do so select Check for Updates from the iMazing menu, or just download the latest available version for your computer below.
Download and install iMazing
Launch iMazing on your computer
If you haven’t already, download and install iMazing. For more details please refer to our guide available for PC and for Mac.
Connect both devices to your Mac or PC via USB
iMazing will prompt you to connect the device to your computer on the first time you're using it. To do so use a USB cable, and unlock the device using your passcode, Face ID or Touch ID, and follow the instructions for pairing.
Tip: For more details on connections and pairing refer to this guide.
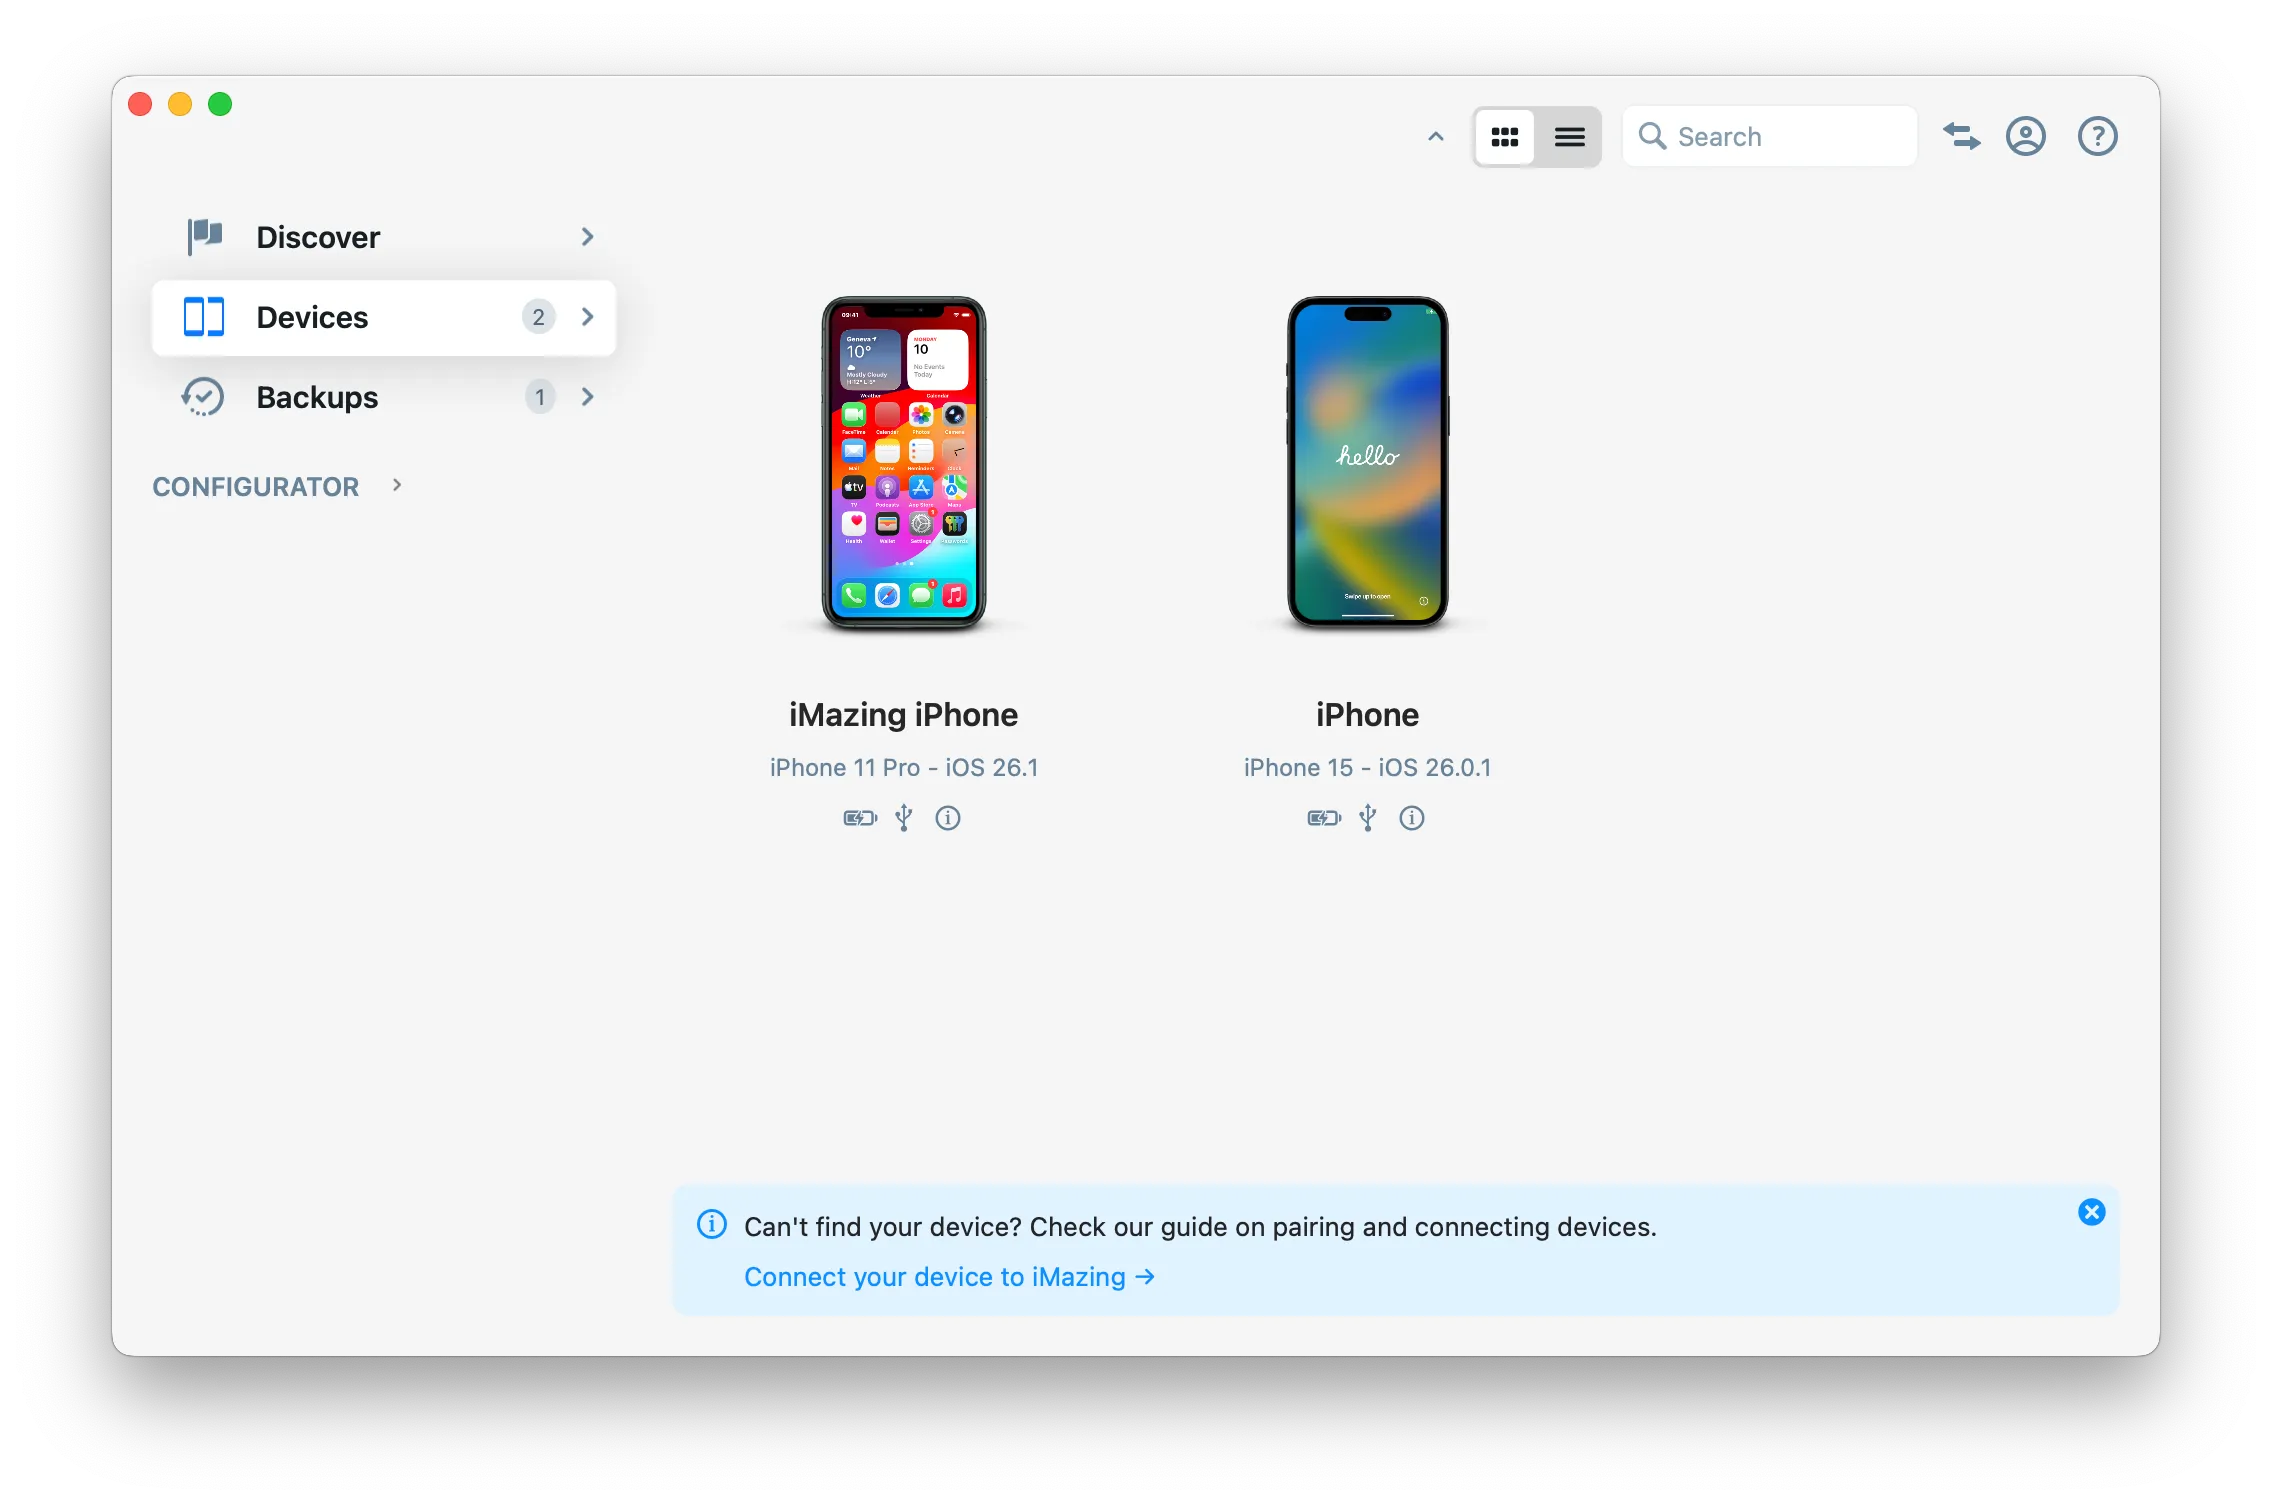
Click on Devices in the left pane
From the devices view you will see all the devices previously connected and paired to your computer. Click to select the device you want to transfer from.
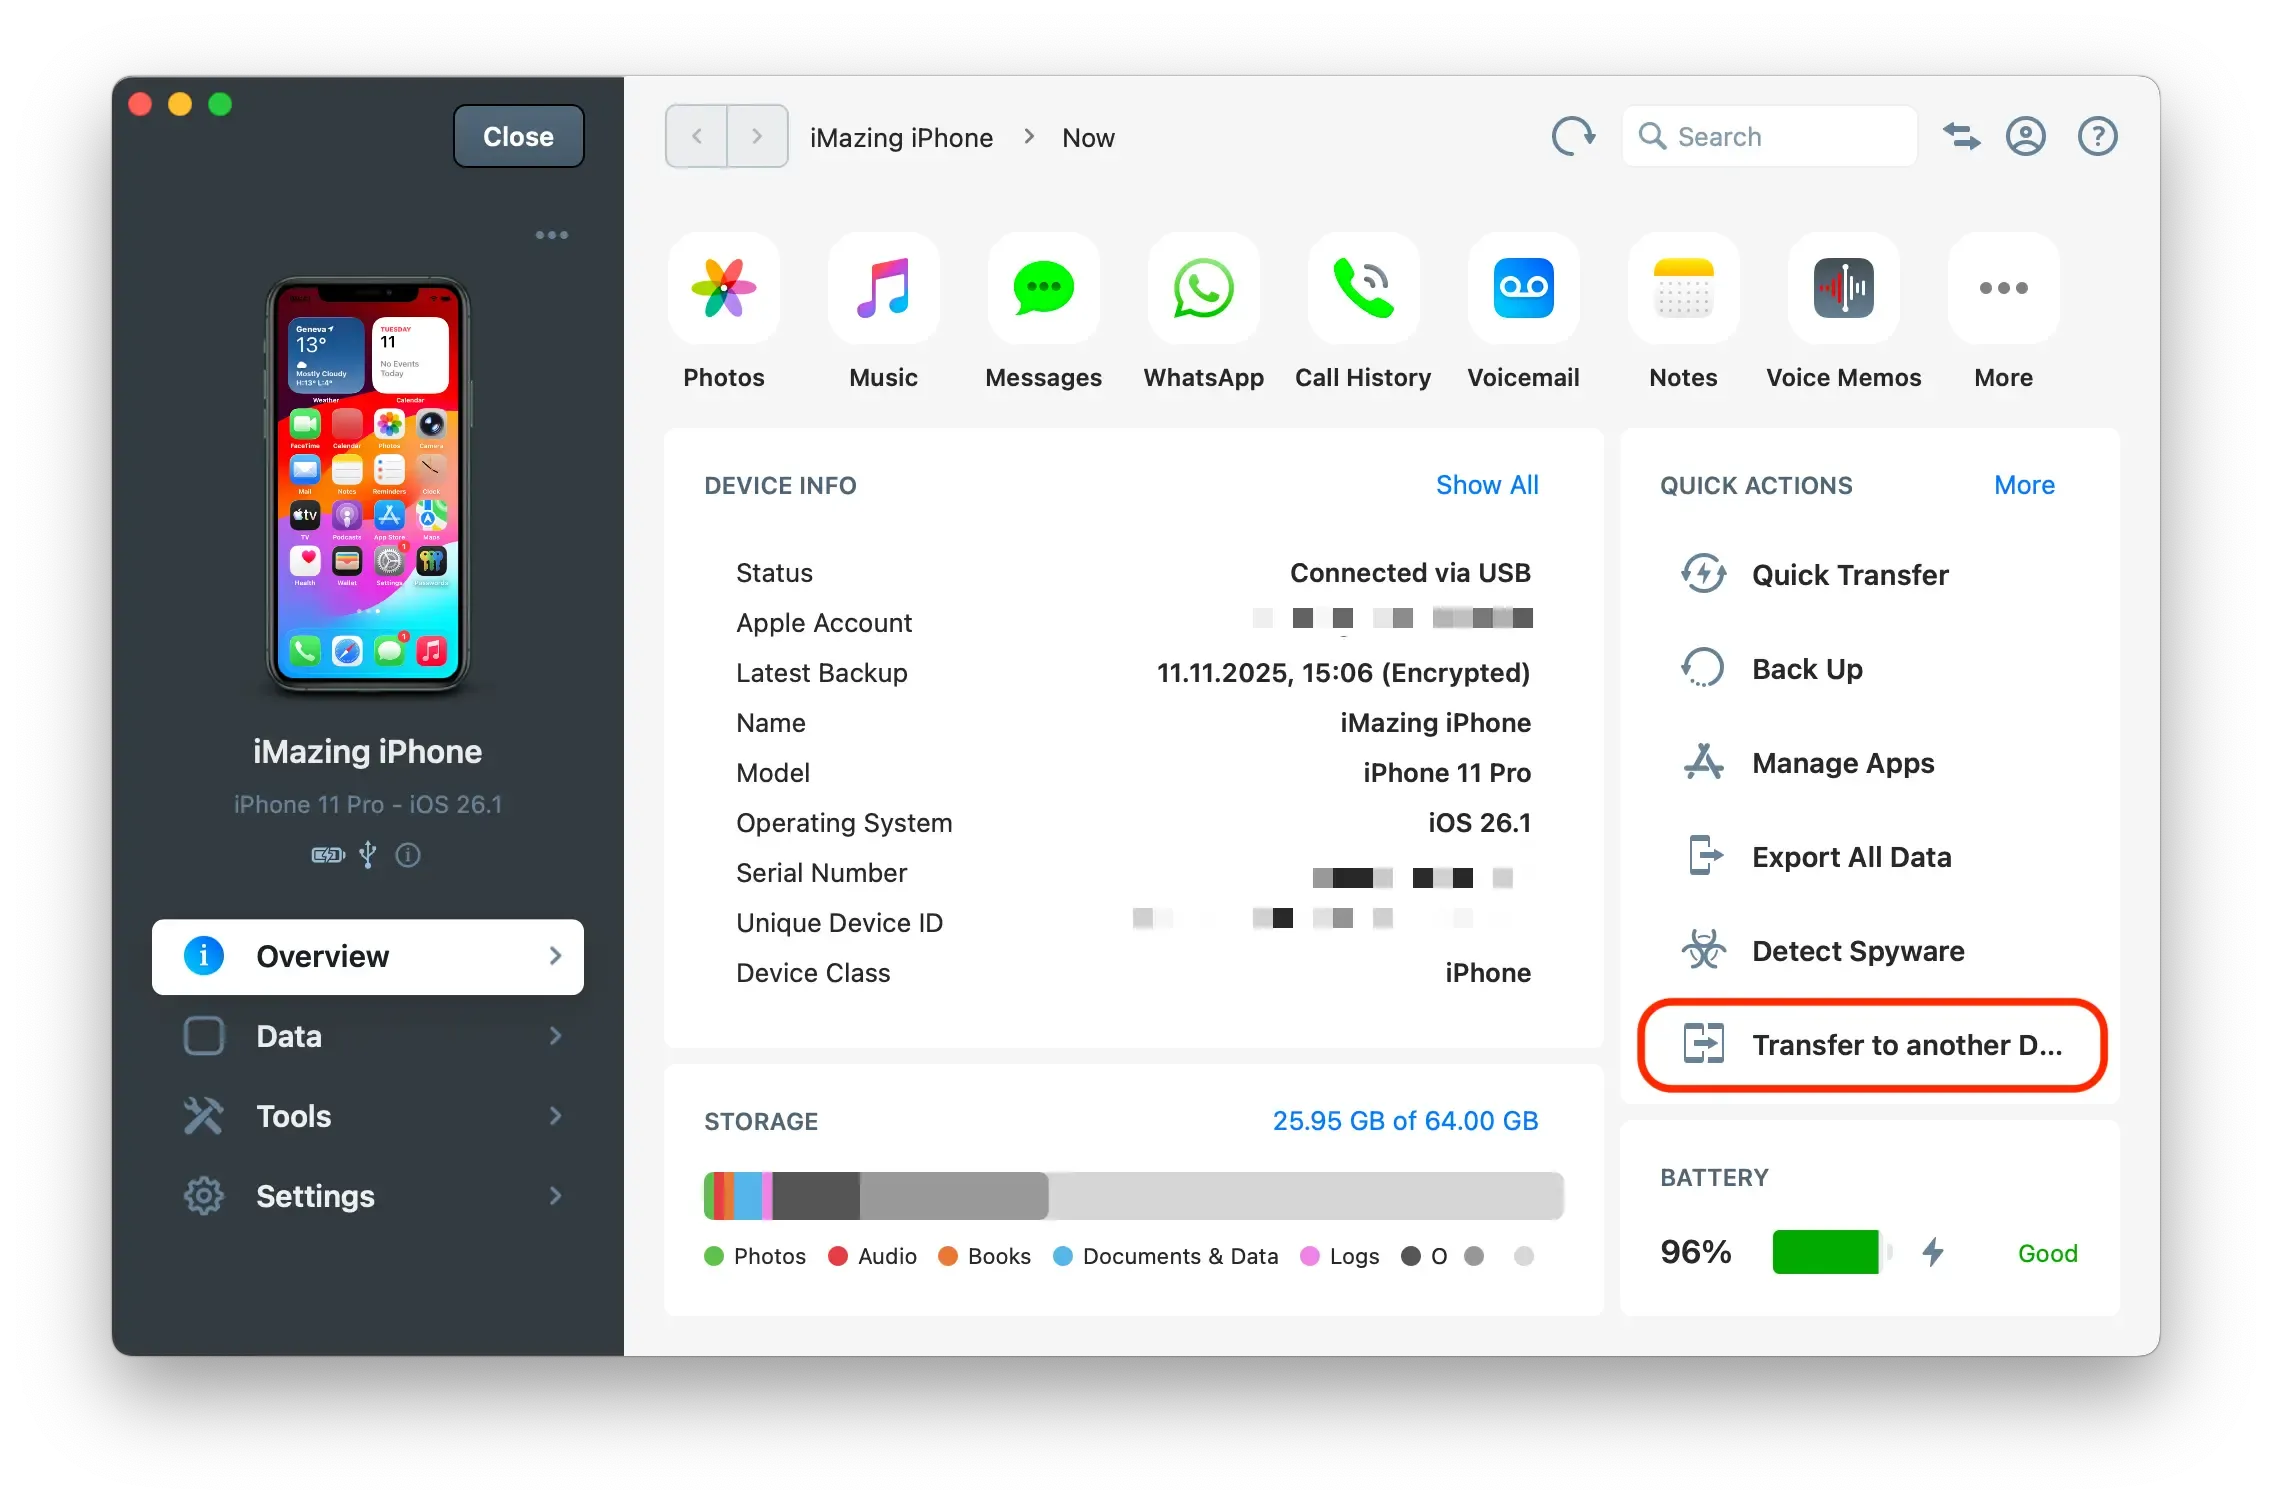
Click on Transfer to another Device
From the Overview screen of the source device, click on Transfer to another Device in the Quick Actions Panel on the right. This will open the Transfer Wizard.
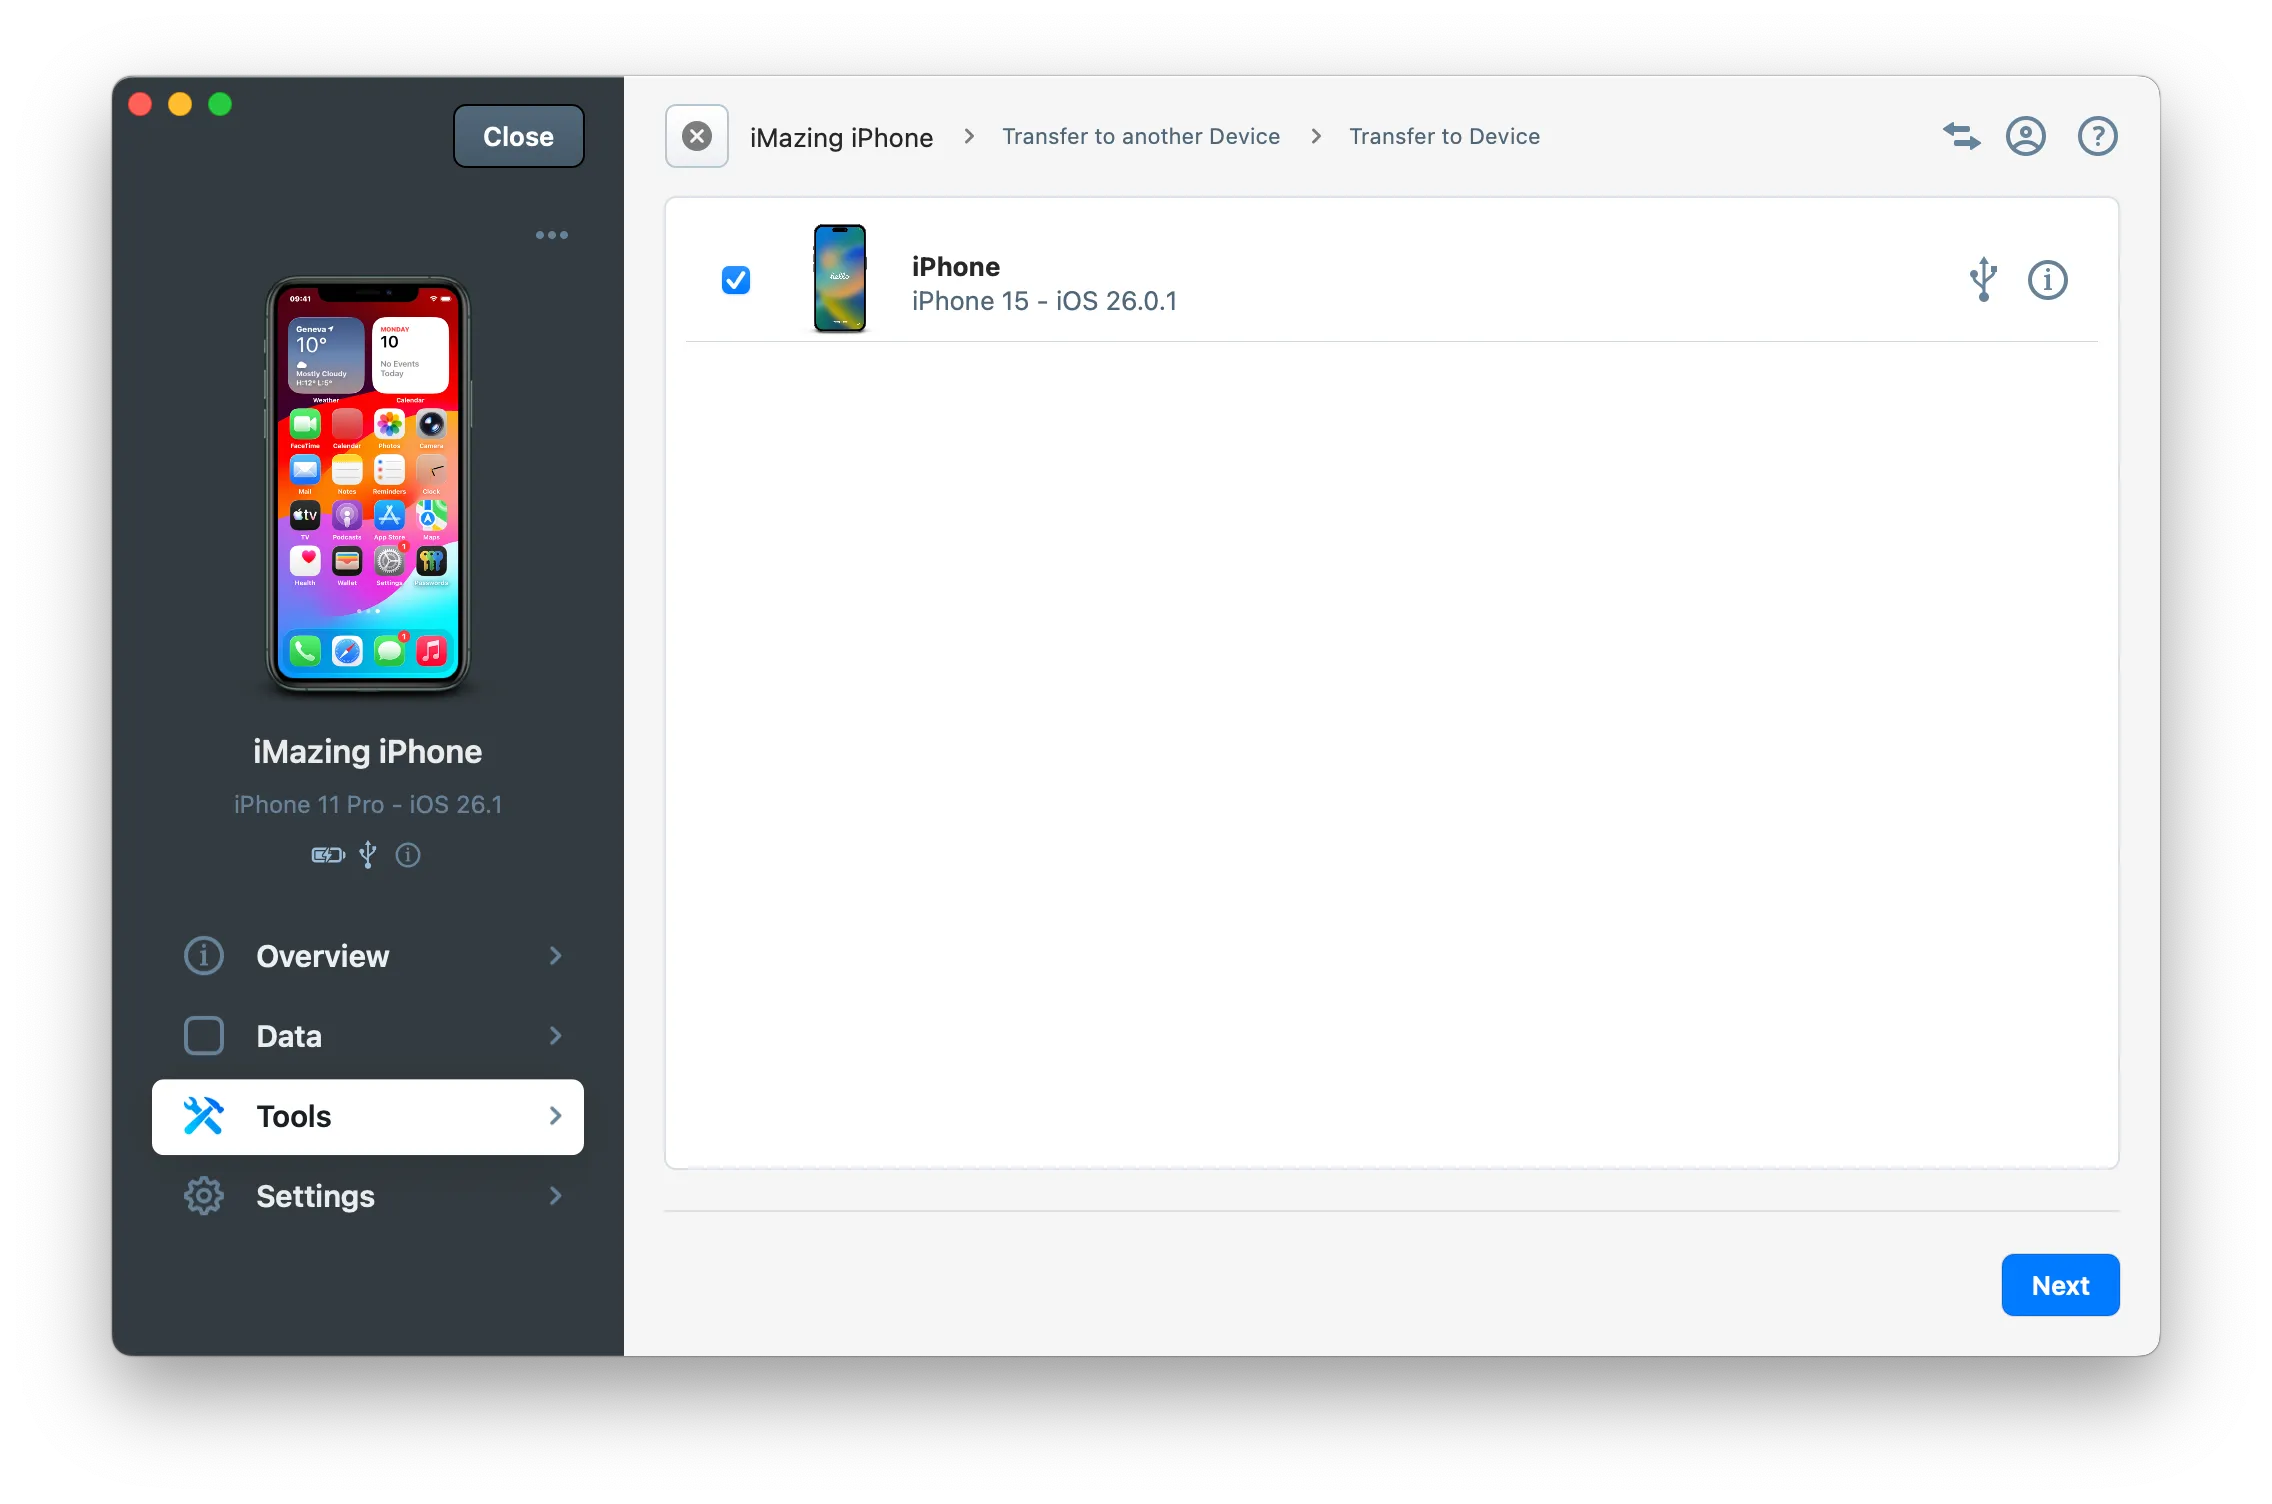
Choose the target device
Select the target device you want to transfer data to, then click Next.
Review transfer Options
iMazing's default transfer settings are suitable for a complete transfer of your data.
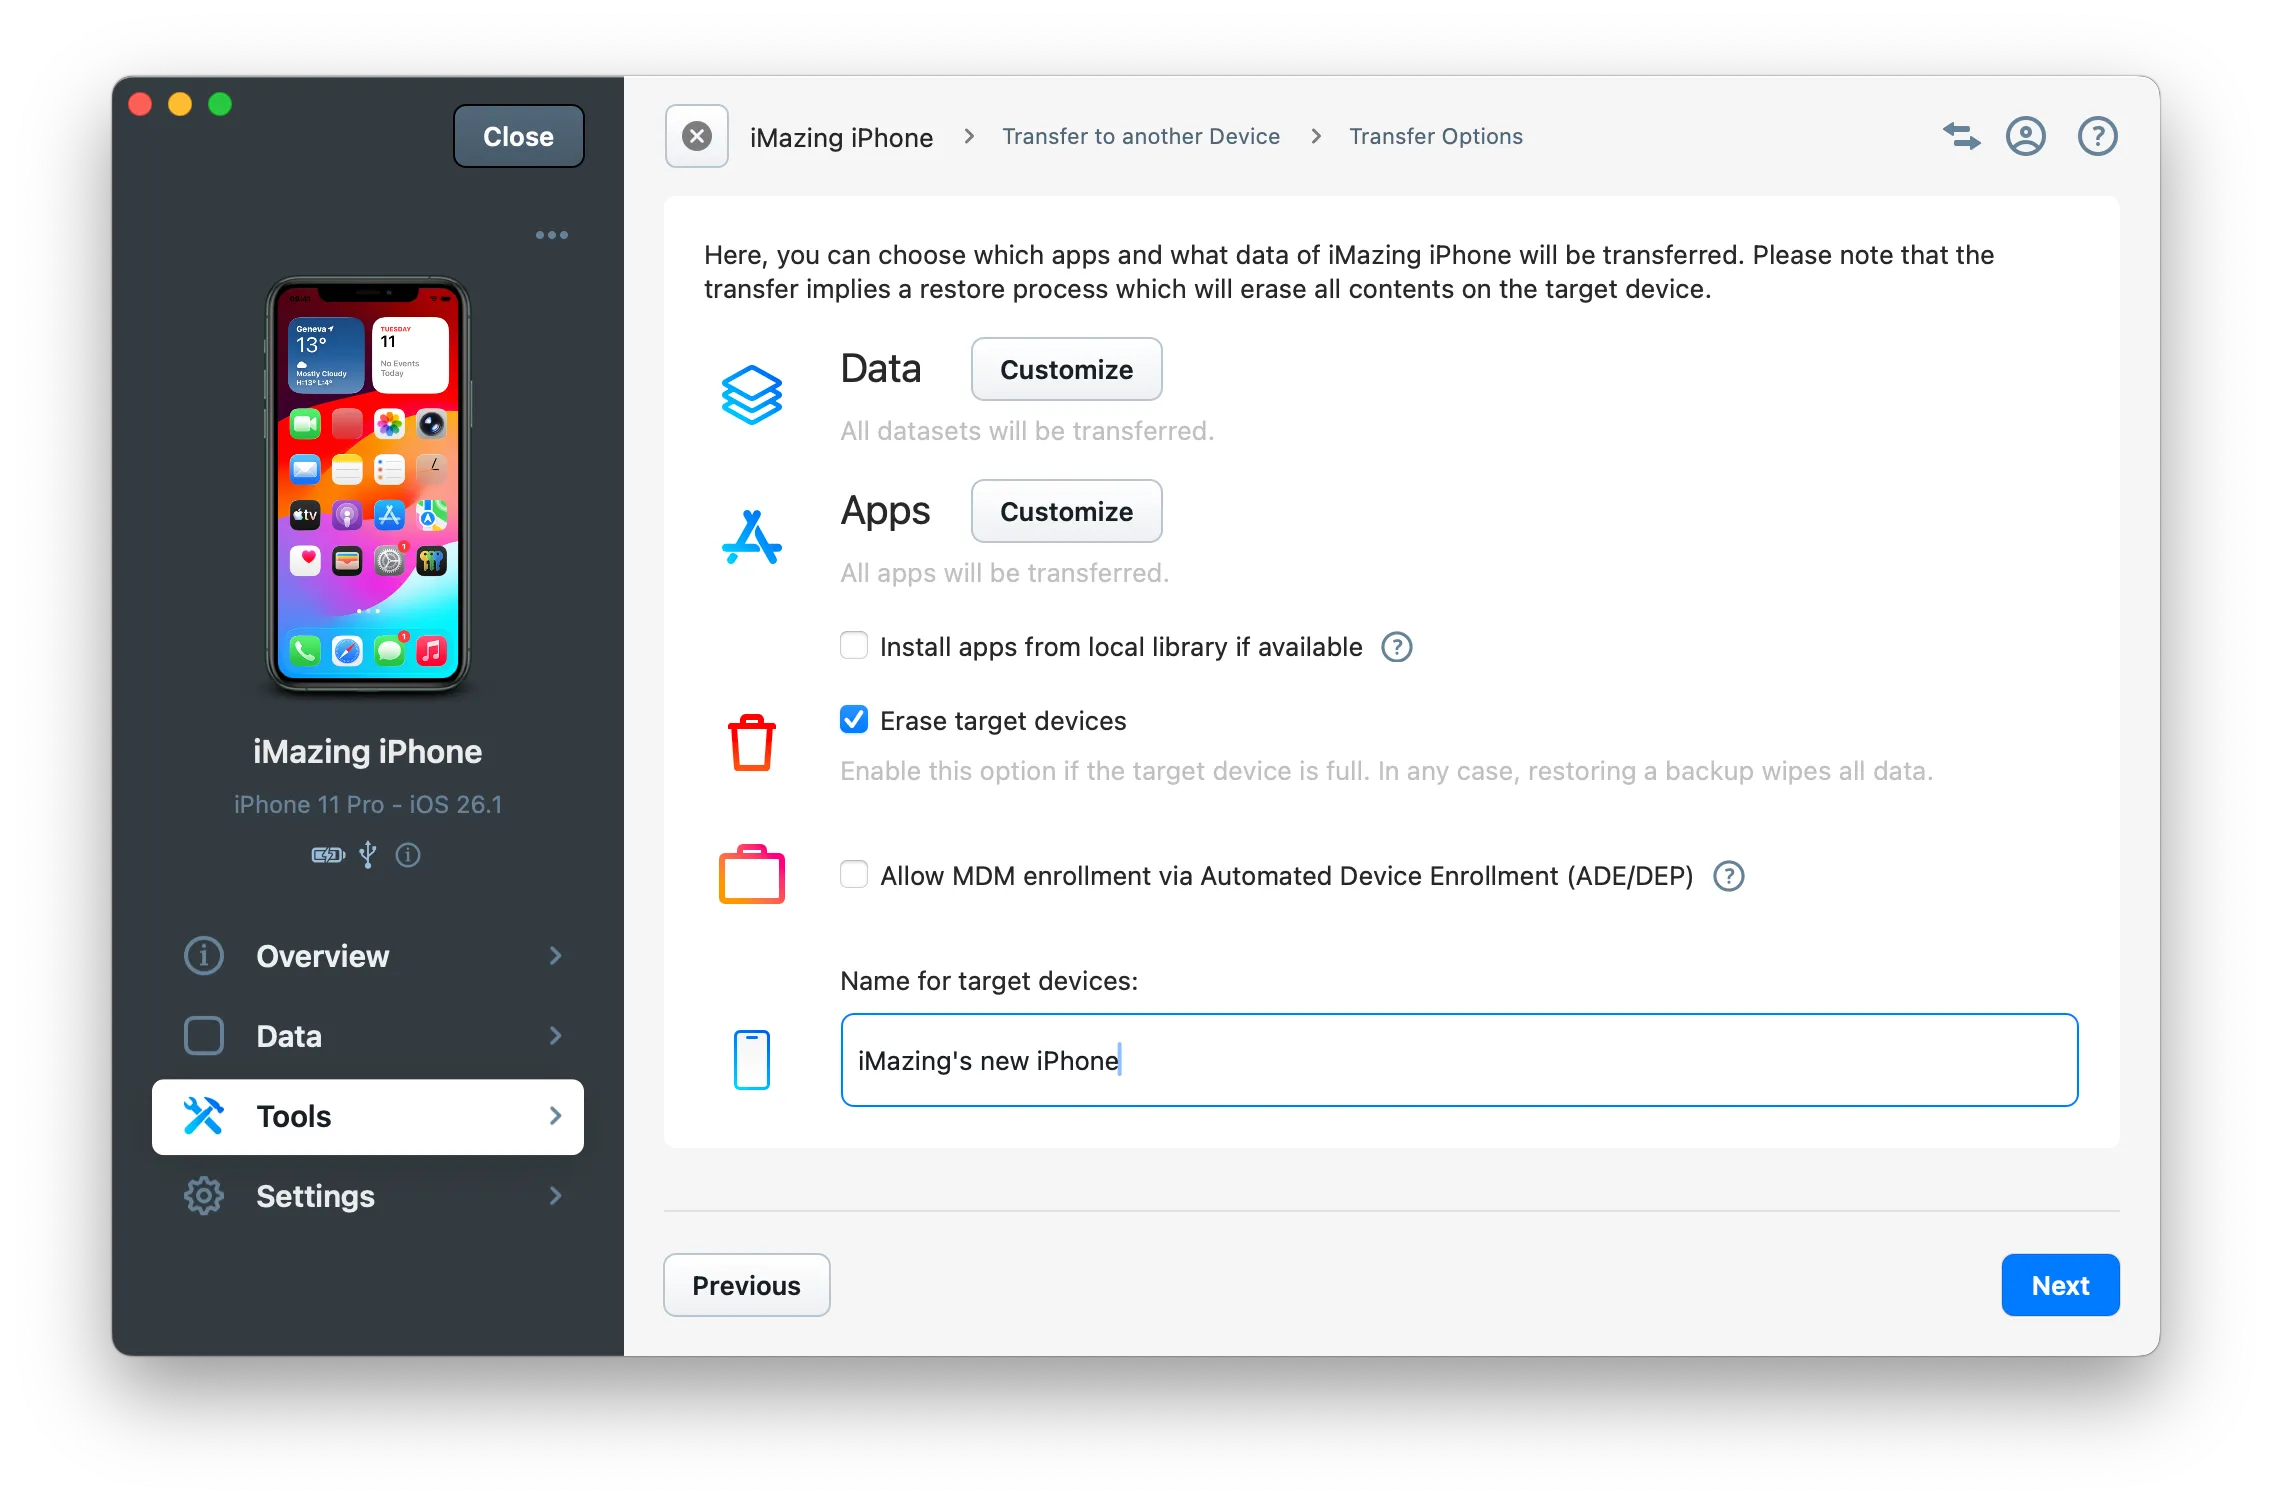
However, you can choose to modify these settings to adjust them to your needs.
Customize what data to transfer
- Select what datasets you want to transfer.
- Use the Select All checkbox to select or deselect all datasets.
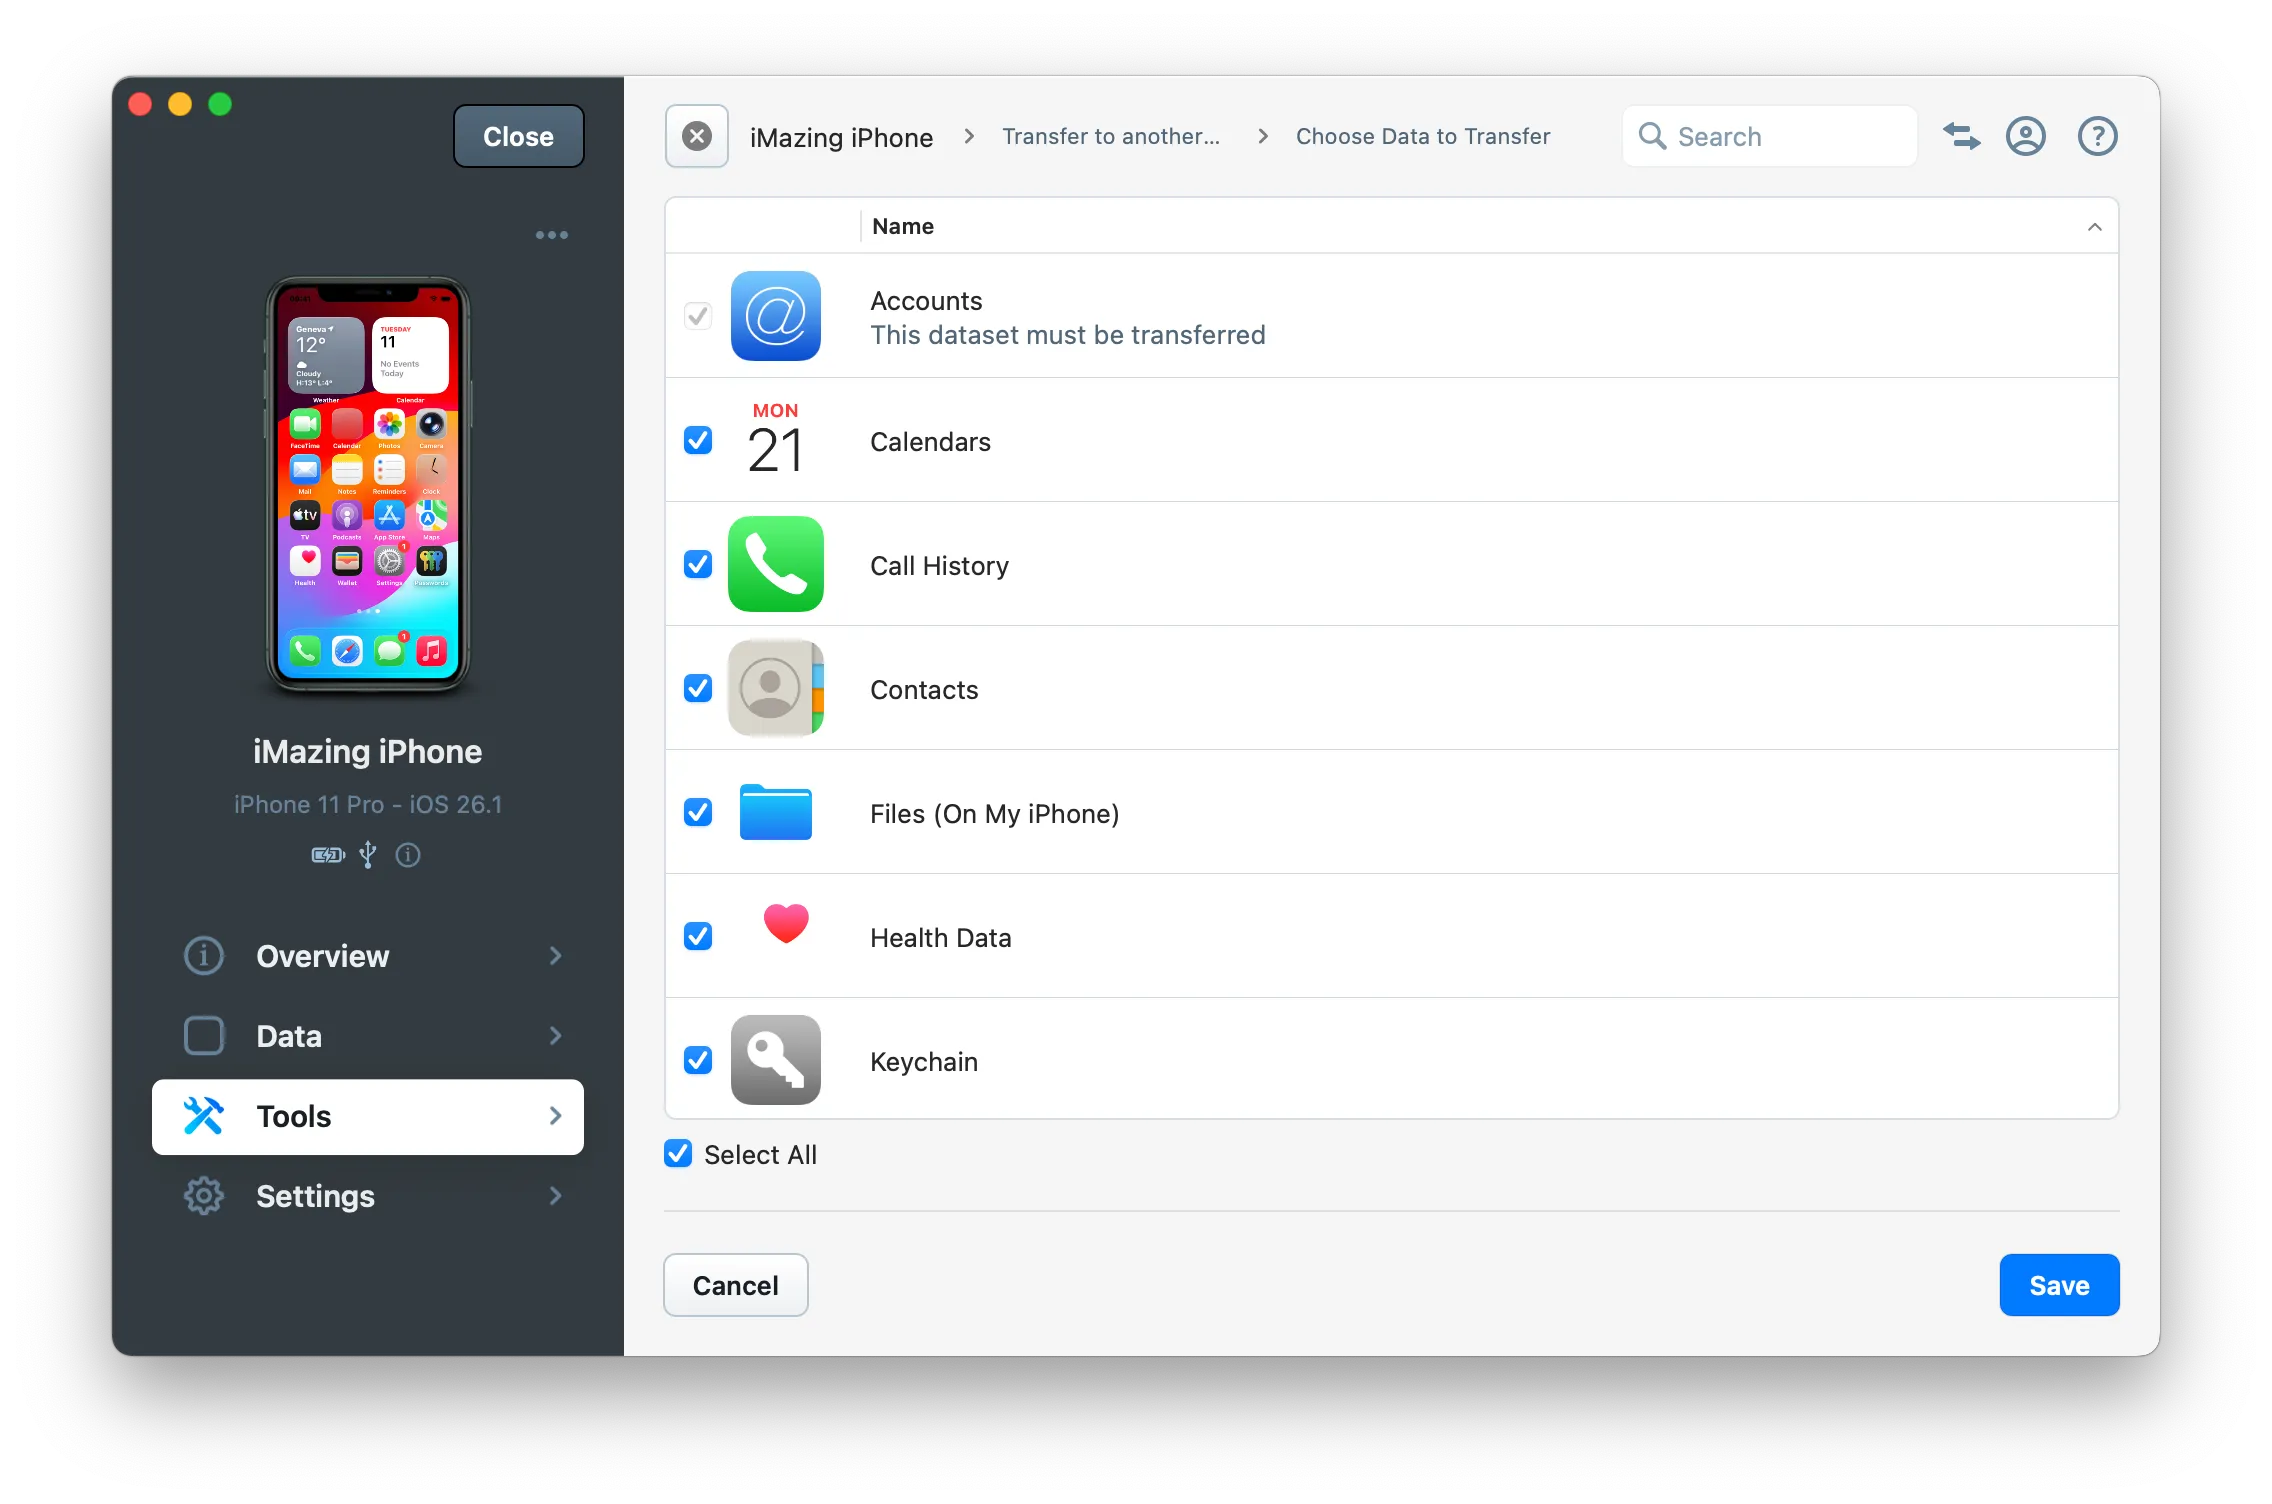
Note: The following data must be transferred
- Accounts: all email, contacts, calendars and other cloud accounts configured on your device.
- Other Data and Preferences: include all settings, system files, etc., so basically all the data not related to a particular dataset.
Customize which apps to transfer
- Choose what apps you want to transfer.
- Use the Select All checkbox to select or deselect all apps.
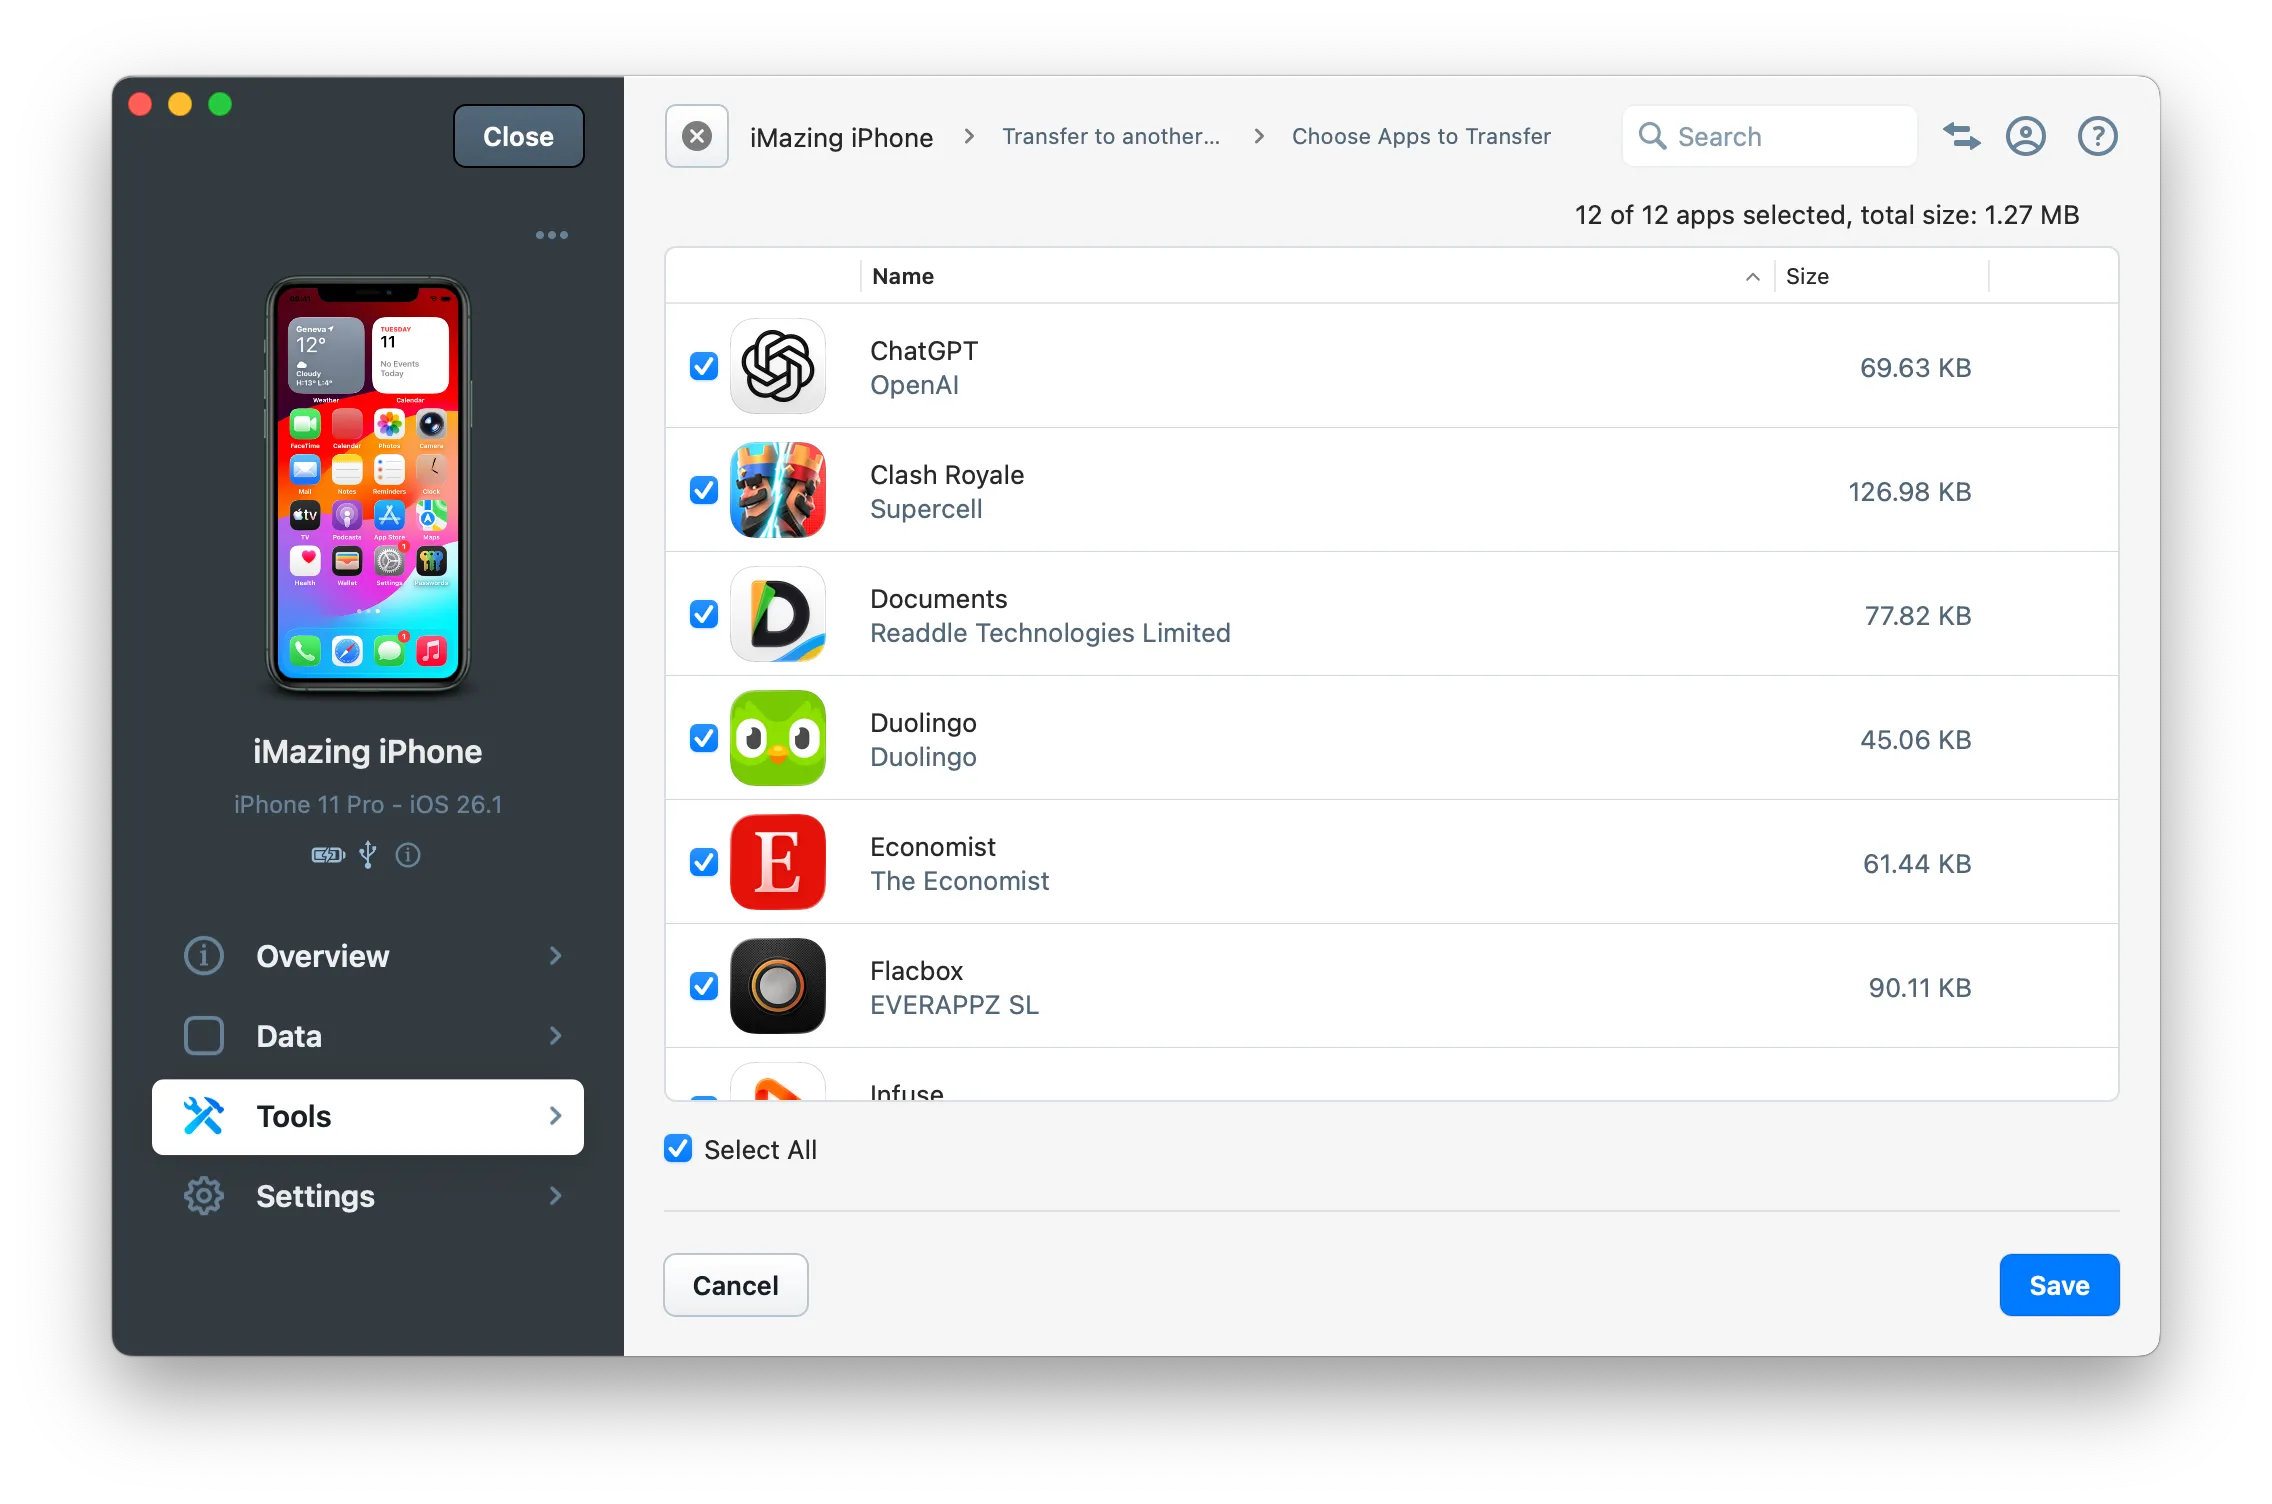
Tip: If you have downloaded some apps with iMazing, you can install them from your app library when transferring data. This ensures apps are ready immediately after the transfer, instead of waiting for iOS to download them again, which can take a long time. Read more in our guide on downloading apps before transferring data.
Other options
- Choose to erase the target device before transferring data to it.
- Choose the name of the target device after the transfer.
Tip: If you are transferring your device to another device that already has data on it, we recommend checking the Erase target devices option. Note that all data on the target device will be removed during the transfer process regardless of whether you select this option. However, enabling this option ensures the backup can be restored even if there isn't enough free space on the target device.
Click Next when you are satisfied with your transfer options, and follow the wizard until the operation starts:
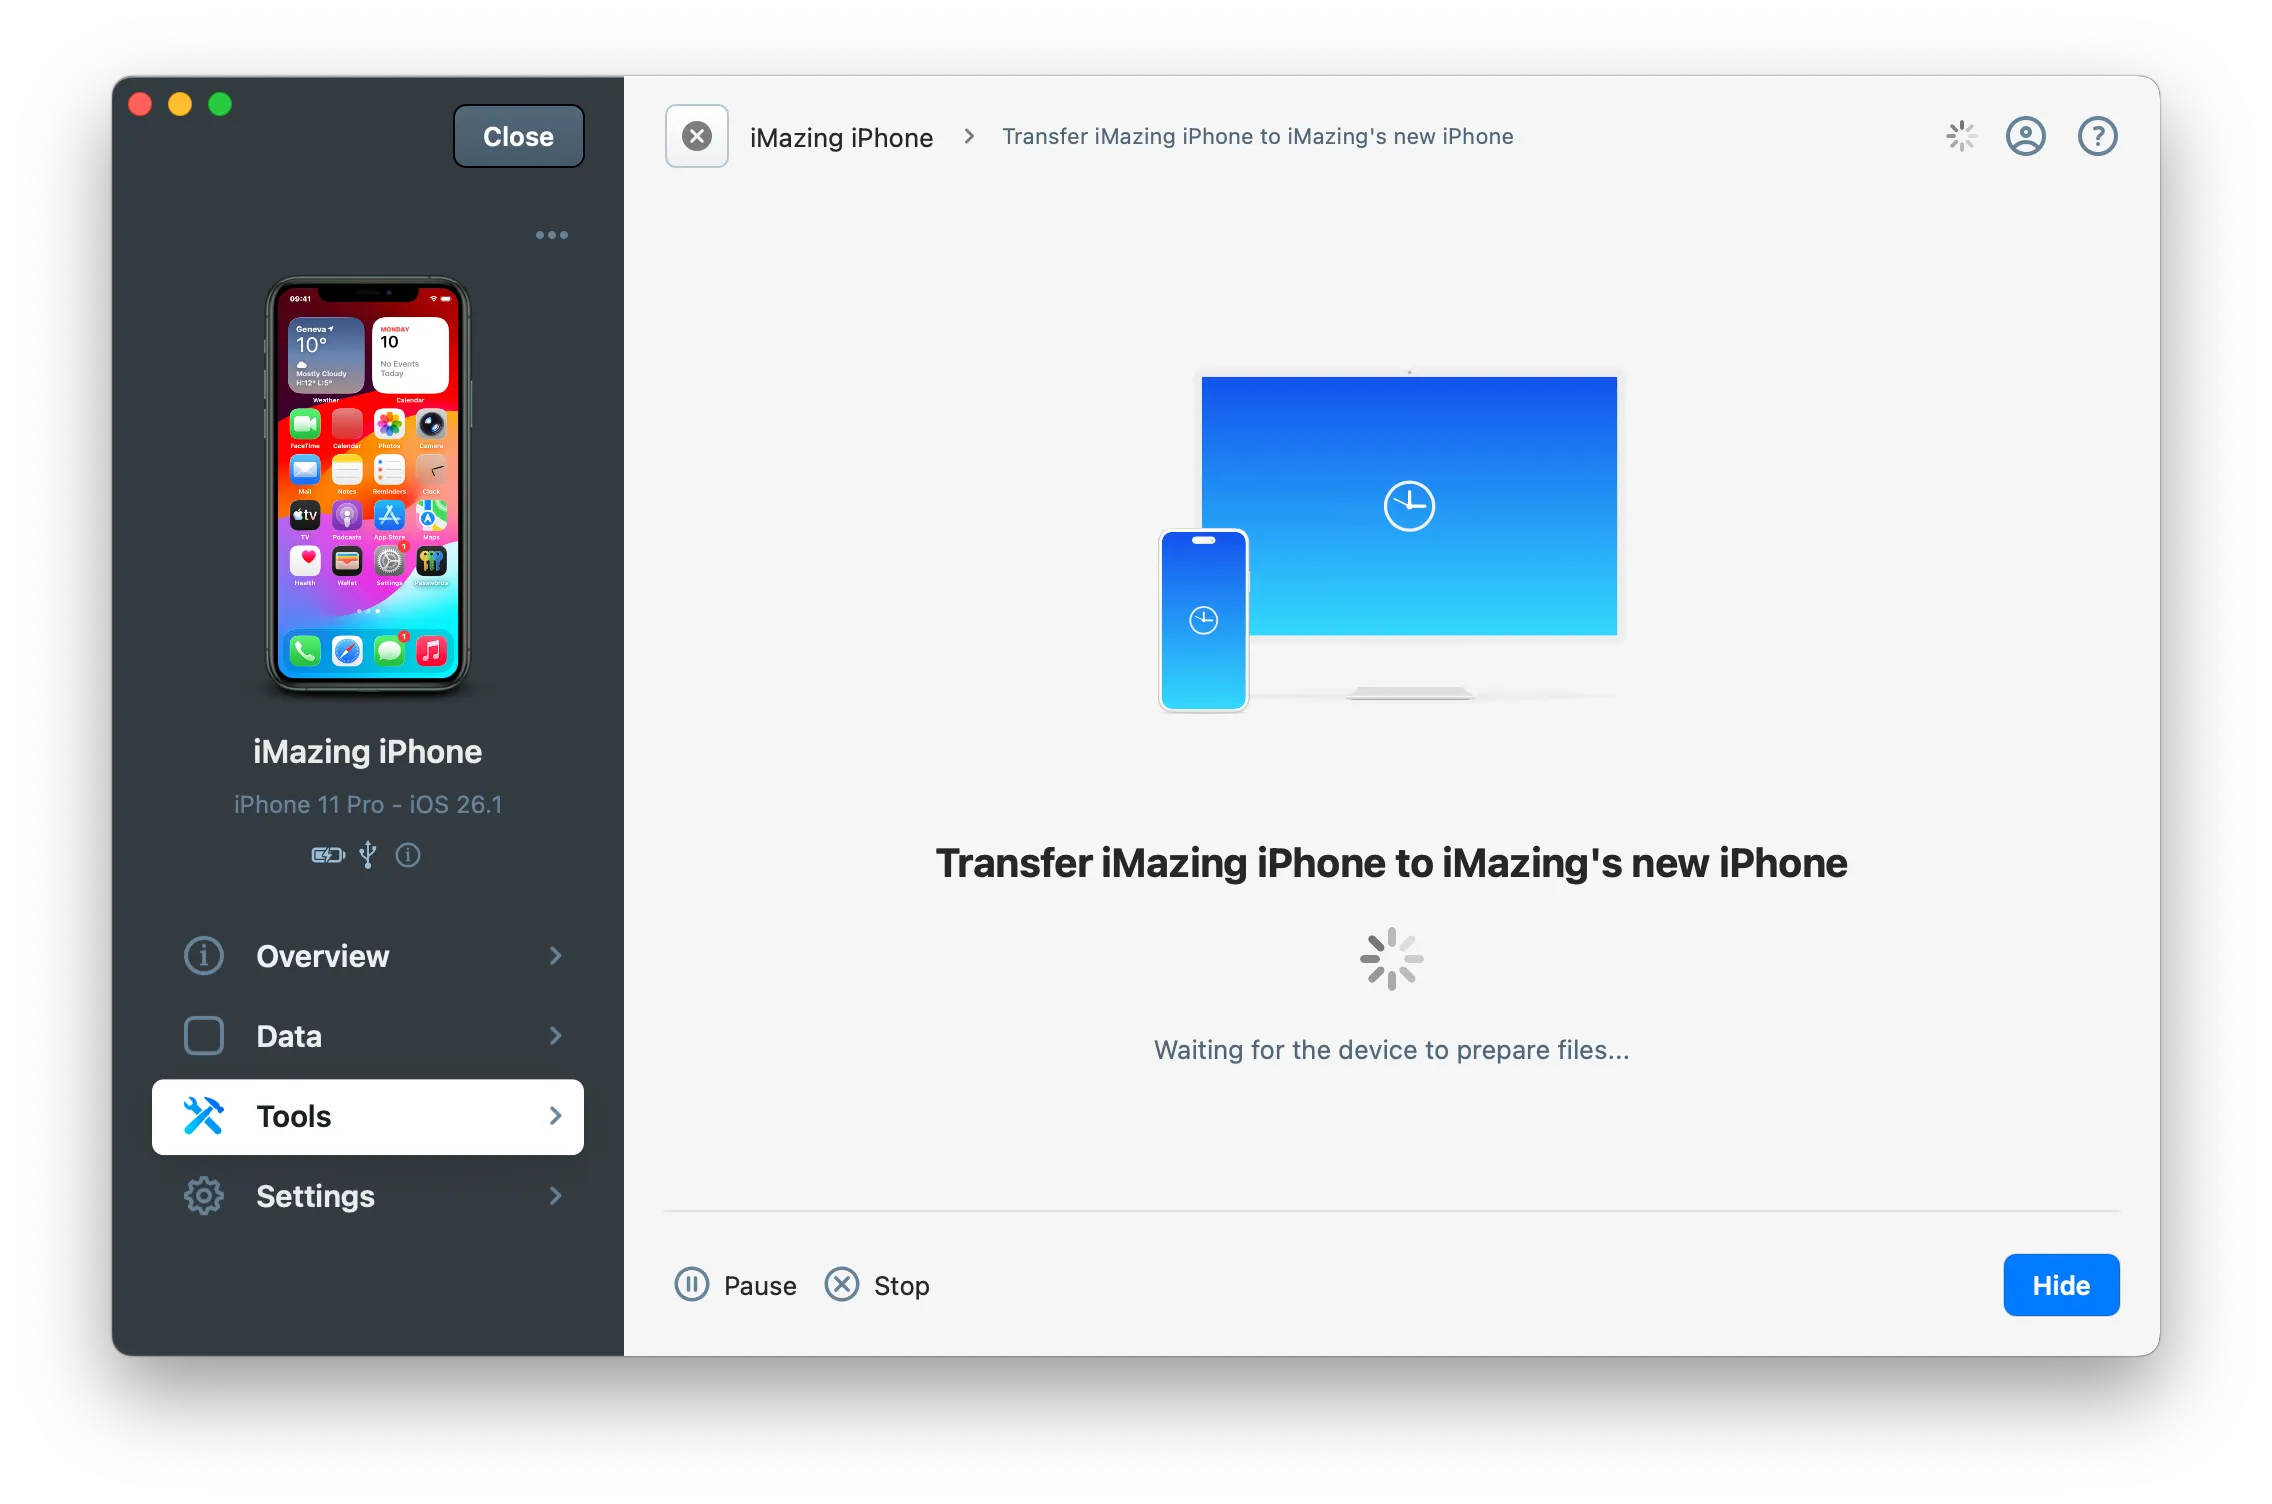
iMazing will start the transfer process, first backing up the source device, then restoring that backup to the target. The target device will then restart.
Start the transfer
Once you start the transfer, you may have a few more steps to complete before the process begins:
Disable Find My
When Find My is turned on, Activation Lock prevents iMazing from restoring a backup to the target device. You will have to turn off Find My before proceeding.Since iOS 17.3 Apple add an extra security layer called Stolen device protection. If it's activated on the device, you will need to disable this at first before being able to turn off Find My.
Note: You won't see this step if it's a new device or if Find My is already disabled on the target device.
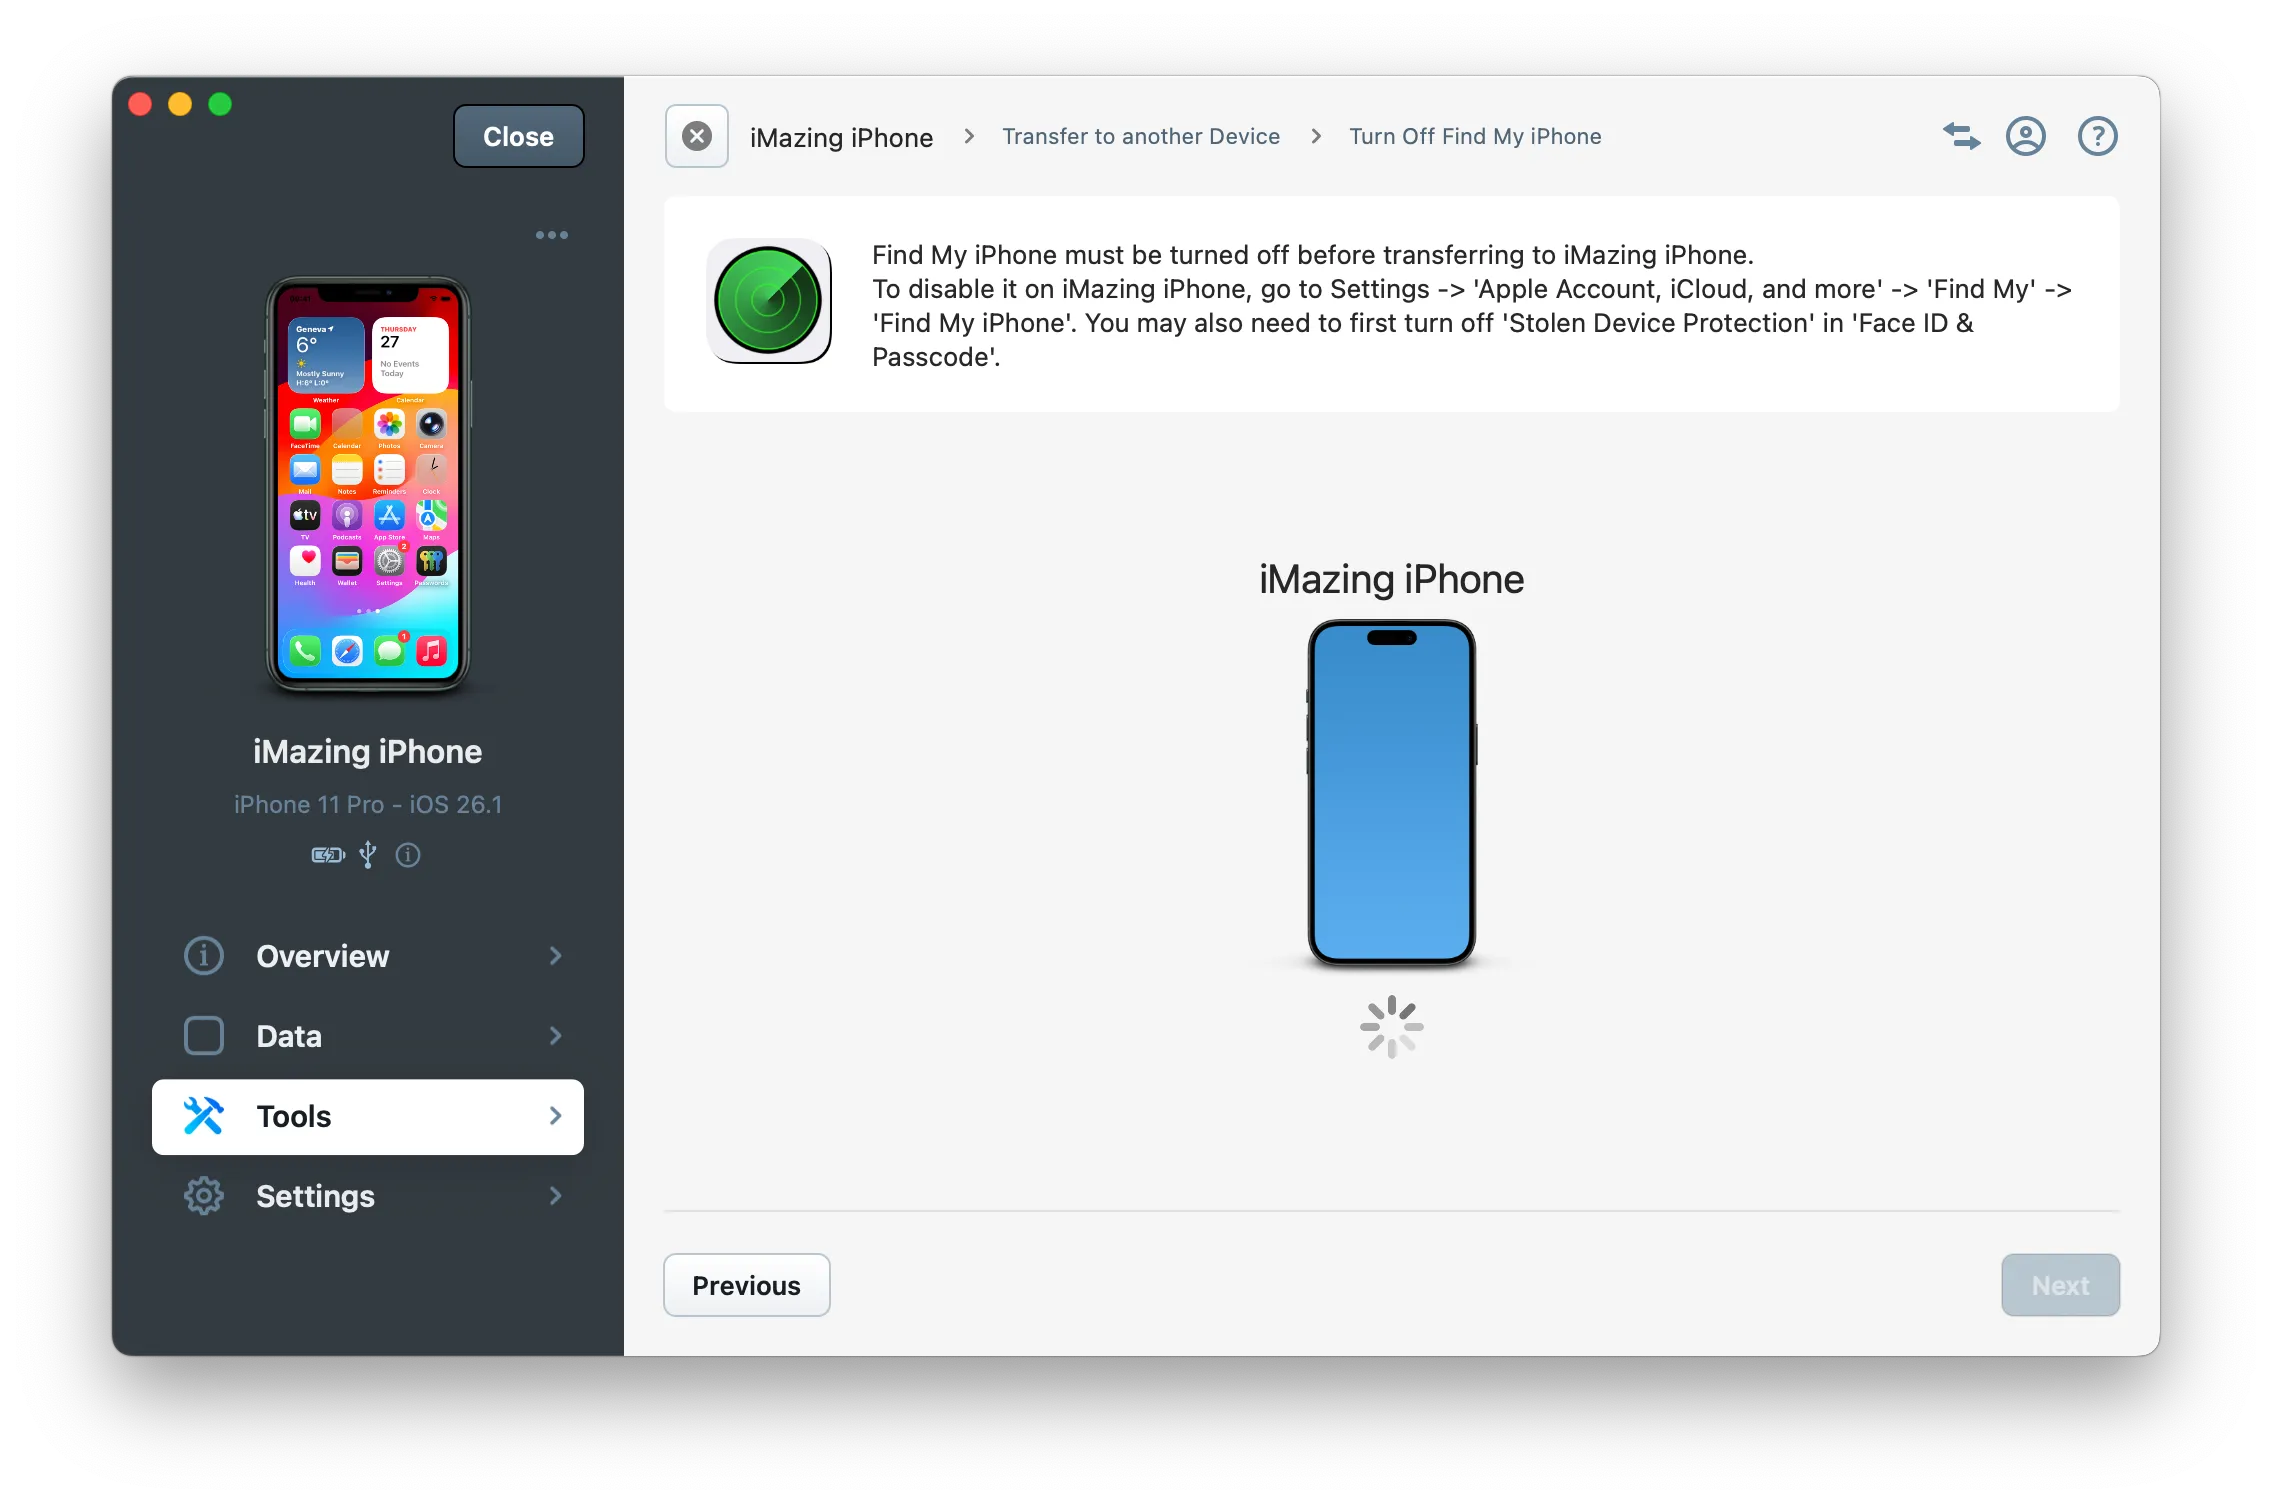
To learn how to disable Stolen Device Protection and Activation Lock, see How to turn off "Find My" on your iPhone, iPad, or Mac.
Enable backup encryption
Backup encryption is highly recommended for better data security. Without encryption, Health data and passwords are not included in backups or transfers.If your source device's backup is not encrypted, iMazing will prompt you to set a backup password before proceeding. Also click the "Remember Password" password checkbox so that the backup password remains securely stored in your macOS Keychain or Windows Credentials.
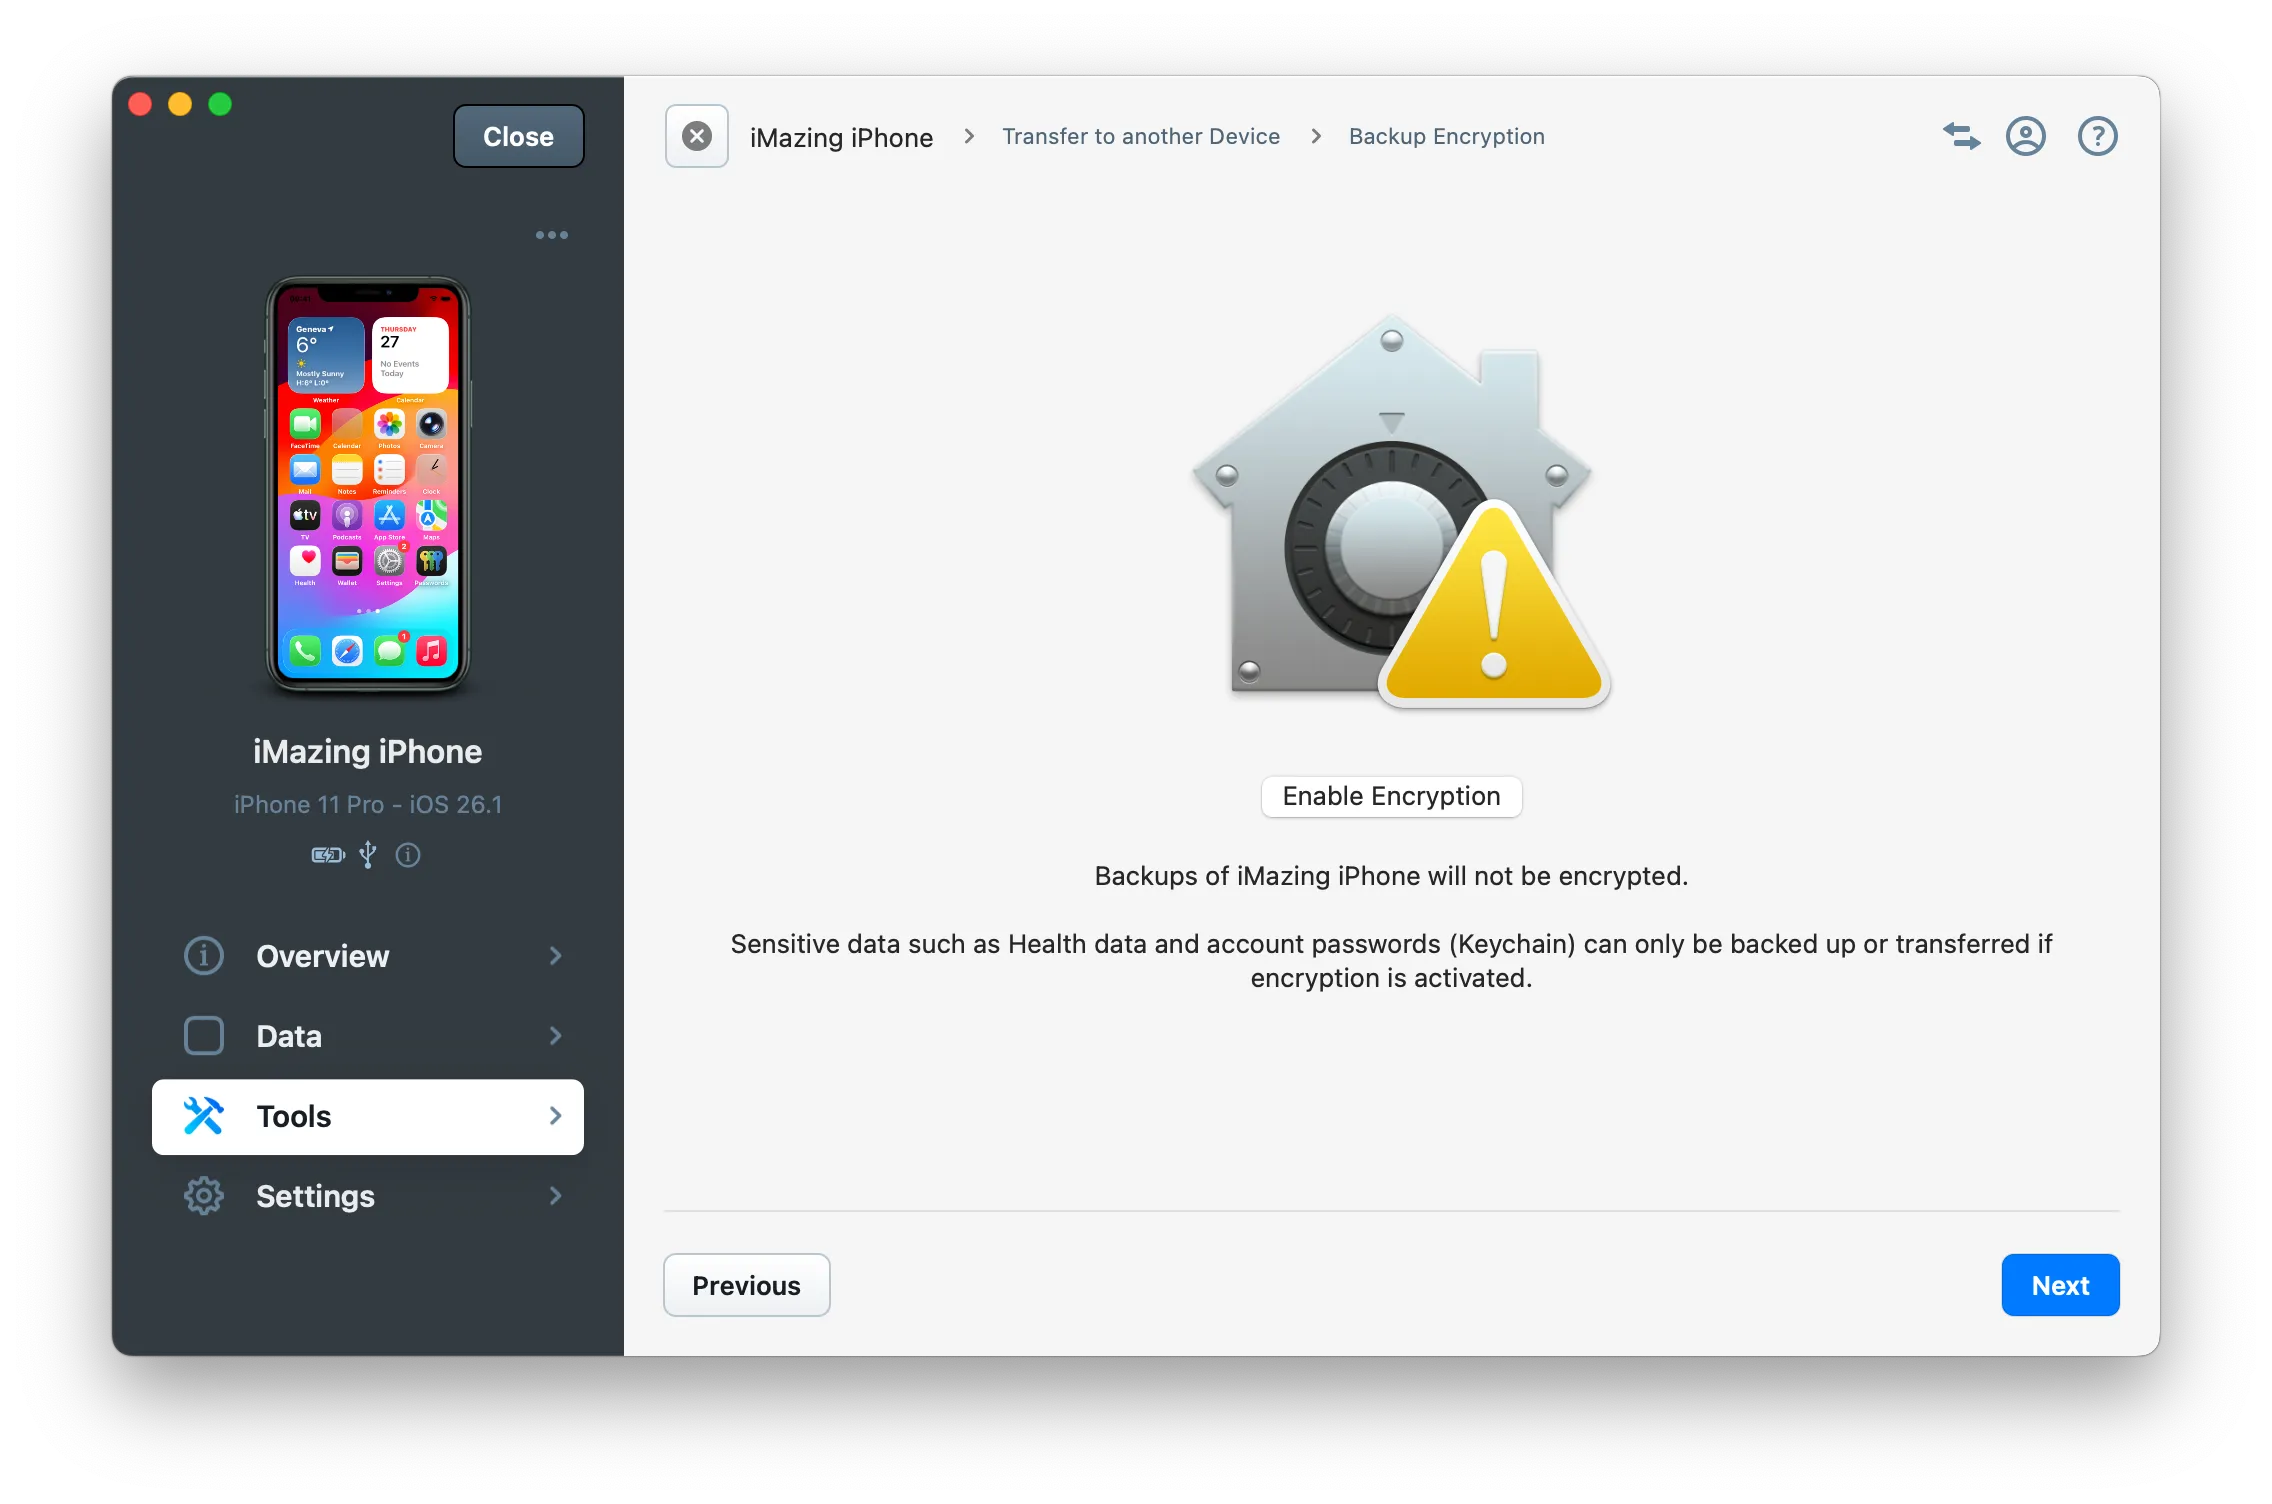
Note: When the backup encryption option was already enabled on the source device, you will be prompted to enter the backup encryption password to proceed with the transfer, if the password wasn't previously saved in the macOS Keychain or Windows Credentials.
Confirm erasing the target device
Final step before starting the transfer is to confirm that the target device will be erased.
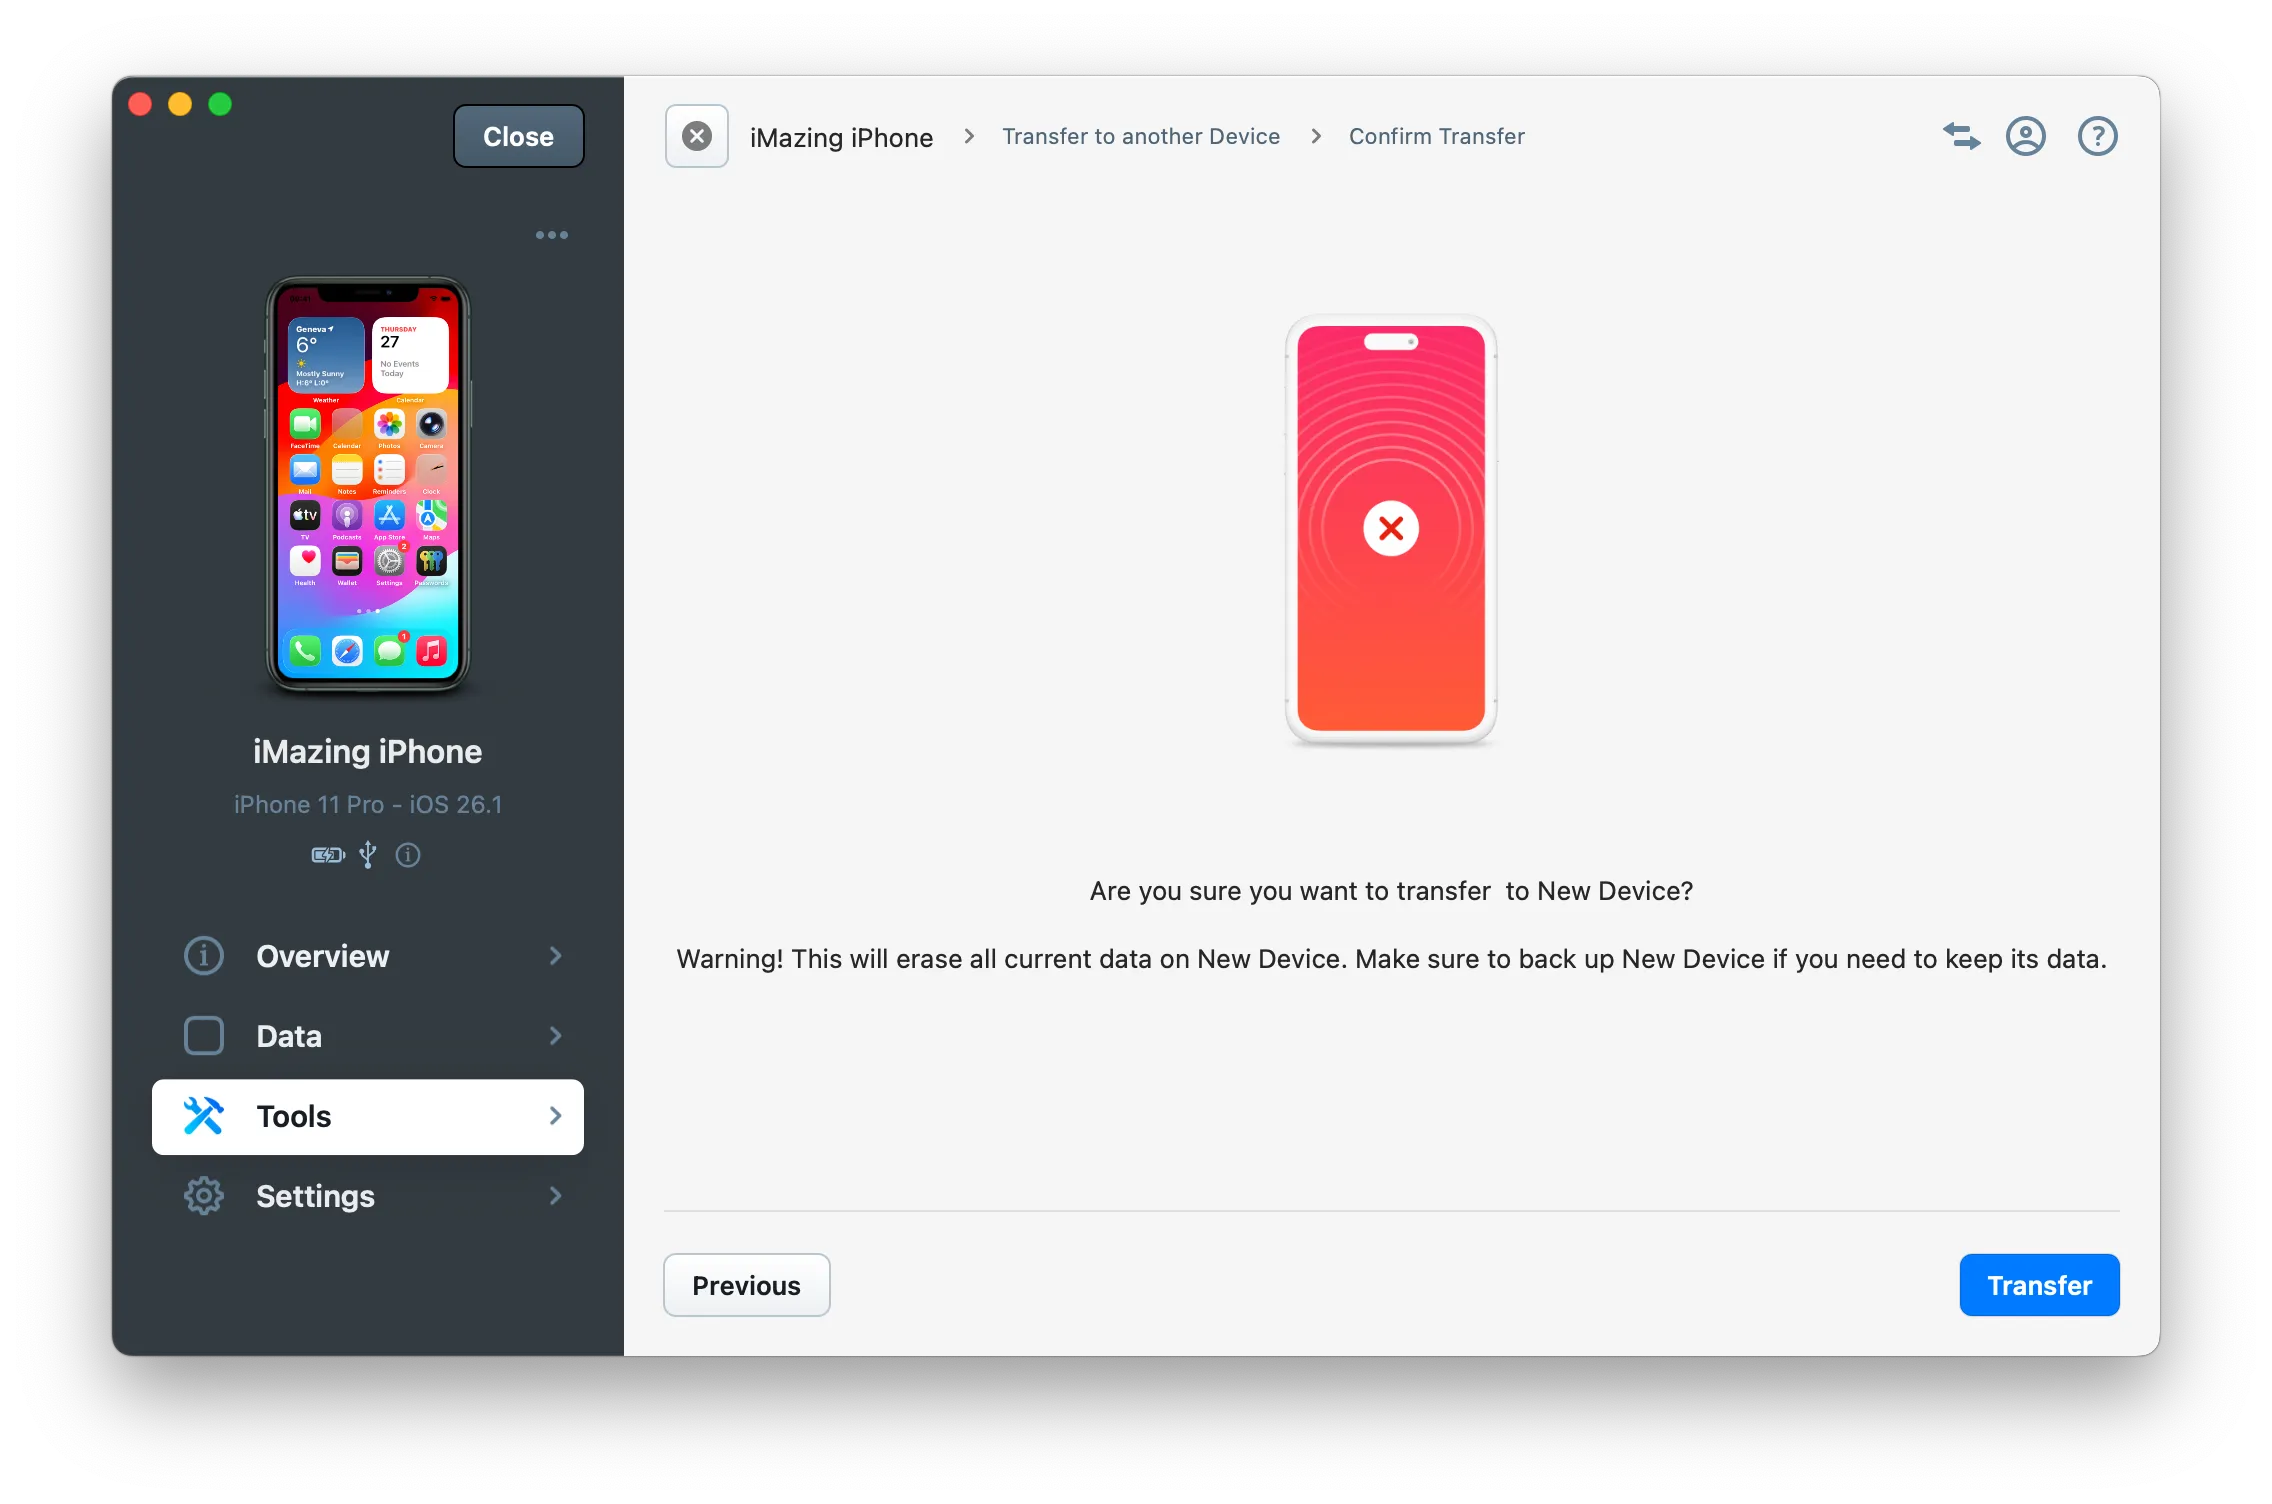
Important: Regardless of if you have selected the option "Erase target devices", all data will be erased on your target device. The iOS backup restore process doesn't allow merging data between two devices, and restoring a backup always erases all data on the target device.
Tip: Once the transfer has started, you can safely click Hide to minimize the wizard and return to iMazing's interface.
What to keep in mind
- Transfer to another Device requires both devices to be connected to your computer.
- If you want health data and your passwords to be copied across, make sure that your current backup is encrypted. Learn more about backup encryption.
- Transferring data from one device to another may take a while. To check the operation's status, click on the Operations button in the upper toolbar. Learn more about fixing slow backups.
- Transferring data to another device will not change the target device's passcode, but will copy over the backup password if backup encryption is enabled on the source device.
- Backups do not include your iTunes Media Library (music, books, iTunes U, podcasts, ringtones, and movies synced or purchased via iTunes). iMazing can manage these categories separately; refer to the relevant dataset guides, such as Transfer music from one device to another.
- For more details on backup contents, see our guide on what is included in an iOS backup.