iMazing Manual
iMazing Configurator: Operation Dispatcher View

💡iMazing 3
This guide is for the legacy iMazing version 2. For information on version 3, please visit this page.
1. General Information
The Operation Dispatcher View is where you'll launch and monitor configuration operations. This view is displayed in the following cases:
- When applying a blueprint, from iMazing Configurator's library or with the Apply Blueprint action of iMazing
- When installing profiles or apps via iMazing Configurator's library
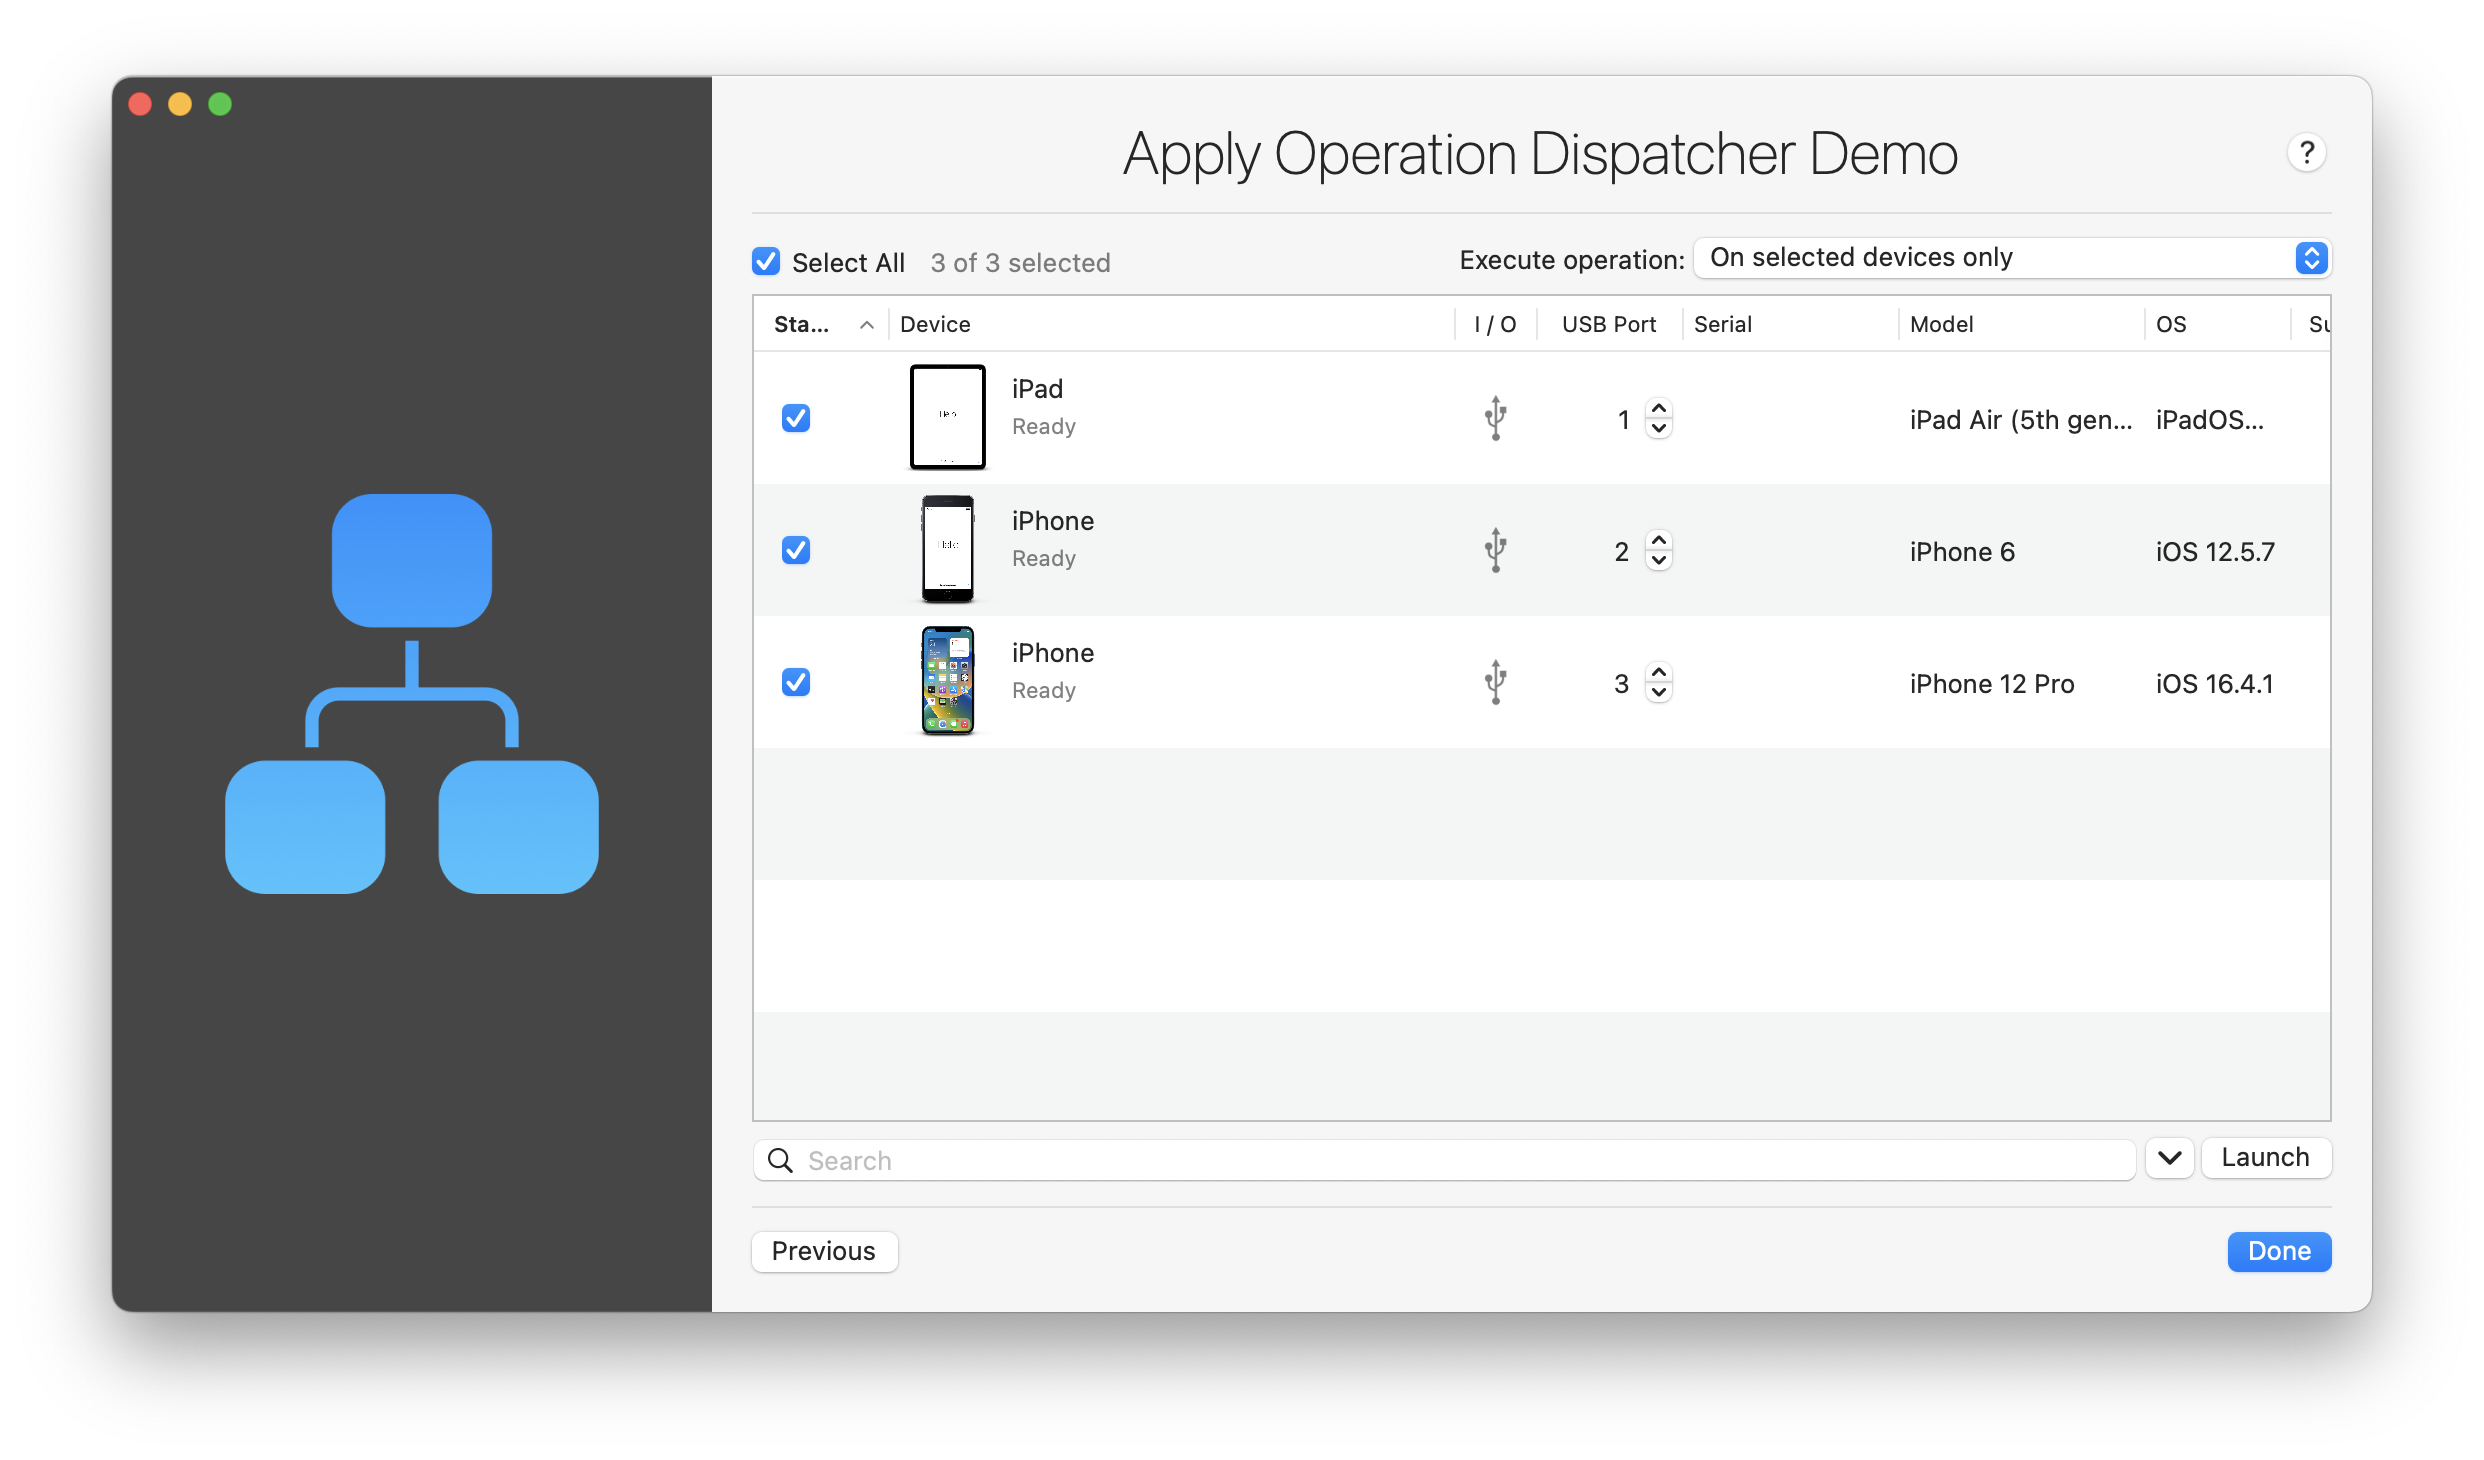
This view is very similar to the library's Devices view, with a few key differences:
- The operation to execute is already known, and reflected in the title.
- Only connected devices are listed, with Wi-Fi connected devices only listed if the current operation can be executed via Wi-Fi.
- An interactive mode is available if you wish to keep executing the same operation on any newly connected devices or to reapply a configuration on a previously deployed device on the fly.
- The port number mapping allows IT pros to better identify on which port devices are connected to, for a specific USB hub.
Let's take a look:

Here, we're about to apply a blueprint named Operation Dispatcher Demo to 3 USB connected devices.
💡 Note that most devices are erased, but not all of them – iMazing will intelligently tailor the actions needed to successfully apply the blueprint according to the state of the target devices. If the device is for instance already empty after an erase, iMazing Configurator won't erase it again while applying the blueprint.
2. Options Menu
Before launching the operation, let's take a look at the options menu. Click the '⌄' button to reveal the menu:

2.1 Show Dialogs
By default, this option is false to minimize as much as possible user interactions. Ignored dialogs are mainly file overwrite warnings, which will default to overwrite if Show Dialogs is false. Note that obligatory user interaction messages such as 'Unlock Device' or 'Trust' are displayed inline for each device in any case.
2.2 Automatically Re-Execute Successful Operation on Reconnect
It may sometimes happen that a device needs to have its configuration applied multiple times during your deployment. This function, when used with 'Execute Operation': Automatically on all devices connected via USB, recognizes the device and automatically reapplies the same configuration when reconnecting it via USB. This setting facilitates automating provisioning in cases where the same device may need to be automatically provisioned multiple times, if for instance an error occurs while applying the blueprint.
2.3 Max Simultaneous Operations
Here you can configure how many devices will be simultaneously processed by iMazing Configurator. The default is 10, which we've extensively tested on a mid-range powered USB hub. When that limit is exceeded, iMazing will simply queue devices and automatically launch operations as other devices finish processing.
2.4 Log Path
By default, a single log file is written for every bulk configuration operation you launch. This file summarizes success and failure of operations on all devices concerned. It can be found here:
/Users/{username}/Library/Caches/iMazing/Logs/Devices_Operation_{date}
For more detailed, per device logs, you must set a log path in the options menu. Once you have set a log path, iMazing will output the summary log like before, and one log file per processed device.
💡 Tip: once a device has finished processing, you can click on the magnifier icon to reveal its log file in the Finder.
3. Launching and Monitoring Operations
3.1 Manual Launch
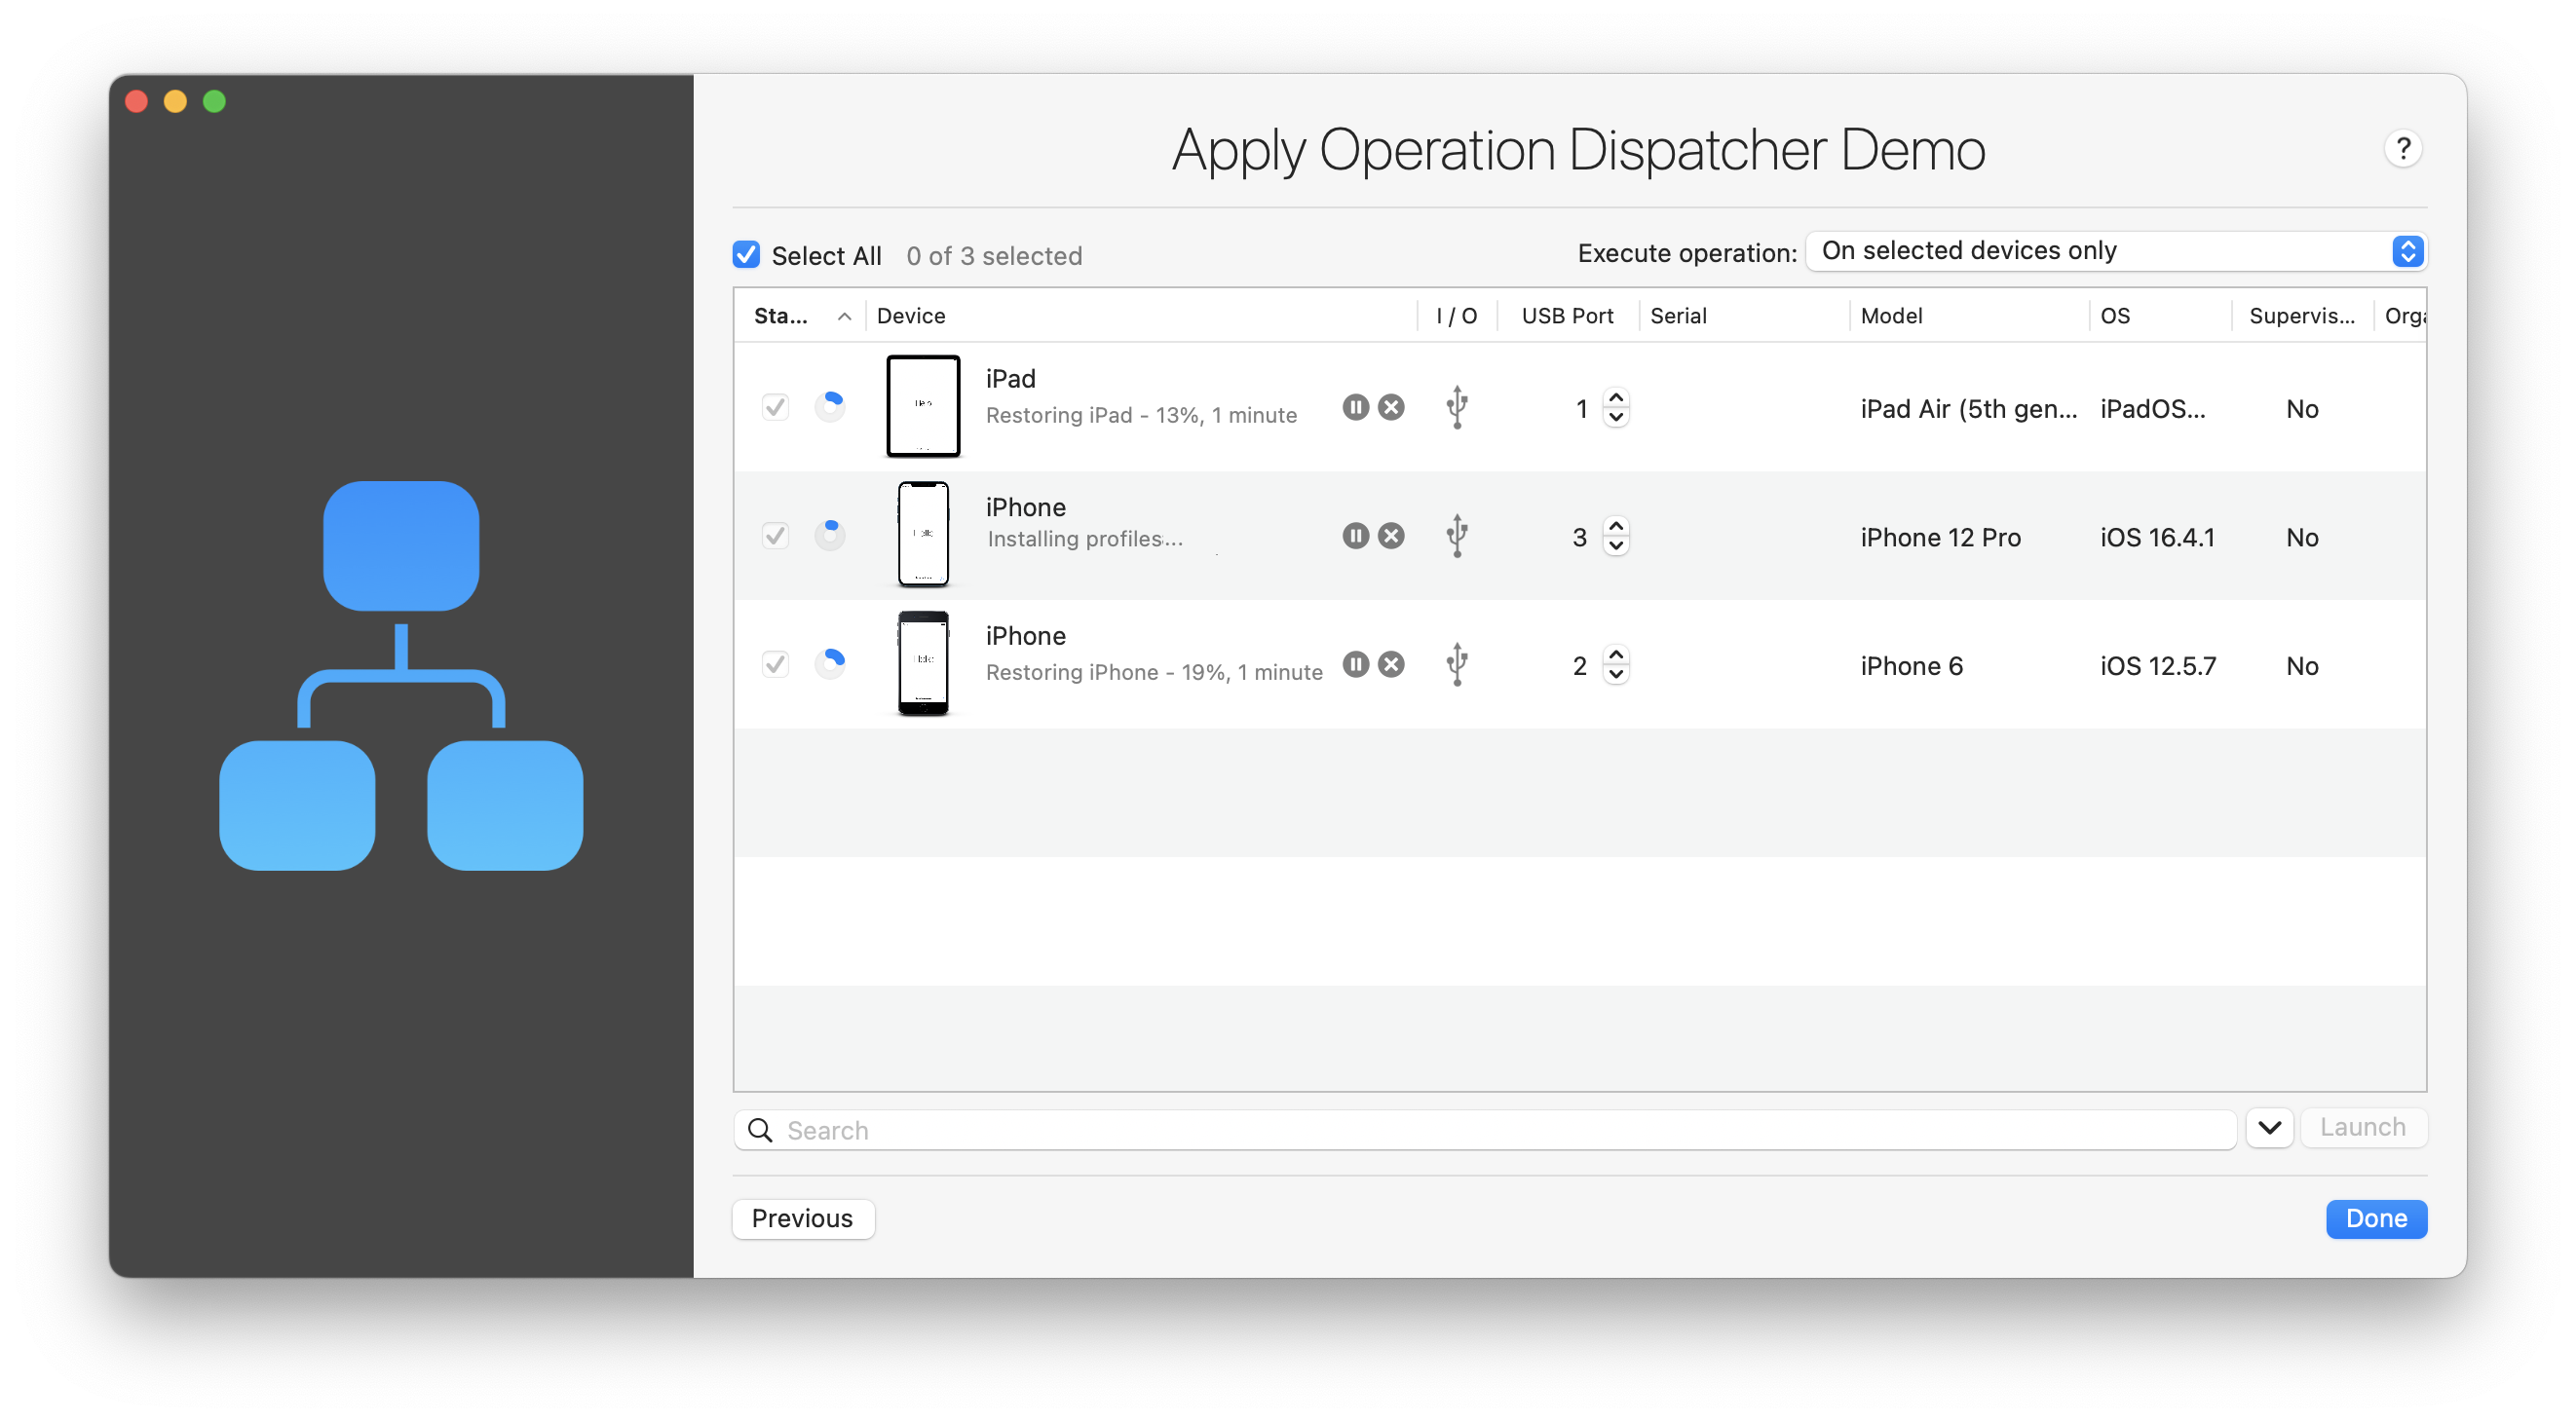
Check the selection checkbox for all devices you wish to process, and click launch to confirm. iMazing will begin simultaneously processing as many devices as specified by the Max simultaneous operations setting in the options menu, and will put the others in a queue. You may also find useful to tick the Select All checkbox above the devices list to apply your blueprint to all connected devices.

3.2 Automatic Launch
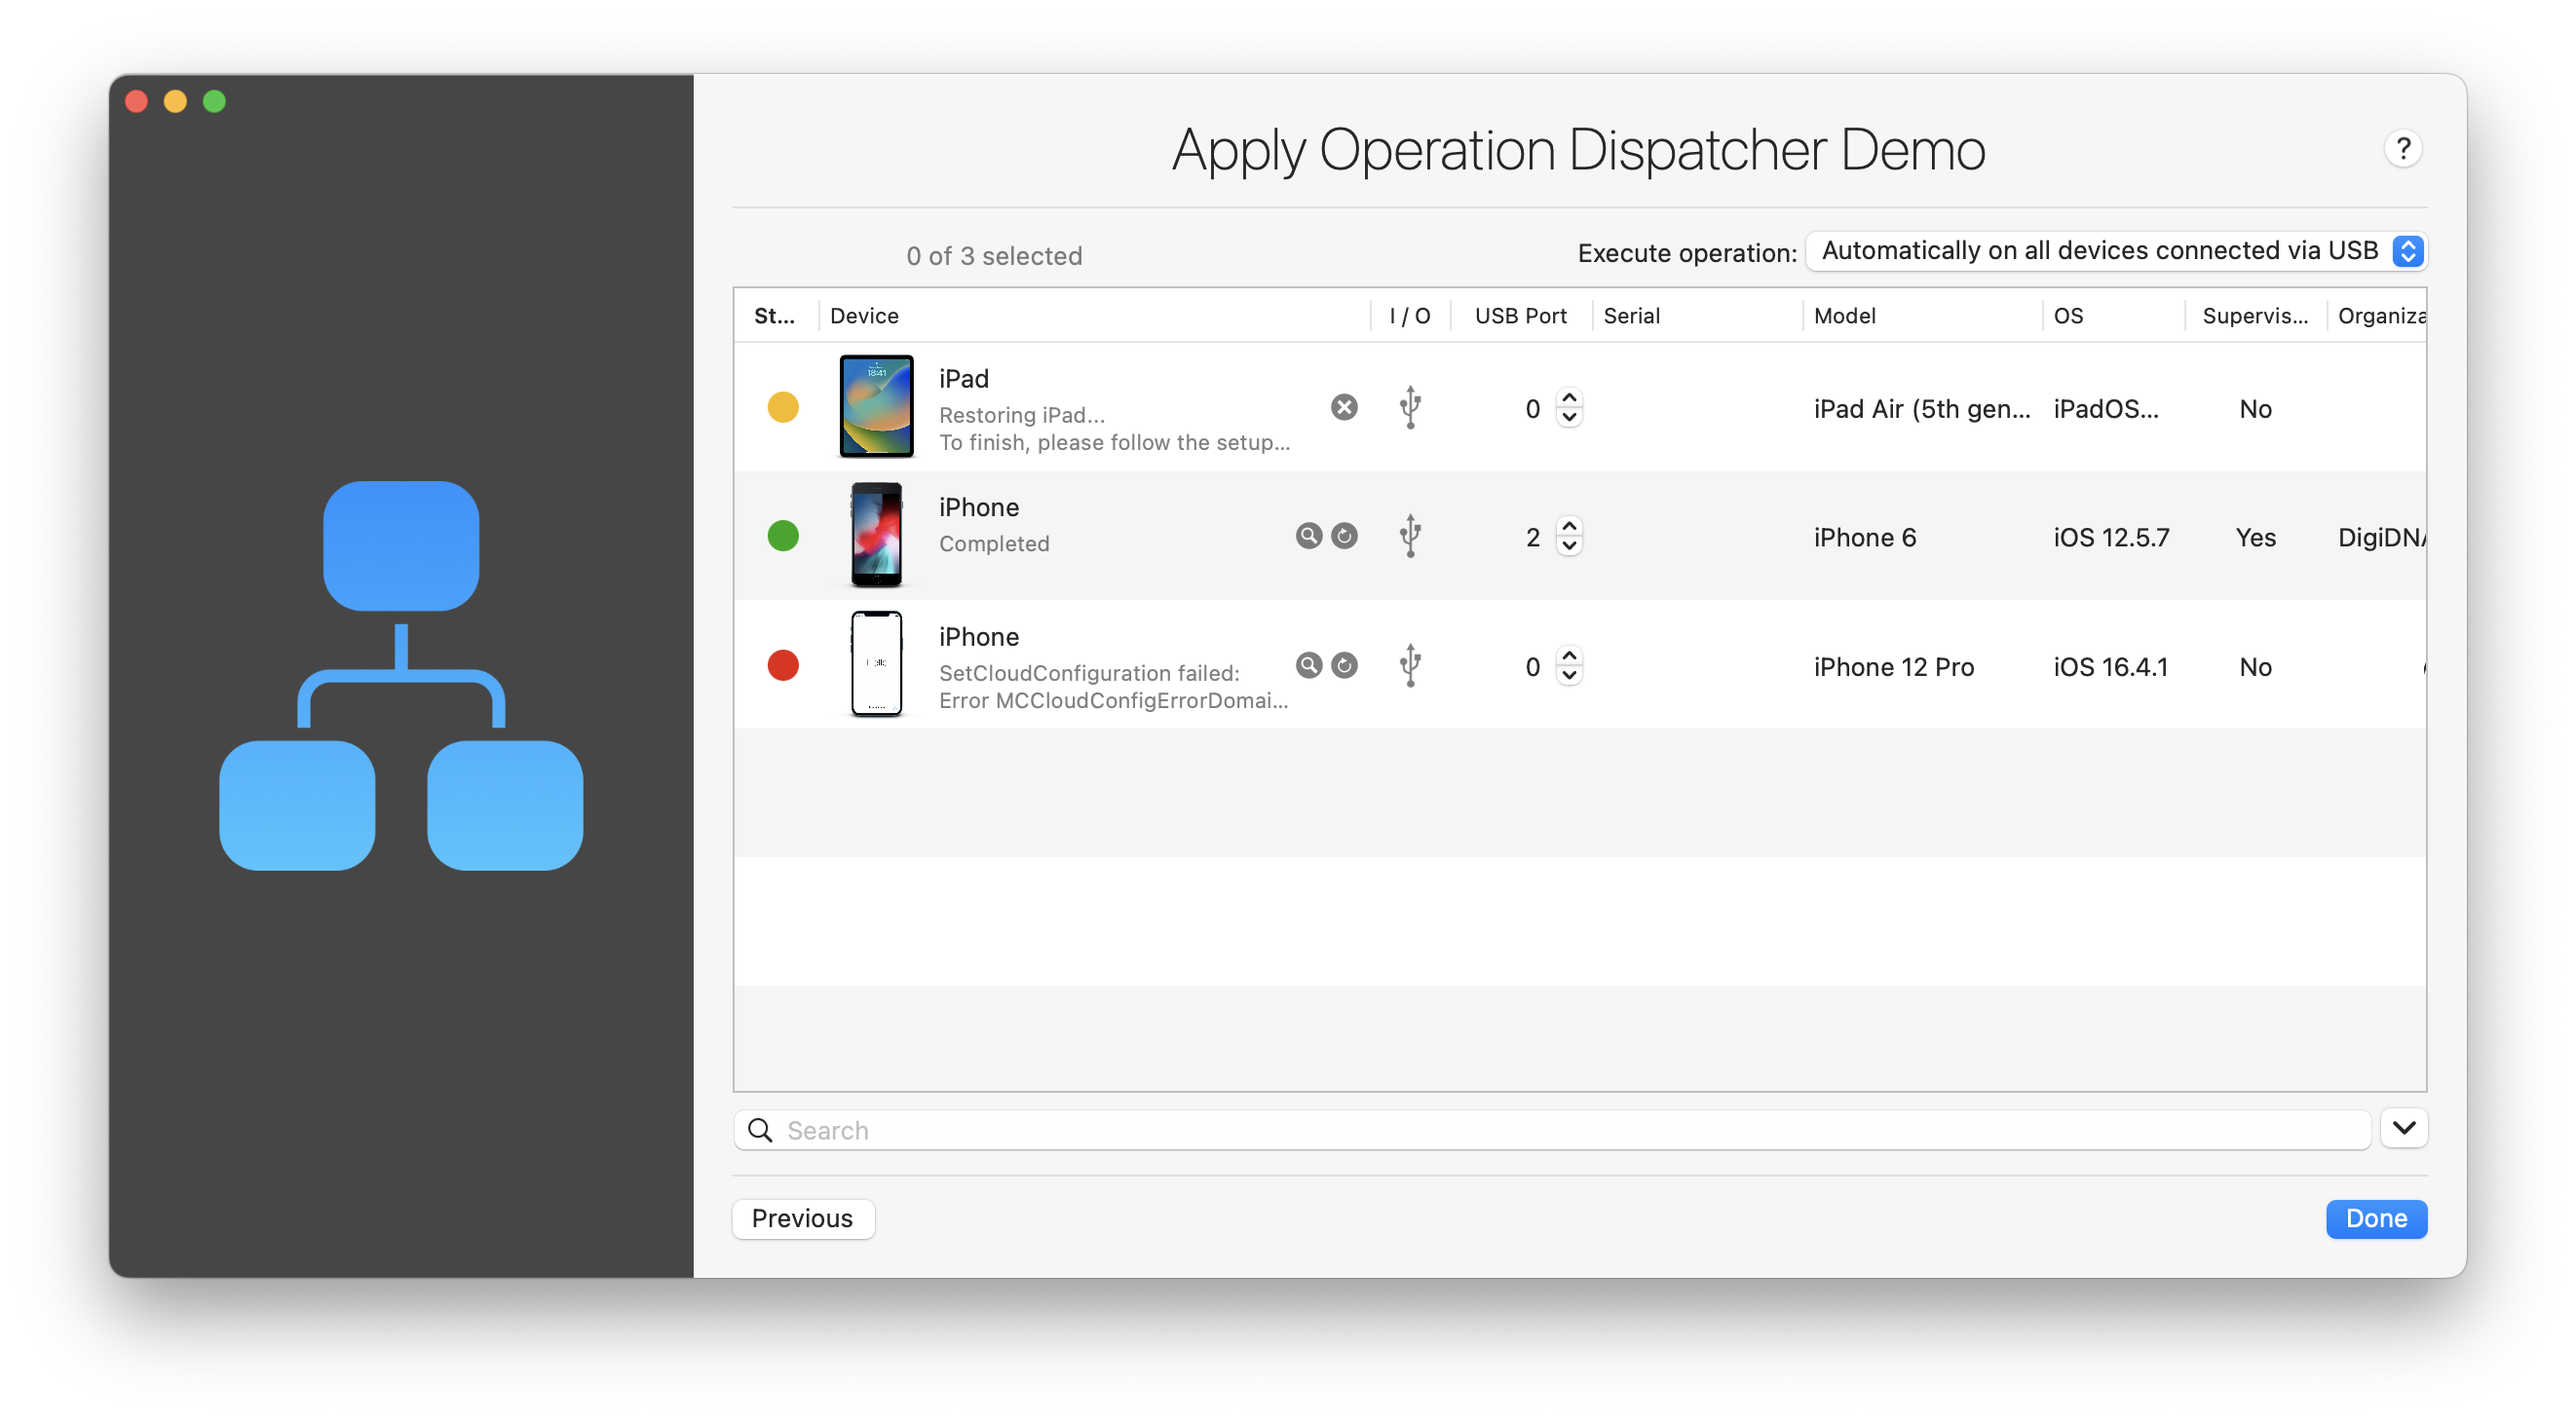
To enter interactive mode, select 'Execute Operation': Automatically on all devices connected via USB in the drop down menu at the top right of the view. iMazing will prompt you for confirmation, and begin to launch the current operation on all currently connected devices and automatically on all devices you connect after this point.
This mode is very powerful and enables processing of large batches of devices one after the other, but it may also result in devices being erased in error. For this reason, exiting the Operation Dispatcher View in any way will always disable automatic processing.
3.3 Status & Progress
Once an operation has been launched, you can easily monitor progress for each device by looking at the Status column:
| Icon | Status |
|---|---|
| N/A | Ready. The device can be selected and an operation launched. |
 | Device is queued for processing. |
 | Device is being processed. |
 | Device requires user interaction, see status message. |
 | Device successfully processed. Can disconnect. |
 | Processing of device failed, see status message. |
The Device column features the status message just below the device's name. If the message is too long, leave the pointer over the message for a few seconds to expand it.
3.4 User Interactions
As long as the list is sorted by Status (the default), iMazing will automatically sort it whenever new devices require interaction, thus placing them at the top of the list.
Interactions can be any of the following:
- Unlock device
- Pair device (trust)
- Disable Find My iPhone
- Enter backup password of device
- Follow steps in the iOS Setup Assistant
iMazing Configurator will generally do its best to avoid unnecessary interactions, but there are cases where they are unavoidable, especially on devices which are already configured and on which a passcode has been set. The Clear Passcode withunlock token (supervised only) action available in blueprints can mitigate this.
⚠ Cancelling Interactions: you can click the x button next to the interaction message to cancel. This will generally result in a failed operation.
3.5 Success & Failure States

When an operation succeeds or fails, 2 new buttons are displayed in the Device column:
- Magnifying glass: click to reveal iMazing's log file for the operation executed on the device. A log path must have been set in the options menu.
- Refresh icon: click to exit the success or failure state and return to the Ready state. If in Automatic Launch mode, the device will be processed again immediately.
3.6 Leaving the View
Dispatching of operations will only take place if the Operation Dispatcher View is displayed, but operations which are already running will continue to do so and become available in iMazing's Operations Window.
Exiting via the Done Button
This will close iMazing configurator and return to iMazing's main window.
- The processing queue is cleared, no new operations will be launched.
- Automatic Launch mode is disabled if it was enabled.
- Returning to the Operation Dispatcher View will show no state preservation.
Exiting via the Previous Button
This will take you back to iMazing Configurator's library.
- The processing queue is cleared, no new operations will be launched.
- Automatic Launch mode is disabled if it was enabled.
- Returning to the Operation Dispatcher View will return you to a preserved state, letting you make minor adjustments to your blueprint as you go without losing context.


