iMazing Configurator Overview
Updated on Jul 13, 2026
Reading time ~21 minutes
General Information
Preview iMazing Configurator
iMazing Configurator can be previewed without a license. Simply download and install iMazing on your Mac, launch the app and select Configurator in the iMazing home screen sidebar:
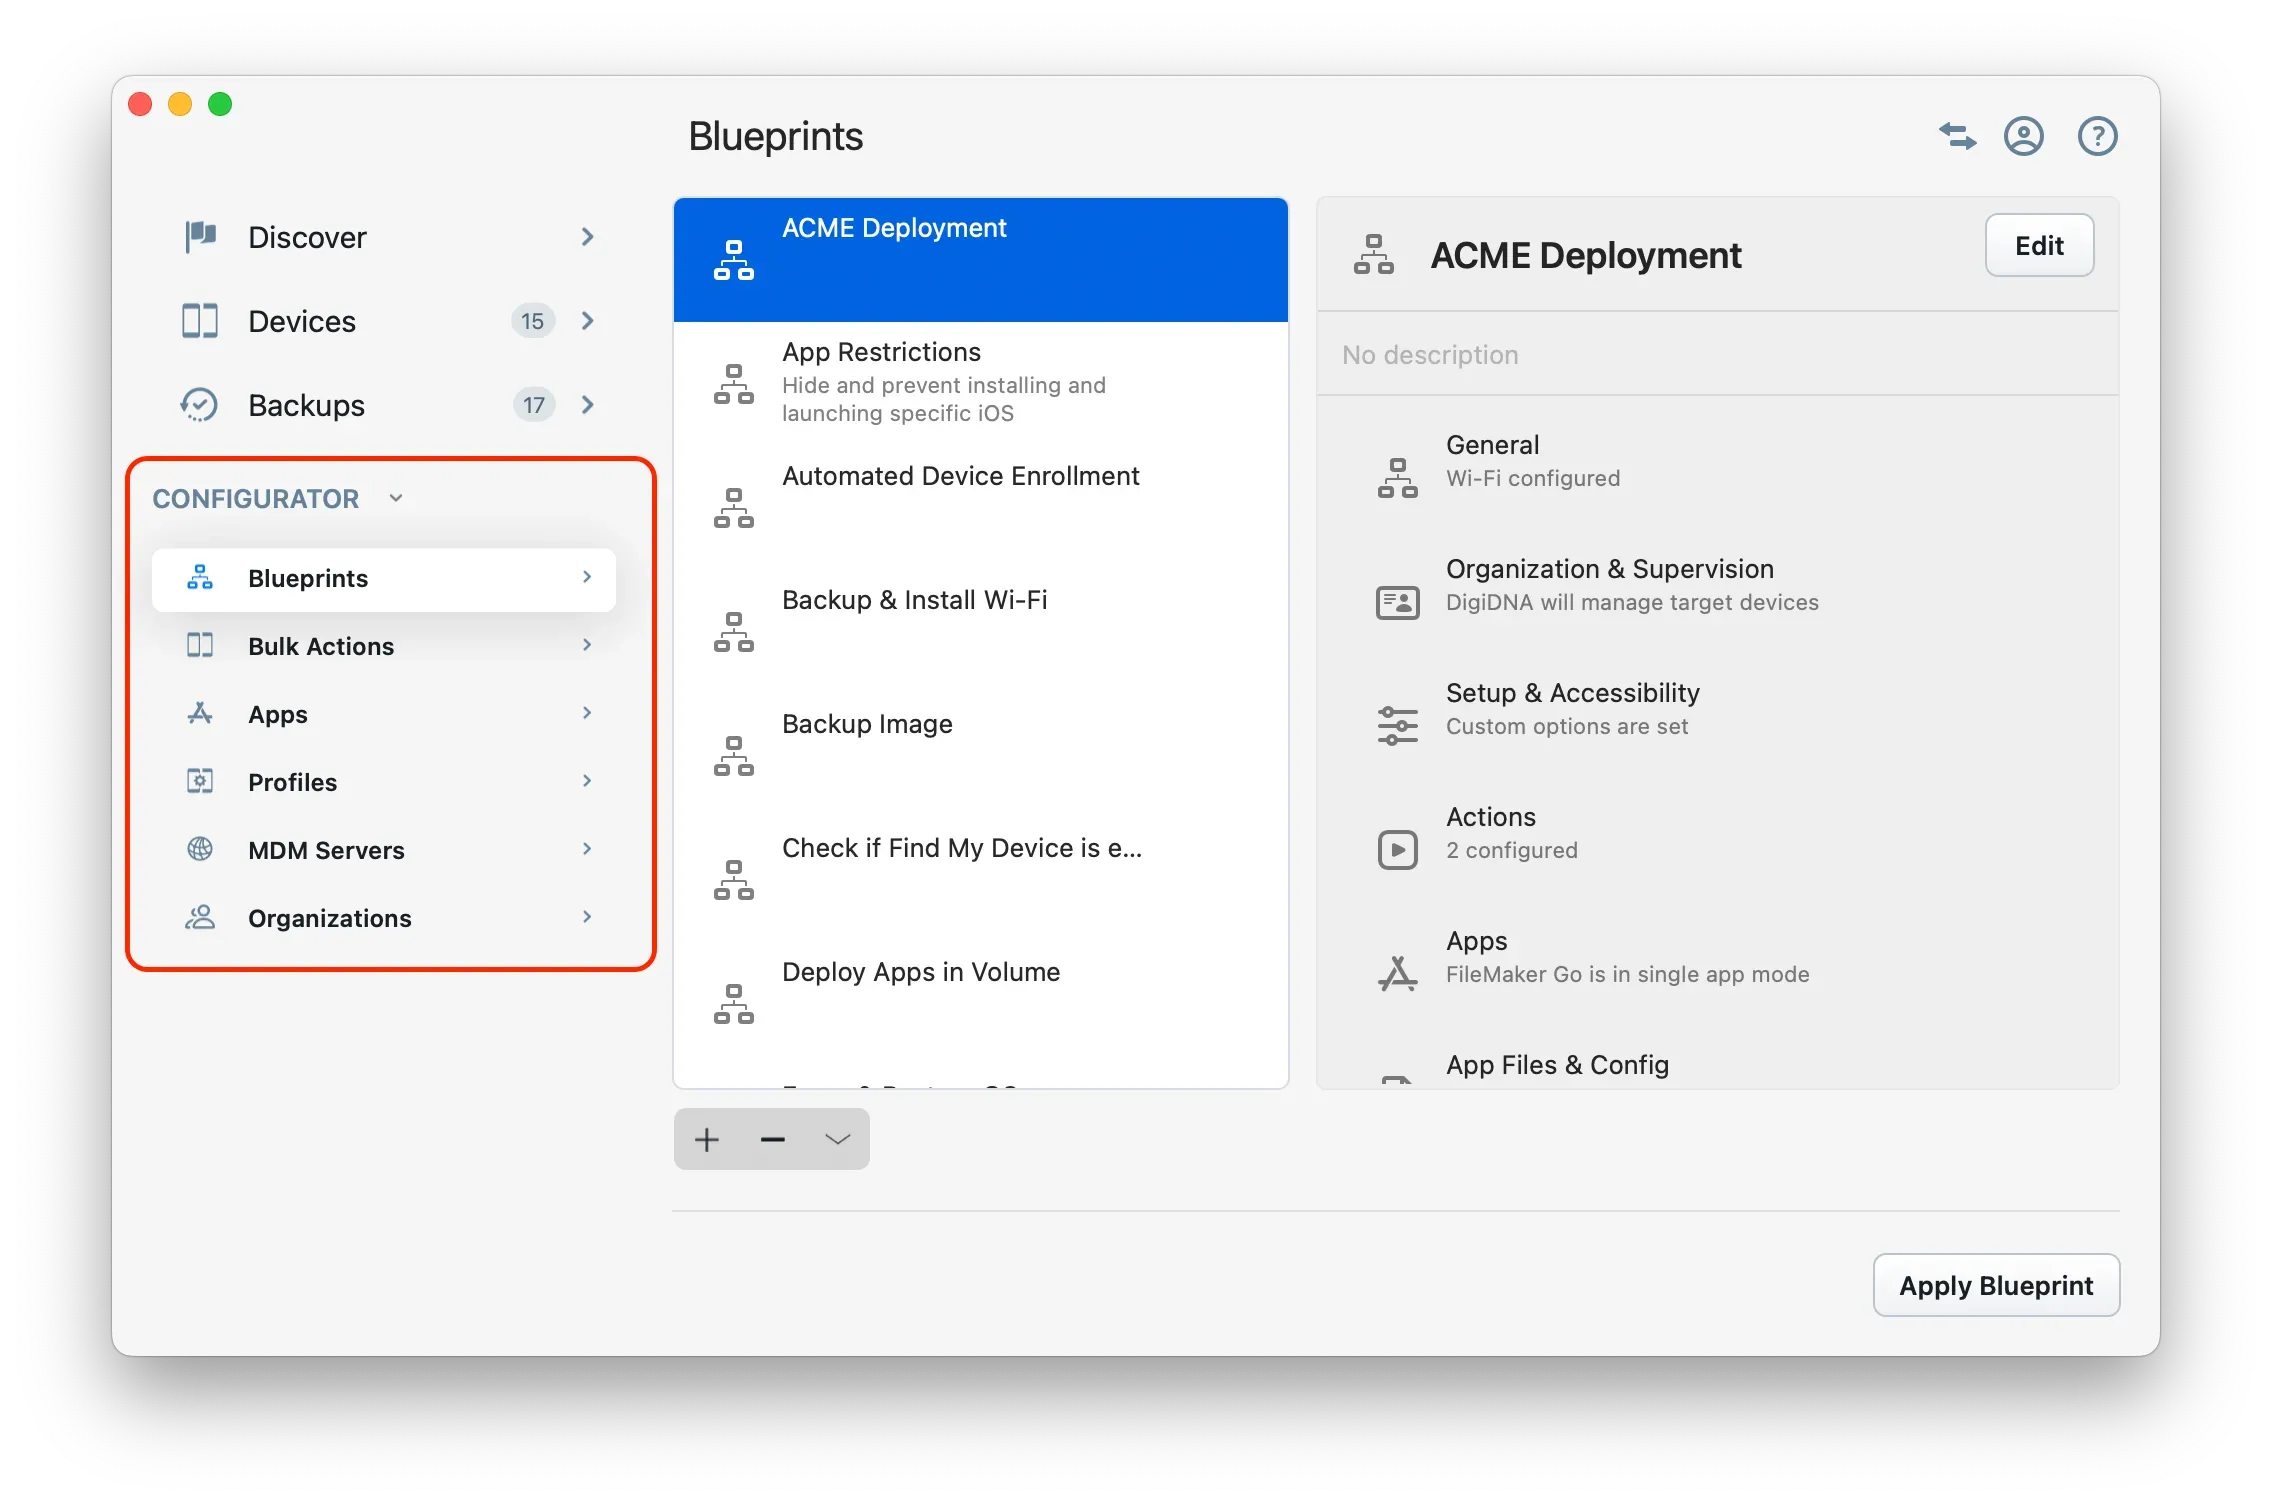
In Preview mode, you can access all available features and fully configure blueprints, but you cannot apply blueprints to devices.
The iMazing Business Subscription provides unlimited access to both iMazing Configurator and iMazing's complete standard features. You can purchase it directly from our store.
Note:
While iMazing Configurator blueprints can't be created or edited with iMazing for Windows, you can still apply them to Apple mobile devices on Windows. First, export the blueprint as a
.blueprintfile from the macOS version. Then, in Windows, apply it to your device using the Apply Blueprint action in the device Tools section.
Quick Start
New to iOS device management? The following article provides a general overview of key concepts and technologies: Understanding Supervision, MDM, ADE (DEP), and Volume Purchase (VPP). For additional reference, check out our glossary of Mobile Device Management terms in the Apple ecosystem.
For experienced users or those who prefer hands-on learning, our iMazing Configurator: Quick Start Guide covers the essentials to get started. Watch the video below for a complete walkthrough—from initial setup to deploying a blueprint that supervises devices, installs a PDF reader, adds a document, and launches the app in Single App Mode:
What is iMazing Configurator?
iMazing Configurator is a set of tools that helps system administrators configure and provision Apple mobile devices locally, while automating backup, erase, and update tasks. It was created in response to enterprise customers who needed an alternative solution to Apple Configurator for preparing and configuring both company and BYOD iOS devices while preserving their existing data. It provides all of Apple Configurator's features plus additional capabilities.
iMazing Configurator excels at enrolling iOS devices into an MDM solution while preserving their data during migrations. It offers full compatibility with Automated Device Enrollment (ADE, formerly DEP) for devices pre-registered in Apple Business Manager (ABM) or Apple School Manager (ASM).
iMazing Configurator comes built into the macOS version of our iOS data management app iMazing. Rather than a separate download, the feature becomes available when you activate iMazing with an iMazing Business Subscription license code.
Note:
While iMazing Configurator cannot yet register devices to ABM or ASM, we are actively working on adding this feature. For guidance on ABM/ASM device registration or MDM migration, please refer to our dedicated guides:
Differences with Apple Configurator
iMazing Configurator uses the same communication channels as Apple Configurator and relies on the same iOS technologies, but offers completely different workflows and quite a few additional features.
Workflow
- Configurations and automations in iMazing are always applied via blueprints, not directly.
- Blueprints are divided into sections, giving you a clear view of available options.
- Inline editing tools and integration with iMazing Profile Editor enable quick iterations when testing new configurations.
Exclusive Features
- Apply blueprints to multiple iOS devices in bulk simultaneously.
- Add files to blueprints and assign them to any app, including system apps.
- Override app default settings with the Set Configuration feature and populate the Documents folder of apps.
- Configure and supervise iOS devices that contain existing data without erasing them.
- Maintain a local repository of apps downloaded from the App Store to eliminate redundant downloading.
- Access powerful pre- and post-configuration automations including battery health checks, Launch app actions, and many features not found in Apple Configurator.
- Halt processes if activation lock is enabled (Find My device is On) during device refurbishment.
- Speed up MDM enrollment with Zero-touch MDM Enrollment mode.
- Create multiple backup snapshots automatically to prevent data loss.
- Map USB port numbers to specific connected devices.
- Remove configuration from backups when restoring for Automated Device Enrollment or other scenarios.
- Ensure Automated Device Enrollment (ADE/DEP) cannot be skipped when restoring a backup to the same device.
- Migrate iOS devices between MDM systems while preserving data.
- Remove keychain data from backups to prevent MDM migration errors.
- Automatically restore device backups made prior to configuration.
- Allow unpaired external boot to recovery (
allowUnpairedExternalBootToRecovery). - Apply exported blueprints to devices using Quick Transfer, even on Windows.
- Share and save blueprints using our AES-256 encrypted
.blueprintformat. - Supervise and configure devices on Windows (see below for details)
- And more…
Windows
While the complete iMazing Configurator toolkit is currently exclusive to macOS, key features—including applying blueprints to iOS devices—are available in iMazing for Windows.
Applying Blueprints on Windows
Blueprints created with the macOS version of iMazing can be exported in .blueprint format and applied to devices on Windows through iMazing's Quick Transfer wizard. Quick Transfer automatically detects apps compatible with your dropped files. When you drop a blueprint on an iOS device, iMazing will offer to send it to Profiles and apply it—just like on macOS when using iMazing Configurator's Operation Dispatcher View to apply blueprints in bulk.
- Select your target device in iMazing's left sidebar
- Drag and drop the
.blueprintfile onto the device detail view - Select the Profiles app and confirm
More info on Quick Transfer.
You can also use the Apply Blueprint action in the device Tools section
Importing Organizations and Supervision Identities on Windows
The Organizations view is fully available in the Windows version of iMazing and can be accessed via the iMazing Preferences window's Library tab.
Import your supervising organization or create one with your supervising identity. This allows you to manage supervised devices with iMazing just as you would on macOS—including pairing devices configured with a allowHostPairing = false restriction.
See the Organizations section below for more details.
Restricted Pairing with Supervision:
For information about restricted pairing with a supervision host certificate, see the Supervision Prohibited Pairing section in our pairing guide.
Creating, Editing, and Signing Configuration Profiles on Windows
The iMazing Profile Editor app is available for Windows too and is identical in functionality to its macOS counterpart. The app is embedded within iMazing and can be launched via the Tools main menu. See Getting Started with iMazing Profile Editor for more information.
Configuration Profiles can be browsed, extracted from devices and installed too. They can also be signed.
More details on profiles management here: How to Manage Configuration Profiles.
Supervising and Managing Supervised Devices on Windows
Starting with iMazing 2.12, the standard version of iMazing features a Supervision wizard – learn more about supervising and managing supervised devices with iMazing's Supervision Wizard.
iMazing Configurator Library
Overview
The Configurator section on the iMazing home screen is the hub of iMazing Configurator.
It is divided in 7 sections:
- Blueprints is where you create, edit and apply blueprints. In iMazing Configurator, supervision and configuration of iOS devices is always done by applying a blueprint.
- Device Bulk Actions displays all iOS devices known to iMazing. This view allows you to quickly unpair and remove devices from iMazing, as well as perform batch operations like exporting device details to CSV, creating backups, updating OS, erasing all data, exiting single app mode.
- Backups displays all backups from available backup locations. Use this view to delete unneeded backups, or to find a specific backup and browse its contents and restore it.
- Apps lets you download iOS apps from the App Store using your standard Apple Account or Volume Purchase (VPP) account, manage a local app library, install apps to connected devices and manage Volume Purchase license assignments.
- Profiles is where you'll add or create configuration profiles which you can then include in blueprints or deploy directly.
- MDM Servers lists MDM servers you've configured in iMazing to streamline MDM enrollment.
- Organizations is where you'll create, import or export supervising identities.
Tip:
You do not need to pre-configure anything before you create a blueprint, as the blueprint editor offers inline tools to import or create configuration profiles, MDM servers and supervising organizations.
Location and persistence
By default, apps, blueprints, configuration profiles and OS image files (.ipsw) are stored in: /Users/{username}/Library/Application Support/iMazing/Library. This location can be changed from iMazing's Preferences window in the Library tab.
Organizations and devices are always located in: /Users/{username}/Library/Application Support/iMazing/Prefs.
Because organizations and devices are treated as preferences, resetting iMazing to factory settings will remove them from iMazing Configurator's library. Organization identities (supervising certificates and their associated private keys) are stored in the macOS keychain or Windows Certificate Store and will persist a reset to factory settings.
Blueprints
In iMazing Configurator, Apple mobile devices are prepared and configured by applying blueprints. There is no Prepare action like in Apple Configurator 2. Instead, the blueprint editor neatly lays out all possible settings in one place. Here is the Blueprints Library:
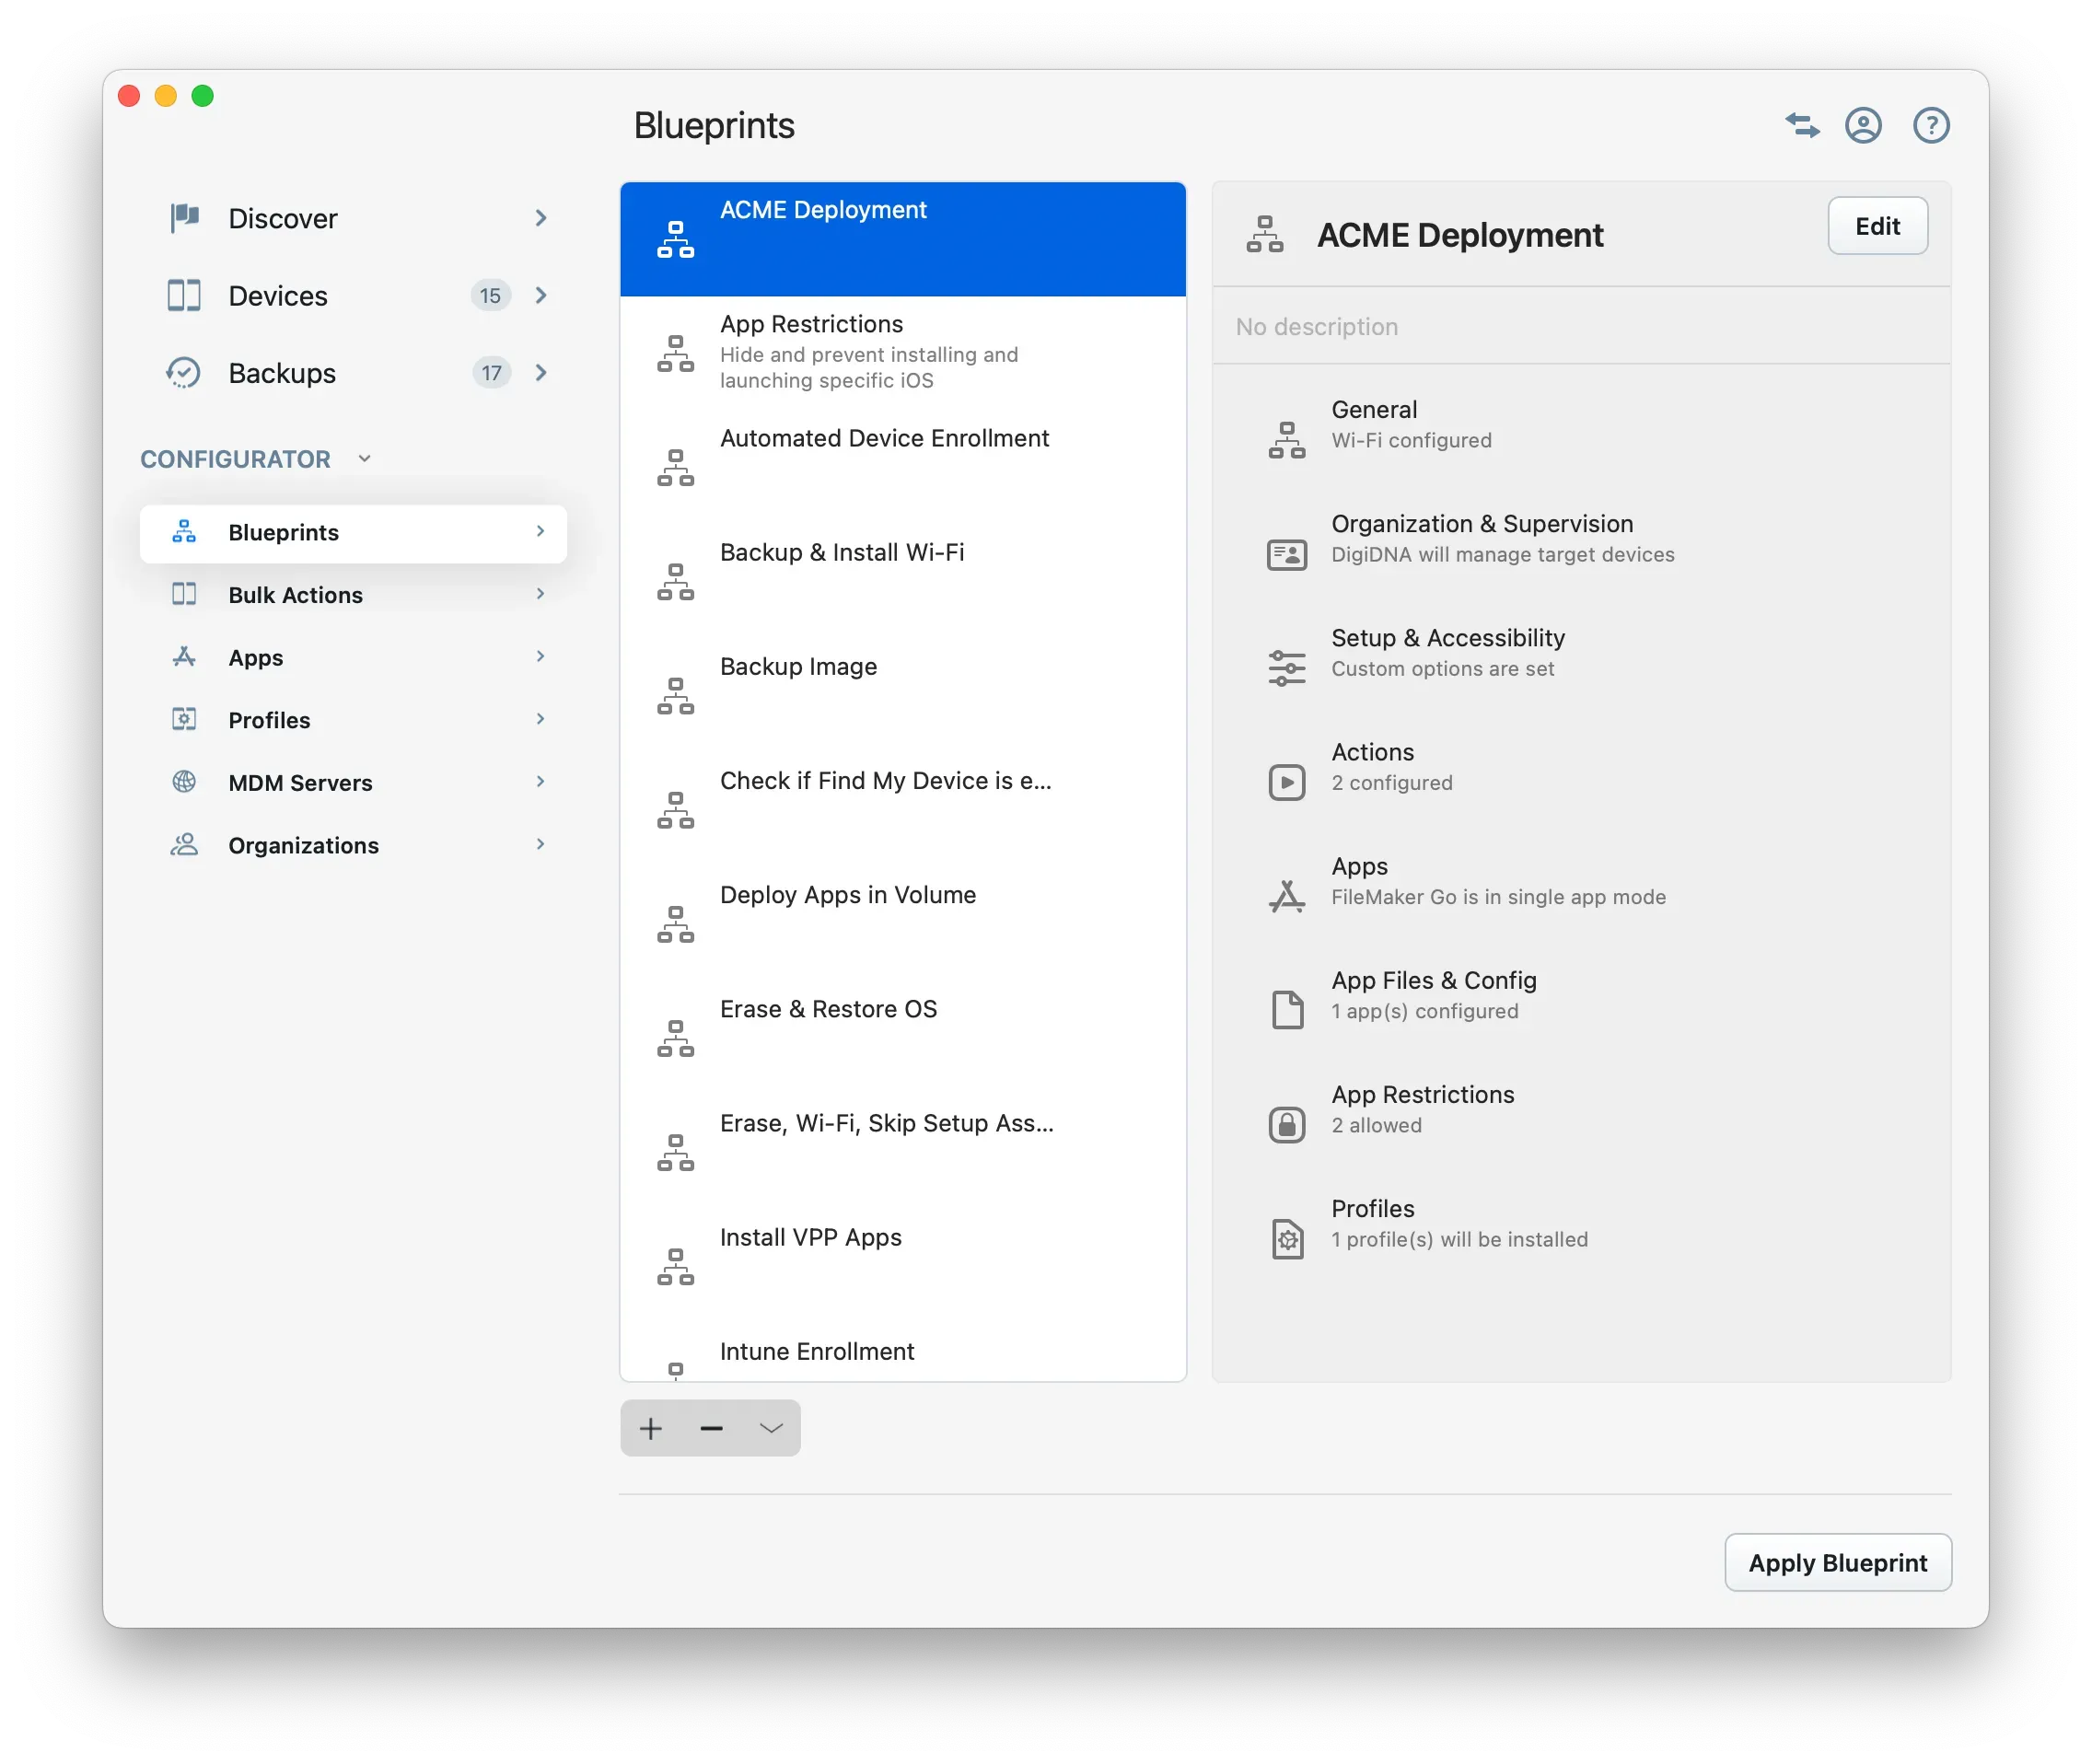
From this section, you can:
- Create or delete blueprints (+ and - buttons)
- Edit an existing blueprint (double click a blueprint in the list or click the Edit button in the summary view)
- Duplicate, import and export blueprints (⌄ button and context menu)
- Apply a selected blueprint to iOS, iPadOS, tvOS or visionOS devices (Apply Blueprint button at the bottom right of the window)
Learn more about creating and managing blueprints in the following guide: iMazing Configurator: Blueprints Deep Dive
Device Bulk Actions
The Bulk Actions tab of iMazing Configurator displays all iOS, iPadOS, tvOS, and visionOS devices paired with your computer. This screen allows you to perform simple tasks on multiple devices simultaneously.
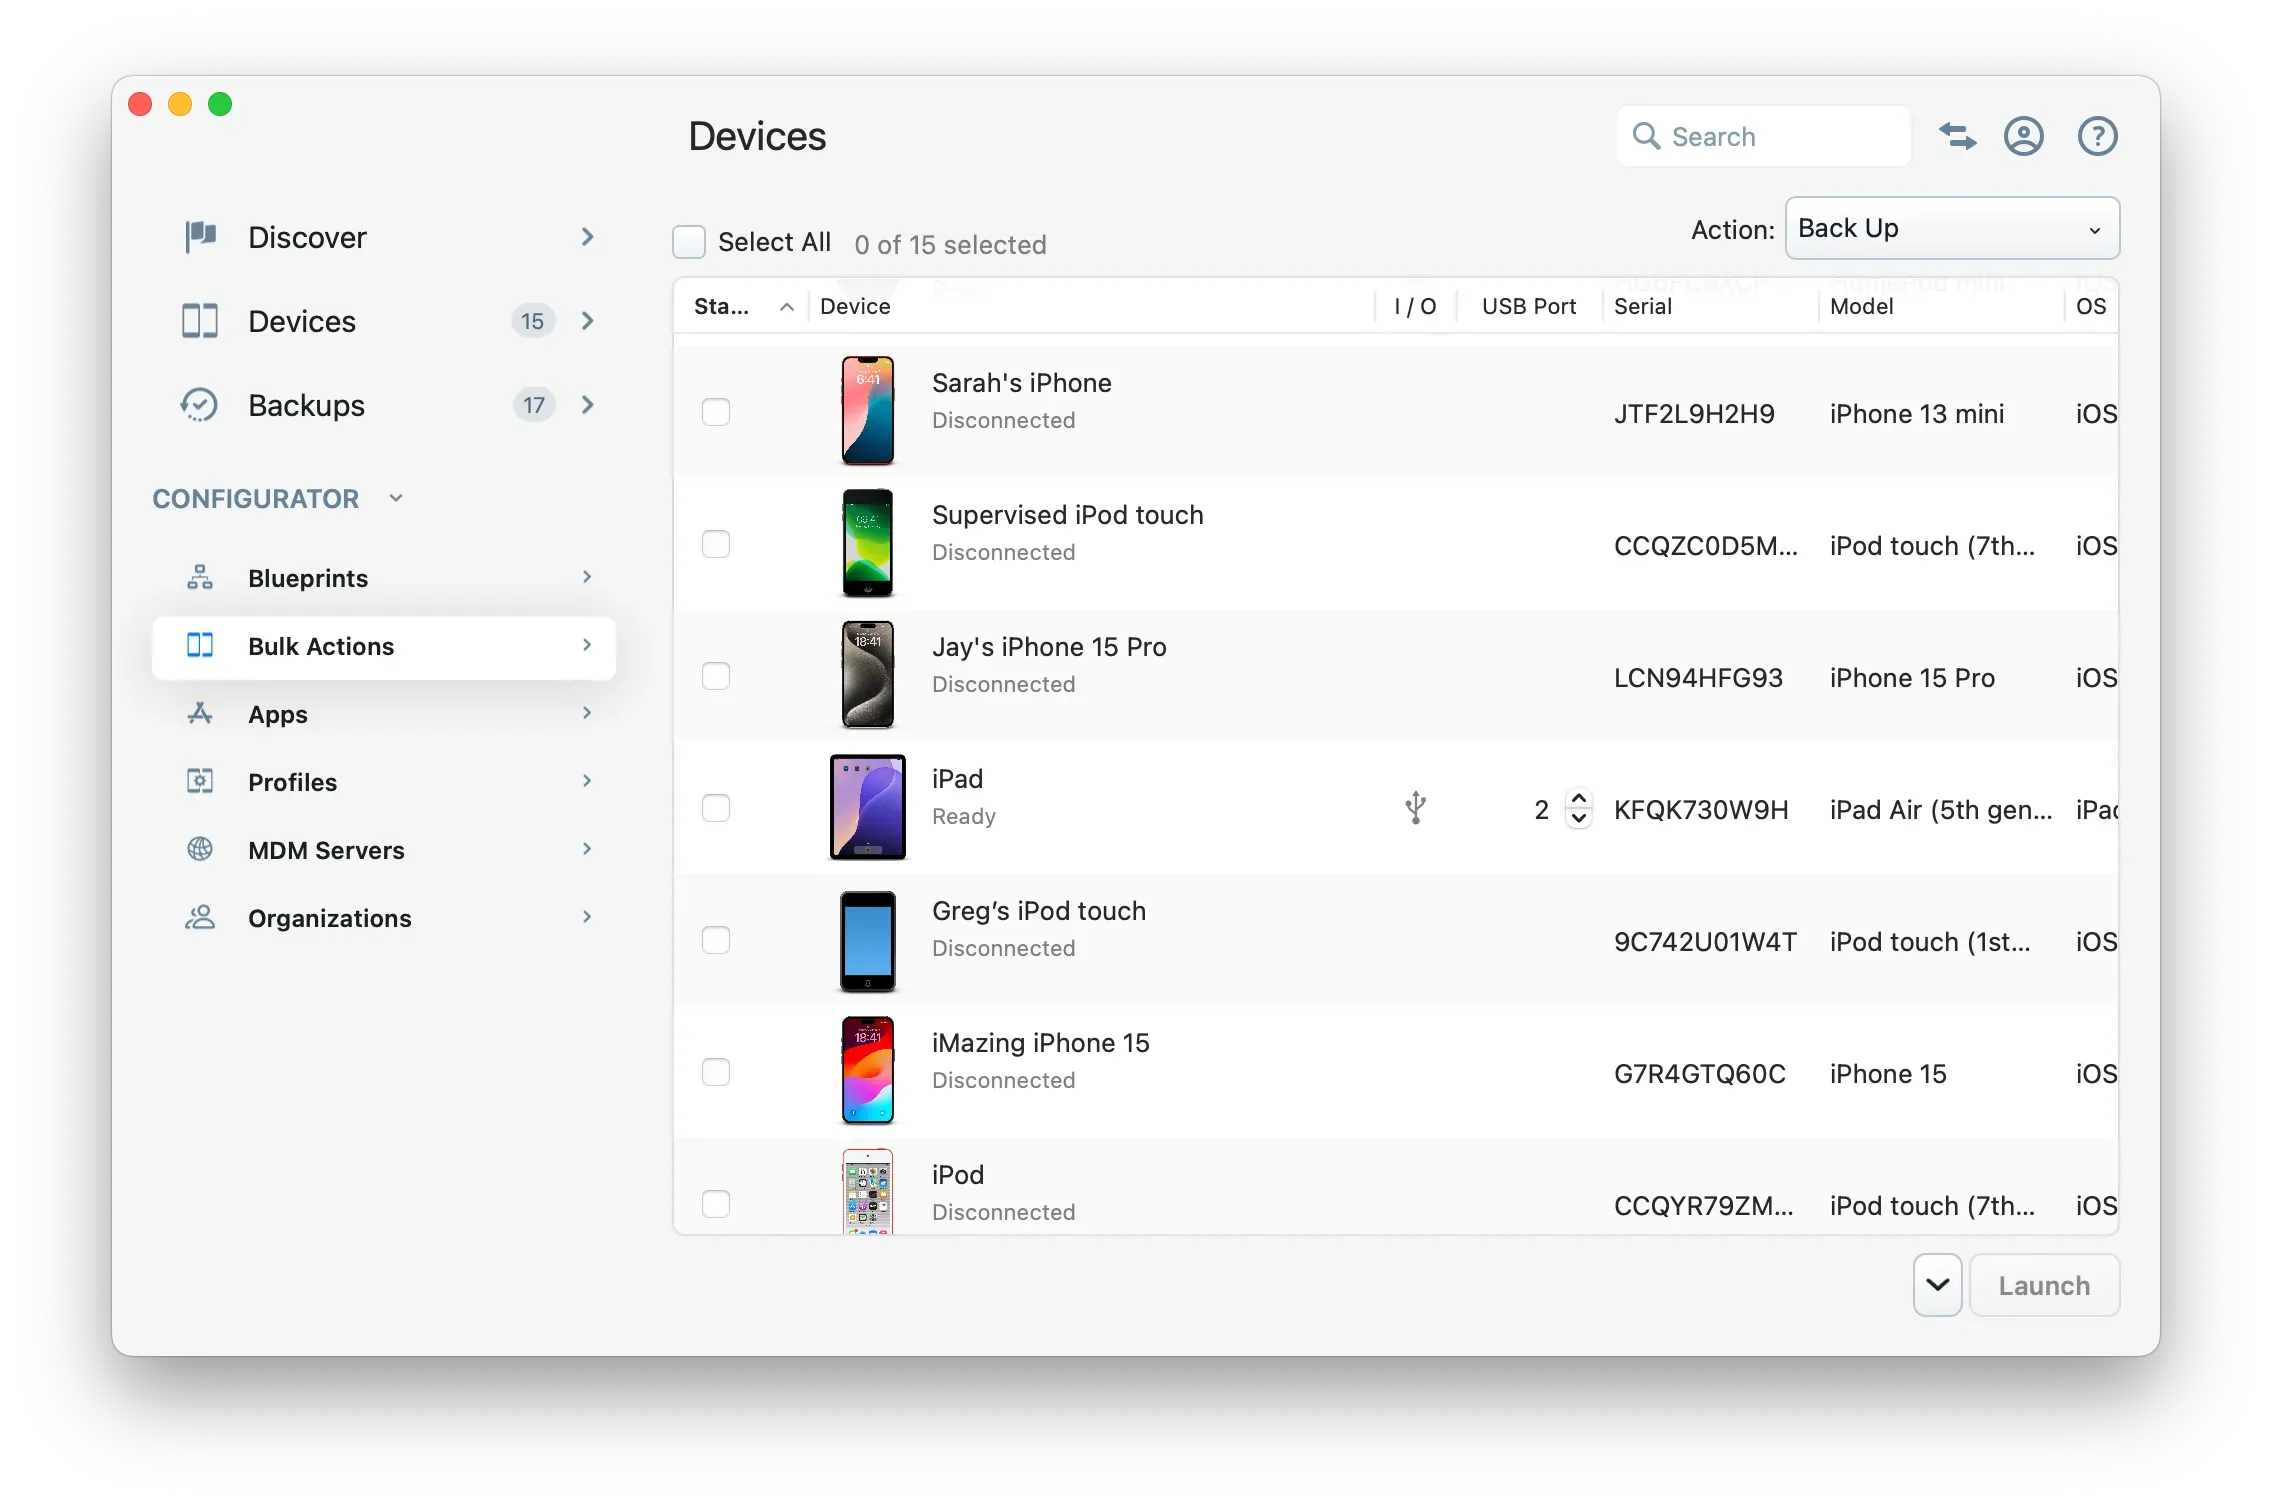
Select an action from the Action dropdown menu in the top right, choose your target devices, and click Launch.
Available actions include:
- On connected devices:
- Back Up
- Update OS downloads and installs the latest supported OS version for each device.
- Erase All Content completely wipes all data and settings from selected devices.
- Restart
- Shut Down
- Exit Single App Mode releases selected devices from Single App Mode installed via iMazing.
- On all devices:
- Remove from iMazing clears iMazing's cache for selected devices and removes their pairing with the computer.
- Export Device Details saves comprehensive device information to a CSV file, using cached data for disconnected devices.
- Export Serial Numbers saves serial numbers to a TXT file, one per line, for device assignment purposes.
Note:
The Devices view functions similarly to the Operation Dispatcher View used when applying blueprints or installing profiles from the library. For more details about available options and behaviors, see the iMazing Configurator: Operation Dispatcher View guide.
Backups
iOS and iPadOS backups made with iMazing use the same format as iTunes/Finder backups, but with an enhanced versioning system. This system creates space-efficient snapshots as a safeguard against accidental overwrites and to maintain a backup history. The dedicated Backups section presents backups in an icon or table format, allowing you to quickly find specific backups by location and size, or remove multiple unnecessary backups at once:
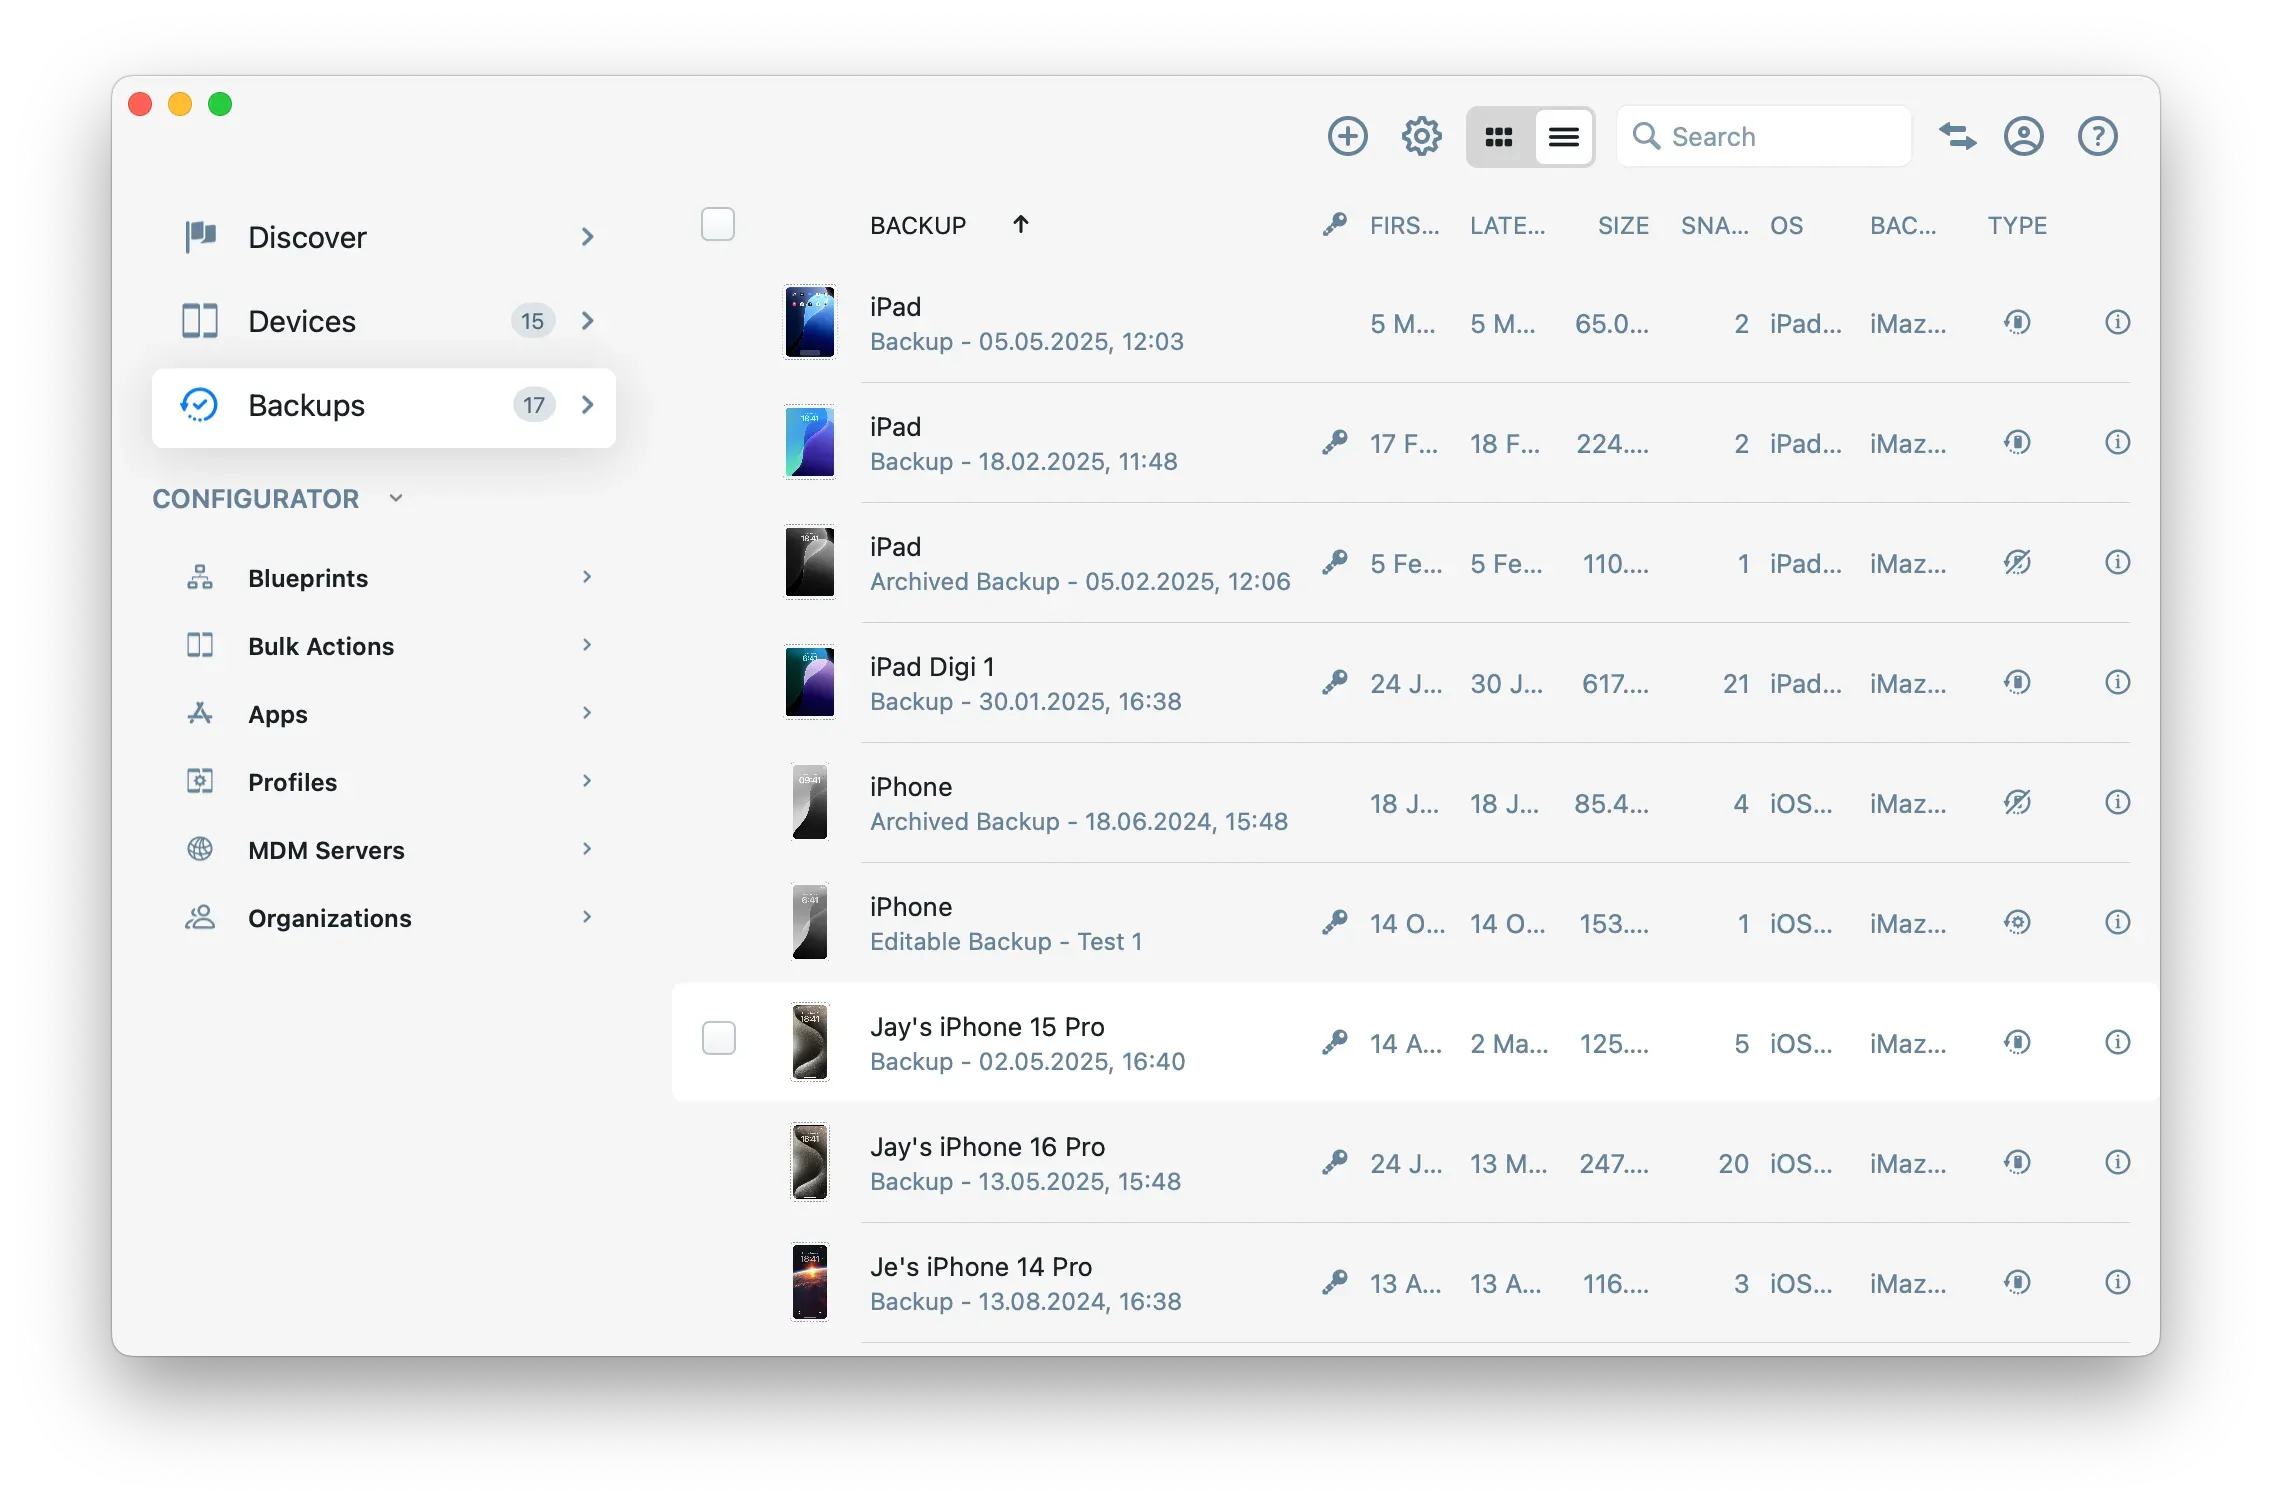
The following fields are available:
- Device name and model (or backup name if the backup was manually renamed)
- Backup encryption status
- First and last snapshot date
- Total size (includes all snapshots)
- Number of snapshots in the backup
- OS (last snapshot)
- Backup location
Browsing backup contents
Click a backup to browse its content. Learn more about accessing backup data in iMazing.
Deleting backups
Select one or more backups, click the Delete button and confirm. This will delete both backups and related snapshots.
Managing backup locations
By default, iMazing lists all backups in its default backup location (/Users/{username}/Library/Application Support/iMazing/Backups), and iTunes/Finder backups. Starting with Mojave, accessing iTunes/Finder backups require that you give iMazing Full Disk Access.
In iMazing's Preferences window, you can easily change iMazing's default backup location and load backups from other locations.
It is also possible to set the backup location of a specific device, overriding the configured default backup location.
Backup Encryption and Versioning Options
It is important to understand that backup encryption is a setting residing on the iOS device itself, and it is iOS which encrypts files during the backup process. Therefore, once enabled, all future backups of the device, whether made with iTunes/Finder or iMazing, are encrypted (AES-256) with the same password.
In iMazing, you can configure the backup encryption password and other backup settings in the Device Settings screen.
Backup password options are also available in the Actions section of blueprints, letting you perform encrypted backups before refurbishing iOS devices, or setting a backup password after configuration is applied.
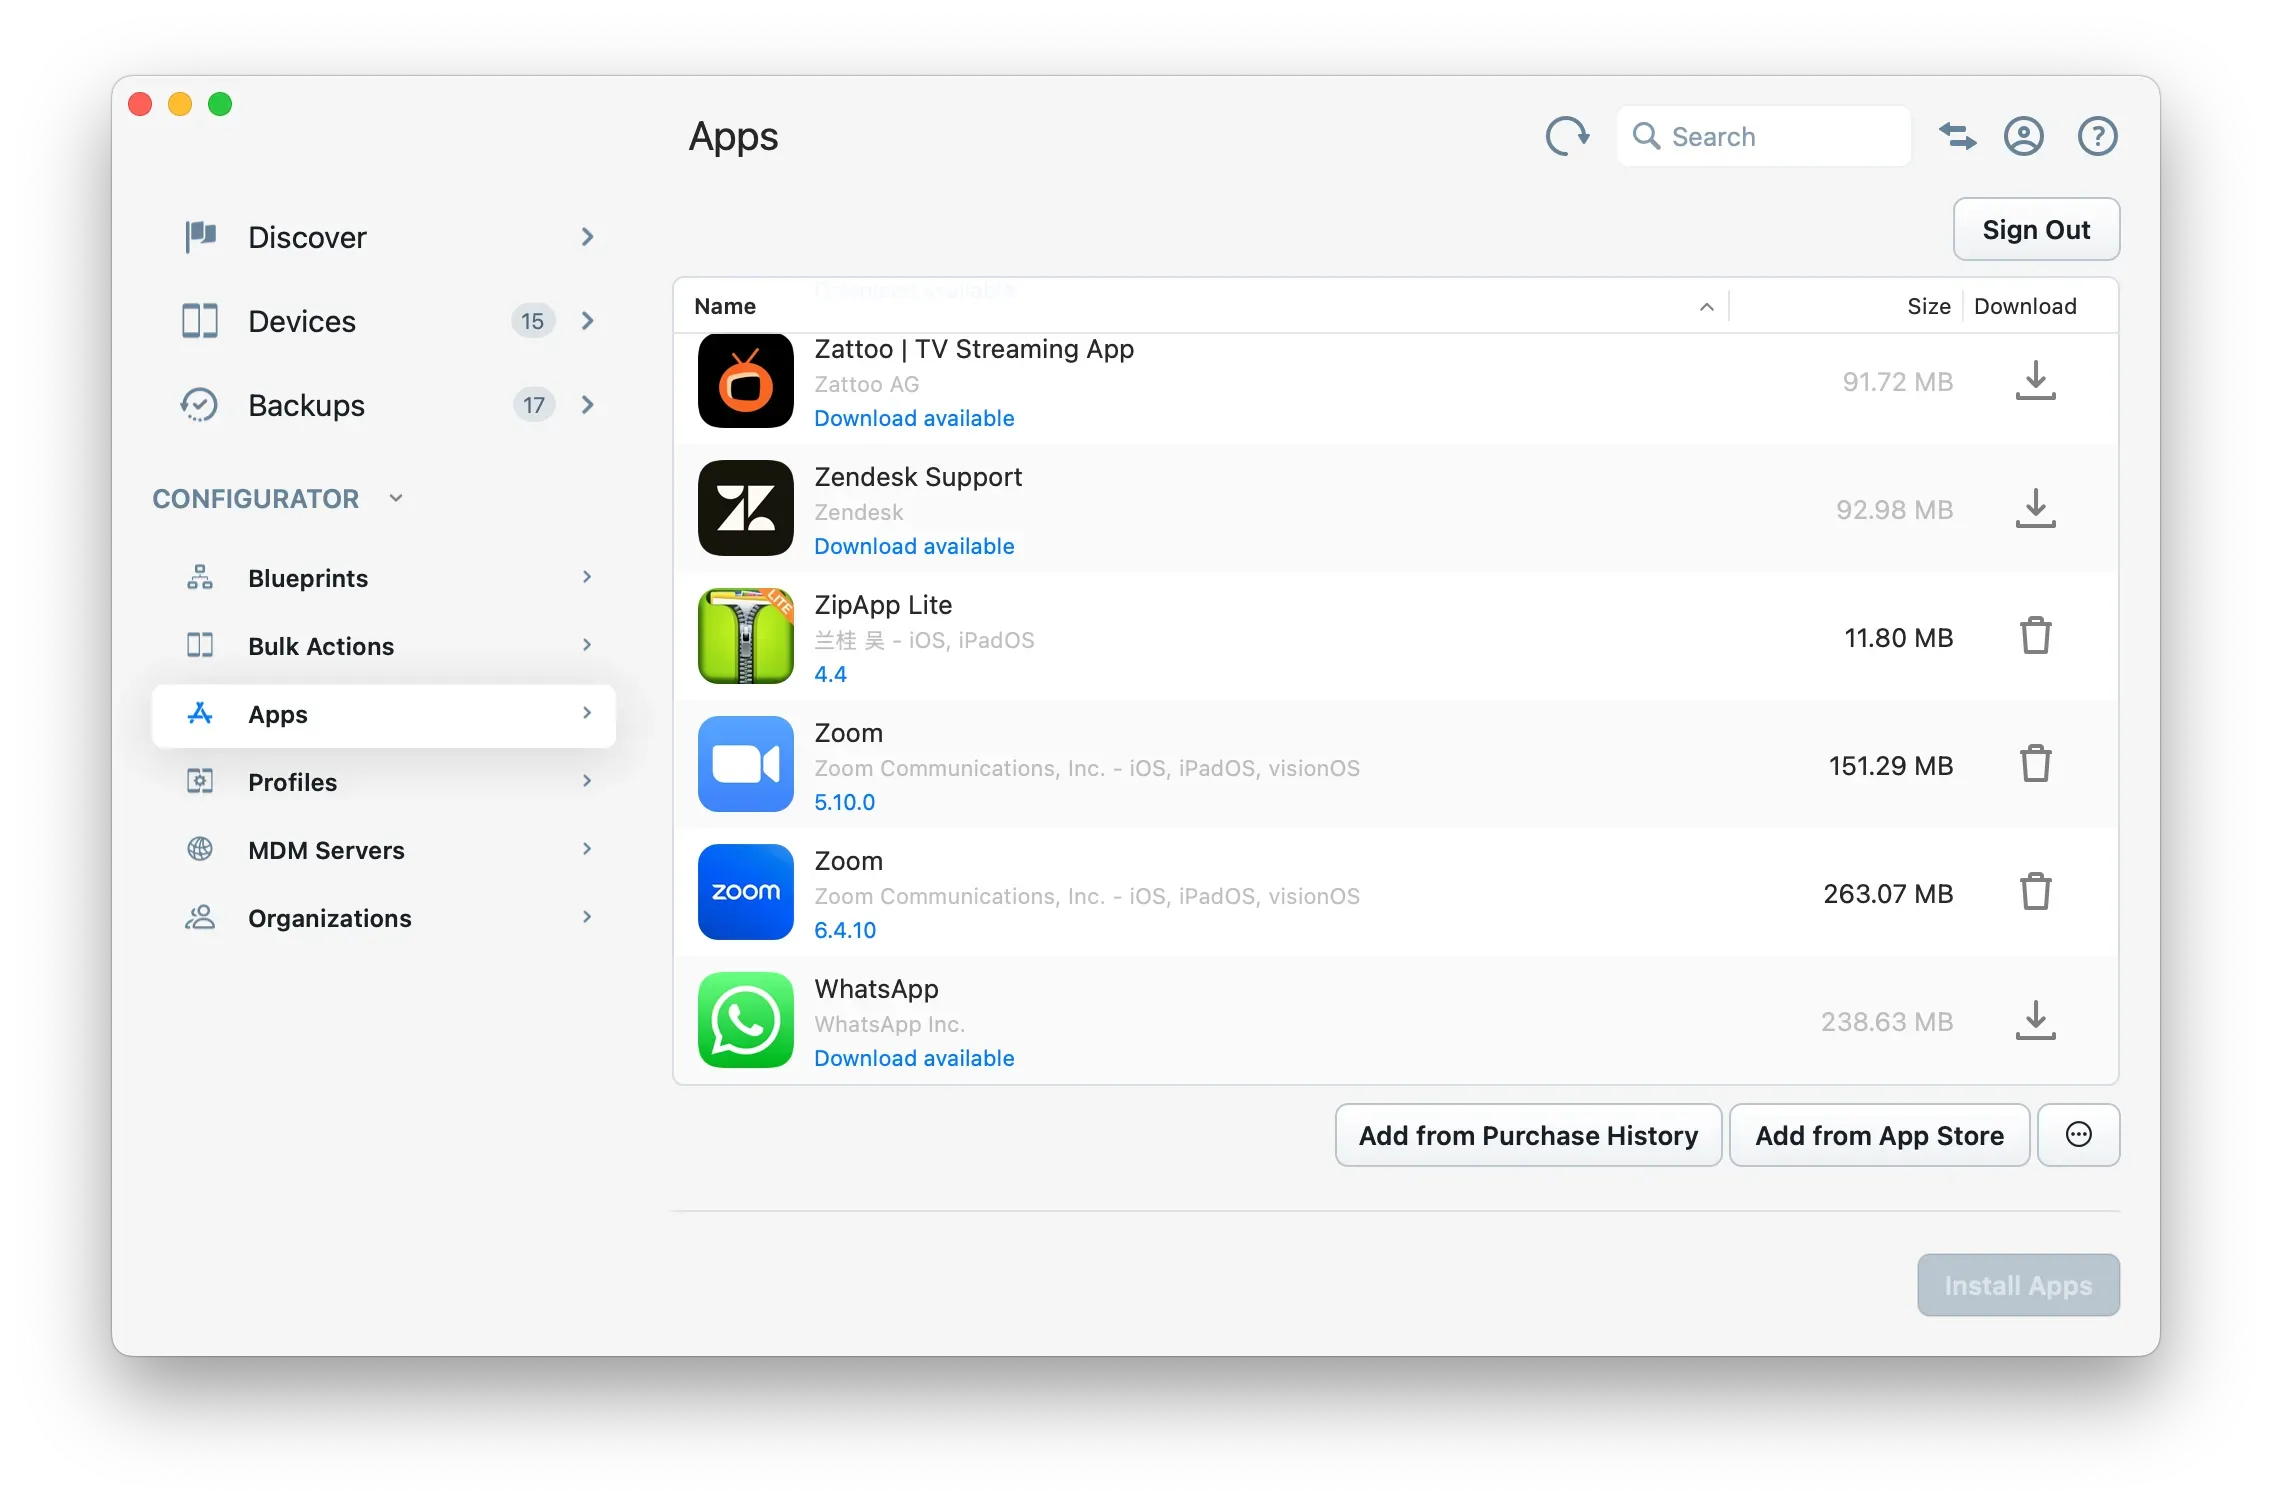
Apps
When you first click on the Apps tab, iMazing will prompt you for Apple Account or Volume Purchase account credentials. These will not be uploaded or shared in any way, and will be securely stored in the macOS keychain or Windows Credentials if you check the Remember password checkbox – read our Security & Privacy statement for more info.
Once you are signed in, iMazing will load a list of apps which you can download locally or install to connected devices.
Apple Account, Managed Apple Account and Volume Purchase (VPP)
iMazing Configurator's app library will adjust to the type of account you're signed in with and display appropriate options. There are also some differences in how apps are loaded and acquired.
If you sign in with a regular Apple Account, iMazing cannot list apps directly from your App Store account. It will list apps it has detected on devices you've connected to iMazing or added with the Add from Purchase History button, and will display an Add from App Store button which lets you add apps to your library manually. Only apps which you've already acquired by purchasing them from the App Store can be added:
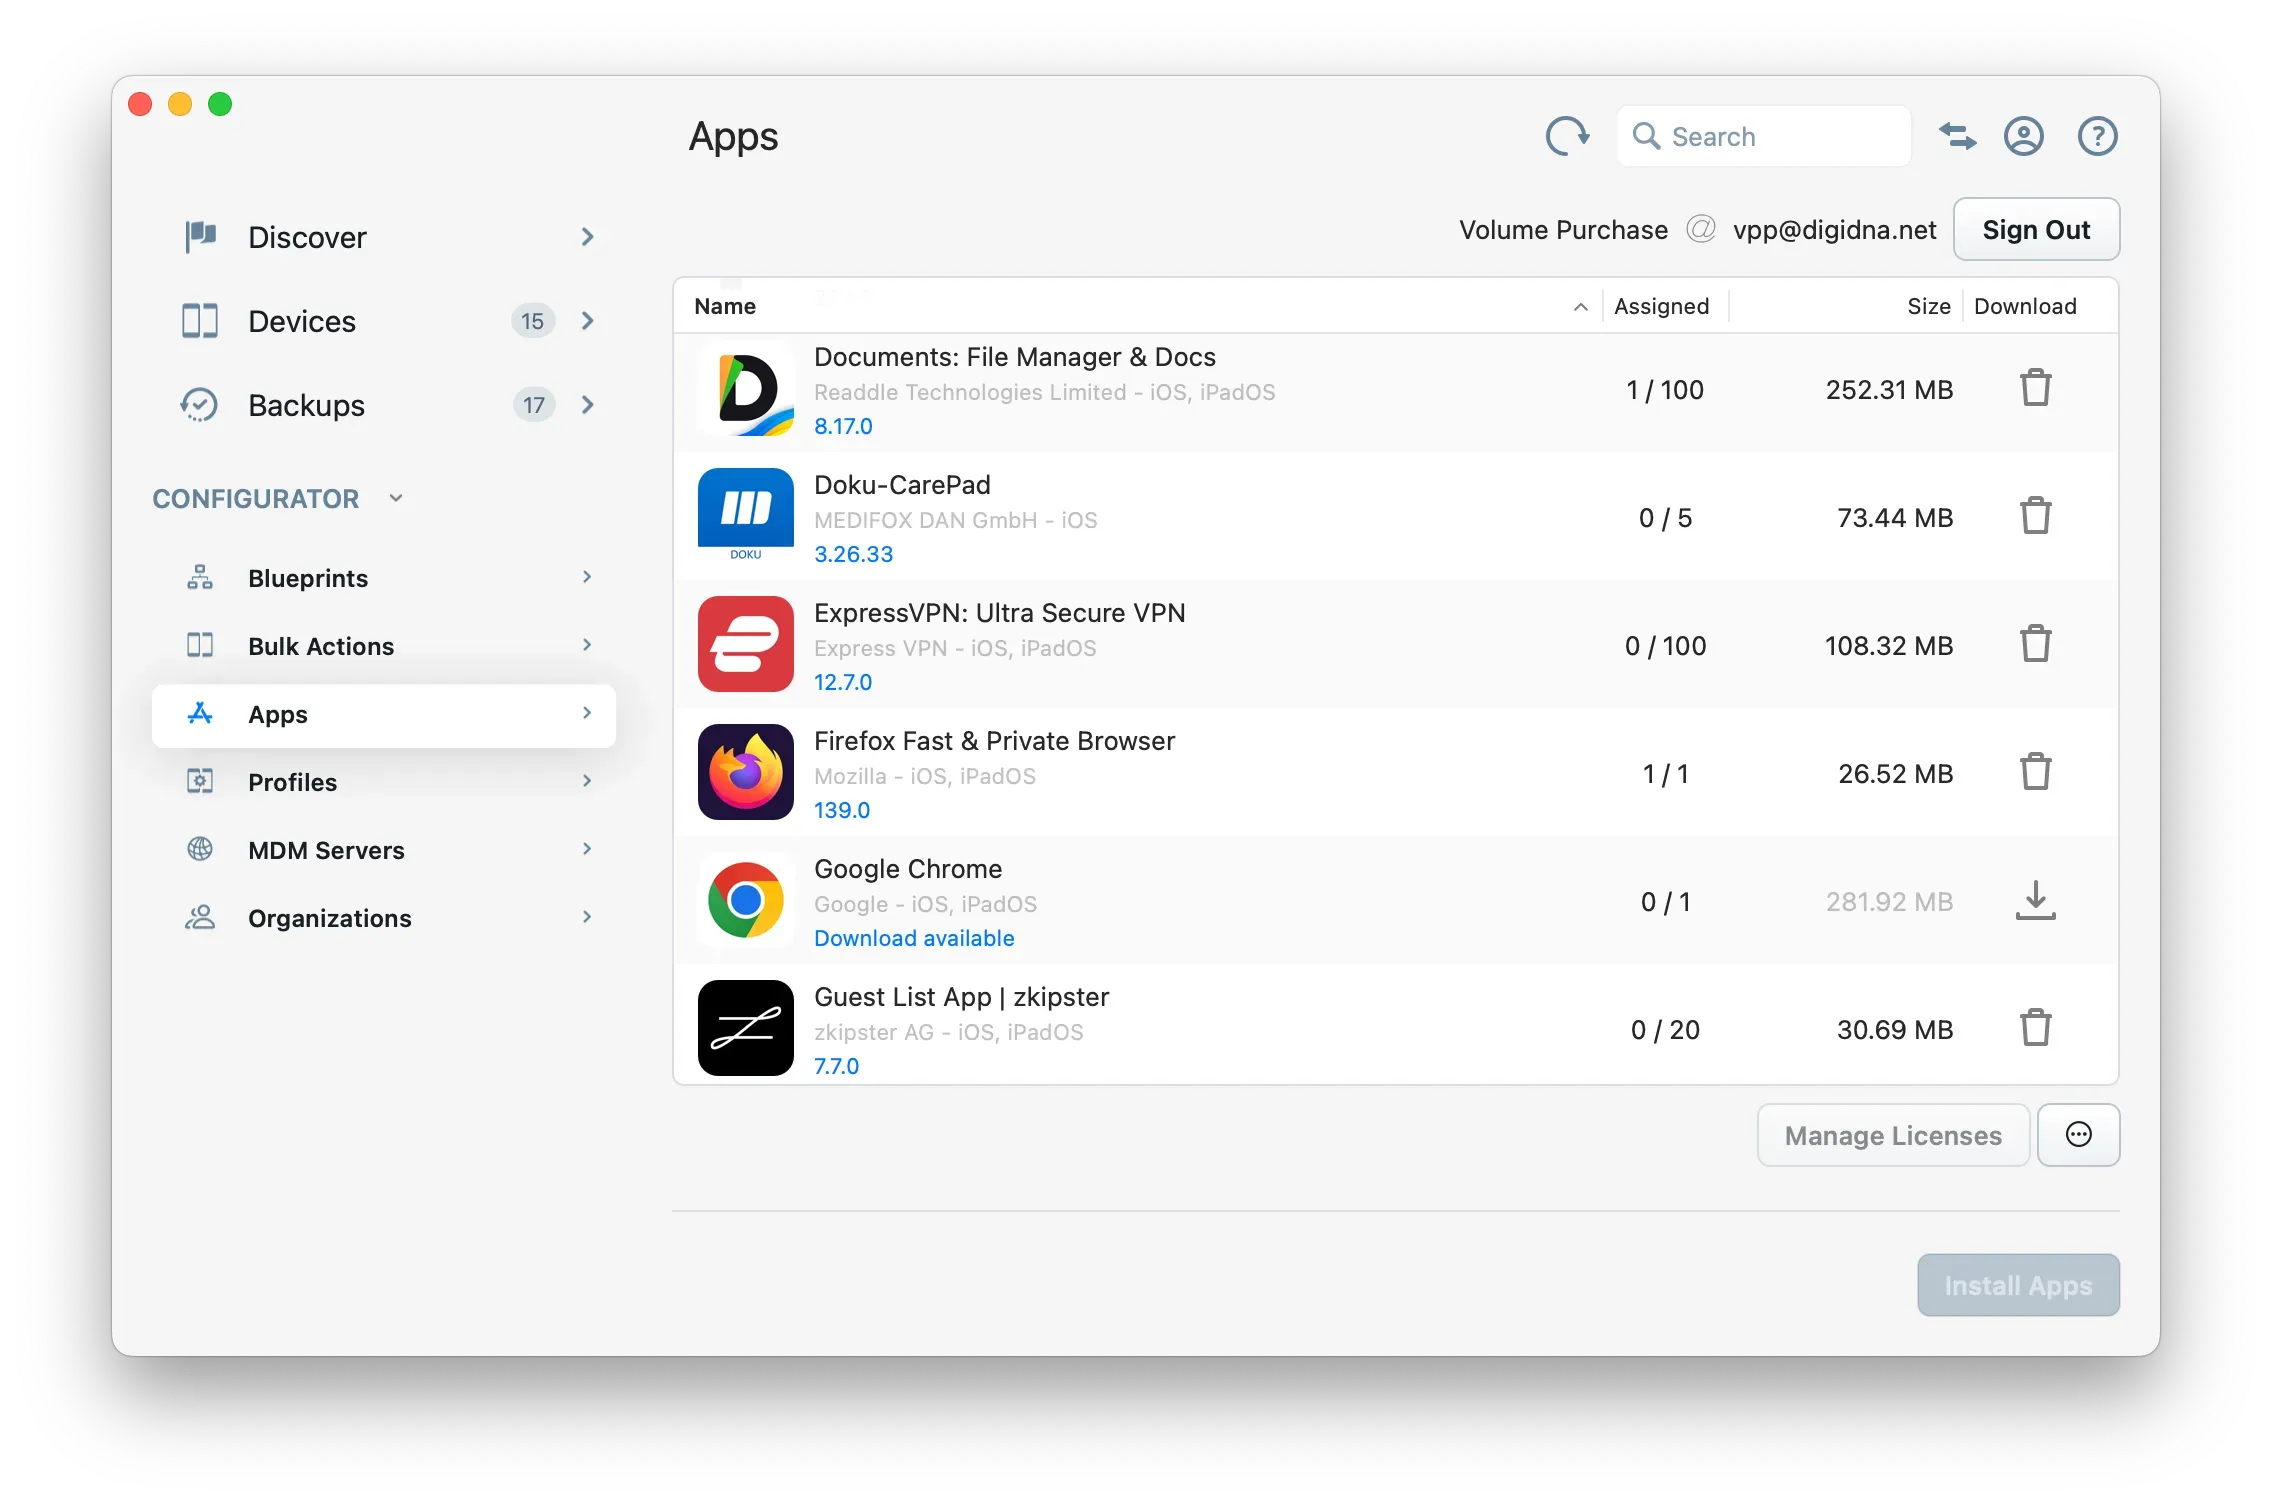
If you sign in with a Managed Apple Account an Apple Business Manager or Apple School Manager account, iMazing will list all apps you've purchased with that Volume Purchase account (free apps need to be "purchased" too). A column labelled Assigned will list assigned versus purchased license counts, and the Manage Licenses button will replace the Add from App Store one. Here is the license management sheet:
Manage Licenses
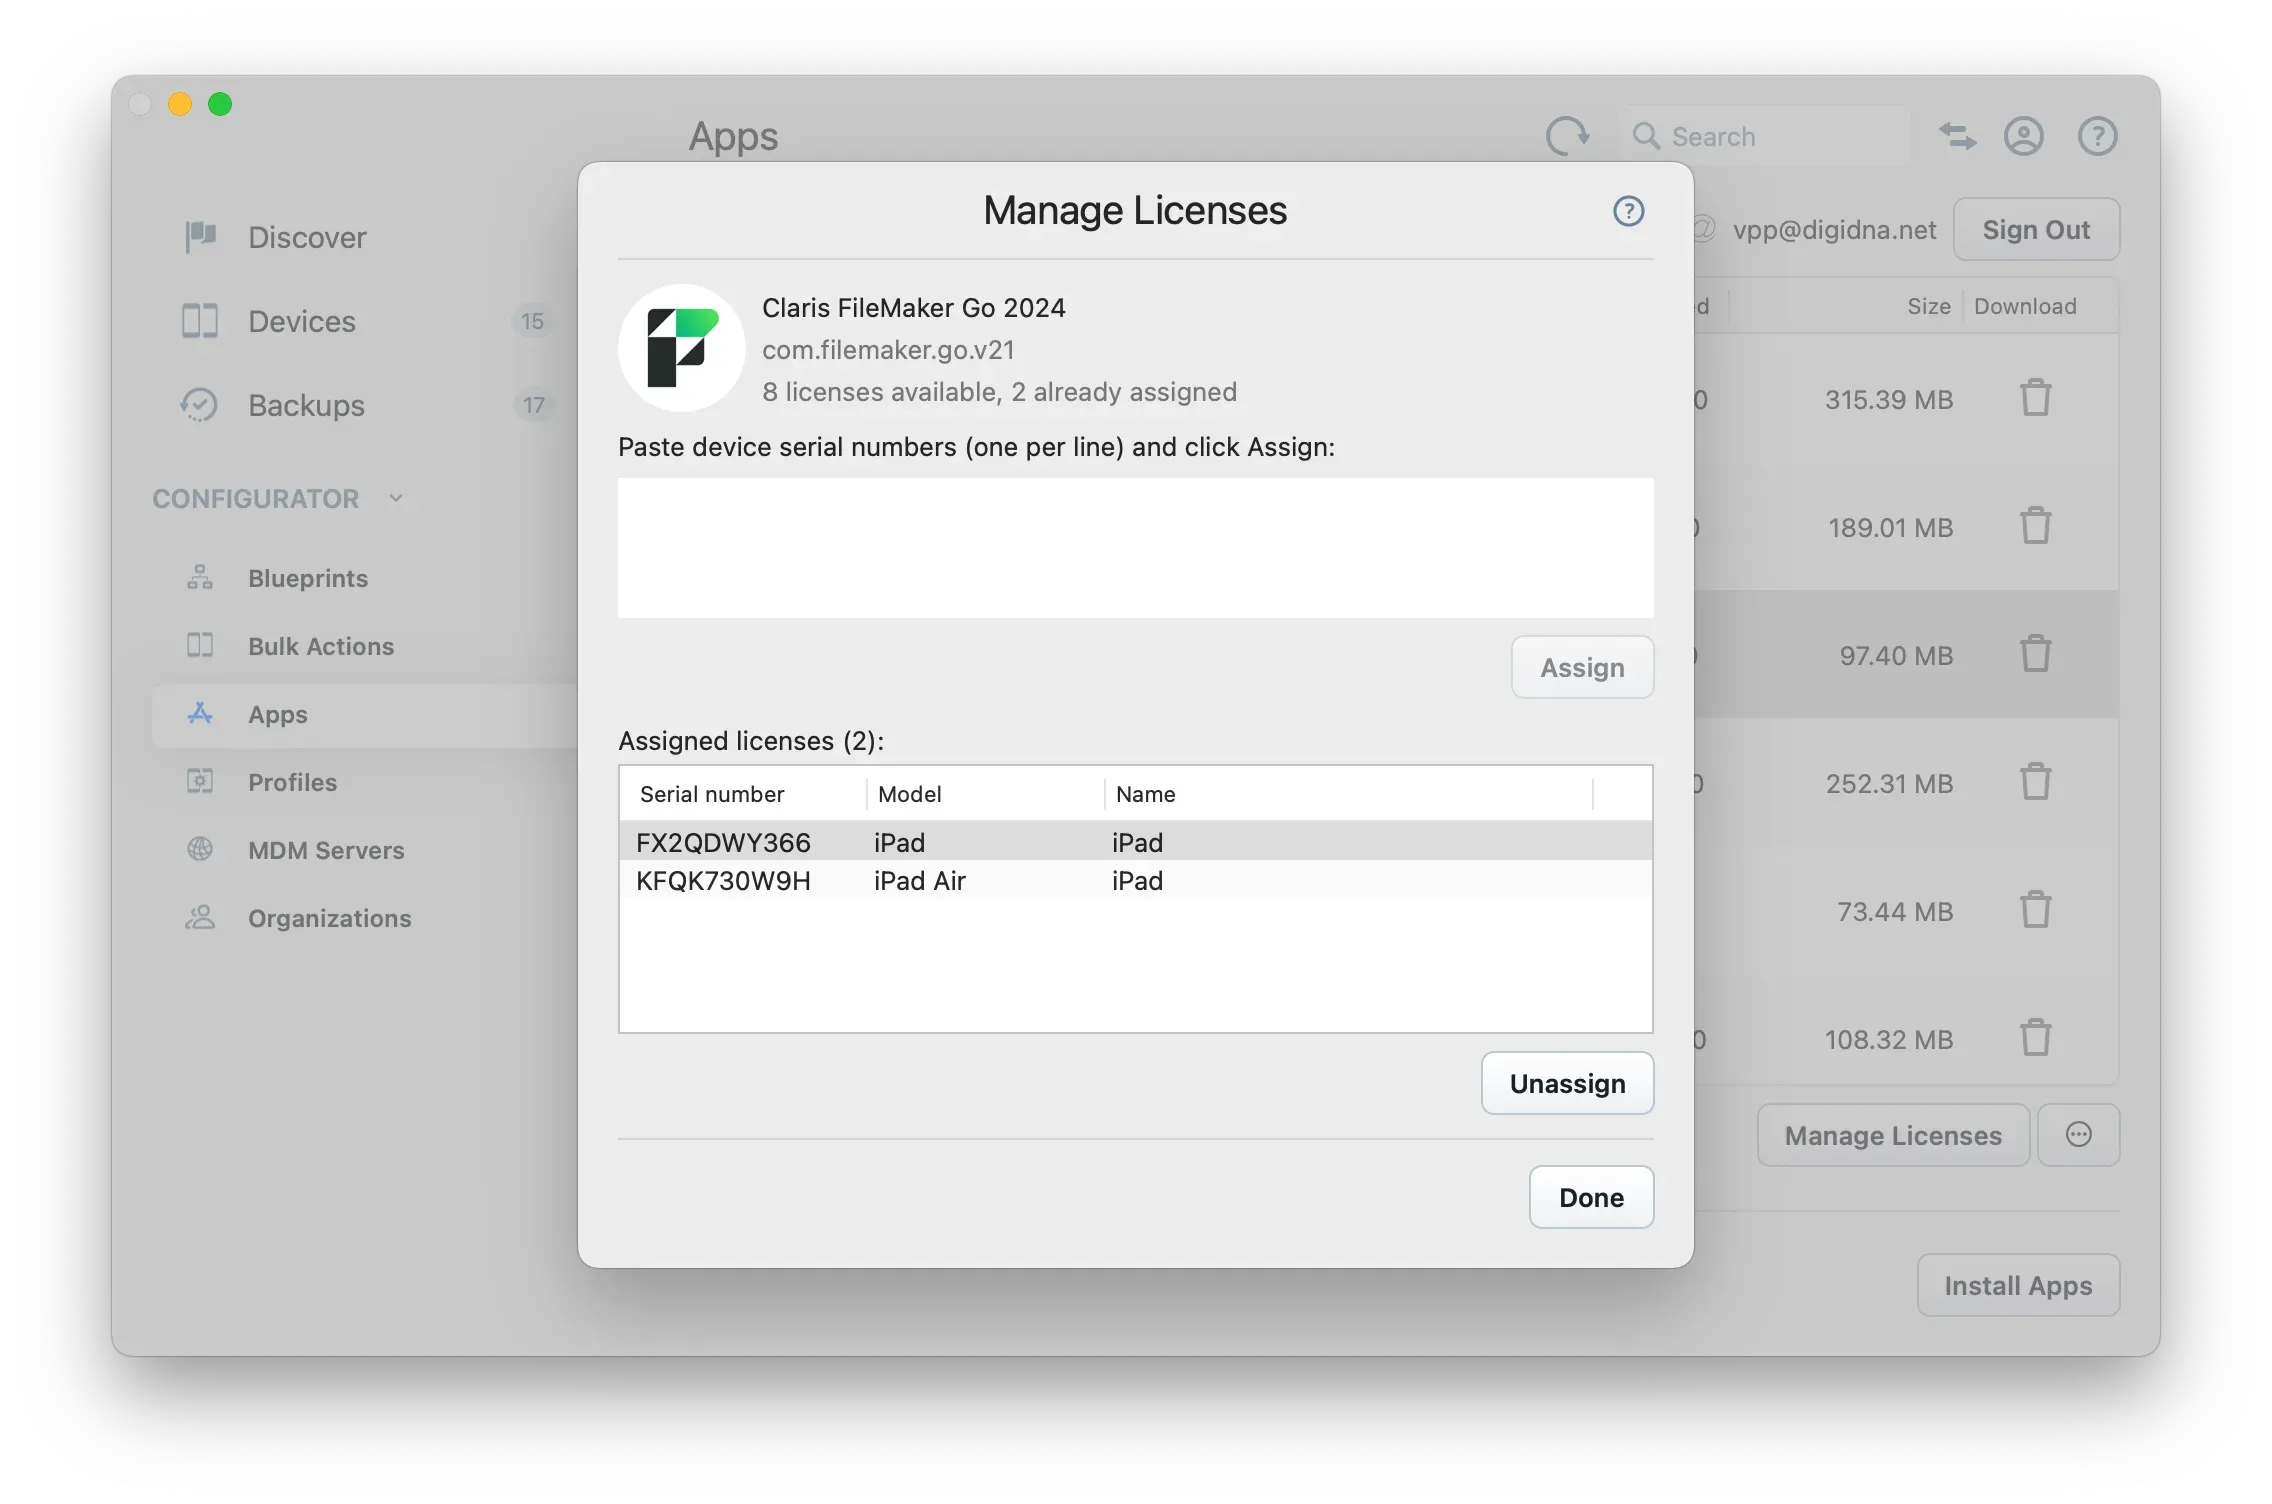
Just like Apple Configurator, iMazing Configurator lets you manage device based license assignments but not user based license assignments. Serial numbers are used to assign a license to known devices.
Tips:
For a detailed guide on how to manage apps with a Volume Purchase account, please read our dedicated guide.
You can use the Device Bulk Actions section of iMazing Configurator to export device serial numbers known to iMazing.
"Volume Purchase Account Already in Use" Warning
When iMazing loads apps from your Volume Purchase account, it may display the following warning:
Volume Purchase for this account is already managed by xxx.com. For your convenience, iMazing will perform device based license assignments and unassignments as needed, on behalf of xxx.com.
This occurs if you are already managing assignments of volume purchased apps or books with your MDM solution. In that case, iMazing will not take ownership of your account so as not to interfere with your current MDM solution, and license management will be performed on behalf of your MDM. You may need to refresh the apps view in your MDM for it to properly reflect license assignments performed by iMazing. Jamf Now, for example, features a Sync button to that effect.
Automatic License Assignments
If you are signed in to a Volume Purchase account, iMazing will automatically try to assign licenses when you install apps, and unassign them upon uninstallation. An error will occur if no more licenses are available.
Tip:
You can disable automatic license assignments in iMazing's Preferences window in the Library tab.
Apps in Blueprints
Blueprints can be configured to install apps, add files to them, and set their configuration. Blueprints also can be configured to put the device in Single App Mode and whitelist or blacklist apps.
- Adding apps to a blueprint
- Configuring a blueprint for Single App Mode
- Adding app files and configuration to a blueprint
- Configuring app restrictions
Managing Downloads and Updates
Maintaining a local library of apps with iMazing is already extensively covered in the following guide: Manage and Download Apps Without iTunes. It describes iMazing's Manage Apps tool, which displays the app library within the context of a specific device.
Configuration and Provisioning Profiles
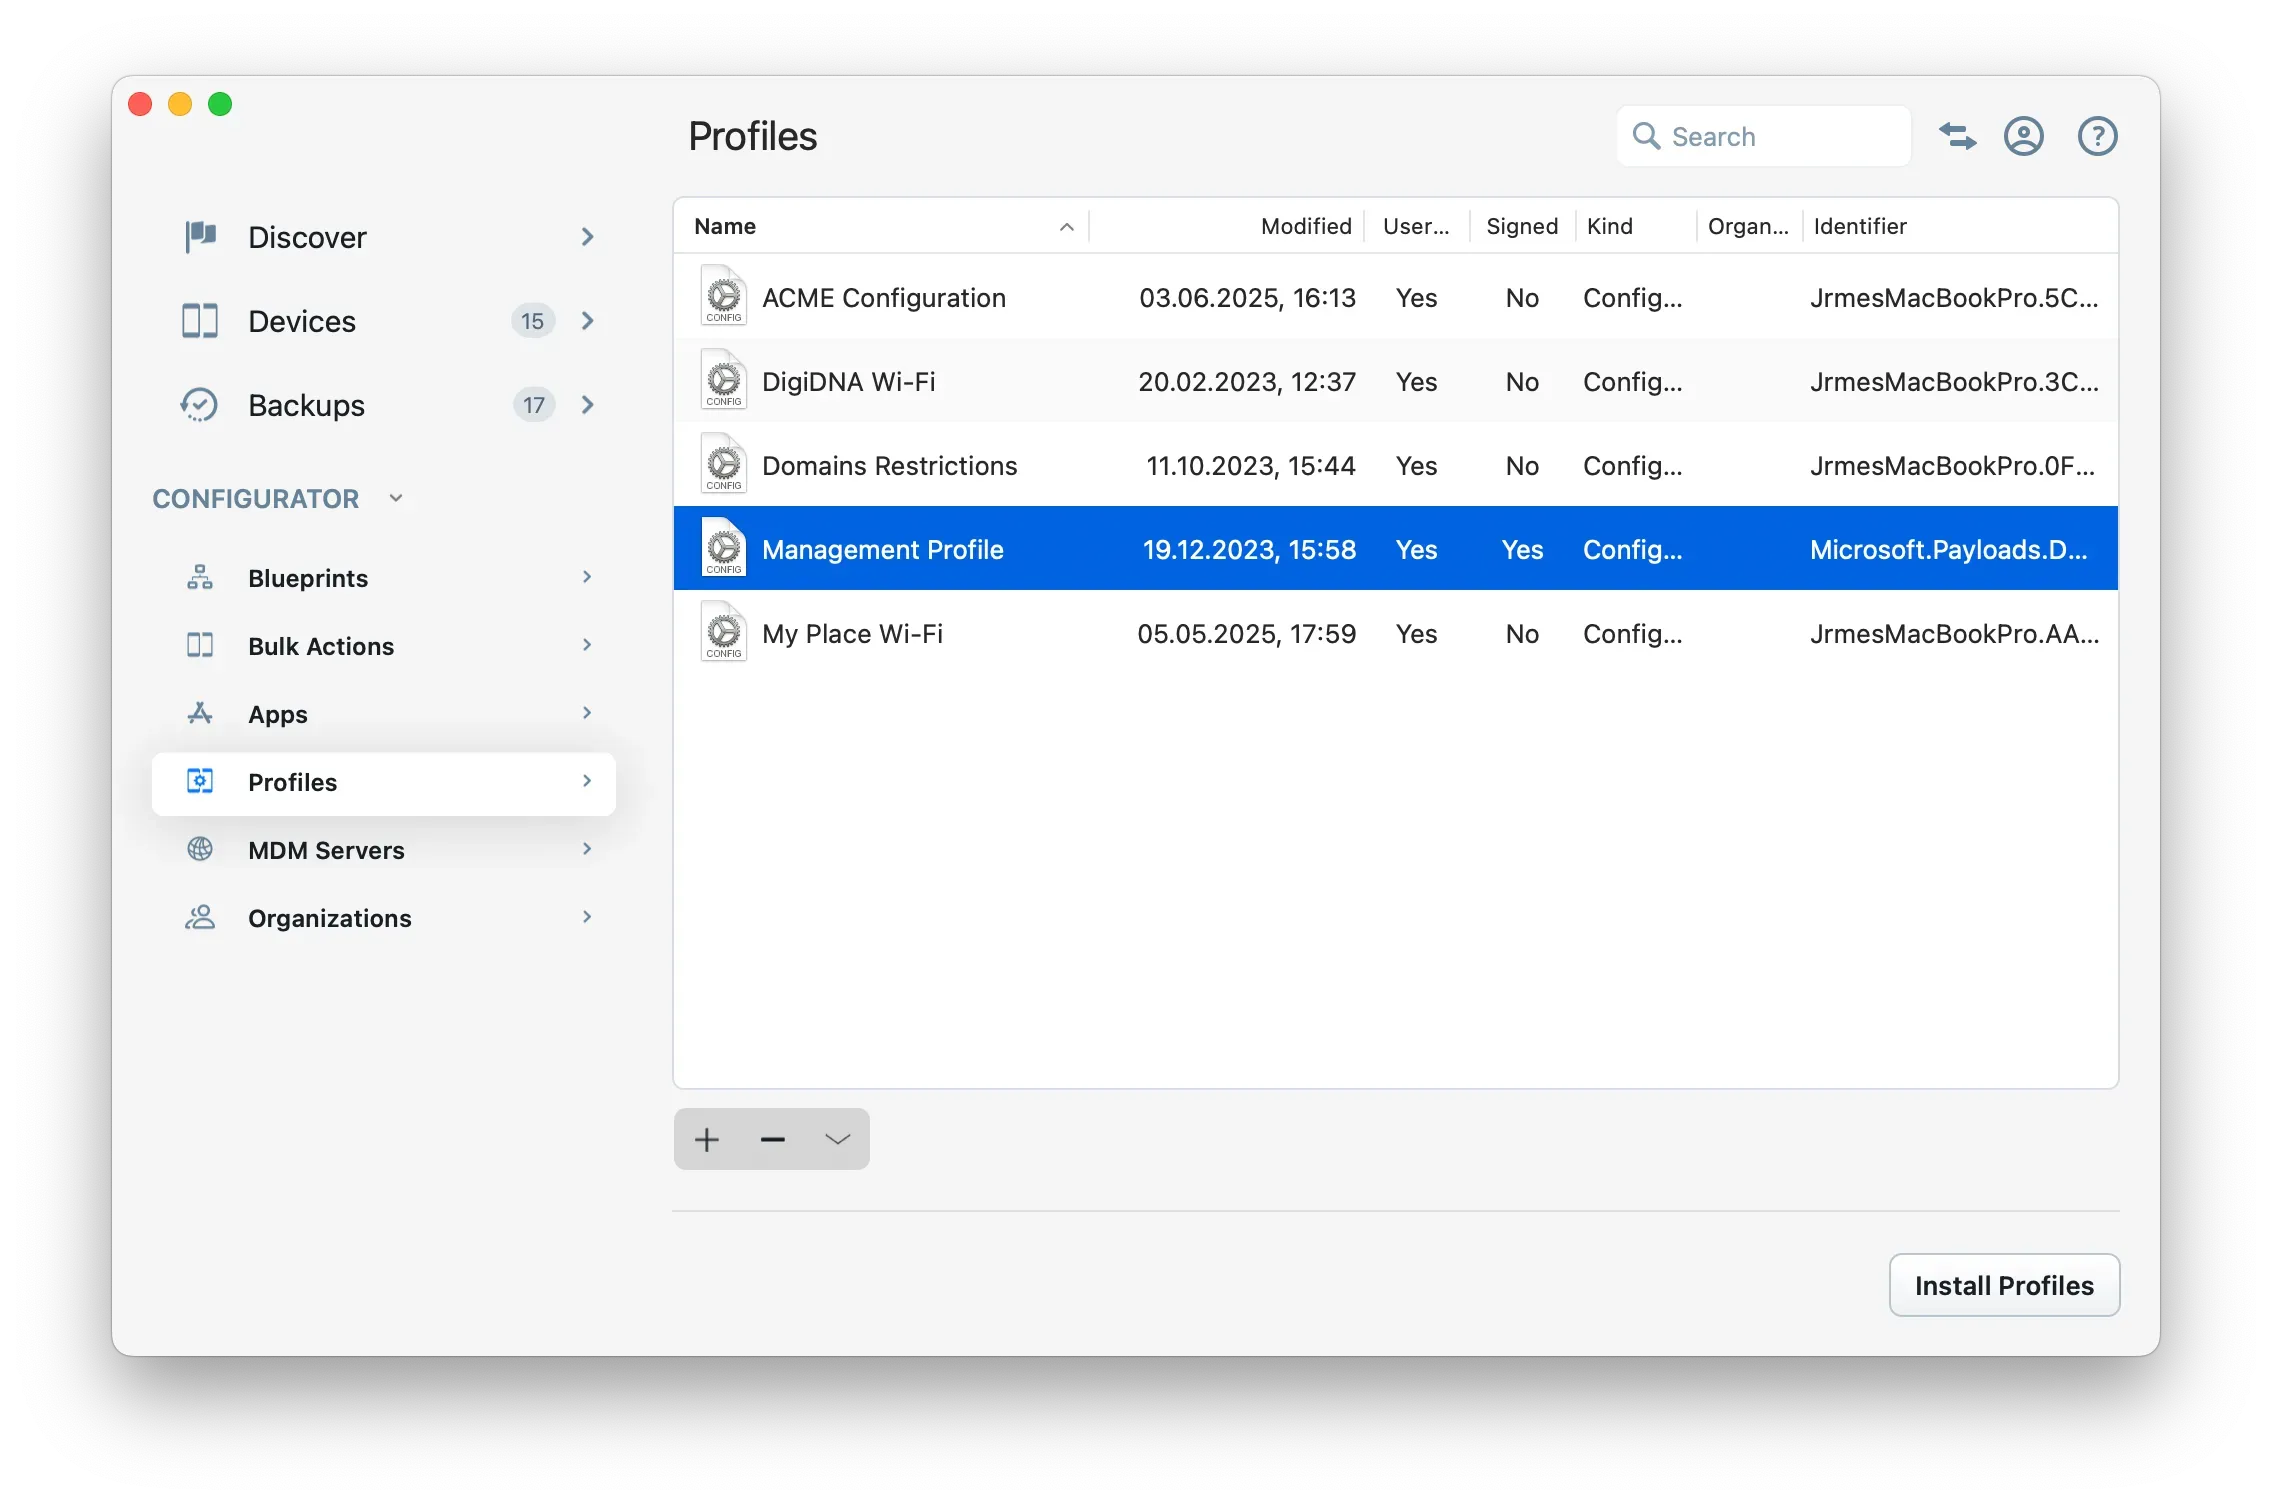
In the Profiles tab, you'll find configuration profiles (.mobileconfig) and provisioning profiles (.mobileprovision) stored in iMazing Configurator's library, default path: /Users/{user}/Library/Application Support/iMazing/Library/Profiles
The profile library is also available in the standard version of iMazing, for both macOS and Windows. Select the Library tab in iMazing's Preferences window and click Manage Profiles to open the library.
Creating and Editing Configuration Profiles
Click the + button to create a new profile, and double click an existing profile to edit it. In both cases, iMazing will launch iMazing Profile Editor, a separate app packaged with iMazing which offers advanced configuration profile editing tools.
For more details on our profile editor, see Getting Started with iMazing Profile Editor.
Importing and Exporting Profiles
Drag profiles to the library to import them, or drag items out of the library to export. Importing a profile copies it to iMazing's Library folder.
Installing Profiles
Select the profiles you want to install and click the Install button in the bottom left corner. This will open the Operation Dispatcher View, where you can choose which target devices should receive the profiles.
Alternate workflow: profiles can also be installed directly from the Device Profiles view.
User Consent: on supervised iOS devices, installing profiles only requires the device to be unlocked or passcode free. On non-supervised devices, iOS will prompt you to install downloaded profiles.
Profiles in Blueprints
Configuration profiles are a vital part of blueprints. Please refer to the Profiles section of our iMazing Configurator: Blueprints Deep Dive article for more information.
MDM Servers
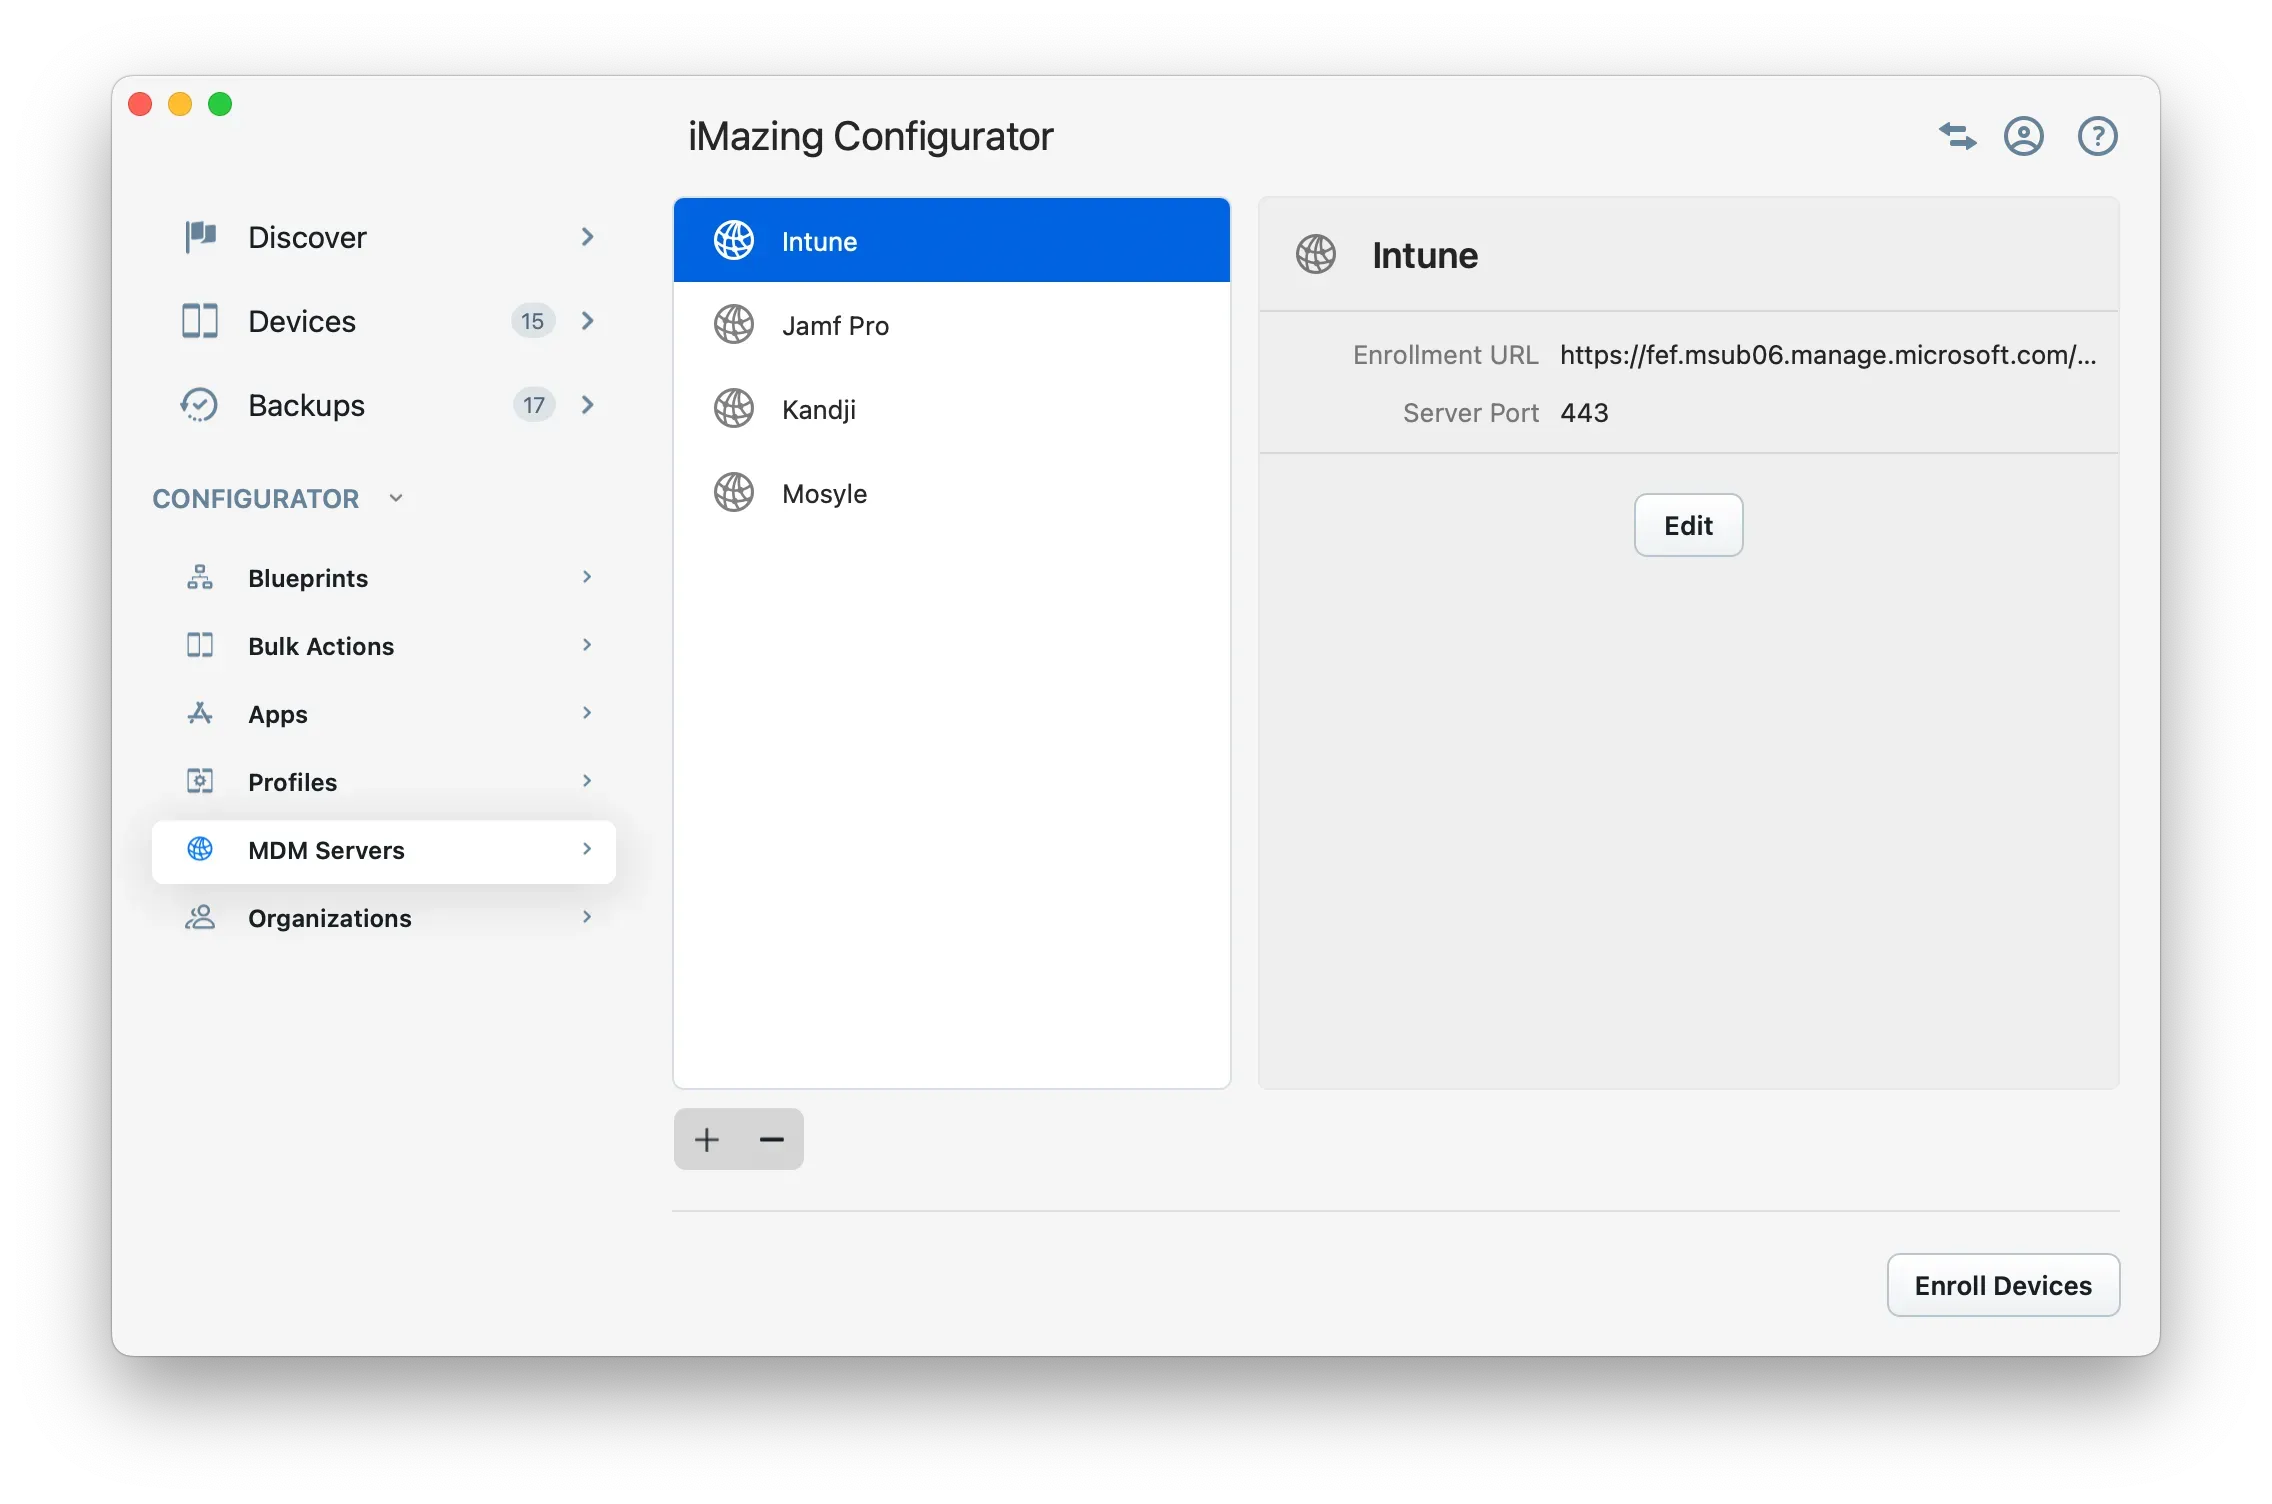
Adding an MDM Server
To add one of your existing MDM servers to iMazing, click the + button and enter a name for that server. You then have 2 options to define how that server's MDM enrollment profile will be acquired:
Enrollment URL
Enter your MDM server's enrollment URL. When you enroll devices via a blueprint, iMazing will either send the URL to the device for manual, user approved enrollment (Manual enrollment), or download the profile from that URL and install it directly (Zero-touch MDM Enrollment).
MDM Enrollment URL: Your MDM needs to support "Enrollment via a URL" by providing a service configuration entry point, see Apple's documentation.
Note that you should enter either the MDM server enrollment's full URL or only its domain name in Enrollment URL, depending on if your MDM server exposes a
MDMServiceConfigendpoint. For example:mymdminstance.mymdmserver.com(if your MDM exposes ahttps://mymdminstance.mymdmserver.com/MDMServiceConfig) orhttps://mymdminstance.mymdmserver.com/xyzif the endpoint is different thanMDMServiceConfig.
Choose from Library
Not every MDM solutions expose an enrollment URL (a service configuration entry point, see Apple's documentation for more details). For this reason, it can be useful to associate an existing MDM enrollment profile downloaded manually with an iMazing MDM server:
- Download the enrollment profile from your MDM server.
- Add the profile to iMazing's profile library.
- When you add the server, choose the Choose MDM Profile from Library option and pick the appropriate MDM enrollment profile from your library.
Notes:
When choosing an enrollment profile in the Add MDM Server view, iMazing will display your profile library with only MDM enrollment profiles listed.
For iMazing MDM servers using an Enrollment Profile (rather than a URL), blueprints only offer Zero-touch MDM Enrollment. This is because iMazing installs the enrollment profile directly to devices instead of configuring an enrollment URL through DEP/Cloud configuration.
When using an Enrollment URL, the end-user must manually accept enrollment through the "Device Management" or "Remote Management" screen in the iOS Setup Assistant.
Enrolling Devices
Direct enrollment (preserves data)
Click Enroll Devices, and iMazing will prompt you to select devices to enroll and confirm. Enrolling devices with this method downloads the enrollment profile if needed, and installs it on target devices. iOS may prompt you to confirm profile installation. This workflow is suitable to test open enrollment or to enroll a device without erasing it.
Automated Device Enrollment and MDM enrollment via blueprints
If your devices are registered in Apple Business or Apple School manager for Automated Device Enrollment (ADE/DEP), you won't need to add your MDM server to iMazing Configurator. Instead, you can use blueprints to streamline Automated Device Enrollment for multiple devices.
For devices not registered in ABM or ASM, you can still minimize user interaction during enrollment with Zero-touch MDM Enrollment. Learn about the available MDM enrollment modes in the blueprint editor's General section (MDM and Automated Device Enrollment).
Organizations
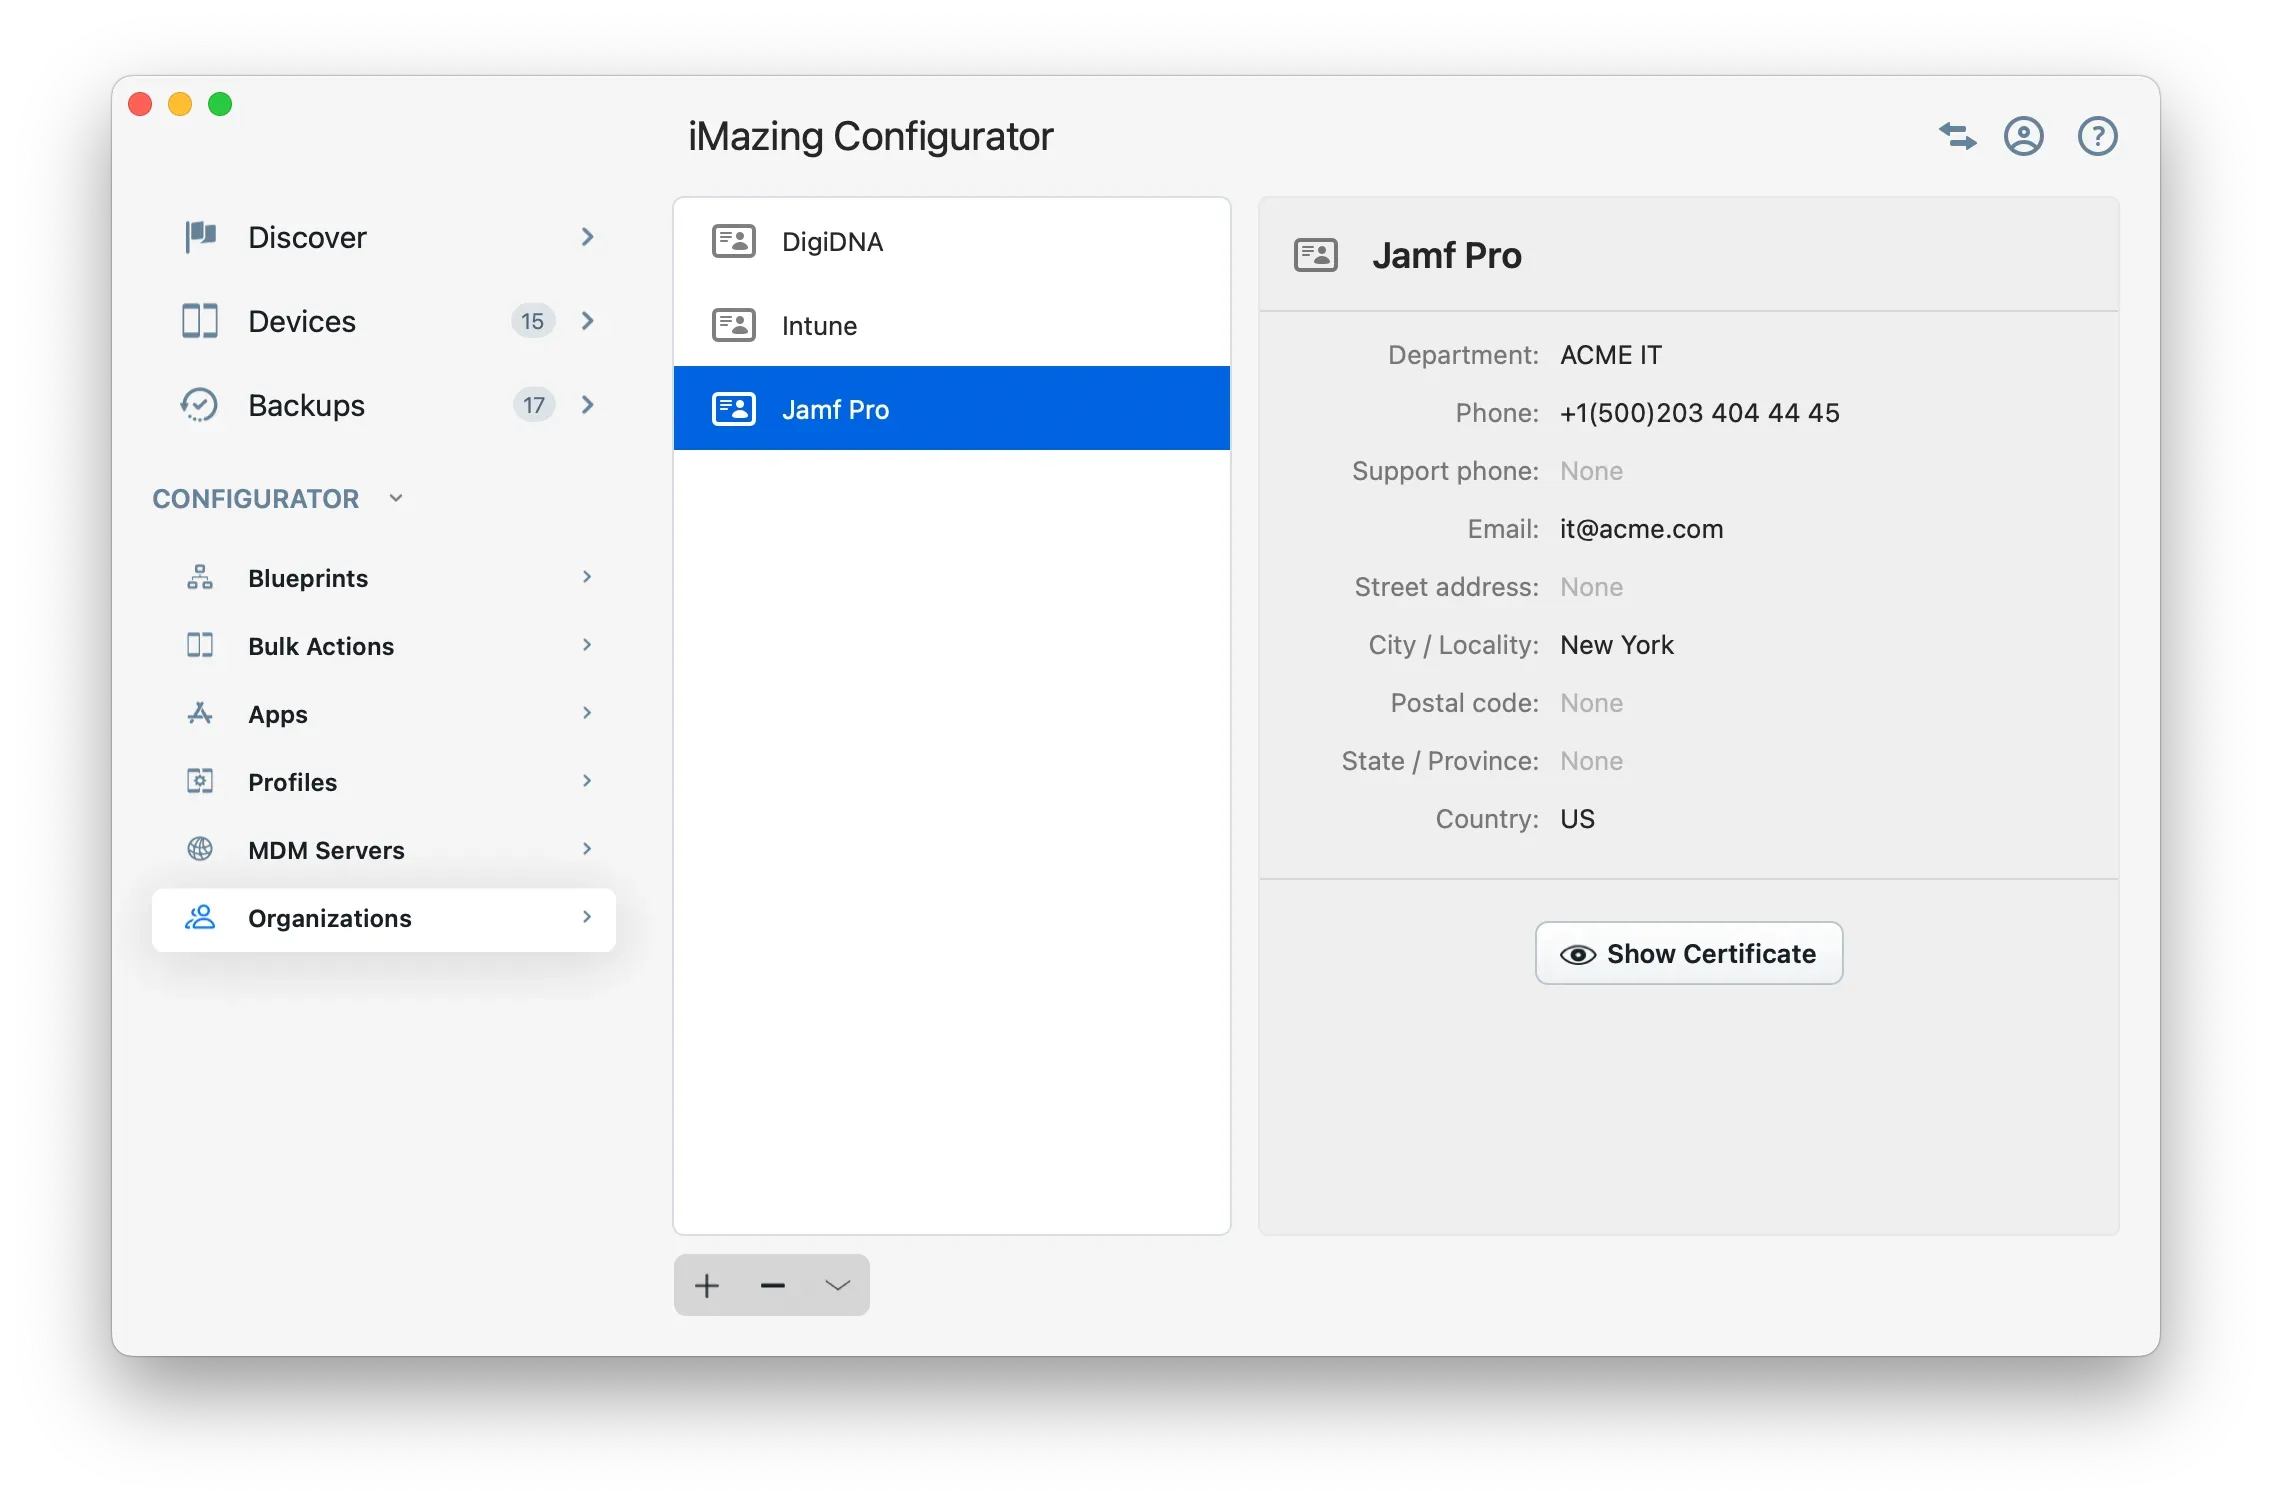
What is an Organization?
Organizations can establish ownership of supervised Apple mobile devices through a digital certificate called the Supervision Identity. This certificate contains metadata (organization name, department, address, etc.) and enables device supervision, privileged pairing, and elevated permissions between iOS/iPadOS devices and their supervising computers (hosts).
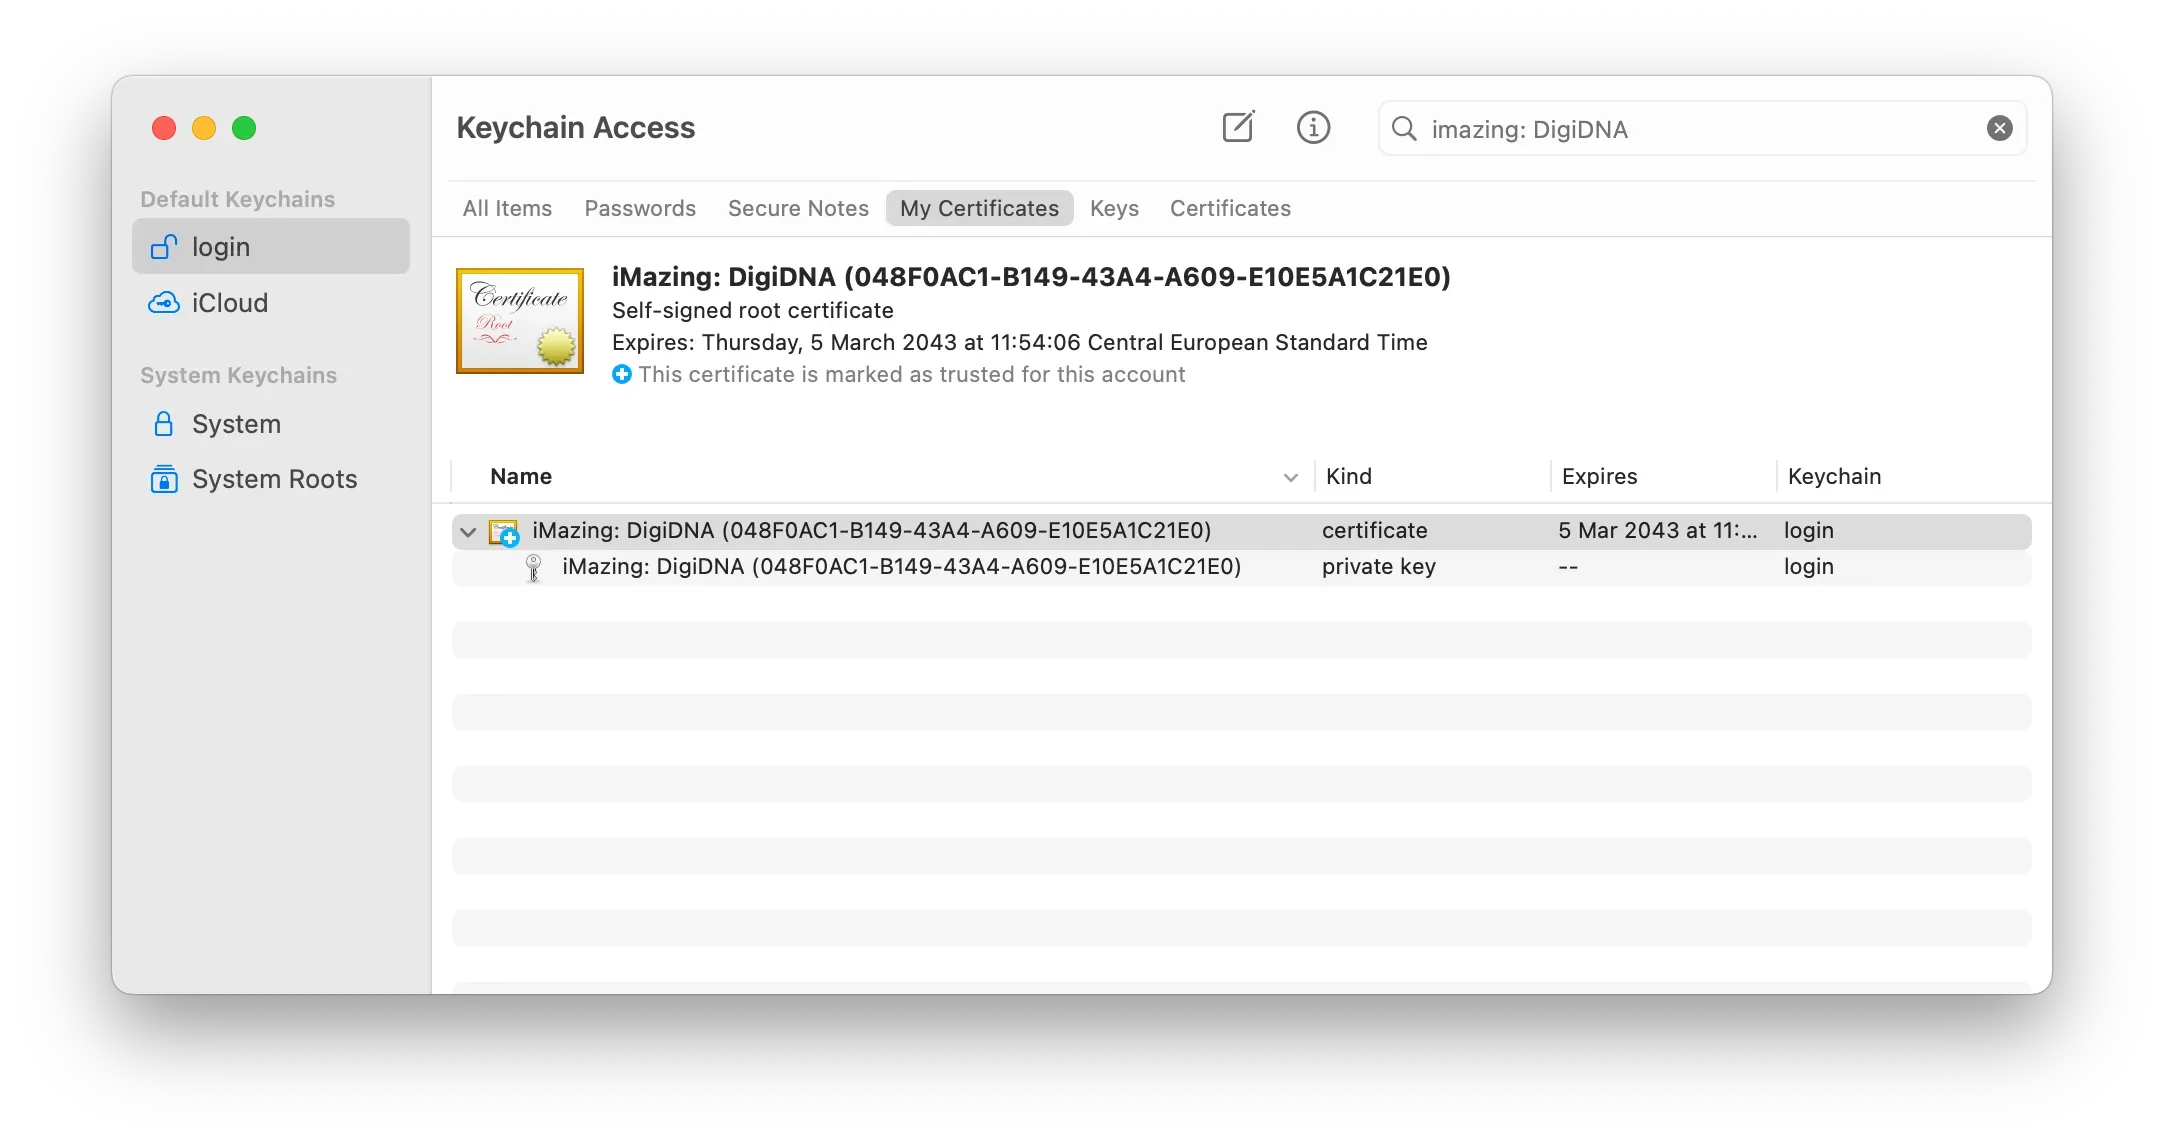
iMazing follows industry standards in securing the handling of identities:
- Securely stored in the macOS Keychain or Windows Store Certificate
- Unencrypted certificates never written to physical storage
- Exported to standard password protected PKCS12 format (
.p12or.pfx) or.organization(compatible with Apple Configurator 2)
If you are not familiar with supervision, please refer to the Supervision Essentials section of our Blueprints Deep Dive article.
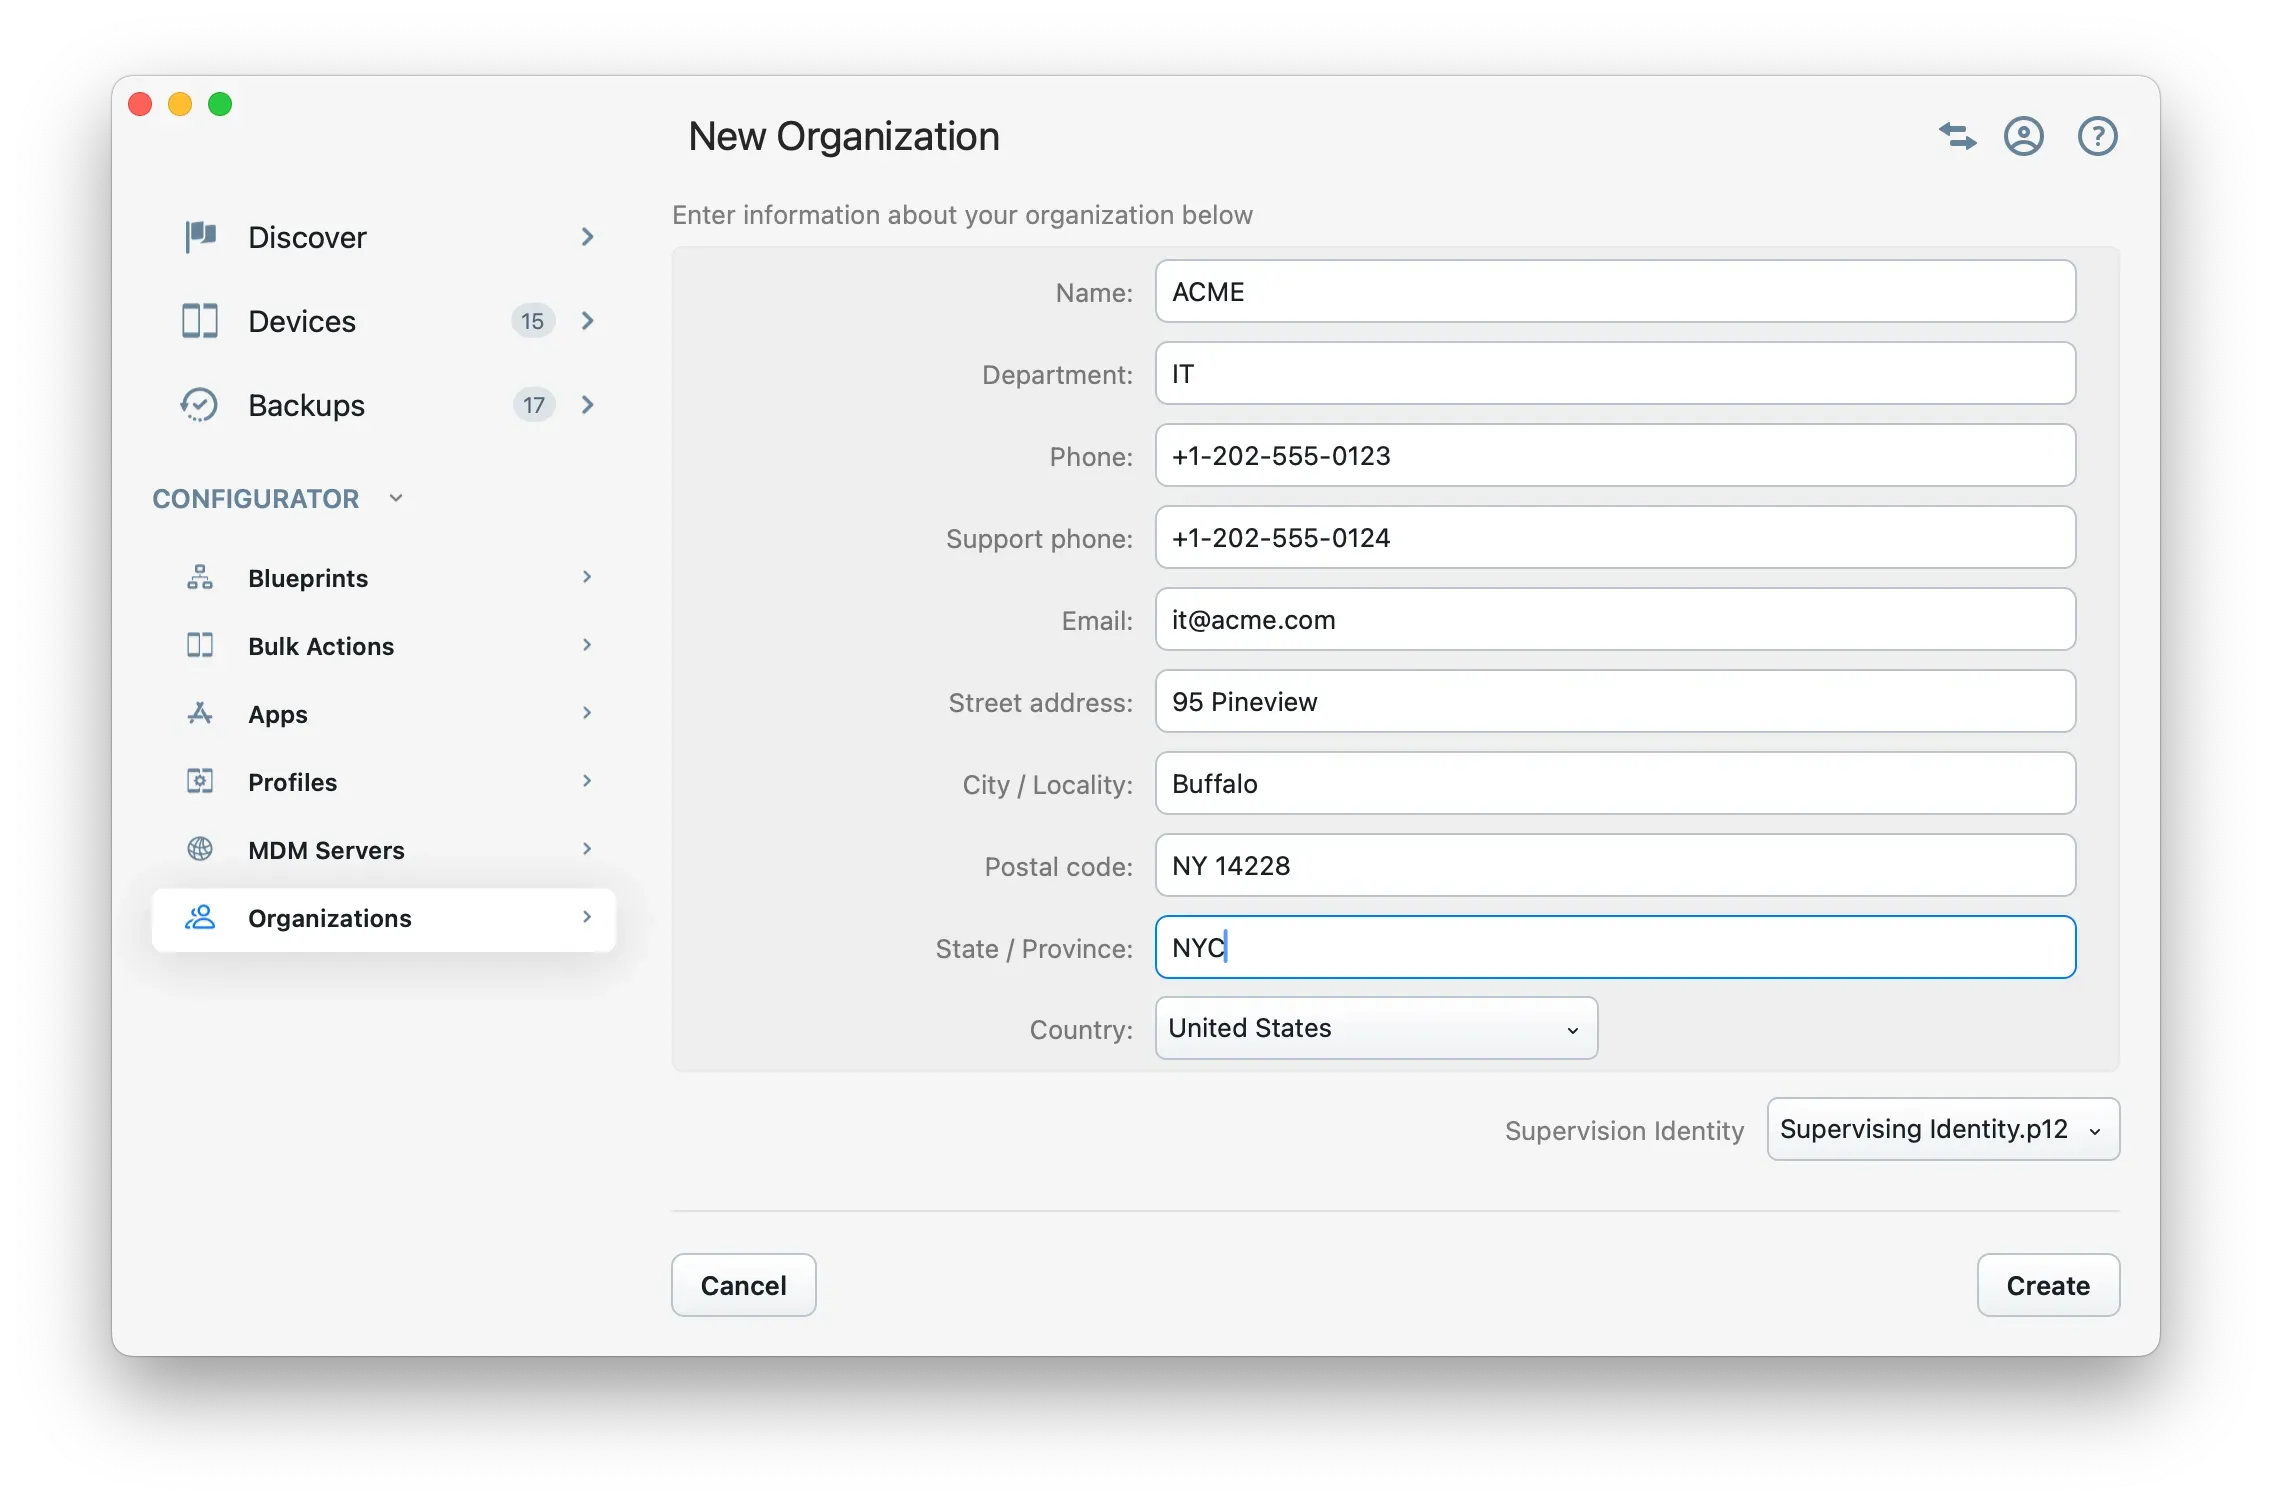
Creating an Organization
Click the + button to create a new organization. Only an organization name is required, the other fields are optional. By default, iMazing will generate a new supervision identity and store it in the macOS Keychain or Windows Certificate Store.
Importing an Existing Organization or Identity
Click the ⌄ button and choose Import .organization File to import an organization exported from Apple Configurator 2 or iMazing Configurator.
To add an organization to iMazing using an existing supervision identity exported from your MDM solution, click the + button. Then, use the Supervision Identity dropdown menu to select a certificate in PKCS12 format (.p12 or .pfx). This will associate the certificate with your organization, as shown in the screenshot below:
Exporting an Organization or Identity
Click the ⌄ button and choose Export to .organization File to export the organization, including its supervision identity, as an Apple Configurator compatible .organization file.
Click the ⌄ button and choose Export Supervision Identity to .p12 File to export the organization's identity only.
In both cases, you'll be prompted for a password to protect the exported identity in PKCS12 format.
The Organizations library is also available in the standard version of iMazing for both macOS and Windows. Go to the Library tab in iMazing's Preferences and click Manage Organizations to open the Organizations window.
Restricted Pairing with Supervision:
For information about restricted pairing with a supervising host certificate, see the Supervision Prohibited Pairing section in our pairing guide.
Other Features
A few features useful for sys admins can be found outside of the iMazing Configurator, in the 'vanilla' iMazing window.
Device Settings
You can configure numerous options for each device in the Device Settings section.
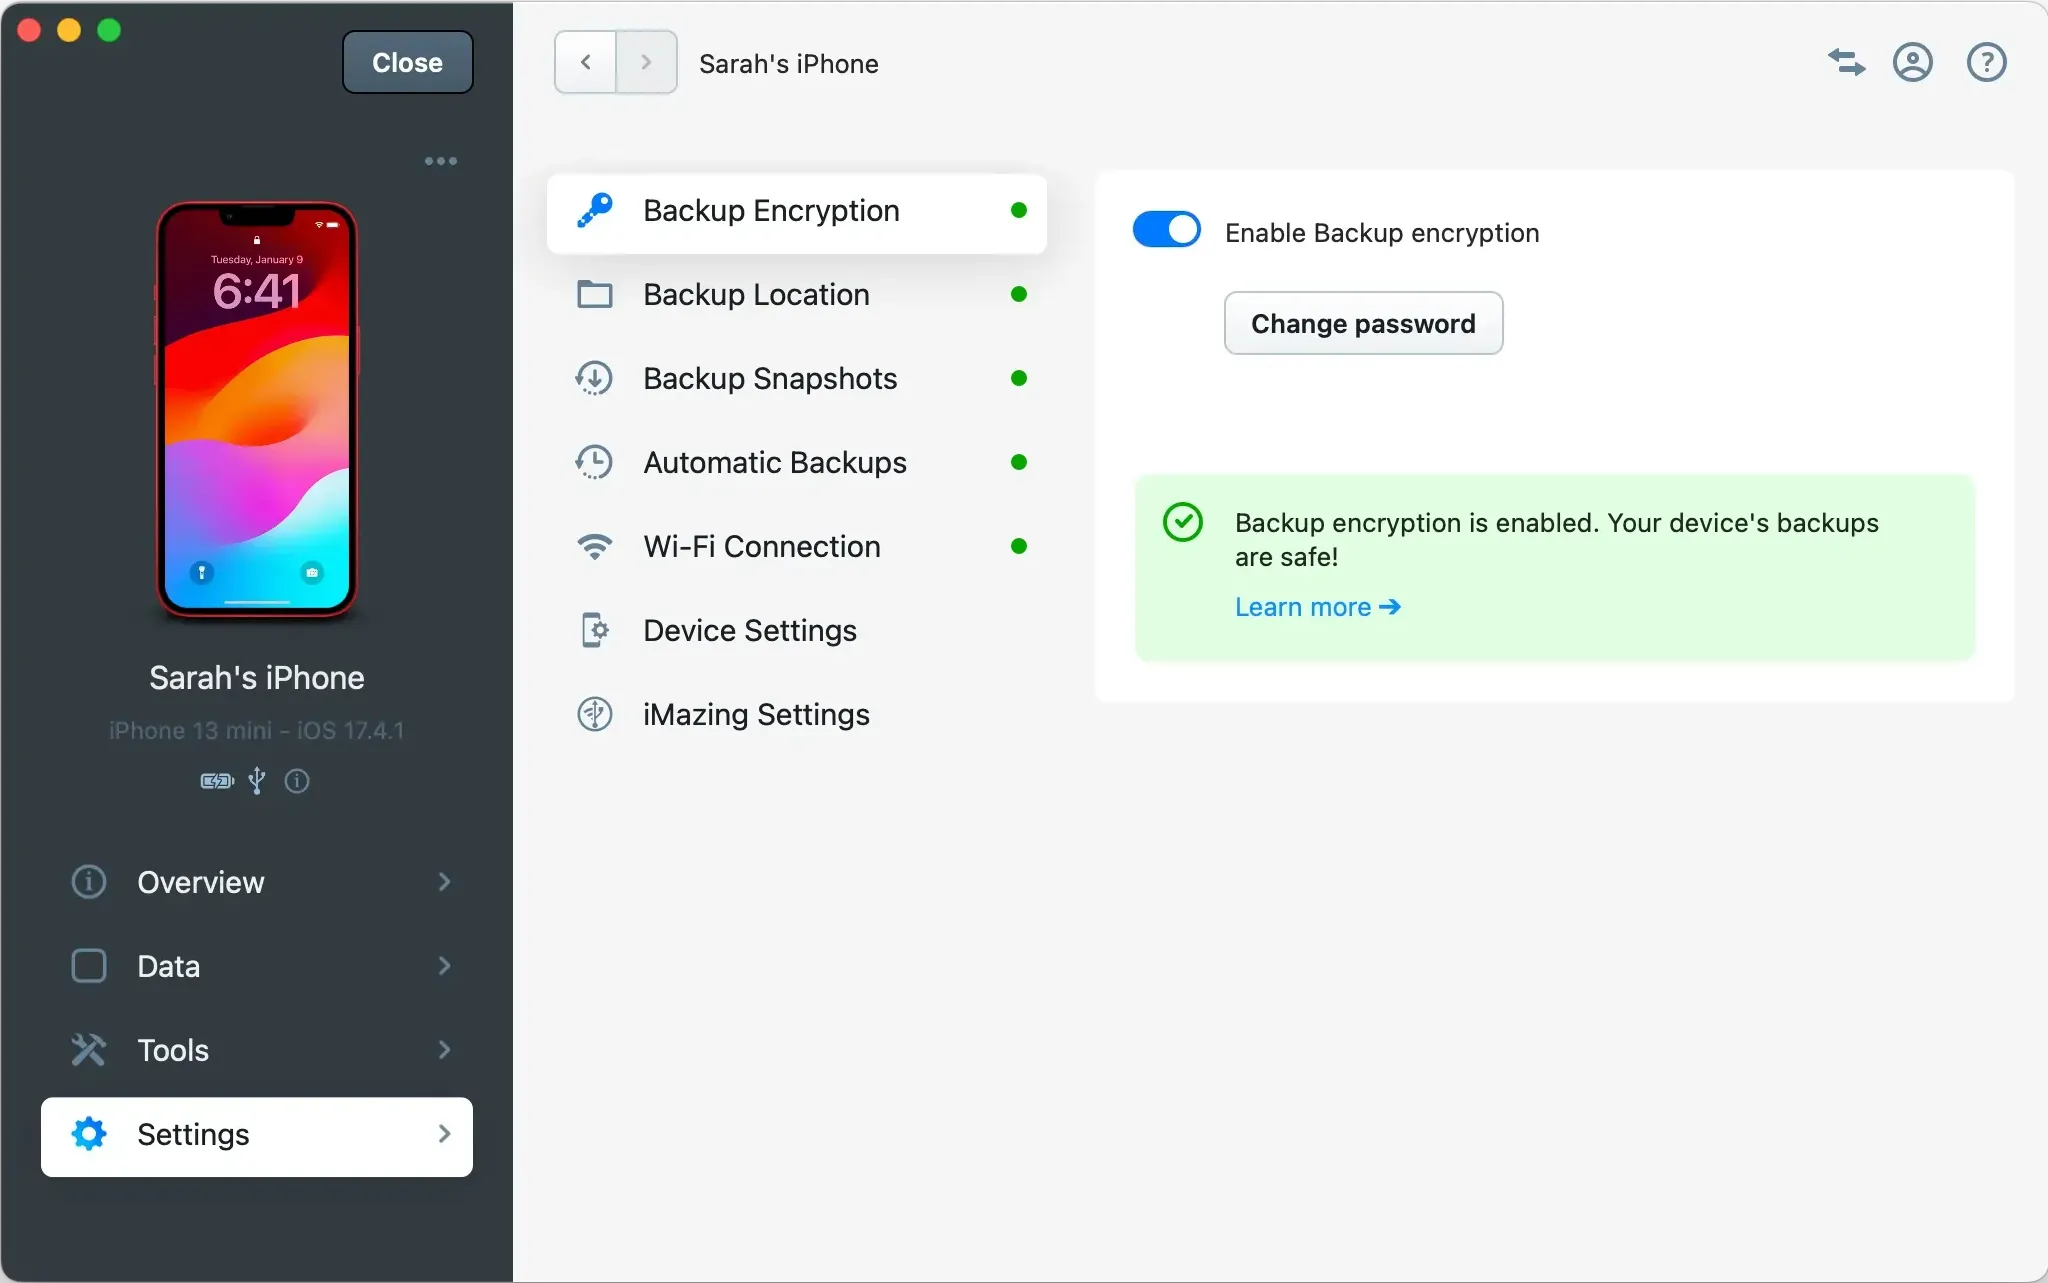
Available options include backup location, backup snapshots, backup encryption, automatic backup, and low battery notifications. These are described in detail in the Device Settings in iMazing guide.
The Device Settings panel is especially important for iOS device management. It allows you to change a device's name, language, and accessibility options. For supervised devices, you'll find these additional options:
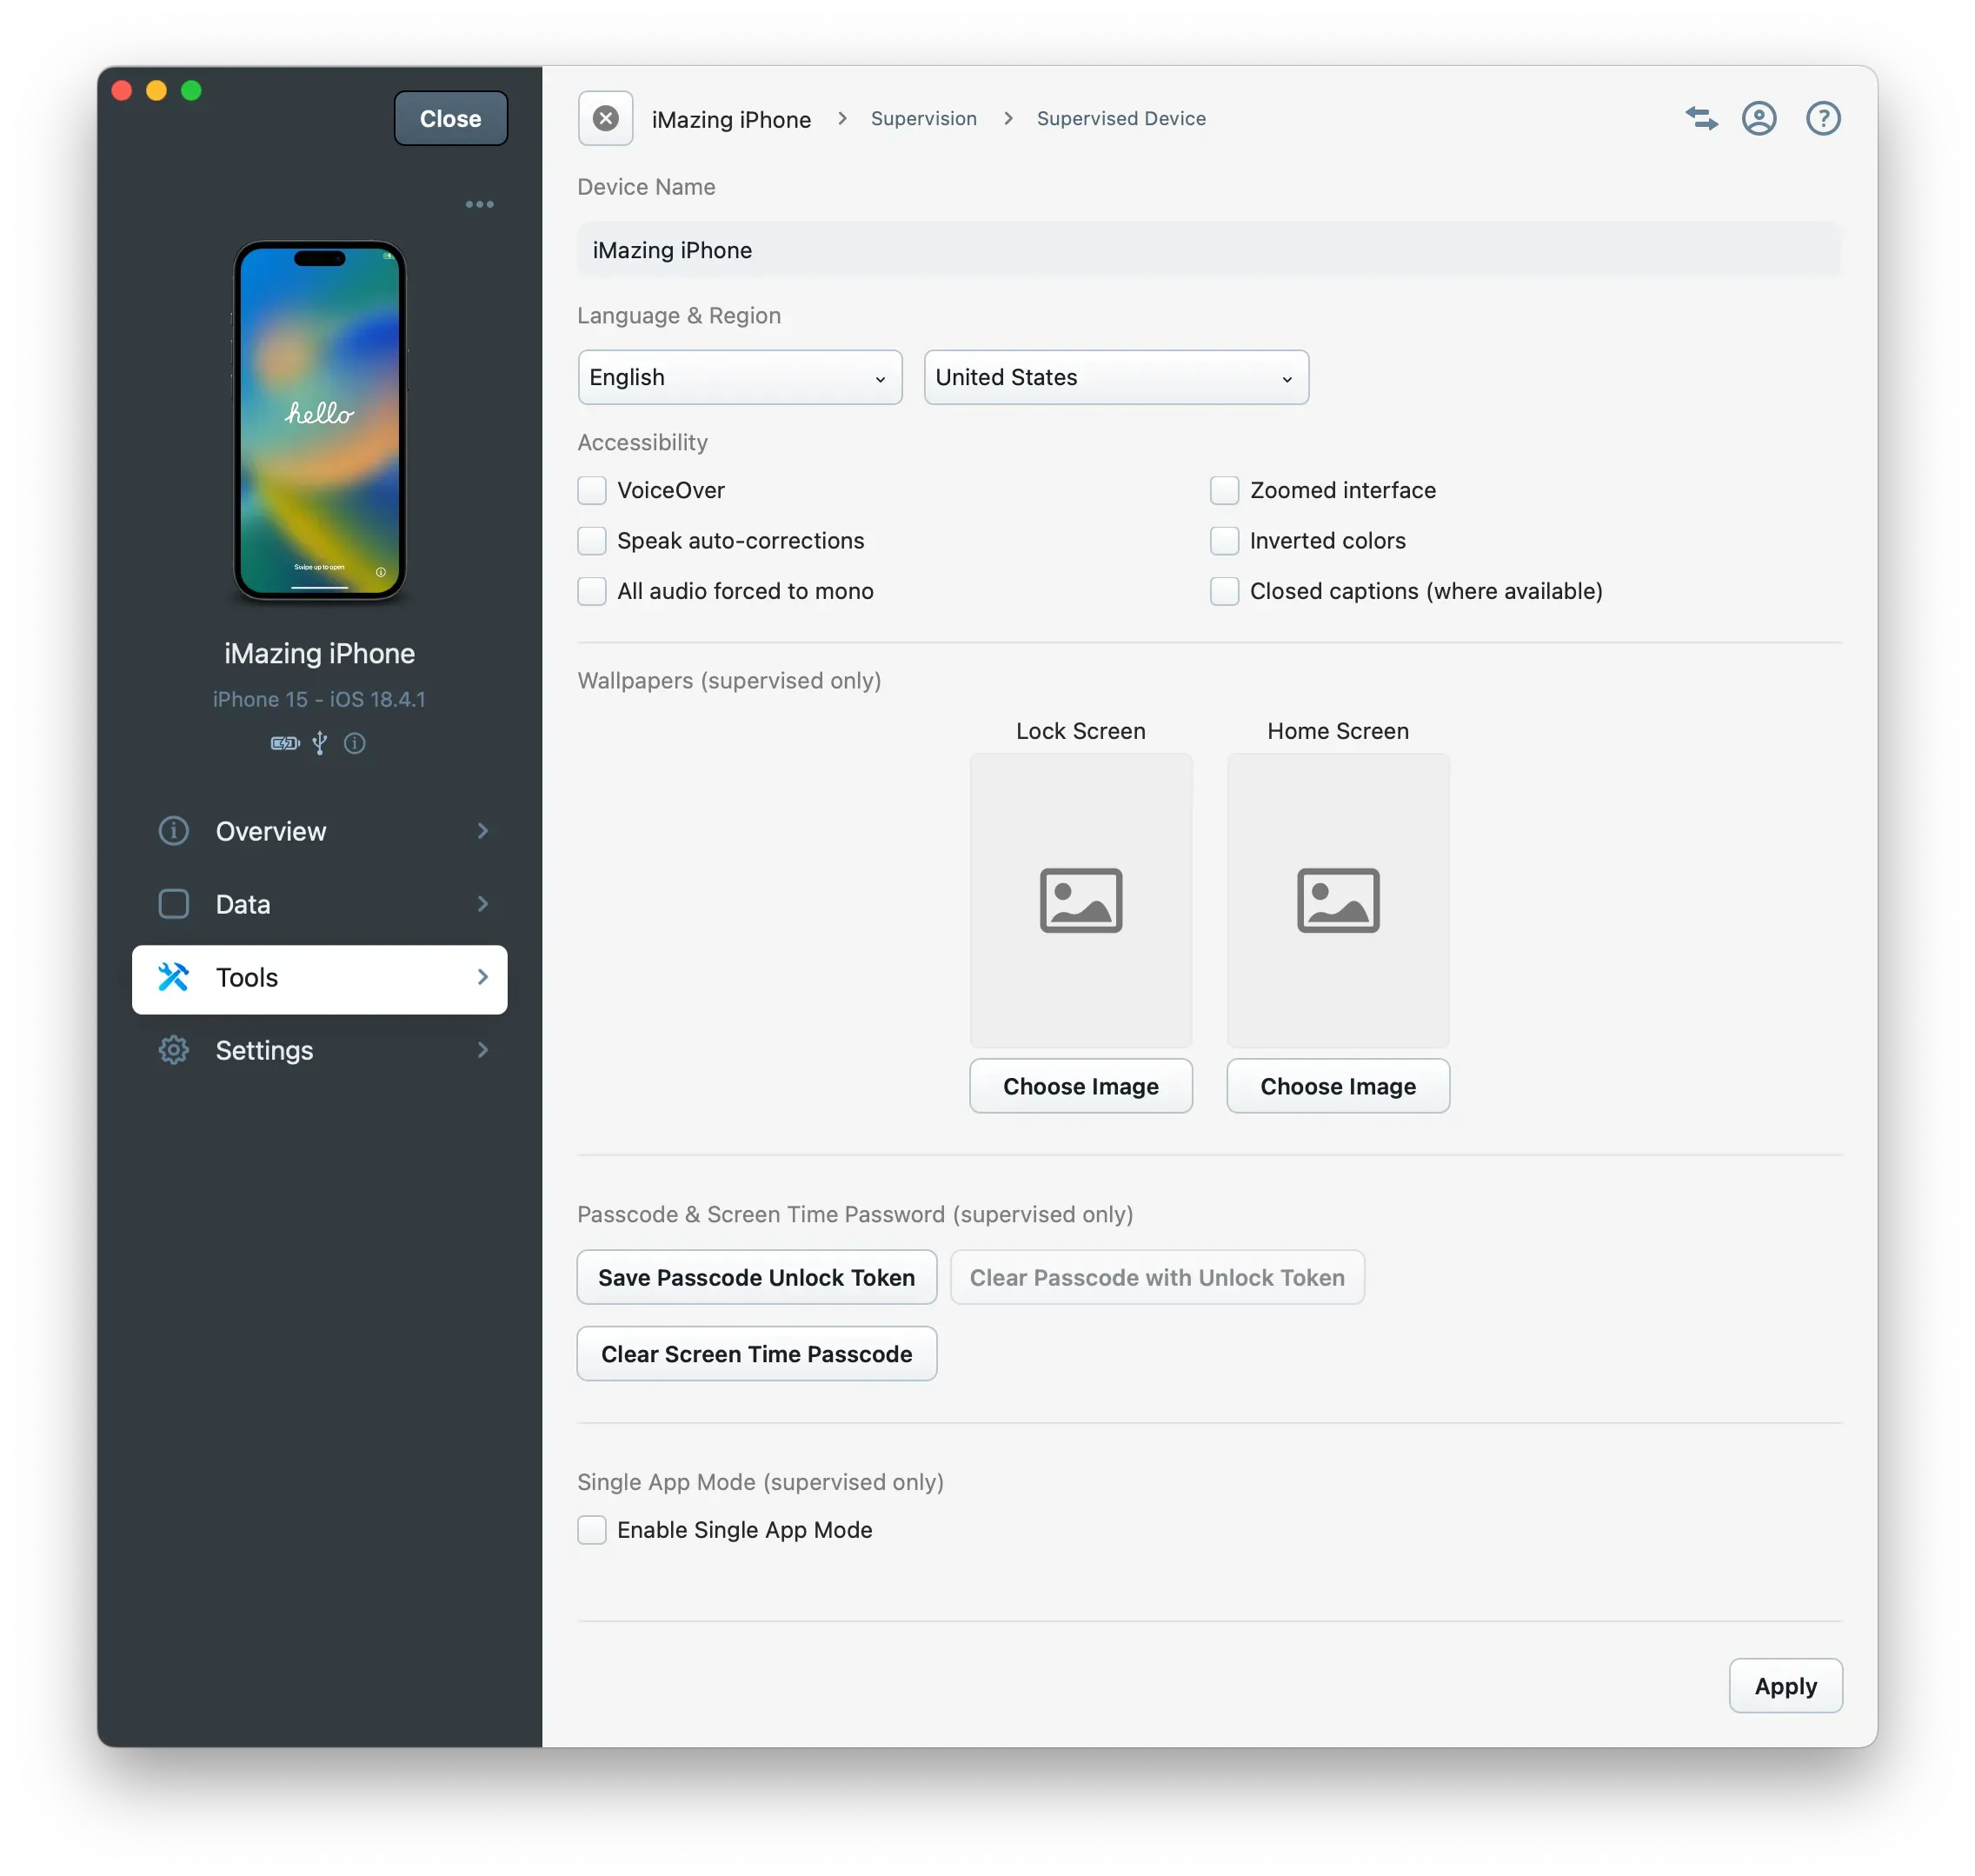
- Wallpapers can be set by dragging and dropping images or clicking Choose Image.
- A Passcode Unlock Token can be retrieved from the device (when no passcode is set) and used later to clear its passcode.
- The Screen Time Passcode (previously Restrictions Passcode) can be removed.
- The device can be put in Single App Mode or released from it (if iMazing initiated the Single App Mode).
Important: The passcode unlock token has significant limitations. If a device reboots or remains unlocked for over 24 hours, computer communication becomes impossible until the device is manually unlocked—even with supervision and disabled USB Restricted Mode. This limitation affects the Clear Passcode feature.
Device Profiles
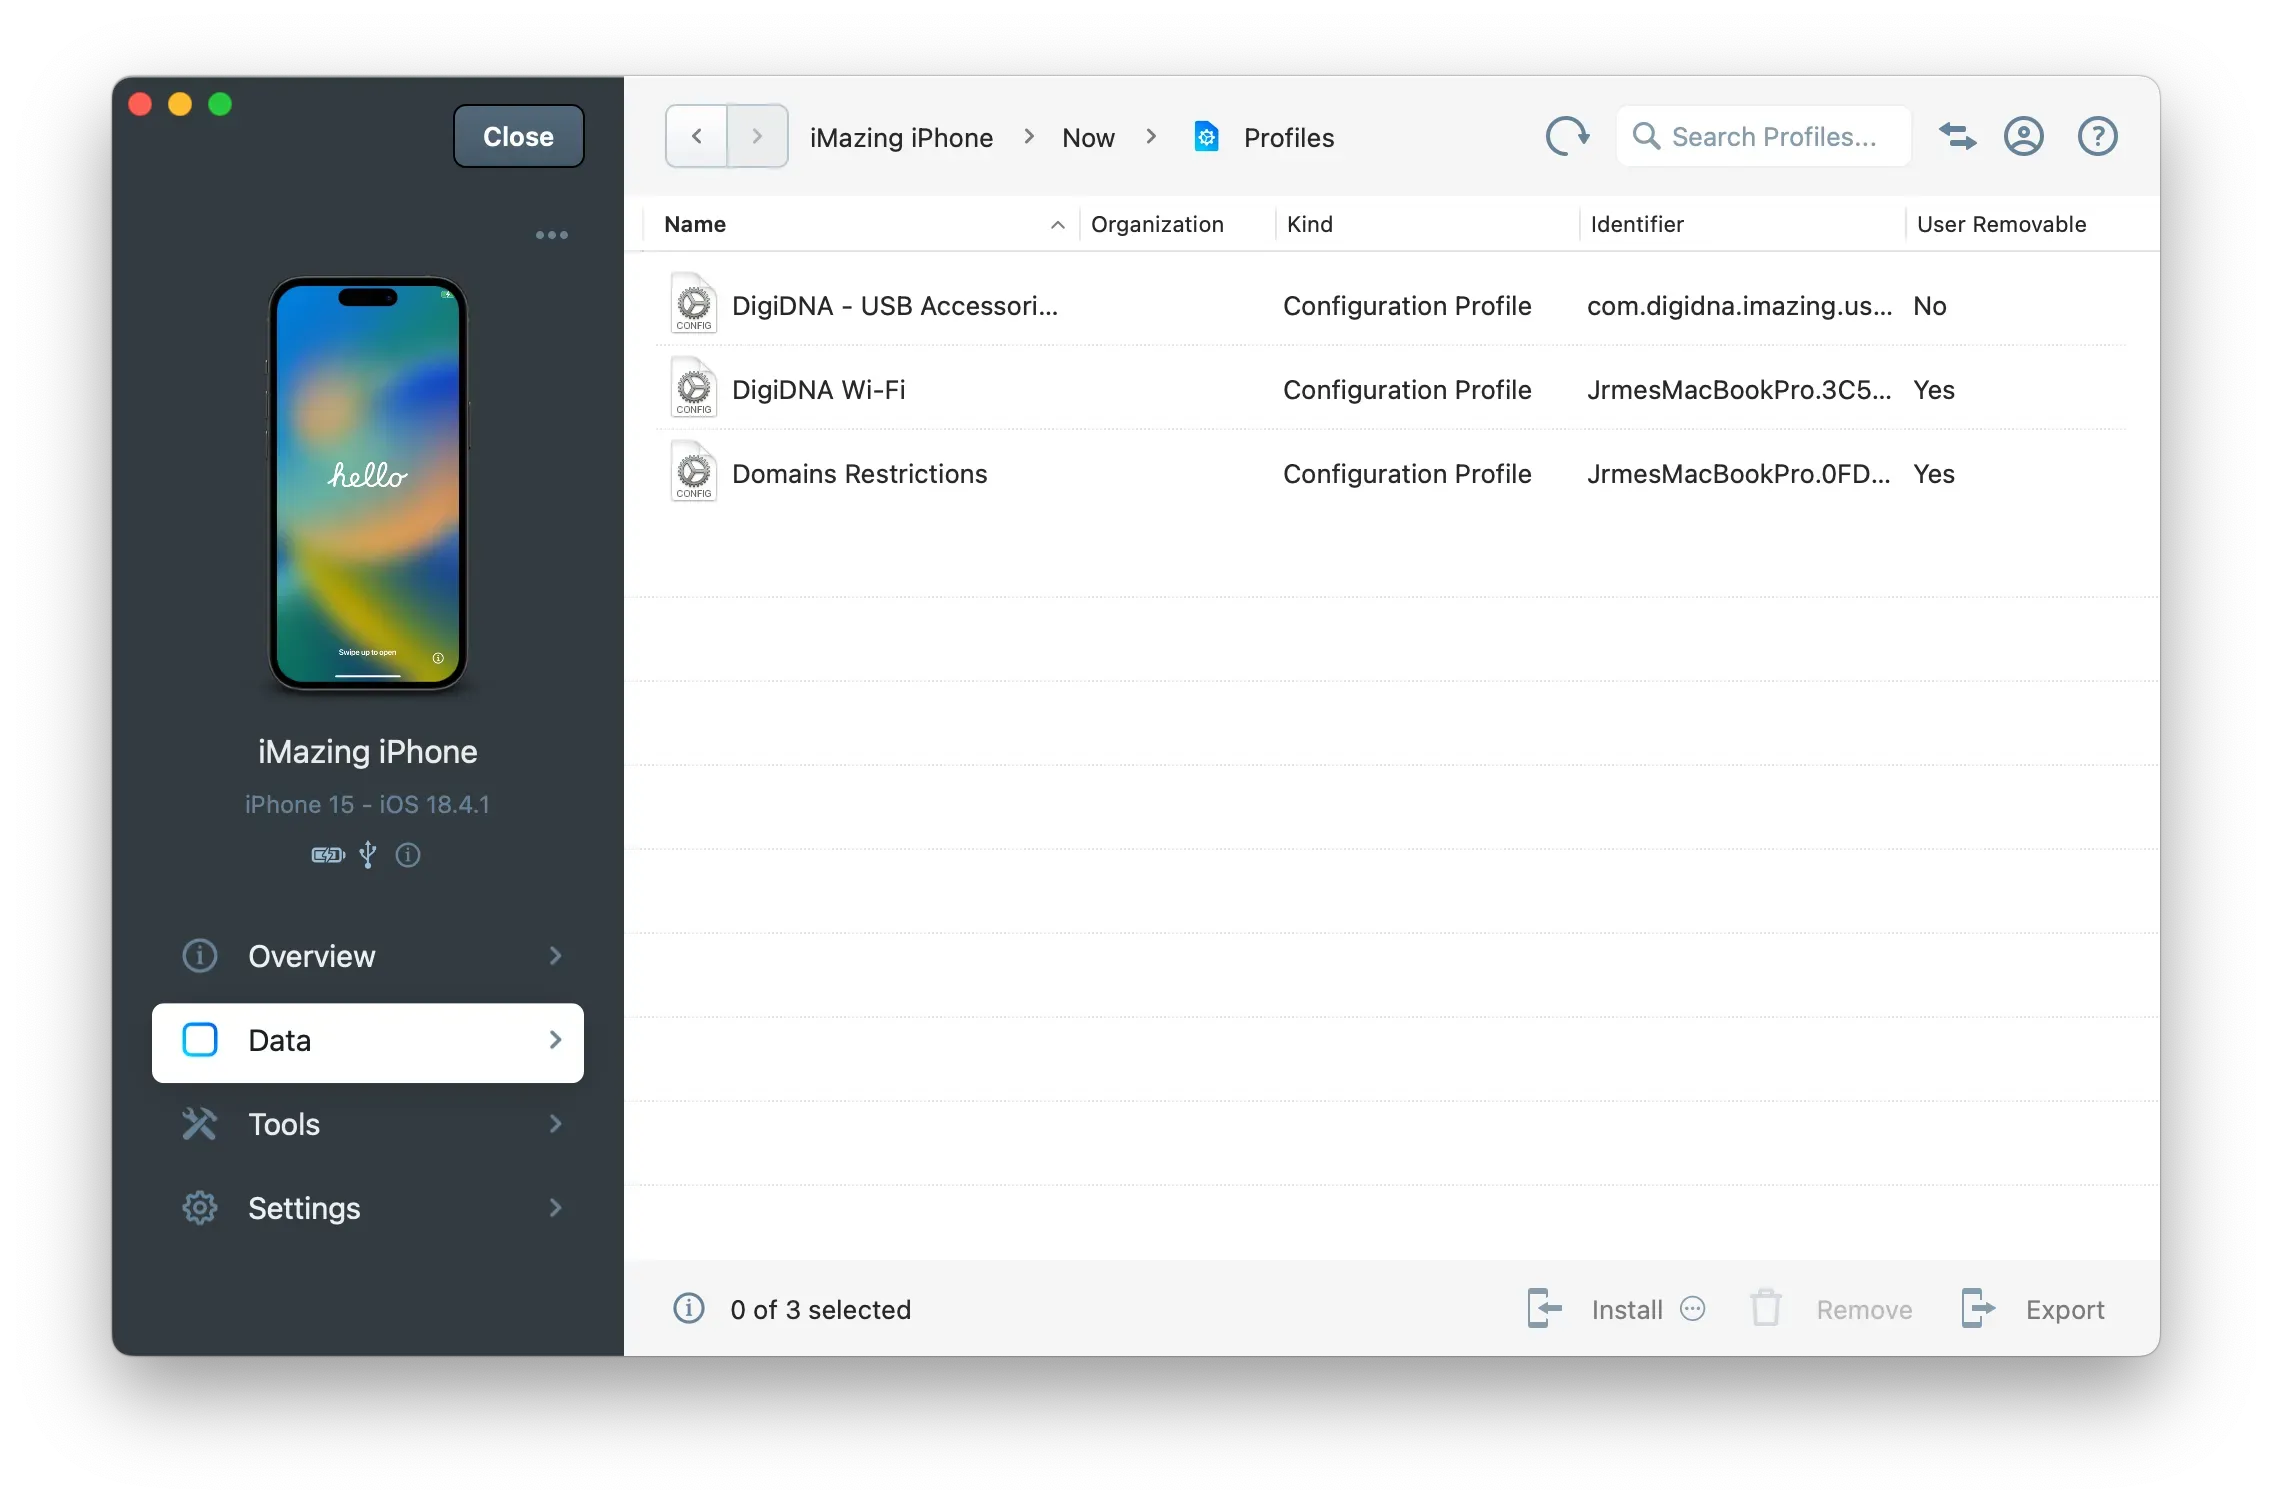
In this section, you can browse configuration and provisioning profiles (for ad-hoc or enterprise apps) installed on your device. This section allows installing profiles from the iMazing profile library, removing multiple profiles at once, and extracting profiles for analysis with iMazing Profile Editor.
For complete details about the Device Profiles view, see: How to Install, Remove or Export iOS Provisioning and Configuration Profiles.
When testing configuration profiles, this view truly shines. The Install from Library button opens a sheet displaying iMazing Configurator's profile library, where you can edit profiles directly using iMazing Profile Editor. Getting Started with iMazing Profile Editor.
iMazing Preferences
iMazing's Preferences window offers several features particularly valuable for sys admins:
Devices
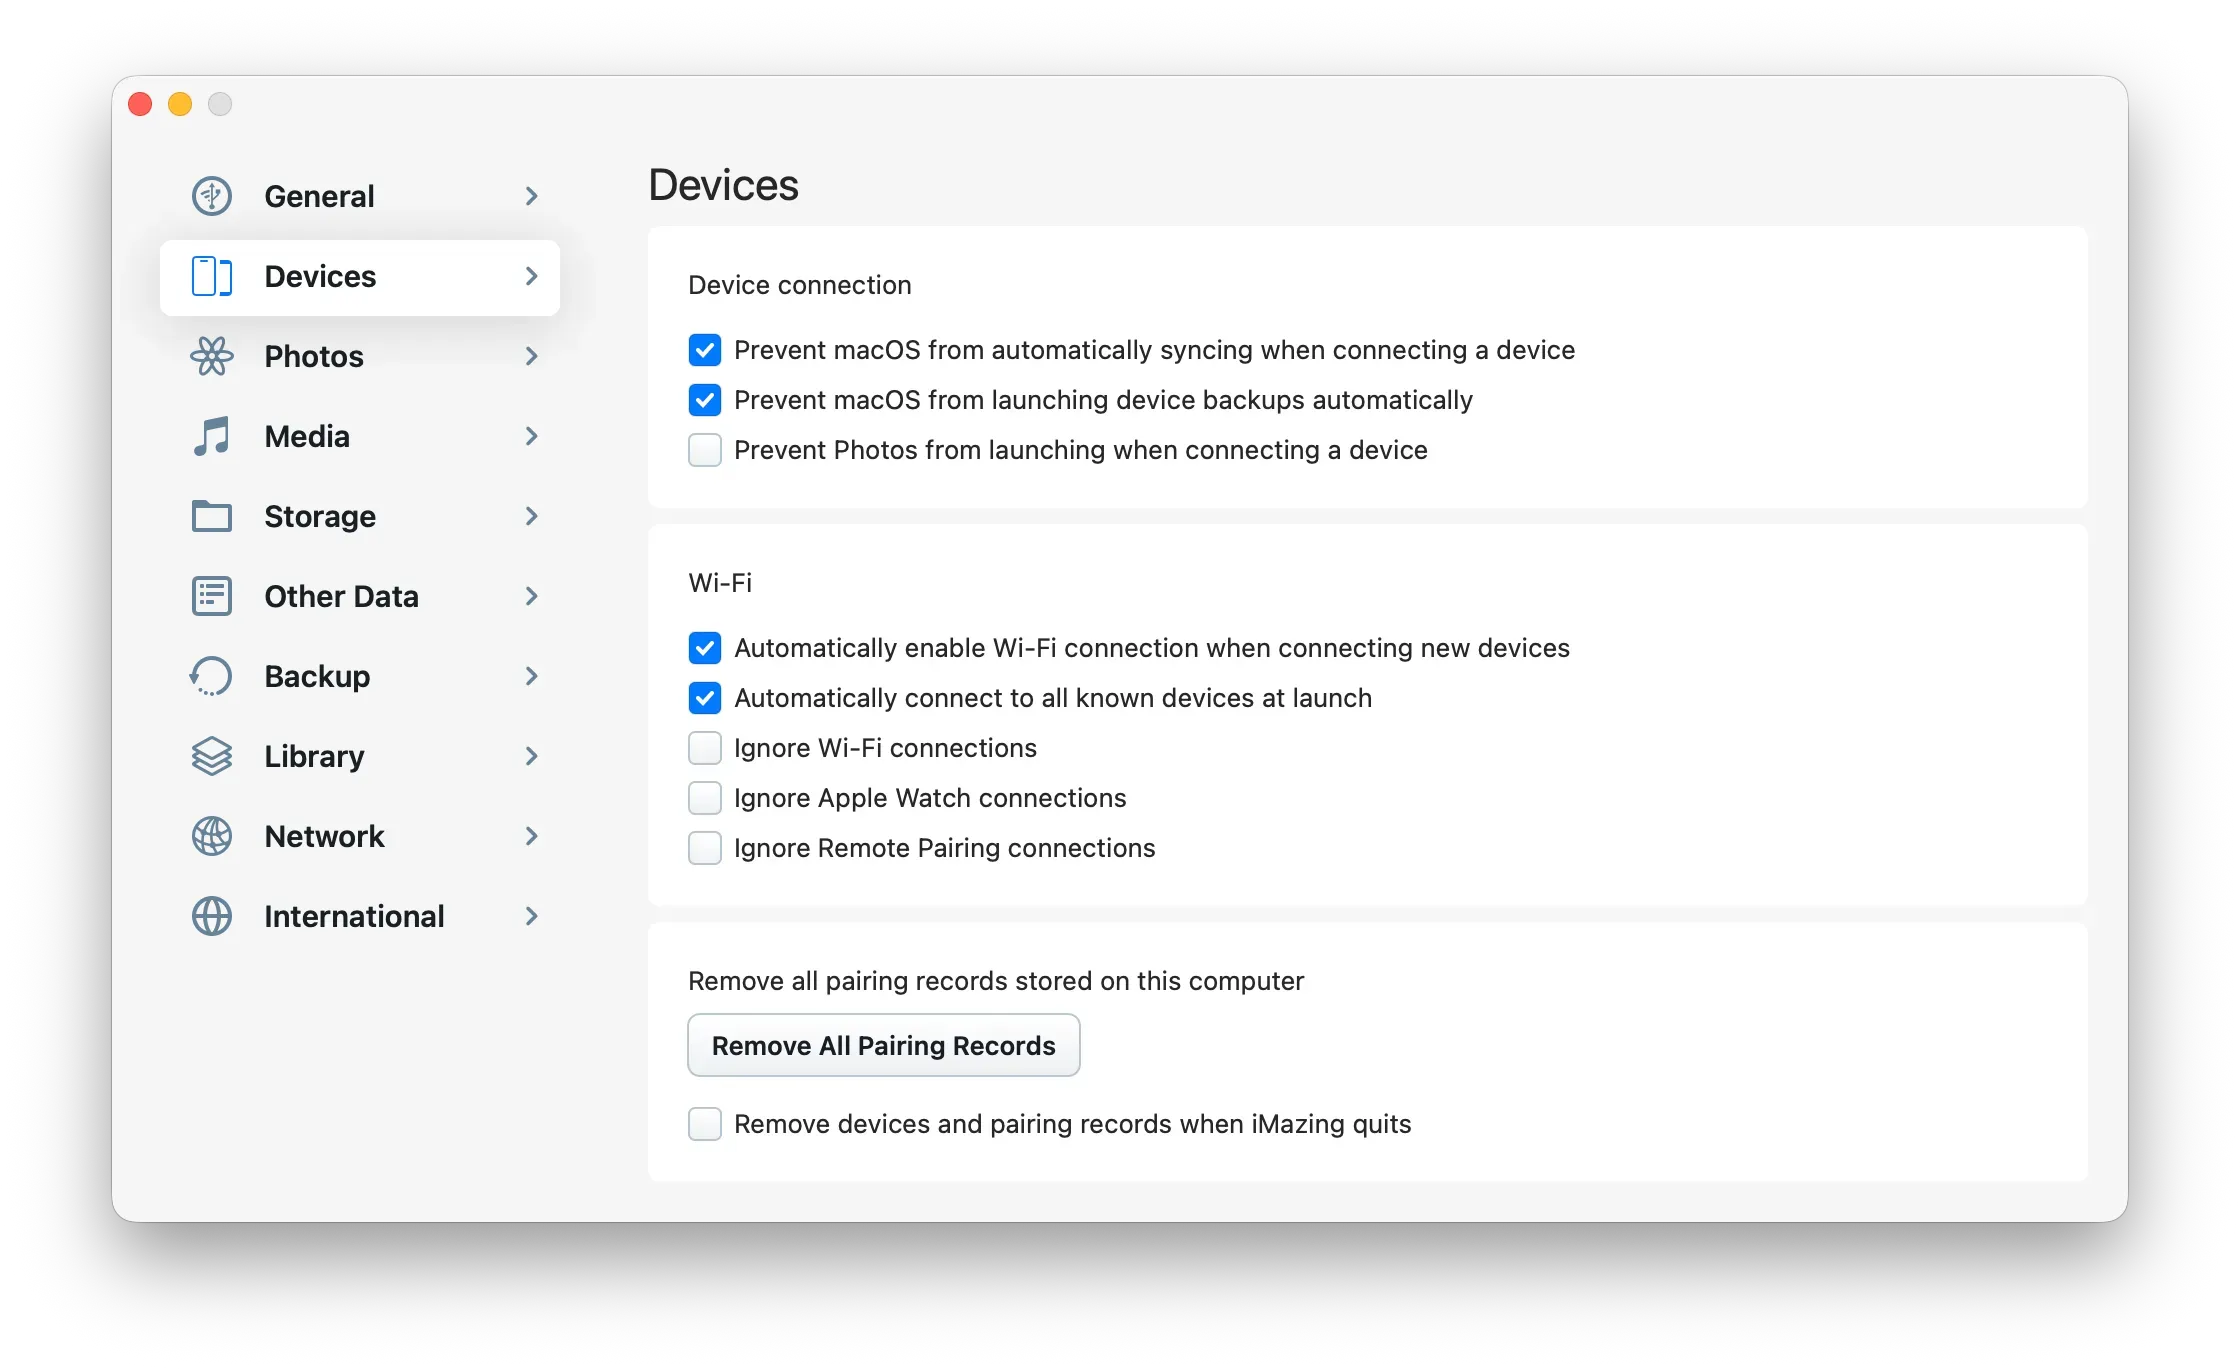
When managing multiple iOS devices daily, you may want to disable automatic Wi-Fi connections for newly connected devices. The Ignore Wi-Fi connections option is also helpful, allowing you to connect only to USB-connected devices.
Additionally you have the option to Remove All Pairing Records from your computer or even Remove devices and pairing records when iMazing quits.
Library
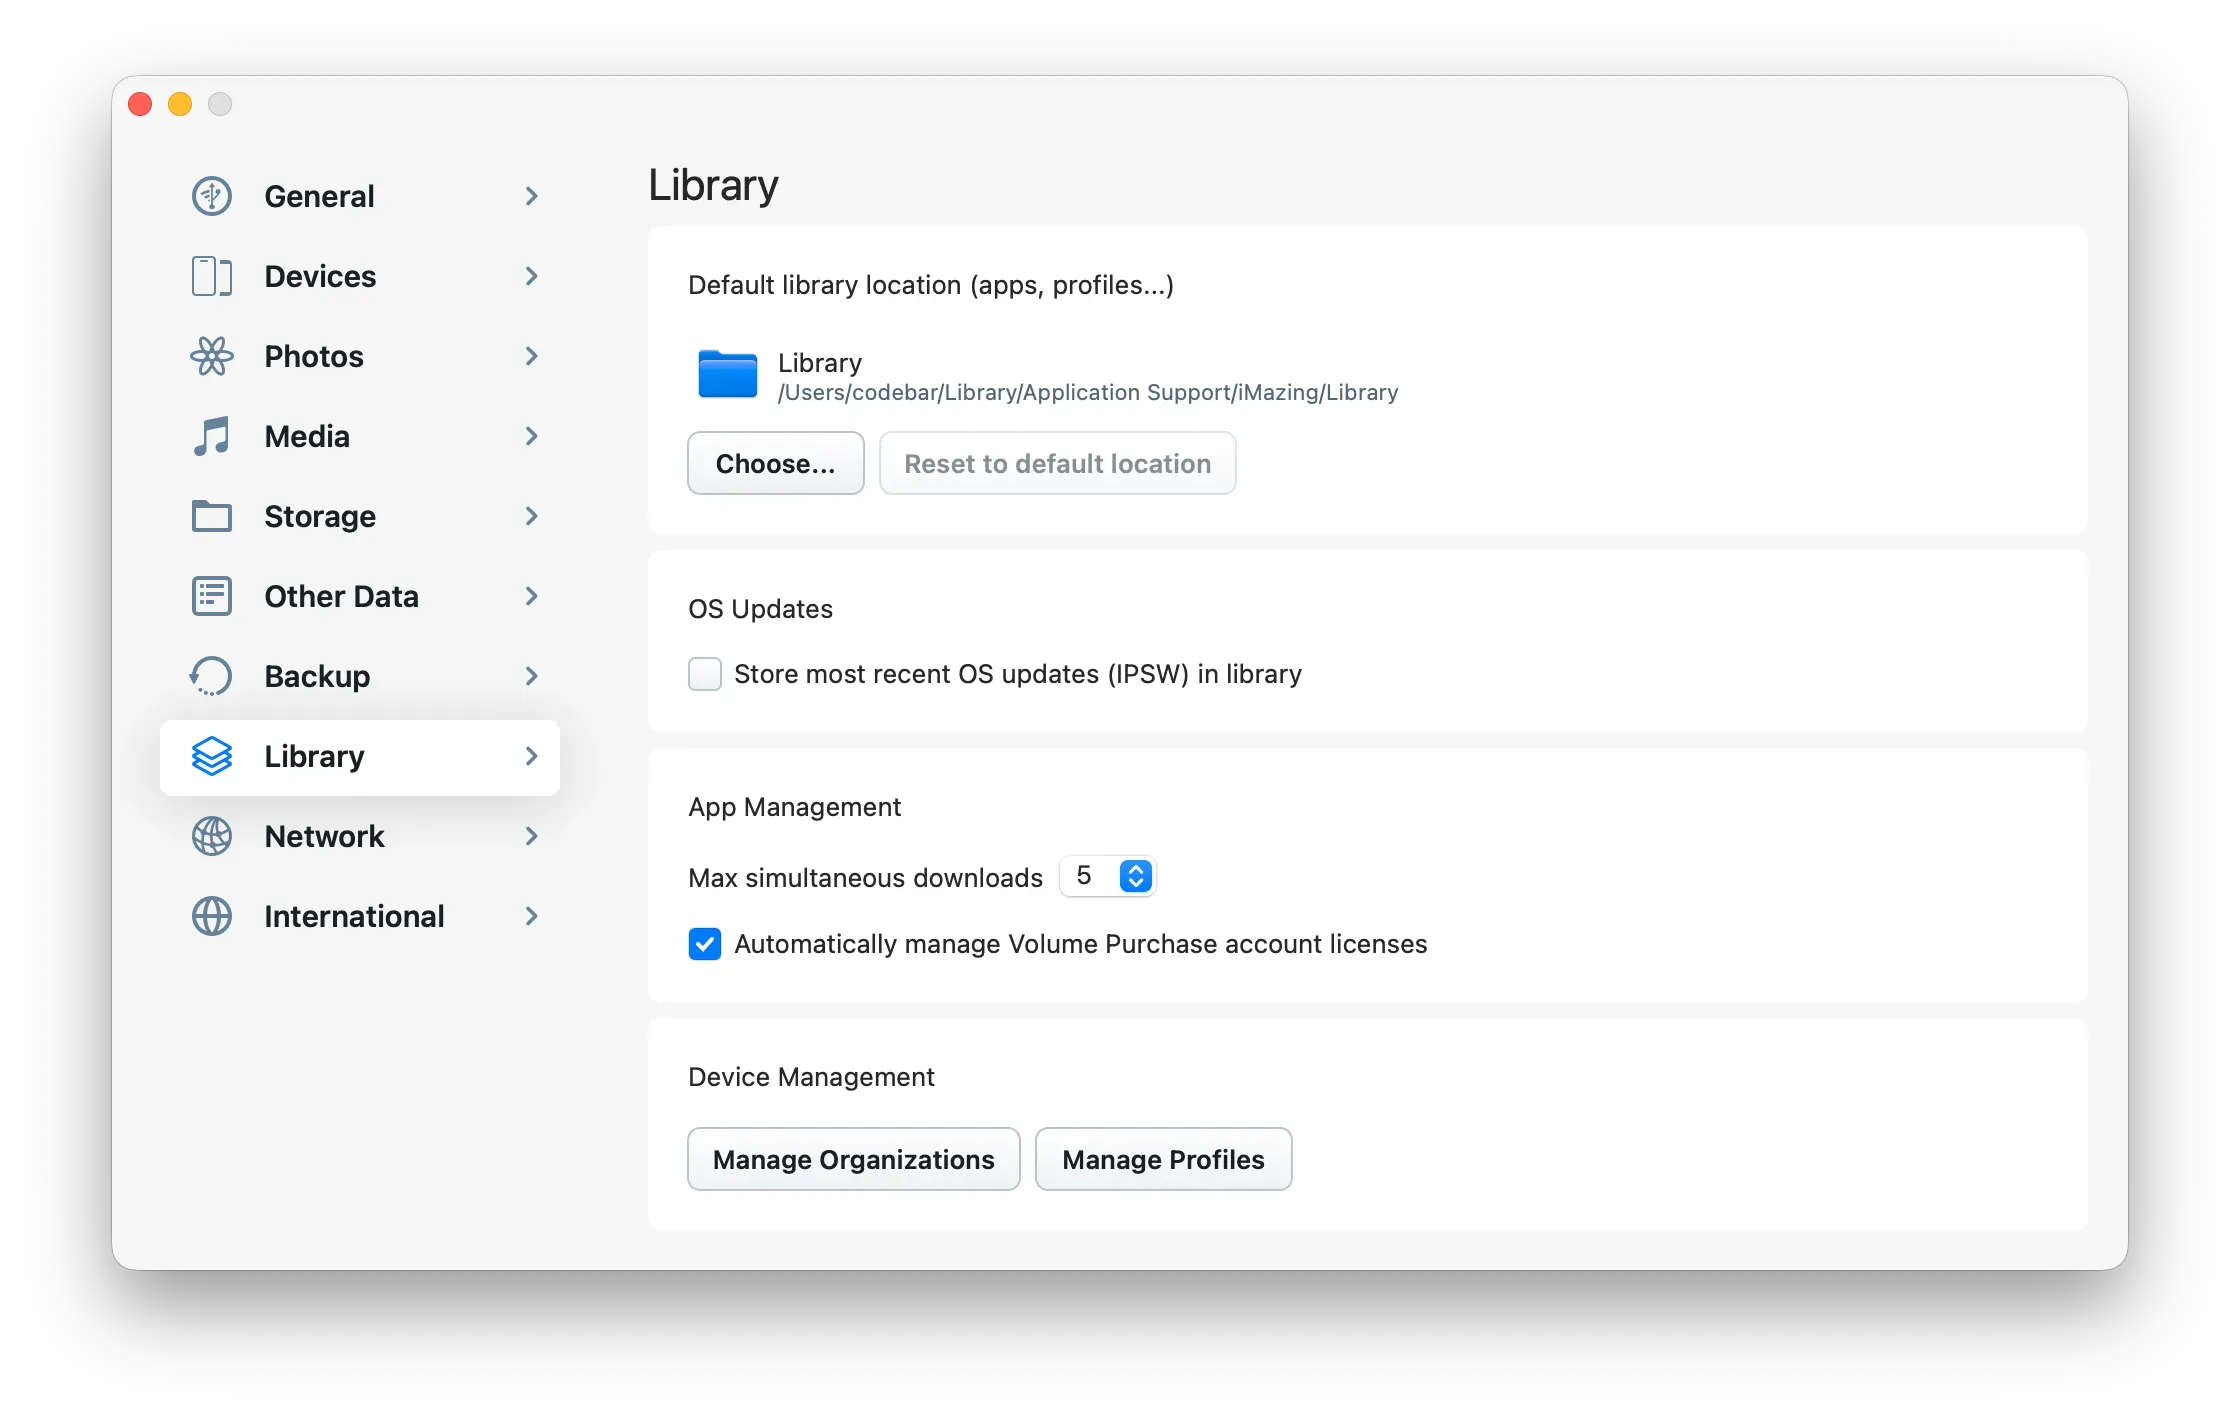
Here, you can customize the location of iMazing's library, control whether iMazing caches downloaded IPSW OS images, and manage automatic app license assignment when signed in to a Volume Purchase account.
For a more detailed look at what preferences are available, head to our iMazing Preferences guide.