Device Management
How to use Apple Volume Purchase (VPP) with iMazing to install apps to devices and manage licenses in bulk

💡iMazing 3
This guide is for the legacy iMazing version 2. For information on version 3, please visit this page.
The purpose of this article is to explain the Apple Volume Purchase (VPP) and provide guidance on using the Apps and Books section in either Apple Business Manager (ABM) and Apple School Manager (ASM) along with iMazing Configurator to install apps and manage licenses in bulk on local devices.
- What is Volume Purchase
- How it works
- How to purchase apps in volume and install them to devices using iMazing
- Post-installation steps
1. What is Volume Purchase
Apple’s Volume Purchase is managed via a section called Apps and Books available in the ABM and ASM portals that allows organizations and schools to purchase apps and digital books in large quantities for deployment on devices.
Previously known as Volume Purchase Program (VPP), it can be used in conjunction with a MDM solution, iMazing Configurator, or Apple Configurator to silently deploy and manage apps and books on devices in bulk.
The App Store and Mac App Store offer thousands of apps that are available for Volume Purchase, covering a broad range of categories. Similarly, a selection of books from the Apple Books Store can also be purchased through this section.
Organizations have the flexibility to use multiple payment methods with Volume Purchase. It also enables license portability across organization users and devices, as well as centralized billing for streamlined management.
Additionally, when using licenses purchased in volume through ABM/ASM, it is important to note that you can install apps even on devices that do not have a configured Apple ID or Managed Apple ID.
For more information on Volume Purchase visit Apple’s Intro to purchasing content in Apple Business Manager.
2. How it works
2.1 App licensing
When purchasing app licenses in volume through the Apps and Books section in ABM/ASM, you must assign them to a physical location. You need to assign the licenses you purchase to a specific location because the apps available on the app store vary by country. Therefore, licenses must be purchased for a specific location. Even free apps must be assigned to a location, despite being free of charge. The only difference is that the organization is not charged for them.
Note that in-app purchases are not supported since purchases are made beforehand.
After purchasing licenses, you can assign them to devices or users (Managed Apple IDs) through your MDM solution. Alternatively, you can use iMazing Configurator and Apple Configurator to assign licenses to devices locally. Once a license has been assigned, the selected solution will proceed to install the app. The installation can be done either manually or automatically, depending on the implemented solution. One available license from your account will be deducted for each assignment.
Apps licenses purchased in bulk can be easily reassigned to different devices within an organization as needed. This makes it easy for organizations to manage their licenses and optimize their app licenses usage across their device fleet.
2.2 Manage app license assignments when installing apps on devices
iMazing Configurator, Apple Configurator, and most MDM solutions communicate directly with Apple's VPP API to manage license assignments. Typically, licenses are assigned to devices rather than to users (Managed Apple IDs).
iMazing Configurator automatically assigns licenses to devices when installing apps purchased in volume. It also unassigns licenses when uninstalling an app to free up license slots. This mechanism enables the software to manage app license assignments automatically, which makes the installation process smooth and transparent when used in conjunction with ABM/ASM.
3. How to purchase apps in volume and install them to devices using iMazing
3.1 Prerequisites
Before you begin, make sure the following components are ready:
- An account with appropriate permissions on ABM/ASM (either Administrator or Content Manager)
- A Windows or macOS computer
- An Apple mobile device, iPhone or iPad
- iMazing installed
3.2 Prepare your ABM or ASM “Content Token” (VPP sToken)
Depending on the ABM/ASM account used, iMazing may need to use your Volume Purchase (content) token to communicate with Apple's VPP API to manage license assignments. It is therefore recommended to download this token in advance.
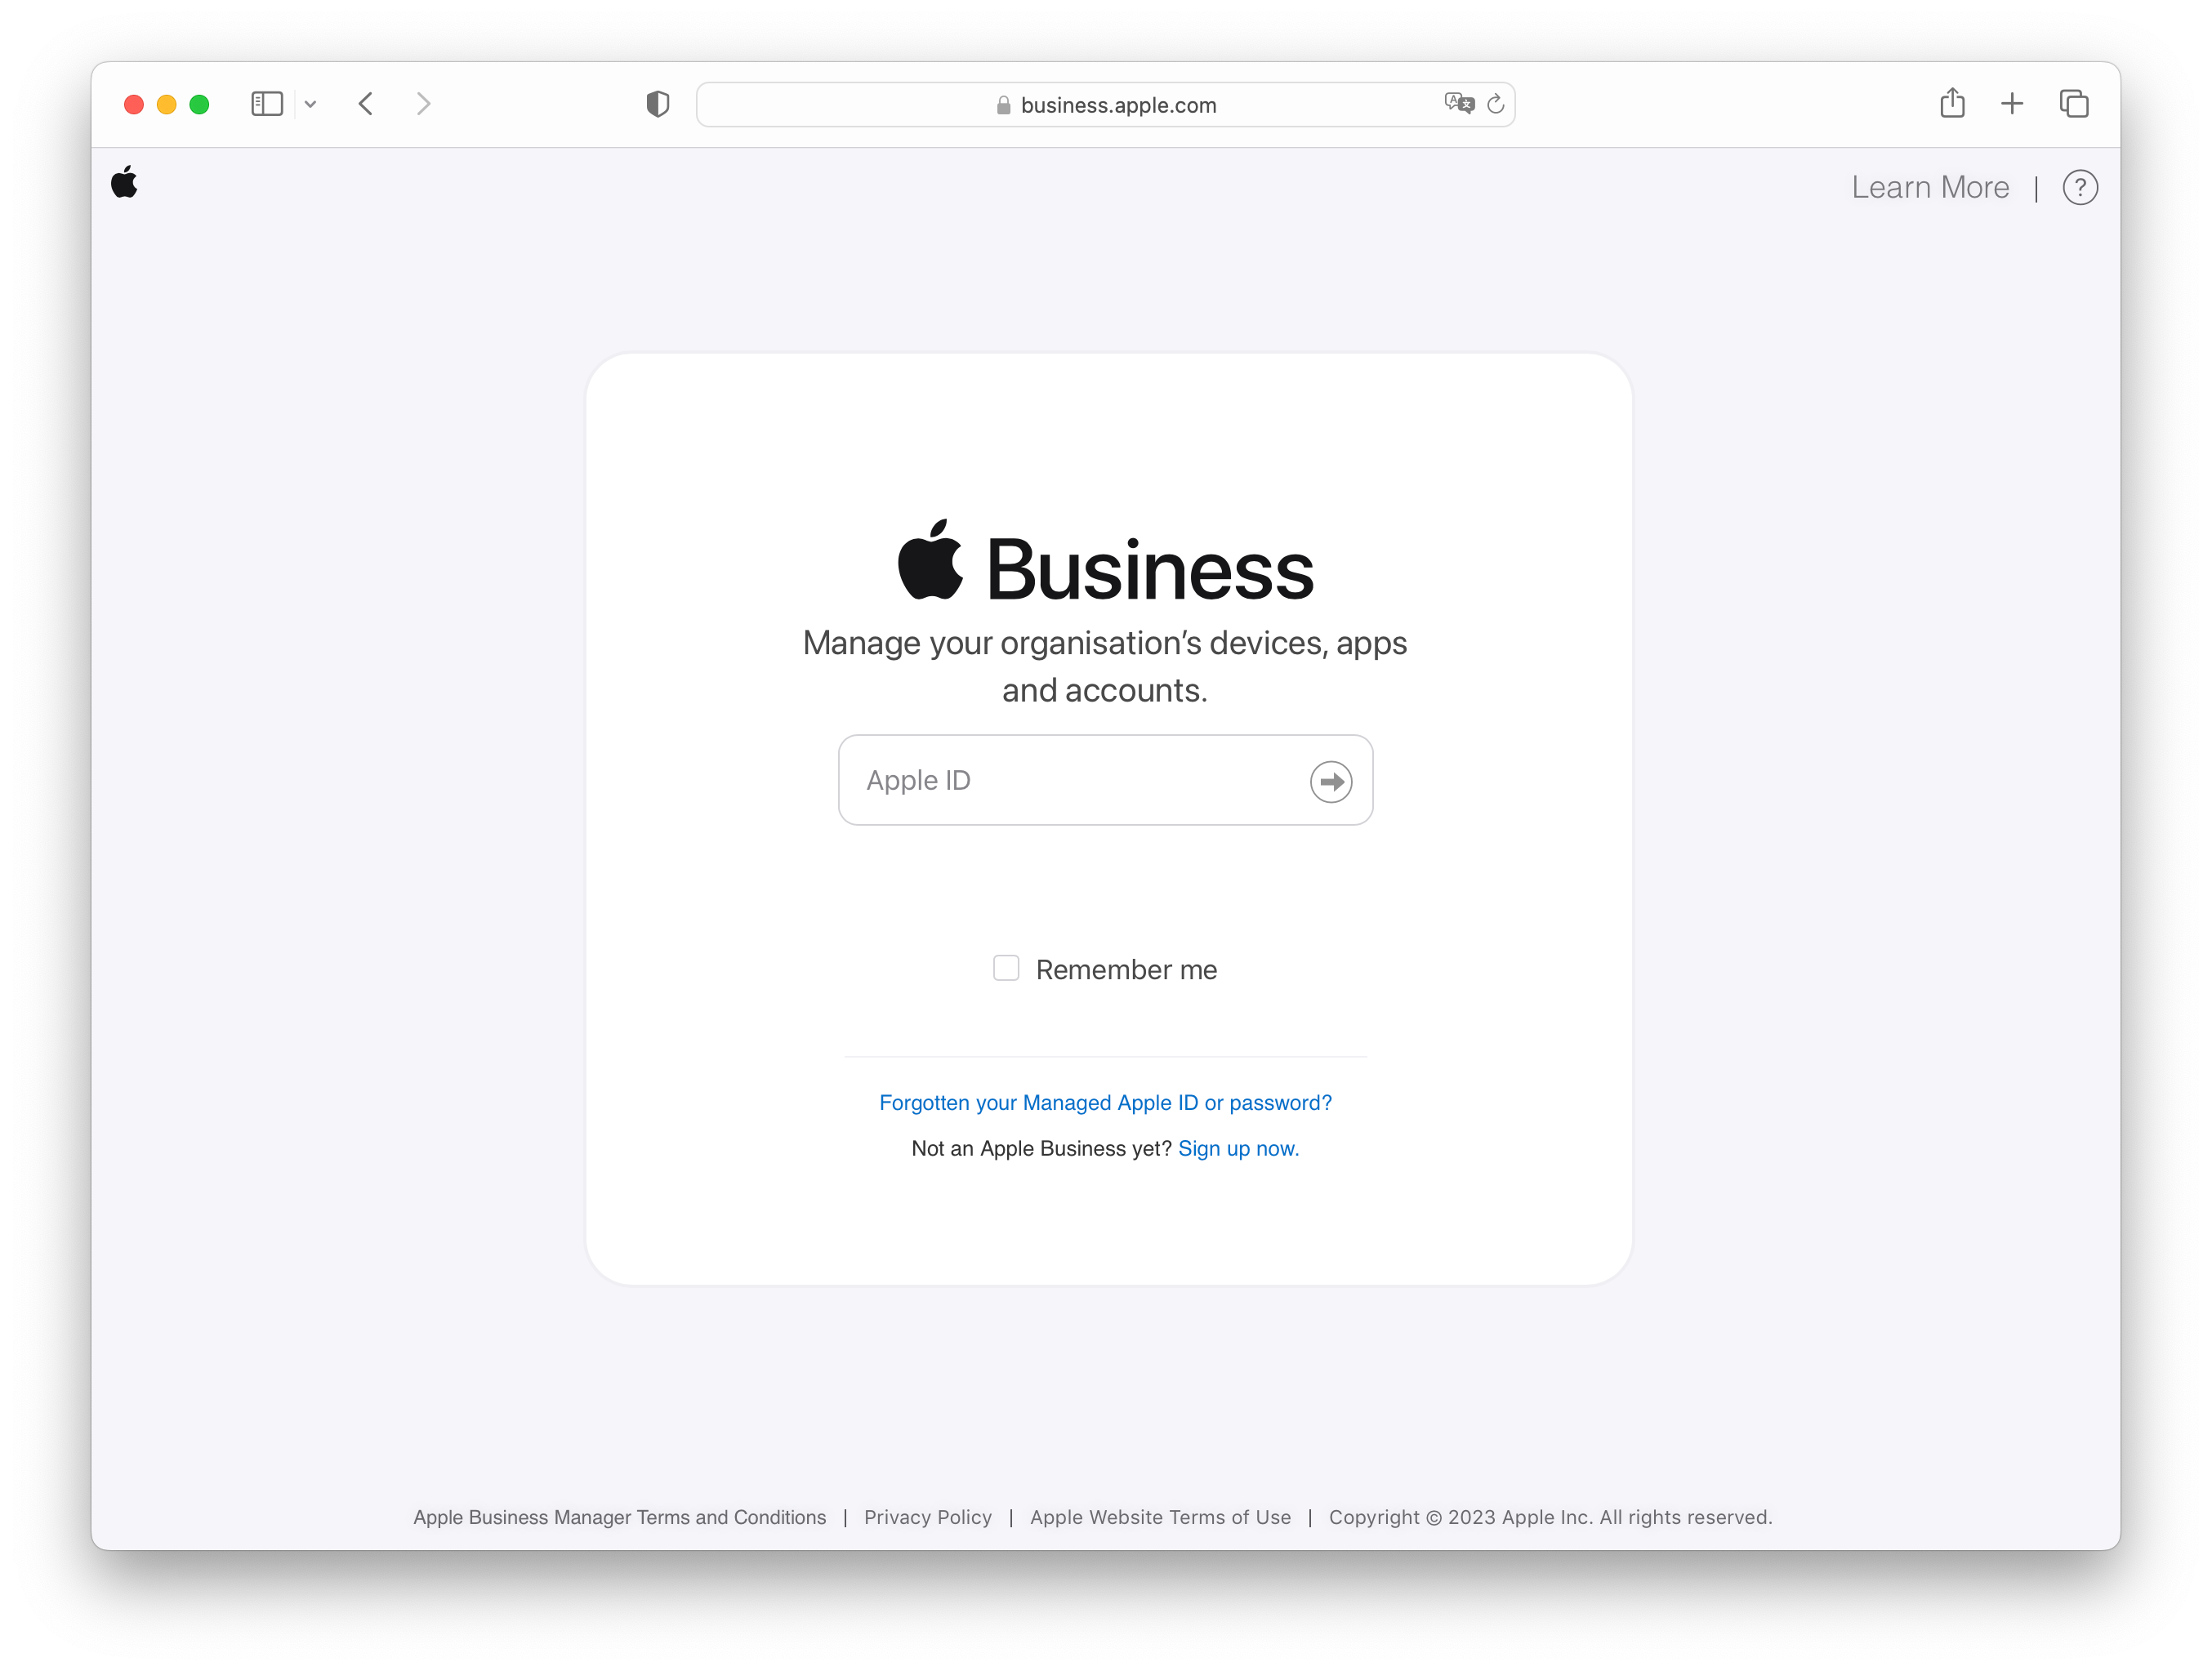
Log in to the ABM/ASM portal with the required account:
Click on your account section located at the lower left corner, and select Preferences:
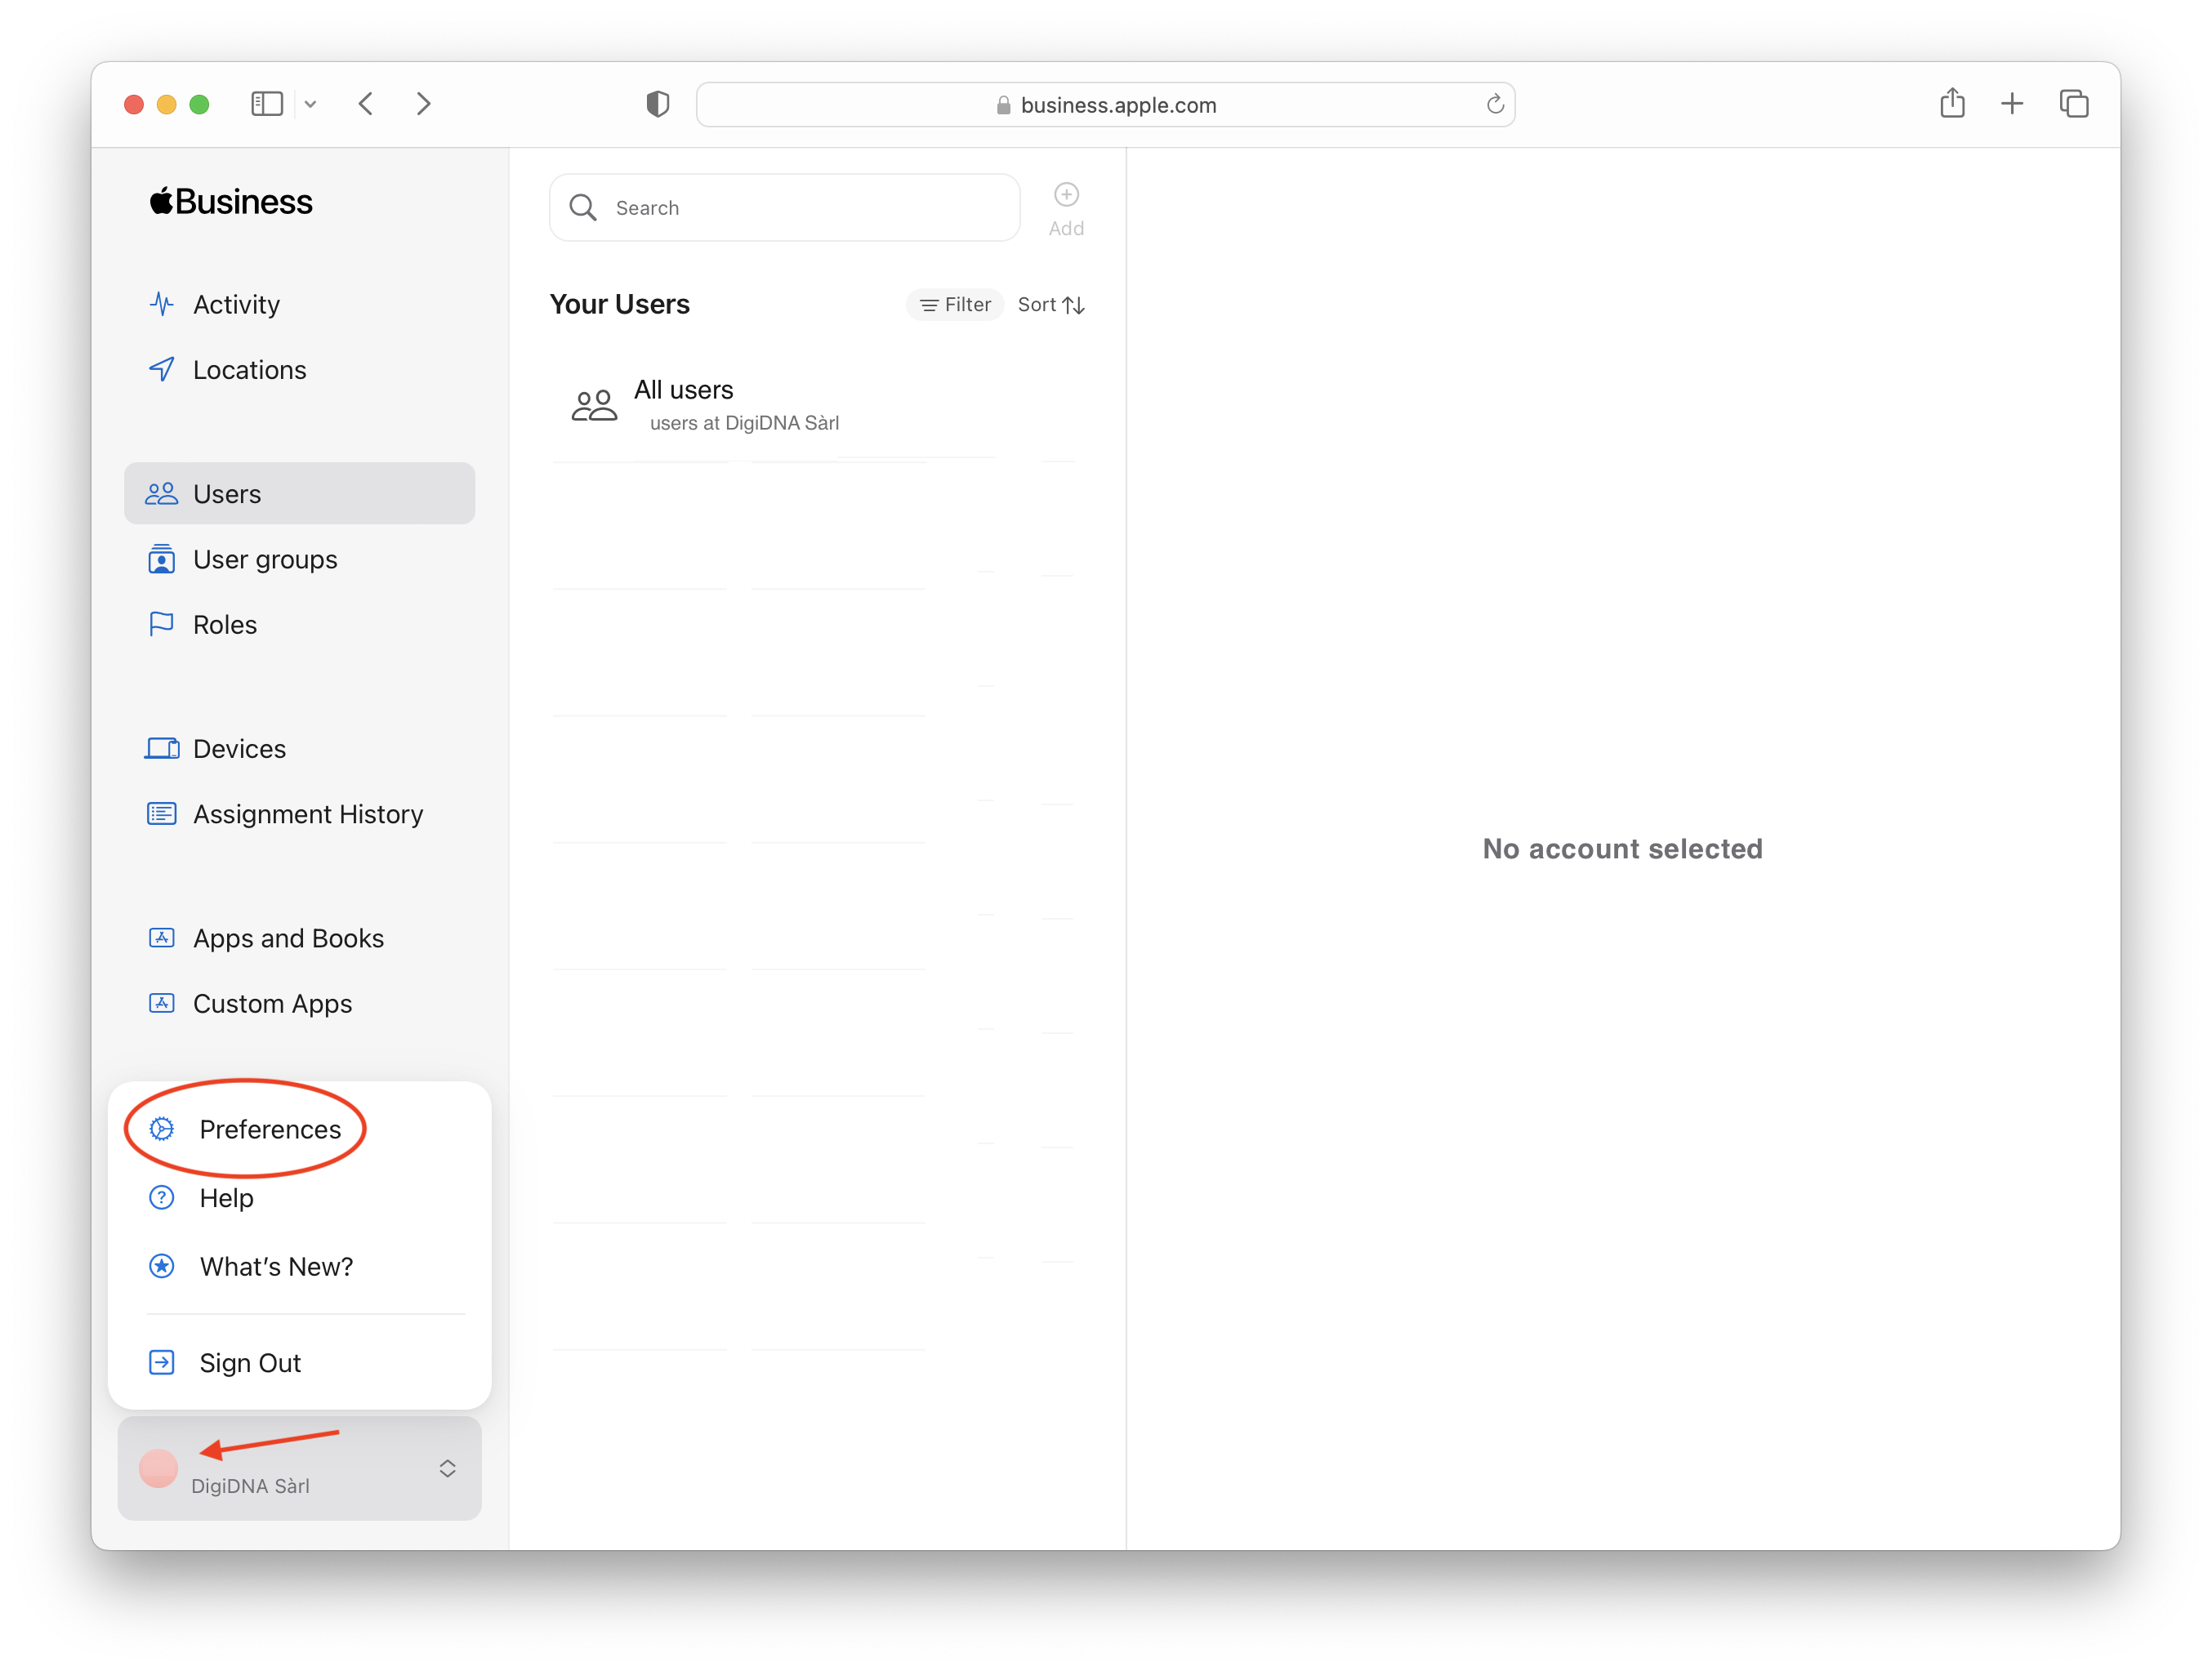
💡 Note: If your screen is not large enough, the account section is located at the top right-hand corner.
In the Payments and Billing section, locate the Download button in the Content Tokens menu to obtain your token. It will be saved as a
.vpptokenfile in your Downloads folder: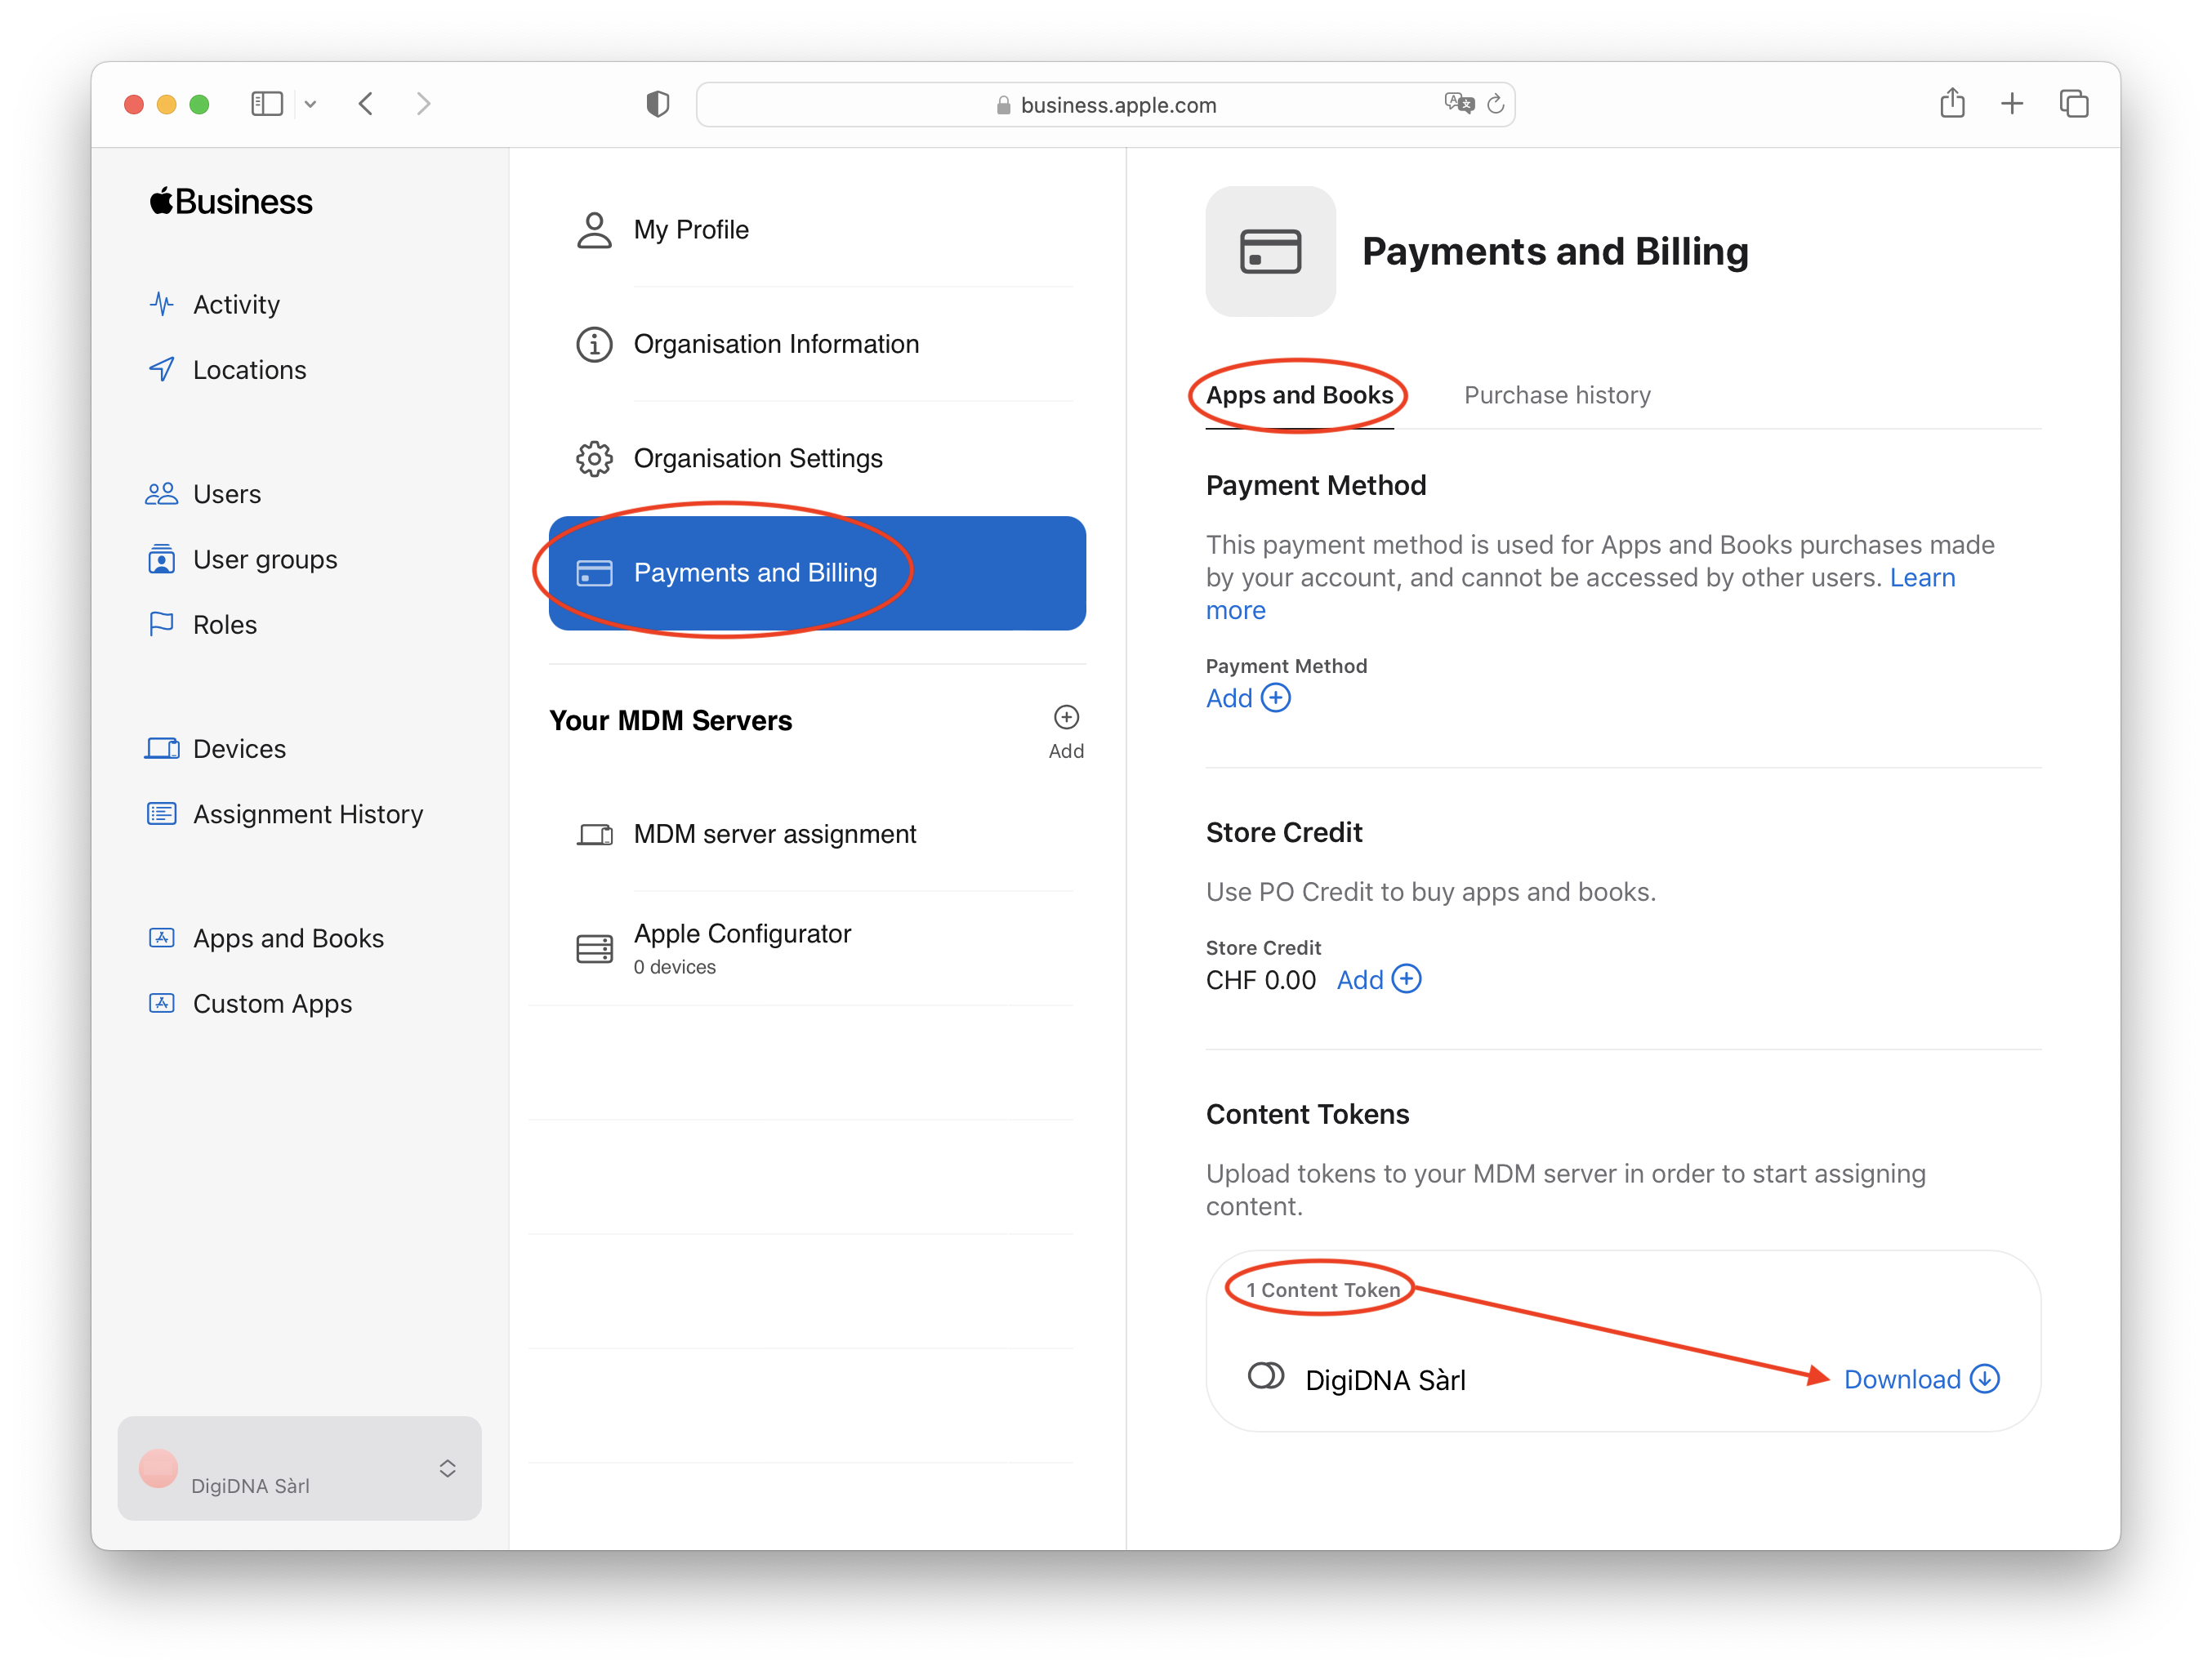
3.3 Purchase an app in volume
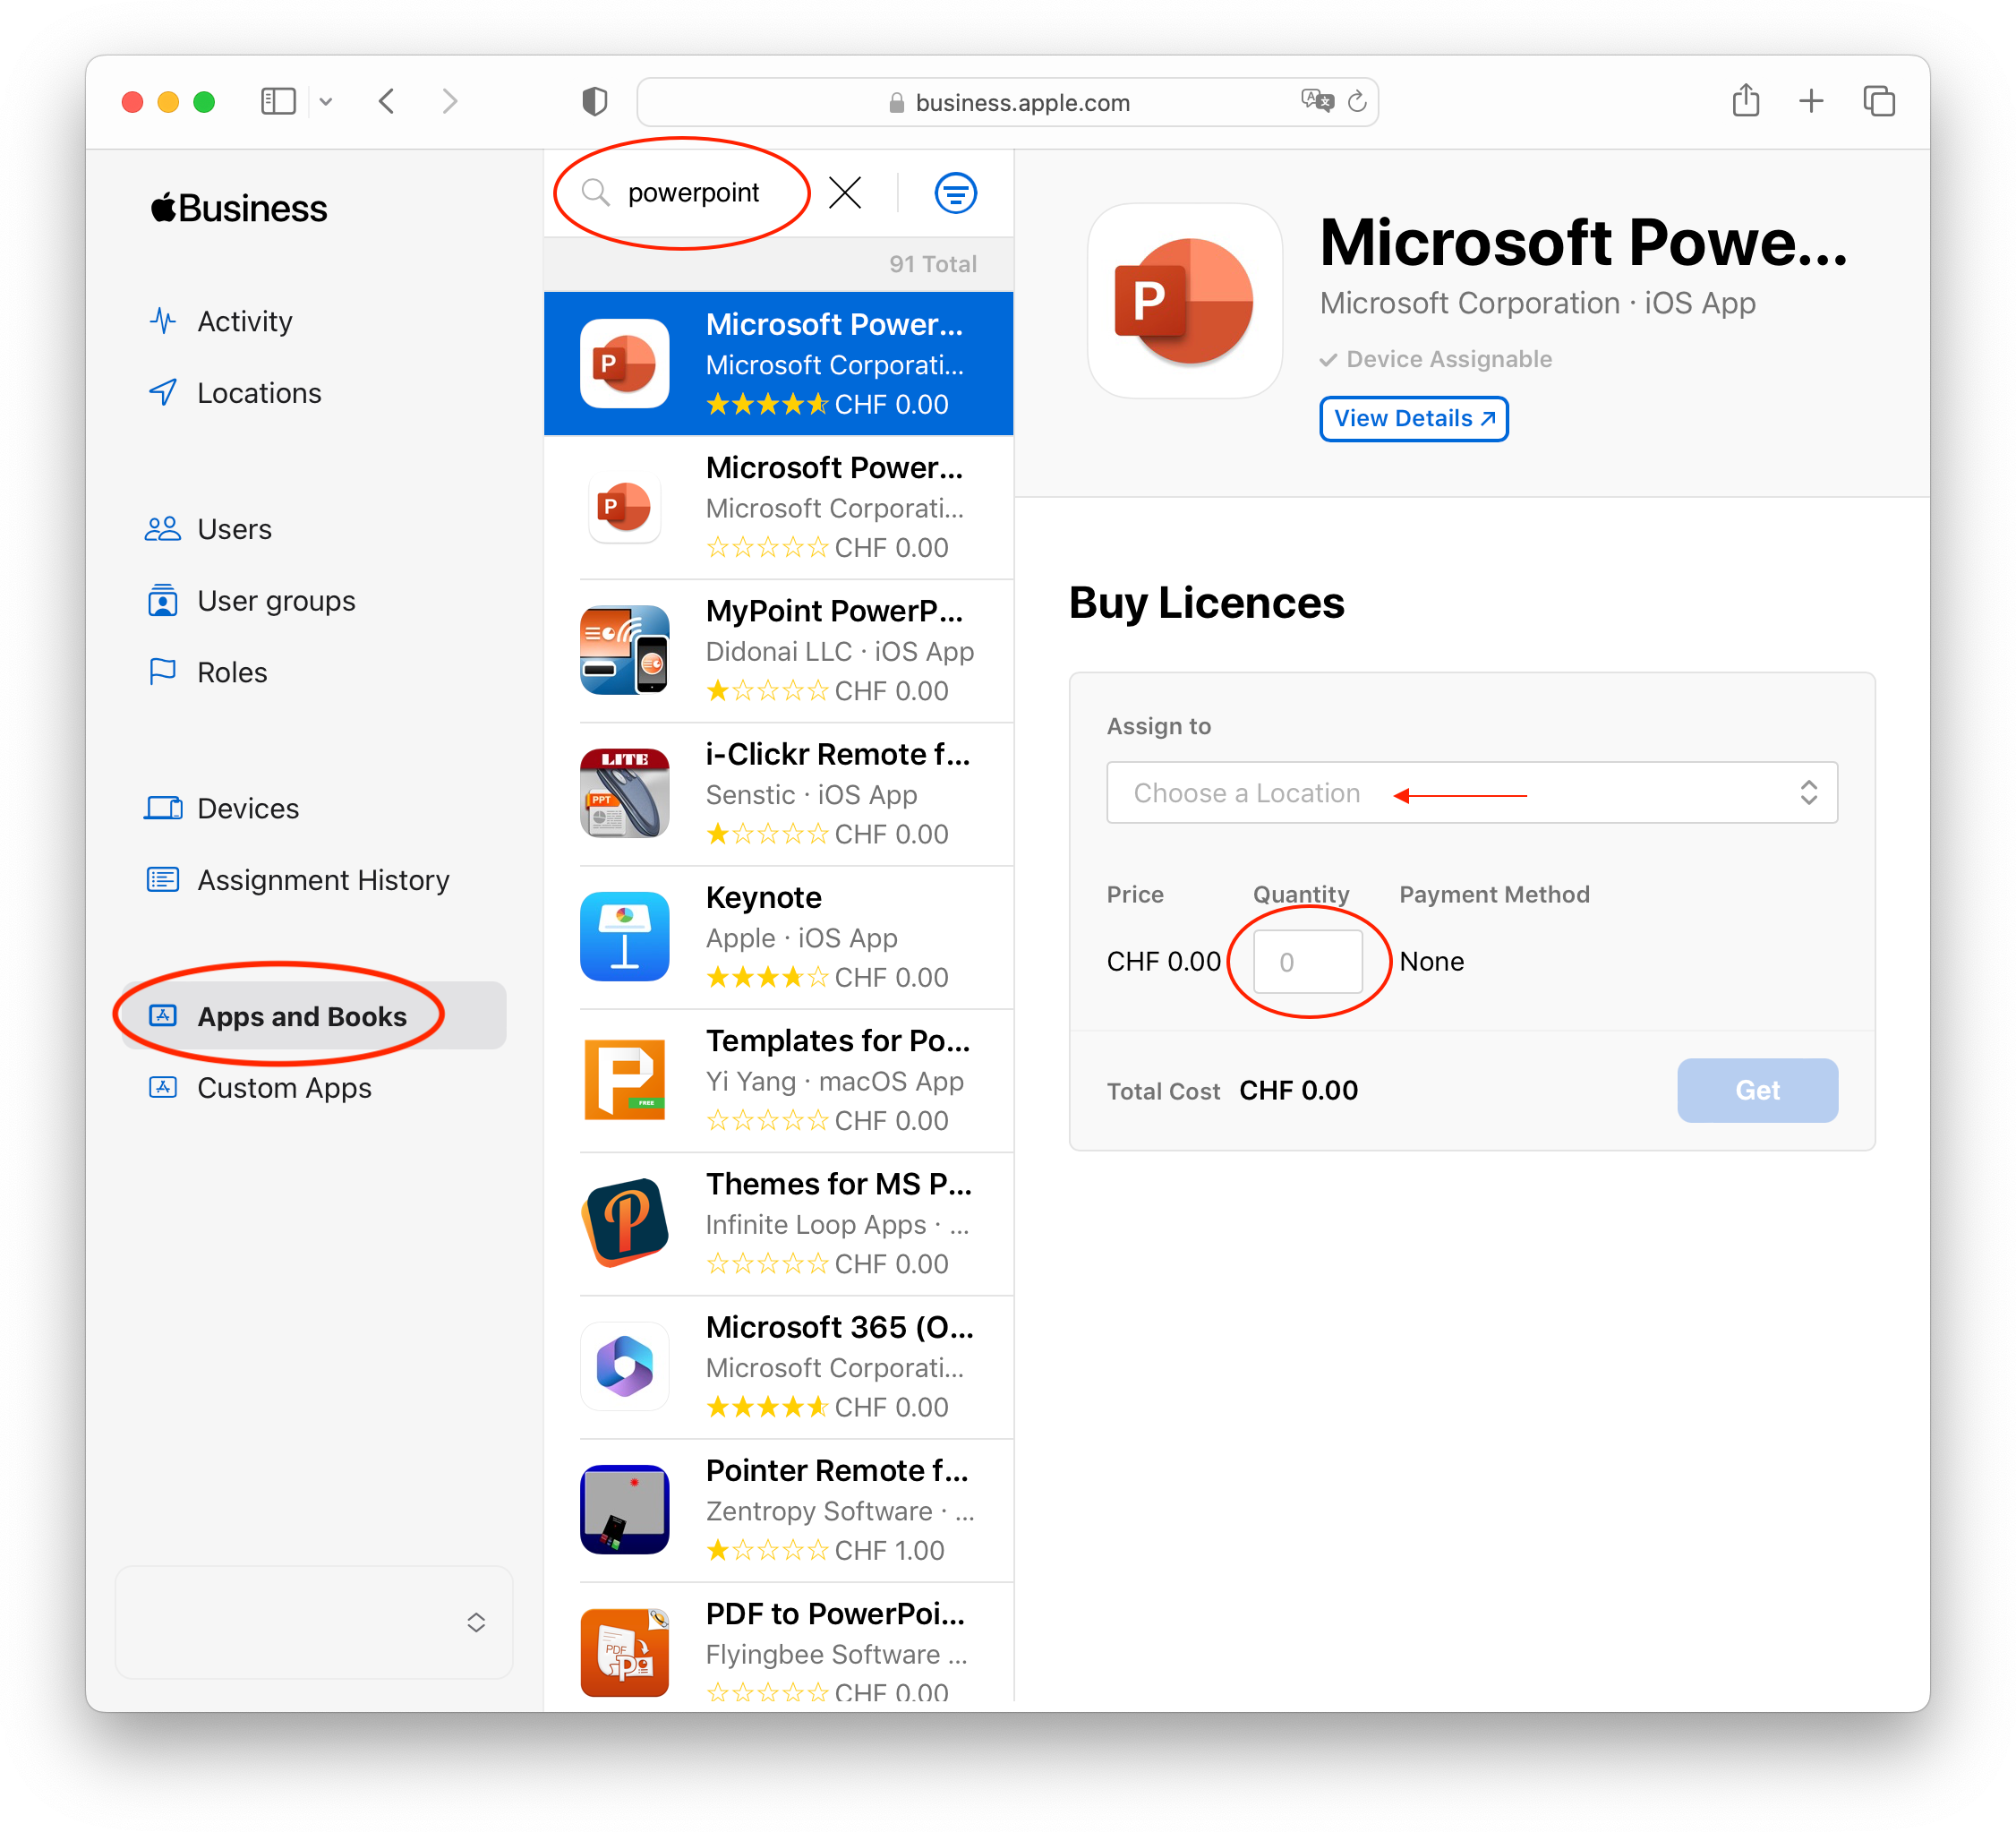
Select the Apps and Books section. From there, find the app you want to deploy (in our example, Microsoft PowerPoint). In the Assign to section, select your location and specify the number of licenses to purchase in the Quantity box:
3.4 Steps to deploy an app purchased in volume with the iMazing Configurator Apps Library
- Launch iMazing and use the menu bar to navigate to Configurator > Library > Apps:

- Enter your ABM/ASM Apple ID, password and click Sign in:
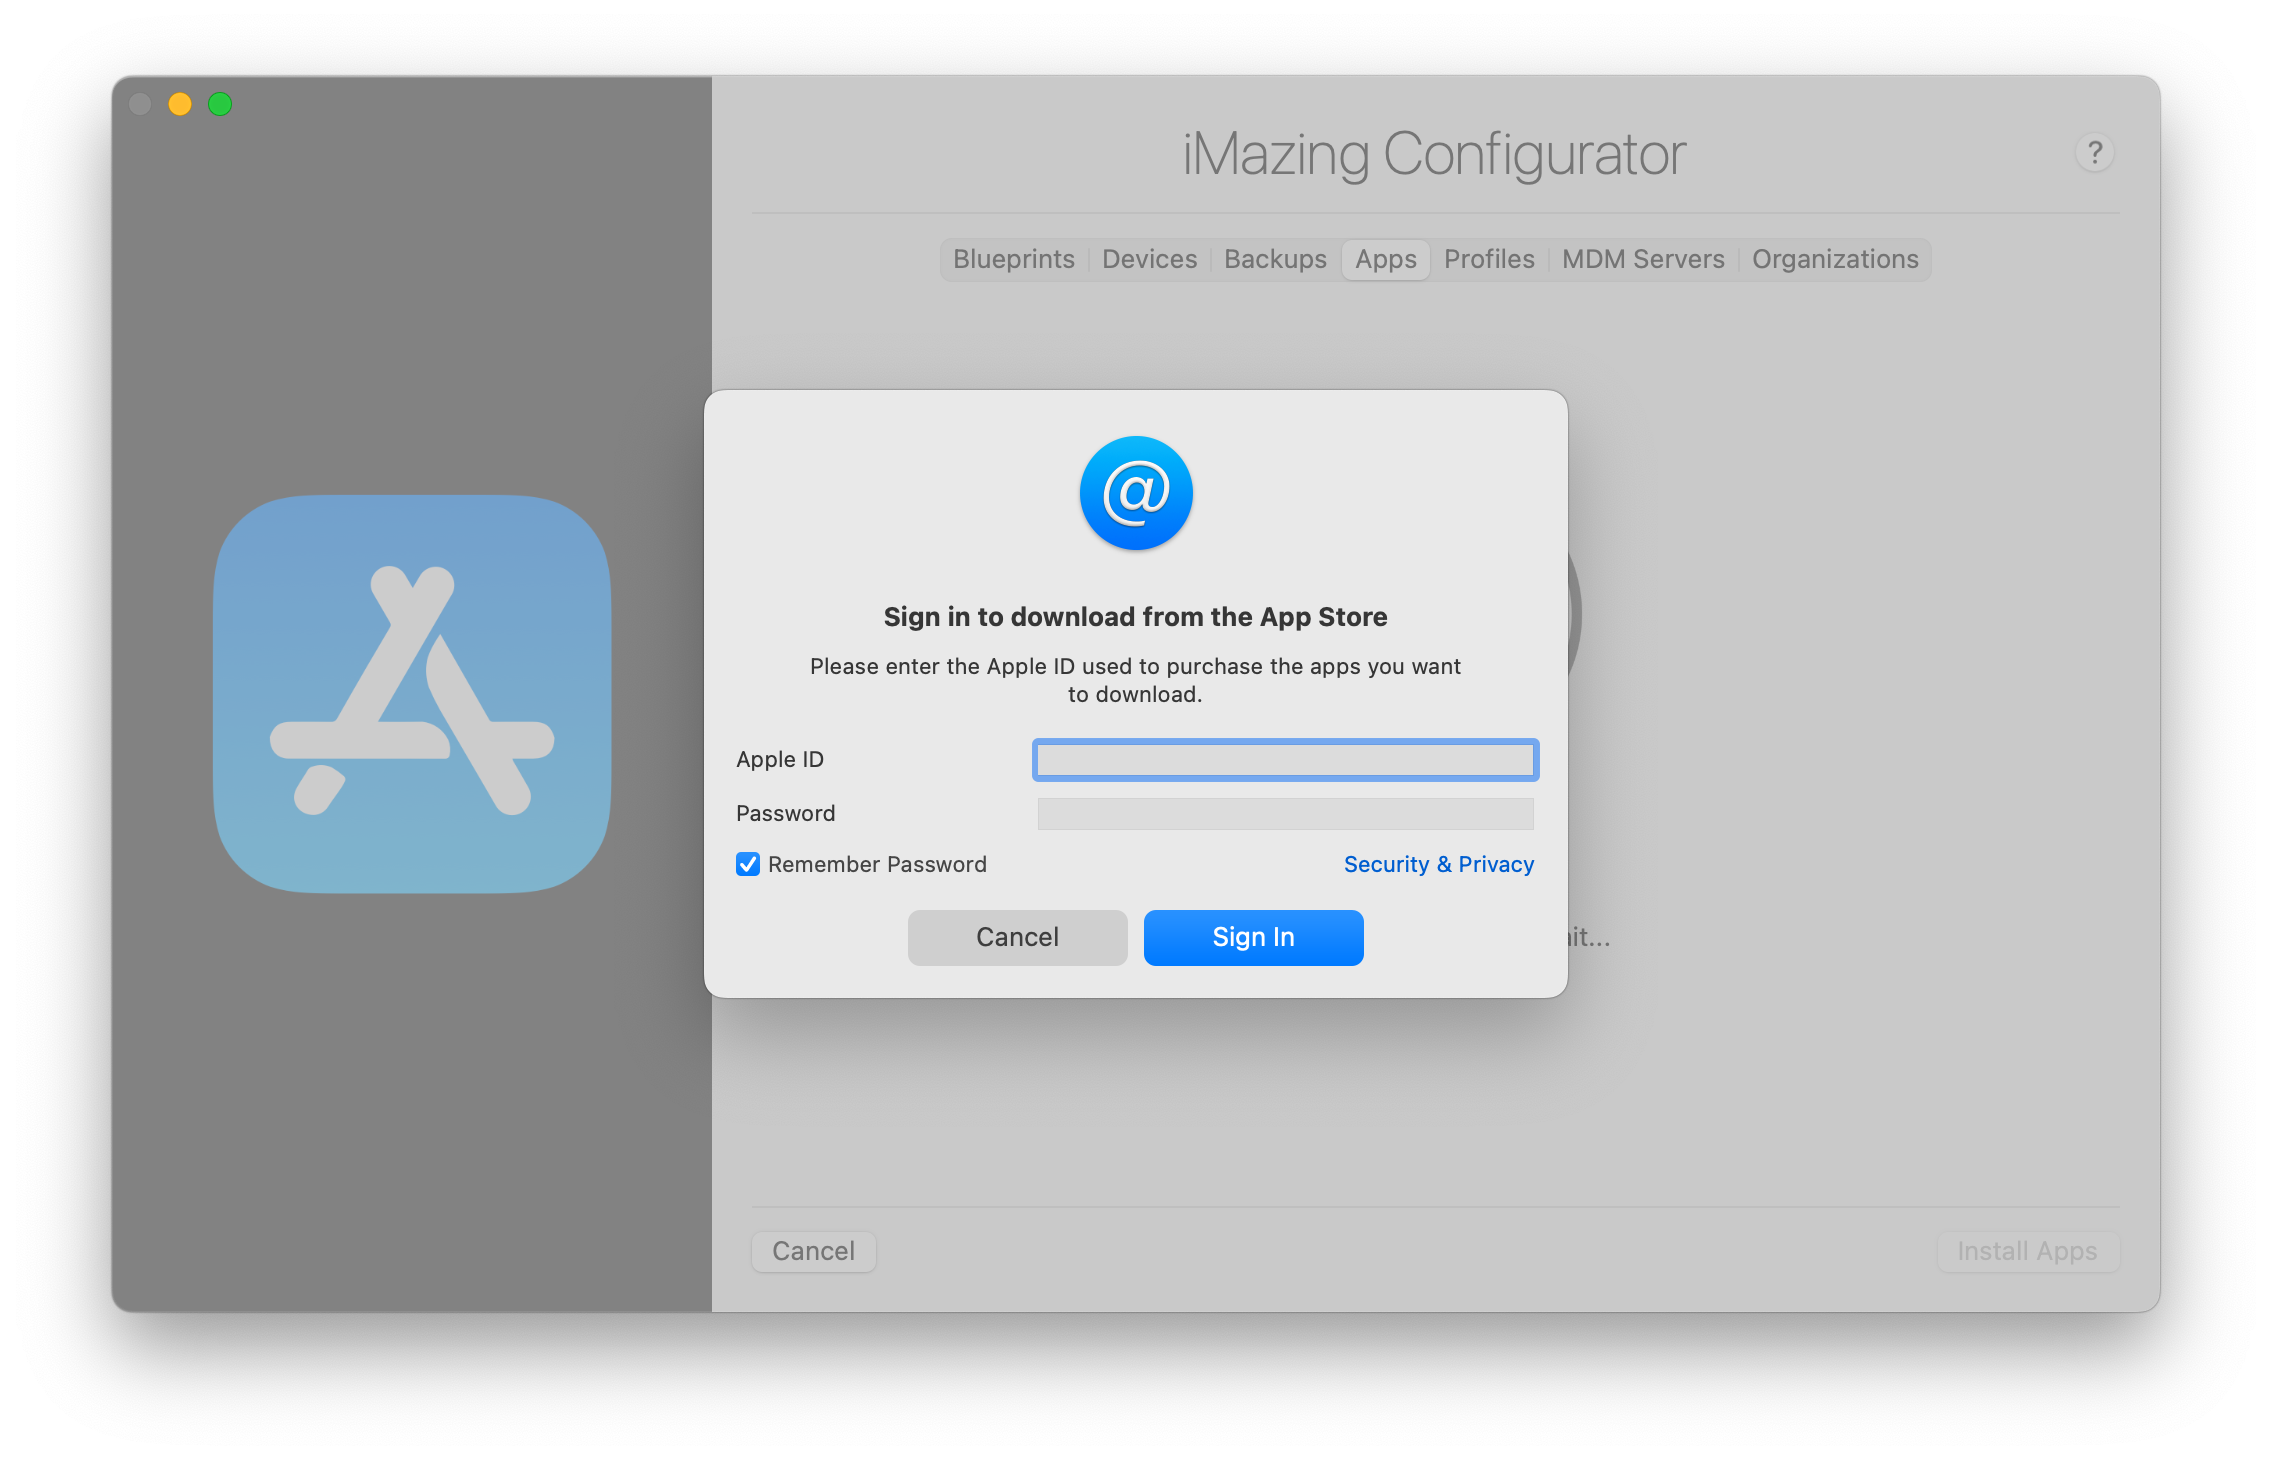
After signing in with your credentials, you may be prompted to enter your Volume Purchase token (downloaded at step 3.2) and click Continue, depending on the ABM/ASM account that you use.
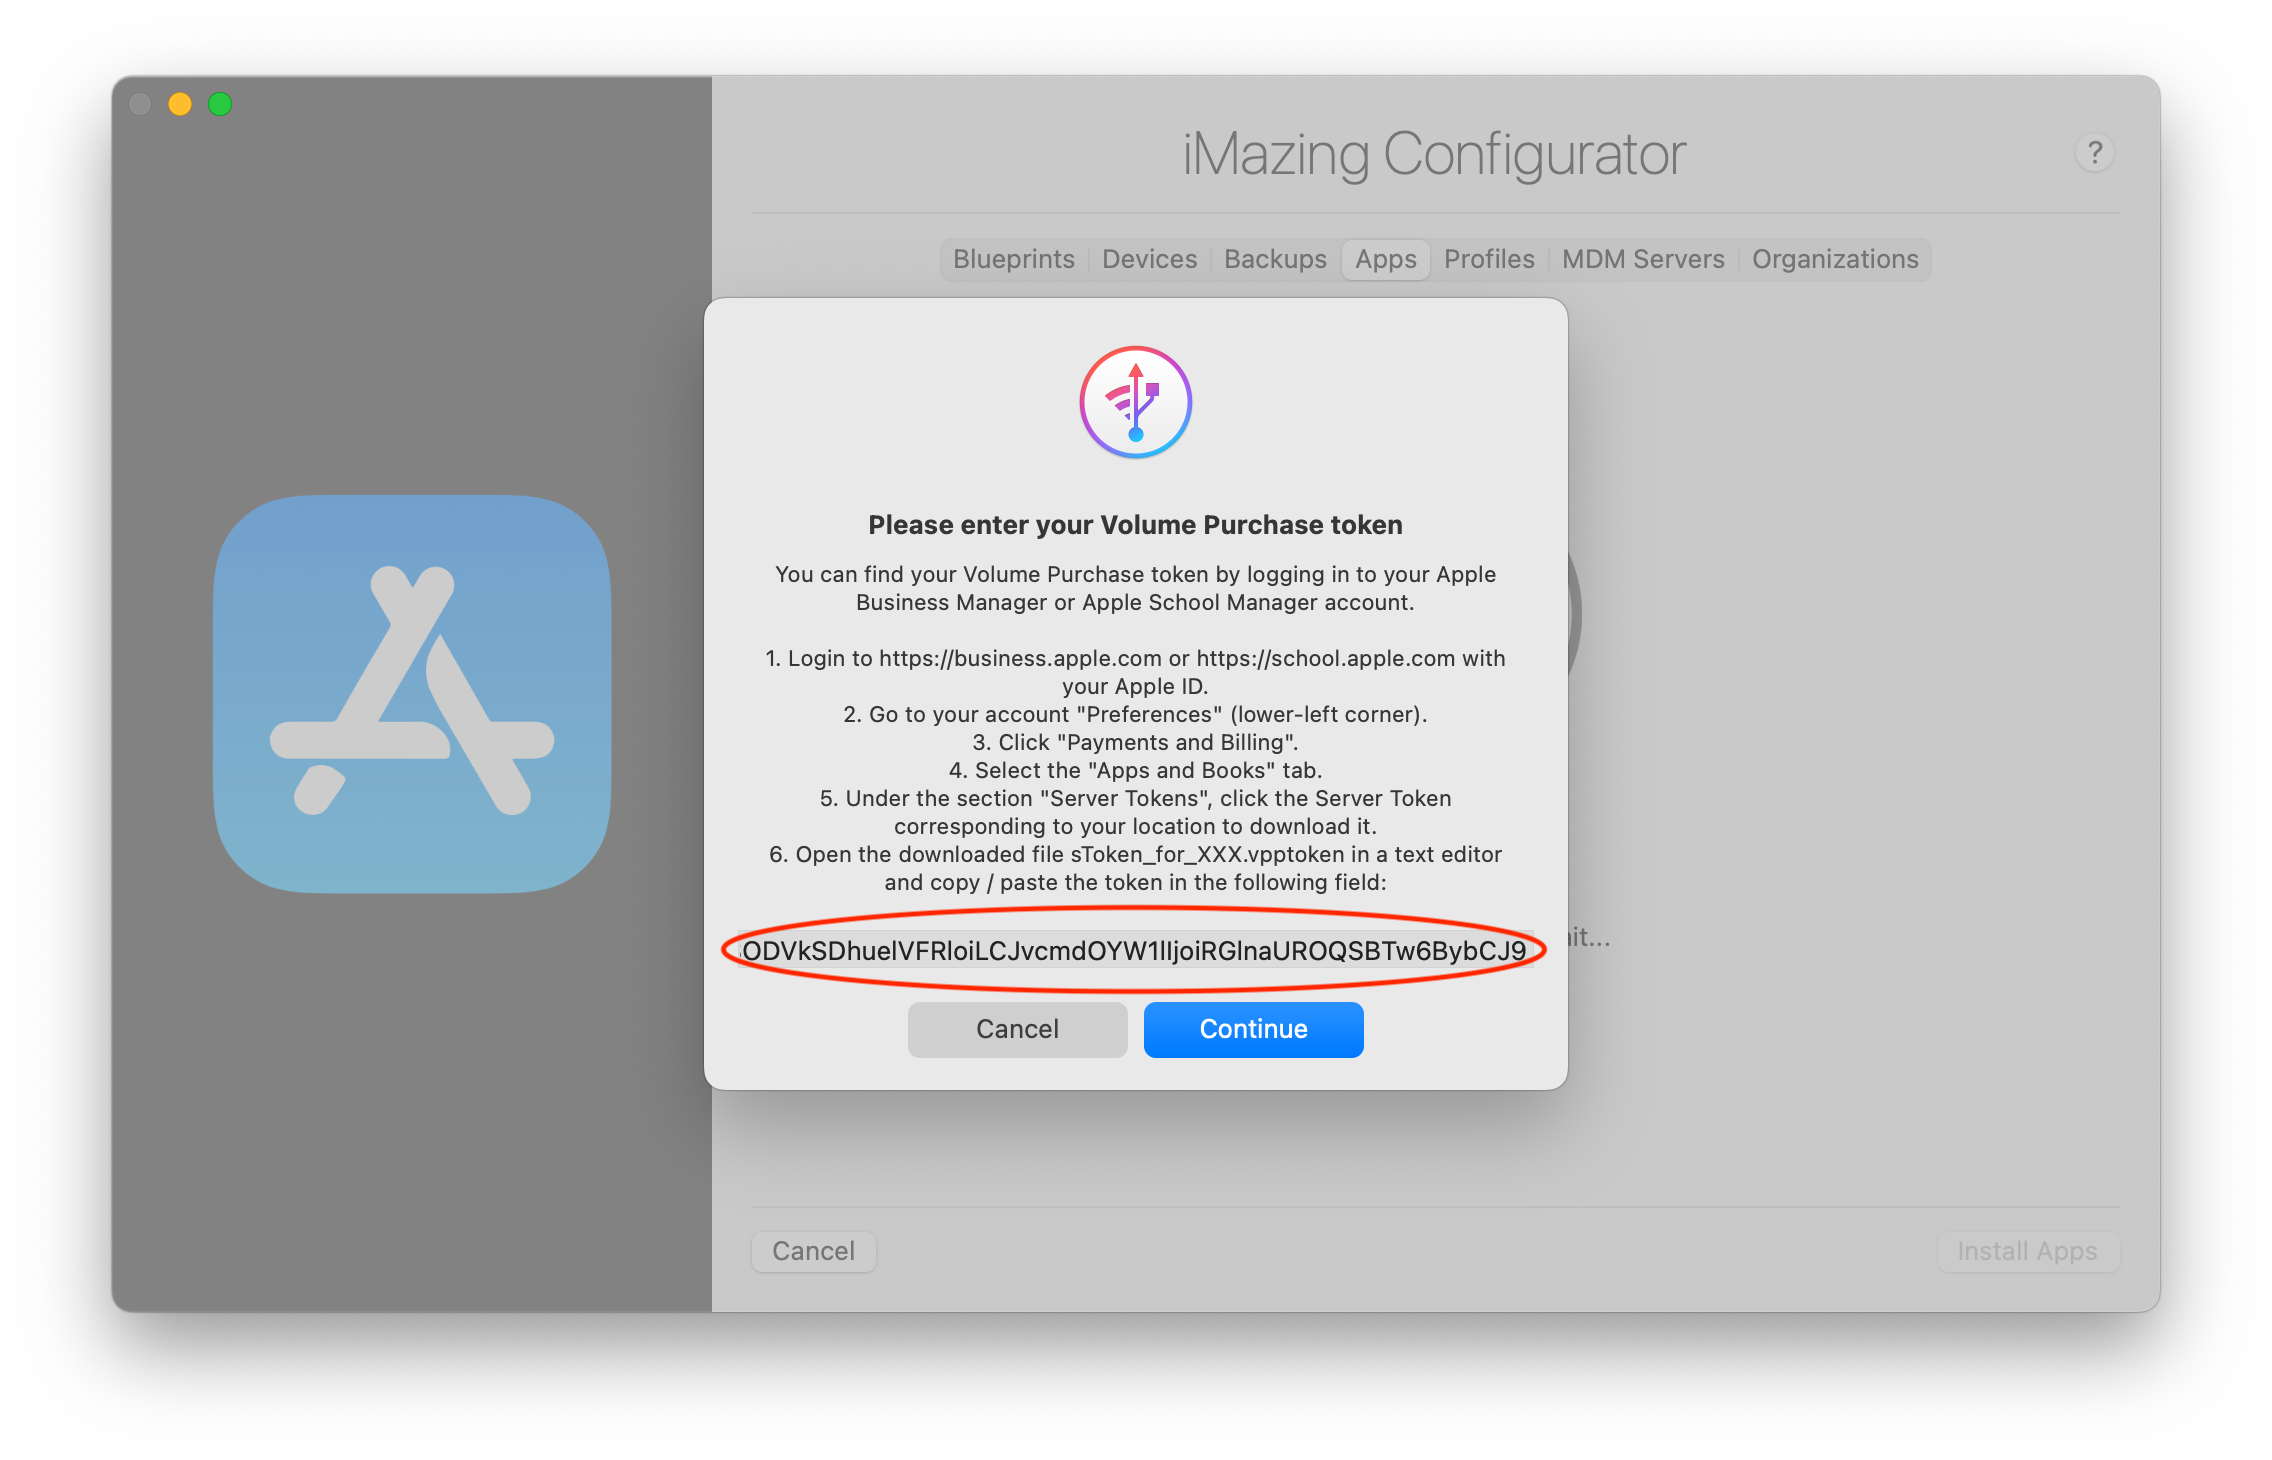
💡 Tip: You will find your token by opening the file
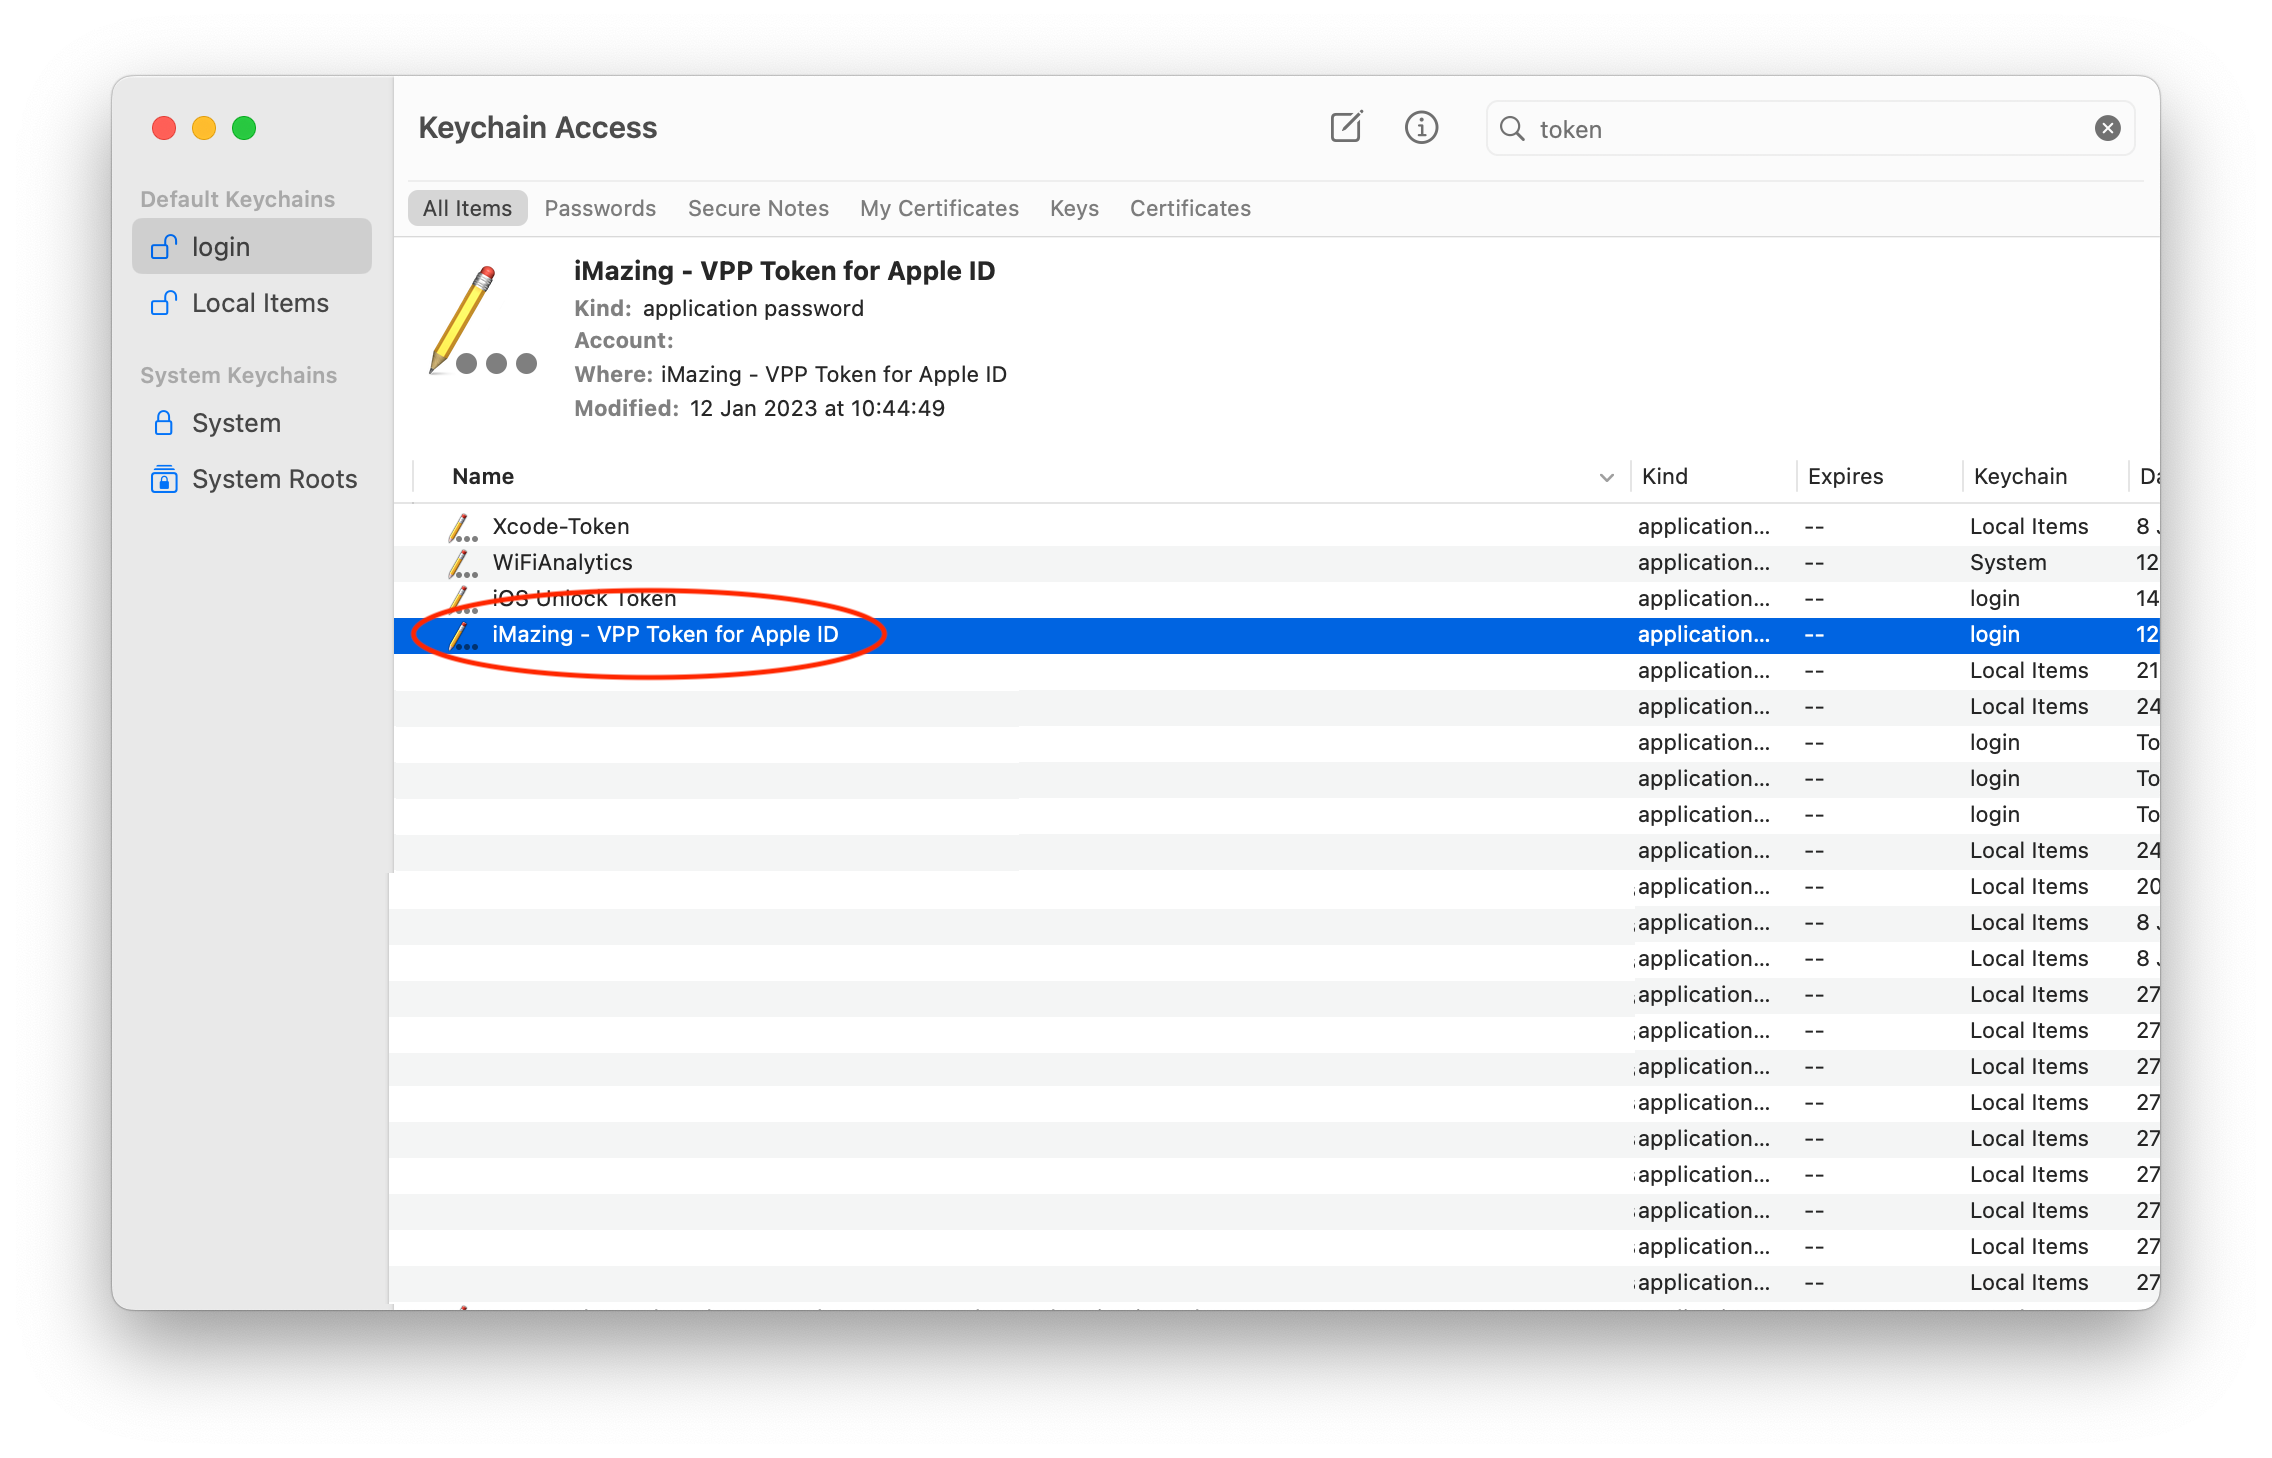
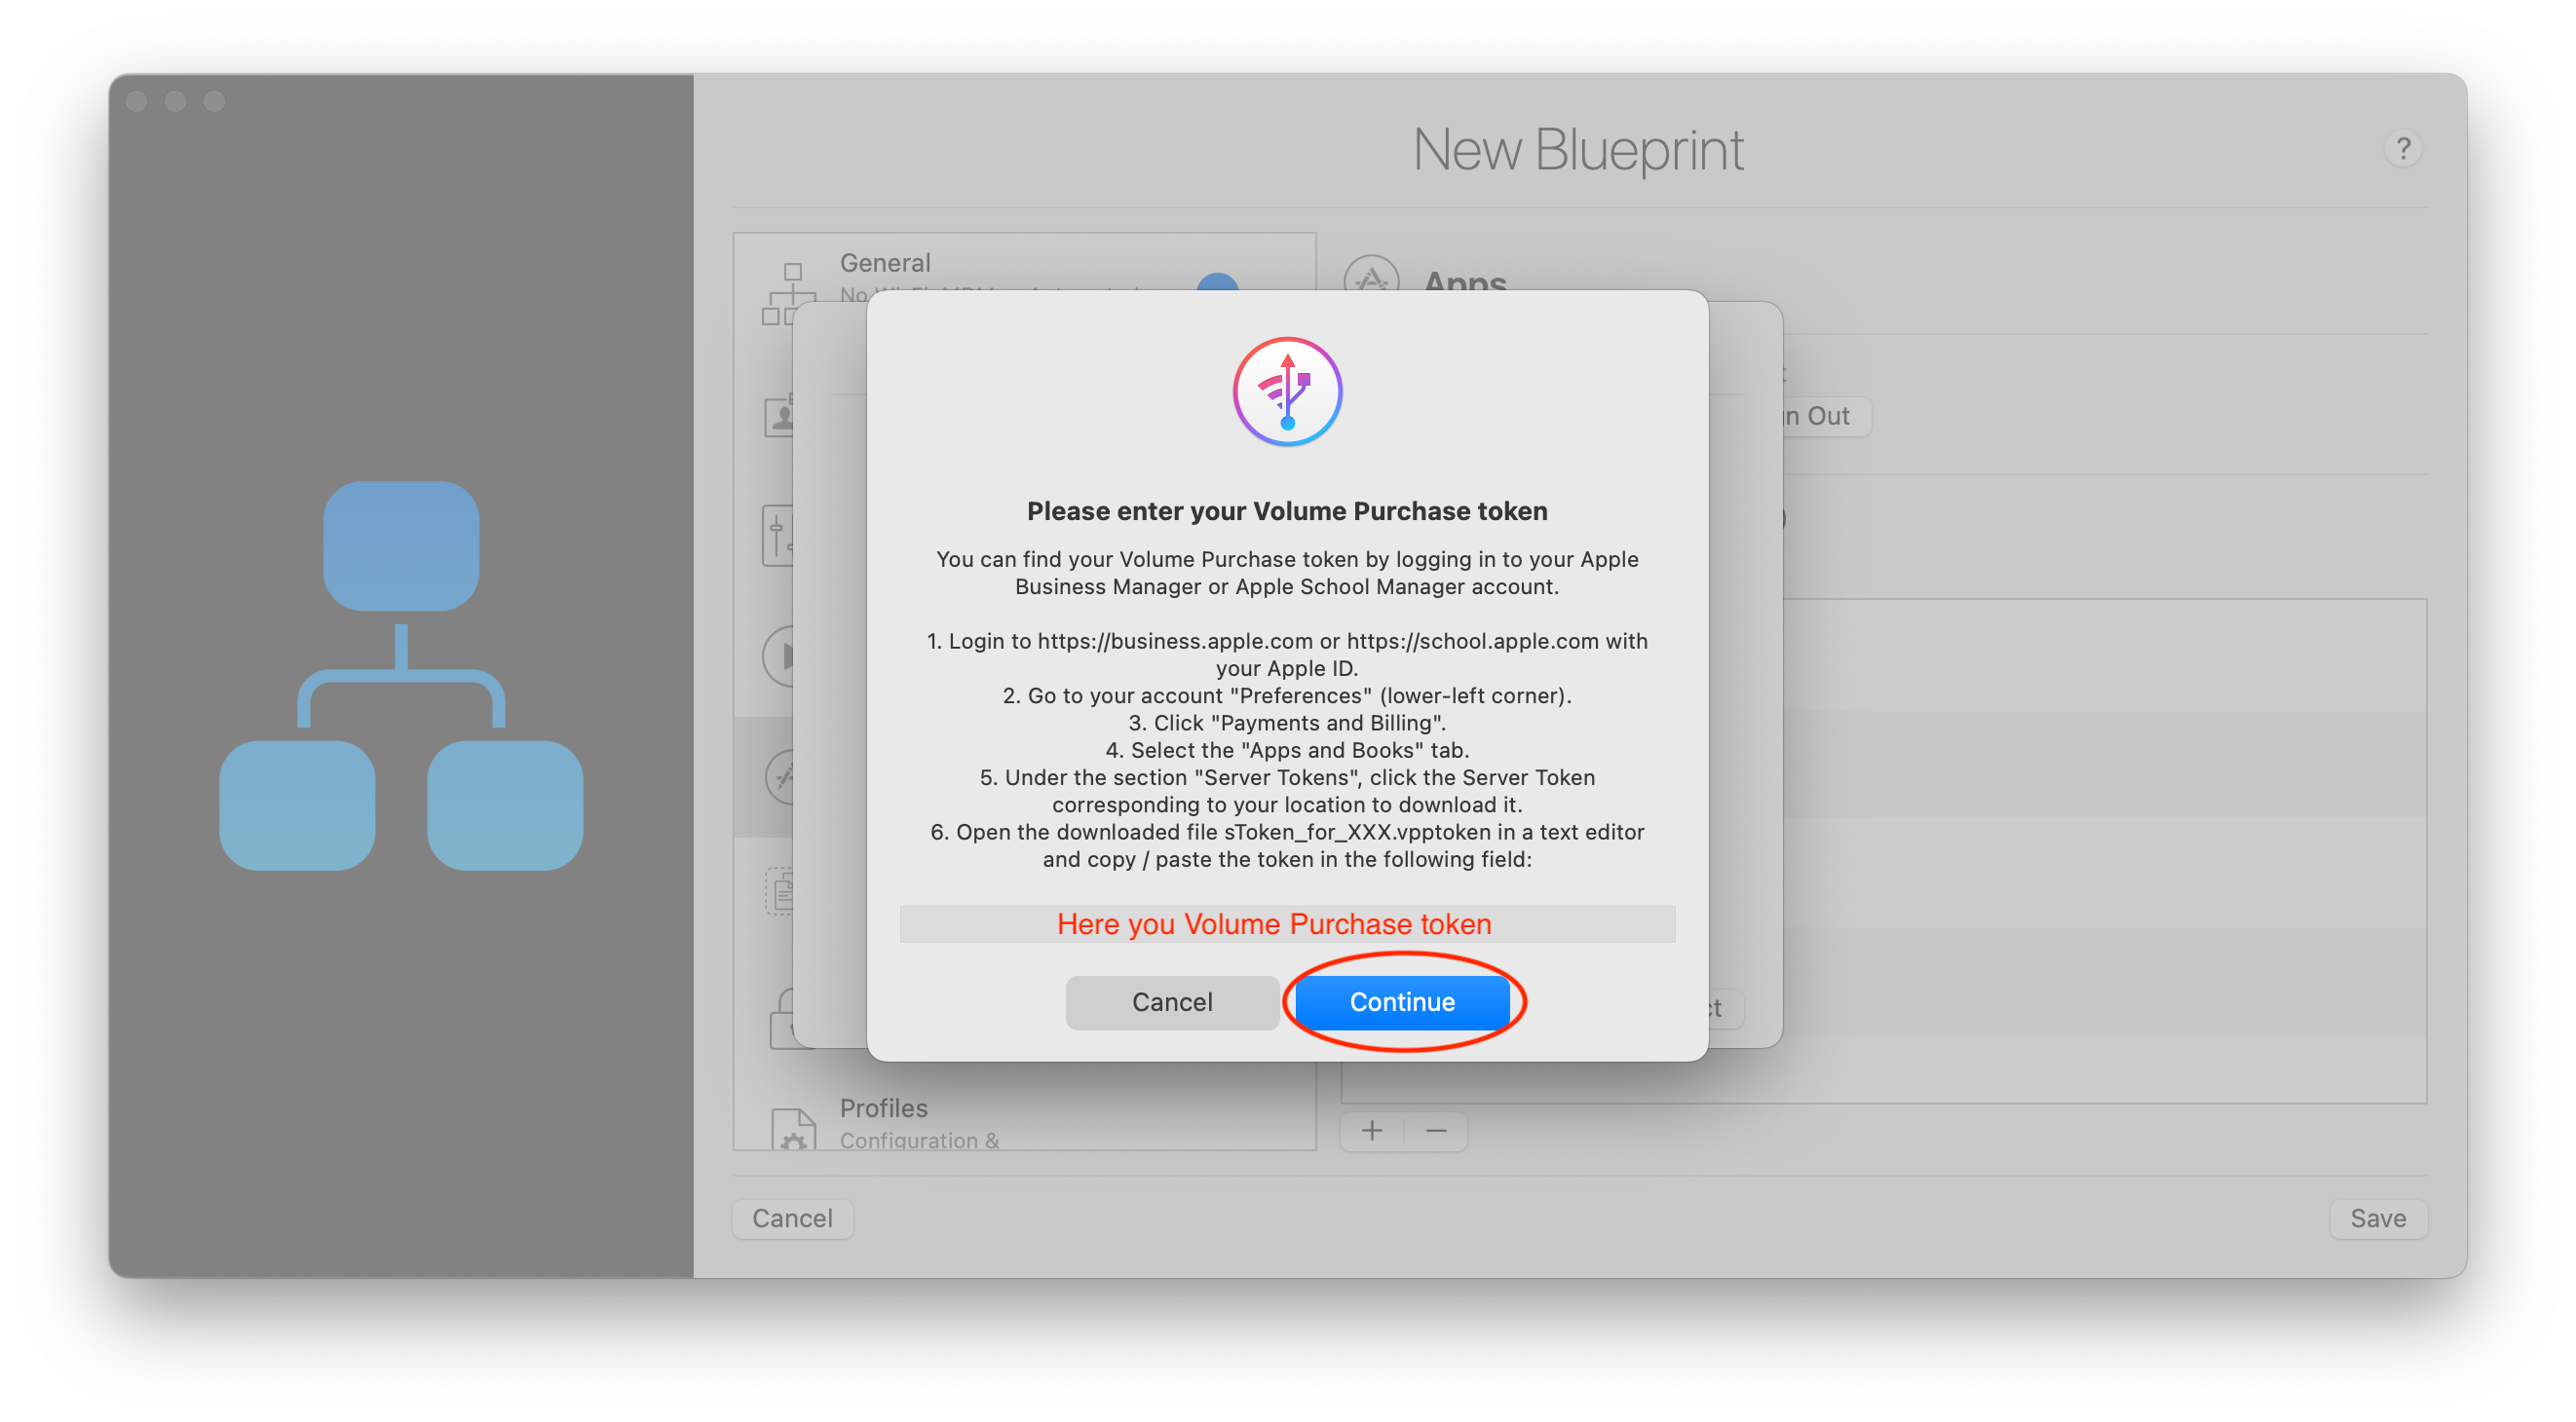
.vpptokendownloaded at step 3.2 with a text editor. It is represented by a string of characters that you need to copy and paste, as shown in the example above: 💡 Nice to know: iMazing will store it as an application password in your keychain or Windows Credentials.
 ⚠ Important Note: If your ABM/ASM Volume Purchase account is also being used in combination with your MDM solution, you may receive the following alert prompt: “For your convenience, iMazing will perform device based license assignments and unassignments as needed, on behalf of {name of your MDM solution}. Please refer to the documentation for more information.”
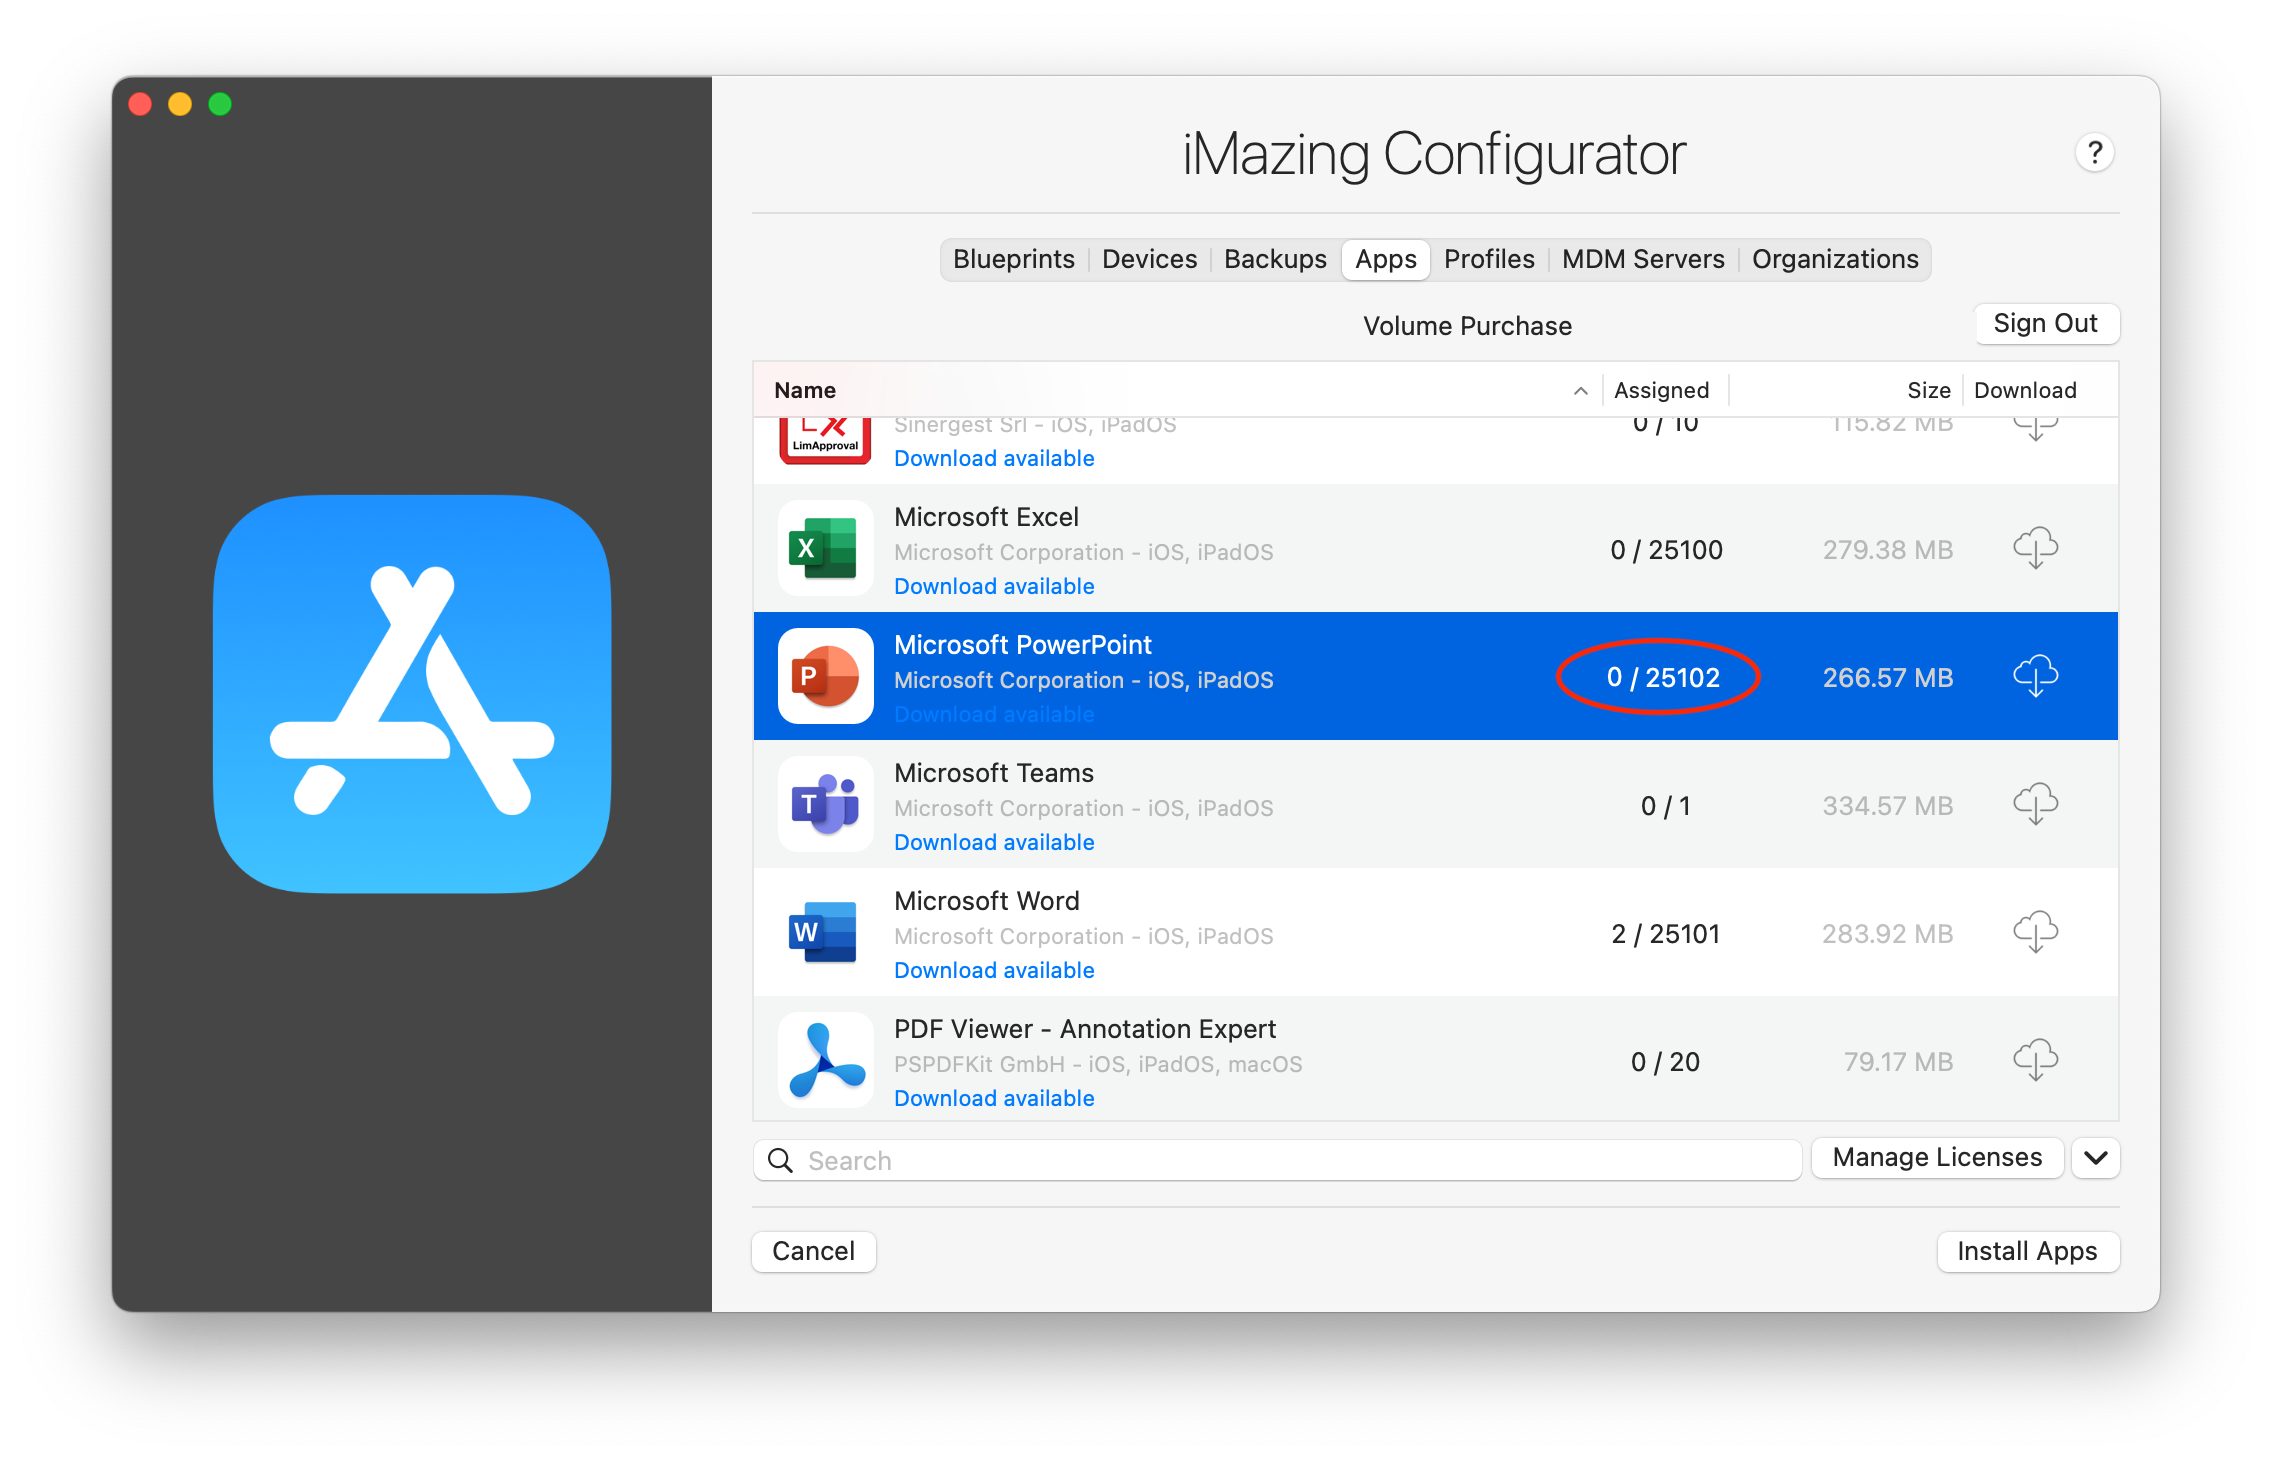
In the iMazing Configurator Apps Library, select the application you would like to install (in our example Microsoft PowerPoint). You will notice that no license has been assigned for this app yet:
- To install the app, click on Install Apps and select the devices on which you would like to install it. Then, click on Launch in the lower right corner. The app will be downloaded and installed on the selected devices. iMazing will also automatically assign app licenses to the devices during this process:
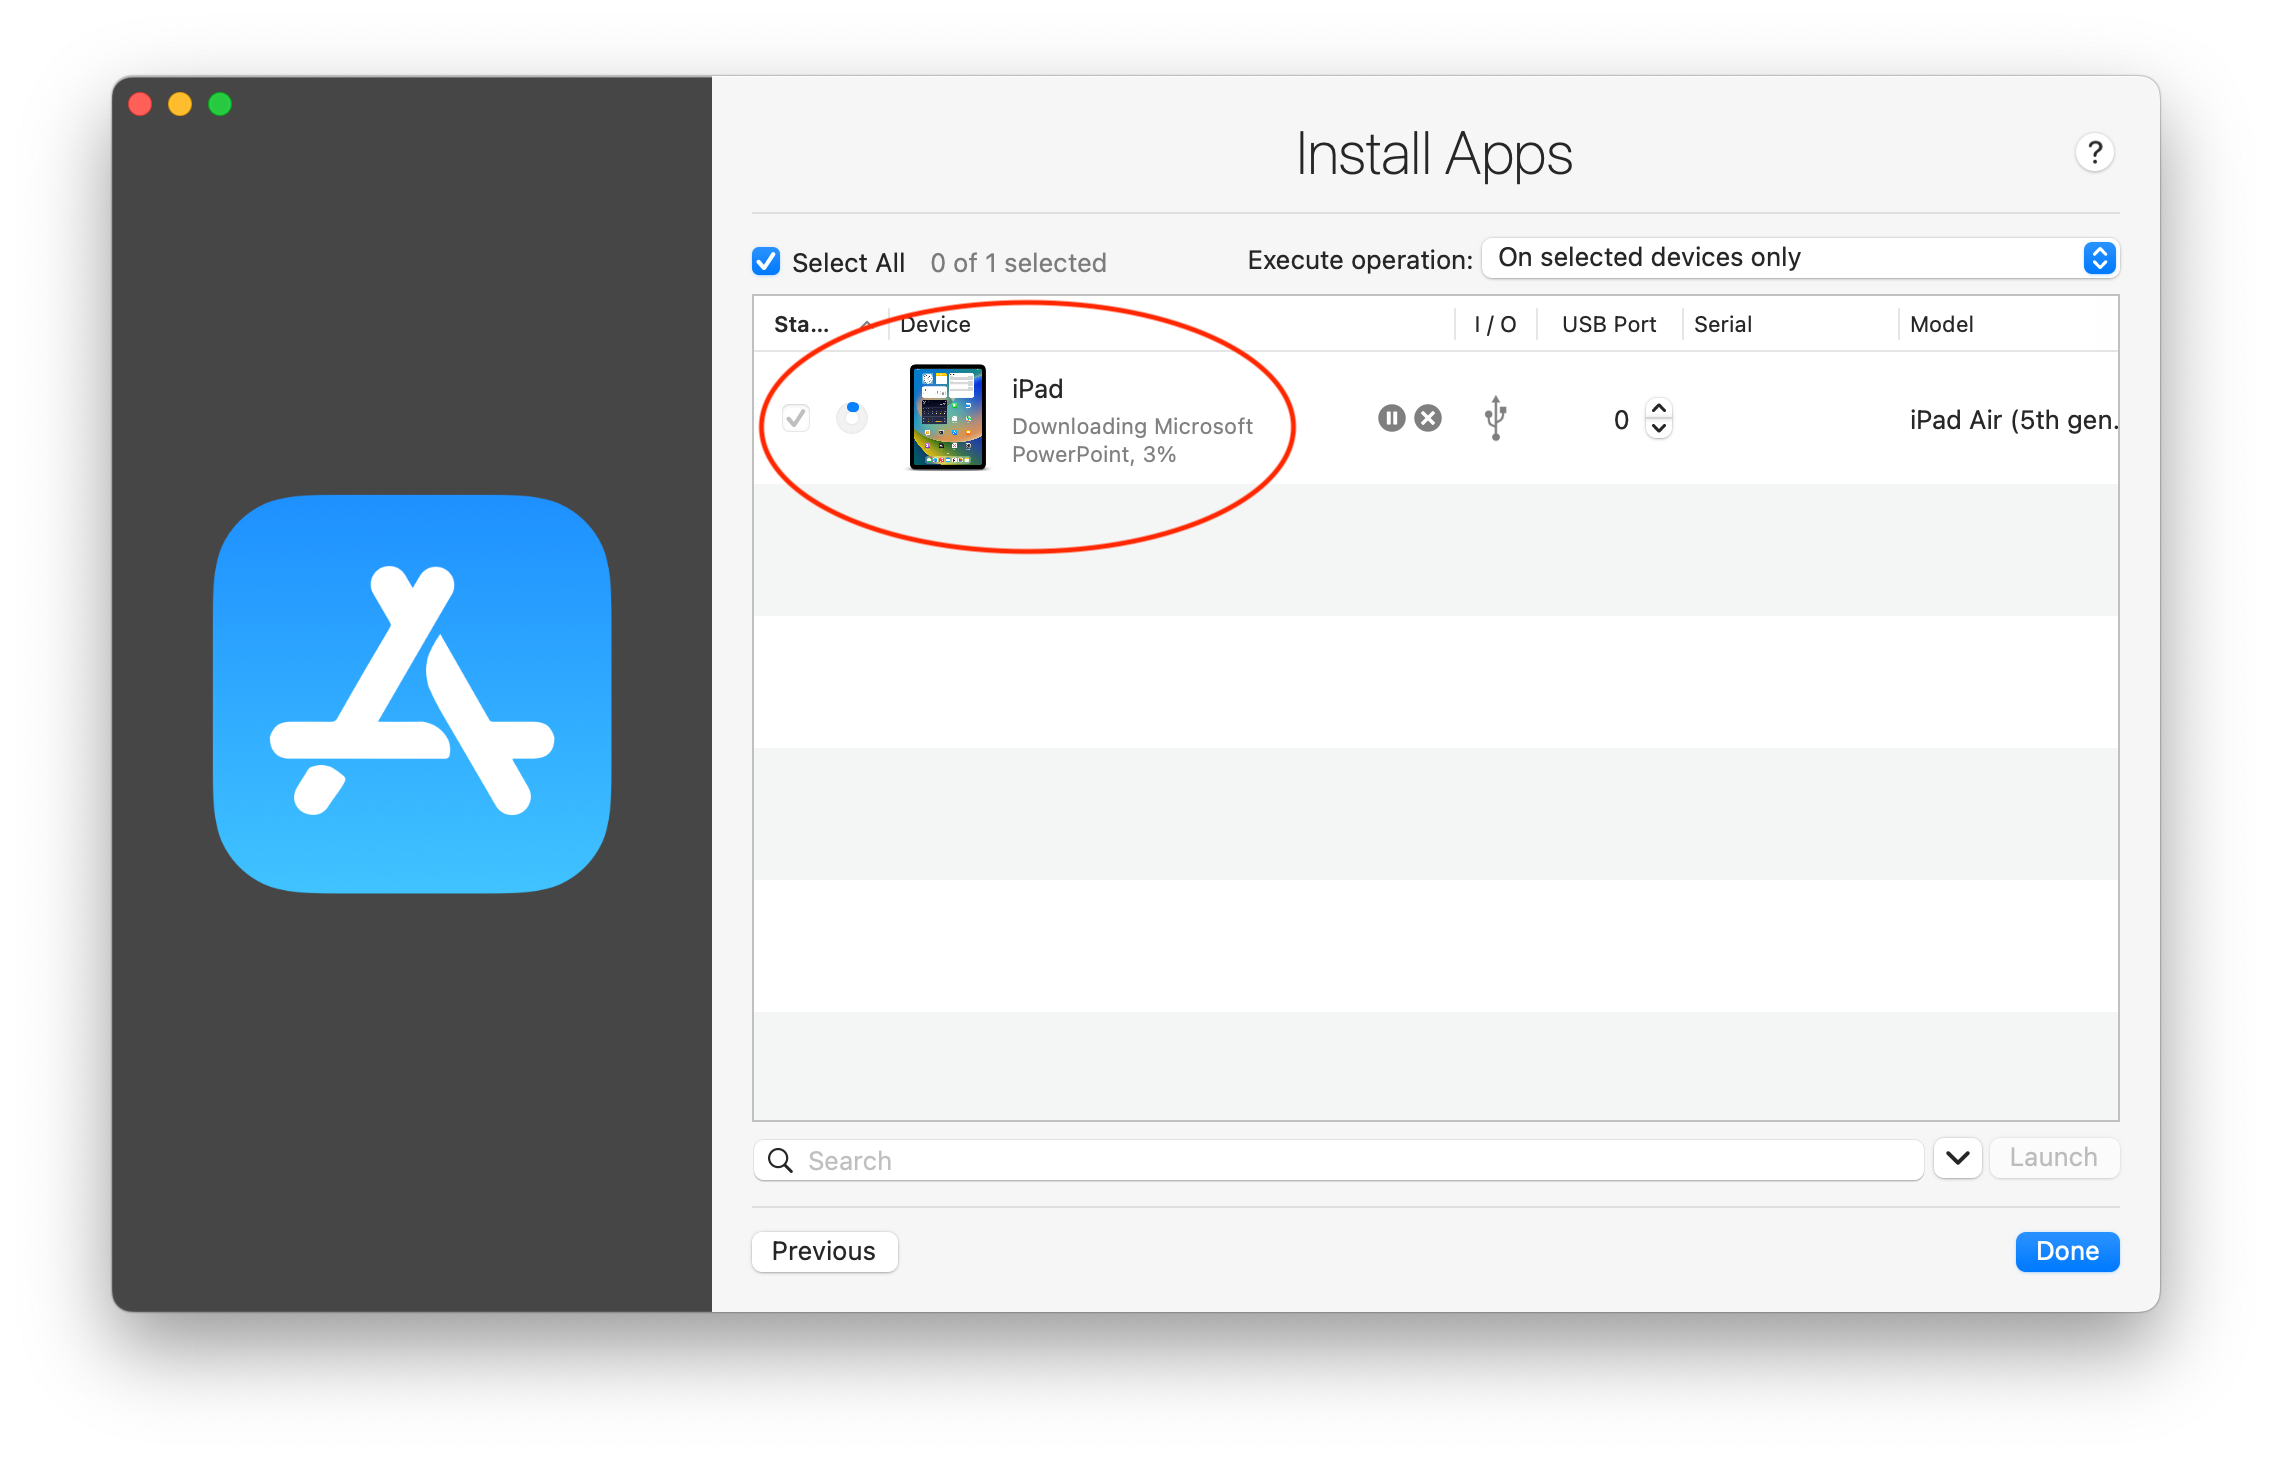
💡 Tip: You have several possible options available to use with iMazing Operation Dispatcher windows. Find more information here: iMazing Configurator: Operation Dispatcher View
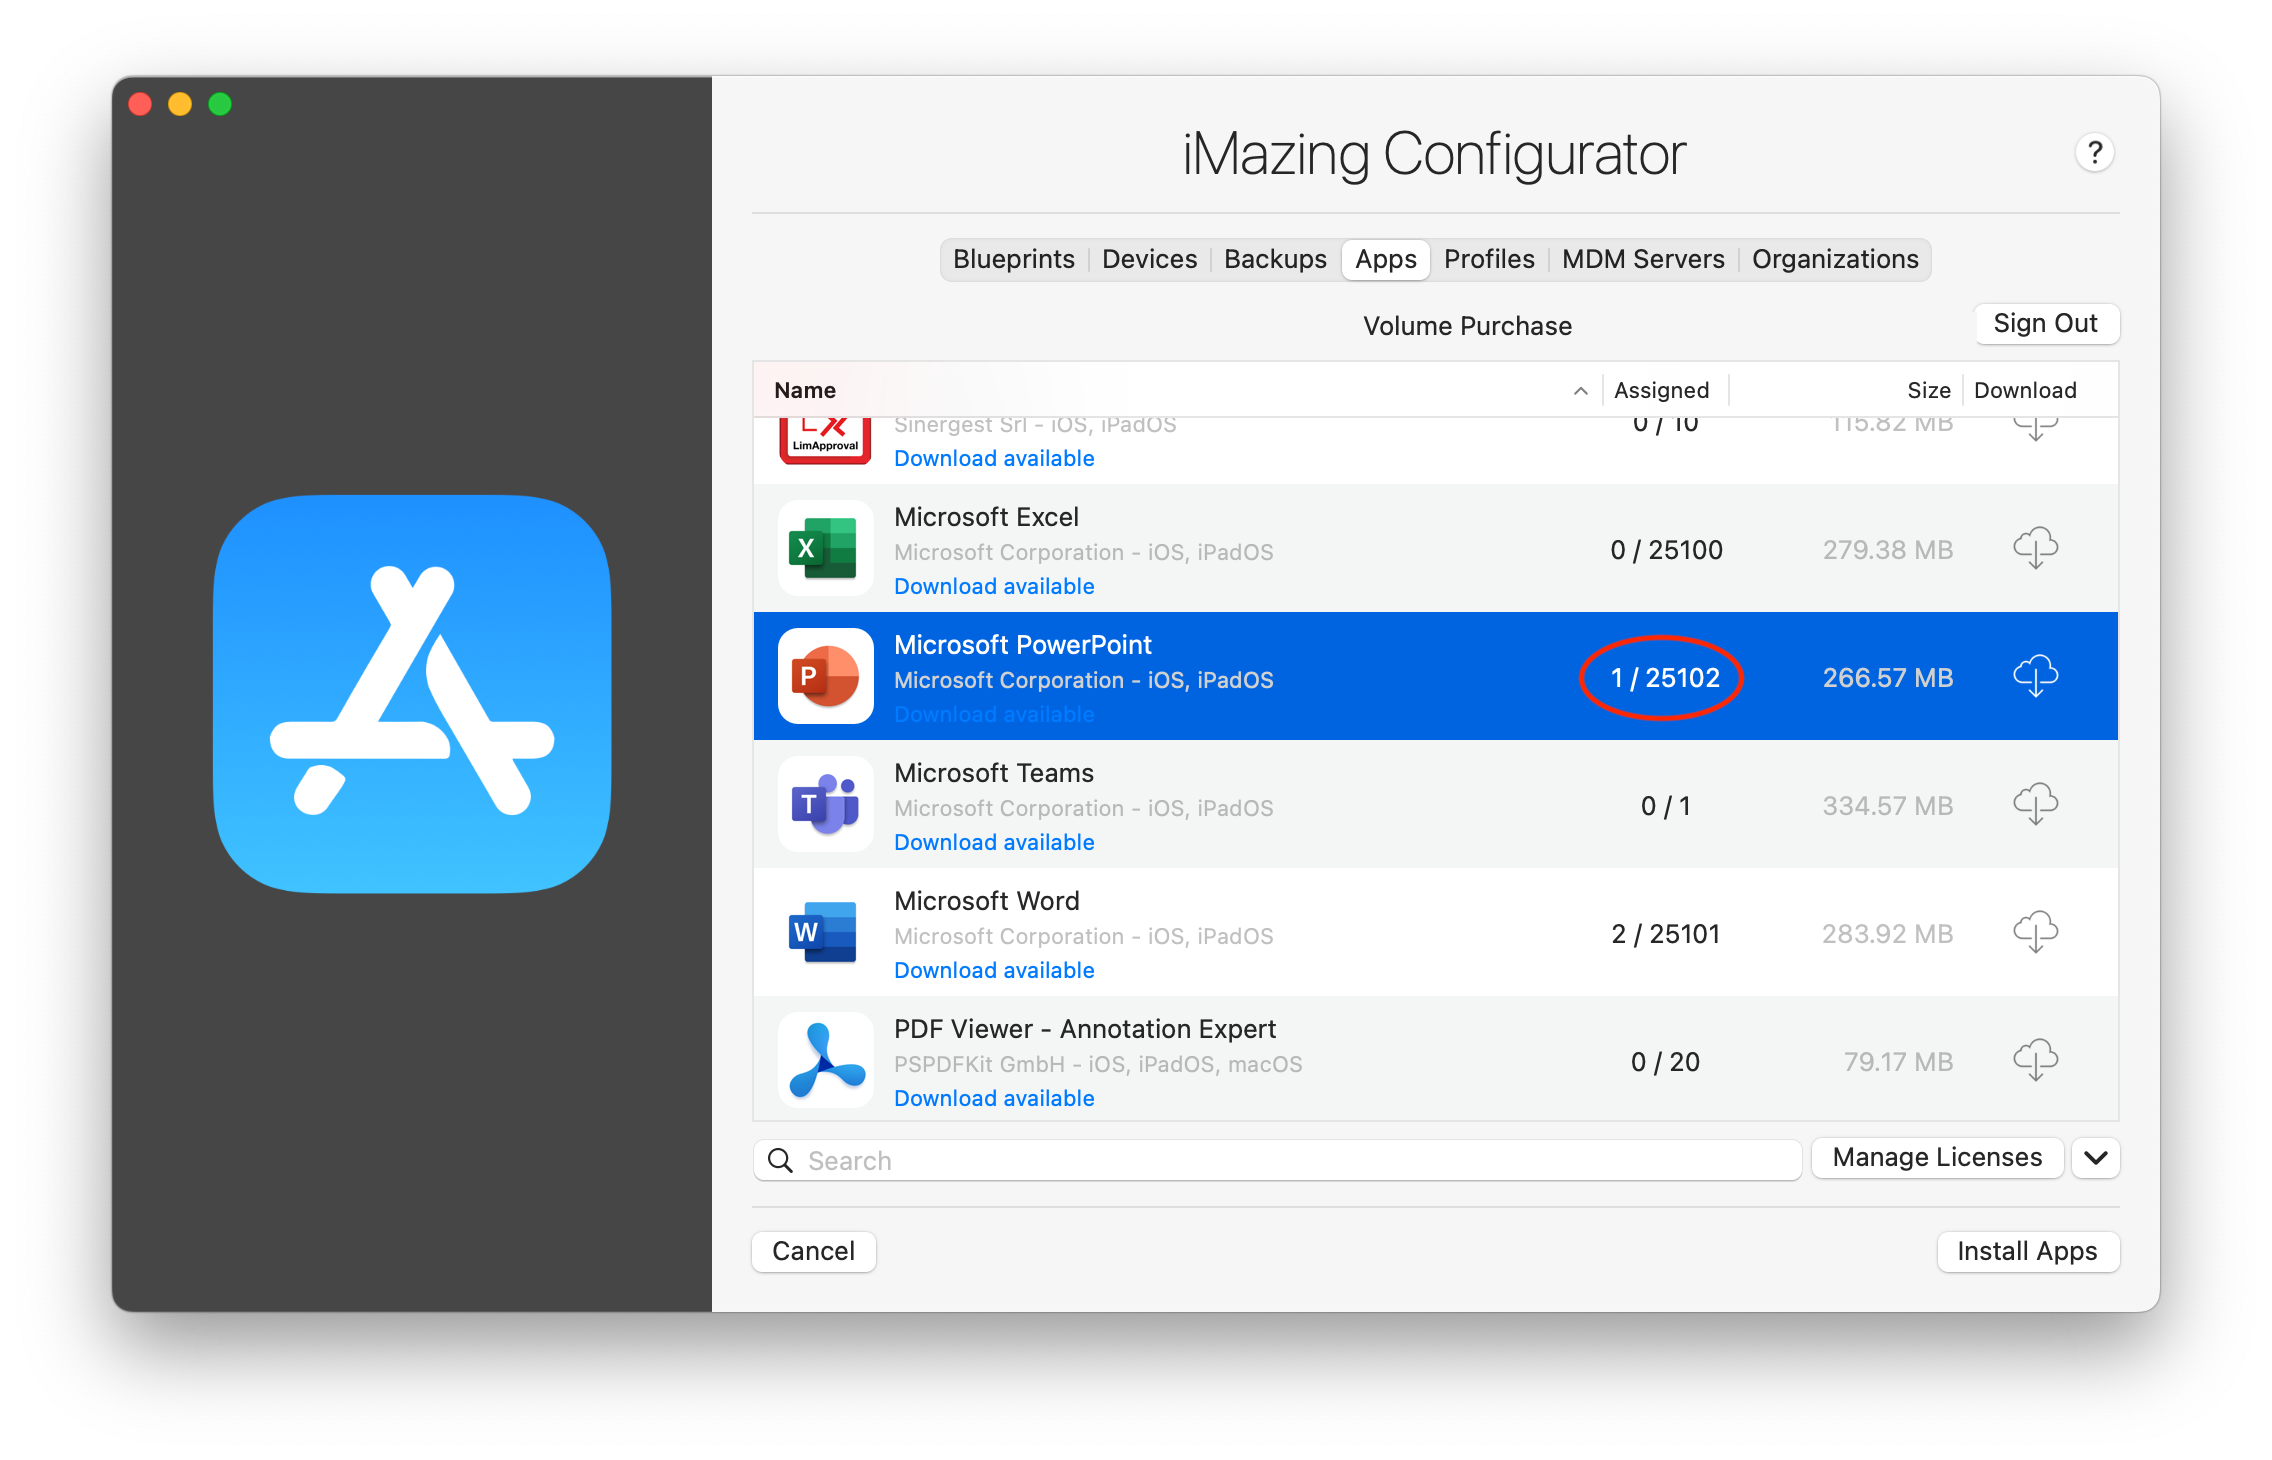
- Shortly after, if you return to the iMazing Configurator Apps library, you will see that a license for Microsoft PowerPoint has been successfully assigned to your device:
- You can also manually manage licenses by clicking on the Manage Licenses button in the iMazing Configurator Apps library. From there, you can manually unassign or assign licenses to devices by entering their serial numbers:
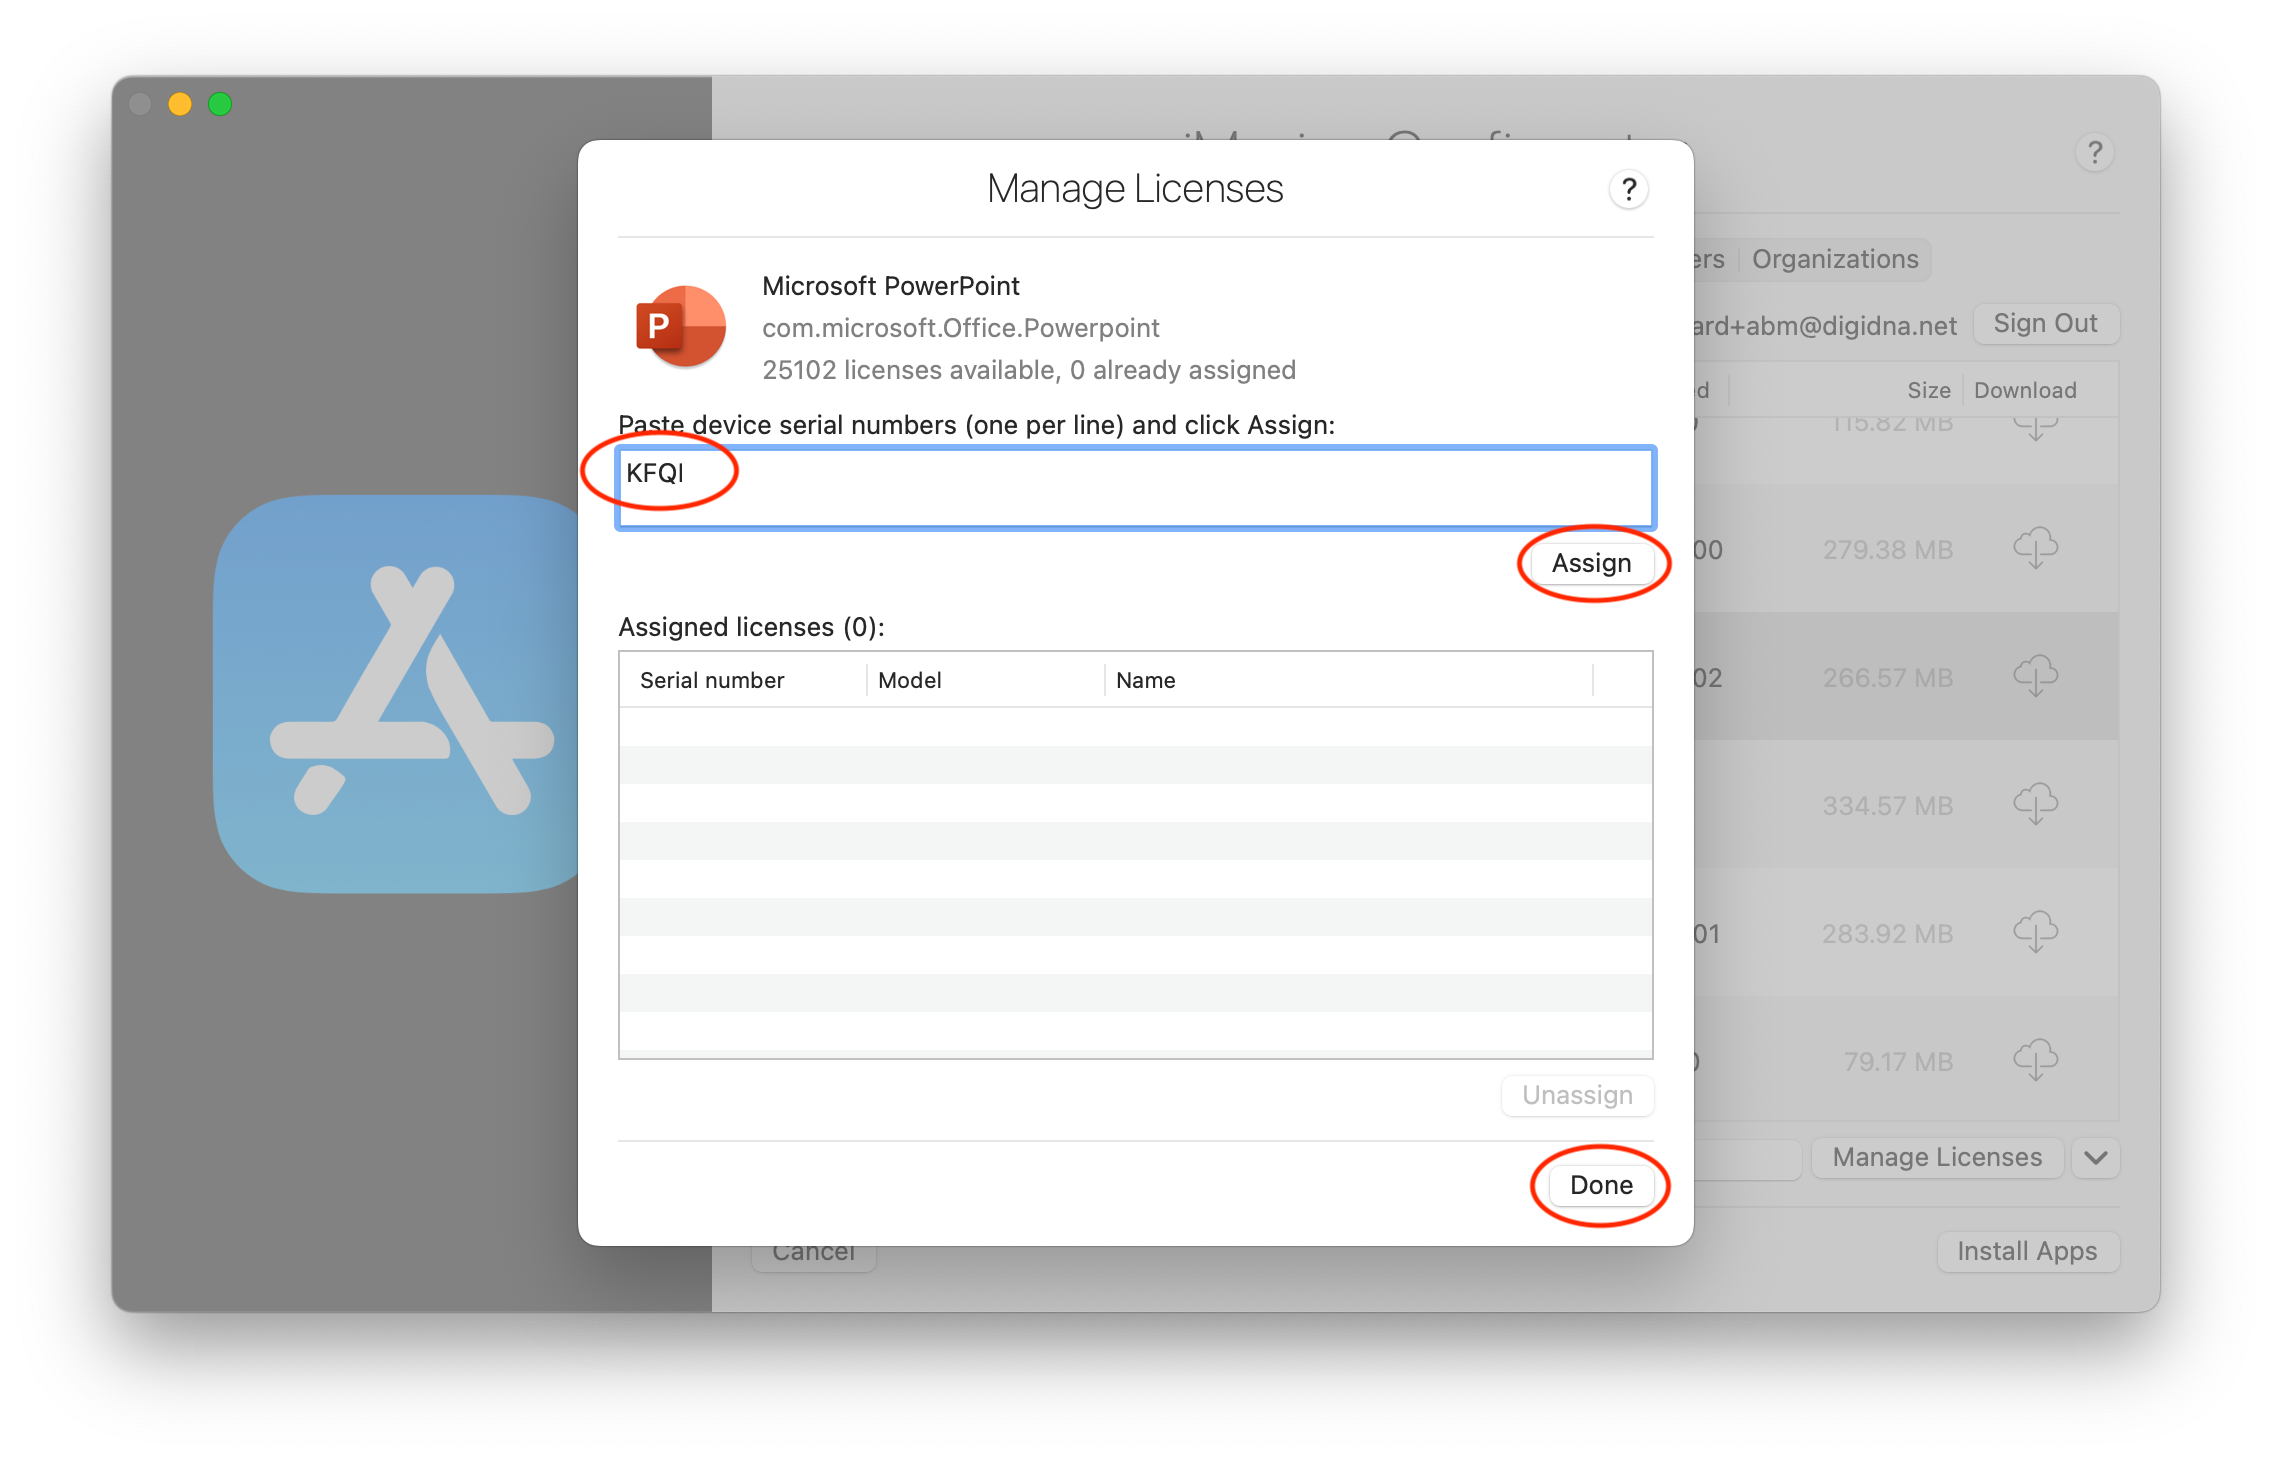
💡 Nice to know: You can assign as many licenses as you like to as many devices as you want, as long as you do not exceed your maximum limit. Also, when uninstalling apps from devices using iMazing, licenses are automatically unassigned from those devices.
3.5 Steps to deploy an app purchased in volume with iMazing Configurator and a blueprint
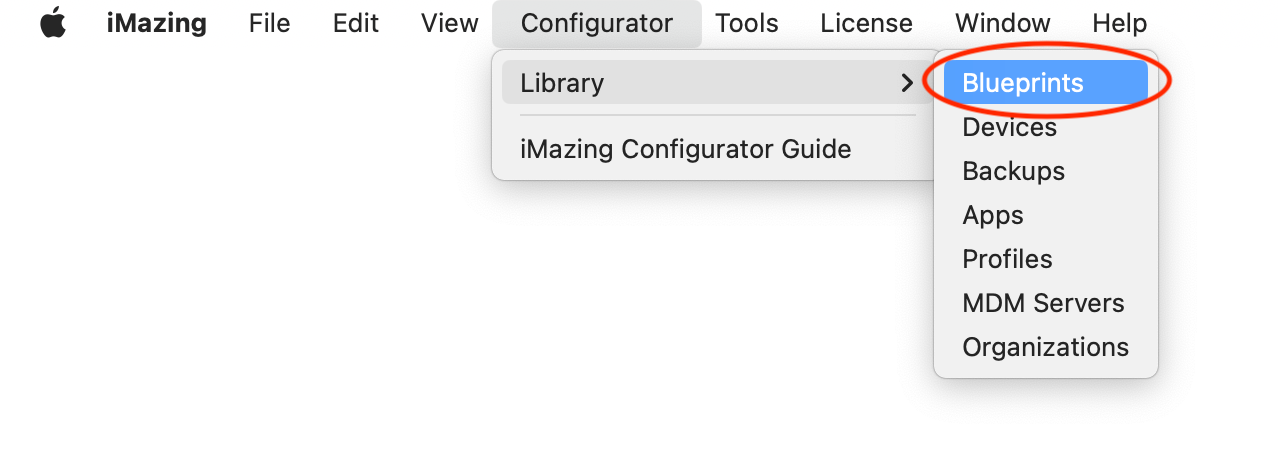
- Launch iMazing and using the menu bar click on Configurator > Library > Blueprints:
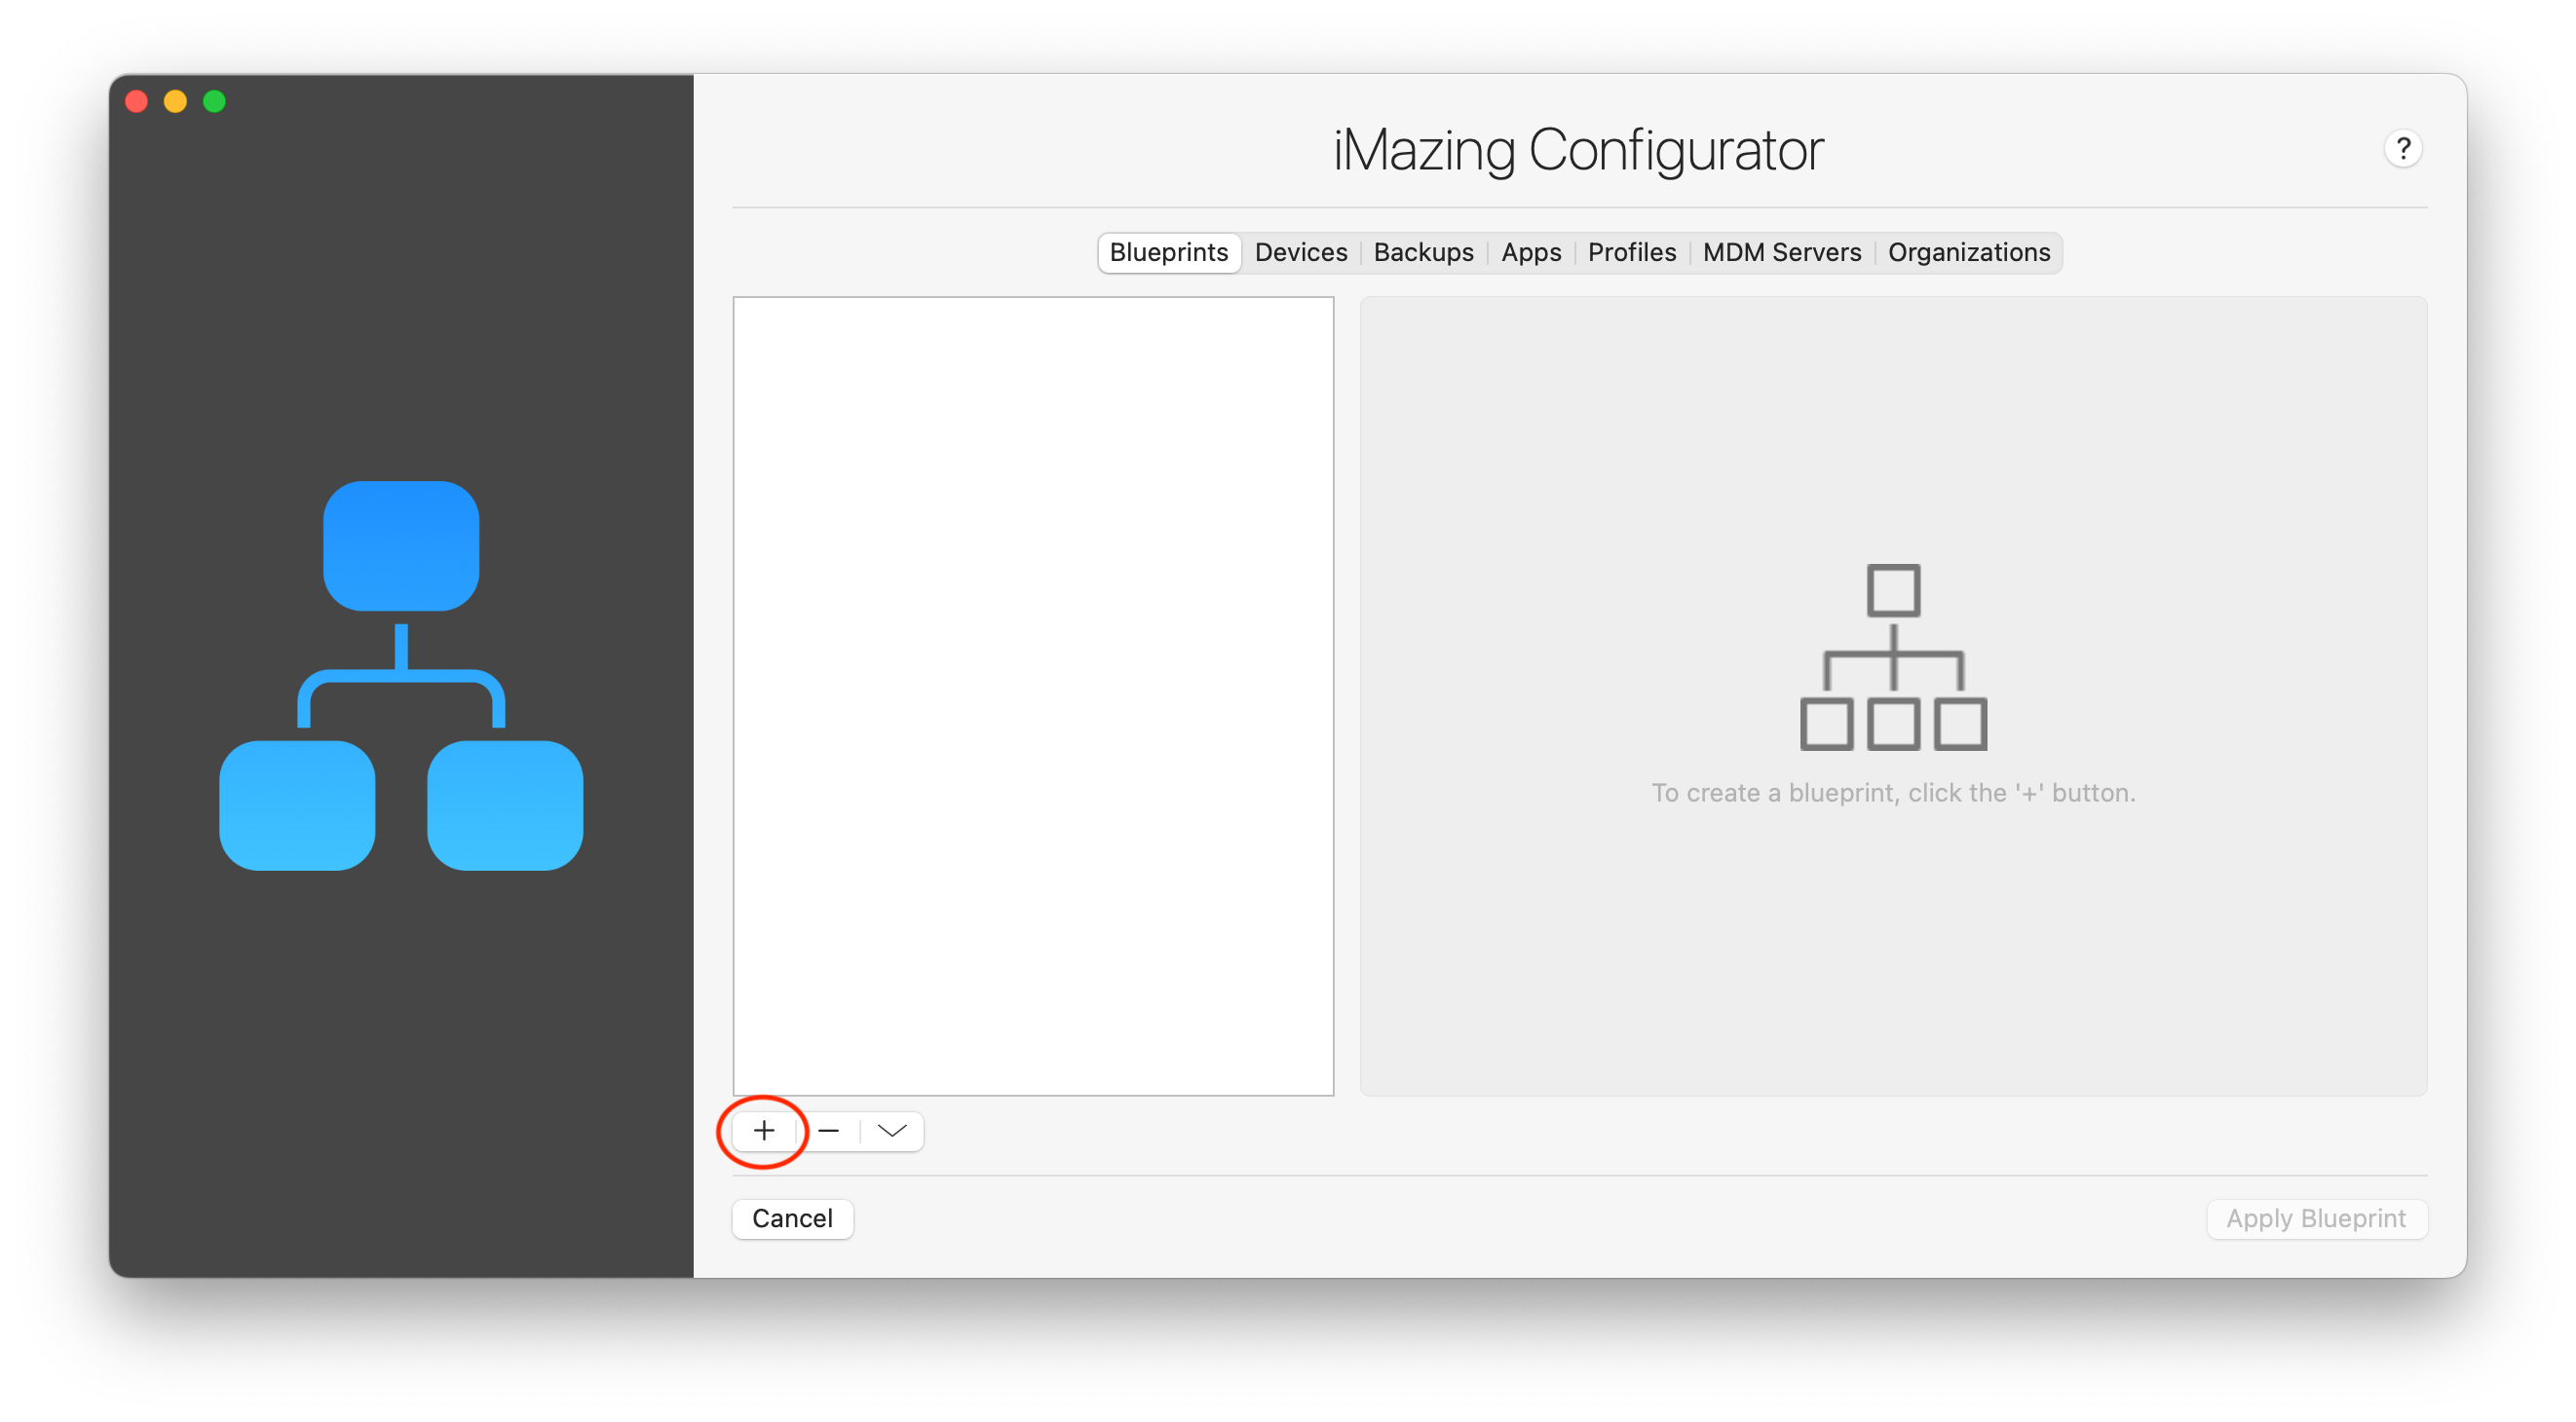
- The iMazing Configurator window will appear and display the Blueprints tab. To create a new blueprint, click on the '+' sign located at the lower left corner:
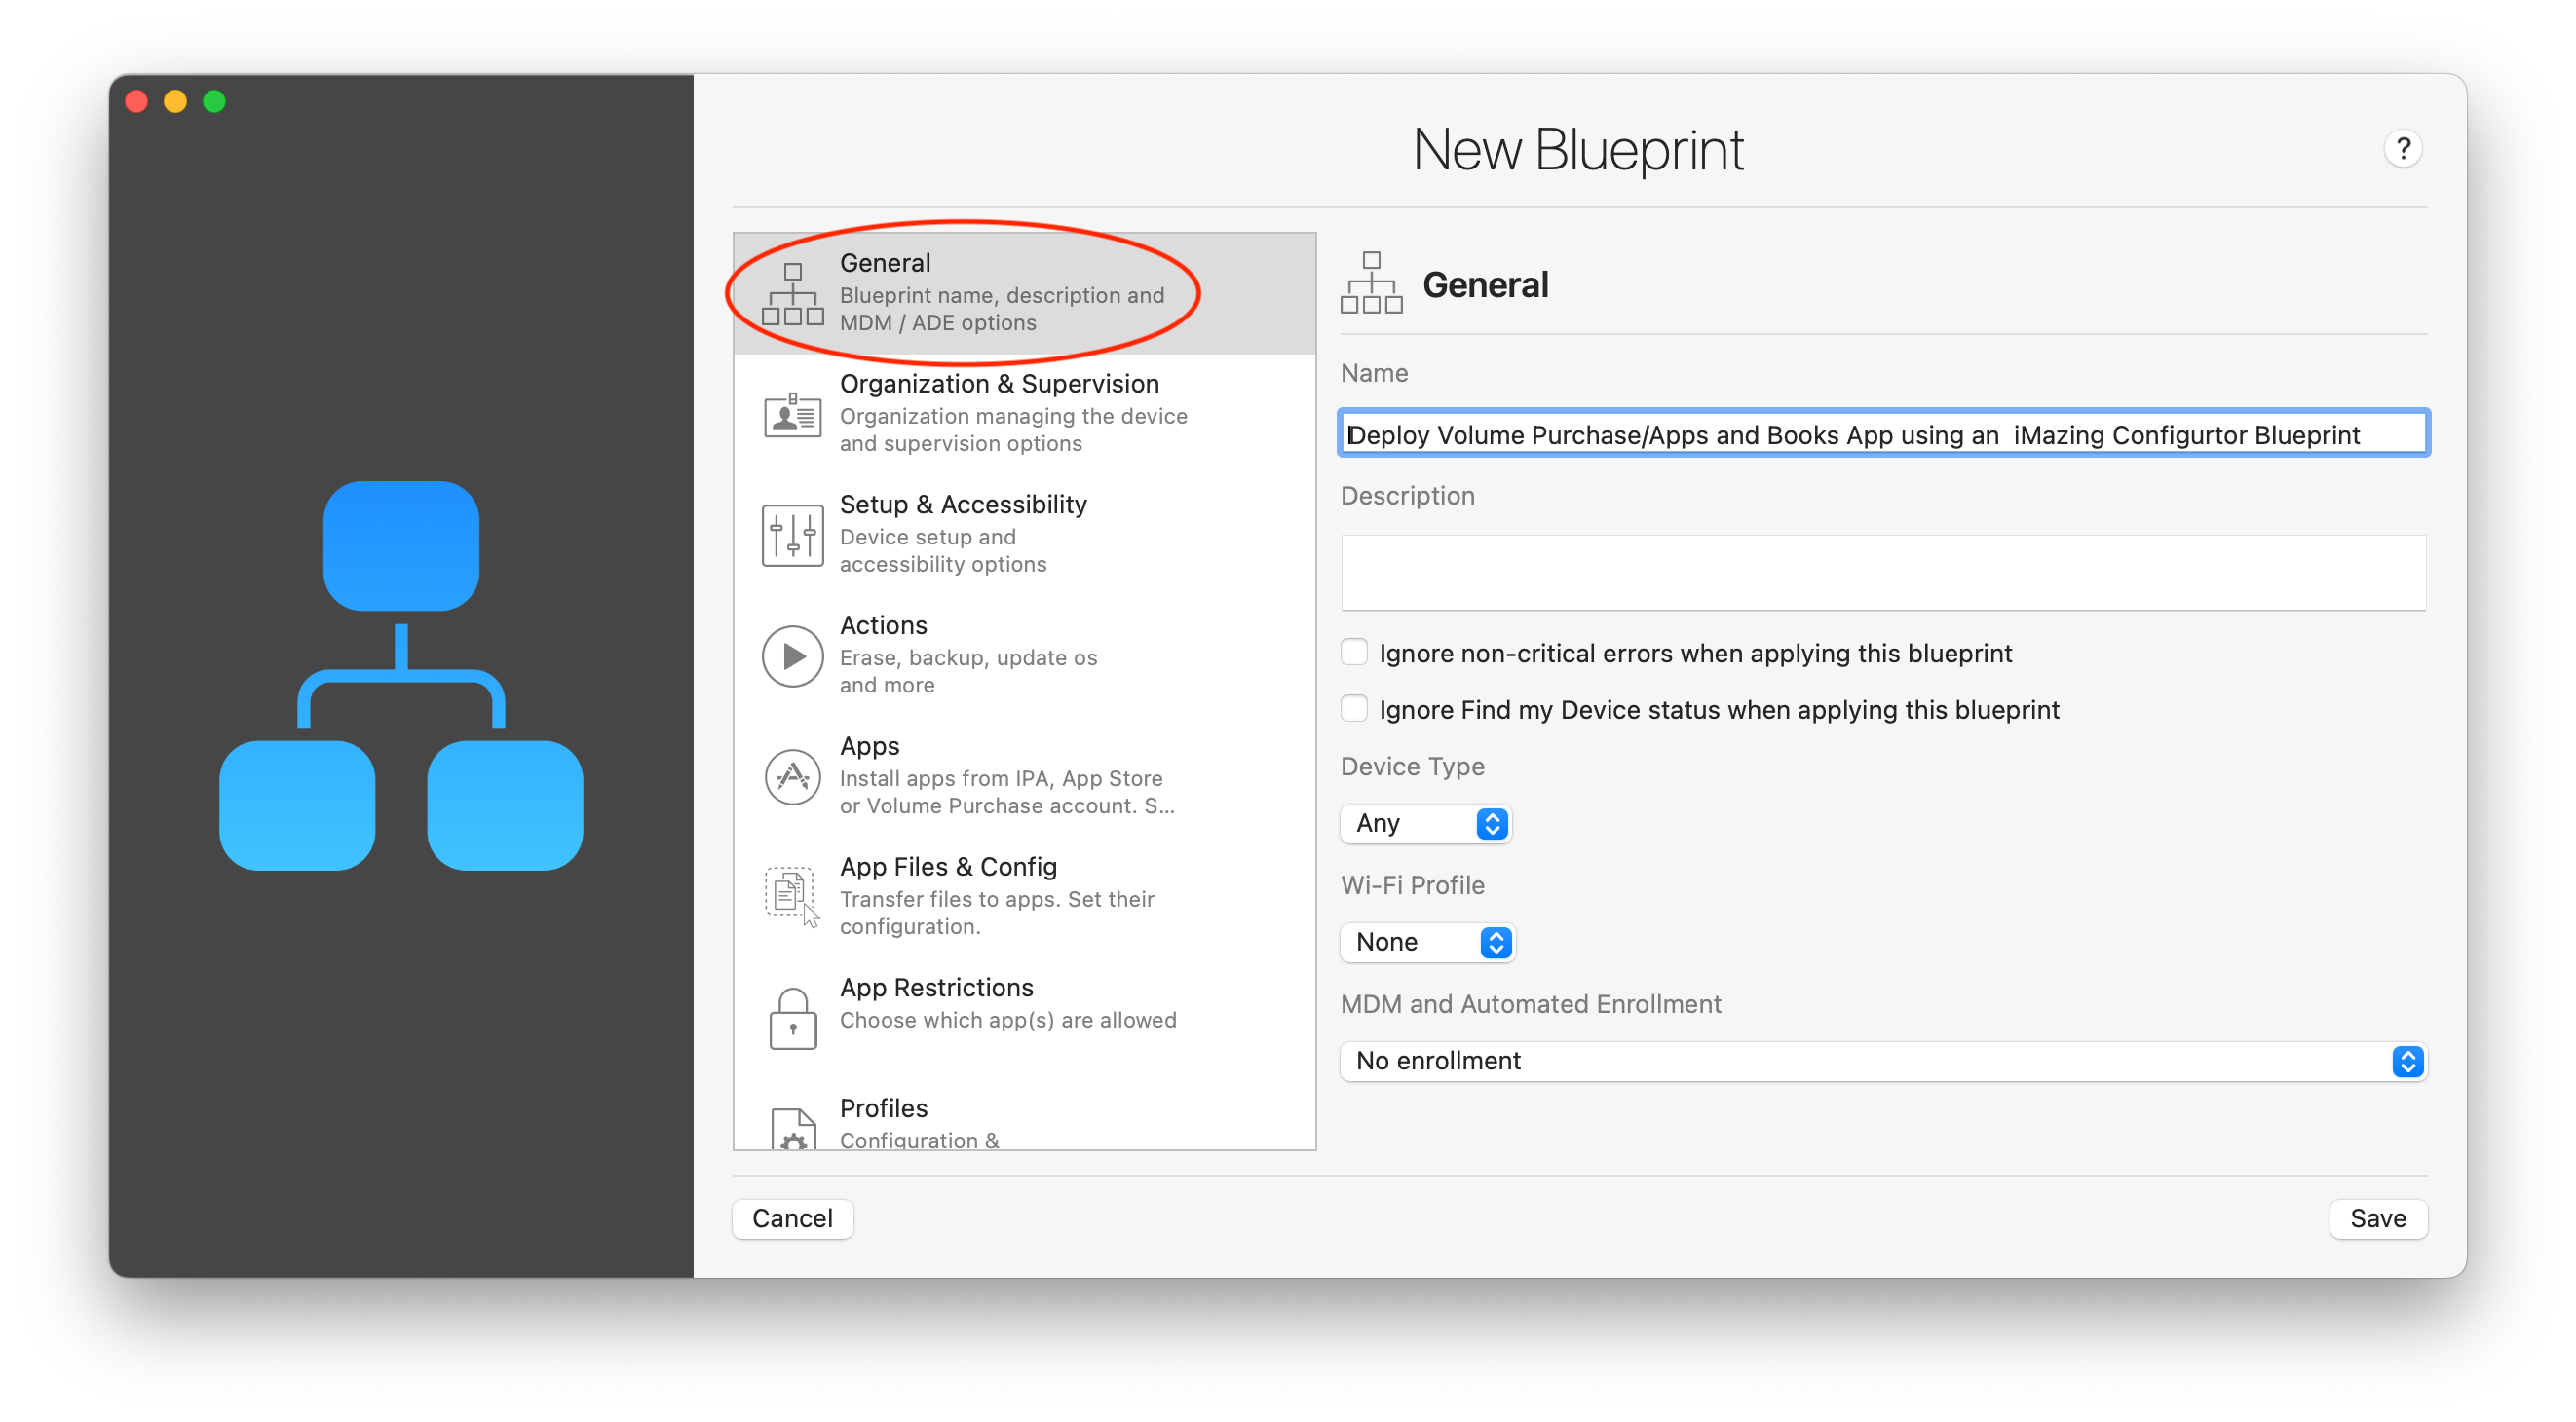
- In the General section, as a first step, name your blueprint. You may also add a brief description explaining its purpose:
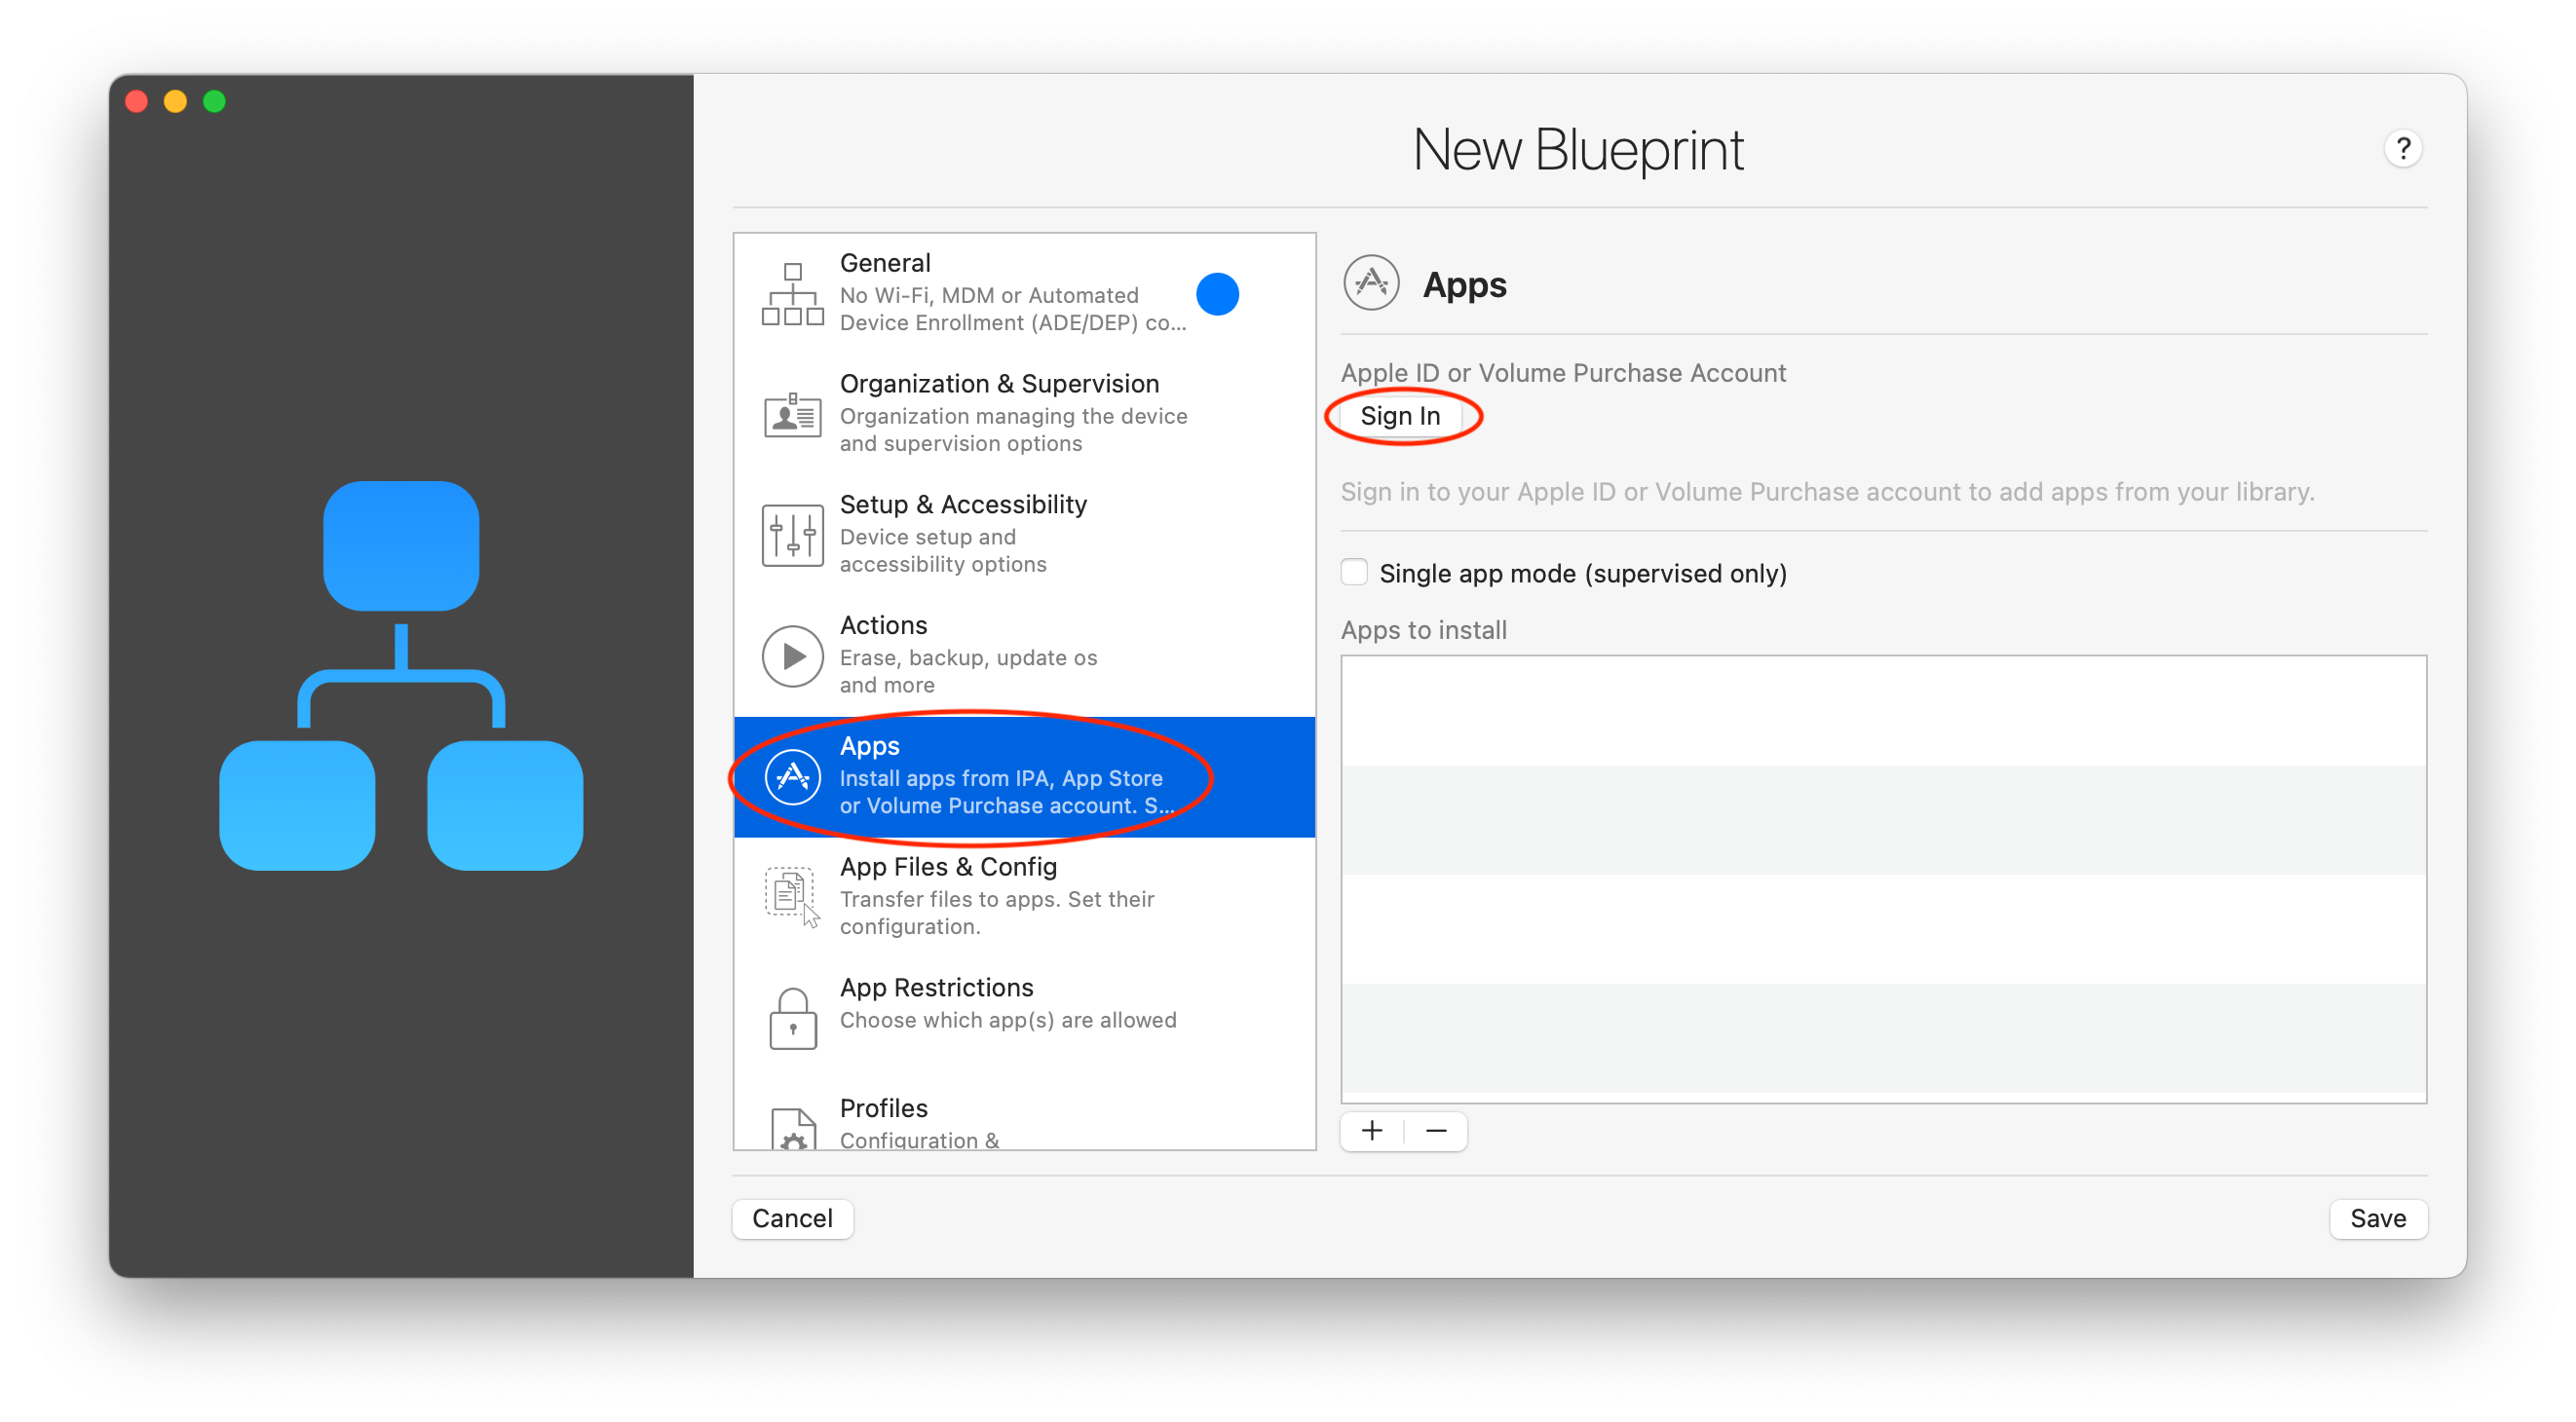
- Prepare your ABM/ASM credentials (Apple ID or Volume Purchase Account) and Volume Purchase token, then go to the Apps section. Once you're ready, click on Sign In:
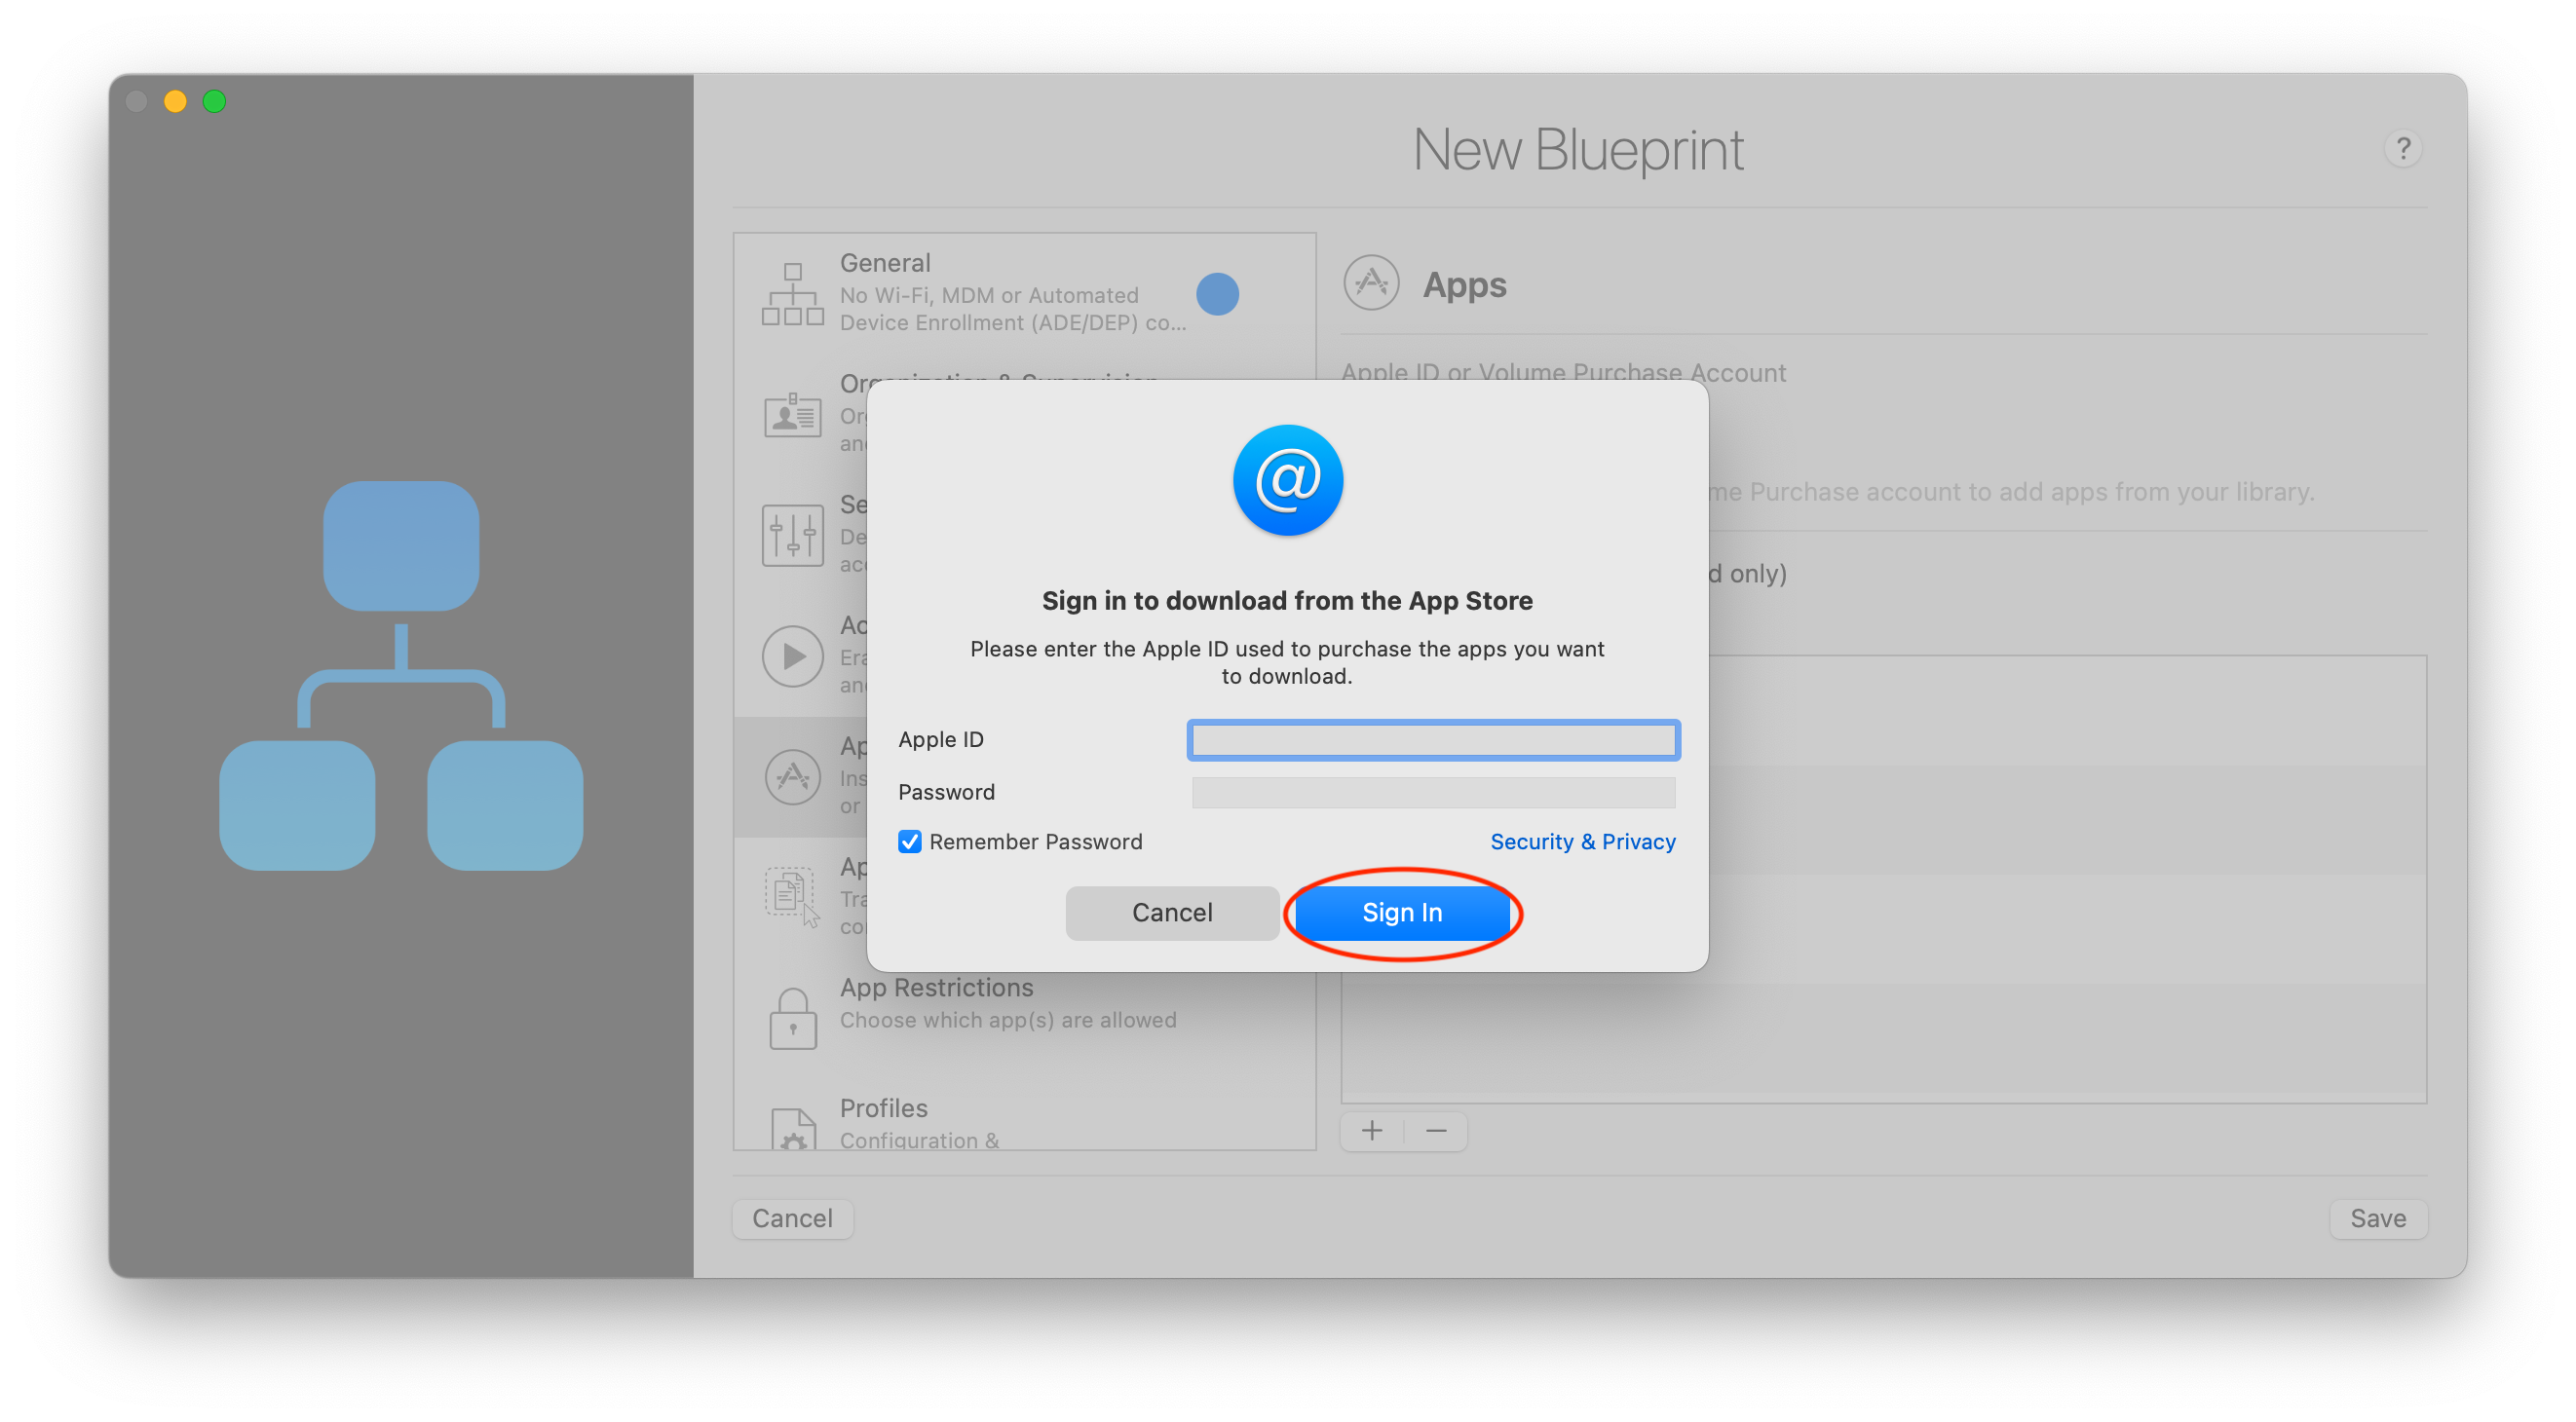
- Enter your credentials and click Sign in:
- If prompted, enter your Volume Purchase token by copying it and pasting it into the box as explained at 3.4.3. Then, press Continue:
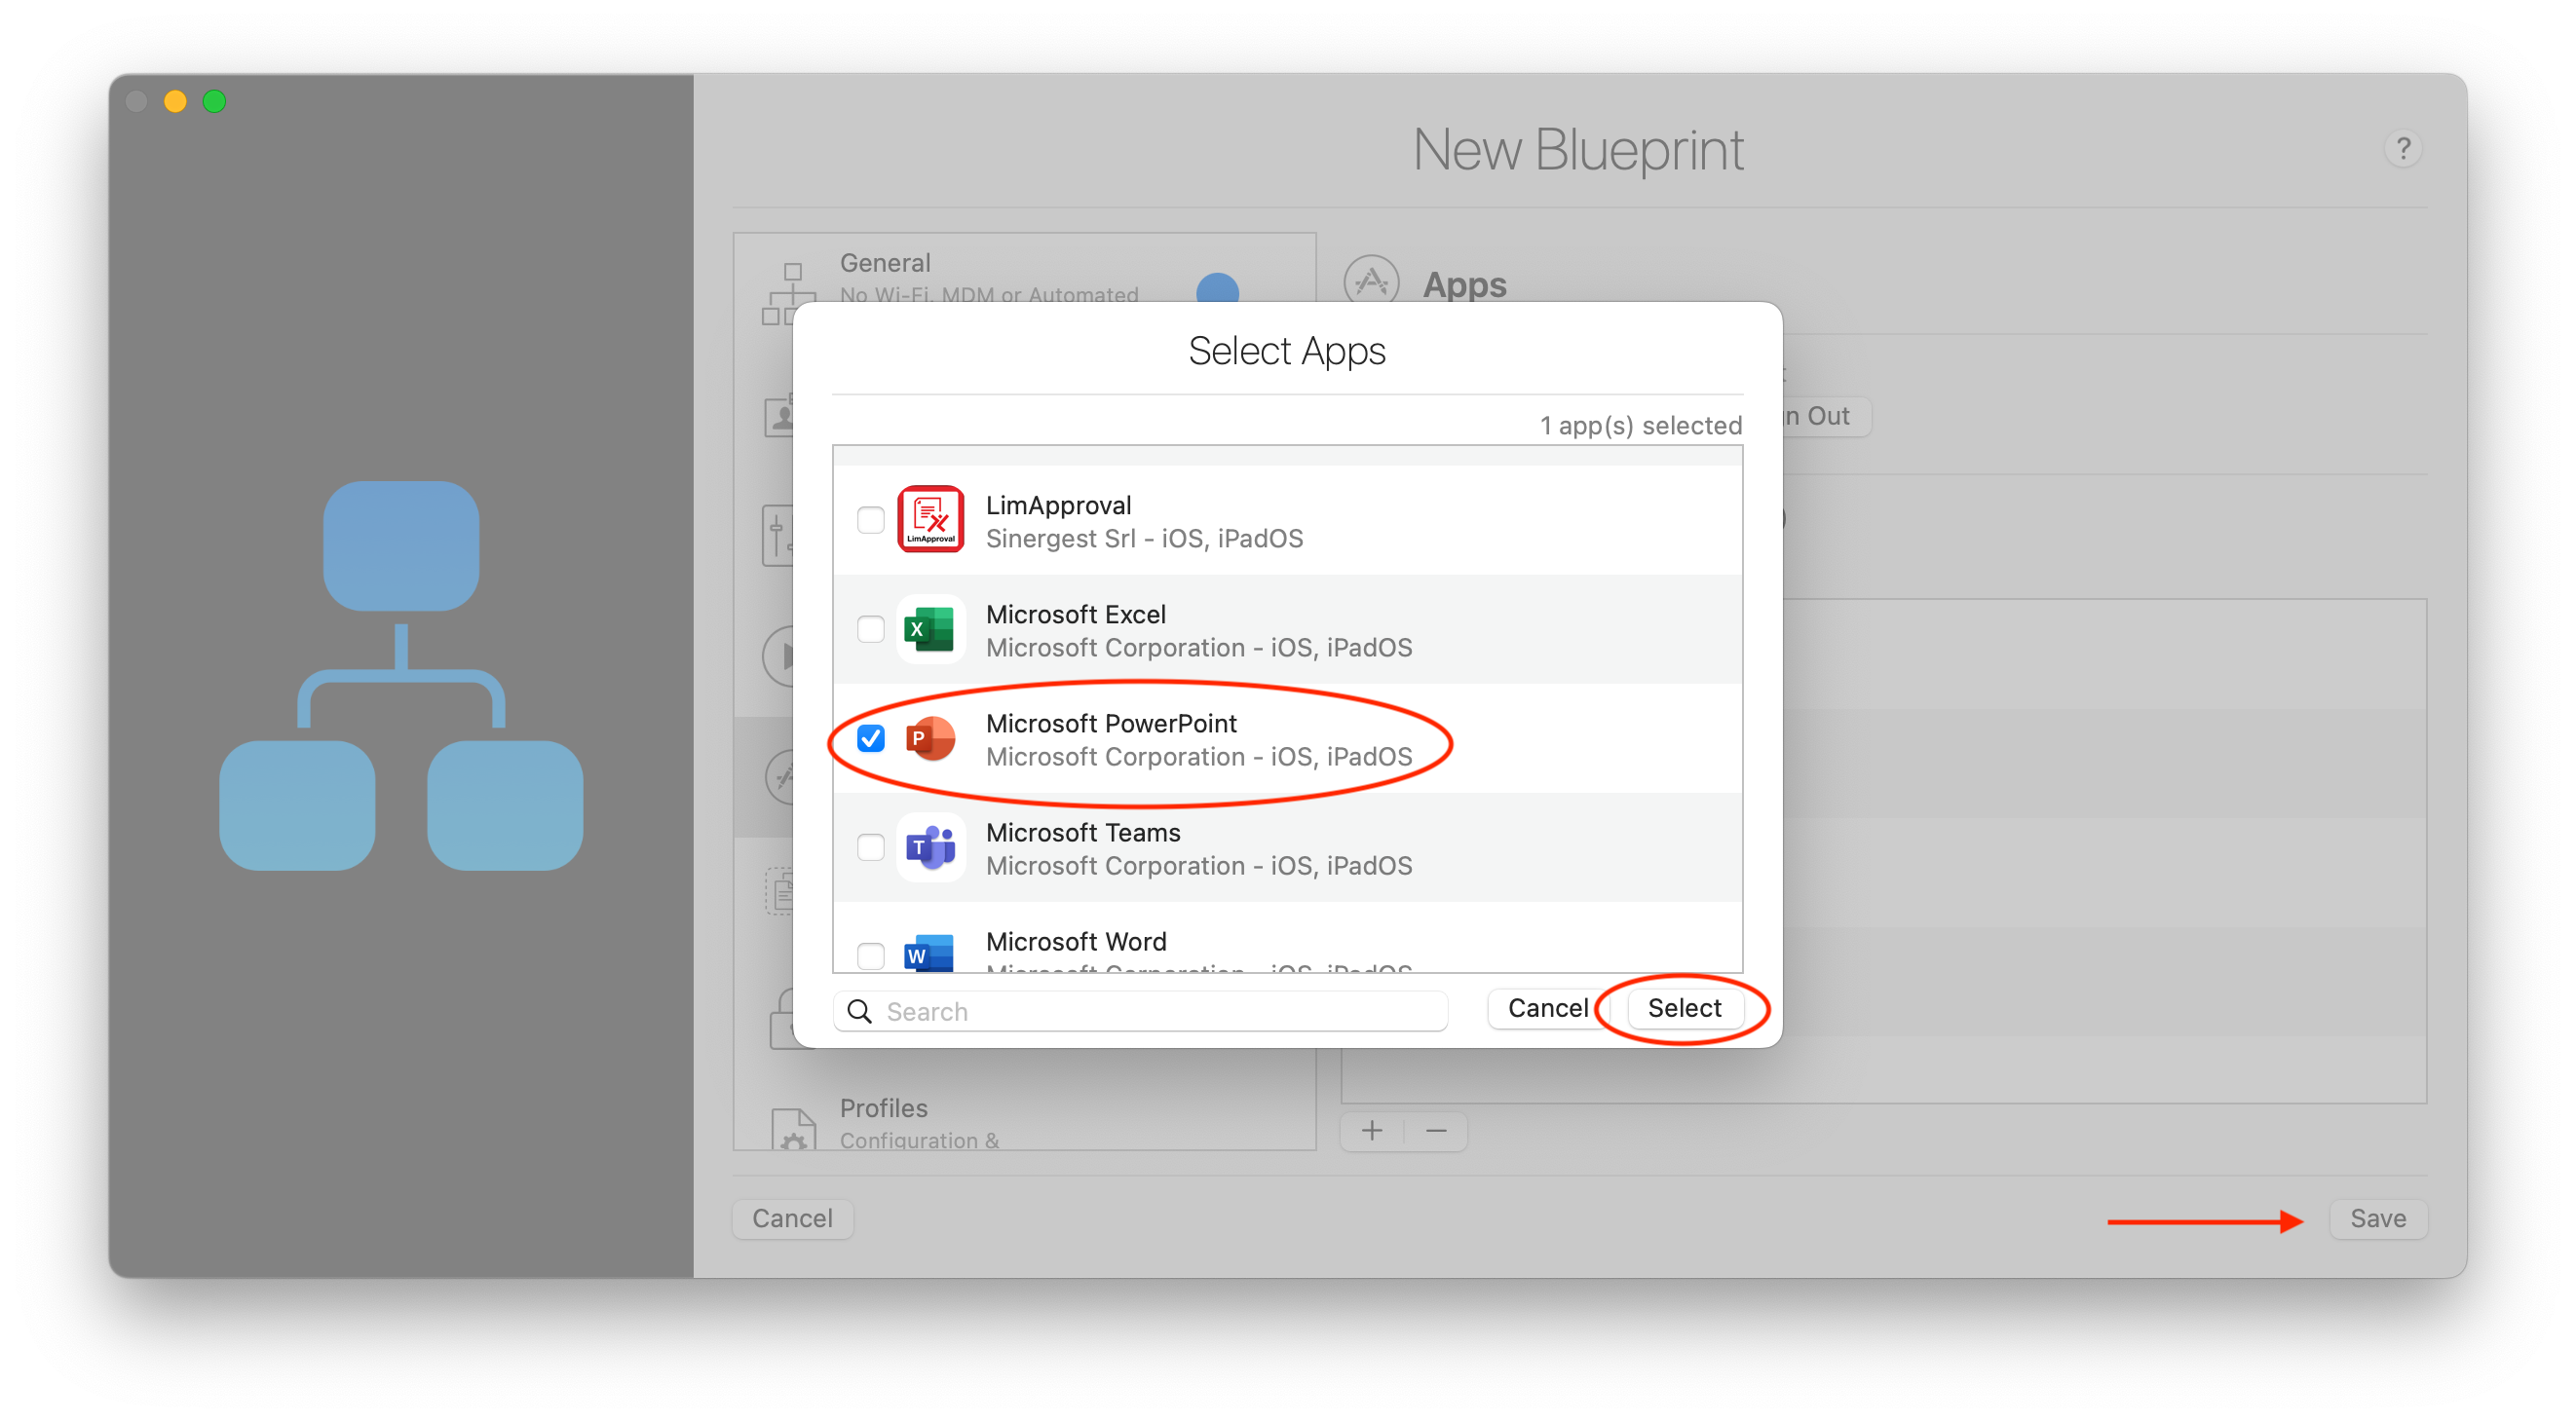
- Click on the ‘+’ box located in the lower right corner of the Apps section within your blueprint. Then, select the app(s) that you want to deploy on your device(s). You can use the search bar instead of scrolling to find the app(s) you need. Once you have selected the app(s) that you want to deploy, click on the Select button to proceed:
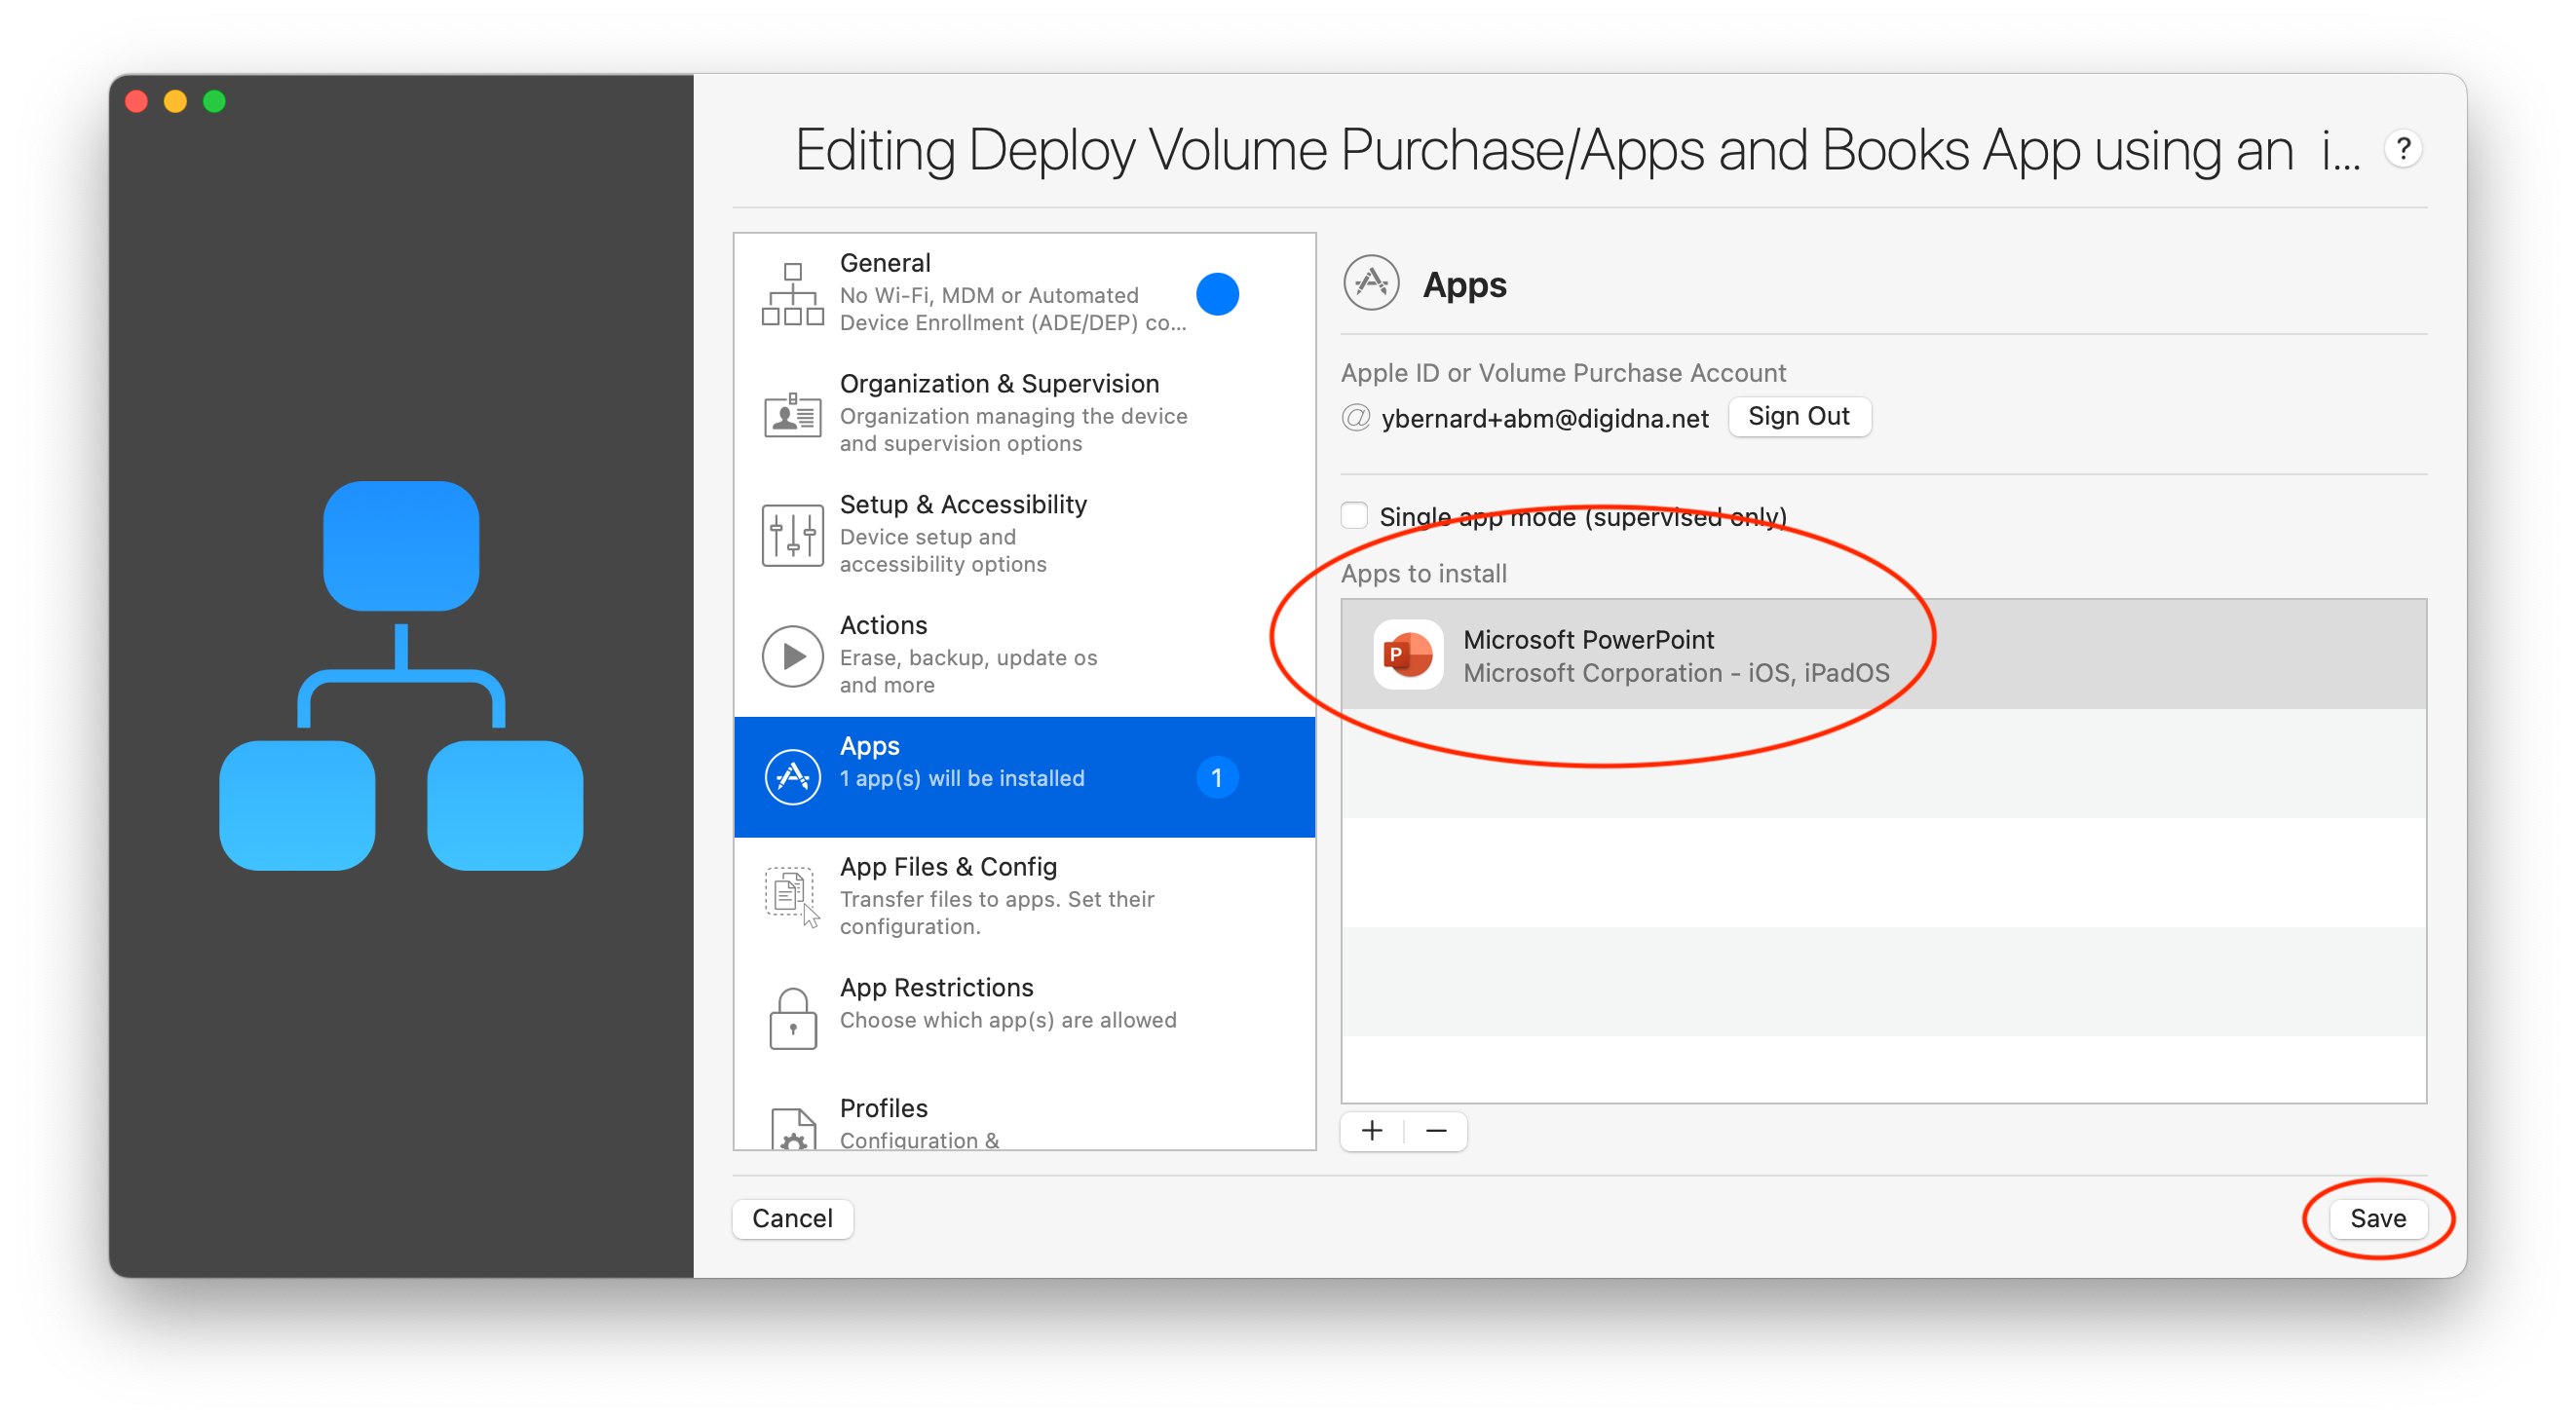
- In the Apps to Install section, Microsoft PowerPoint is listed as available for installation on your device. Click Save to confirm your blueprint:
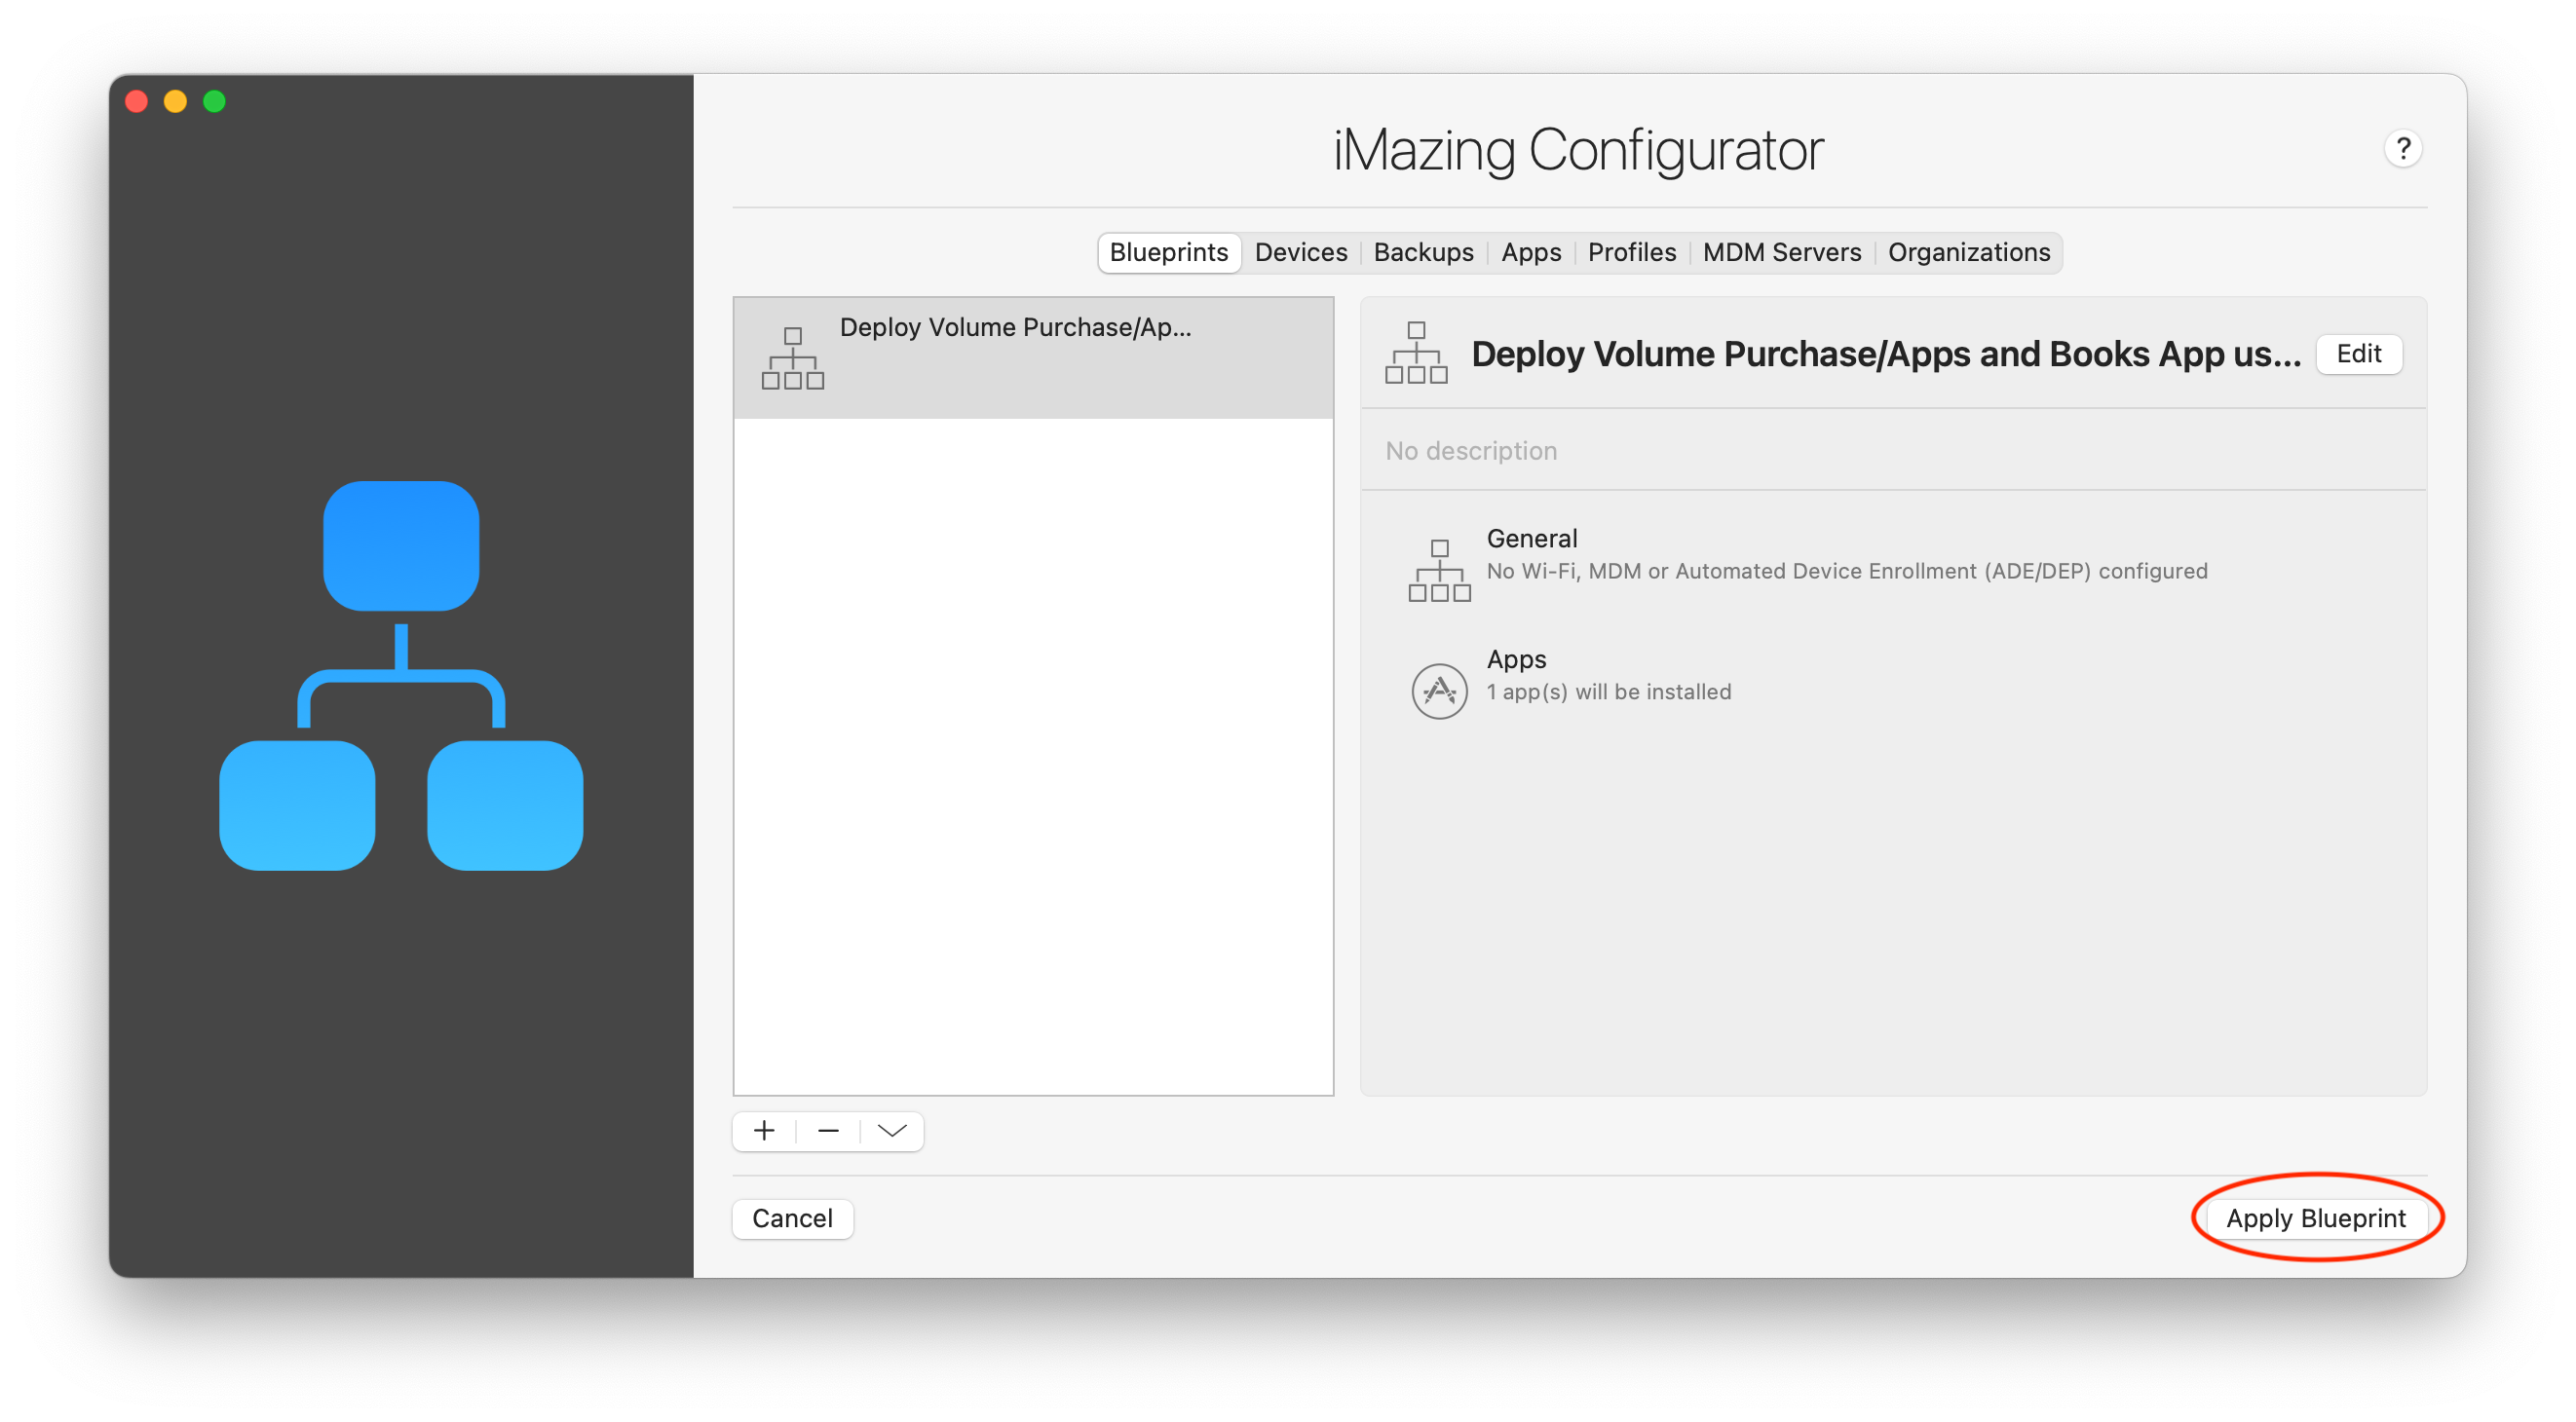
- Your blueprint is now ready to be used. Click Apply Blueprint:
- At the next screen, select your device (or use Select All) and click Launch at the lower right corner:
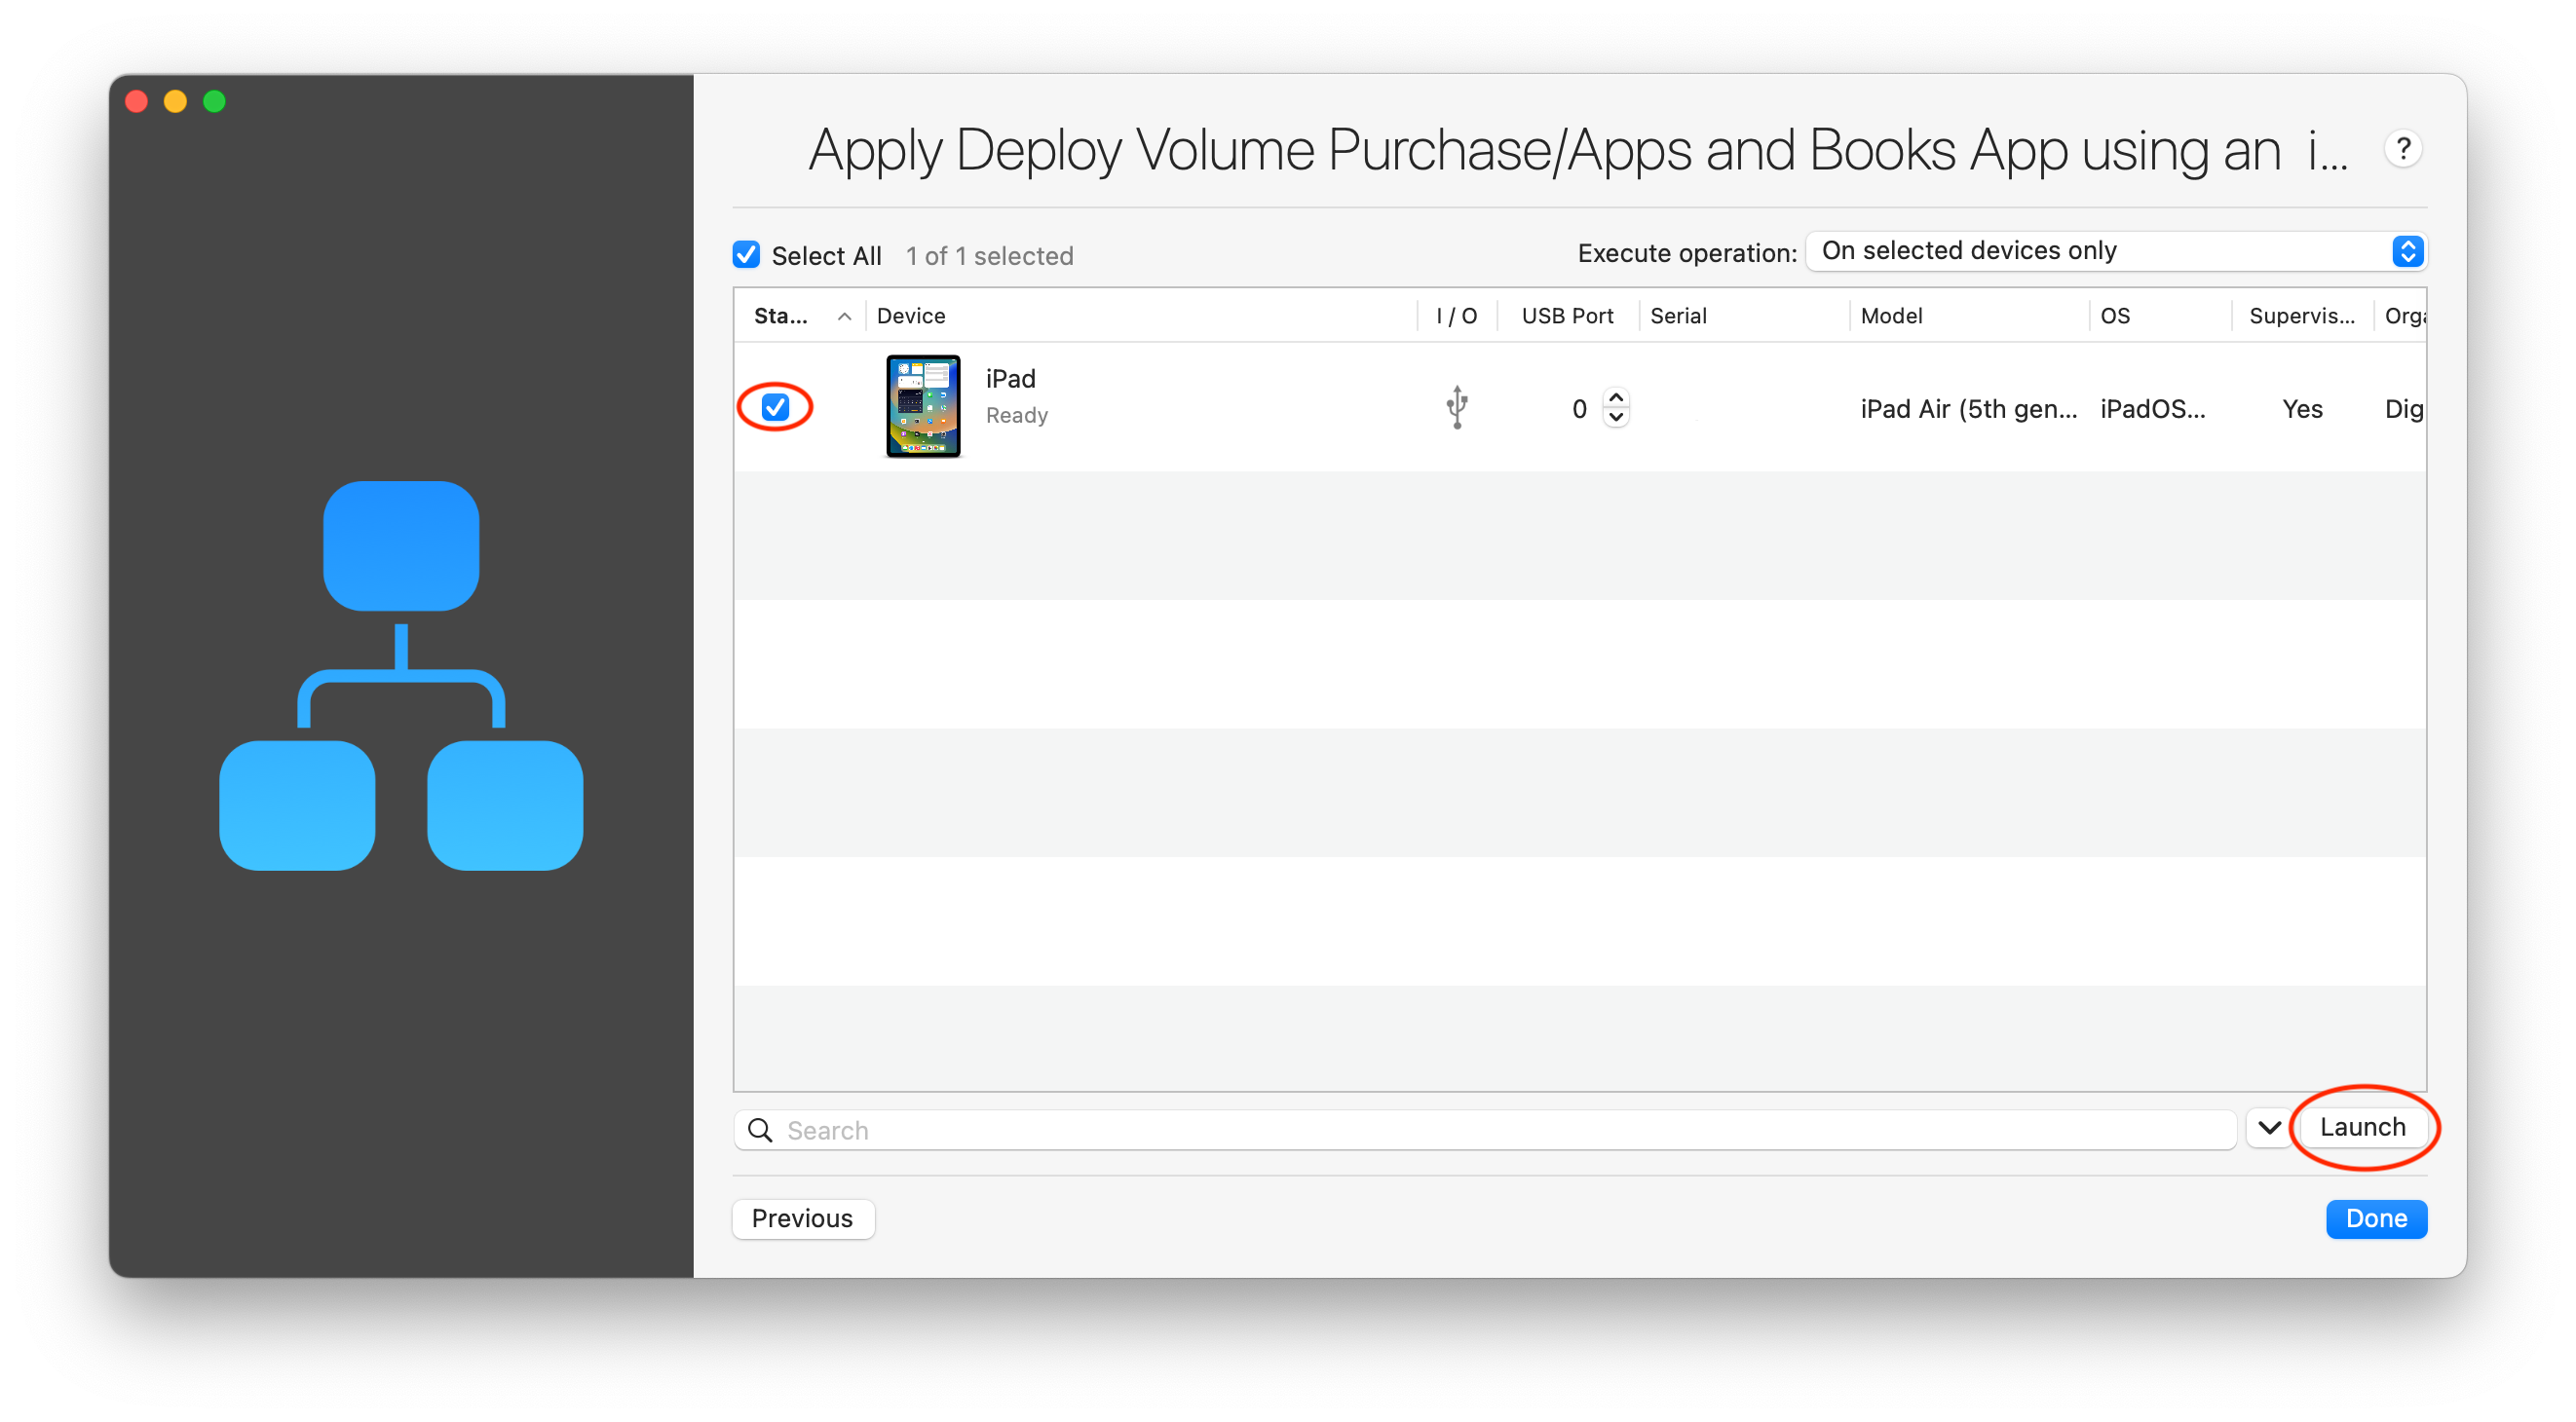
💡 Tip: You have several options available to use with the iMazing Operation Dispatcher window. You can find more information here: iMazing Configurator: Operation Dispatcher View
- Once the iMazing Configurator blueprint is launched, the app will be downloaded, installed, and its volume purchased license will be assigned to your device:
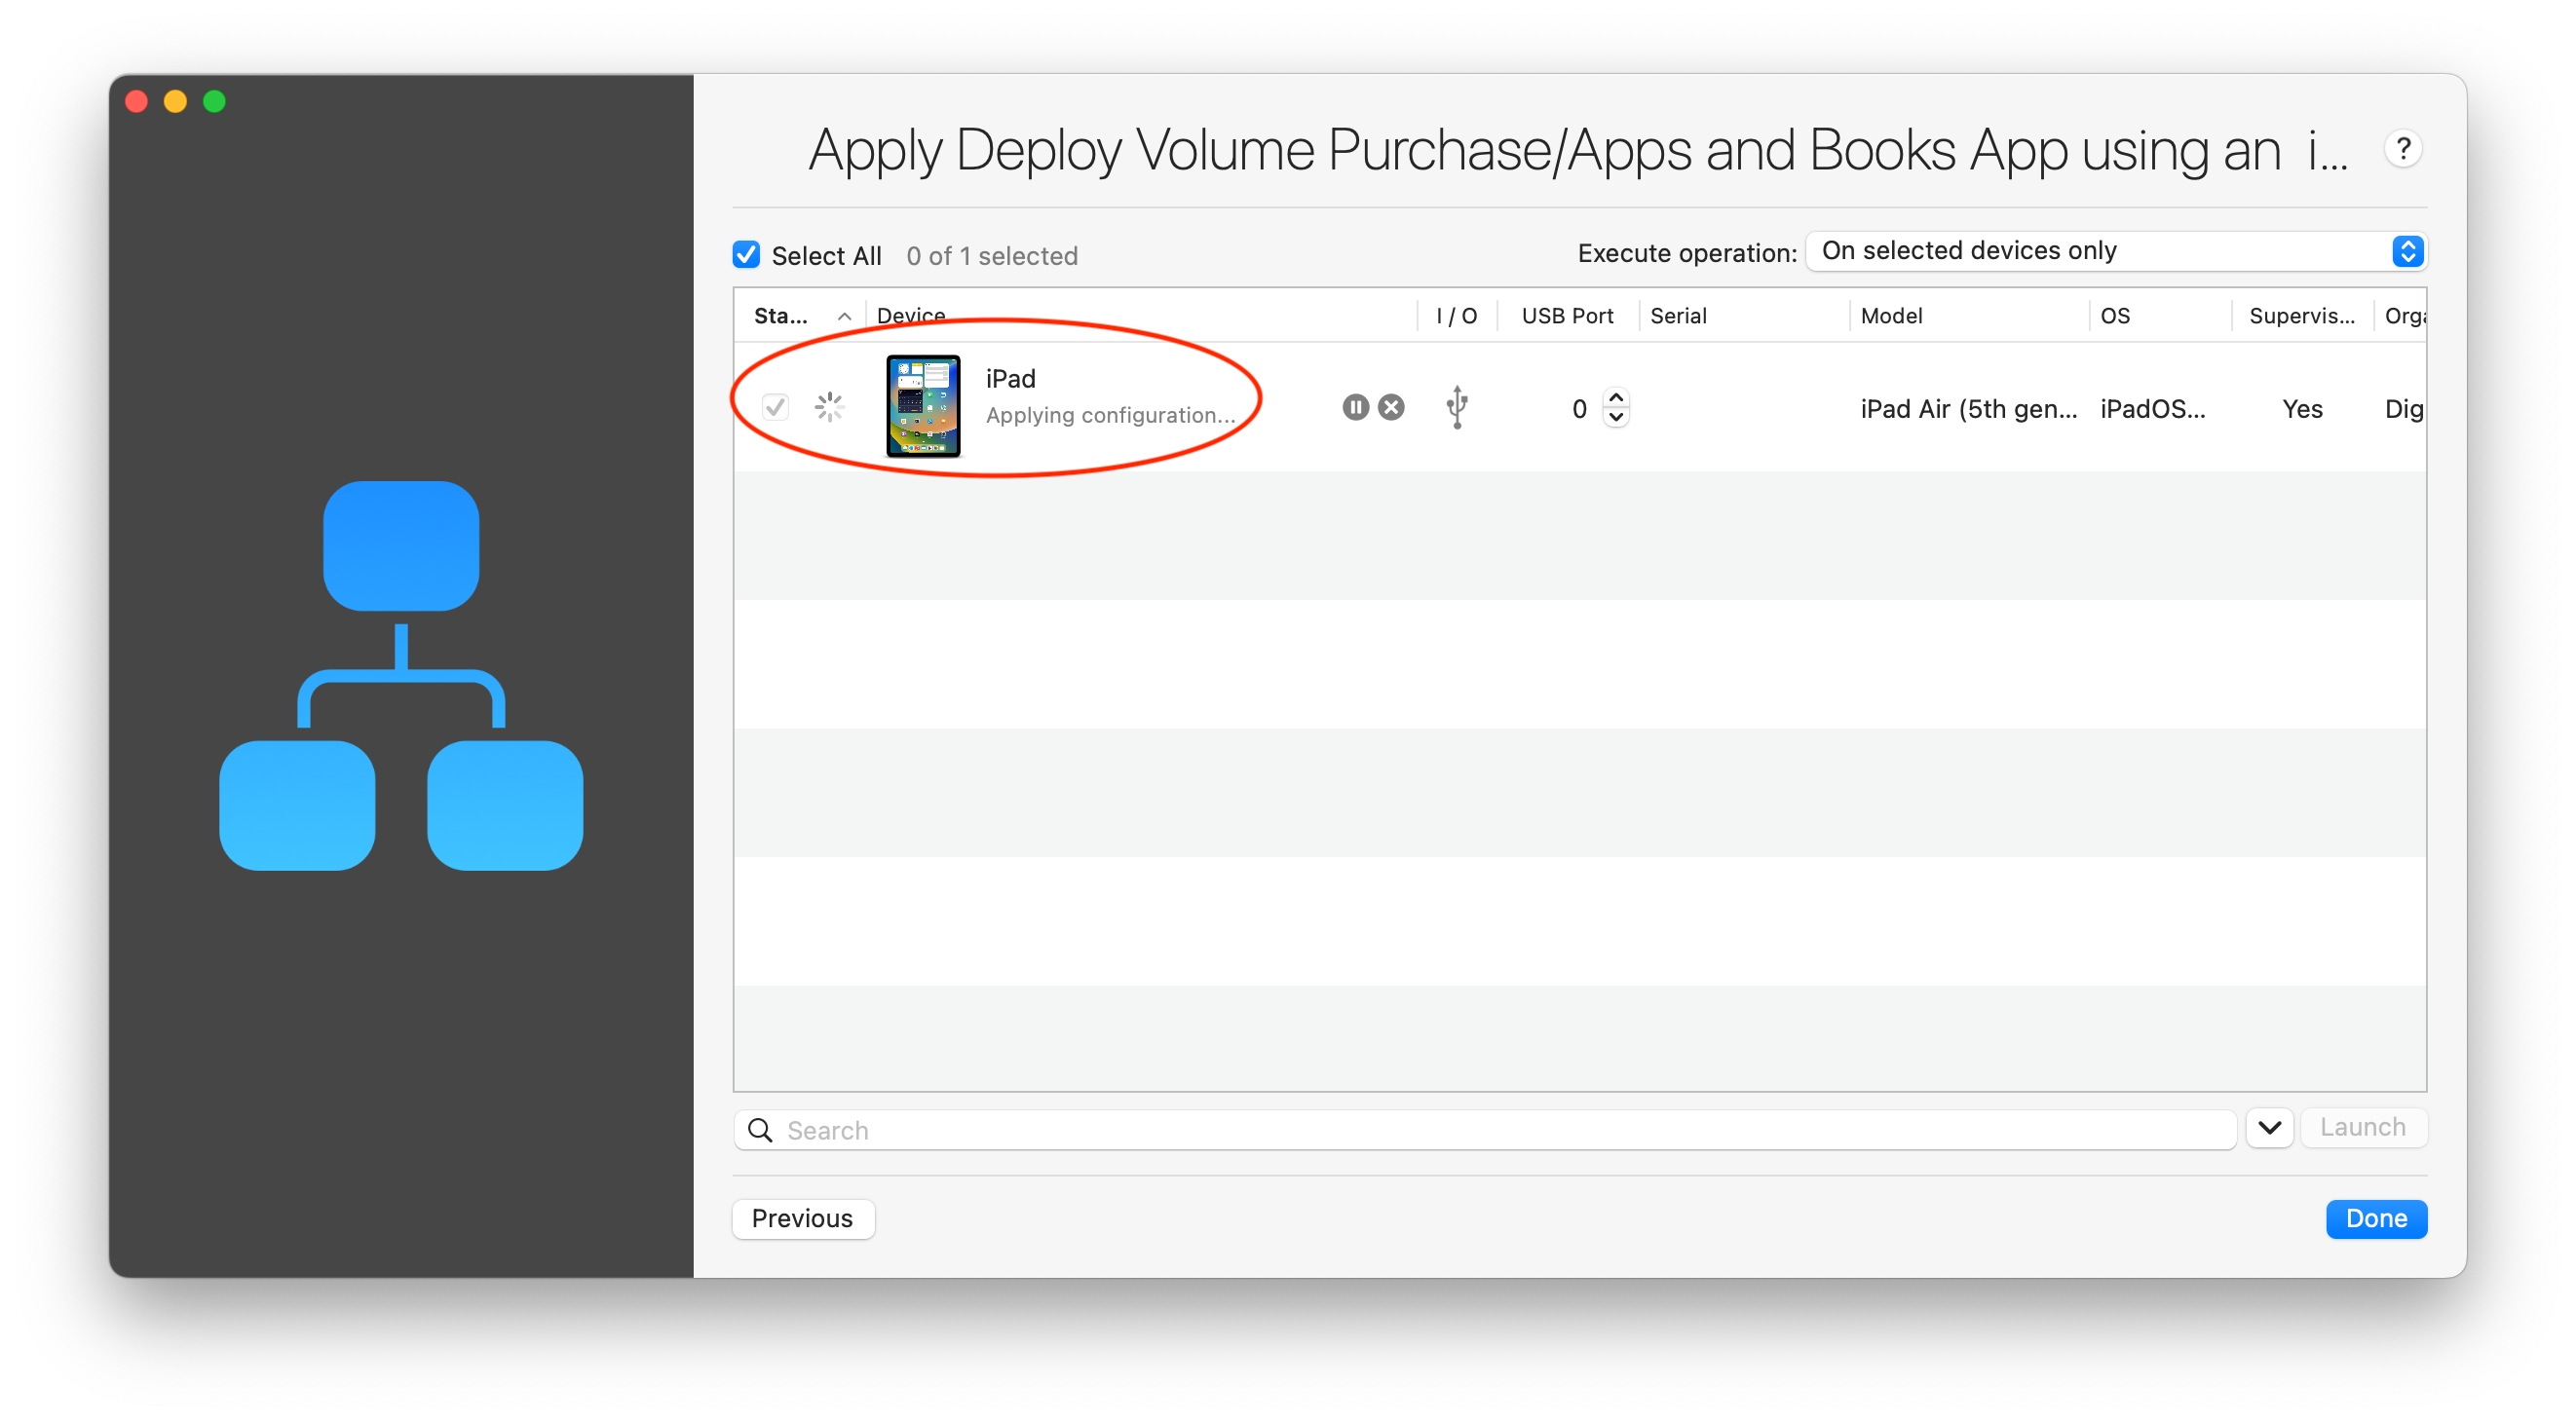 Well done, you have now successfully distributed an app with a device license on your device using an iMazing Configurator blueprint!
4. Post-installation steps
Take your device in hands and verify that the app is now installed and that you can launch it.
If the app launches as expected, well done, you have now successfully distributed an app using iMazing Configurator and the ABM/ASM Volume Purchase.
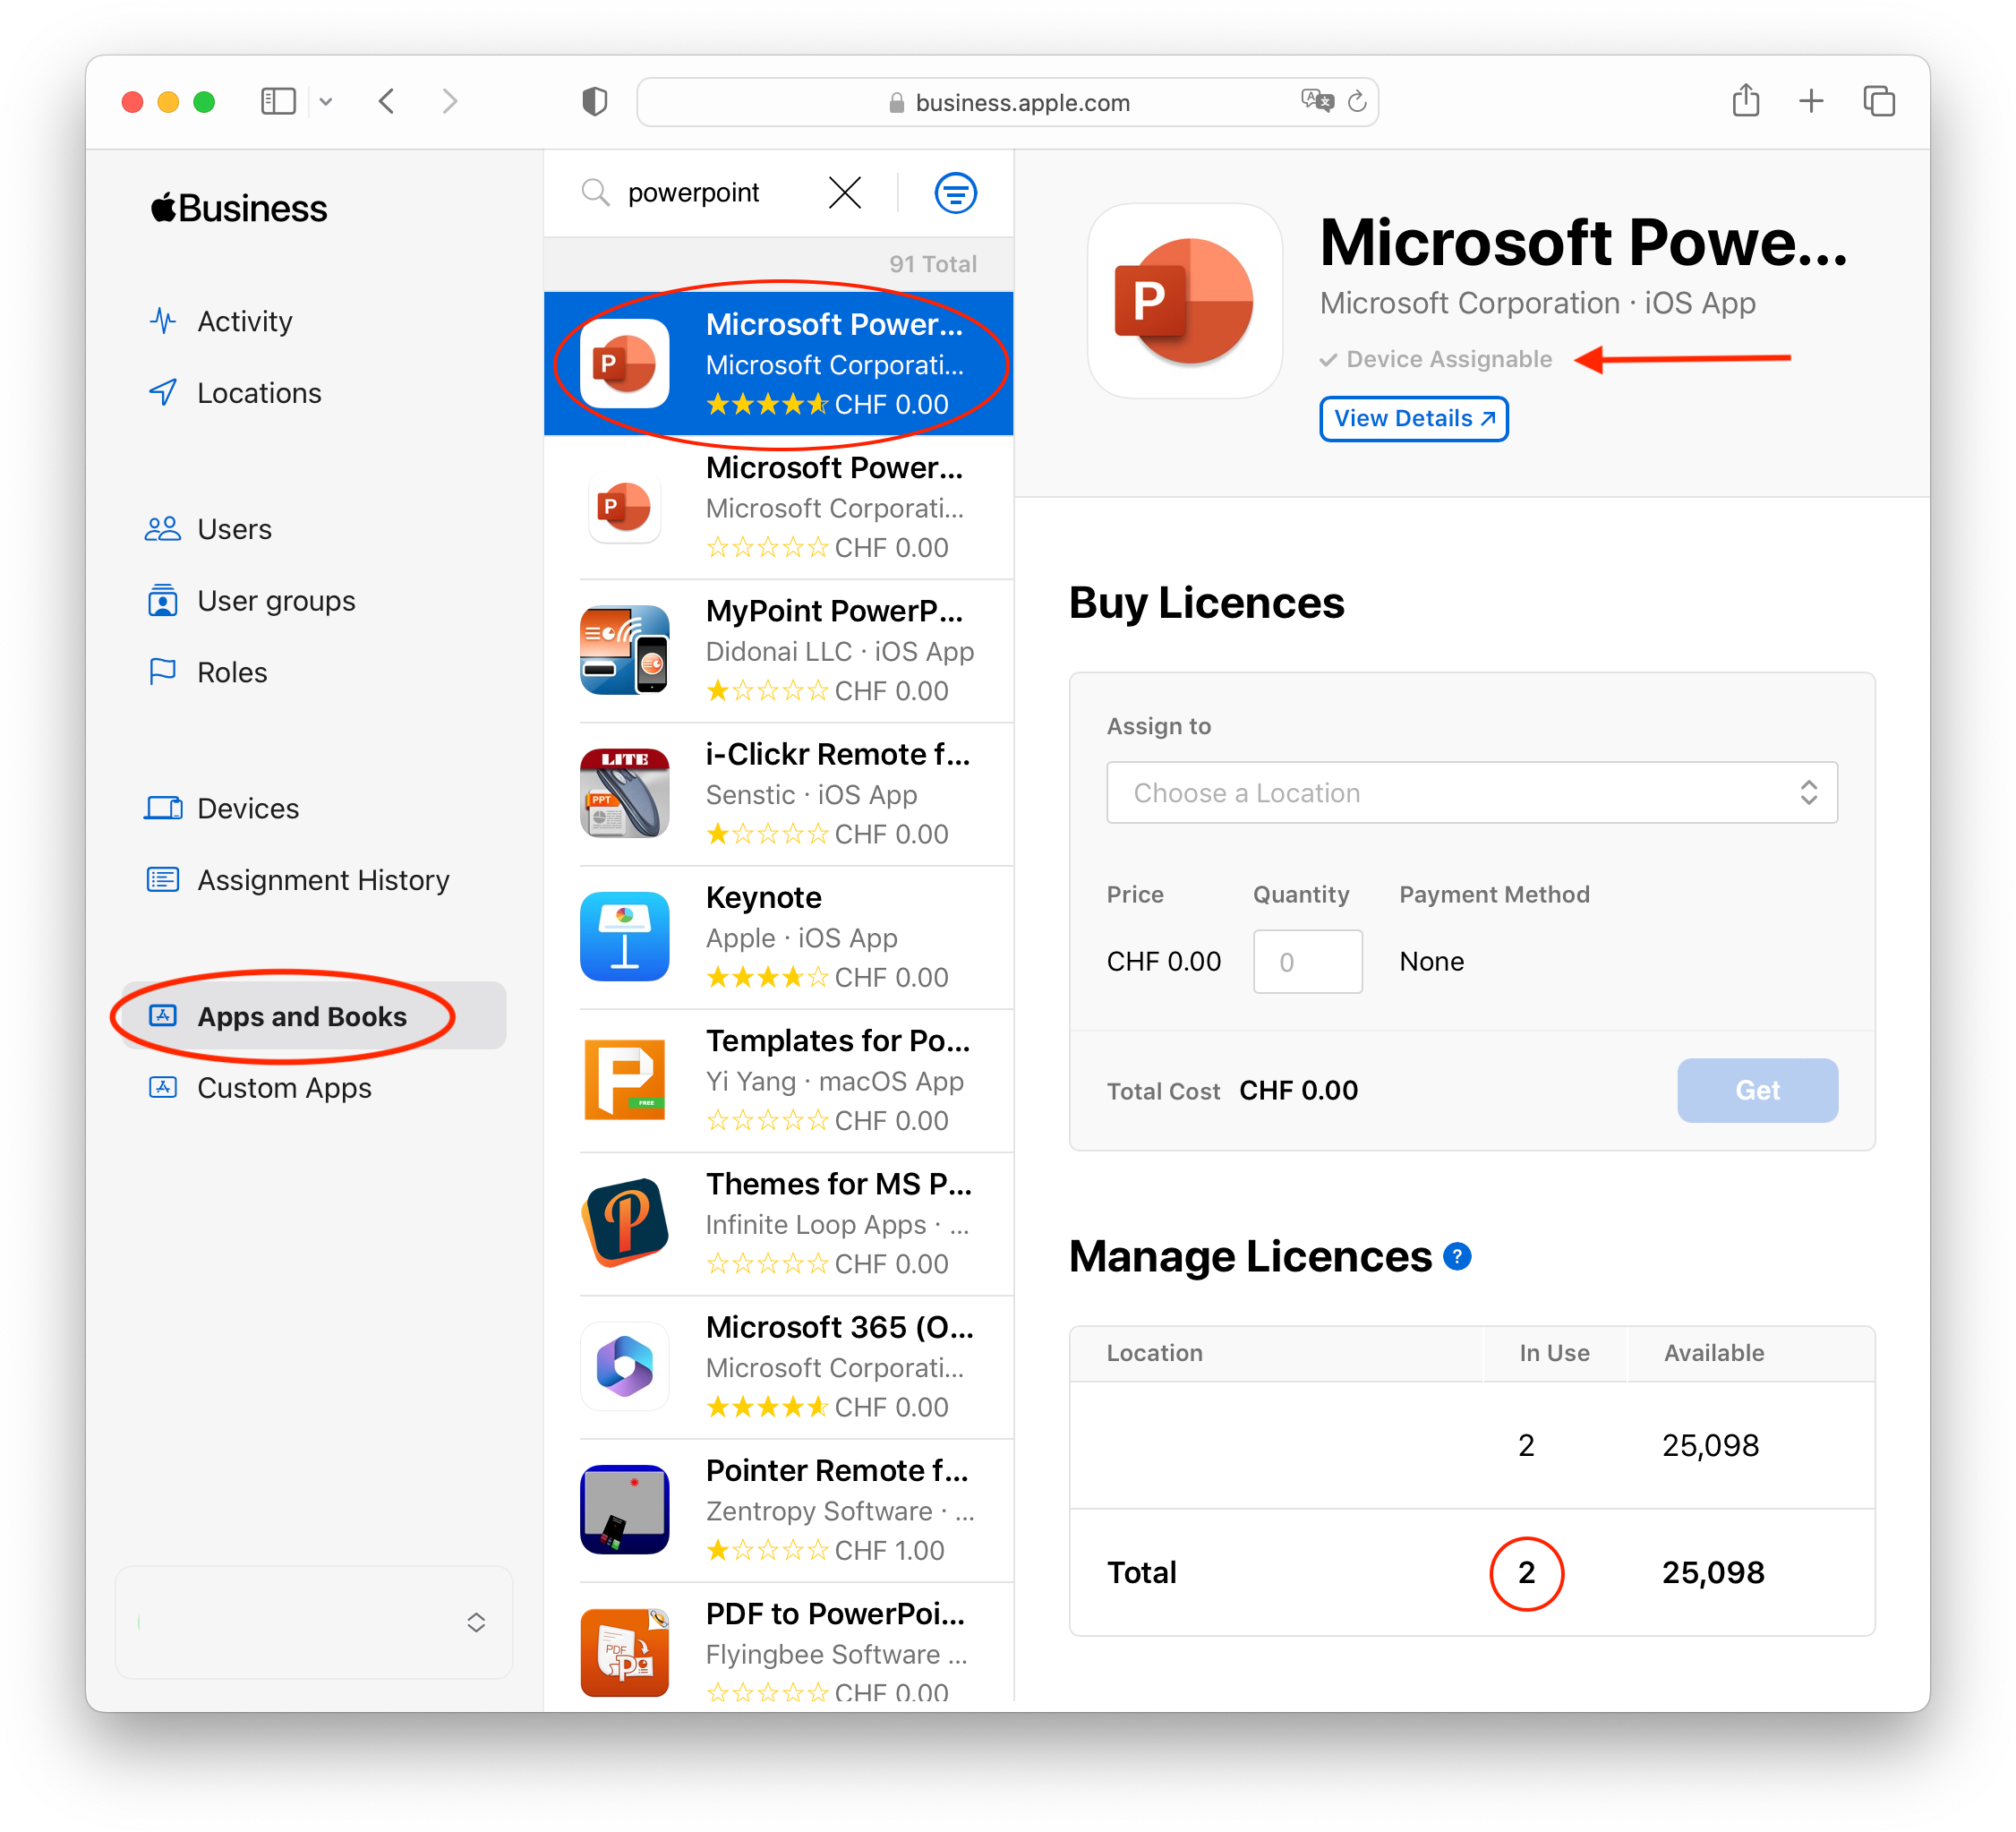
Additionally you can log in ABM/ASM, navigate back to the Apps and Books section. Search for Microsoft PowerPoint. You will notice that licenses have been assigned to your devices (in the In Use column):
💡 Follow this link for more information, knowledge and training about Apple Content Distribution with MDM

