Transfer music from an iPhone, iPad, or iPod to iTunes or Music
Updated on Jun 10, 2026
Reading time ~5 minutes
If you're looking for better way to manage music on your iPhone, iPad, or iPod touch, iMazing is a great alternative to Apple Music or iTunes.
iTunes (Windows and macOS Mojave or earlier) and Finder (macOS Catalina and later) do not let you transfer music from your iPhone, iPad, or iPod back to your computer. Music purchased or added directly on the device stays locked in there unless you use a third-party tool.
iMazing gives you full access to your device's music library on macOS and Windows. It preserves your playlists and your library's metadata, including ratings, play counts, artwork, and skips. When transferring to iTunes or the Music app, iMazing avoids importing duplicates.
Here is how to transfer music from your Apple devices to iTunes or Music
Before you begin
Select Music
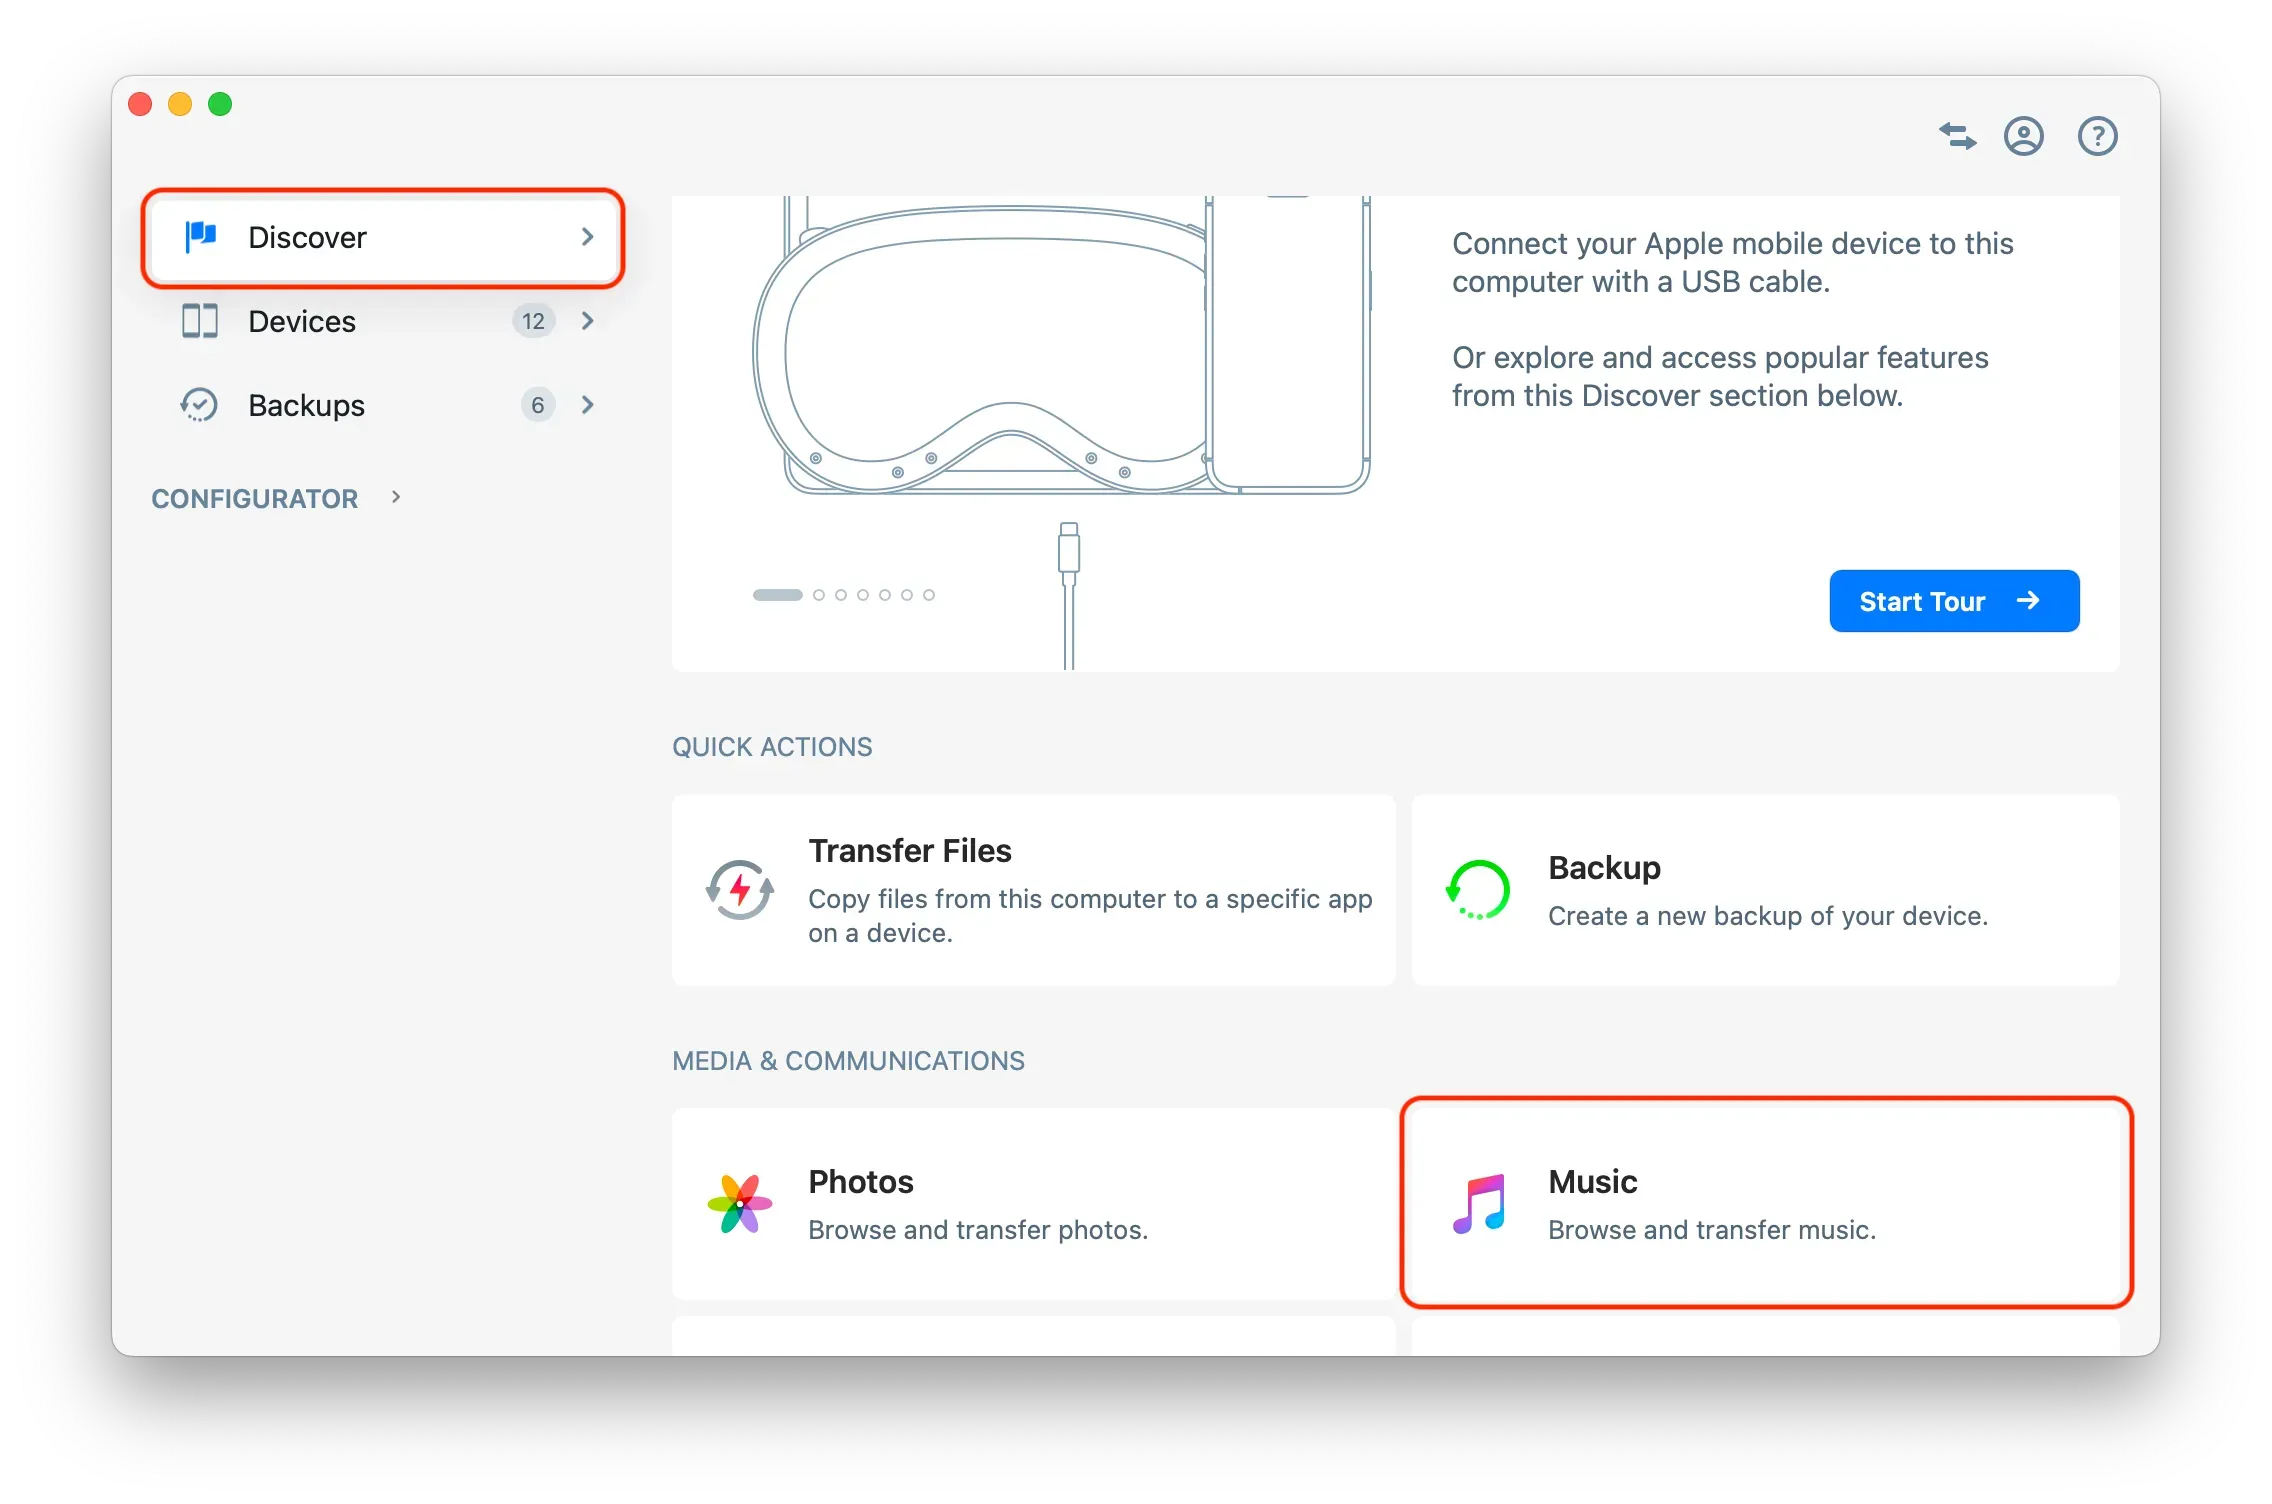
In the Discover section of the Home Screen, scroll to Media and Communications and click Music.
Tip: If a device is already connected and selected, you can also access the music library from the Device Screen: go to Data in the sidebar and select Music.
Connect your device
Pair your device
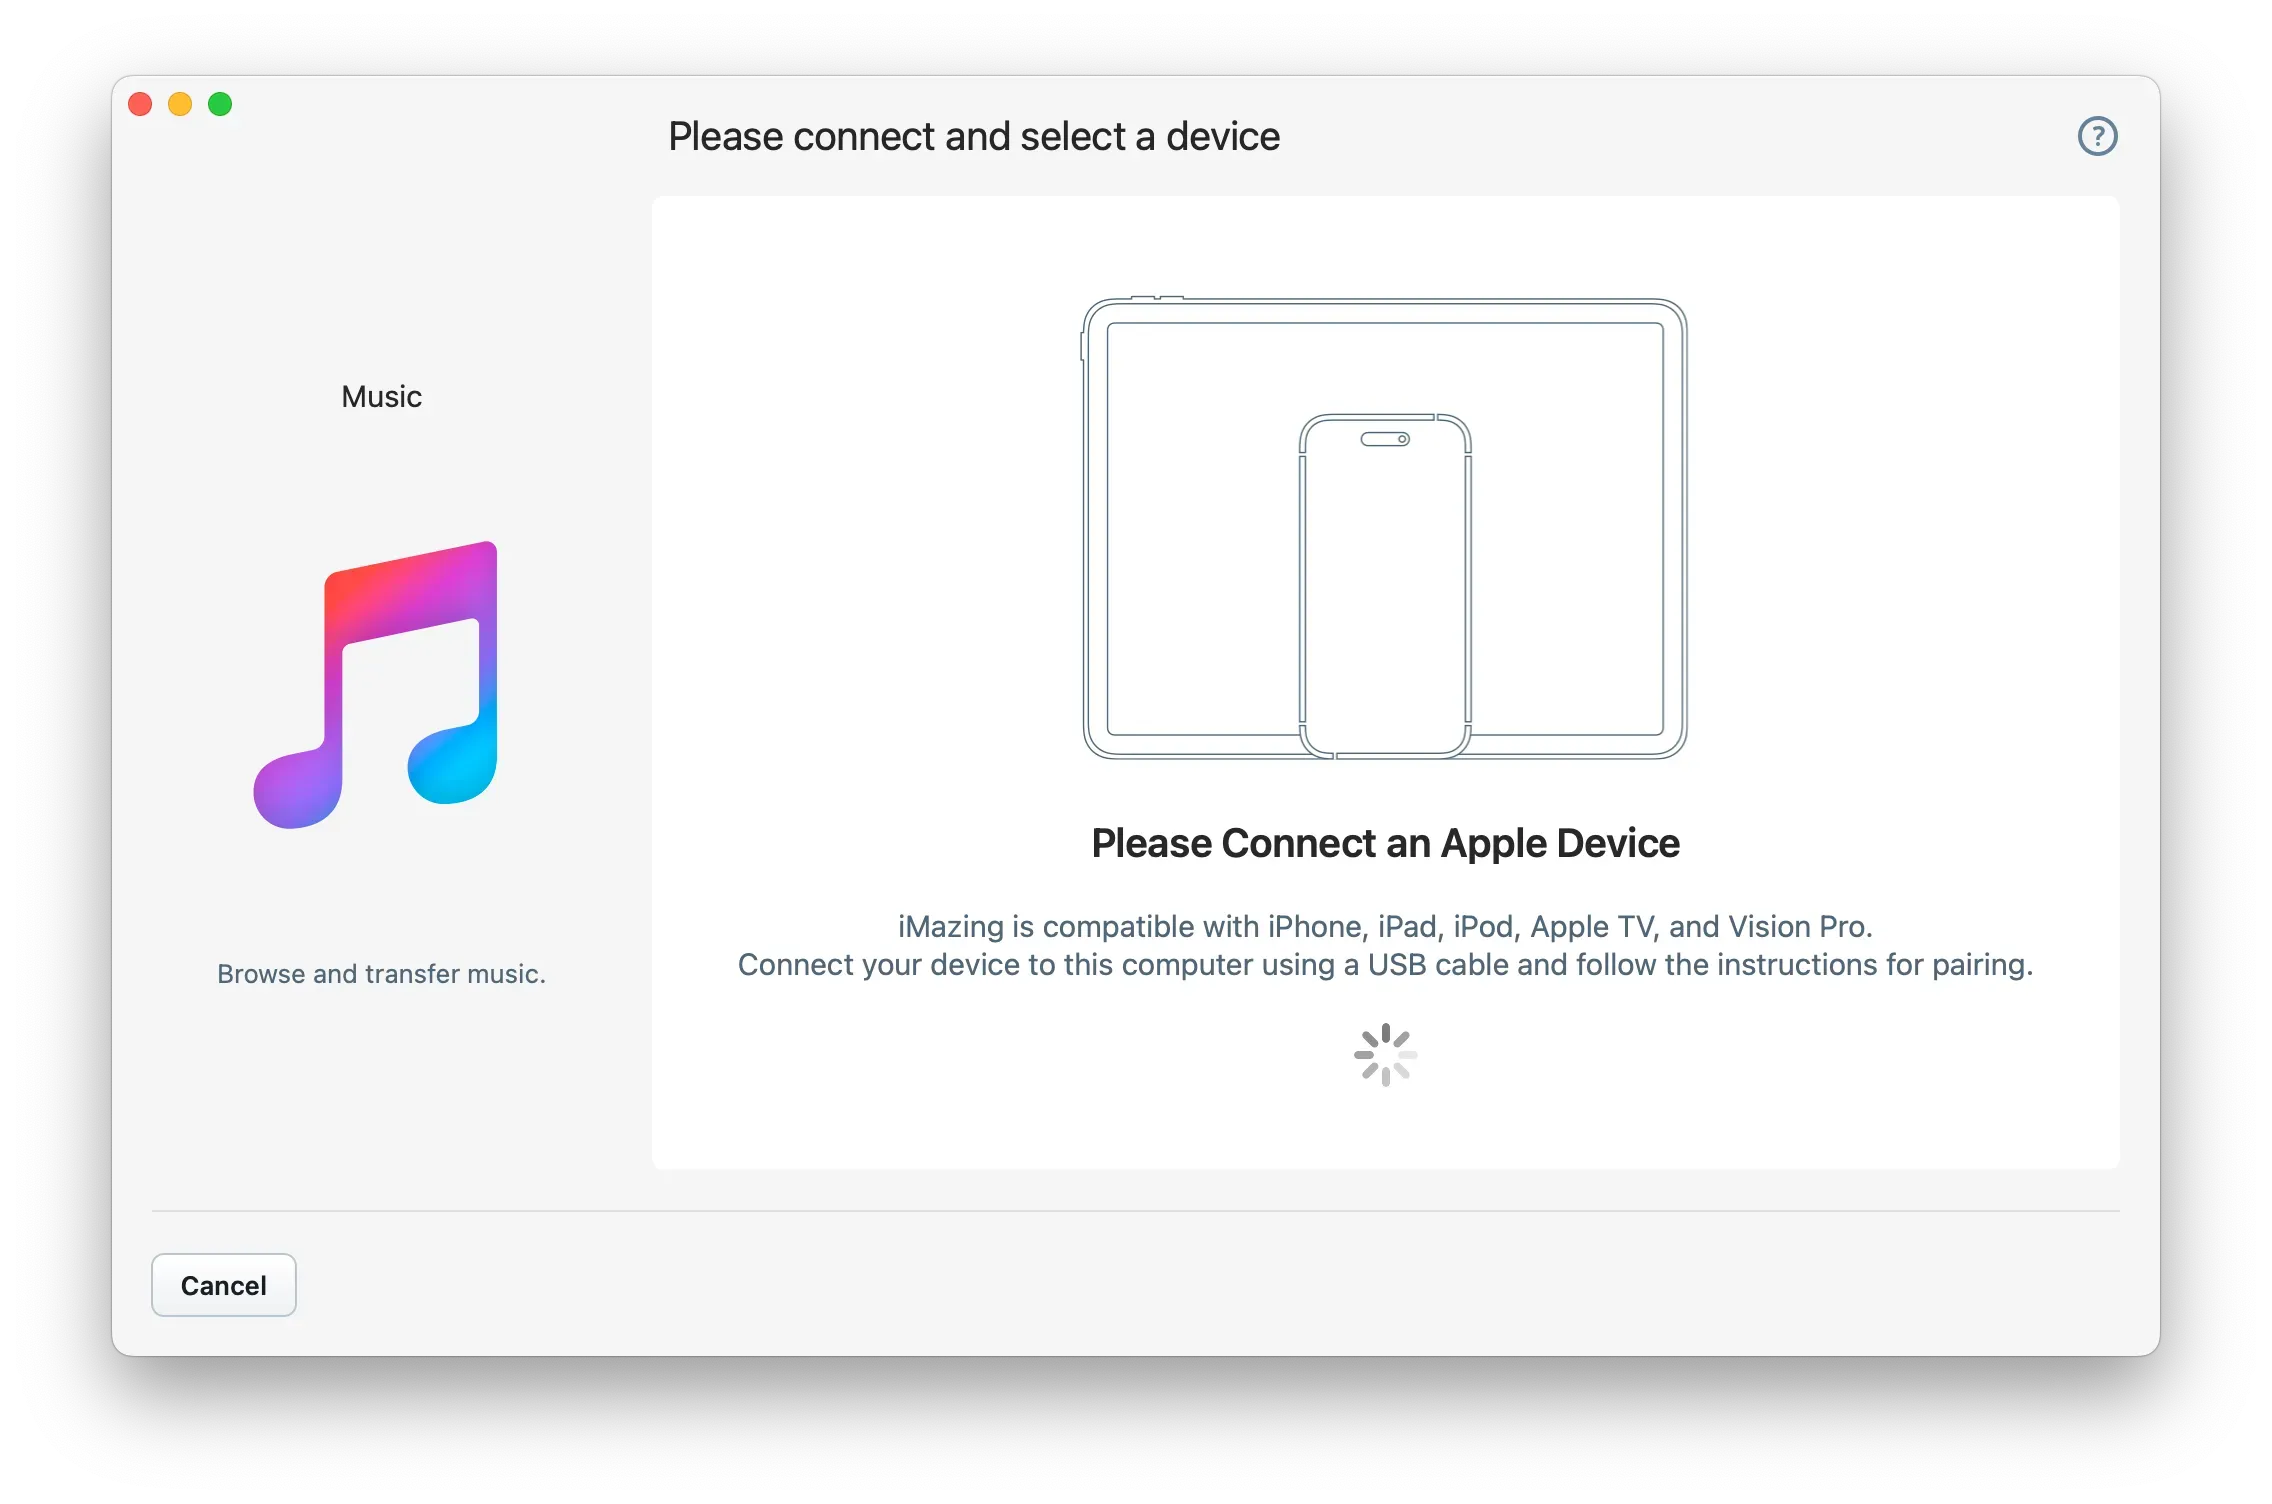
If no device is currently connected, iMazing prompts you to connect one. Connect your iPhone, iPad, or iPod to your computer via USB, unlock the device, and tap Trust if prompted.
Tip: For more details on connections and pairing, see the dedicated Connect your device to iMazing guide.
Select your device
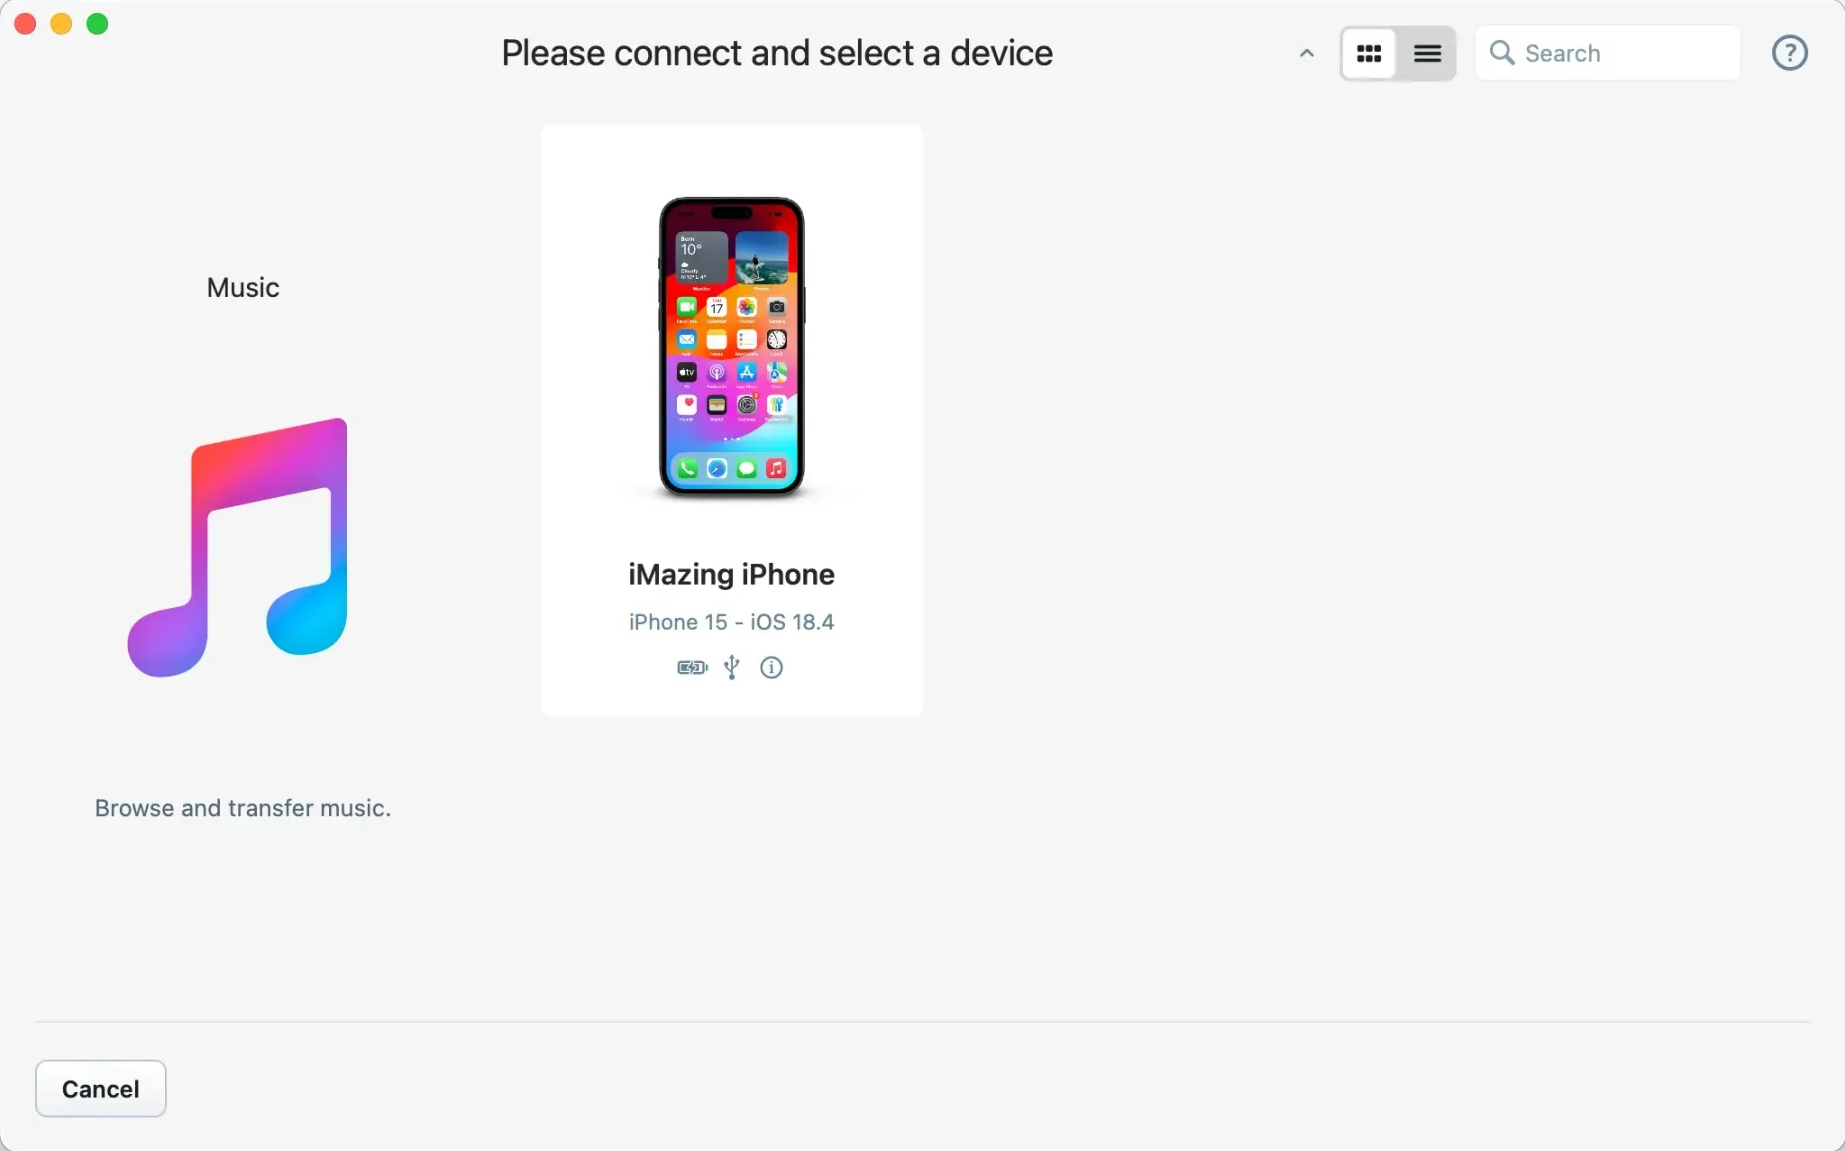
iMazing displays all available devices from which music can be exported. Click the device you want to select.
Browse your music library
iMazing loads your device's music library. Depending on its size, this may take a few seconds. Use the genre, artist, and album filters, as well as the search bar, to explore your library's contents.
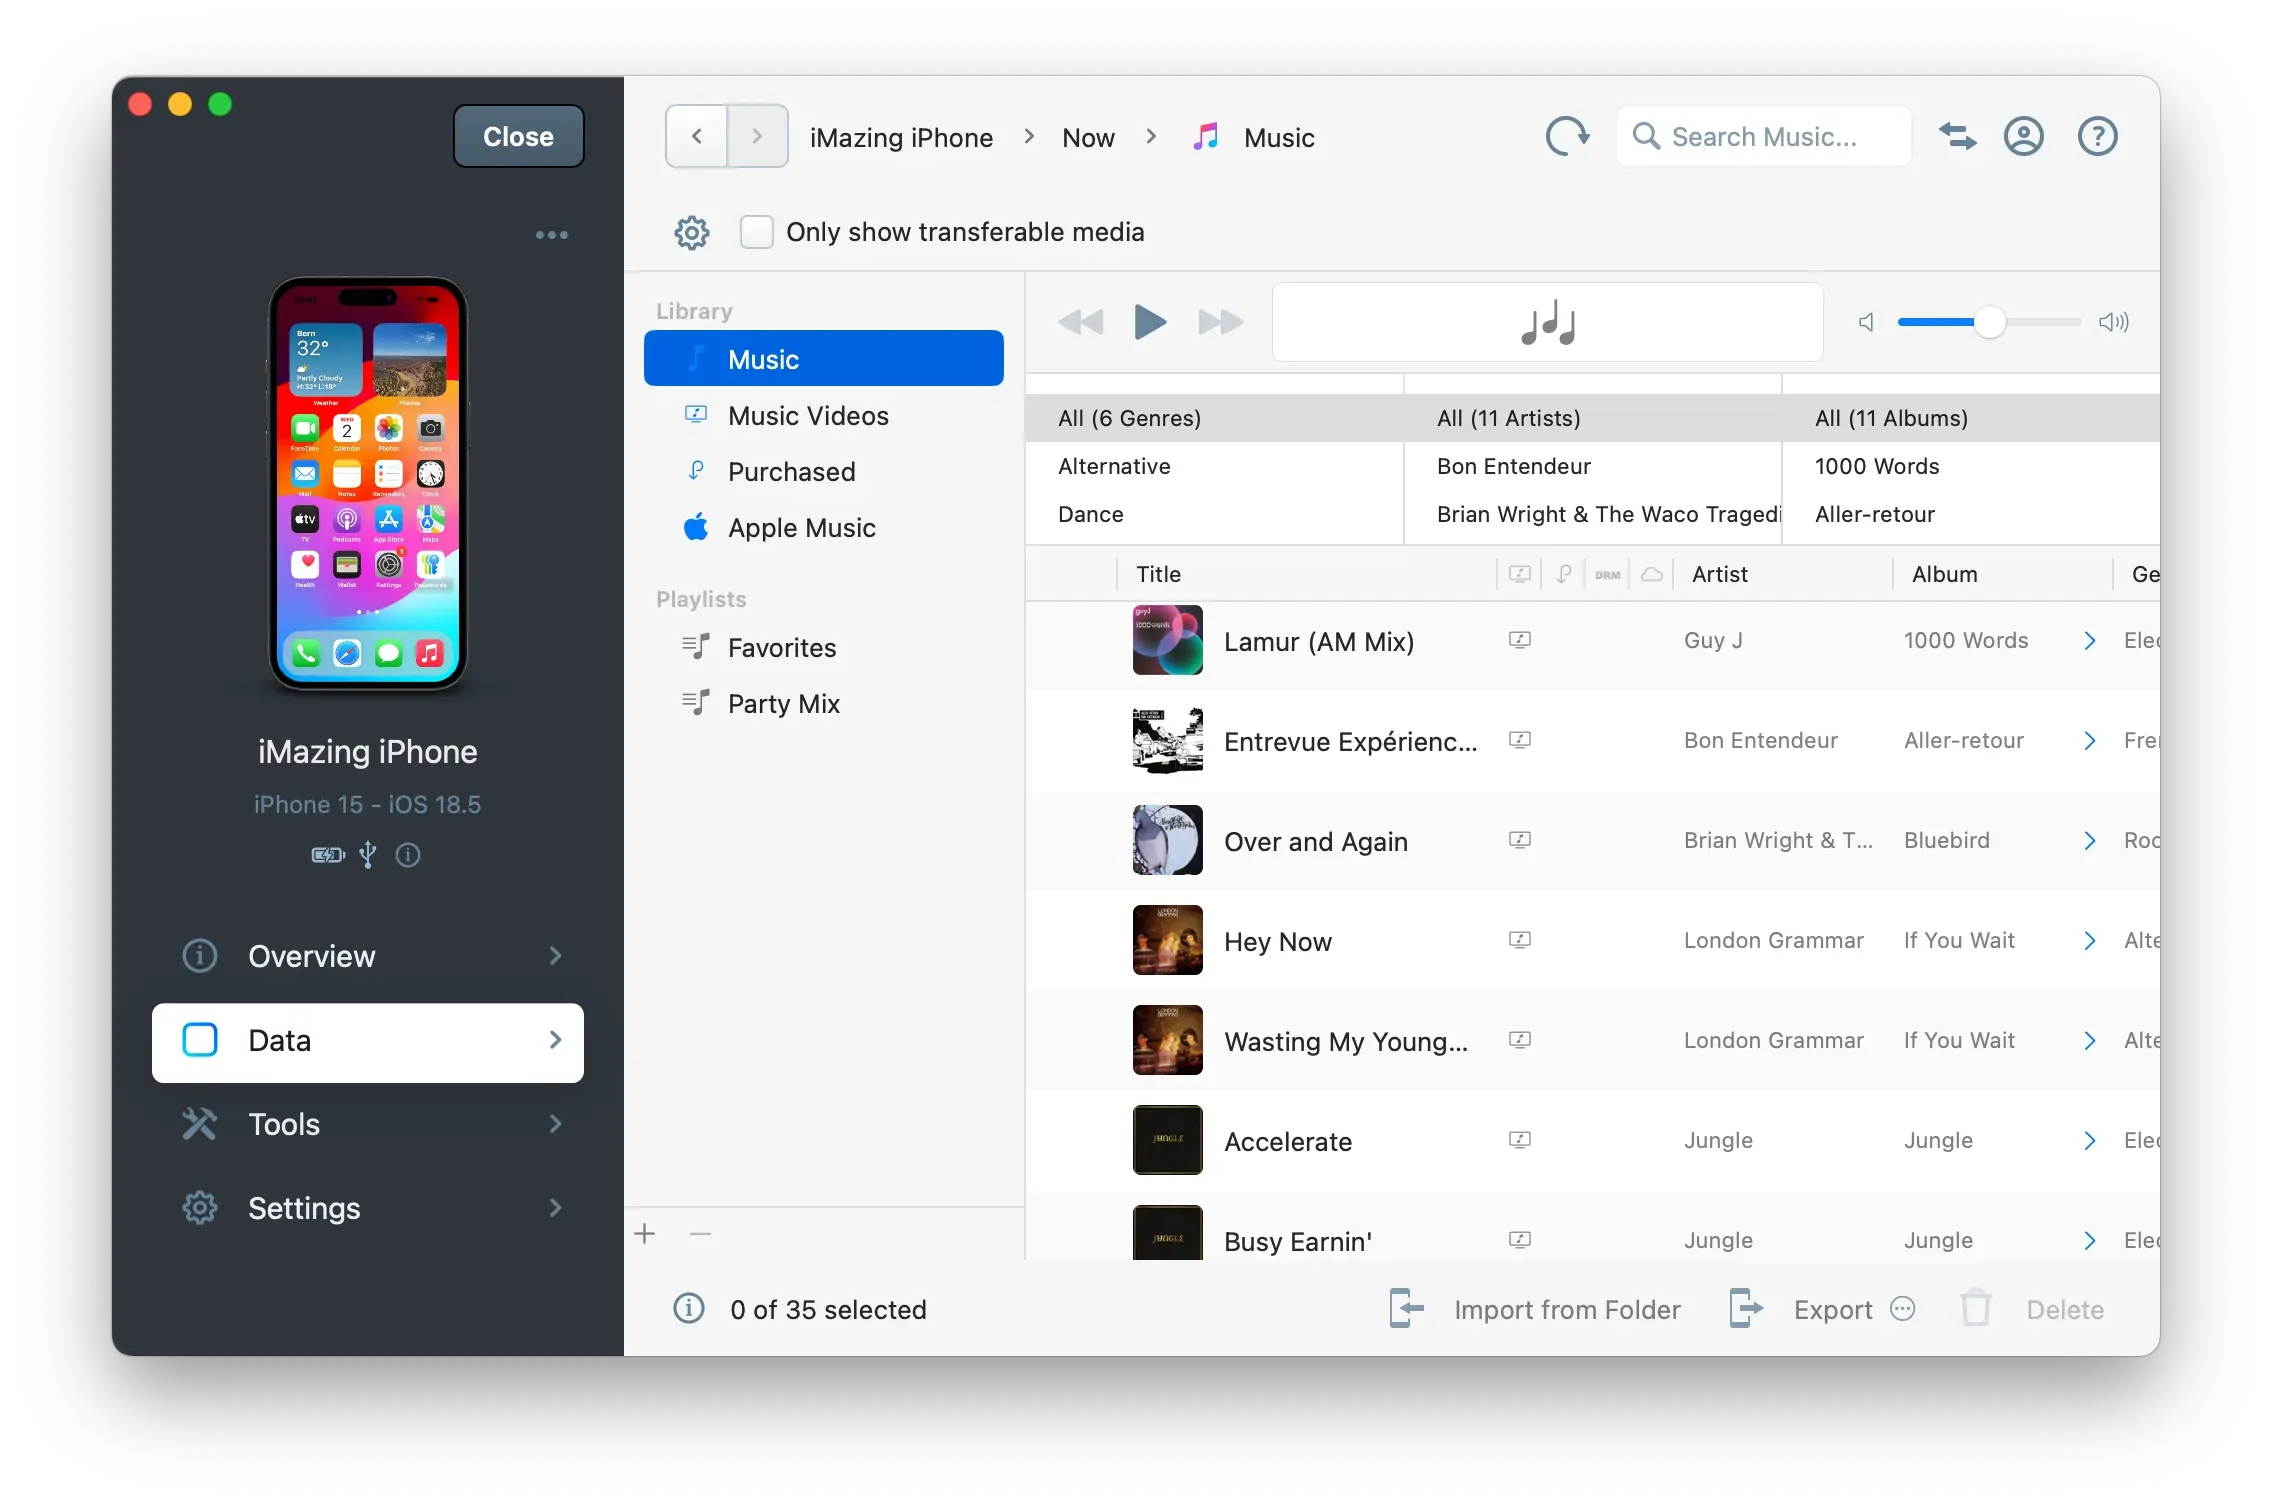
Tip: Enable Only show transferable media above the toolbar to hide tracks that cannot be exported. Tracks shown in grey are non-transferable. See What to keep in mind below for details.
Choose the tracks to export
Select the tracks, albums, or playlists you want to transfer. Three modes are supported:
- Specific tracks or albums: use the filters and search bar to narrow the list, then select the items you want.
- A playlist: select it in the left sidebar. Do not select individual tracks.
- Your entire library: leave everything unselected and proceed to the next step.
Tip: To export a small number of tracks, drag them directly from iMazing onto your desktop. No additional steps required.
Configure the export
Click Export in the bottom-right corner, then select Export to iTunes or Export to Music.
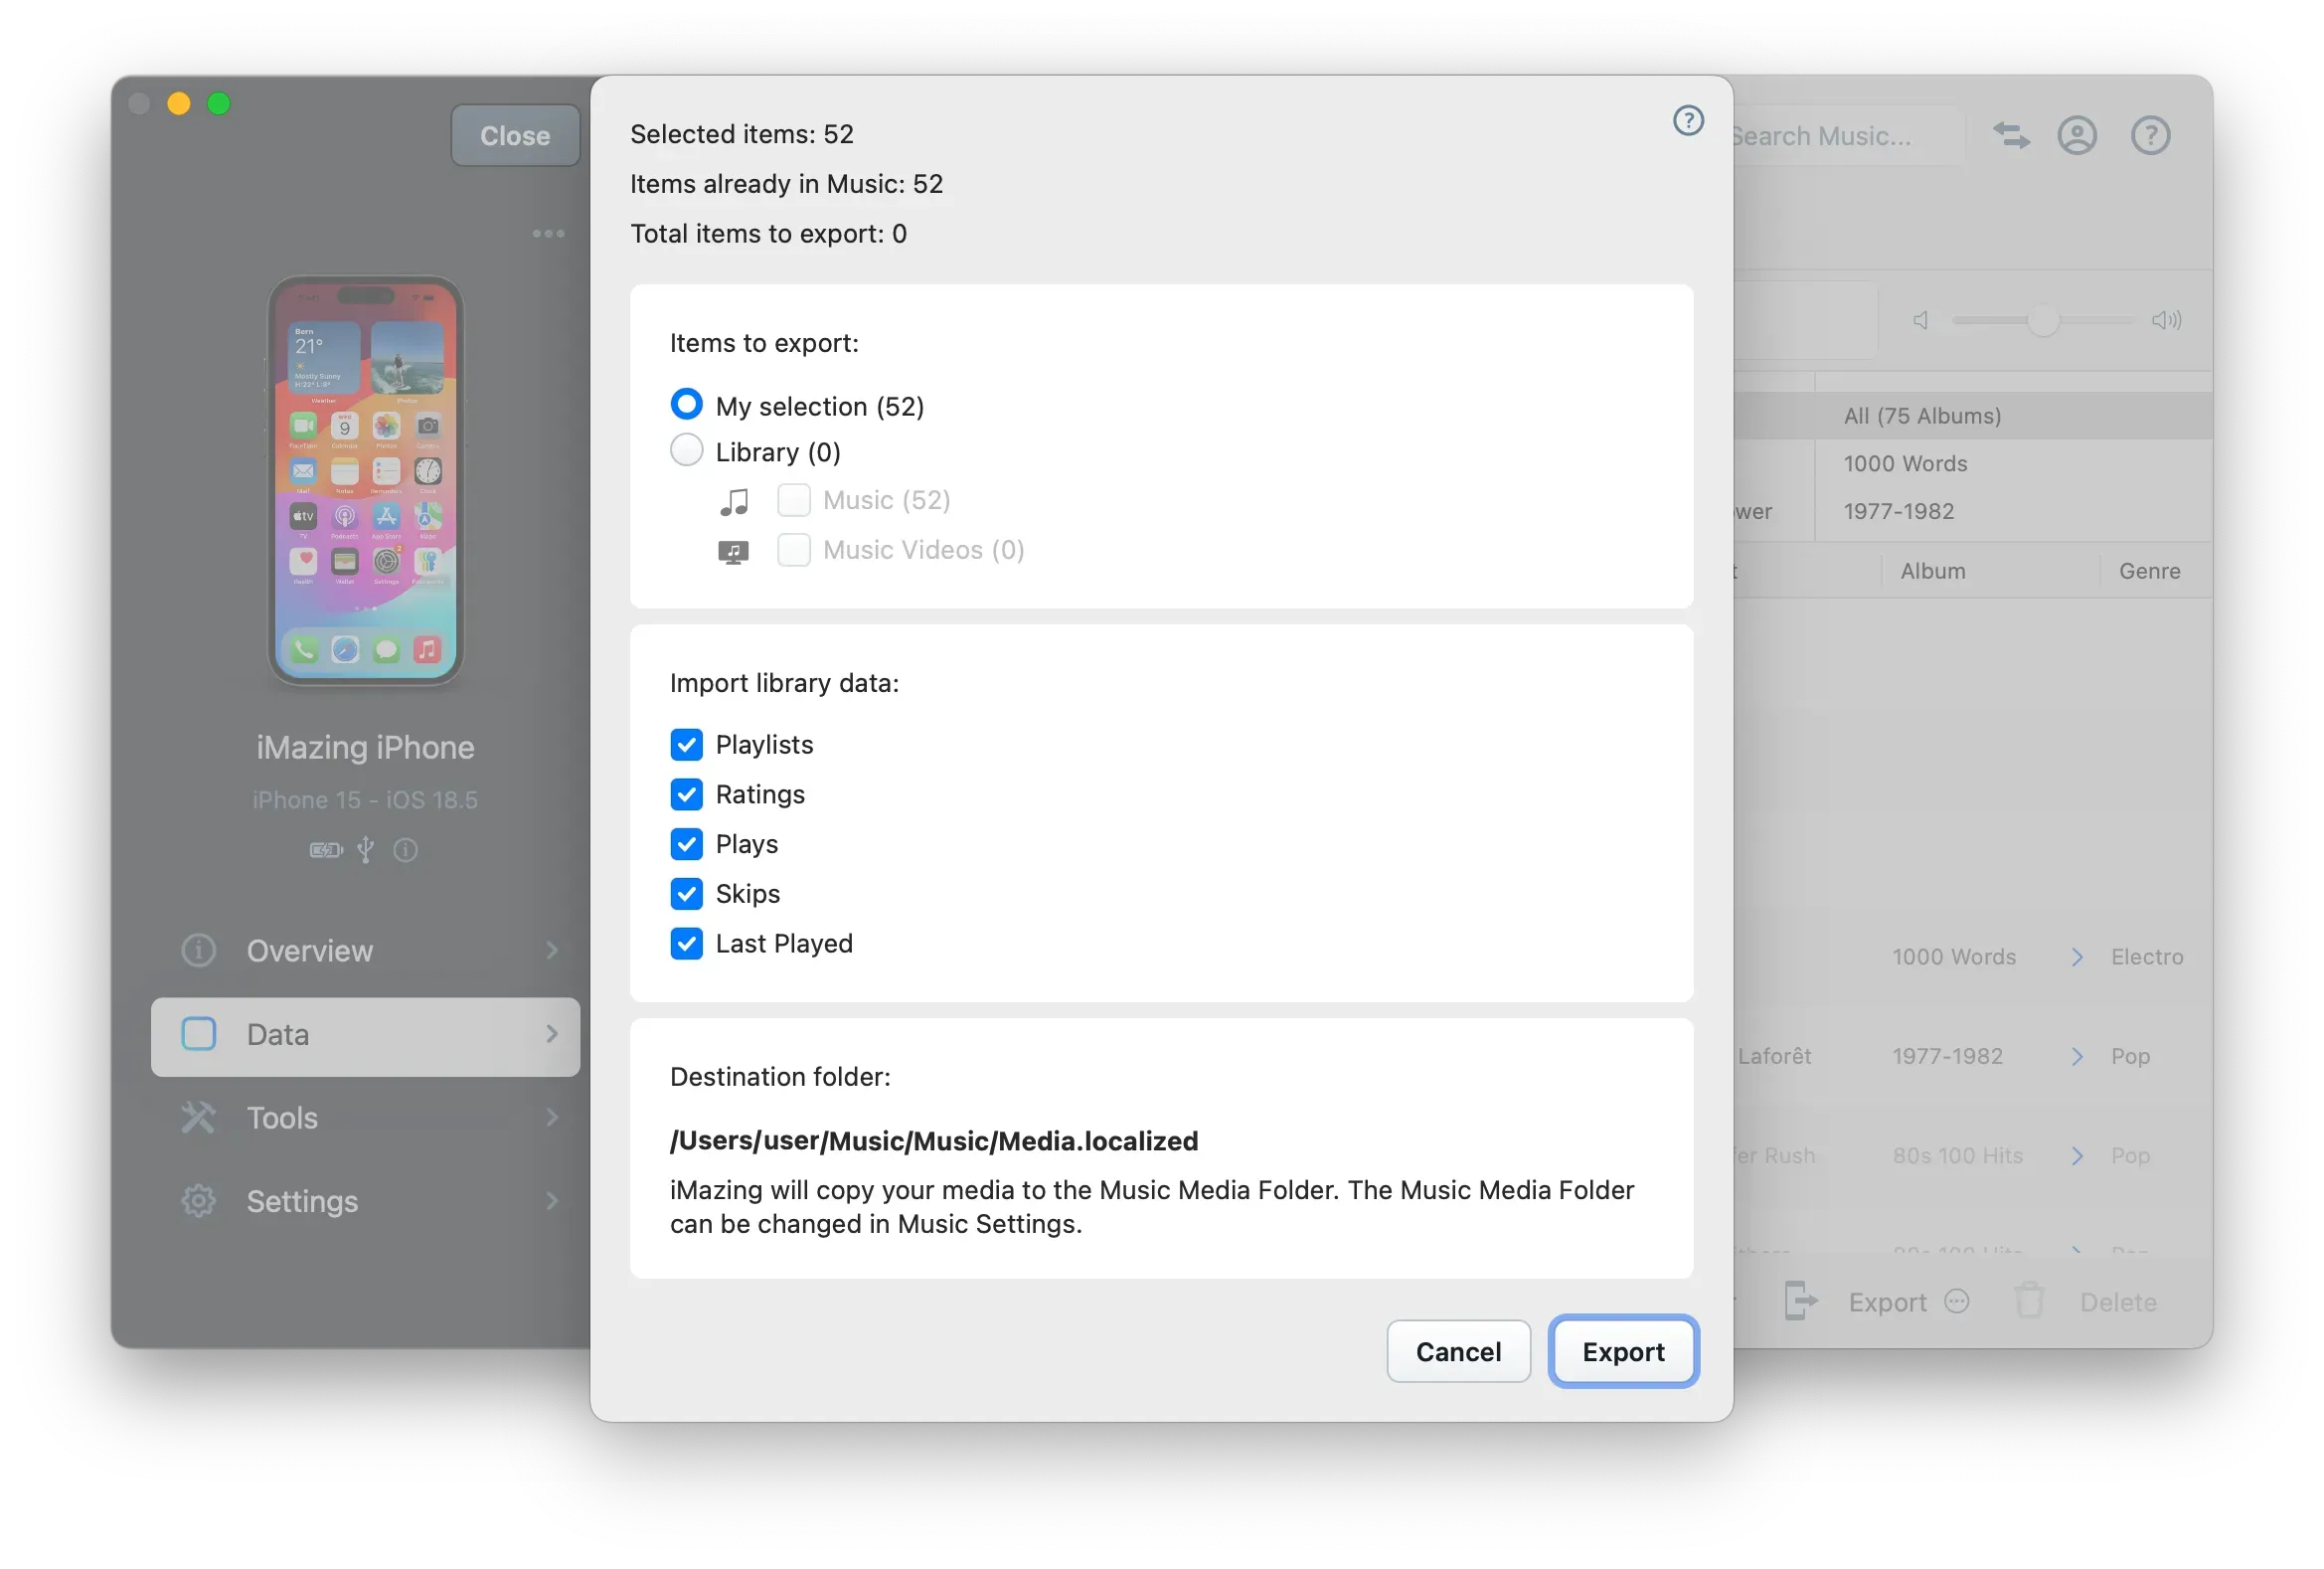
The export options window lets you review your selection and choose which metadata to include.
Review your selection
The top section shows how many items are selected, how many are already in your computer's music library, and how many will be exported.
You can still switch to exporting the full library at this stage. Click Library to further refine which types of items to include.
Choose metadata to include
In the third block, select the metadata types to export. All options are enabled by default:
- Playlists: available only when you selected a playlist or the entire library.
- Ratings: star ratings applied to your tracks.
- Plays: total play count per track.
- Skips: number of times each track was skipped using the Next button.
- Last Played: date and time of the last listen per track.
Start the transfer
Click Export in the bottom-right corner of the options window, then confirm Export to iTunes or Export to Music.
iMazing begins transferring files from your device to your computer's music library. Transfer time depends on the number of tracks selected.
Note: iTunes or the Music app may open during the transfer. iMazing needs to communicate with it to add tracks and metadata to your library and to create playlists. Let iMazing complete the transfer before using iTunes or the Music app.
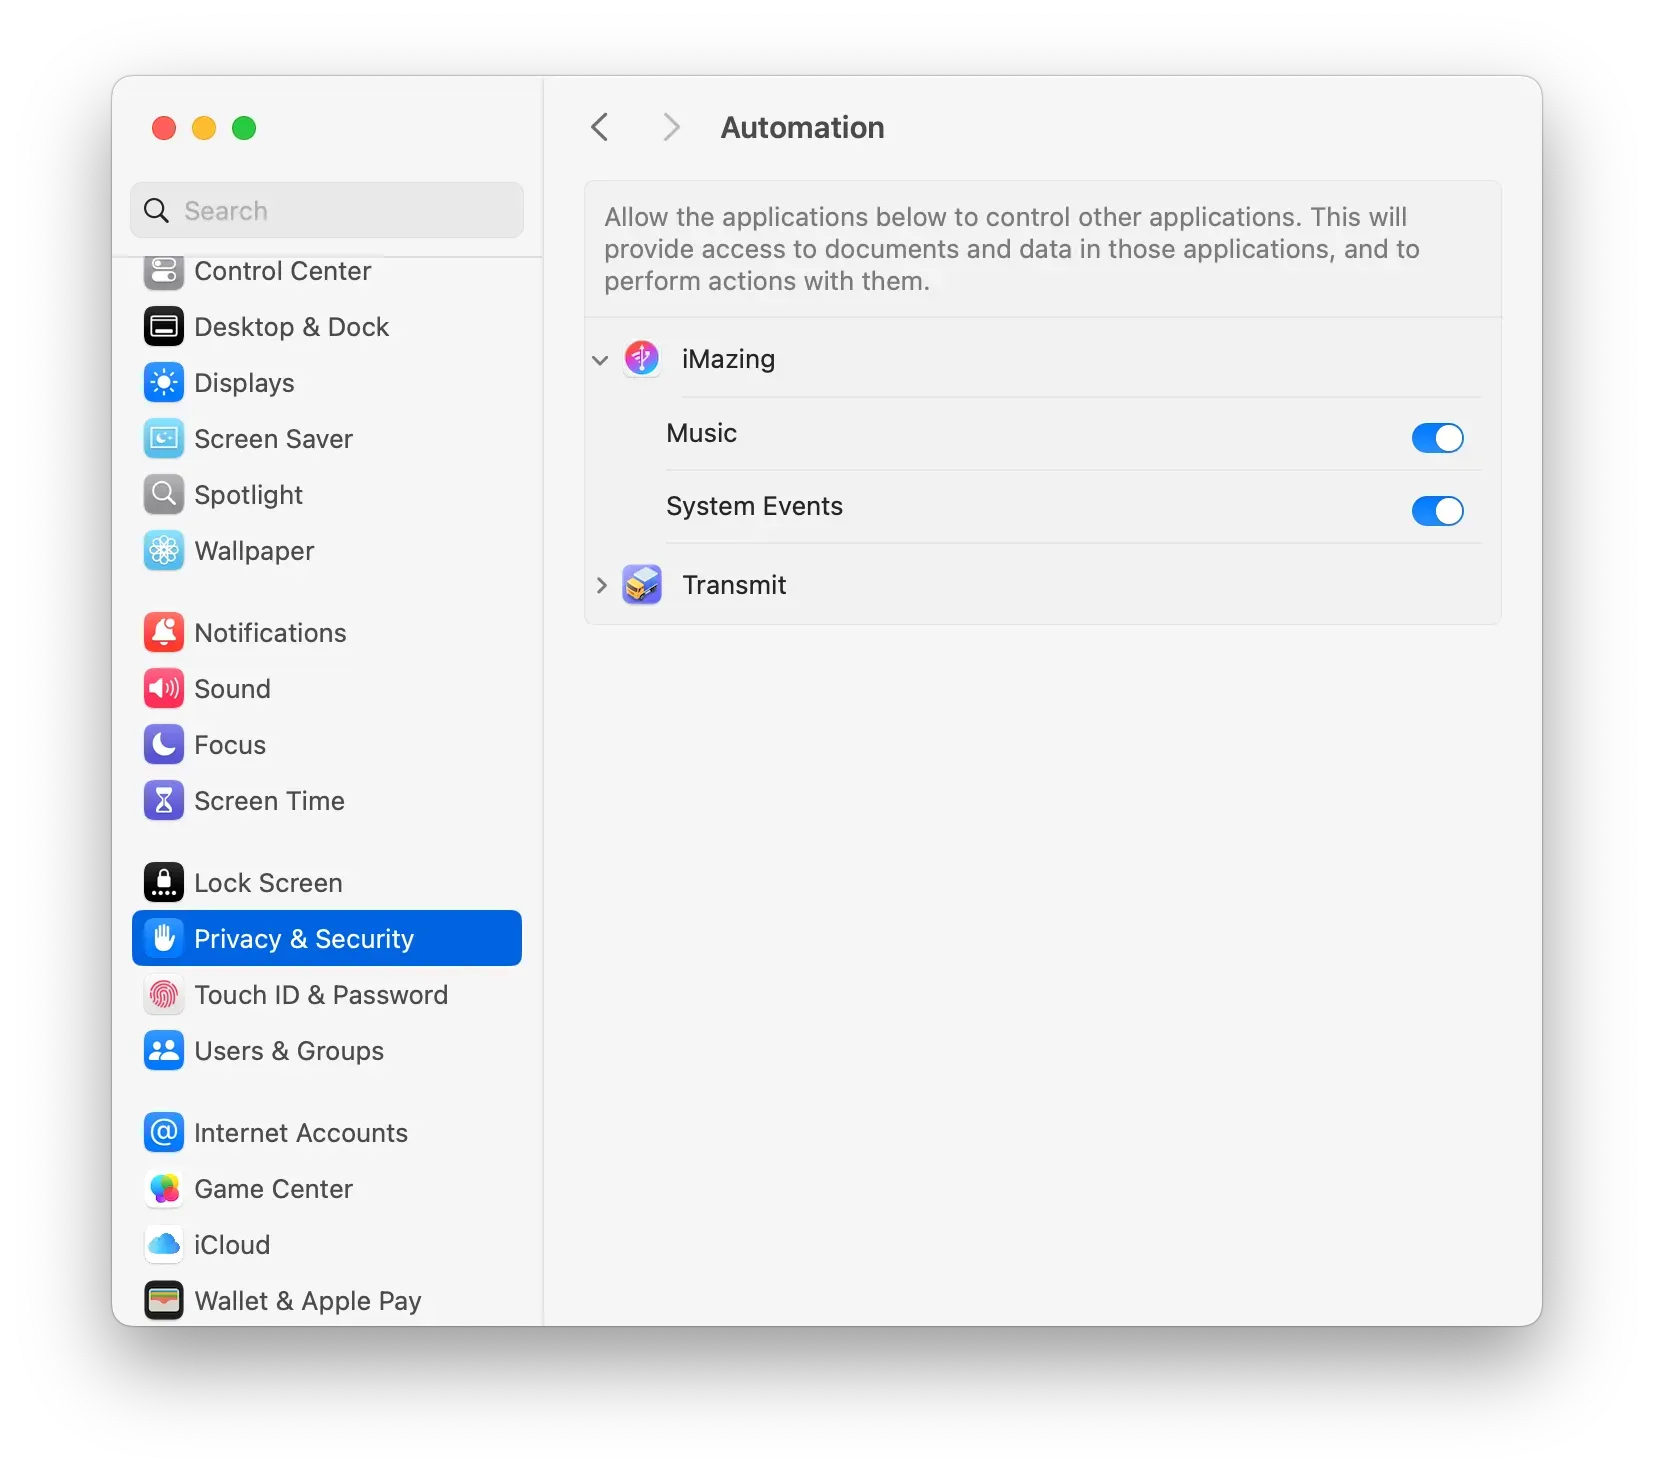
Grant macOS permissions (first run only)
On macOS, the first time you use Export to Music, macOS prompts you to authorize iMazing to control Music and System Events. This prompt does not appear on Windows.
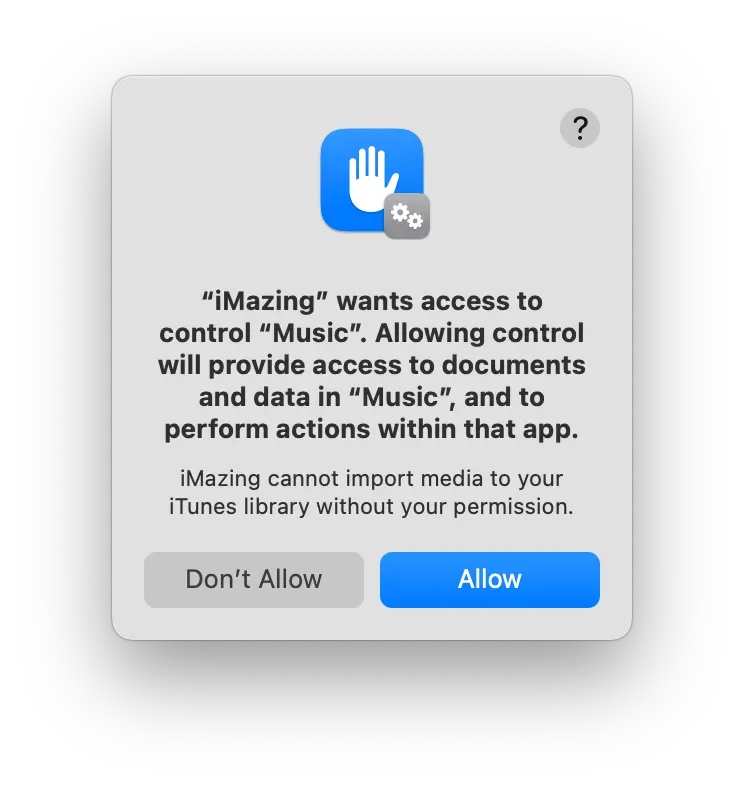
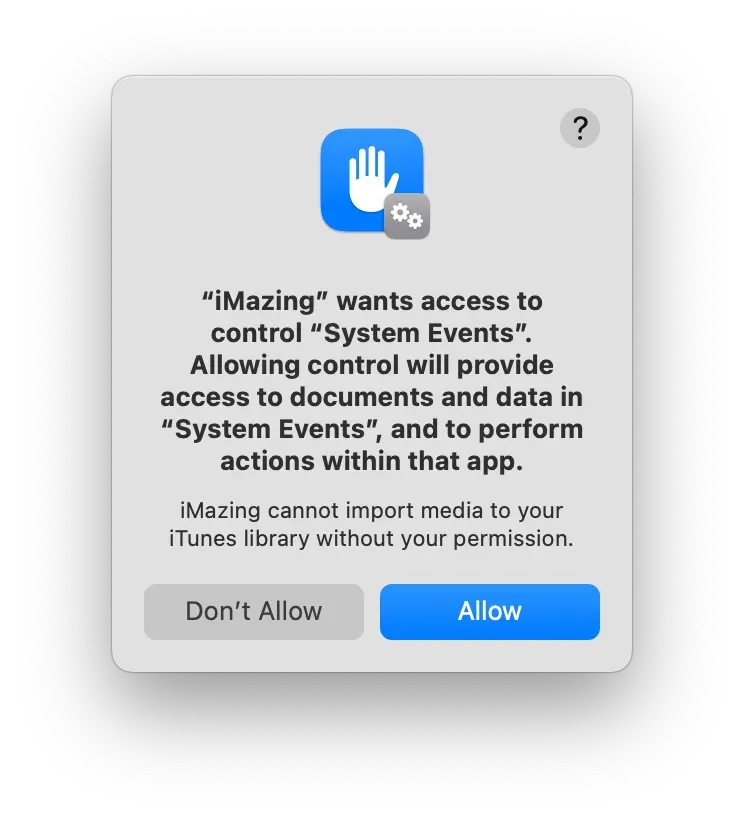
Note: iMazing uses these permissions only to import media into your music library. Granting access is safe.
Grant access through both prompts, then proceed with the export. You will not be prompted again.
If you previously denied access, iMazing displays a dedicated screen when you attempt to export.
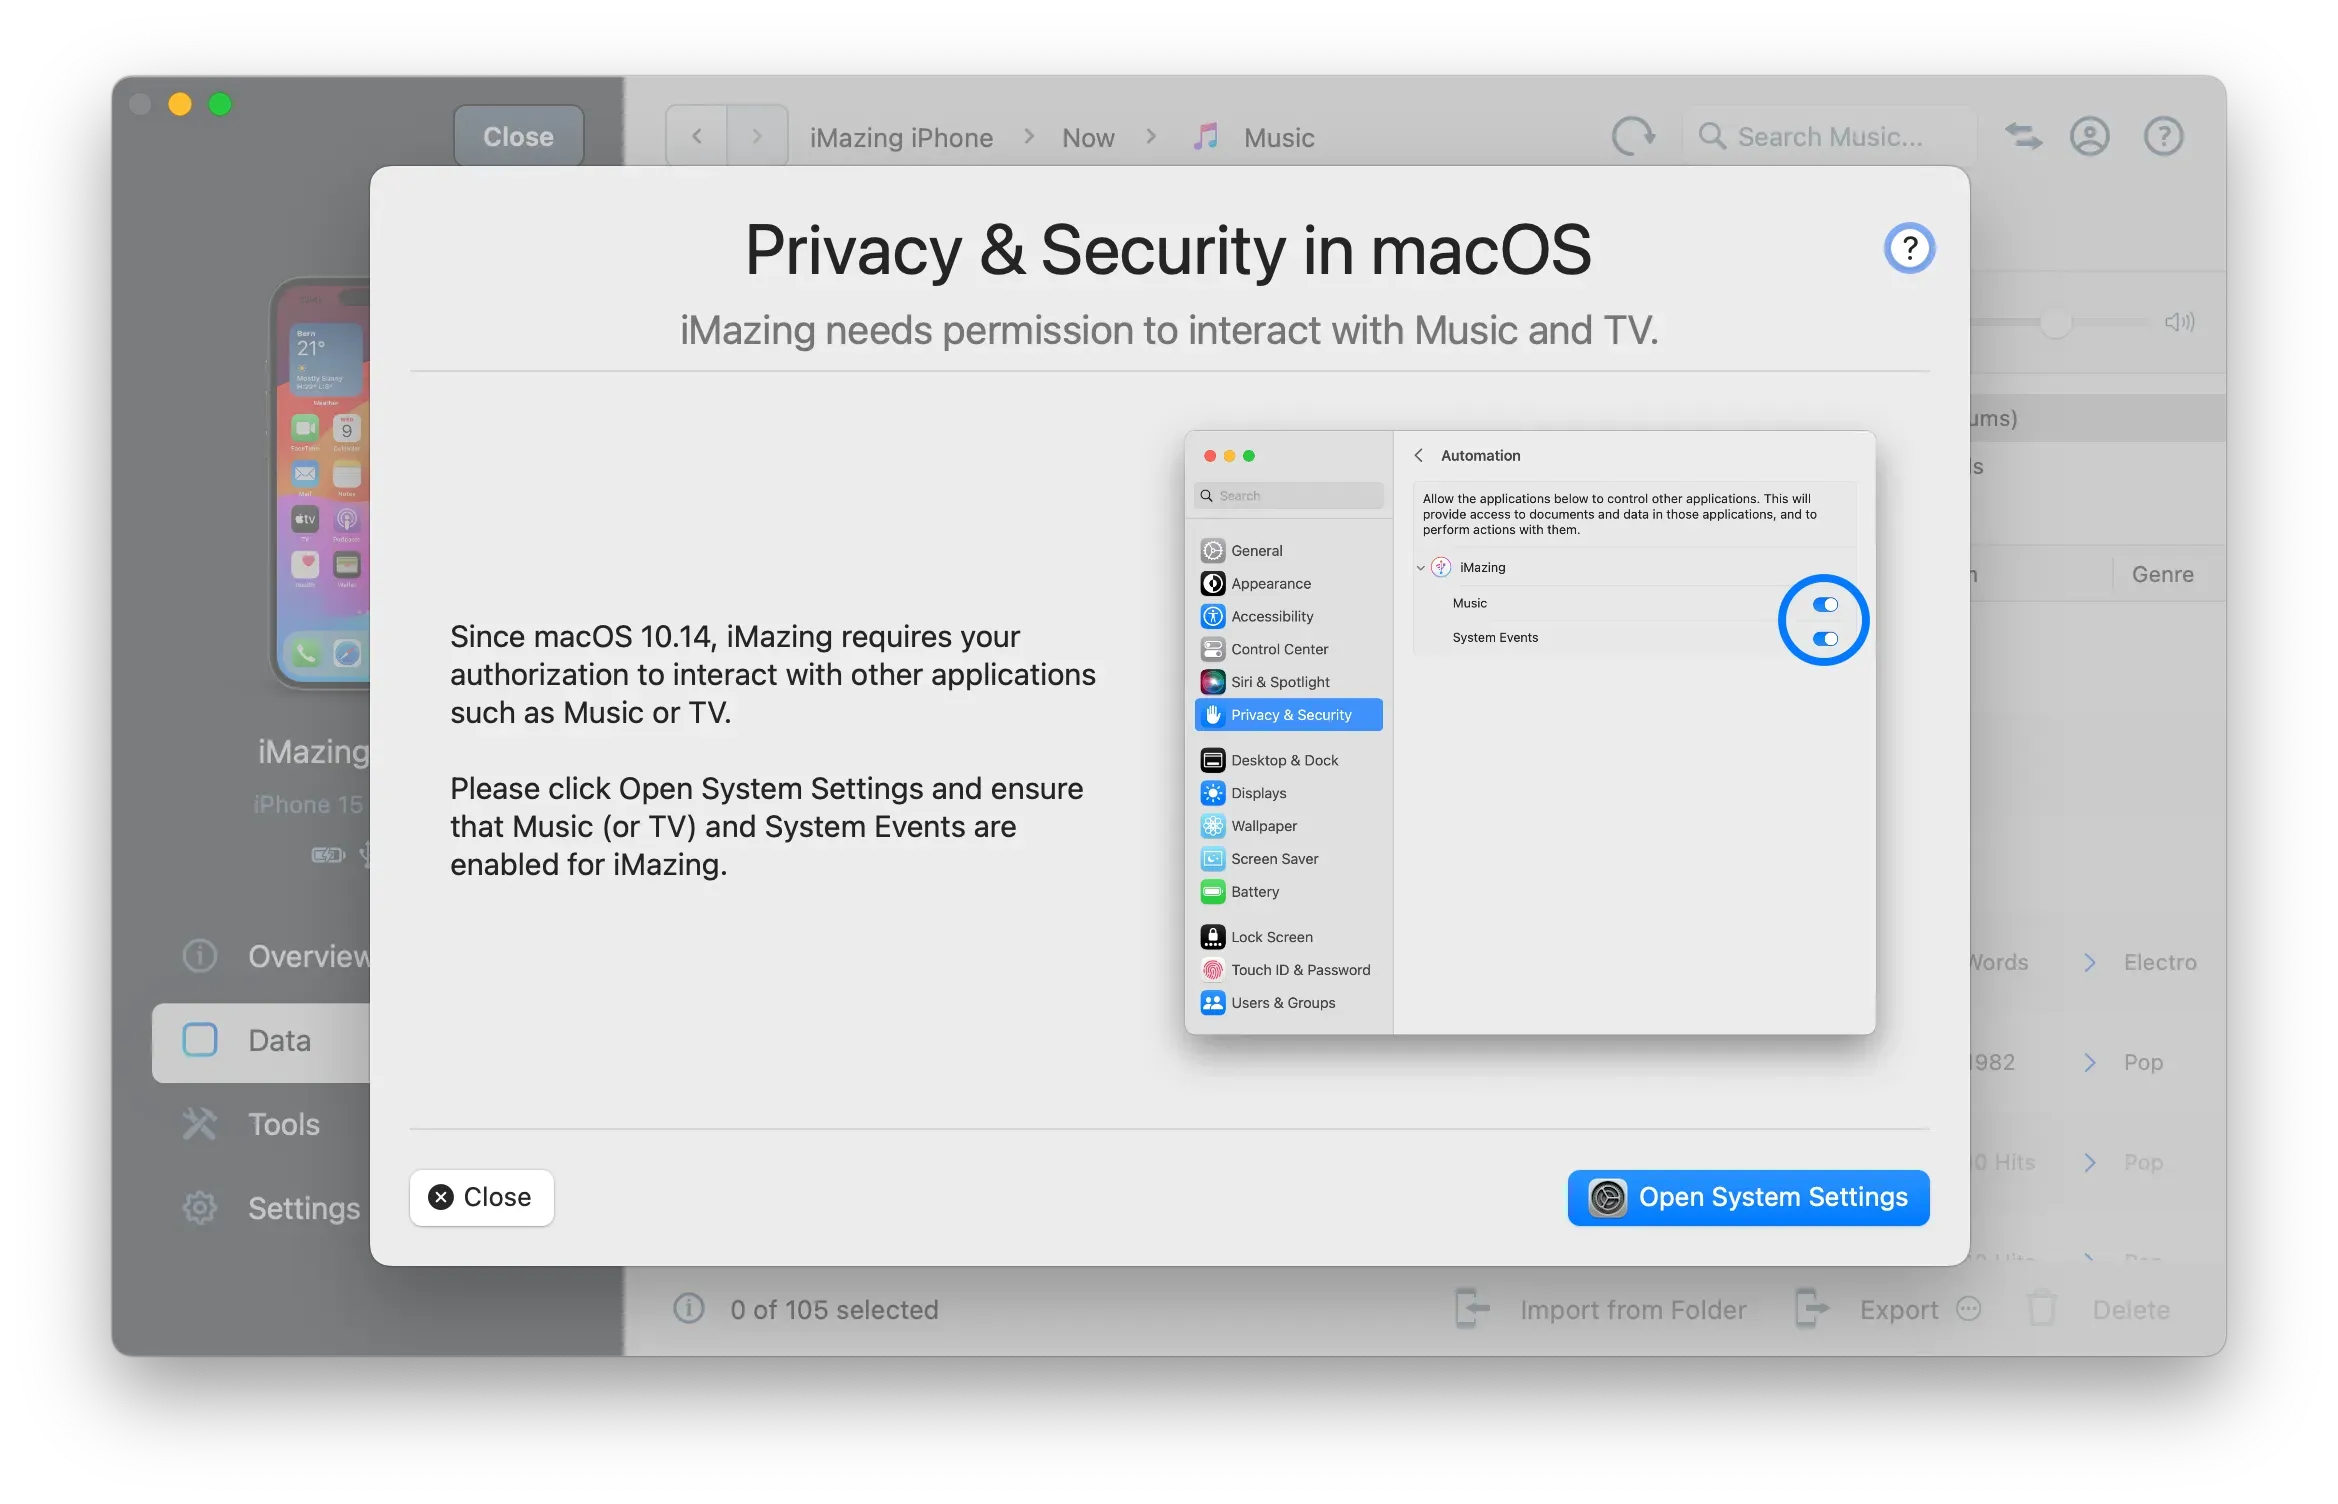
Follow the on-screen instructions to restore access:
- Click Open System Settings in the iMazing window.
- Click the lock icon and enter your macOS user password to allow changes.
- Check both checkboxes for iMazing in the Automation section.
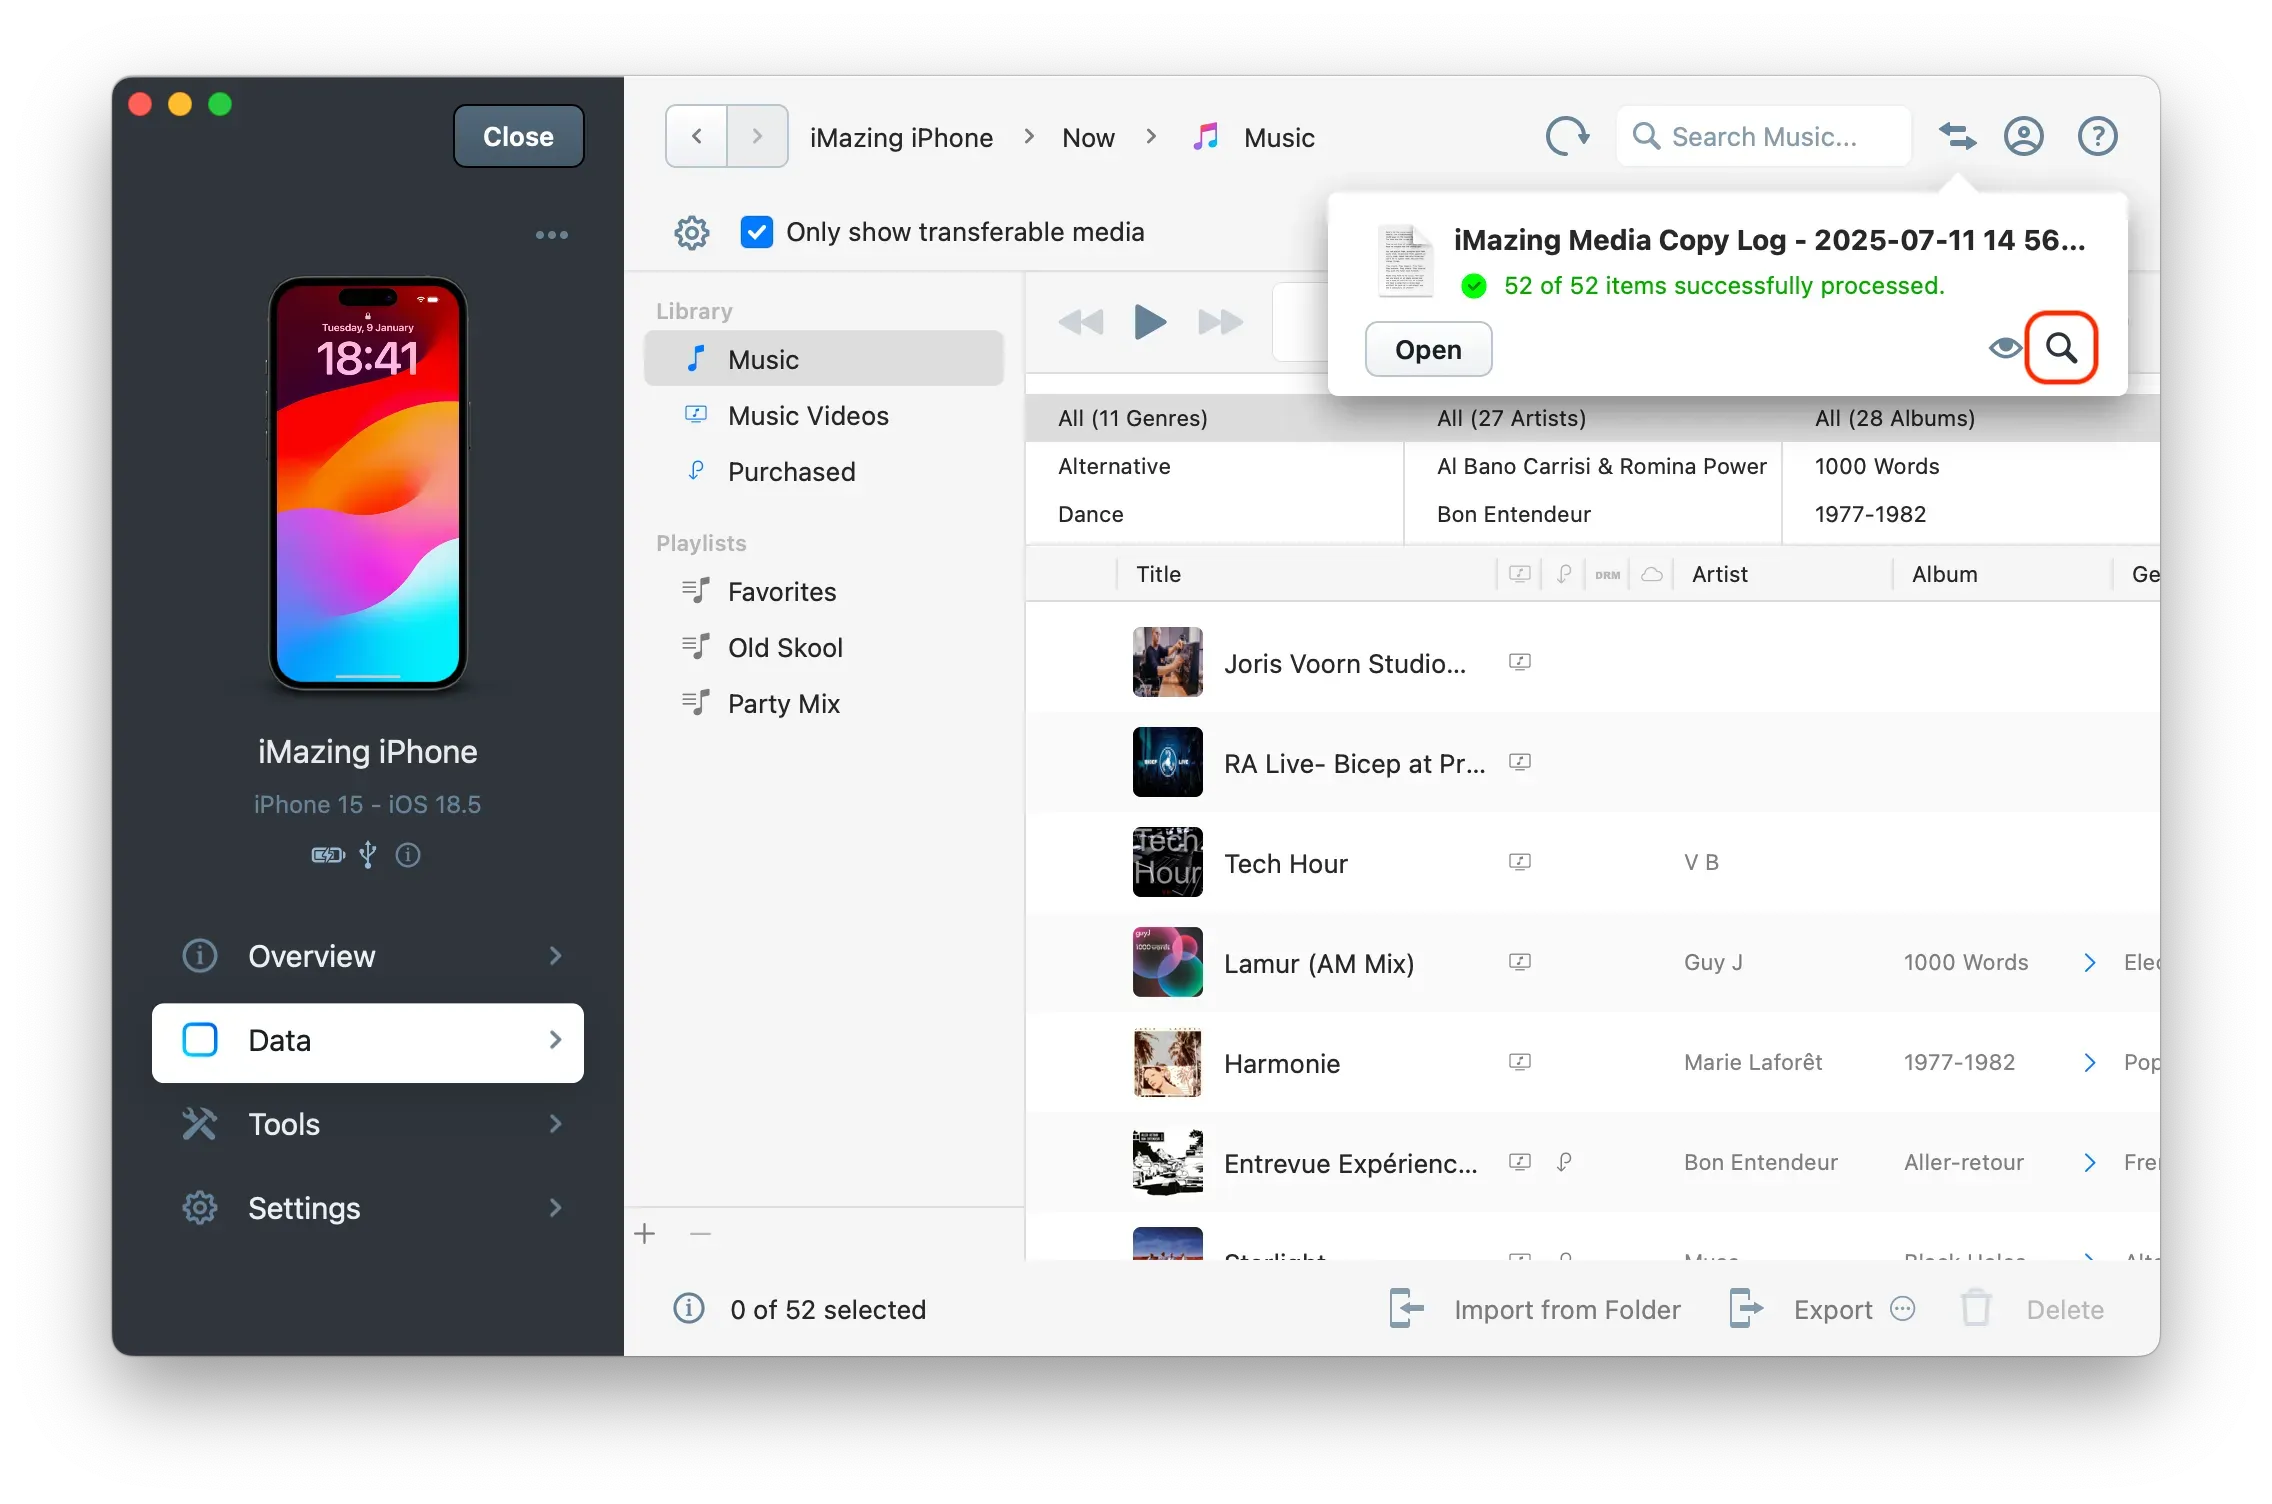
Review the transfer log
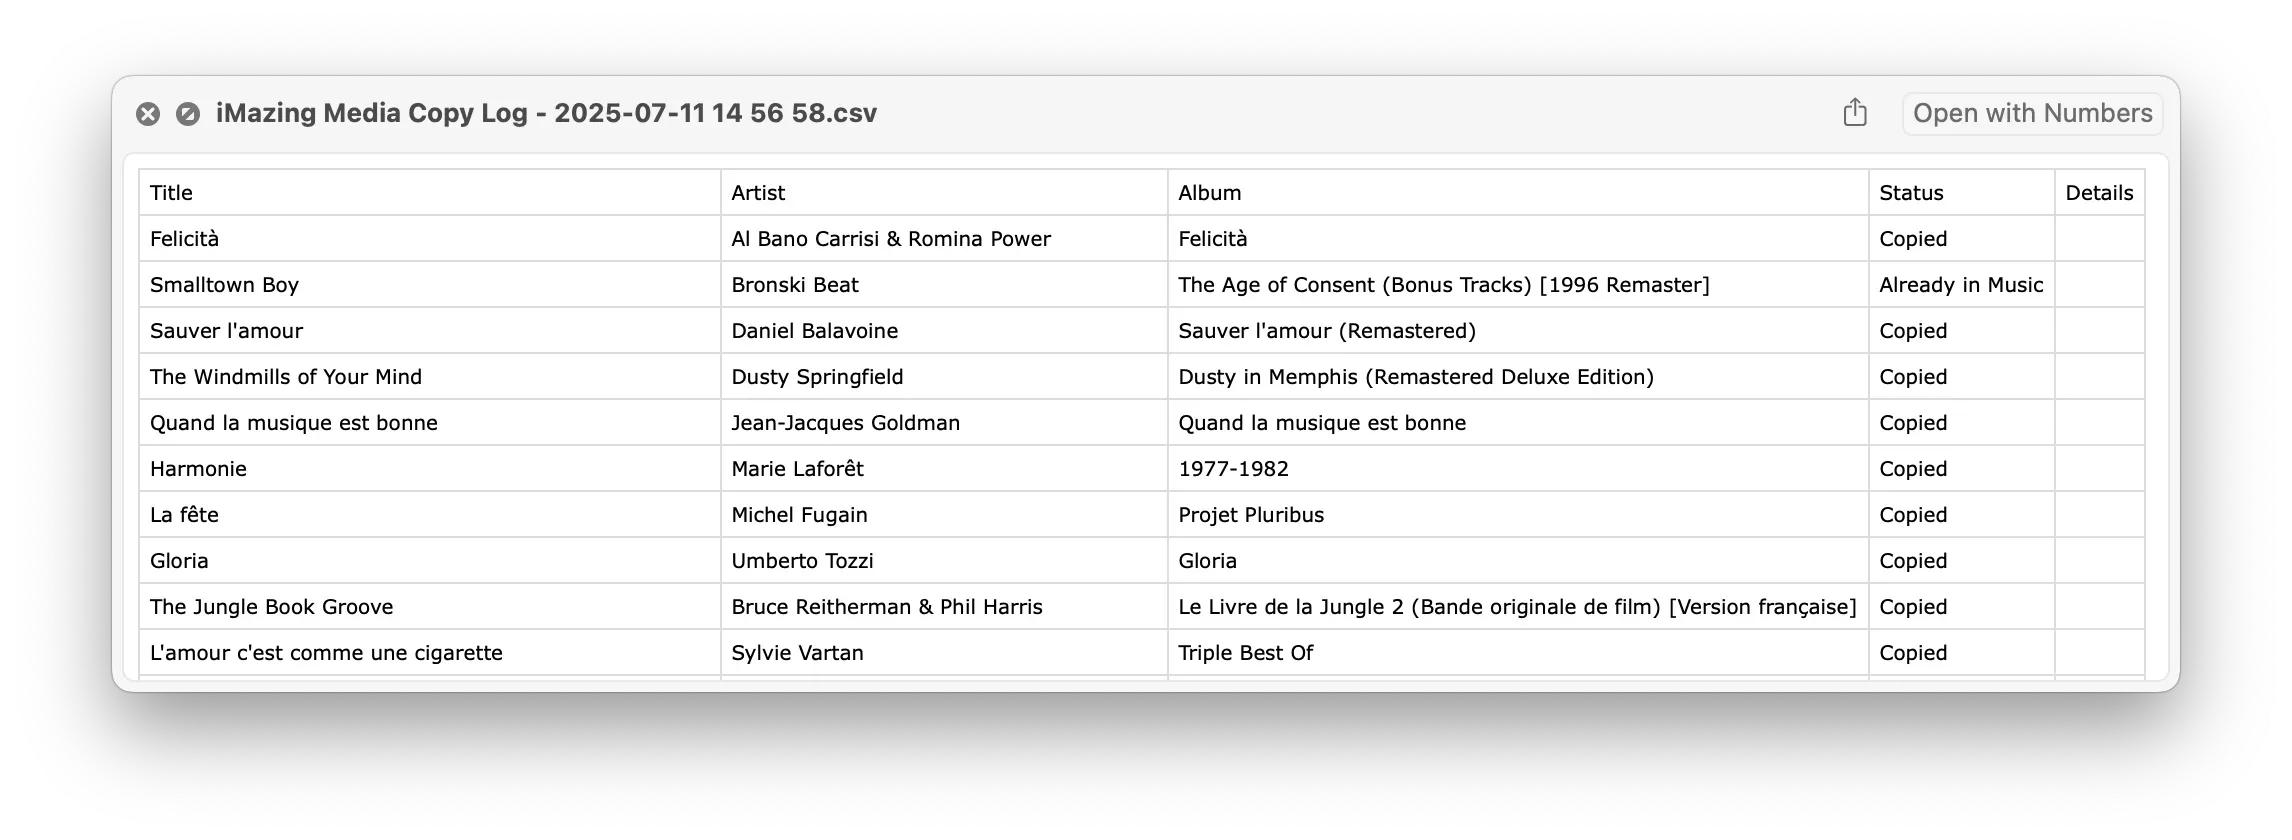
When the operation completes, it appears in the Operations Panel. Click the magnifying glass icon to view the transfer log.
The log is available as a CSV file you can open in Excel or any spreadsheet editor.
What to keep in mind
- Tracks from iCloud Music Library that are not downloaded to your device cannot be exported. Download them to your device first, or access them through iCloud Music on your computer.
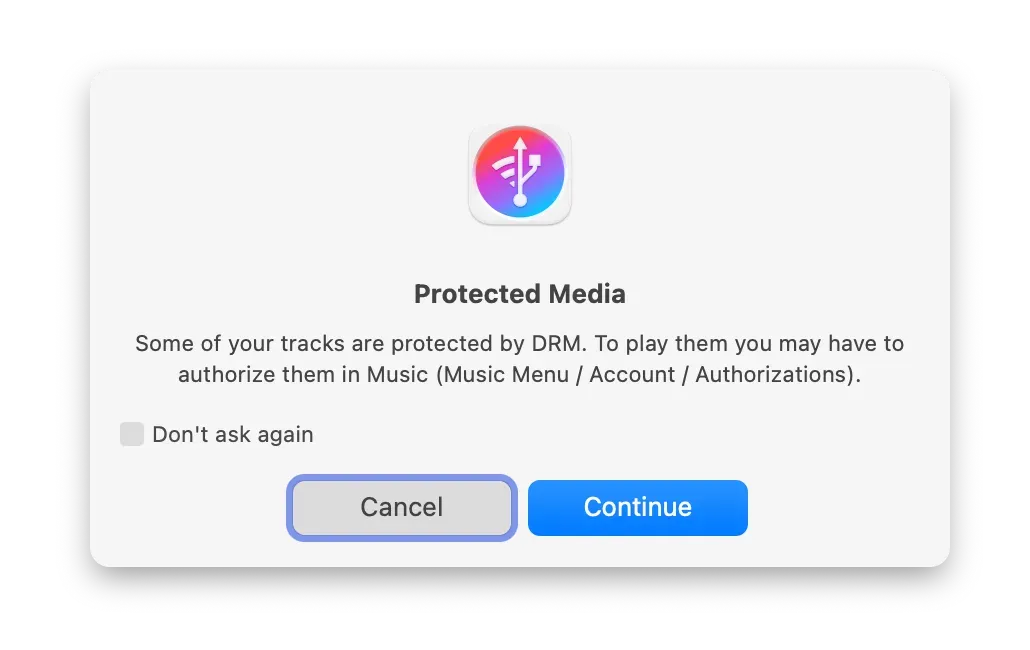
- Apple Music subscription tracks are DRM-protected and cannot be transferred. iMazing marks them as non-transferable. These tracks are identified by an Apple logo.
- Tracks purchased from the iTunes Store before 2009 may also be DRM-protected. iMazing displays a warning if a selected track cannot be exported.