Device Management
Create or edit Configuration Profiles for iOS, macOS, tvOS, visionOS, or watchOS

In Apple's ecosystem, configuration profiles are XML files which define a wide array of settings and enable streamlined configuration of iOS, macOS, tvOS, visionOS, or watchOS devices. Apple's Mobile Device Management (MDM) technology relies on configuration profiles to push settings to fleets of enrolled devices remotely, and Apple Configurator uses them to configure mobile devices locally.
Most MDM vendors such as Jamf or Simple MDM provide a simplified configuration interface and translate the desired settings into one or more configuration profiles behind the scenes. But in many cases, working directly with configuration profiles may be necessary:
- Your MDM vendor does not expose a specific setting that you need to implement
- You need to configure settings for 3rd party applications
- You do not use MDM, but prepare iOS devices with Apple Configurator or iMazing Configurator
You can create and edit configuration profiles with ease using the iMazing Profile Editor app for macOS and Windows. The app contains definitions for all of Apple device configuration options and for a large number of third party apps as well, which it displays in a friendly graphical user interface.
Here's summary of how to create or edit configuration profiles for iOS, macOS, tvOS, visionOS, or watchOS:
- Download and install iMazing Profile Editor, then launch the app.
- Use the sidebar to add your desired configuration domain(s).
- Enter your relevant preferences in the property fields.
- Save the profile as a .mobileconfig file. The file is ready for use.
Before you begin
Download and install iMazing Profile Editor, a desktop application for both macOS and Windows. It can be downloaded from the following links:
In-Depth Tutorial
- Create a new configuration profile or open existing
- Understand the layout of the user interface
- Enter general configuration settings
- Add a configuration payload
- Set payload preferences
- Remove a configuration payload
- Save the profile
1. Create a new configuration profile or open existing
Create a new profile
A new configuration profile window will be created when you launch the app, or when you click on New in the File menu. This can also be achieved by pressing ⌘N on the keyboard.
Open an existing profile
You can select a profile file (.mobileconfig) to open in the app when launching the file-open dialog by clicking Open... in the File menu, or by pressing ⌘O on the keyboard.
2. Understand the layout of the user interface
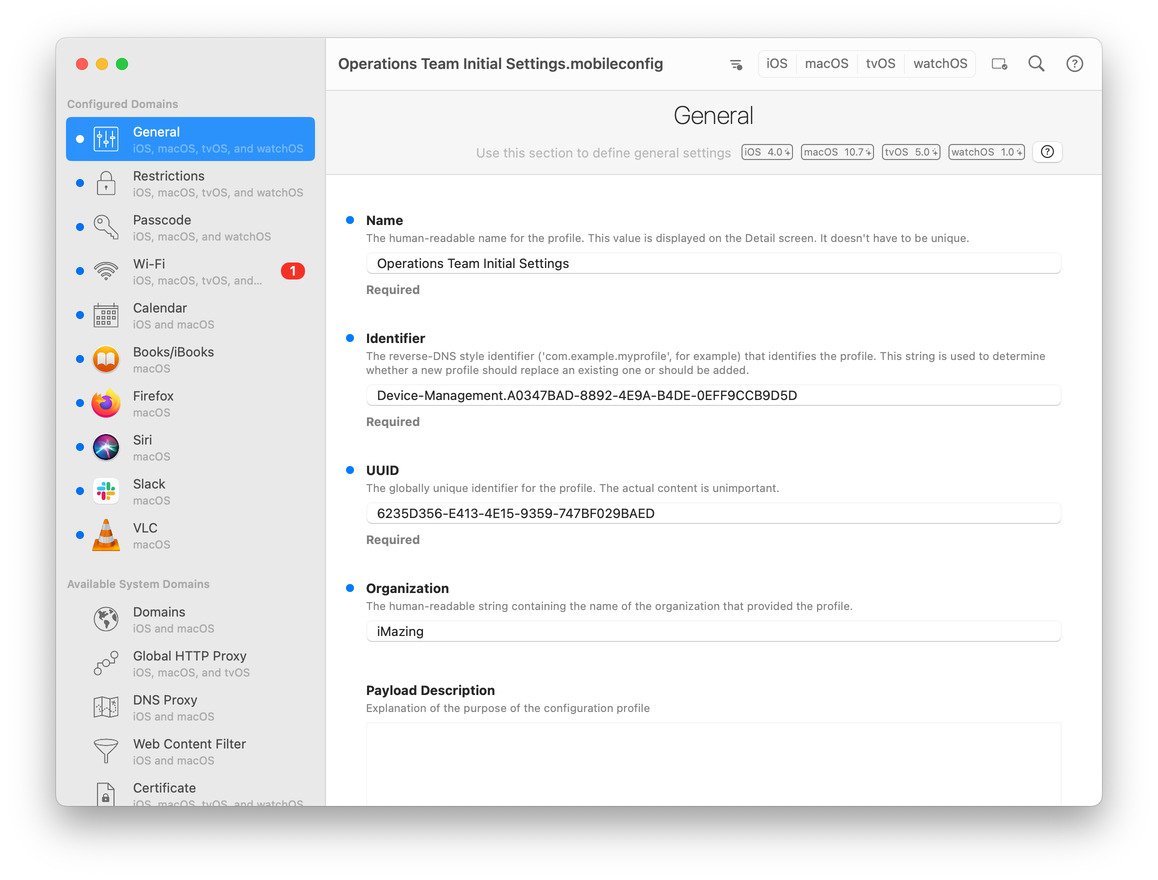
iMazing Profile Editor is made up of a sections sidebar, and a main area displaying preference pages.

The sidebar shows all of the available Apple configuration domains for iOS, macOS, tvOS, visionOS, and watchOS as well as many third party domains for macOS.
Configuration domains are a way to split all of the available settings into related groups, such as Restrictions, Wi-Fi, and Notifications. Third party apps which are configurable via profiles on macOS have each their own configuration domain too.
The main display area is where most of the work is done. It shows the various available fields for the selected configuration domain, and provides the place to select the right settings and enter the configuration data.
3. Enter general configuration settings
The first section on the sidebar, General, is the place for defining settings for the profile itself. These settings have no effect over any preference on an Apple device, but instead influence how a profile is installed, removed, and what information is displayed about it to the user.
💡 Note: The identifier field is automatically filled for you. The device on which the profile is installed will rely on this identifier to determine whether or not it should replace an existing profile. For this reason, it may be useful to change the identifier, when you duplicate a profile to use it as a template for example.
4. Add a configuration payload
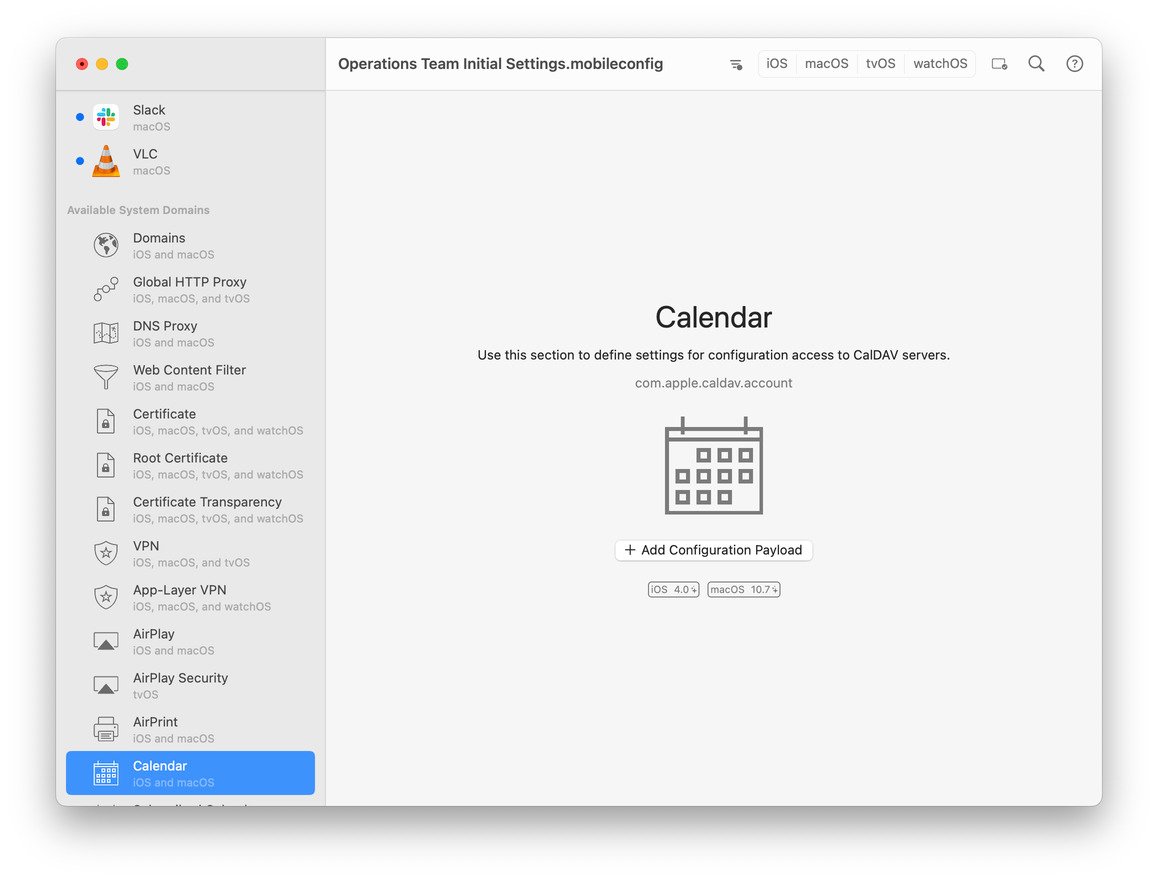
For every domain that you want to configure with a profile, the relevant preferences are added within a domain-specific payload.
Profiles can contain multiple payloads, however multiple payloads of the same domain are only supported for a small number of domains. These are usually ones that do not define global settings (it would be contradictory to define those more than once on a device), but those that define settings that can coincide like mail accounts, calendar accounts, Wi-Fi networks, and so on.
To add a payload, select the section for the domain that you want to add a payload of, and click Add Configuration Payload to add it to the current profile. You can also click the + button on the toolbar, press ⇧⌘A on the keyboard, or double-click the section in the sidebar.

On domains that support multiple payloads, the toolbar button will not become grayed-out after the first payload was added, indicating that more payloads can be added.
💡 Tip: You can rename payloads that you have added to profiles. This is especially helpful in domains that support multiple payloads. For example, you can add different payloads for different calendars, and give each a meaningful name rather than "Calendar #1" and so on. To rename a payload, simply click on the payload name.
5. Set payload preferences
For each payload that you are configuring, fill in the settings information that's relevant for you or check the necessary checkboxes.
💡 Tip: A blue indicator circle adjacent to a property's title will let you know that the property has a value set on it, and that it will be written to the profile on save.
Documentation
If you require more information about the available settings, please visit Apple's payload keys documentation for respective Apple domains.
For third party app configuration domains, the best place to find information is the community of Apple system administration experts on the MacAdmins Slack. Members of the community compile the third party app definitions, and the community channels are an incredible resource for learning about Apple device configuration and for posting questions on the topic.
6. Remove a configuration payload
Removing a configuration payload from a profile can be done by pressing the - (minus) button at the head of the payload, or by pressing ⇧⌘R on the keyboard.
7. Save the profile
Before saving, make sure that there are no validation errors on the profile. Those are shown in the sections sidebar as numbered red badges that count the number of errors per section. A red badge will become green once all of the errors in the section are resolved. Note that though it is possible to save a profile which still contains validation error, it isn't advisable to do so.
When you are done, save the profile to your drive by clicking Save in the File menu, or by pressing ⌘S on the keyboard. The resulting .mobileconfig file is a standard configuration profile which conforms to Apple's specification and is compatible with any conformant software.
Digitally sign profile
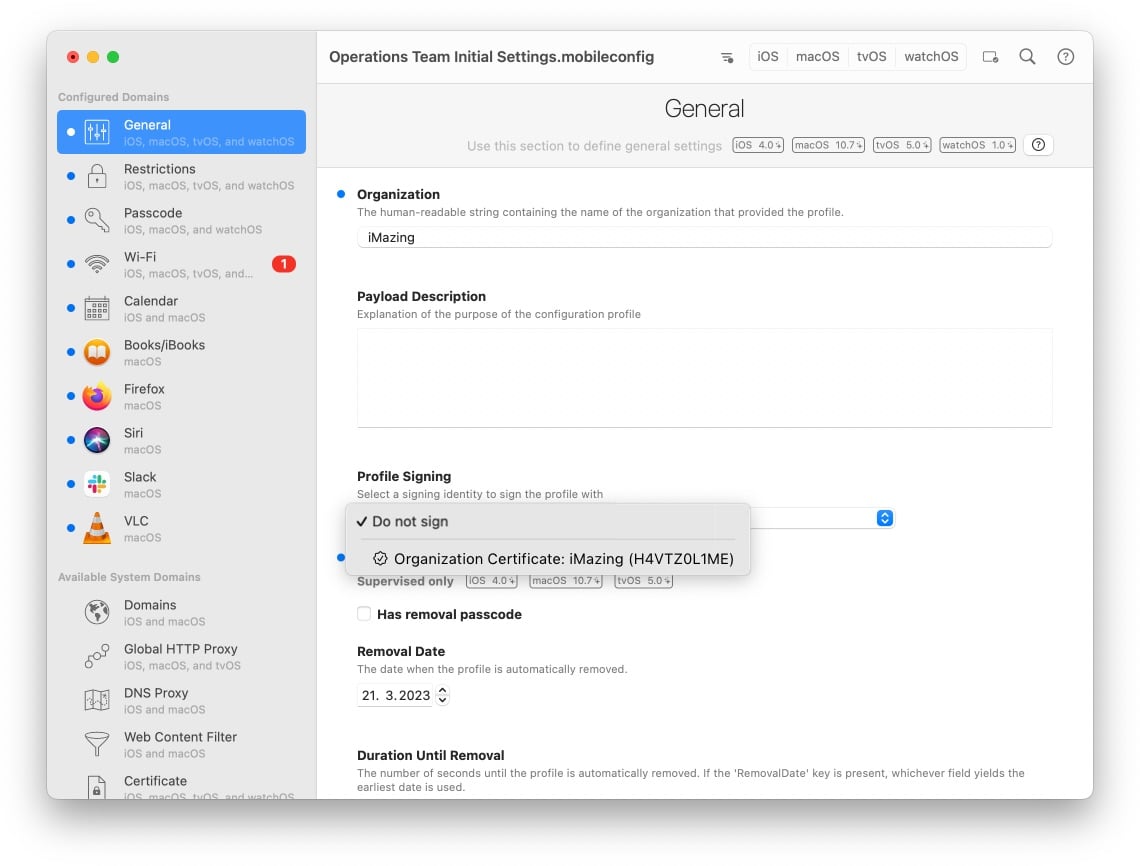
For an additional layer of trust and security, you can digitally sign the profile with a certificate stored in your macOS Keychain or Windows Certificate Manager.
To do so, select a signing identity from the Profile Signing field that can be found in the General section of the profile.

Further steps
The configuration profile file that you created is now ready for use on an iOS, macOS, tvOS, visionOS, or watchOS device. You can install it locally using iMazing, iMazing Configurator, Apple Configurator or via a supporting MDM service.
For more information about using iMazing Profile Editor, head over to our Getting started with iMazing Profile Editor guide.


