Backup & Restore
View the contents of an iPhone or iPad's backup

💡iMazing 3
This guide is for the legacy iMazing version 2. For information on version 3, please visit this page.
iPhone and iPad backups contain nearly all your mobile data. They are a great way to make sure that your data is safe - lose your phone, and you'll be up and running in no time on a new one if you have a recent backup at hand.
But what if you need to access data from a backup quickly, without restoring it to a device? Or access and export data that is only available in backups, like Messages? Apple's iOS backup format is not human readable, and you'll need a dedicated software to do just that. Browsing backups in iMazing is 100% free, so there's no reason not to give it a go!
And if you've made your backups with iMazing, you'll have the option to choose between multiple snapshots of your devices (unlike iTunes, which only keeps one backup per device.)
Before you begin
Download and install iMazing on your Mac or PC computer.
What content can I browse in a Backup?
If your device is not connected to your computer by USB or Wi-Fi, you'll still be able to browse its backup.
The following datasets are available when browsing a backup:
| Photos | |
| Messages | |
| Apps and App Files | |
| Contacts | |
| Notes | |
| Ringtones | |
| Voicemail and Call History | |
| Safari History and Bookmarks | |
| Calendars | |
| File System |
When browsing a backup, you can browse your device's File System - even if it's encrypted. And there's no need to jailbreak your device!
For more information, see:
- How to Extract files and data from an encrypted iPhone backup?
- What data is included in an iPhone or iPad backup?
- How to browse and transfer iPhone files and folder?
Instructions
- Browse device backups
- Switch backup to current state
- Browse iTunes backups in macOS 10.14 Mojave and above
Browse Device Backup
To browse a device's backup:
- In the sidebar, select your device.
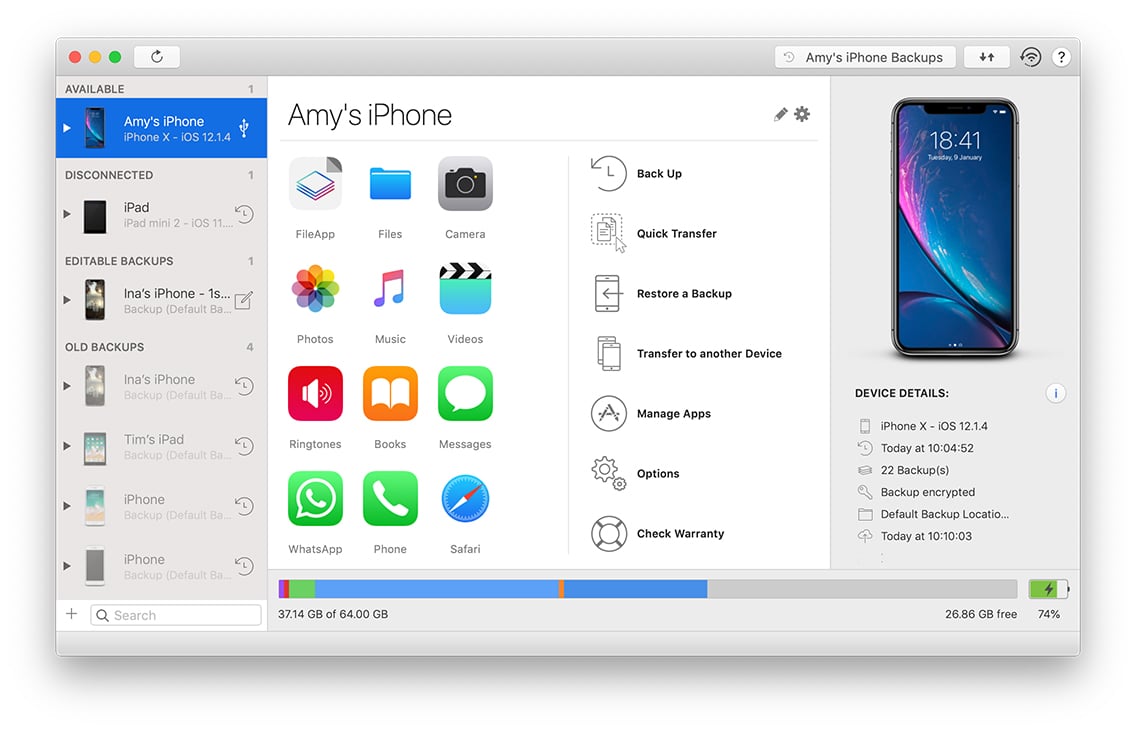
- In the upper toolbar, click Backups. This will open the Backups Window.
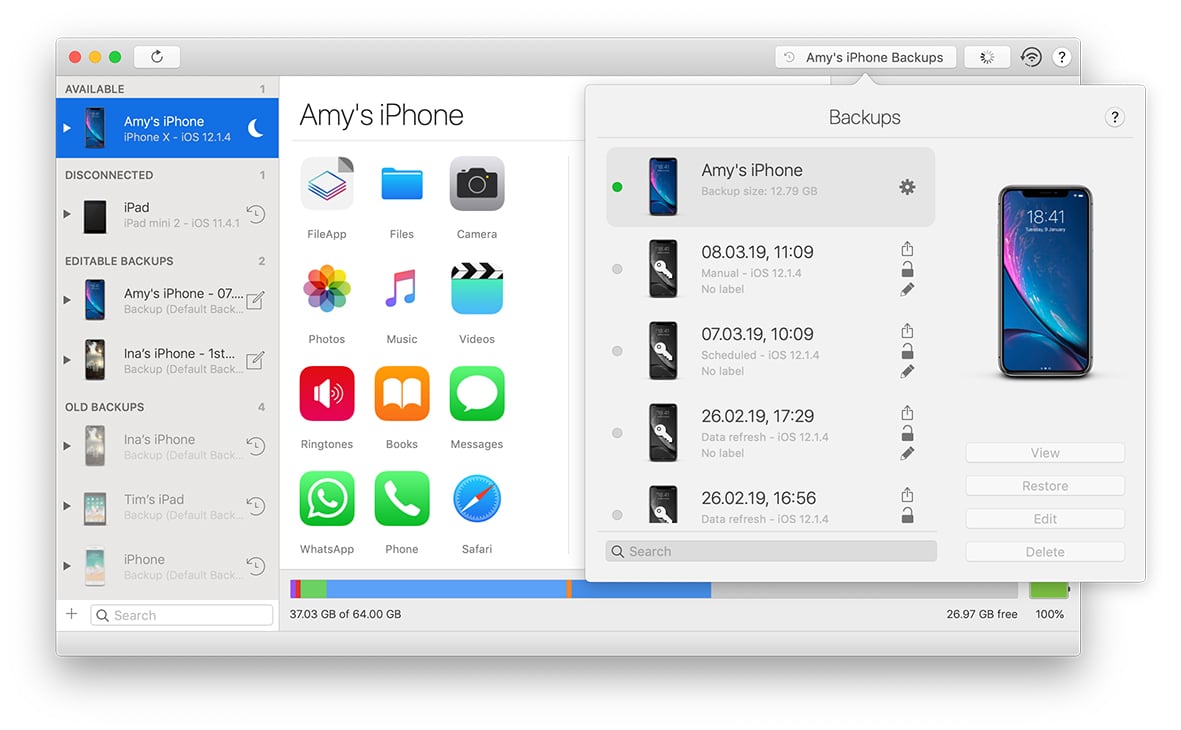
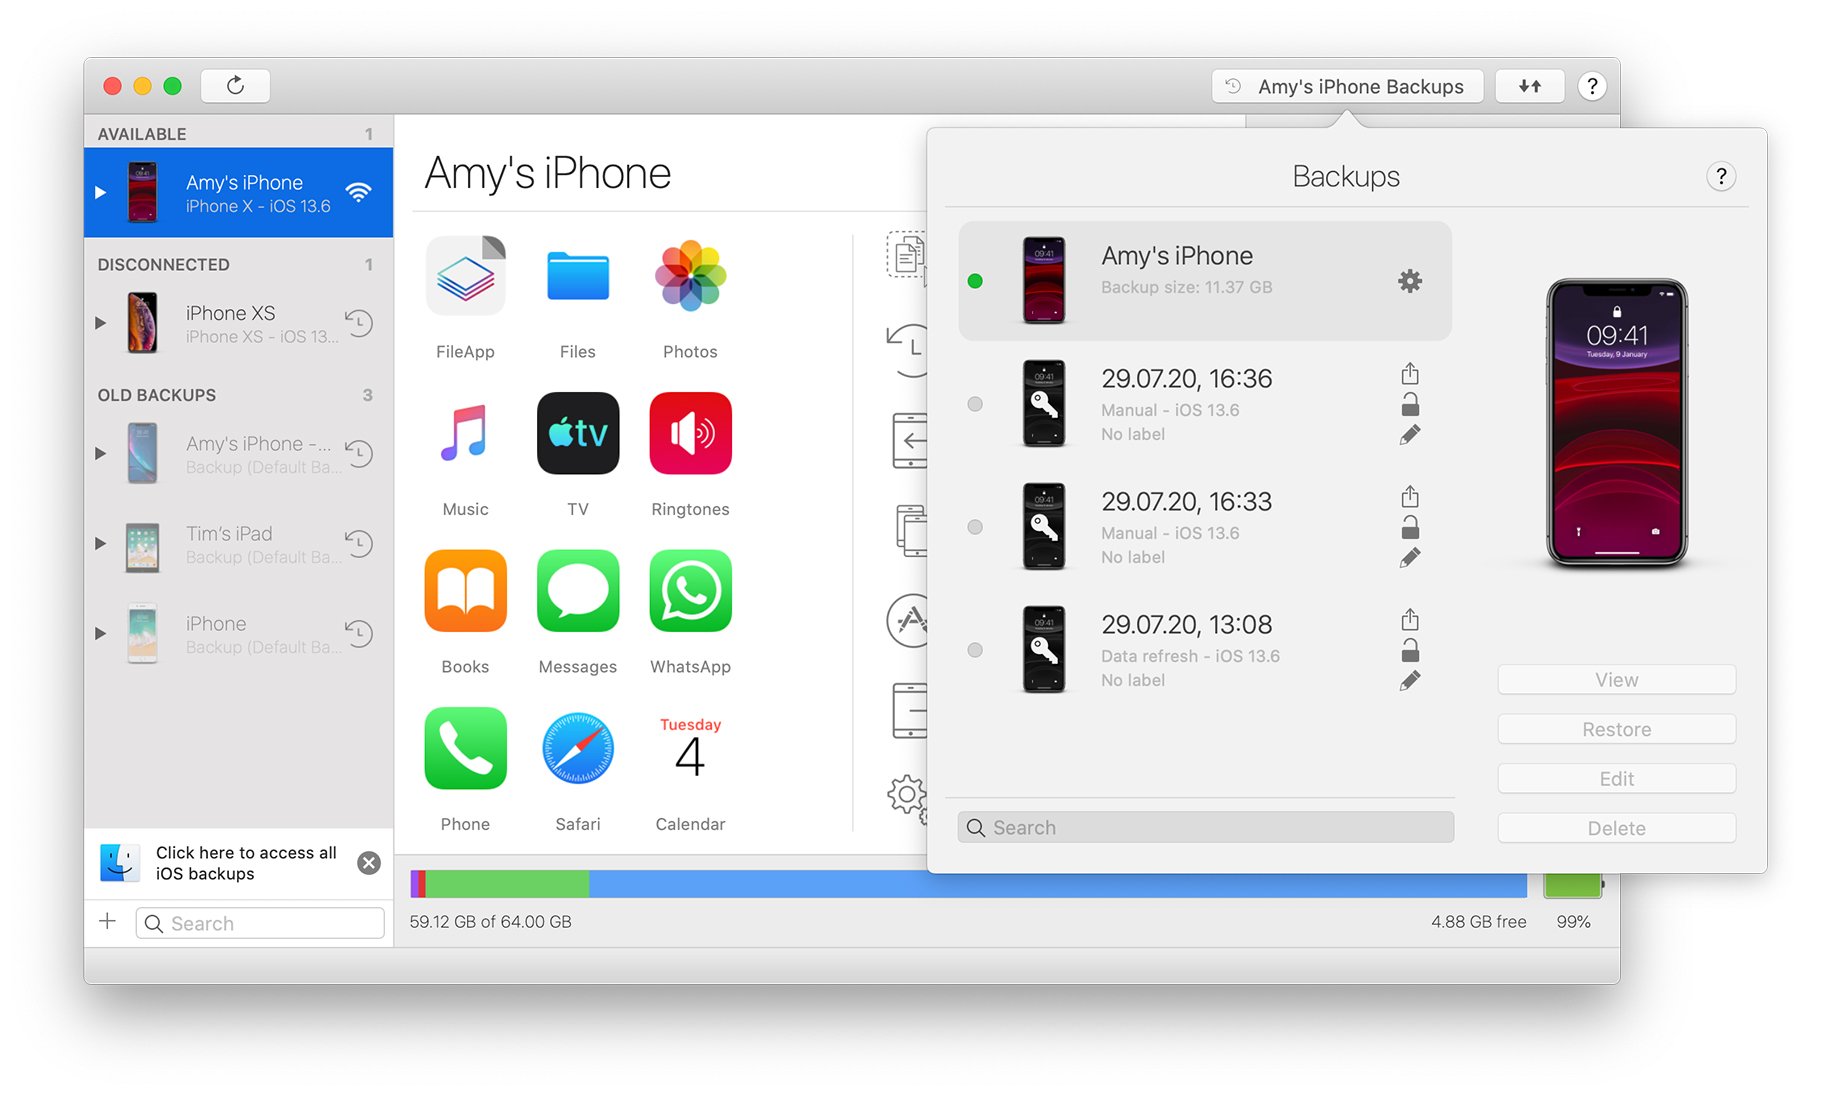
- In the Backups Window, select the backup that you want to browse and click the View button.
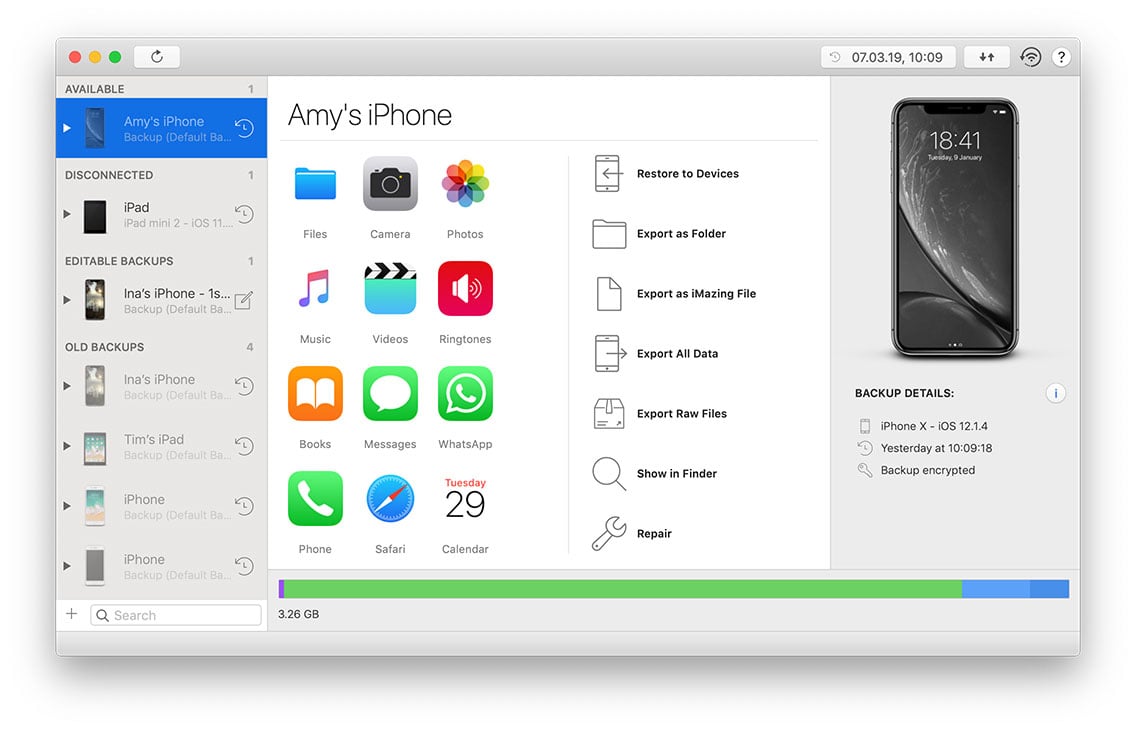
- You have now entered your device's Backup Browsing View, and you can view its content as it was when the backup was made.
Switch back to current state
To switch back to a device's current state:
- In the upper toolbar, click the Backups button. This will open the Backups Window.
- In the Backups Window, select the current state and click the View button.
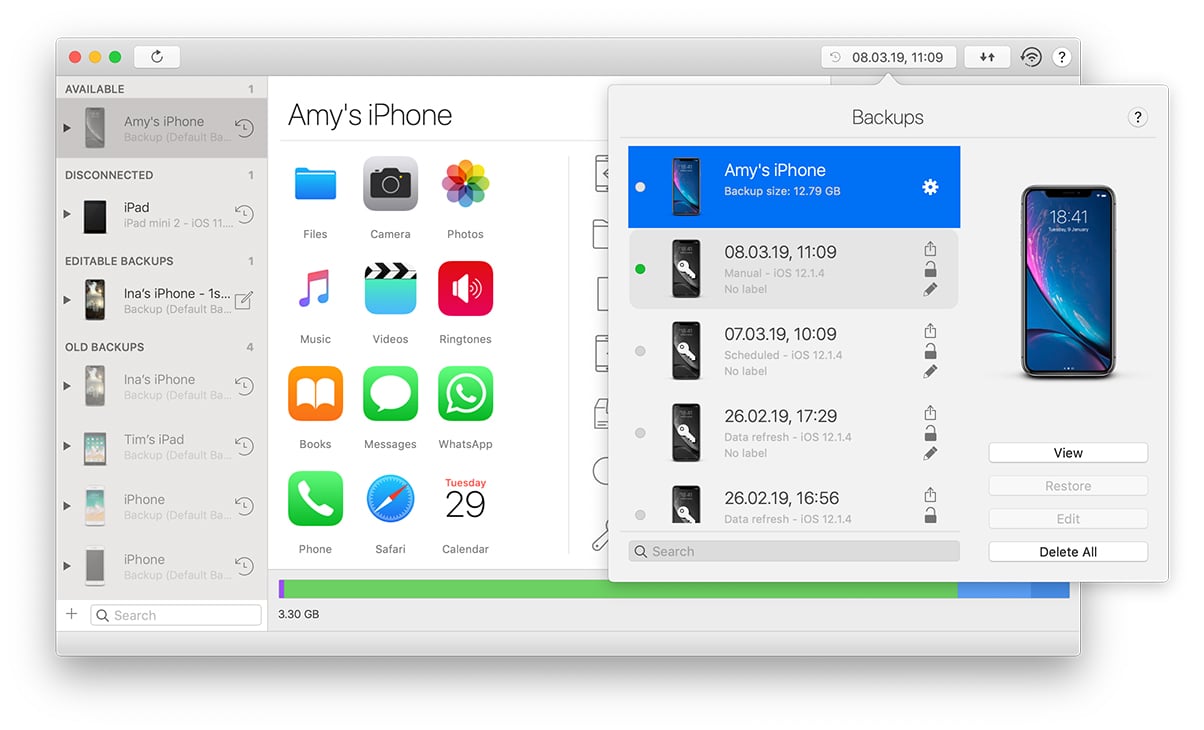
- You are now back to Device View

💡Tip: You can quickly switch to the current state by right-clicking your device in the sidebar and selecting Switch to Connected Device
Browsing iTunes backups on macOS 10.14 Mojave and above
With macOS 10.14 Mojave, Apple made your data even more secure by adding new security features which guard against malware and spyware accessing your private information. You must now explicitly authorise apps to access specific data, including iTunes backups.
- If you haven't authorised iMazing to access your iTunes backups yet, you will see a button to do so at the bottom of iMazing's sidebar:
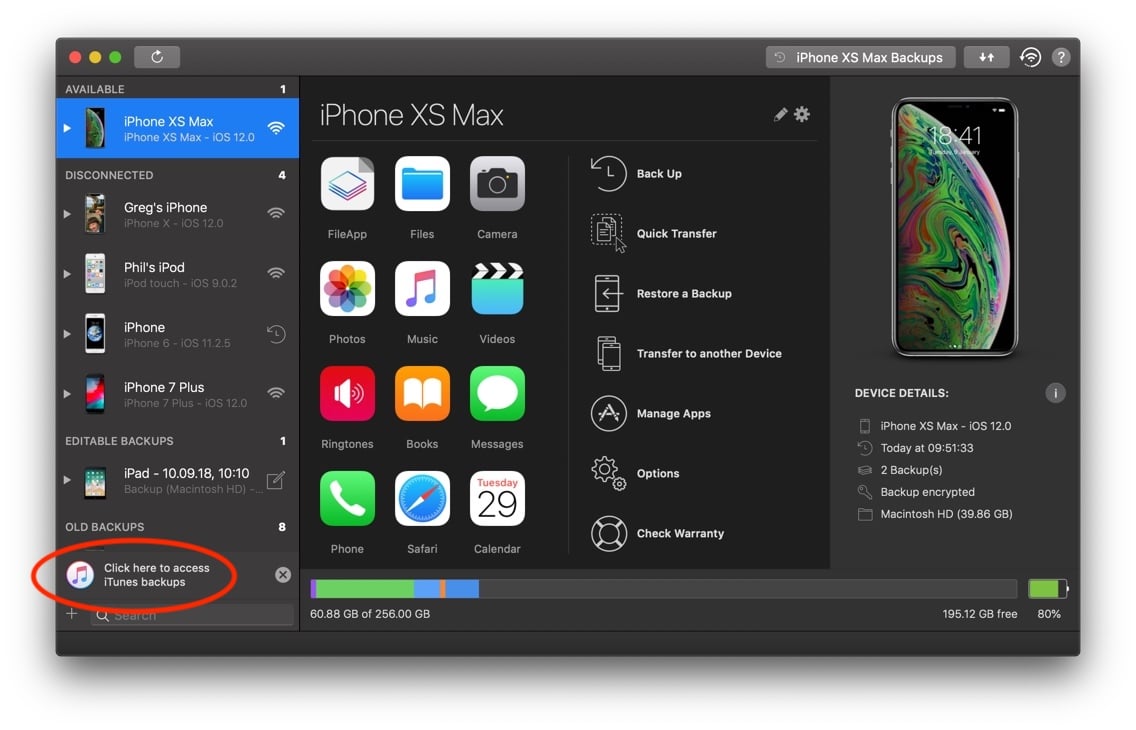
- Click the button, and iMazing will display instructions to help you add it to the list of apps which can access iTunes backups:
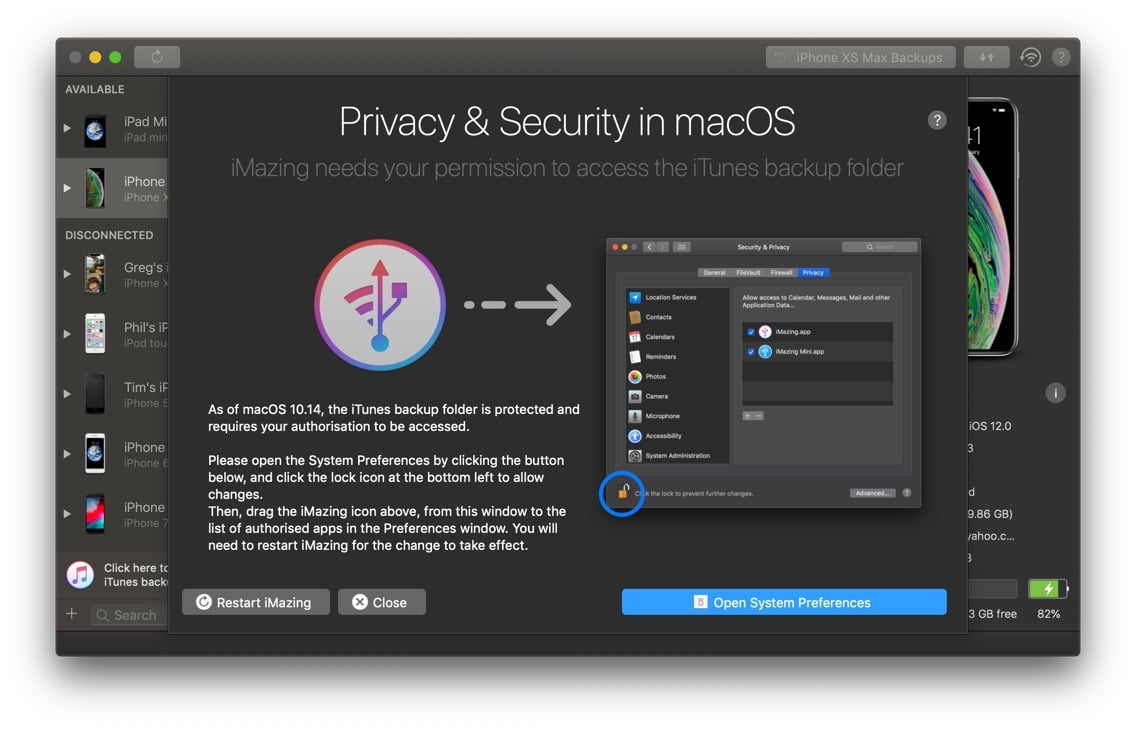
- Click the "Open System Settings" button, and iMazing will open System Settings at the right spot: Security & Privacy, Privacy tab, Full Disk Access whitelist:
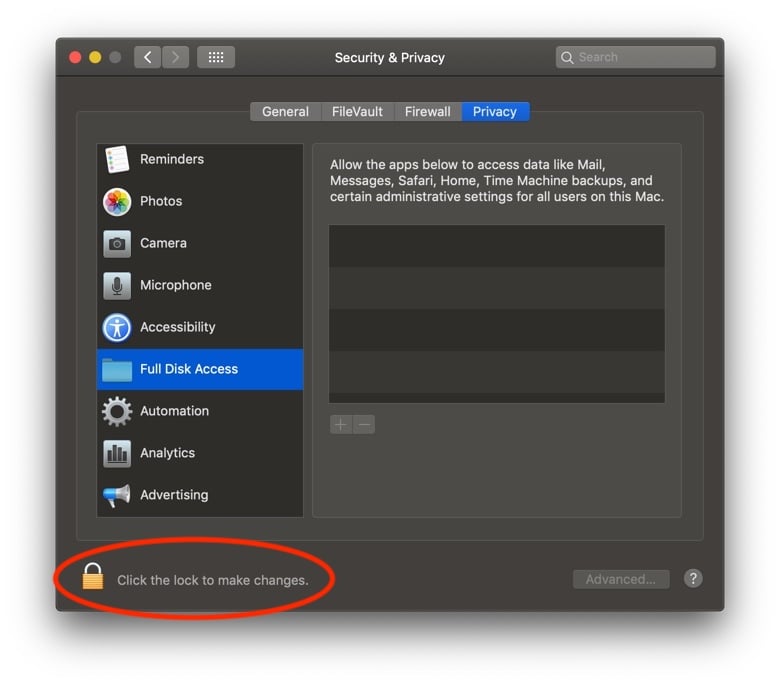
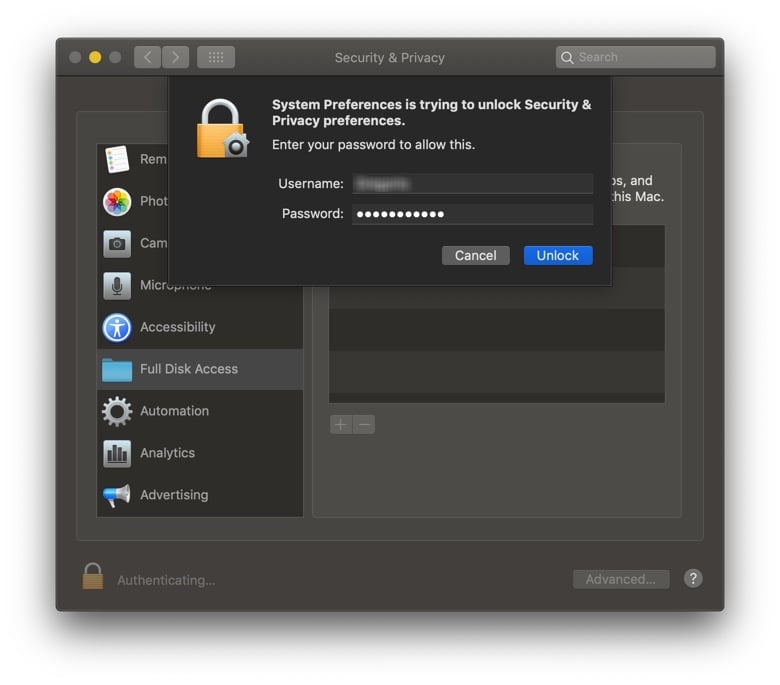
- Click the lock in the bottom left and enter your macOS user account password to allow changes:
- Now simply drag and drop the iMazing icon from iMazing to the Preferences window as shown below:
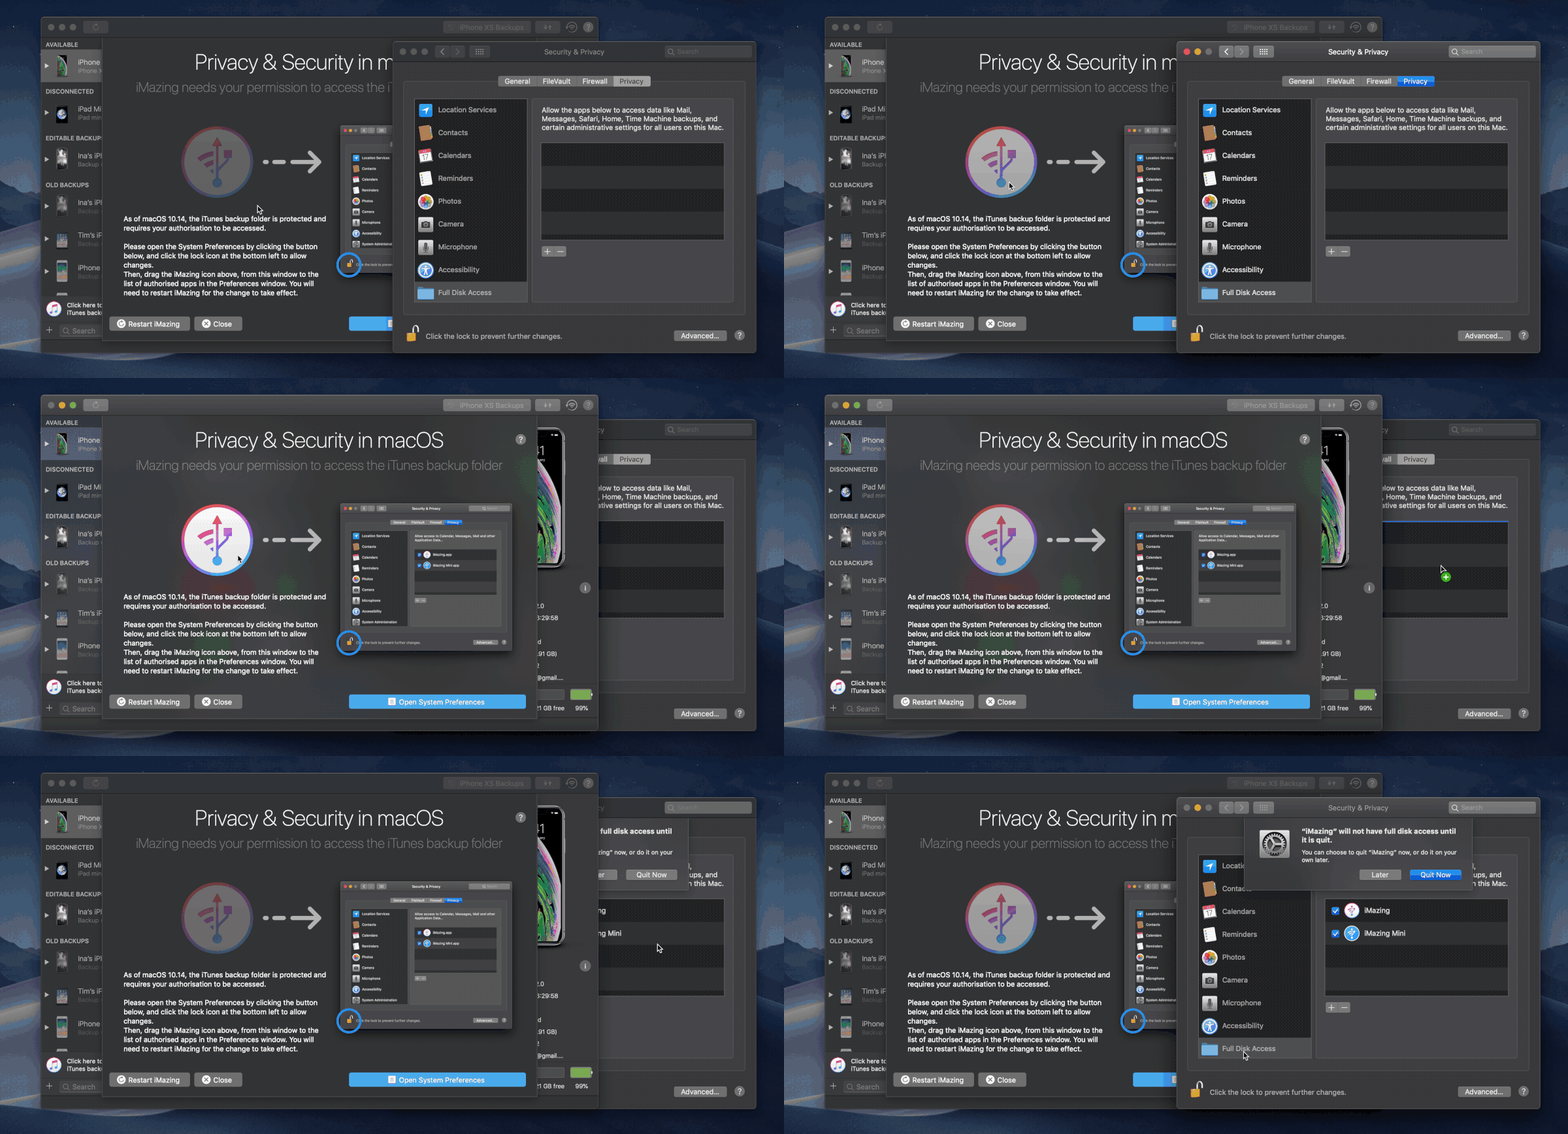
- macOS will warn you that iMazing must restart for the change to take effect, and offer to quit the app. If you don't have any operations running, you can quit now, otherwise simply click Later and quit and restart iMazing and iMazing Mini at your convenience.
Once you've authorised iMazing to access iTunes backups, the backups will appear in iMazing's left sidebar along with devices, in a section labelled Old Backups.
💡 iMazing needs to be whitelisted for Full Disk Access in order to access your iTunes backups because there is no finer grained setting available. It does not take advantage of that privilege to access any other protected data, and can work perfectly well even if you don't grant access. You can simply move or copy your iTunes backups to a location to which macOS does not restrict access to, and then open them with iMazing.
💡 Tip: You can of course rescind permissions at any time: launch the macOS System Preferences app, select Security & Privacy -> Privacy tab -> Full Disk Access, and remove iMazing from the list.
What to keep in mind
In the sidebar, devices listed under the Available Devices section are currently connected, or can potentially be connected to via Wi-Fi.
All other devices listed in the sidebar are not connected. When you select one of those devices, iMazing displays the contents of its most recent backup. To view a different backup for that device, choose one from the Backups Window.
When browsing a backup from the backup list, you'll notice changes in iMazing's interface:

- Sidebar - device is greyed out with a backup connection icon
- Backup lists - button indicates the date and time of backup
- Backup actions are available
- Backups details - device thumbnail is in black and white
- Disk usage - bar is full and shows how much space is being used by the backup.

